7. Computational Couture
 Learning outcomes
- Research skills: the participant has acquired knowledge through references and Concept development
- Design skills: the participant has acquired 3D modeling skills and explored parametric skills
- Fabrication skills: the participant is capable of executing from file to production workflow, from 3D modelling to 3D printing
- Process skills: Anyone can go through the process, understand it and reproduce it
- Final outcome: Create samples/swatches of 3D printing as fabric or on fabrics and a 3D/parametric model
- Originality: Has the design been thought through and elaborated?
Student checklist
- Document the concept, sketches, references also to artistic and scientific publications on 3D printing and parametric modeling
- Design a parametric model using Grasshopper3D (or alternative parametric software) and upload the 3D design file + required parametric files
- Learn how to use a 3D printer and document the step-by-step process and settings
- Document the workflow for exporting your file and preparing the machine, Gcode and settings to be 3D printed
- Print your file and document the outcomes
- Upload your stl file
- Submit some of your swatches to the analog material library of your lab. Size 20cm x 20cm approx (extra credit)
Research & Ideation
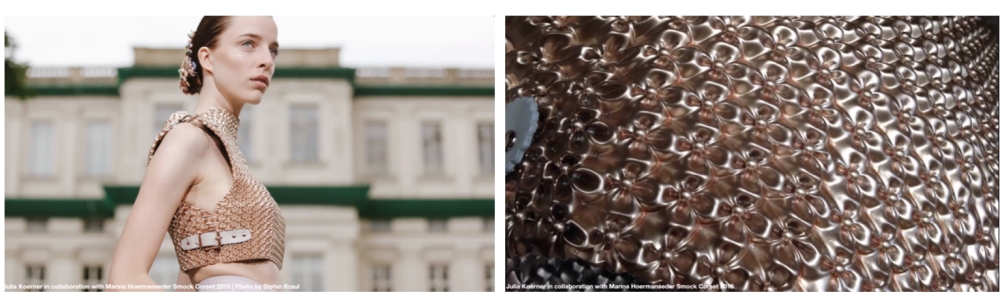
I was really into the Julia Koerne's lectures in the class. I was especially surprised by this expression. The material is generated in 3D like fur. She researched the composition of natural objects such as seaweed and incorporated them into her designs.

 I also researched 3D printed fabrics, textures, and Grasshopper techniques on Pinterest and other sites.

References & Inspiration
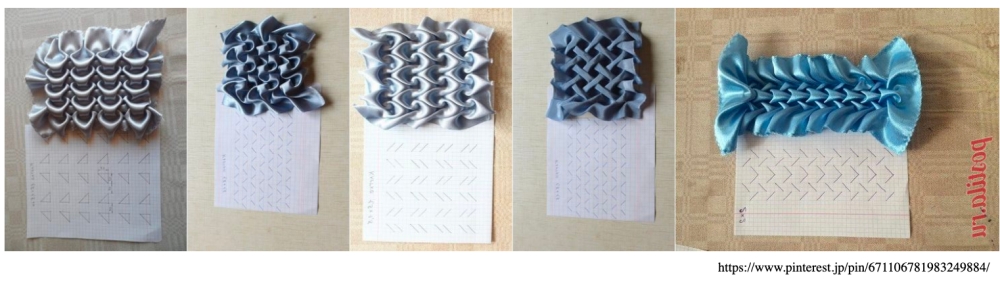
One of my reference is Julia Koerne's amazing work below. This texture looks like a fine hand-crafted smock. I researched smock techniques on Pintrest. I was surprised to find so many patterns, from traditional ones to ones with a new feel.
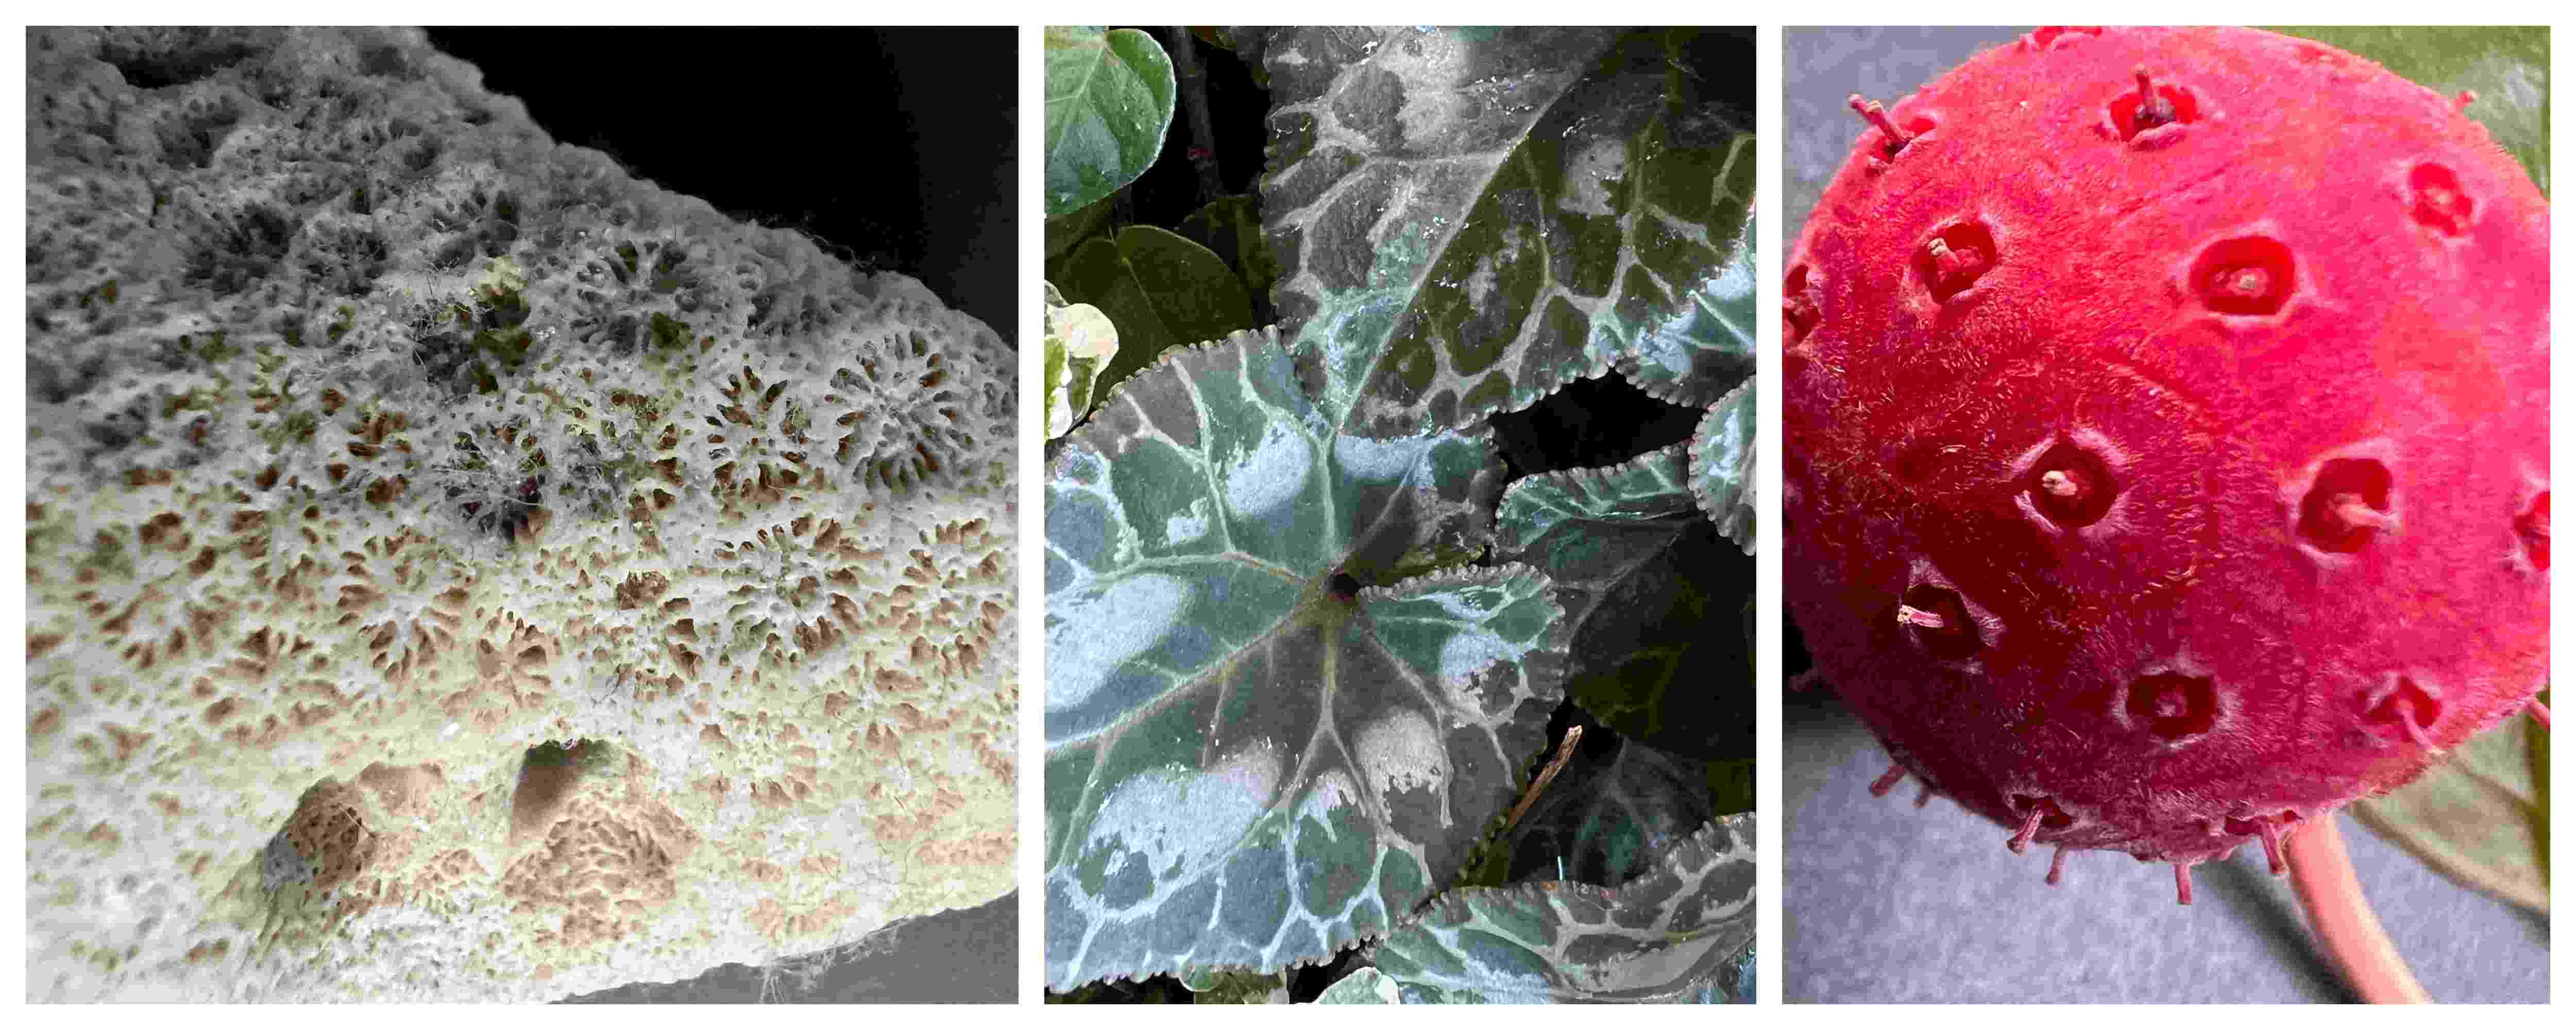
 I was also impressed by the way Julia creates her works by observing the formation of things in nature. So I refocused my attention on the nature around me.
I observed the coral I had picked up from the sea and the plants in my garden. It was full of interesting patterns created during the growth process, such as Voronoi.
I was also impressed by the way Julia creates her works by observing the formation of things in nature. So I refocused my attention on the nature around me.
I observed the coral I had picked up from the sea and the plants in my garden. It was full of interesting patterns created during the growth process, such as Voronoi.
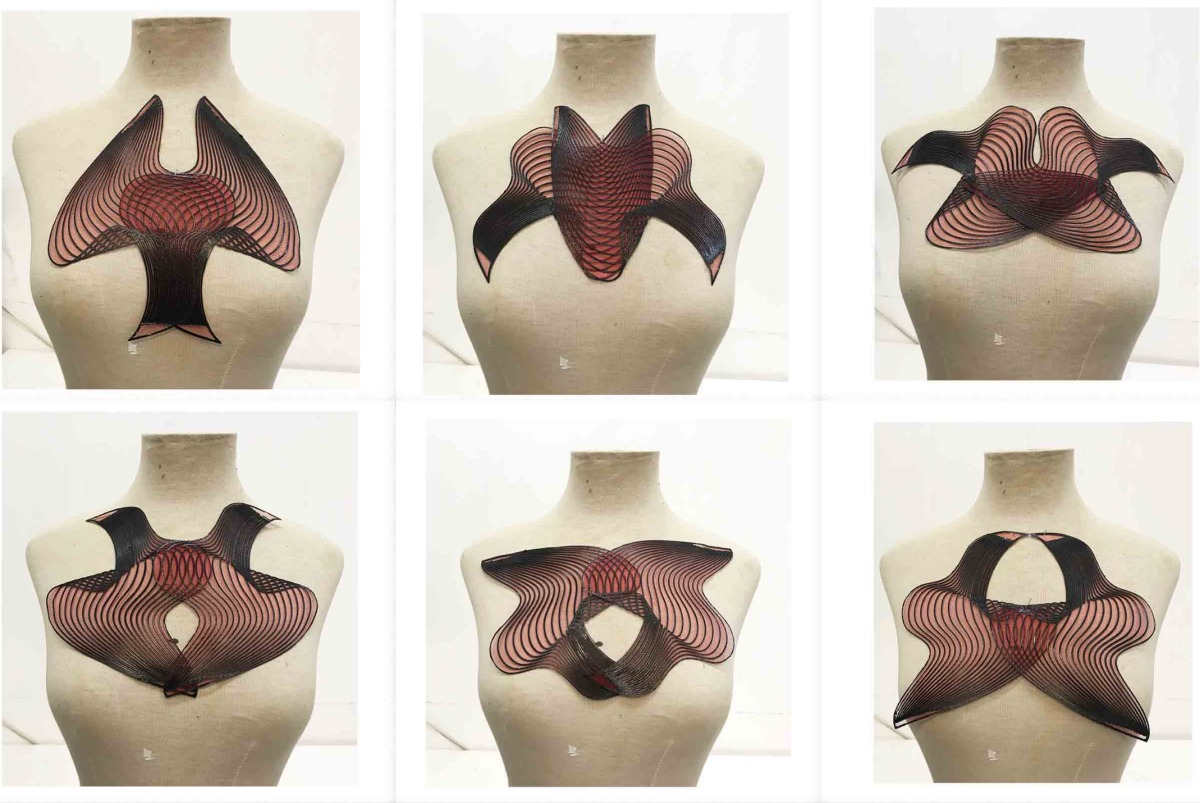
Regarding 3d printing on fabric, I was inspired by Dinish Kumar's works.
Tools
- Grasshopper: 3D pattern design
-
Anemone: Grasshopper plugin
-
PrusaSlicer: Slicer
-
Prusa: 3D printer
-
Filament: PLA, TPU
-
Fusion360: Mesh repair
Process and workflow
Pattern1 Simple
Step: Design
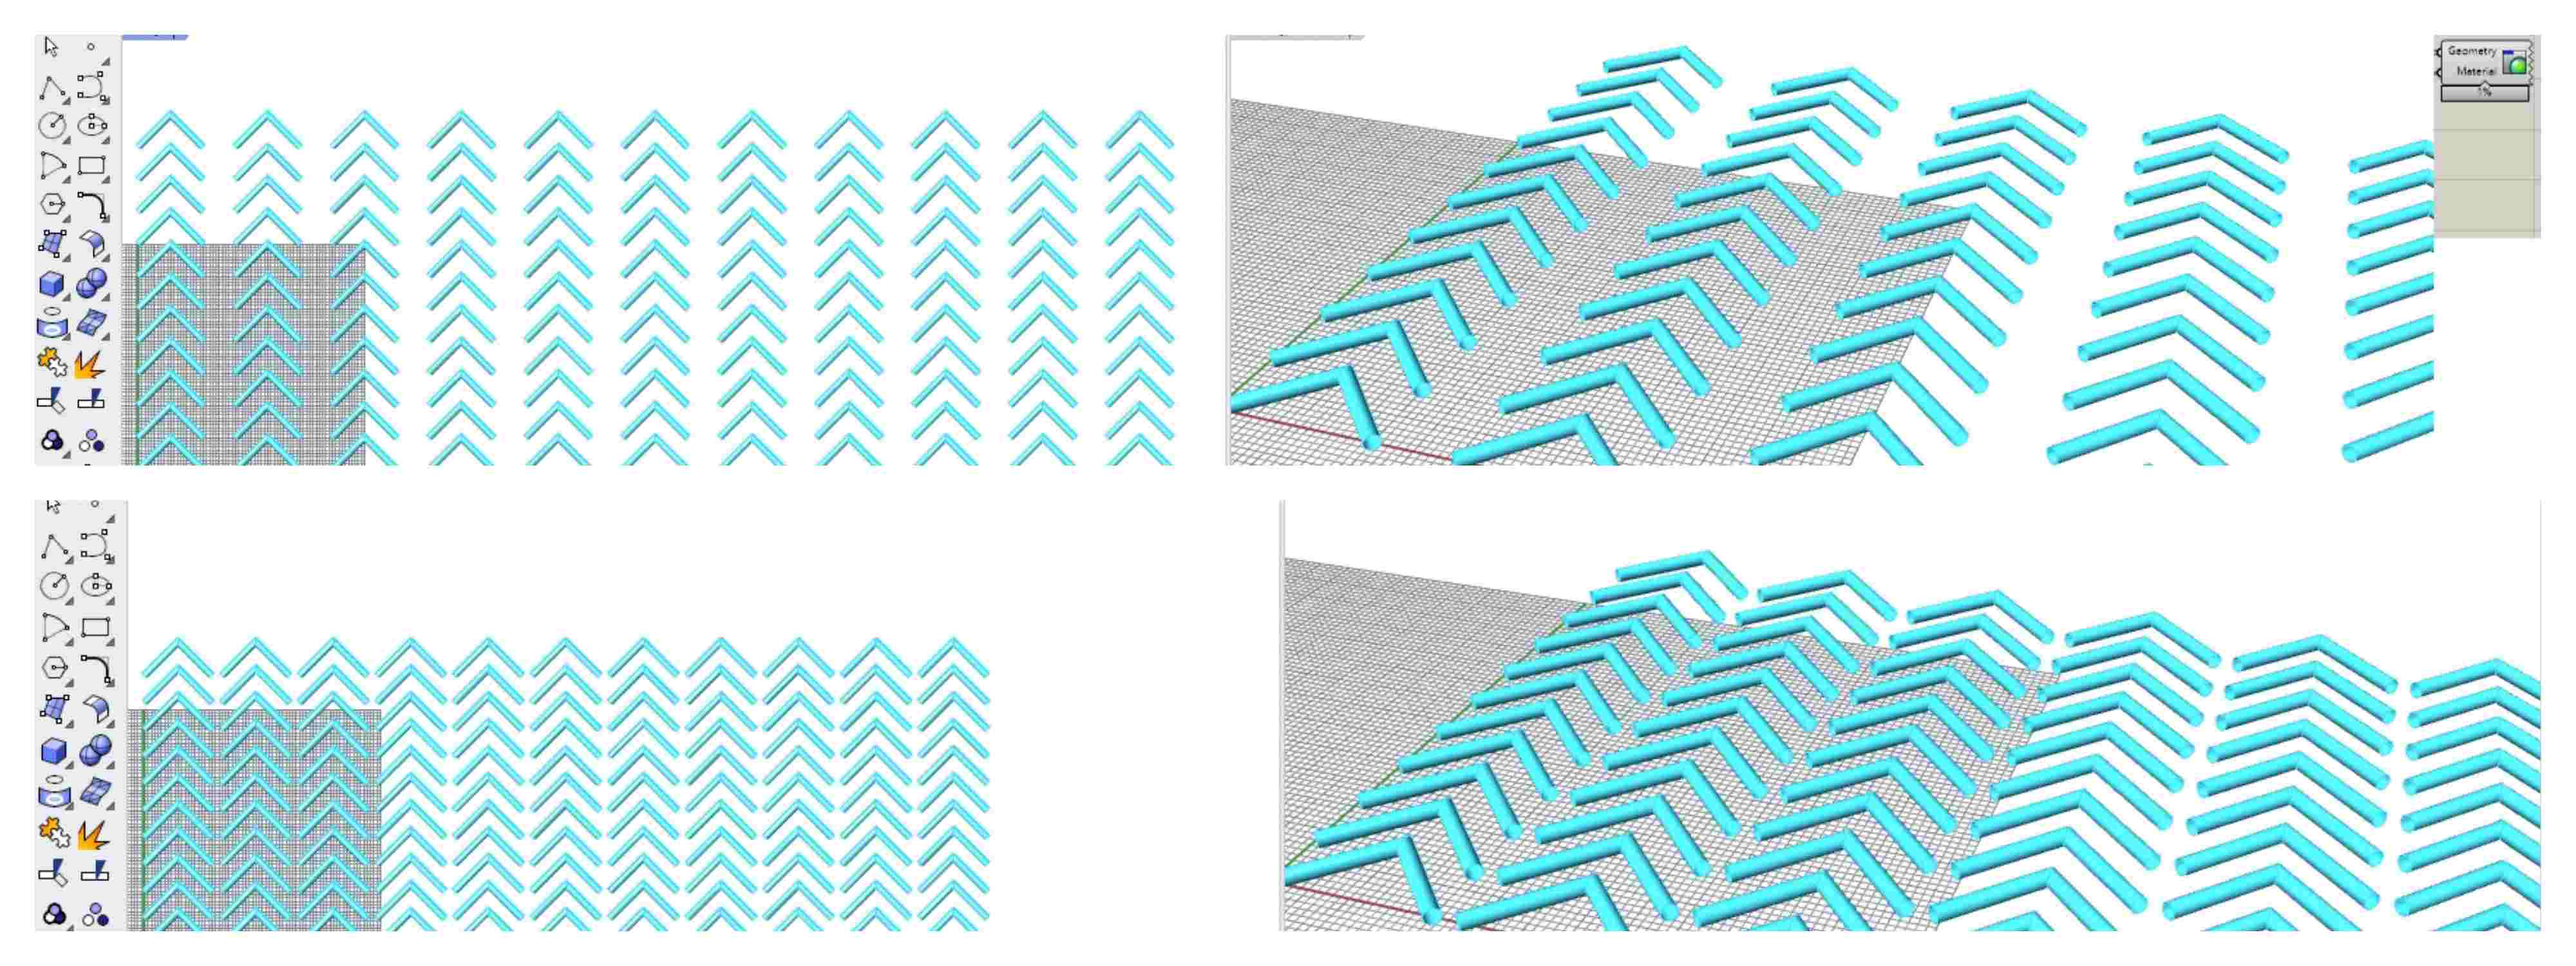
I made a simple parametric pattern like smock pattern using grasshopper.
Draw lines using Rectangular intersection points.
It is necessary to make it 3D for 3D printing, so there are two methods included below chart.
(a) Turn the line into a pipe
(b) Offset the line to make it a surface and then Extrude
First I tried the (b) type, because the flat bottom will be good for 3D print.

Step: Make STL file,
After completing the design, it was exported as STL file. The step is as follows.
-
Right-click the node of the model to export
-
Select Bake (right image below) > Select the layer of Rhinoceros.
-
The baked model is created in Rhinoceros. (It overlaps with the Grasshopper model)
- In the Rhinoceros screen, select the model > File (top bar) > Export Selected Object > Select STL and name the file.
I didn't change the tolerance value. Save as binary.

Step: Make Gcode
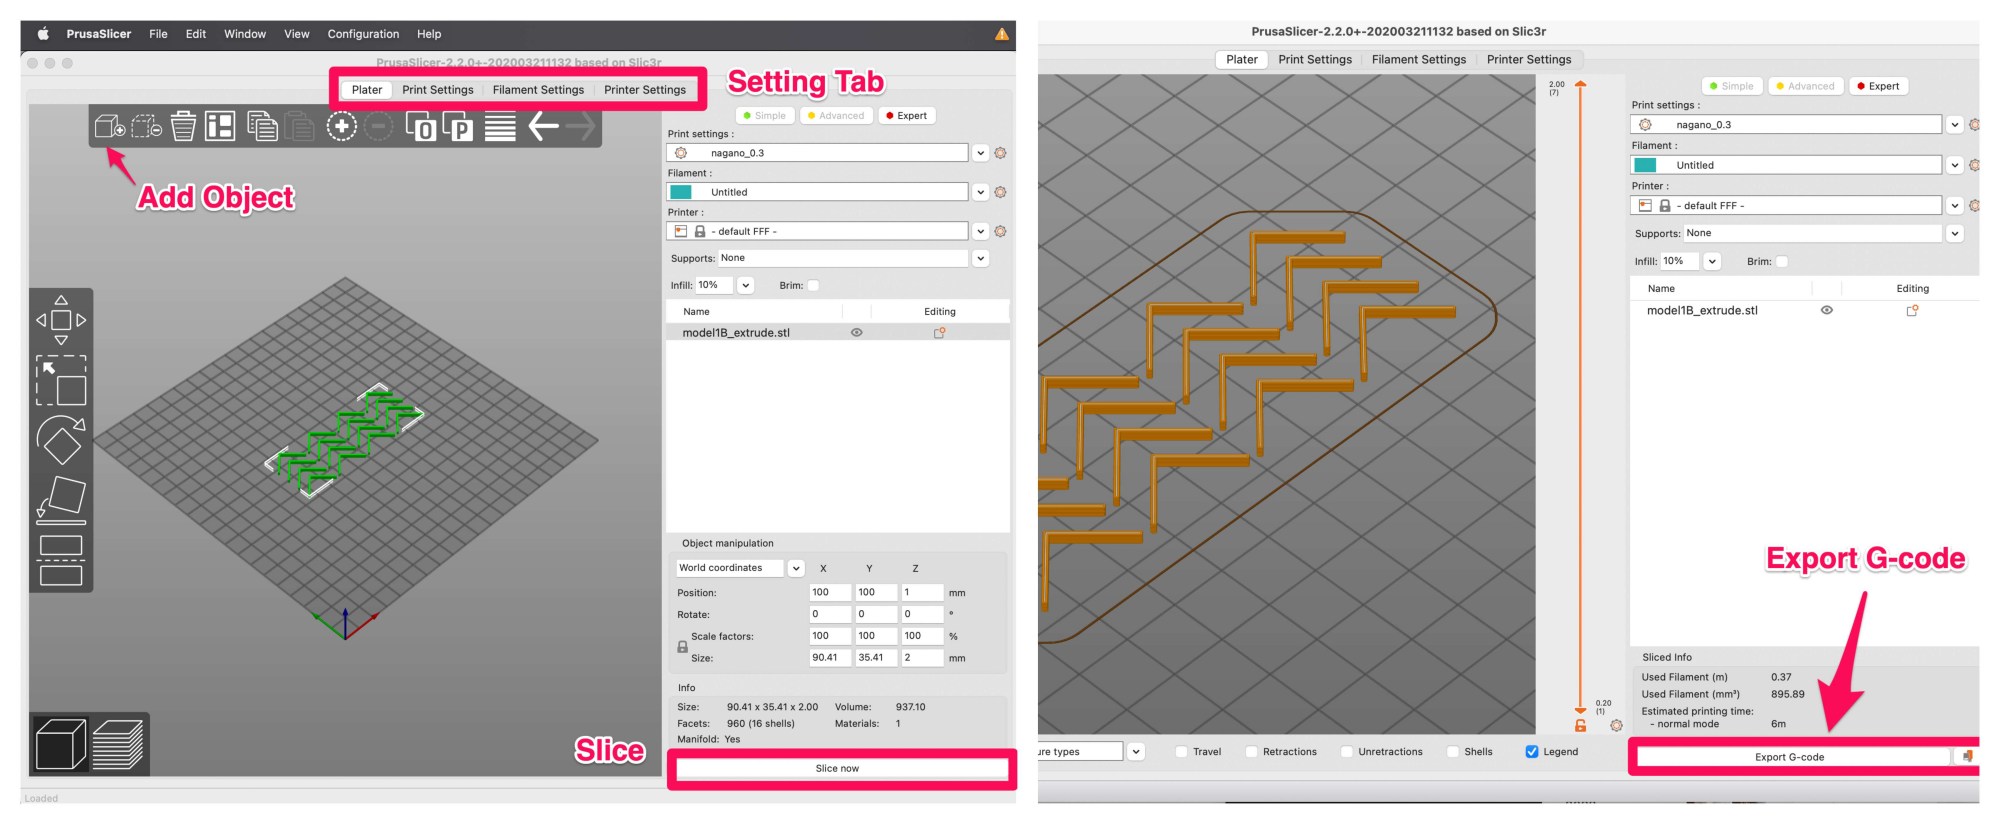
I used Prusa Slicer to make Gcode.
- Add the stl model into the Prusa slicer
- There are many settings. The example is below. The filament was PLA, the setting of heatbed was 65°, extruder was 215°.

Step: 3D Print
The step is as follows. I tried the method of sandwiching the cloth.
- Set PLA filament.
- Start normally without placing any fabric.
- Using the realtime tuning function of Prusa, I set 40% speed. I usually start from very slow speed especially first layer. (Tough I can adjust in the slicer application)
- After about 2 layers, pause and place the fabric on top.
- Pull the cloth and secure it with a clip so that it does not bend.
- Be careful not to let the tip of the clip hit the 3D printer when moving it.
- Check that there is no filament debris on the tip of the Extruder.
- resume printing

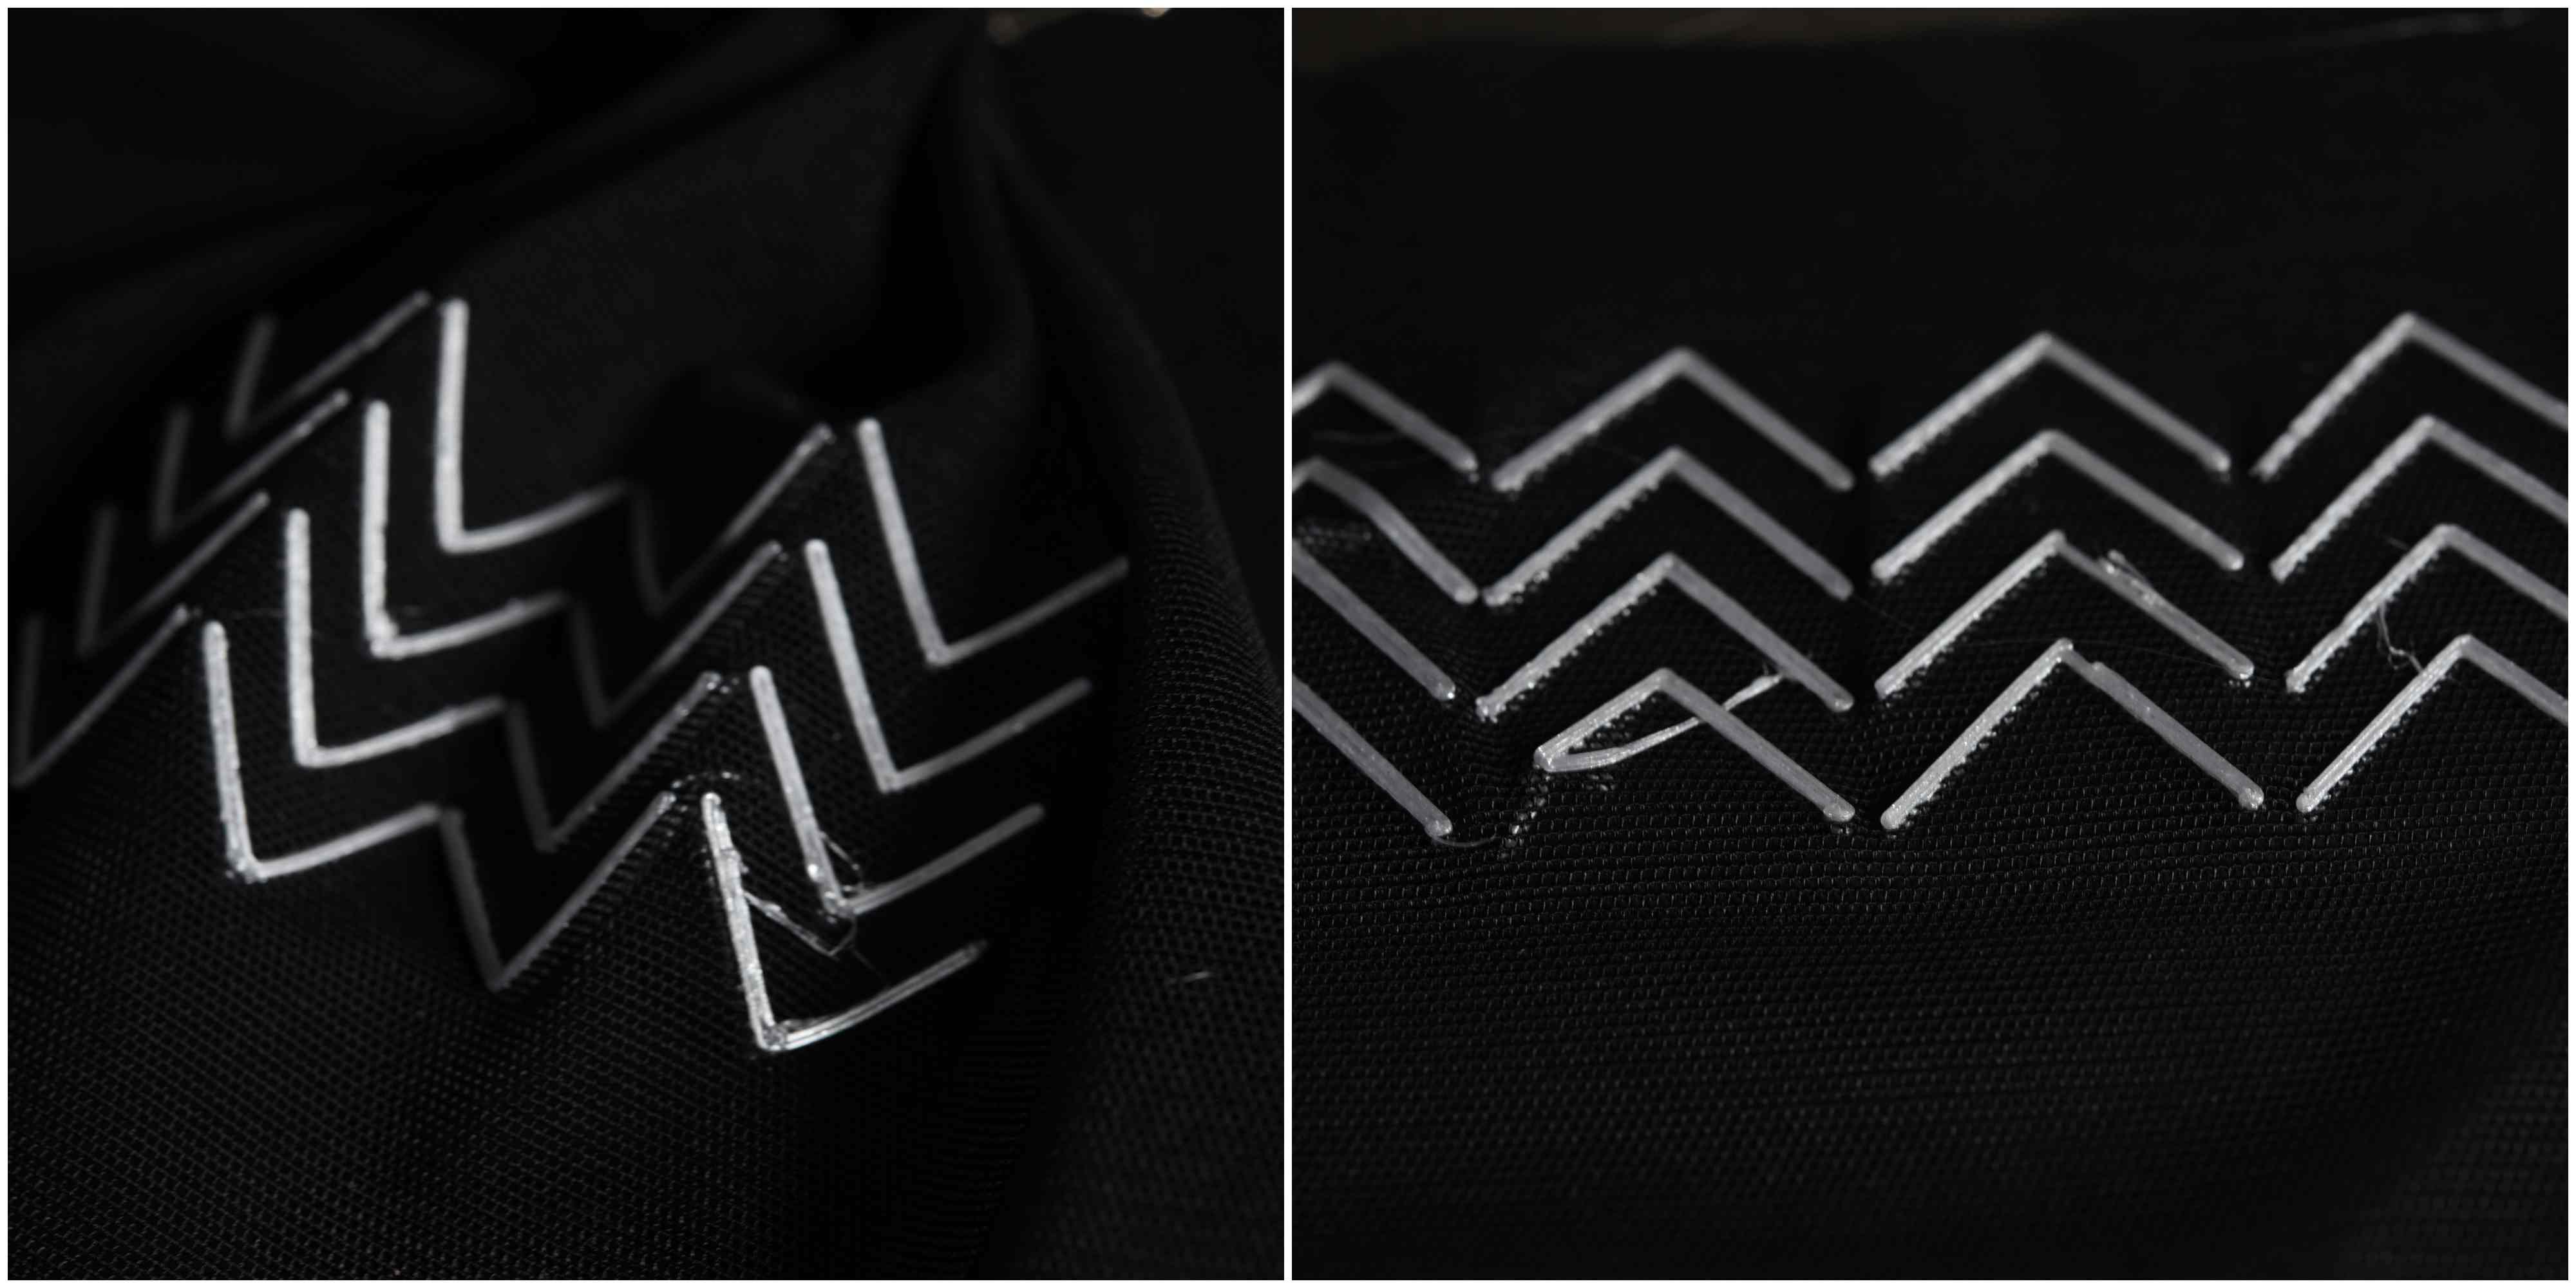
I printed it on two types of fabric. The left below is stretch, fine mesh fabric (nylon/polyester). Since I pulled the fabric and clipped it, when I took it off from 3d printer it shrunk to form three-dimensional pleats. On the other hand, the fabric on the right does not stretch, so it is flat.
Pattern2 Geometric
I designed geometric pattern using Anemone plugin. It allows you to change the design by changing the number of polygons and the rotation. I made every other one a surface and extruded it.

 At first, I printed without the raft, but it didn't stick well to the bed, so I printed with 1 layer raft. Other settings were same as pattern1. The fabric was white chiffon georgette.

I removed the raft carefully. It seems that not only the raft but also the first 1-2 layers have peeled off.
The print on the front did not peel off, so it seems that the filament is entangled in the fabric.

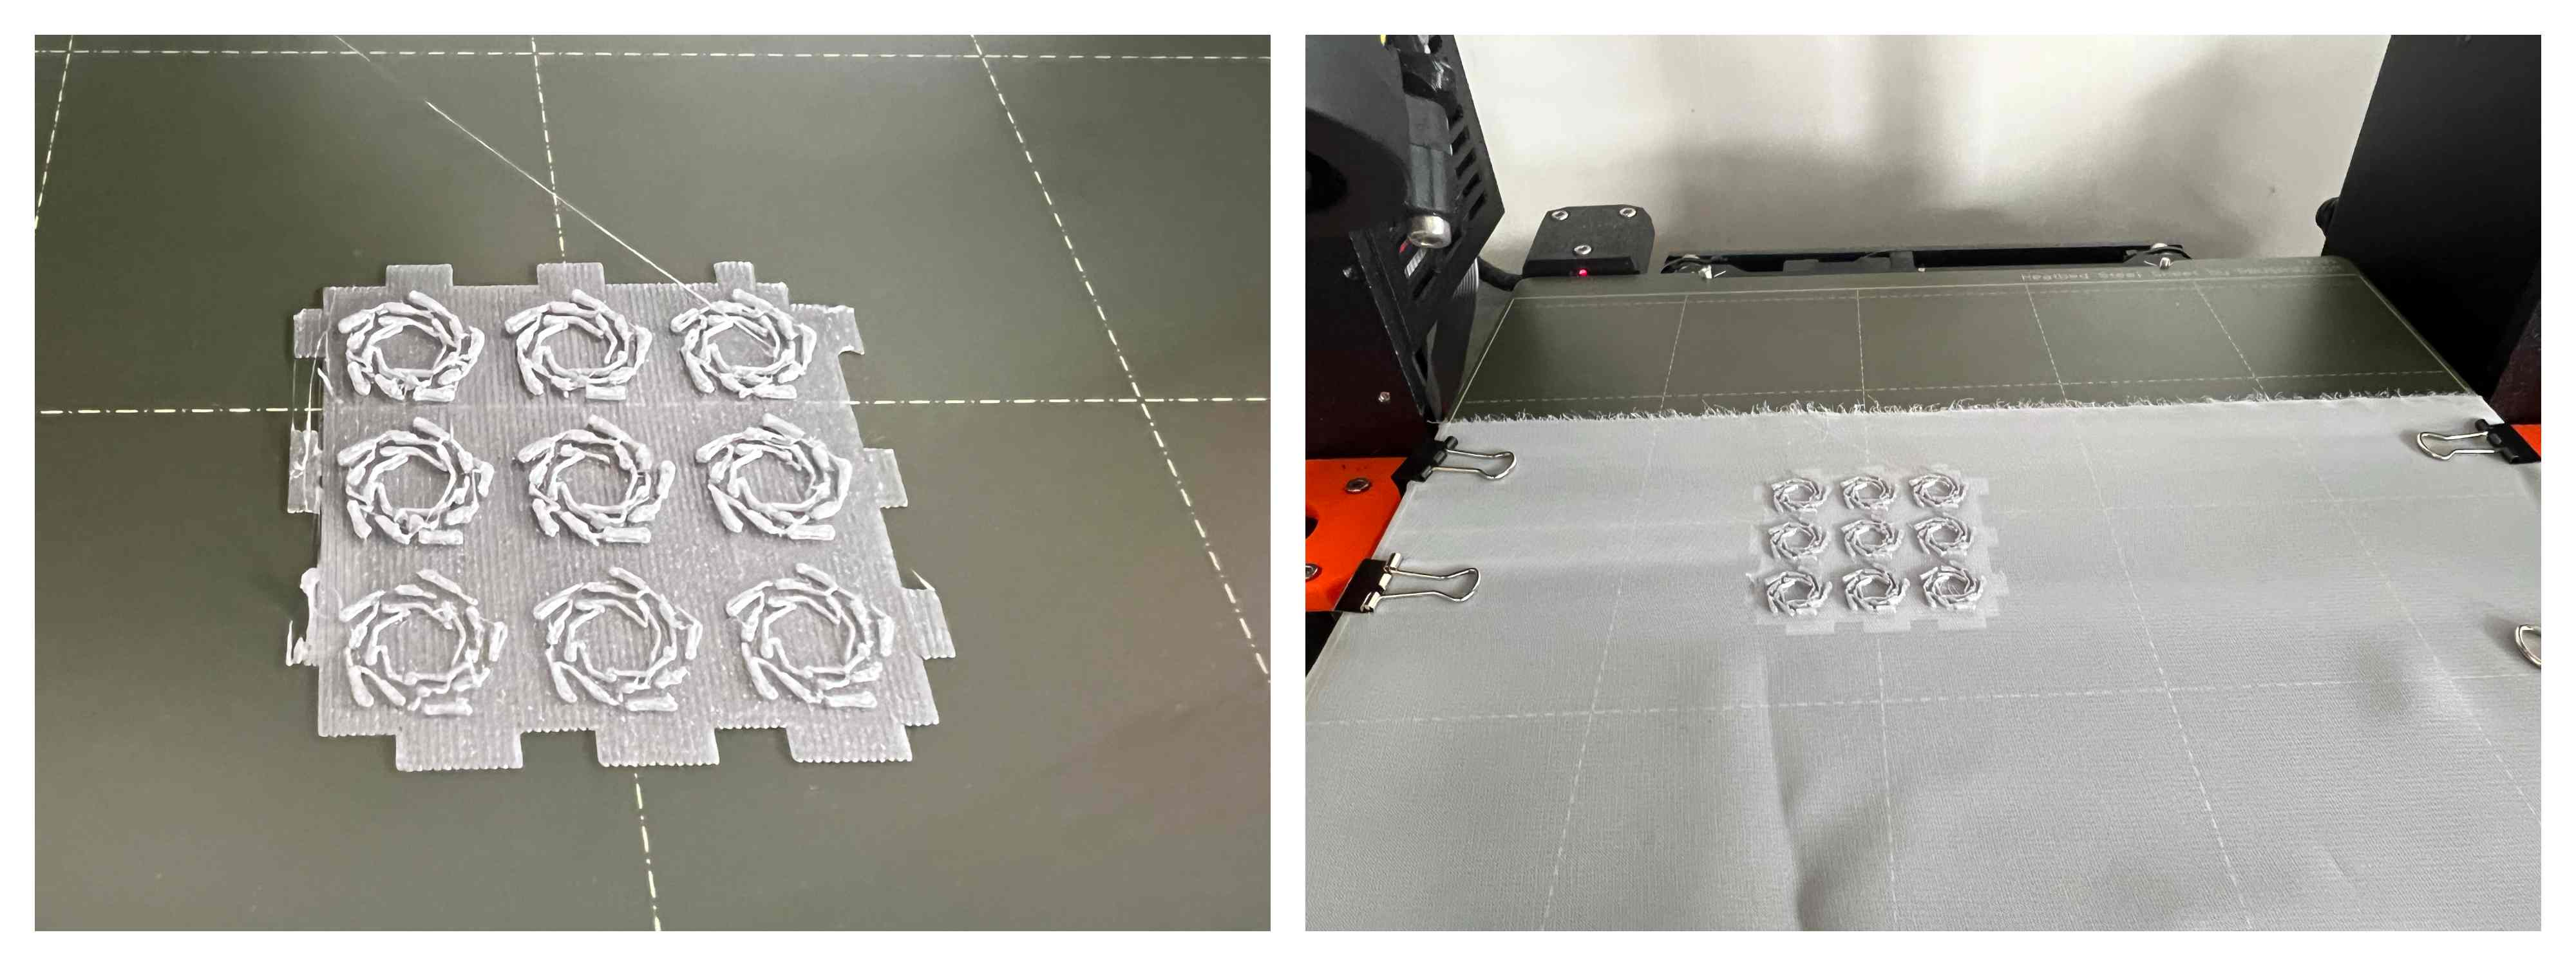
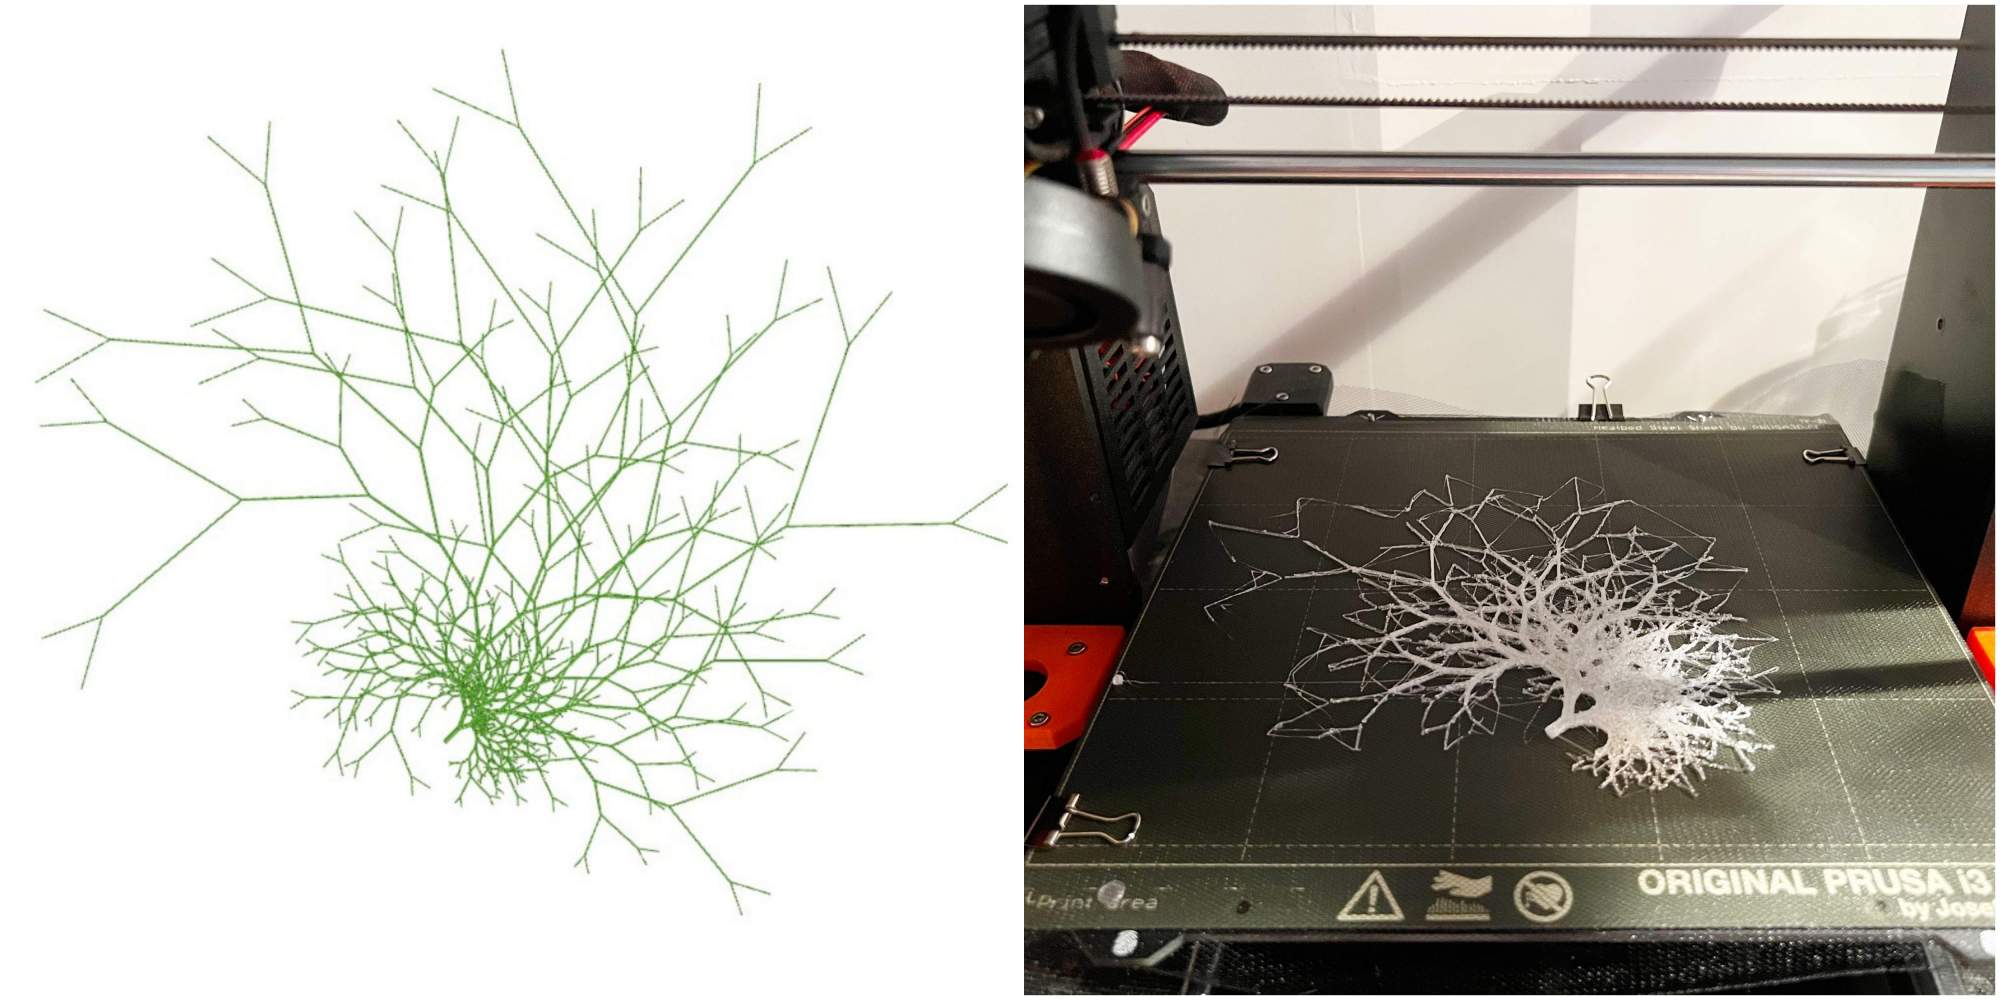
Pattern3 Leaf vain
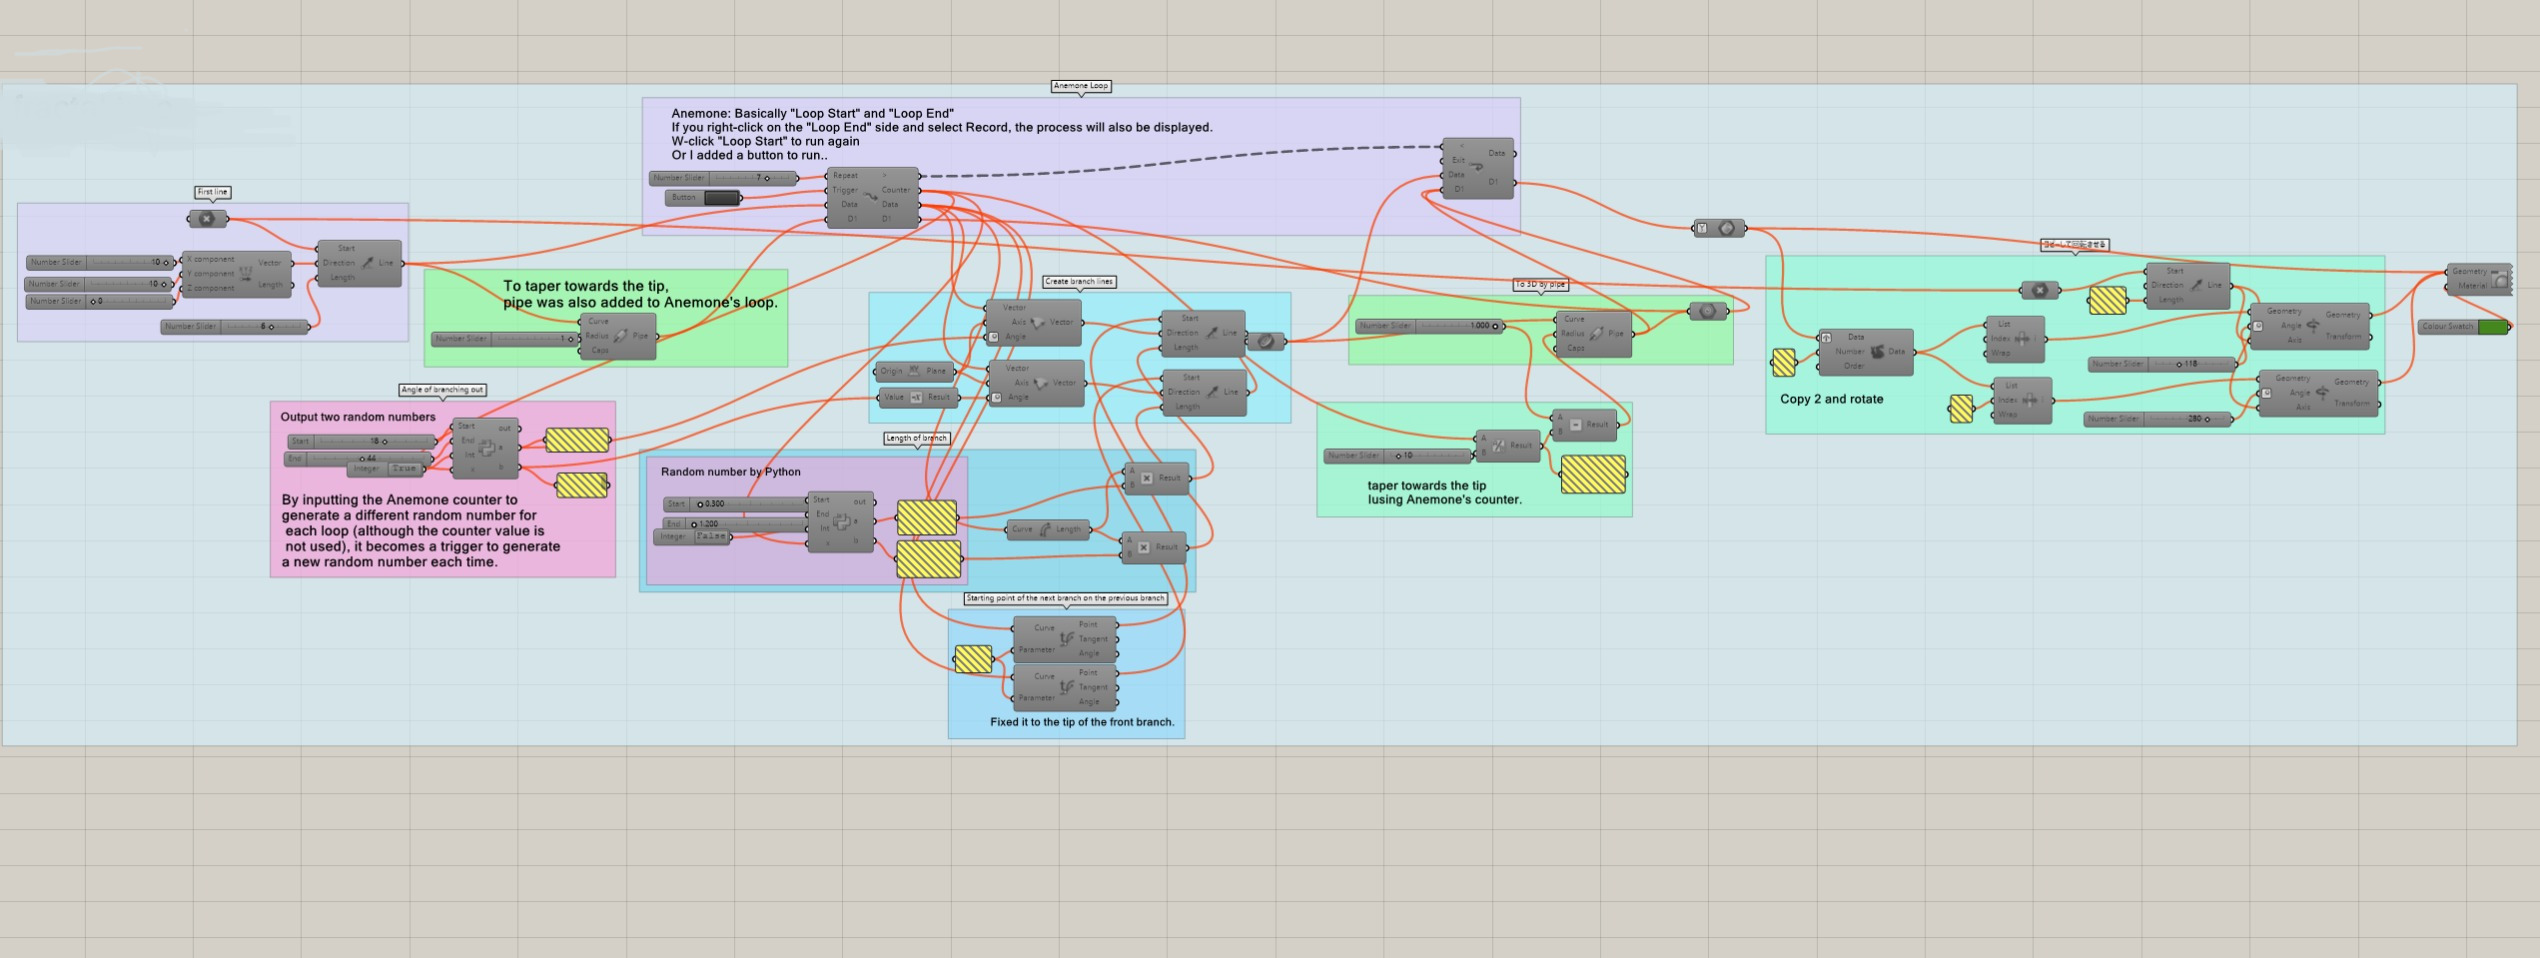
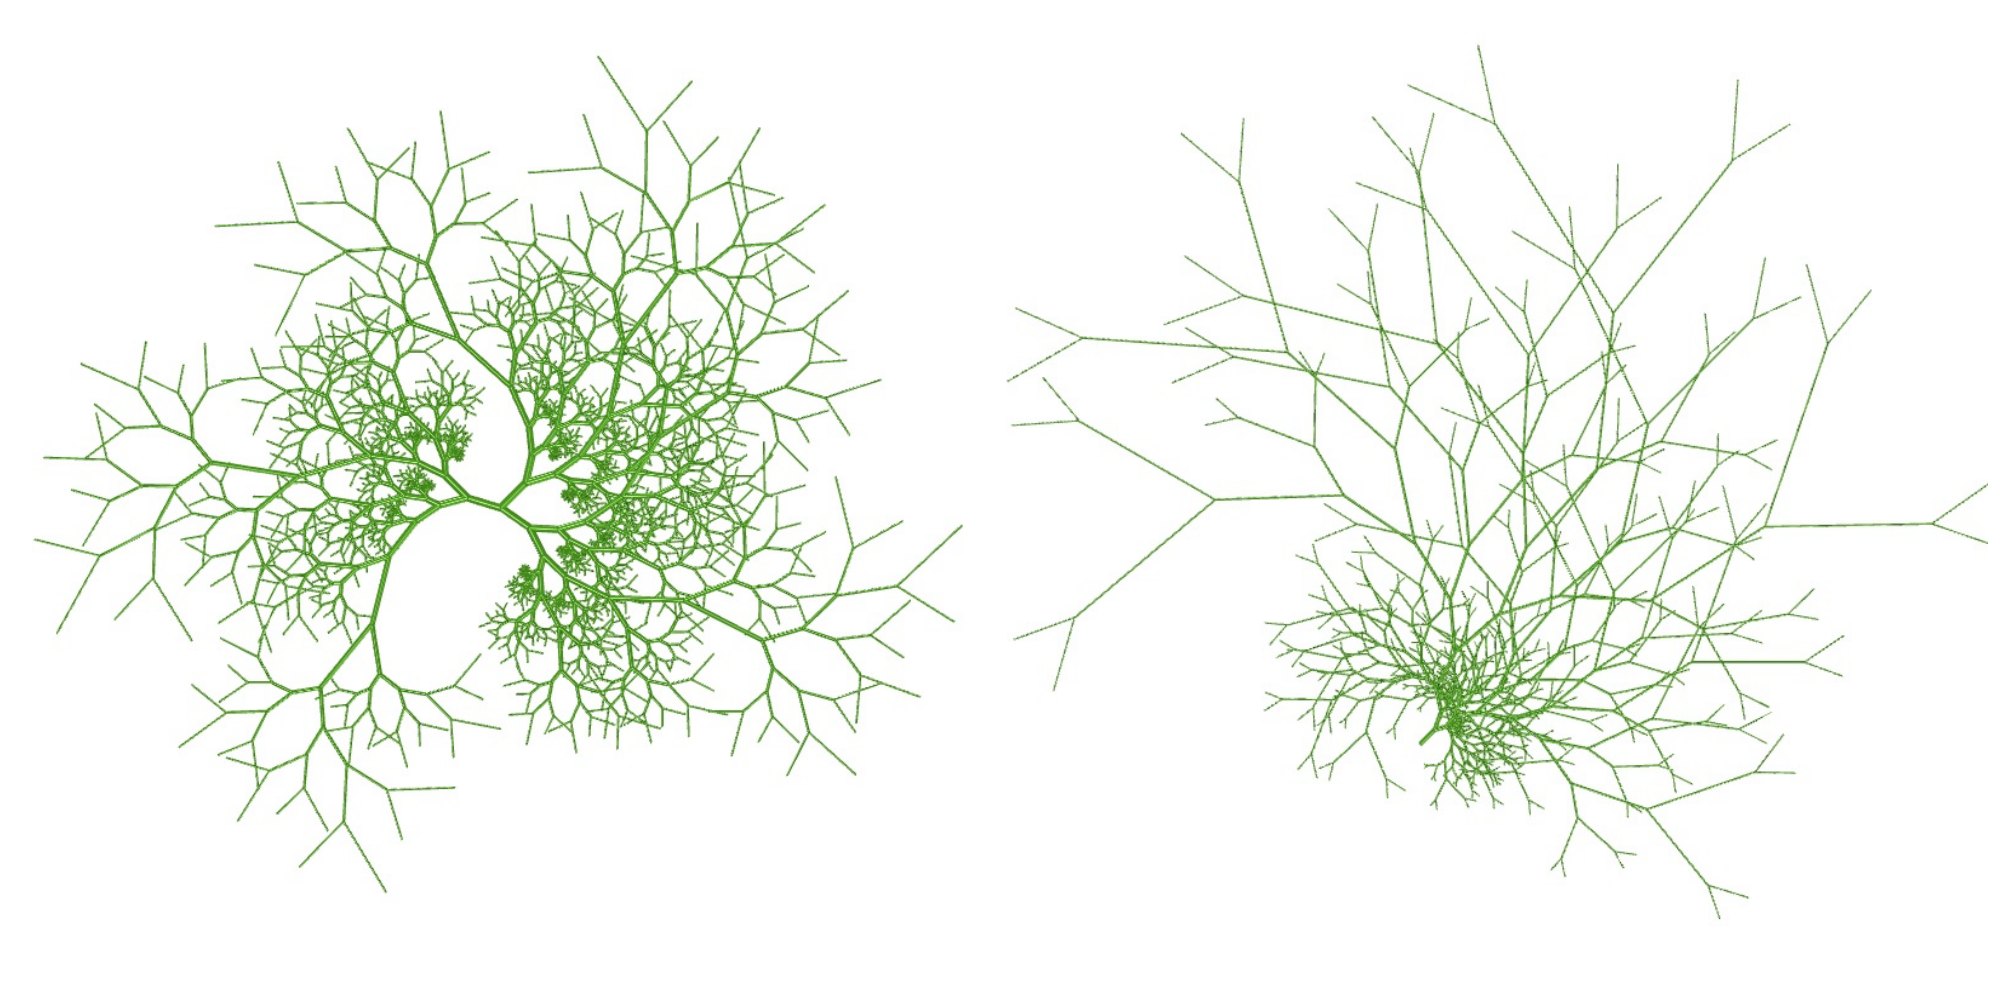
I tried to create a pattern that resembles the veins of a leaf in nature. The length, number, and angle of extension of the branches can be changed parametrically.
After creating the shape with lines, I used pipe to make it 3D. I devised a way to make it taper towards the tip of the branch.

Similar to pattern 2, a raft was attached and sliced. Printed on the white chiffon georgette. I was worried that complex shapes like branches would peel off, but the prints came out better than I expected. The pipe shape, rounded bottom, was not problem for printing.

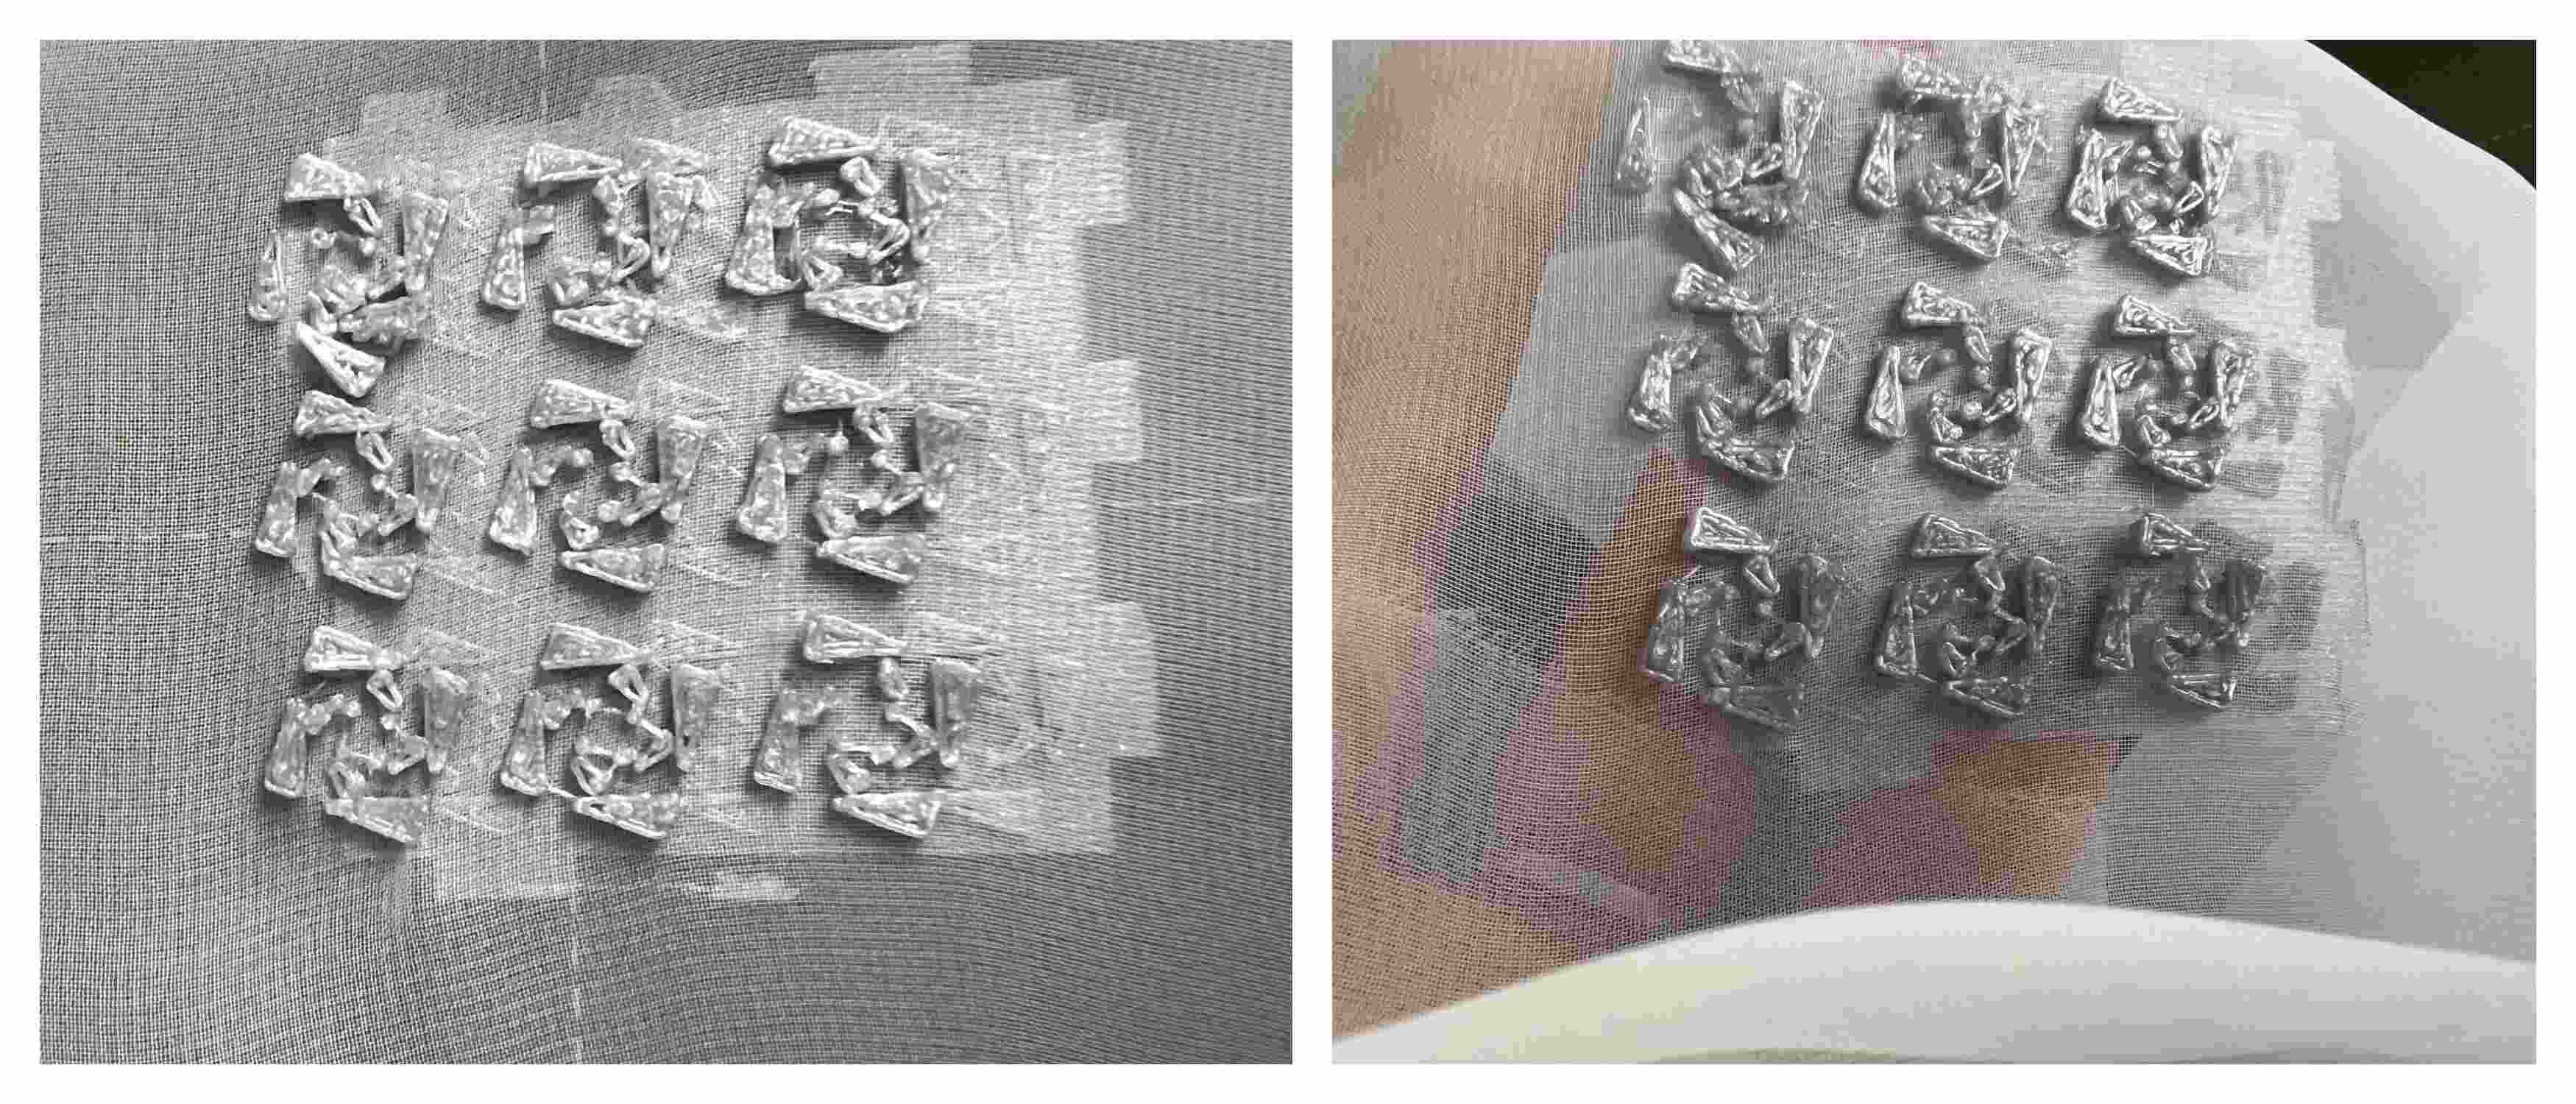
I increased the number of branches and tried printing larger pattern. The left below is, one branch group was copied two times and rotated. Right below is one branch group.
Since it exceeded the size of Prusa's bed, resized it to 35%. Then I encountered the caution of auto repaired error. I tried slicing it but was not successful.
So I imported the stl file into the Fusion360, then repaired using mesh tool. Then I could slice it successfully.


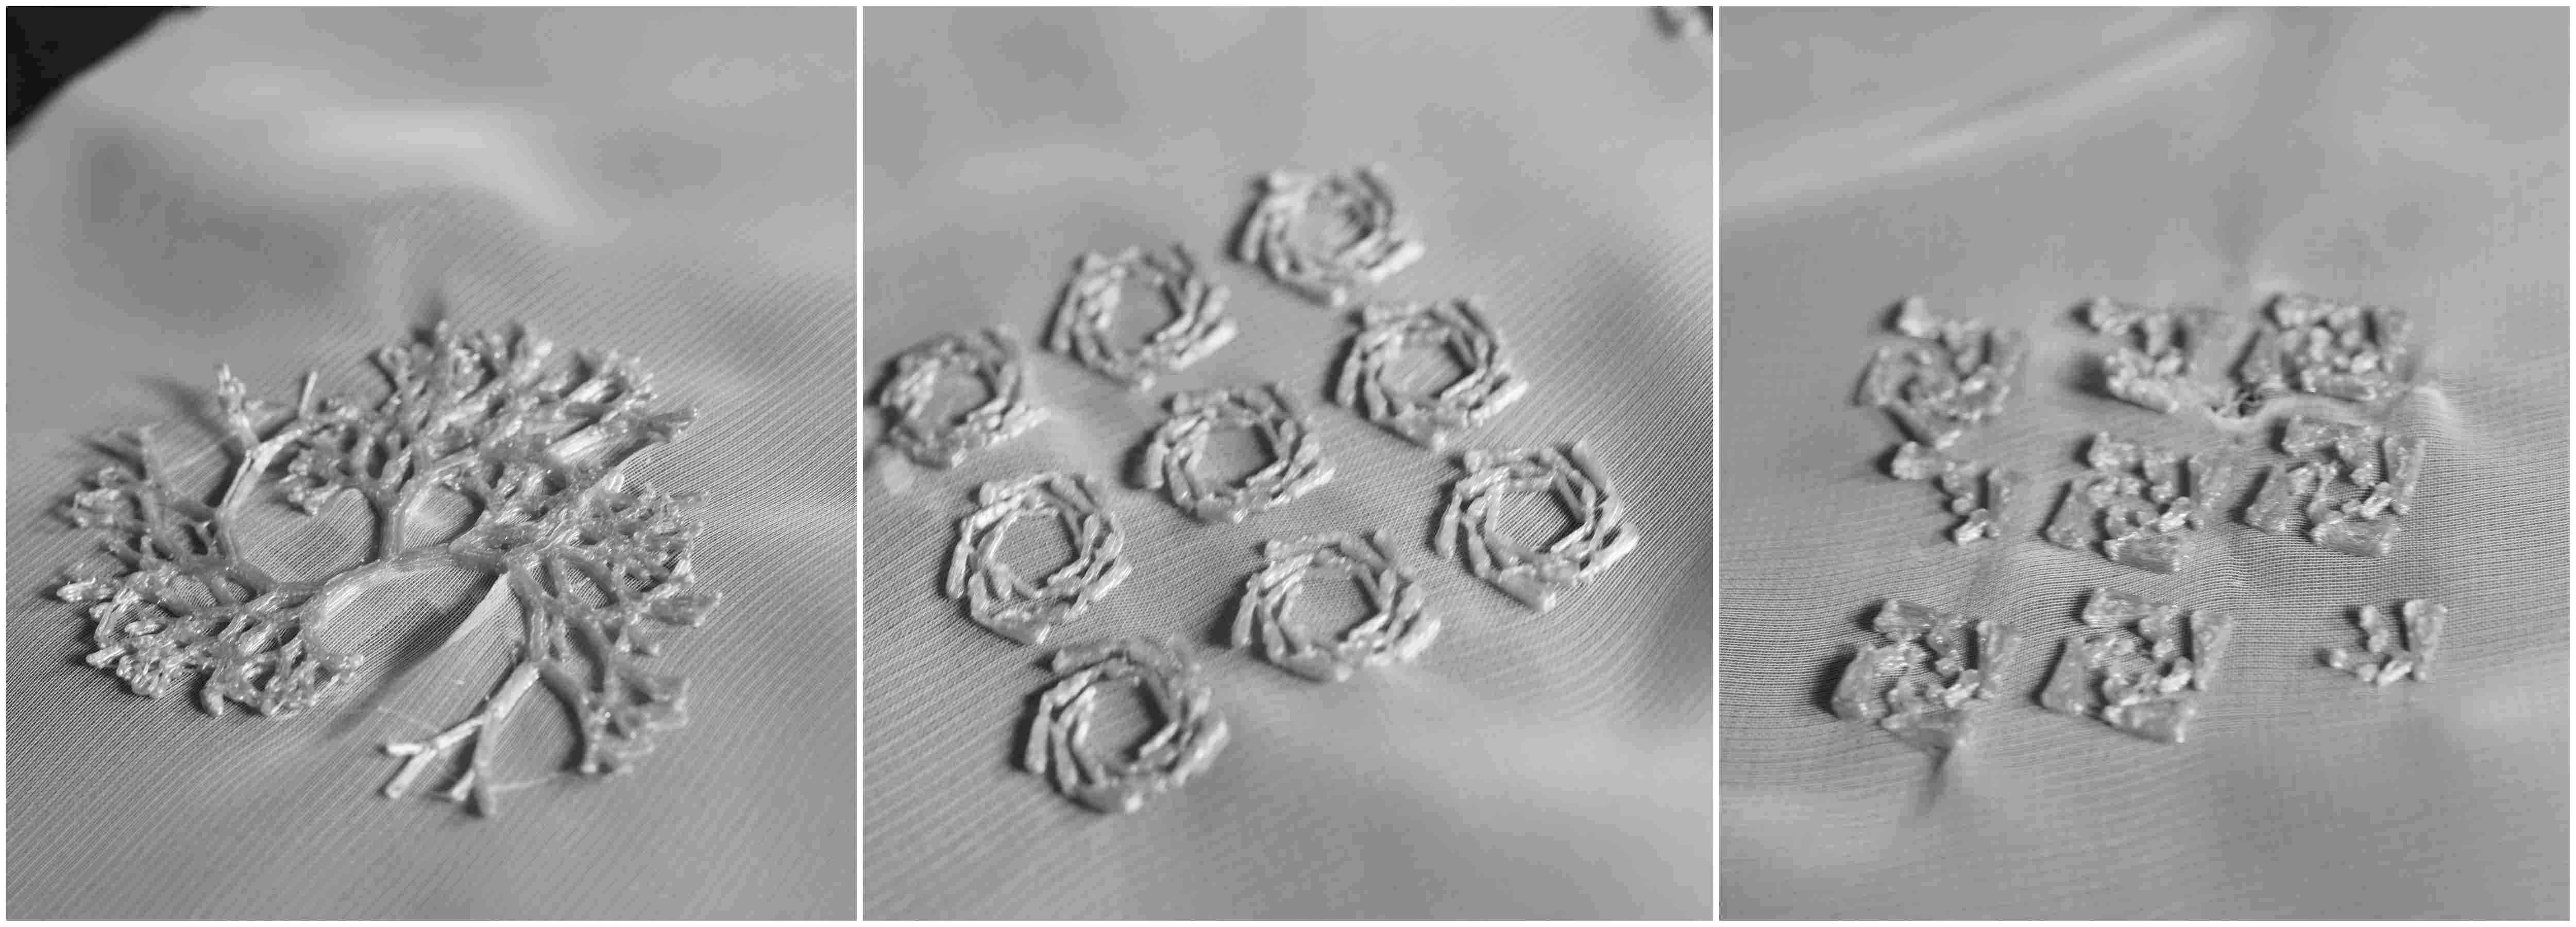
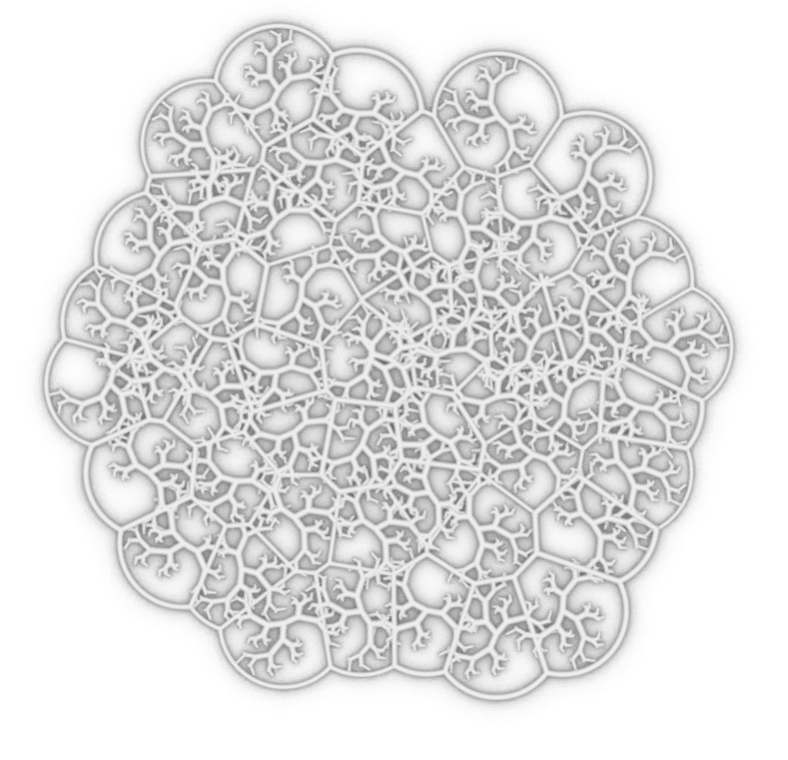
Pattern4 Coral pattern
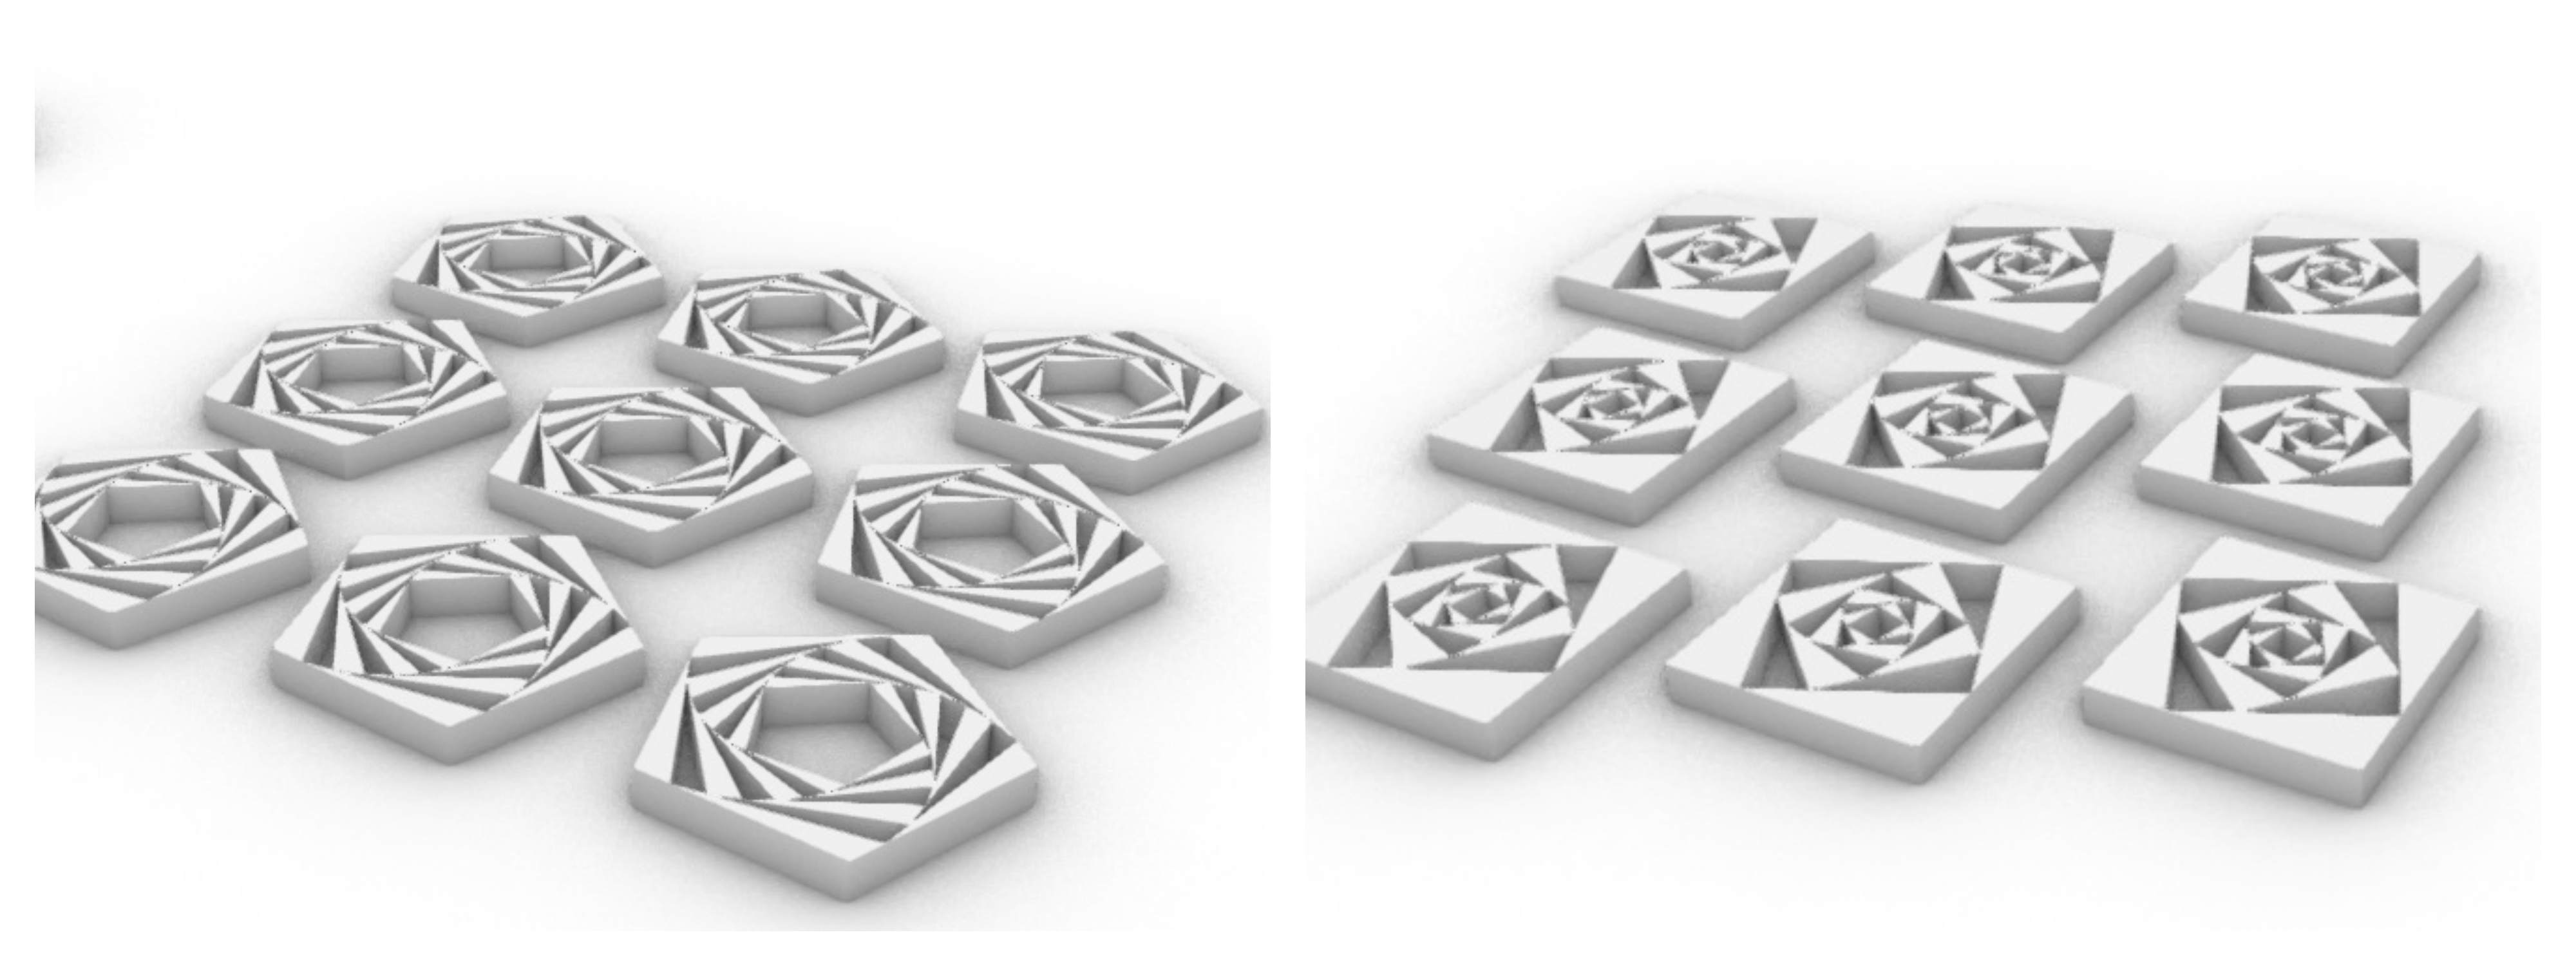
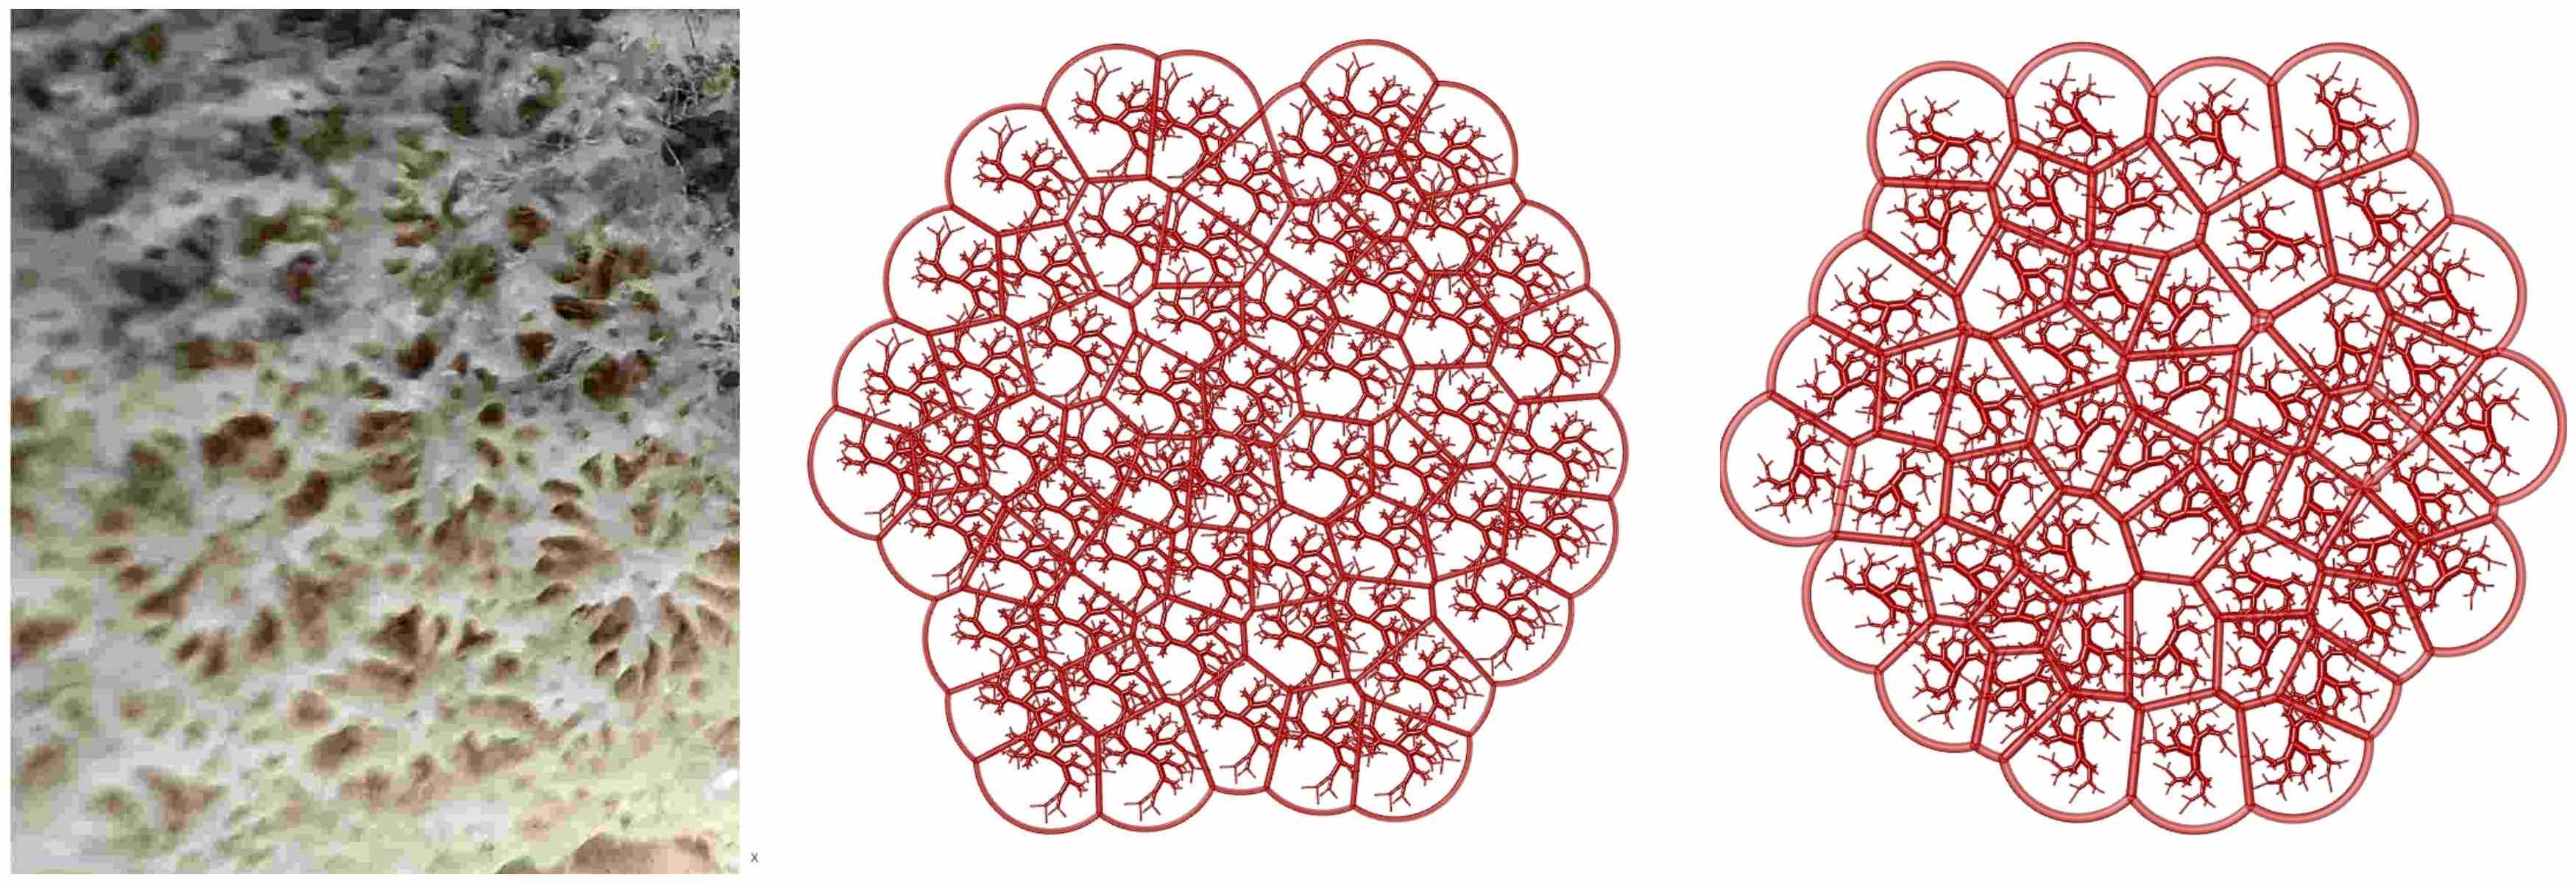
The next trial was the coral pattern. Originally, I think it would grow little by little from the center, and a wall would form at the border between it and its neighbors, creating a Voronoi pattern. This time, I simply incorporated the Leaf vain pattern into Voronoi. The center below is, leaf vain was copied to the center of Voronoi. The right below was, the leaf vain was rotated randomly after copying. Therefore, the right one has more natural randomness. In the next step, I want to create a pattern that grows randomly one by one, but it may be better to use Python.

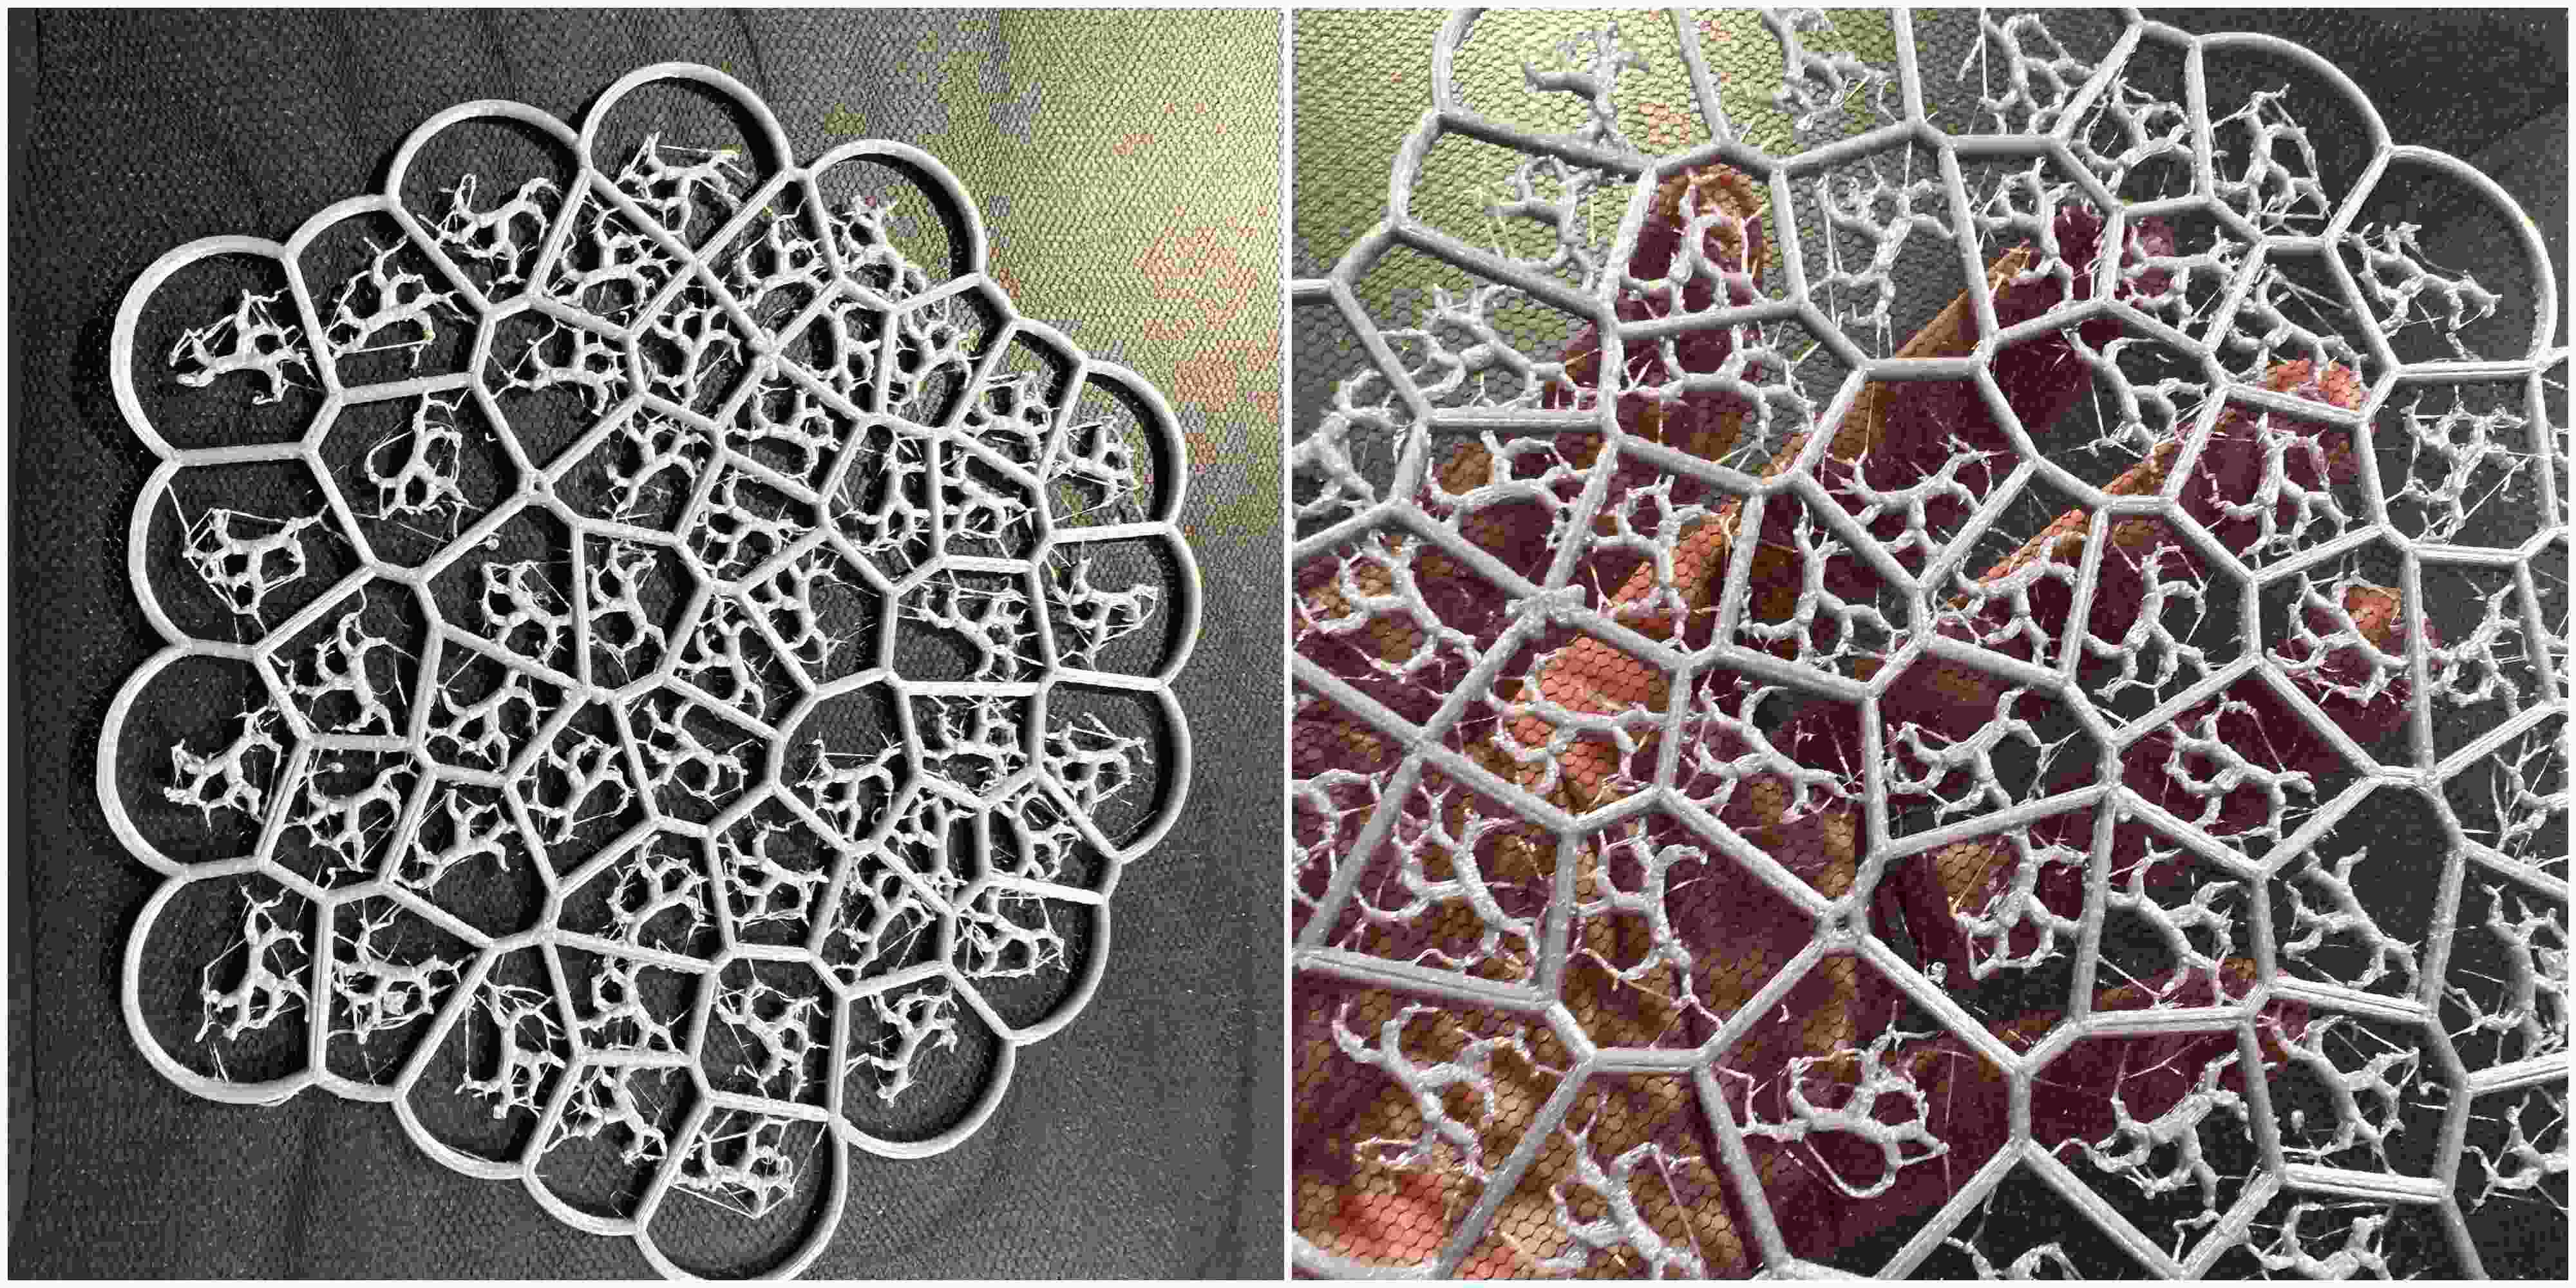
I adjusted the size to fit the heat bed, and tried slicing, but couldn't because of the caution of auto repaired. So repaired the mesh using Fusion360 (it took long time), then sliced again.

This time, I changed the step a little.
- no raft. other settings were same as pattern1
- not sand fabric. The fabric、black nylon mesh, was set before printing.
- After auto calibration of Prusa, paused the printing, then set the fabric with clips, then resumed printing.
- Tune speed while printing
- Very slow speed during initial stages. about 30%.
- If you can print without any problems and there are no bumps that will interfere with printing, increase the speed to about 50%.
Coral #1
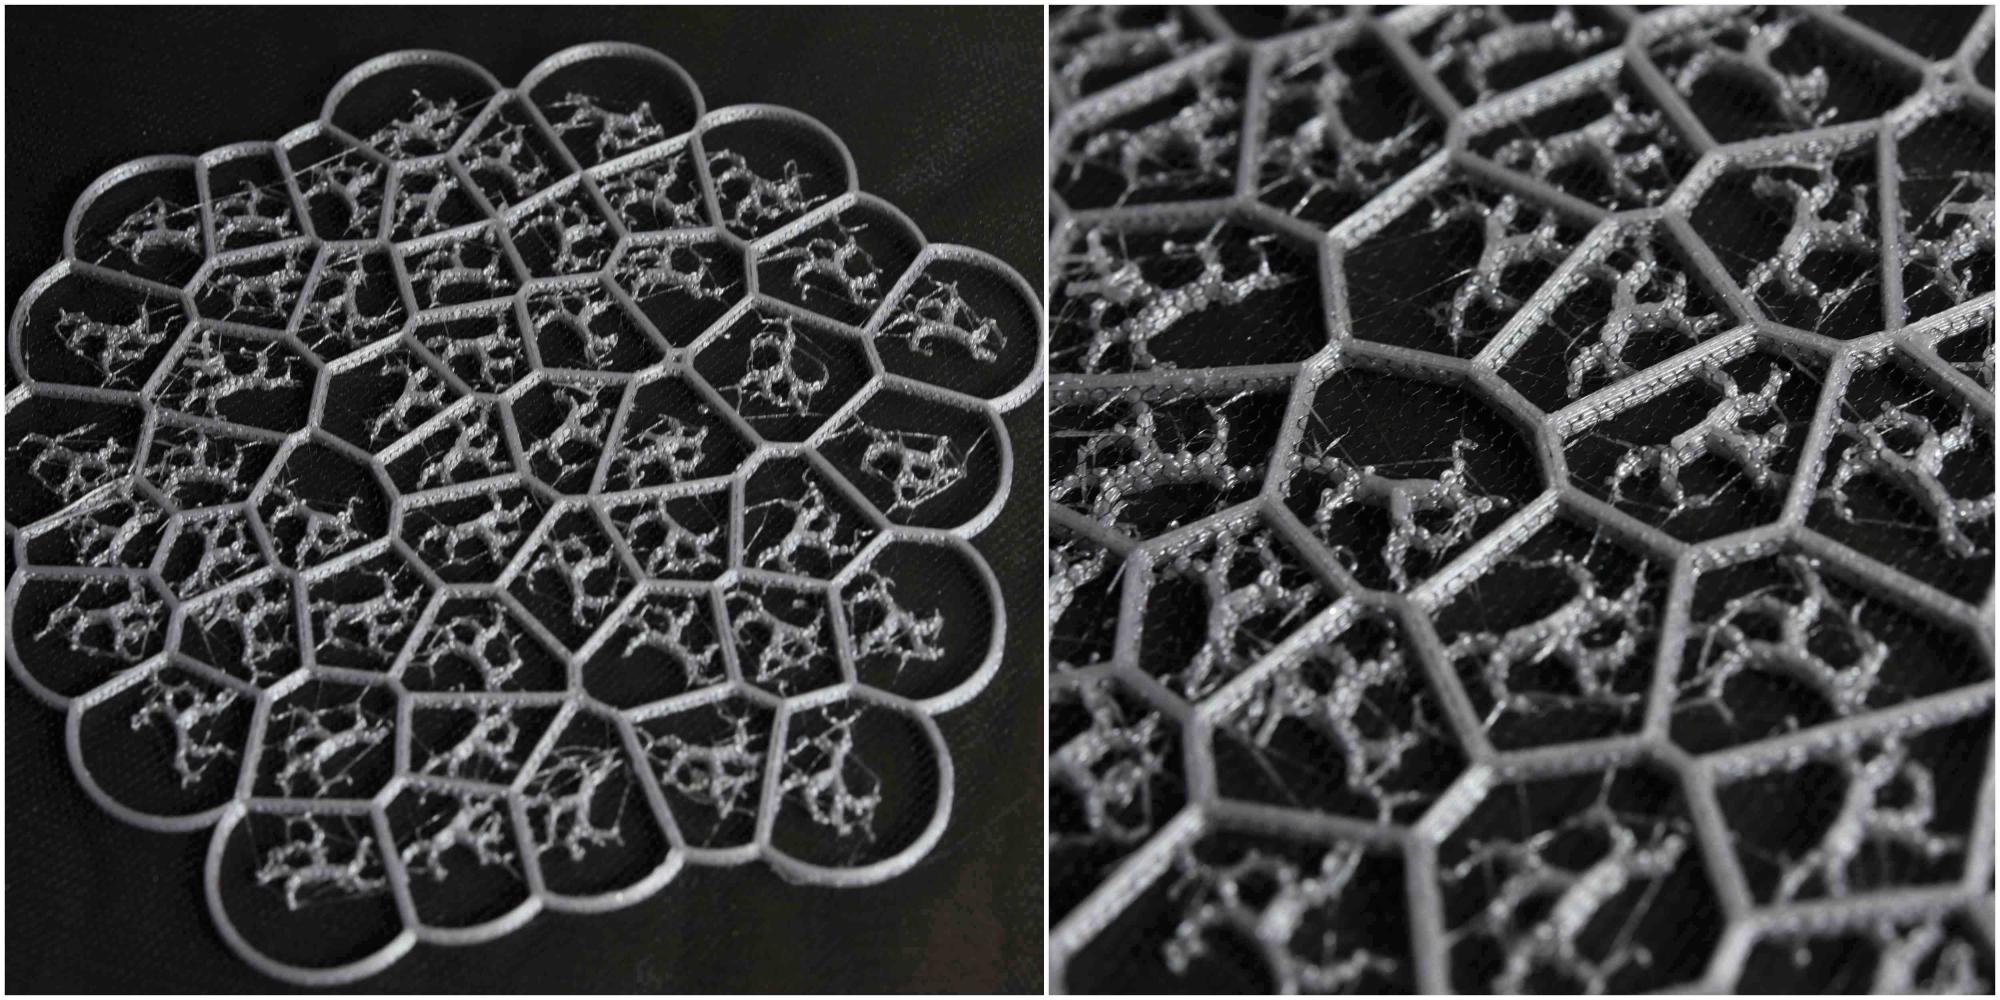
Coral #2

Coral #1,#2 + Leaf vain

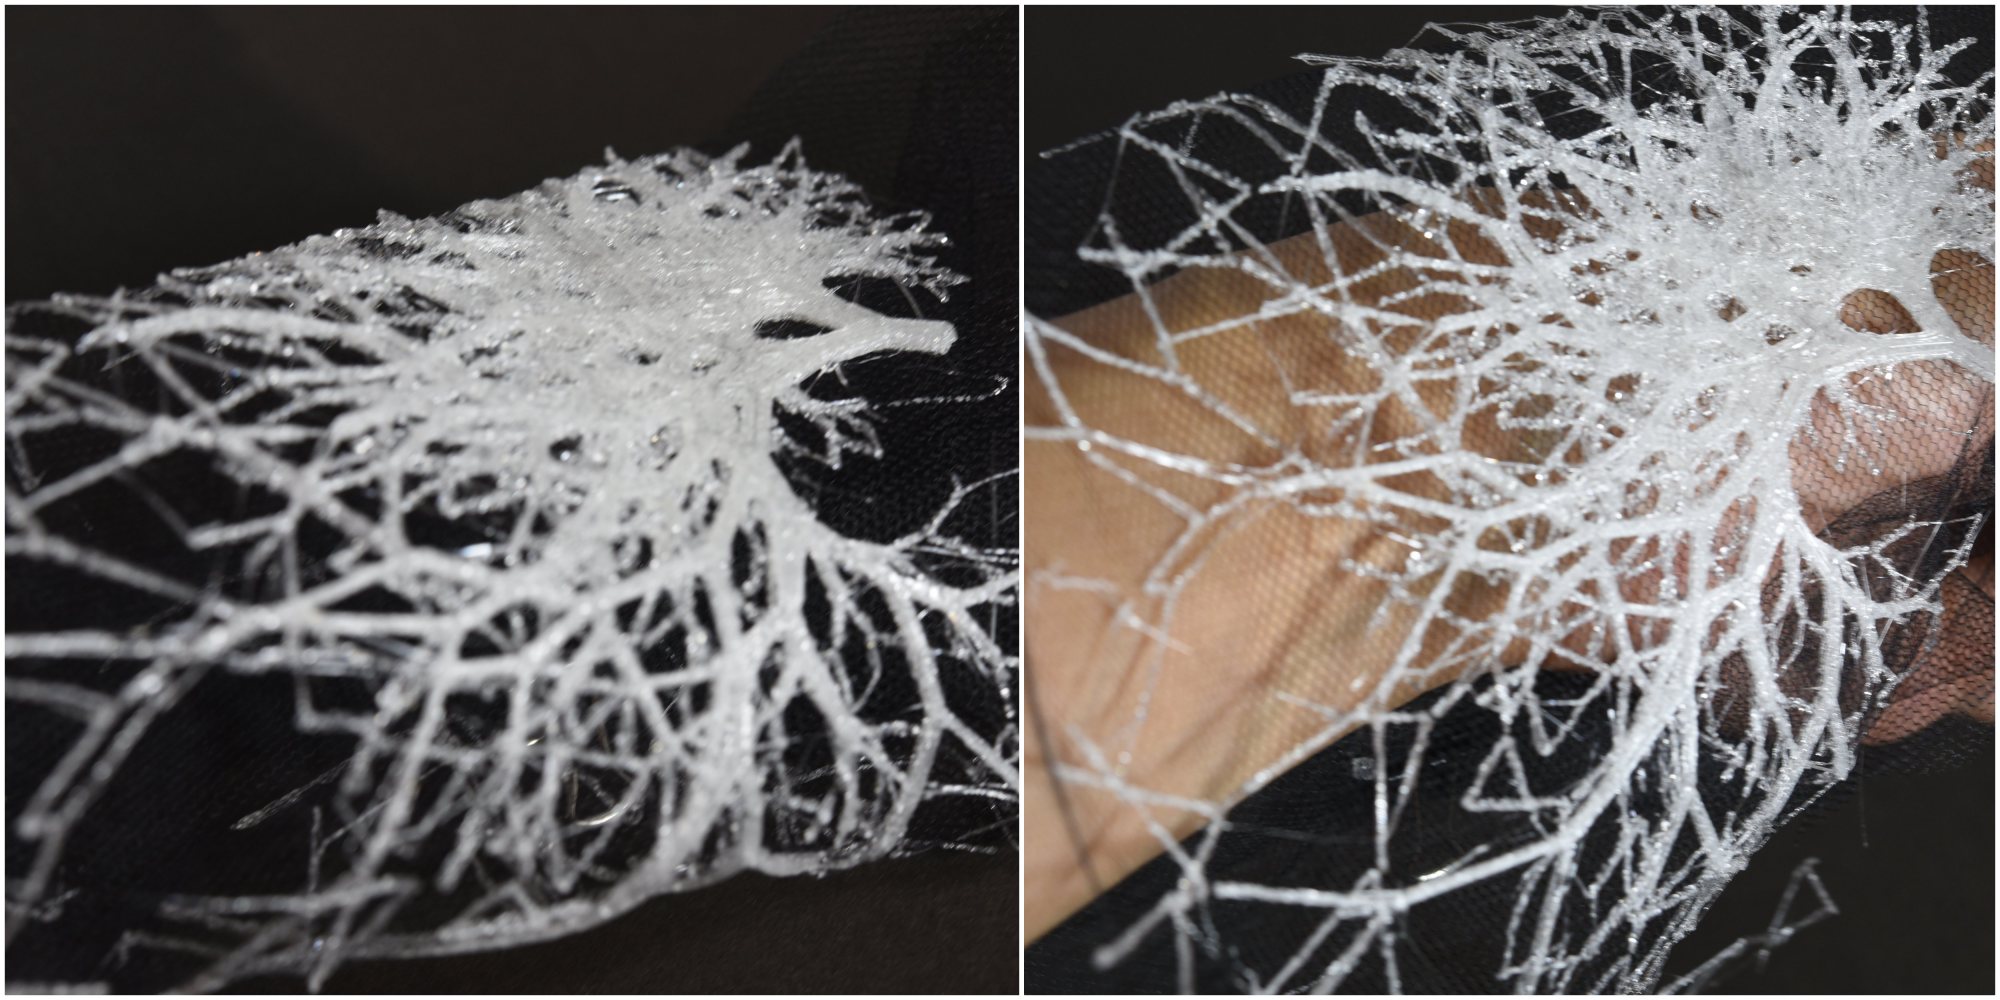
Flex filament
The issue with the above print results is their hardness. When I thought about using it for clothes, I really wanted something soft texture. So I finally tried Flex TPU filament for the big leaf vain pattern. The slicer setting was as follows.
 The fabric was nylon mesh. I did not use the raft and fabric sandwiching technique. The printing speed was tuned while printing from 30% to 50%.
As a result, although the filament thread was twisted a little, I was able to print beautifully. It's flexible and bendable, so you can fit it around your arm.

My Learning outcome
- I researched the origins of shapes, such as Voronoi shapes in nature, and learned how to create parametric patterns with Grasshopper.
-
When printing on cloth, there were many parameters to consider, such as the timing of installing the cloth, layers, and printing speed. I think you can use the method of slowing down the print speed very much and increasing it while watching the print condition.
-
I learned fabric printing using the FDM (Fused Deposition Modeling) method, but I would like to continue trying other printing methods.
Fabrication files
Pattern1: Simple Grasshopper
Pattern2: Geometric Grasshopper
Pattern3: Leaf vain Grasshopper
Pattern4: Coral Grasshopper