6. BioFabricating Materials
Learning outcomes
- Research skills: the participant has acquired knowledge through references and Concept development
- Technical skills: Master techniques for growing and crafting personalised materials
- Process skills: Anyone can go through the process, compare and explore the recipes
- Final outcome: create a material chart
- Originality: Has the design been thought through and elaborated?
Student checklist
- Include some inspiration: research on artists, projects, platforms that work with bio materials, local ingredients and resources
-
Produce at least one crafted and one grown material:
-
Crafted material - explore the different recipes and understand how to adjust them based on the ingredients:
- Grown material - explore the different recipes and understand how to adjust them based on the ingredients
-
Document your recipes, the ingredients and process and if there have been changes, document your unexpected discoveries
-
Name your materials, classify them by typology and display them in a systematic order of samples
- Submit some of your swatches to the analog material library of your lab. (20cm x 20cm approx.)
Research
I've known about the existence of vegetable and fruit-based leather products that don't use animal skin, but lately I feel like they've become more familiar.
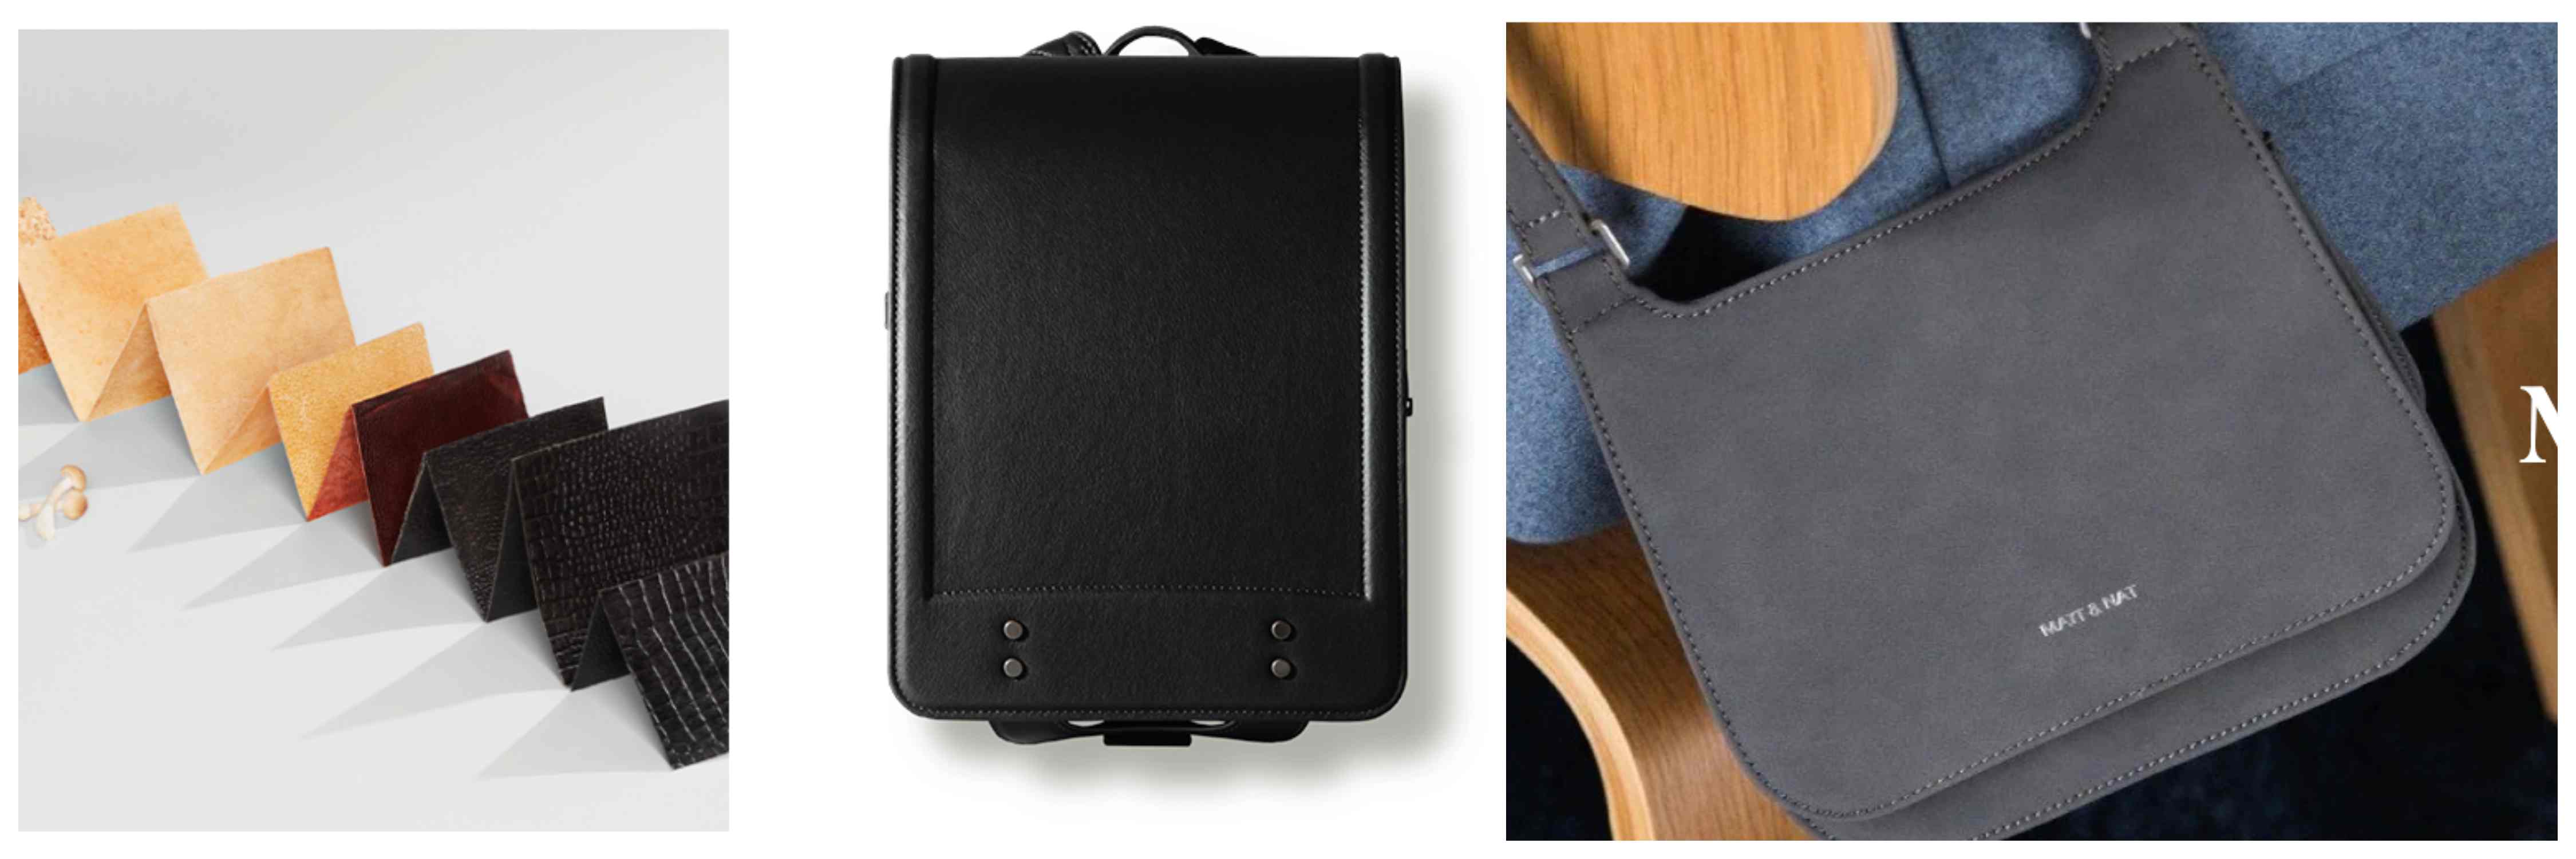
The images on the left and center are mushroom-based leather products that Tsuchiya Kaban is working on. Tsuchiya Kaban is a popular leather goods store in Japan, but they have also started BIO-based research. This leather will also be used for the school bag that Japanese elementary school students use to go to school. It seems that children's awareness of materials will also change.
The right images is the vegan leather shop Matt&Nat. It was founded in Montreal, Canada in 1995. Matt&Nat stands for MATERIAL + NATURE.
I was surprised to see so many variations of Vegan Leather products. I would be willing to use a product like this.
Suzanne Lee's Ted Talk was interesting. The method would allow designers, or anyone, to grow and shape their own microbial fabrics.
I was also surprised that kombucha leather is easy to dye. For example, this blue jacket is dyed with indigo by just one coat. For cotton, you need to repeat about 8 times.

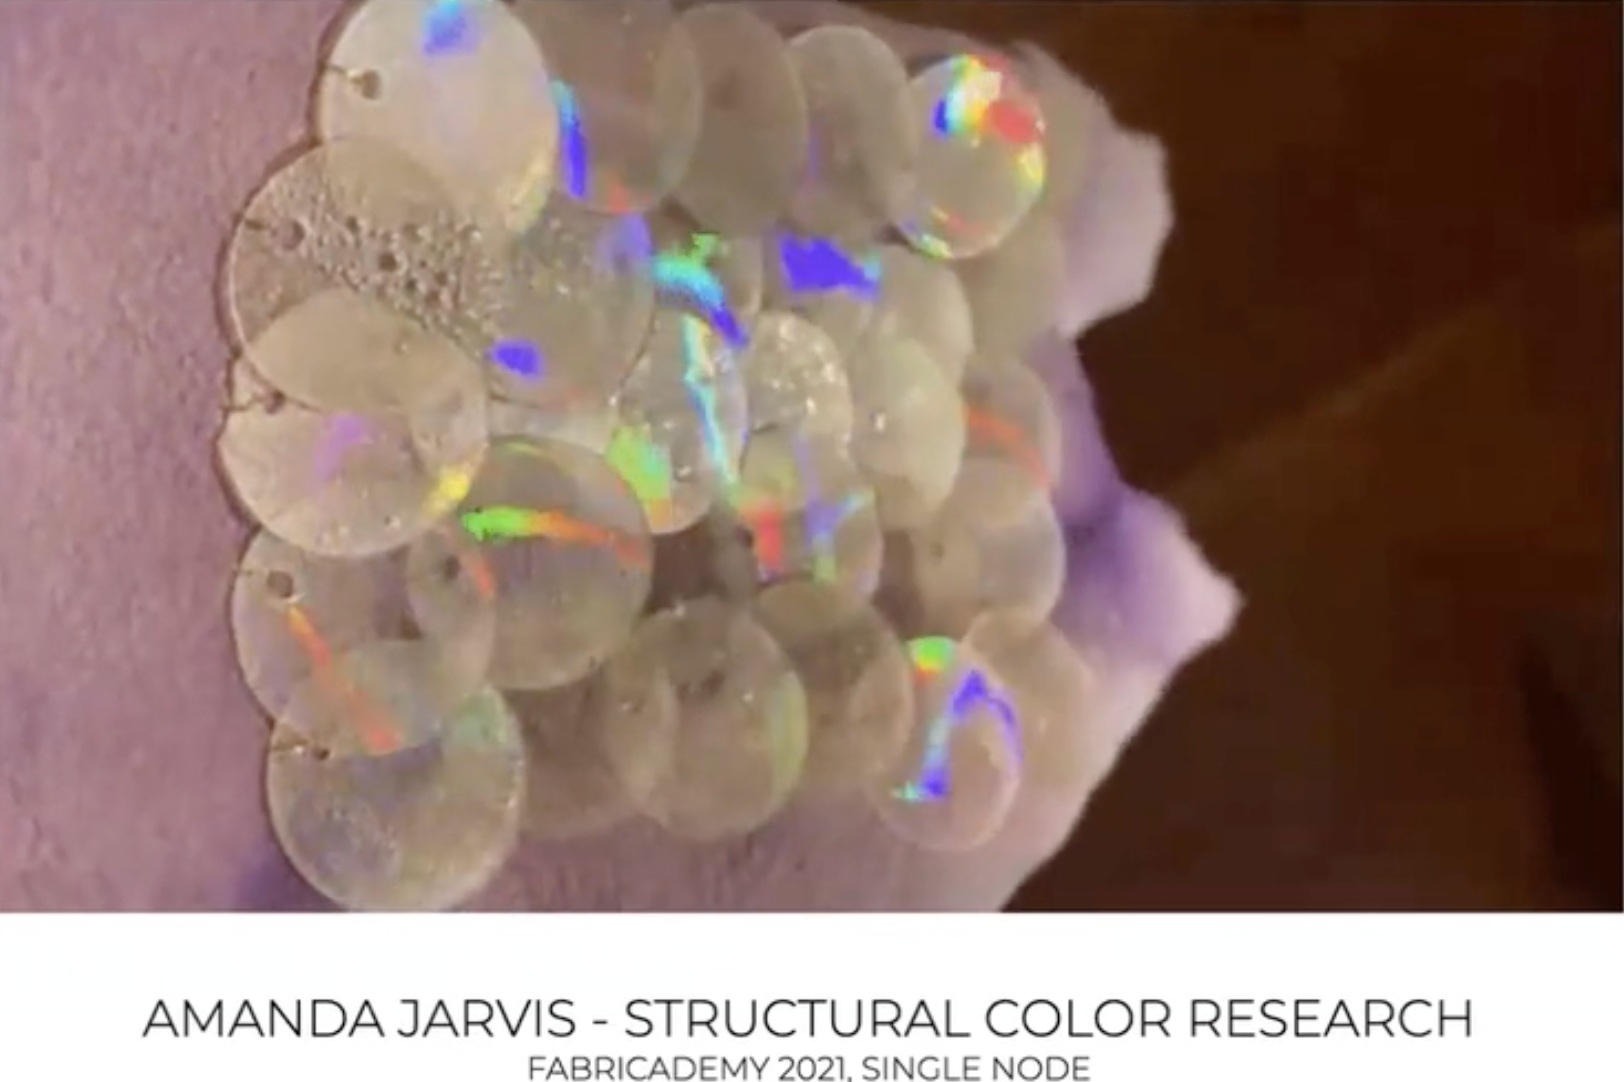
The material of structural color is also amazing. As I was in charge of disc business before, I know the structure color created by the fine grooves of the disc. I found the research of chocolate. It is suitable for food applications since no coloring agent is required.
References & Inspiration
I used the class videos and the Research Book Bioplastic to help me come up with a plan. I was also interested in cellulose, which is used in gastronomy, so I used the book "Molecular Cooking in Japanese Cuisine" to consider how to use methyl cellulose. Methyl cellulose is a food additive with unusual characteristics. Generally, gel-like foods such as jelly become soft when heated, but the Methyl cellulose becomes hard at high temperatures and liquefies at low temperatures. Therefore, this time I would like to experiment with making paper using methyl cellulose and cutting it with a laser.
Process and workflow
Bio Plastic
Agar
The ingredient I used is called ``Kanten'' in Japan, and is familiar as an ingredient in sweets. The seaweeds Amakusa and Ogonori are used as ingredients. Unlike gelatin, it hardens at room temperature and is easy to handle.
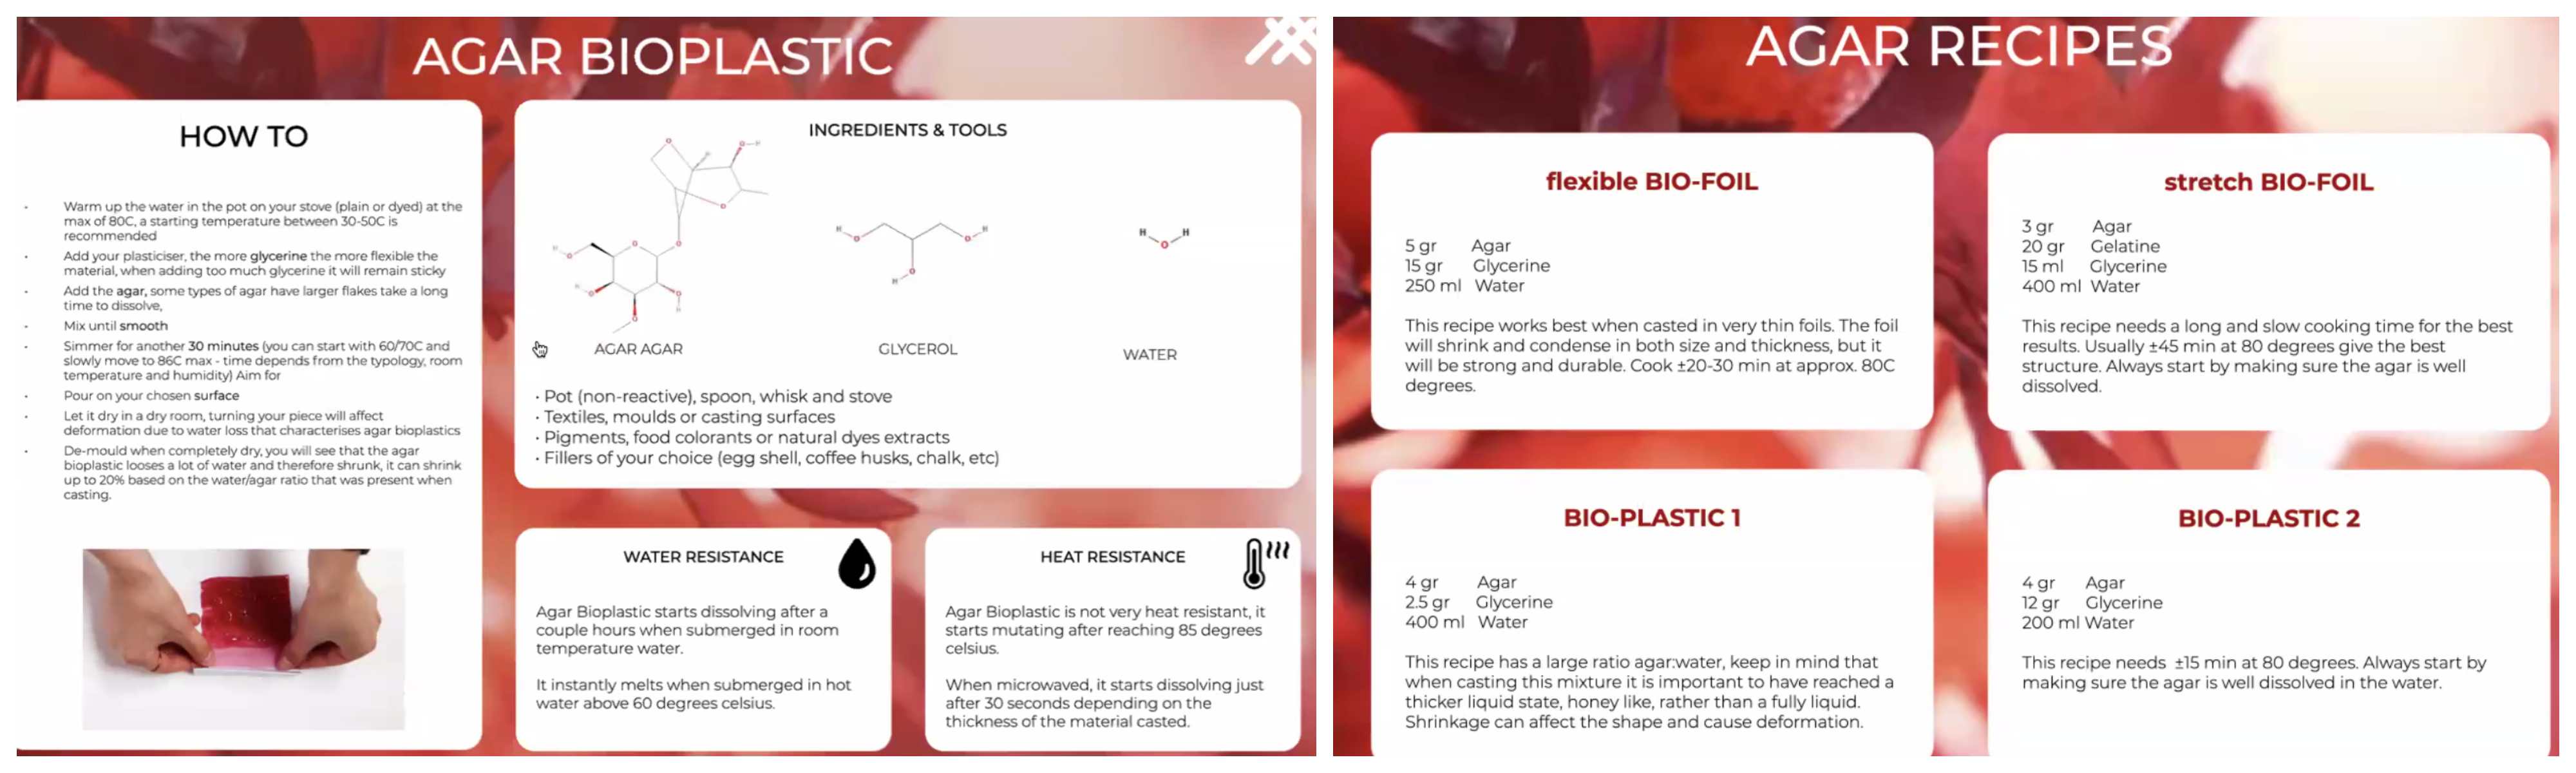
Flexible BIO-FOIL
Comparison of Glycerin amounts
* Agar 5g  (for 5 cups)
* 250ml water ( for 5 cups)
* Glycerin for each cup  (A)0g  (B)1g (C)3g (D)6g  (E)9g
* cup
* scale
* spoon
* mold
* Measure agar and put into a cup
* Pour water into the cup and stir it with a spoon.
* Boil for 2 minutes. I used the microwave. Stir occasionally. A large cup is better to avoid spills.
* If there is evaporation, add water to make 250ml.
* Divide into 5 cups ( 50ml each)
* Measure Glycerine for each cup. , then pour into each cup. Stir it.
* Pour into some molds
* Leave it around one day ( room temperature )
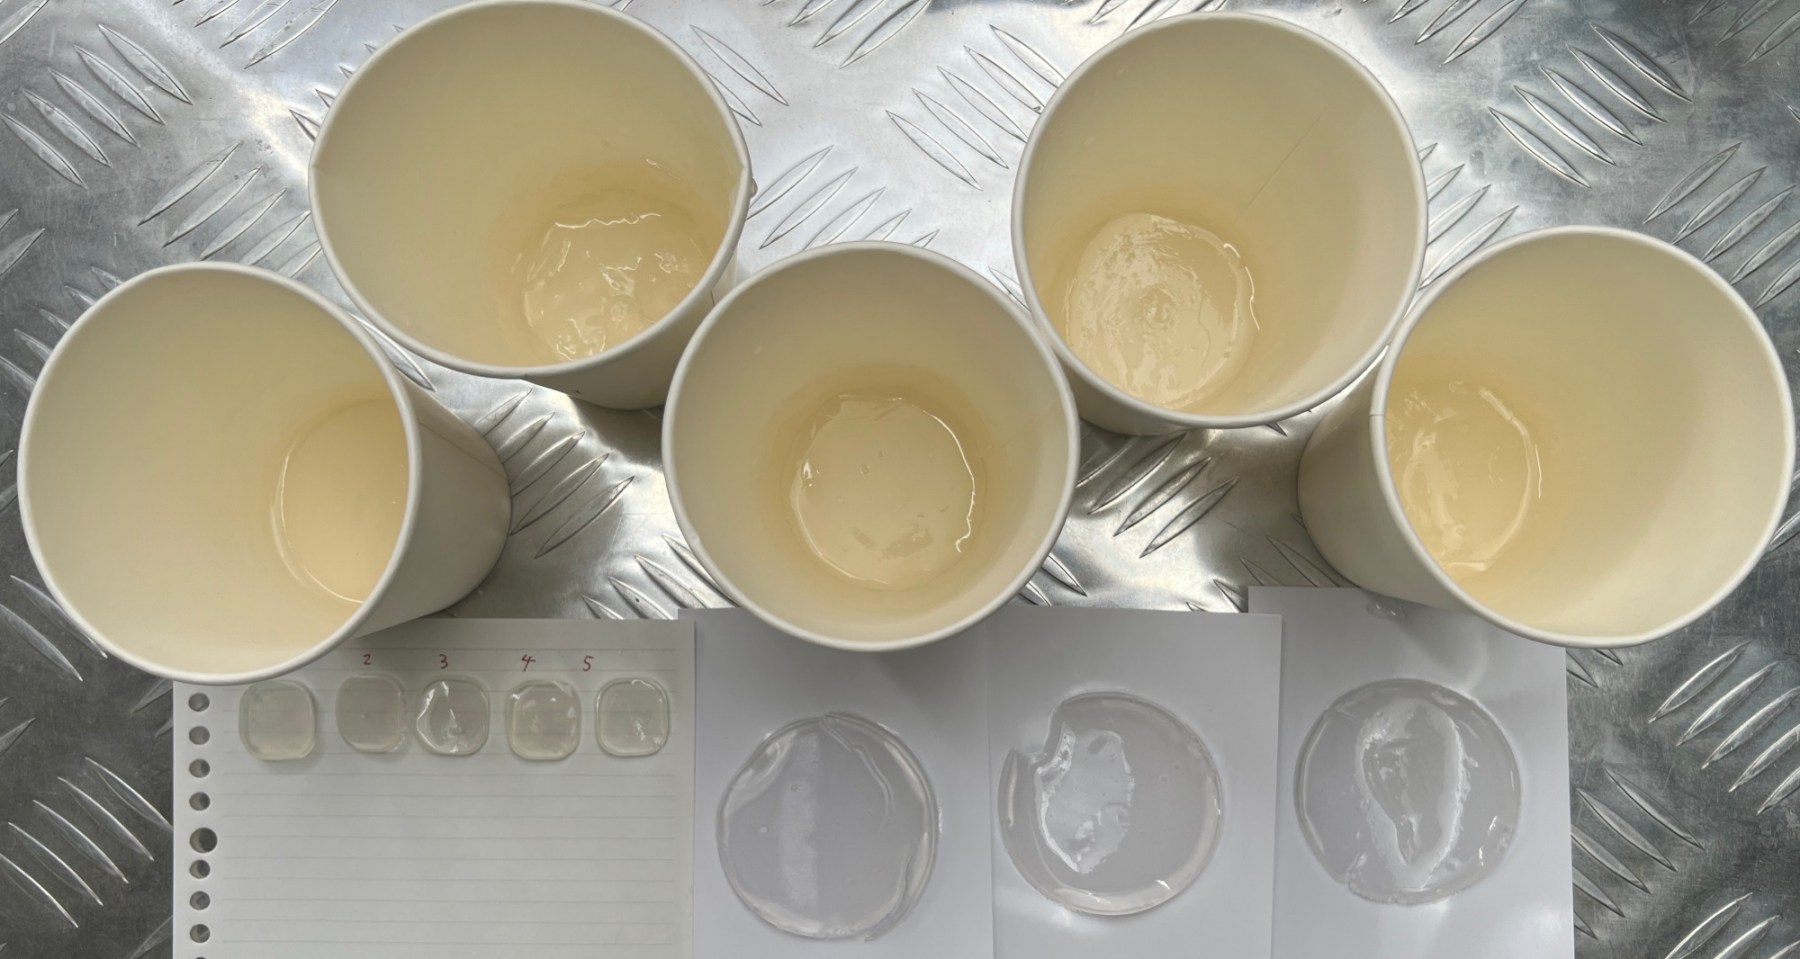
Texture:
- It started to solidify in about 10 minutes, but the difference in texture was hard to notice right away.
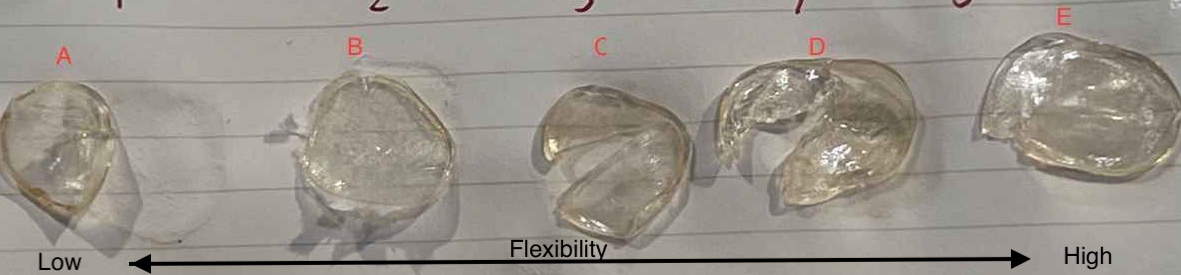
- After a day, the dryness progressed and a difference in texture appeared. A and B, which contain less glycerin, were hard, but C had flexibility. D and E had a slightly wet feel and were more flexible. However, because it was thin, it teared if I pulled it too hard.
- It was resistant to water and did not dissolve even after being soaked for 30 minutes.
1Recipe#1 Flexible Agar Foil
* Agar 5g   (Kanten)
* Glycerine 15g
* 250ml water
* cup
* scale
* spoon
* mold
* Measure agar in the cup
* Pour water into the cup and stir it with a spoon.
* Boil for 2 minutes. I used the microwave. Stir occasionally. A large cup is better to avoid spills.
* Measure Glycerine, then pour into the agar liquid. Stir it.
* Pour into some molds
* Leave it around one hour ( room temperature )
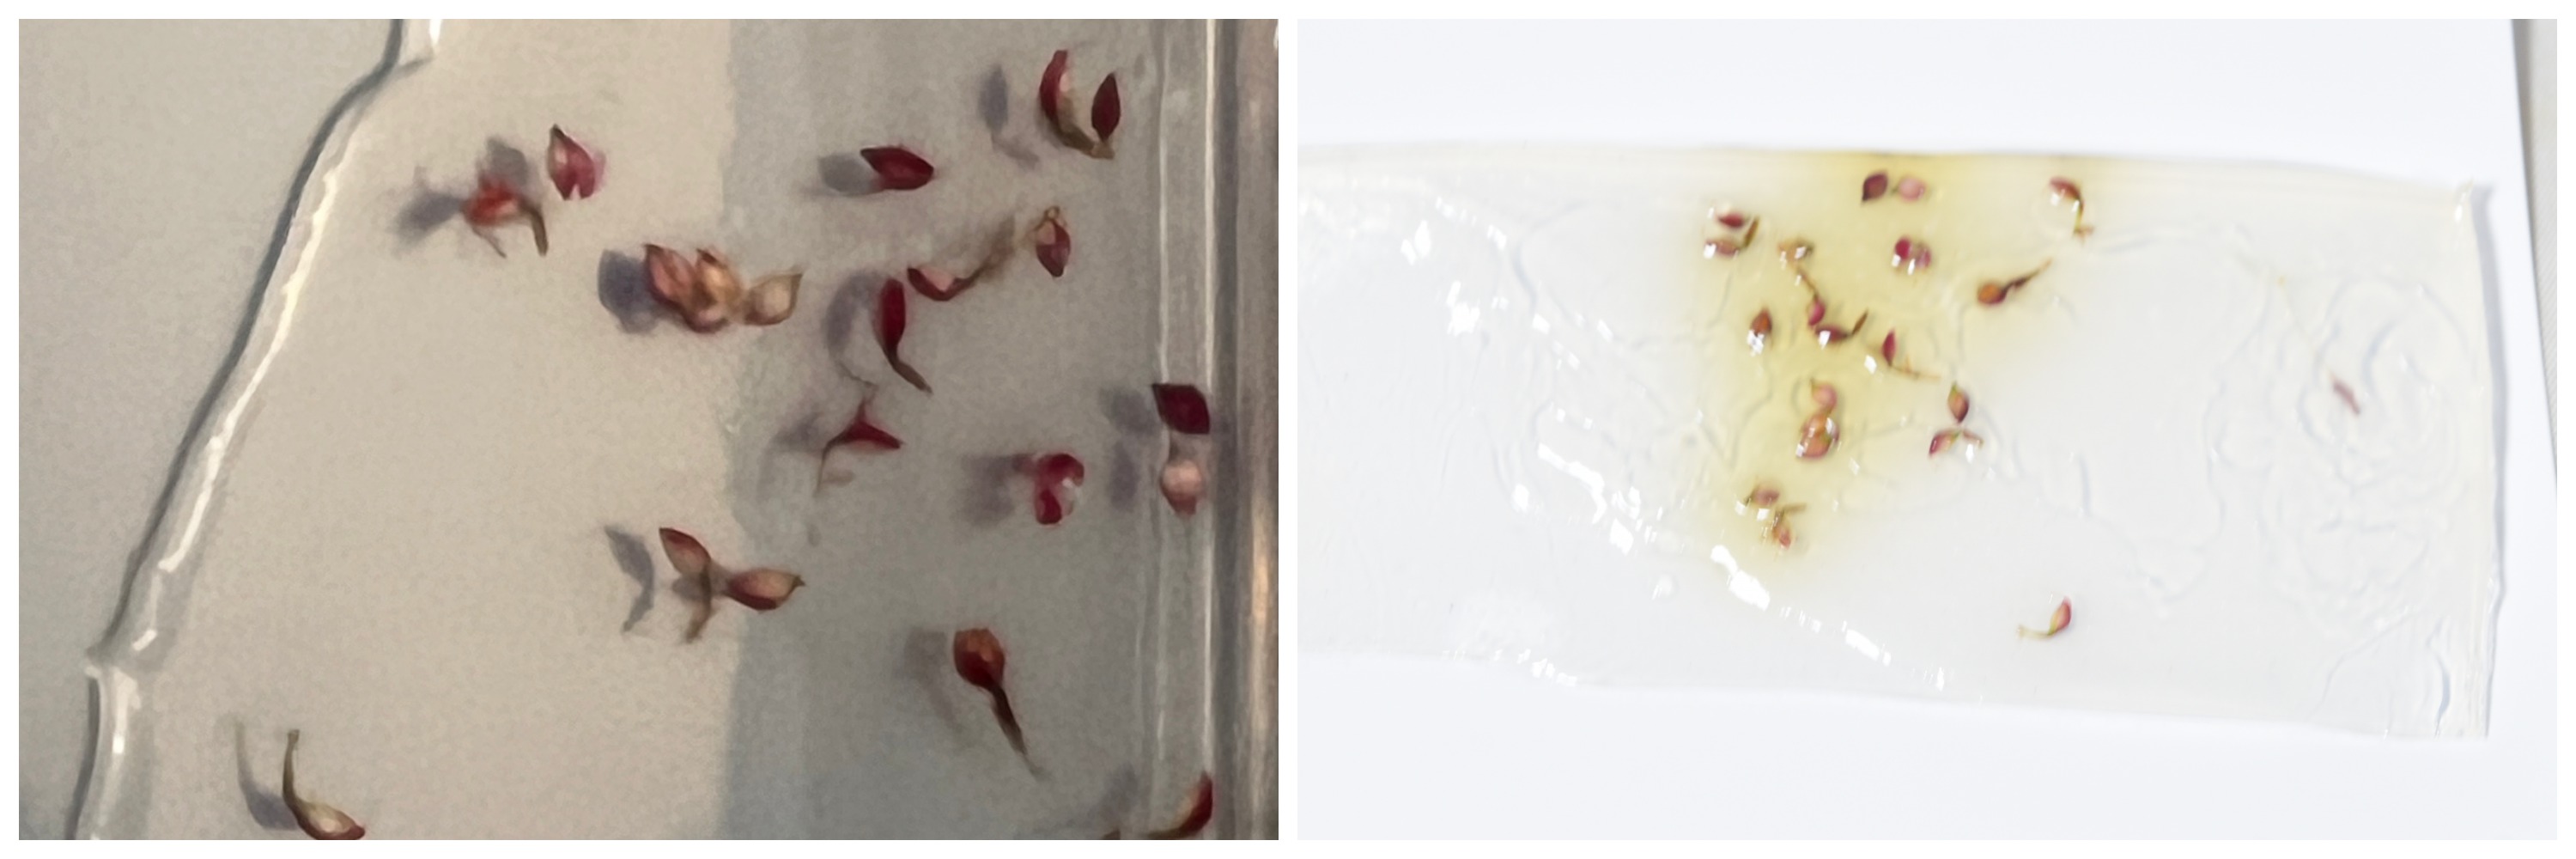
Left image is first one, about 5mm thickness and right is after one night. I thought it was too thick for a foil, but after a day it thinned out and became more flexible.
Corn String
Flower particle (Mizuhiki in Japanese)
Coffee(left over)
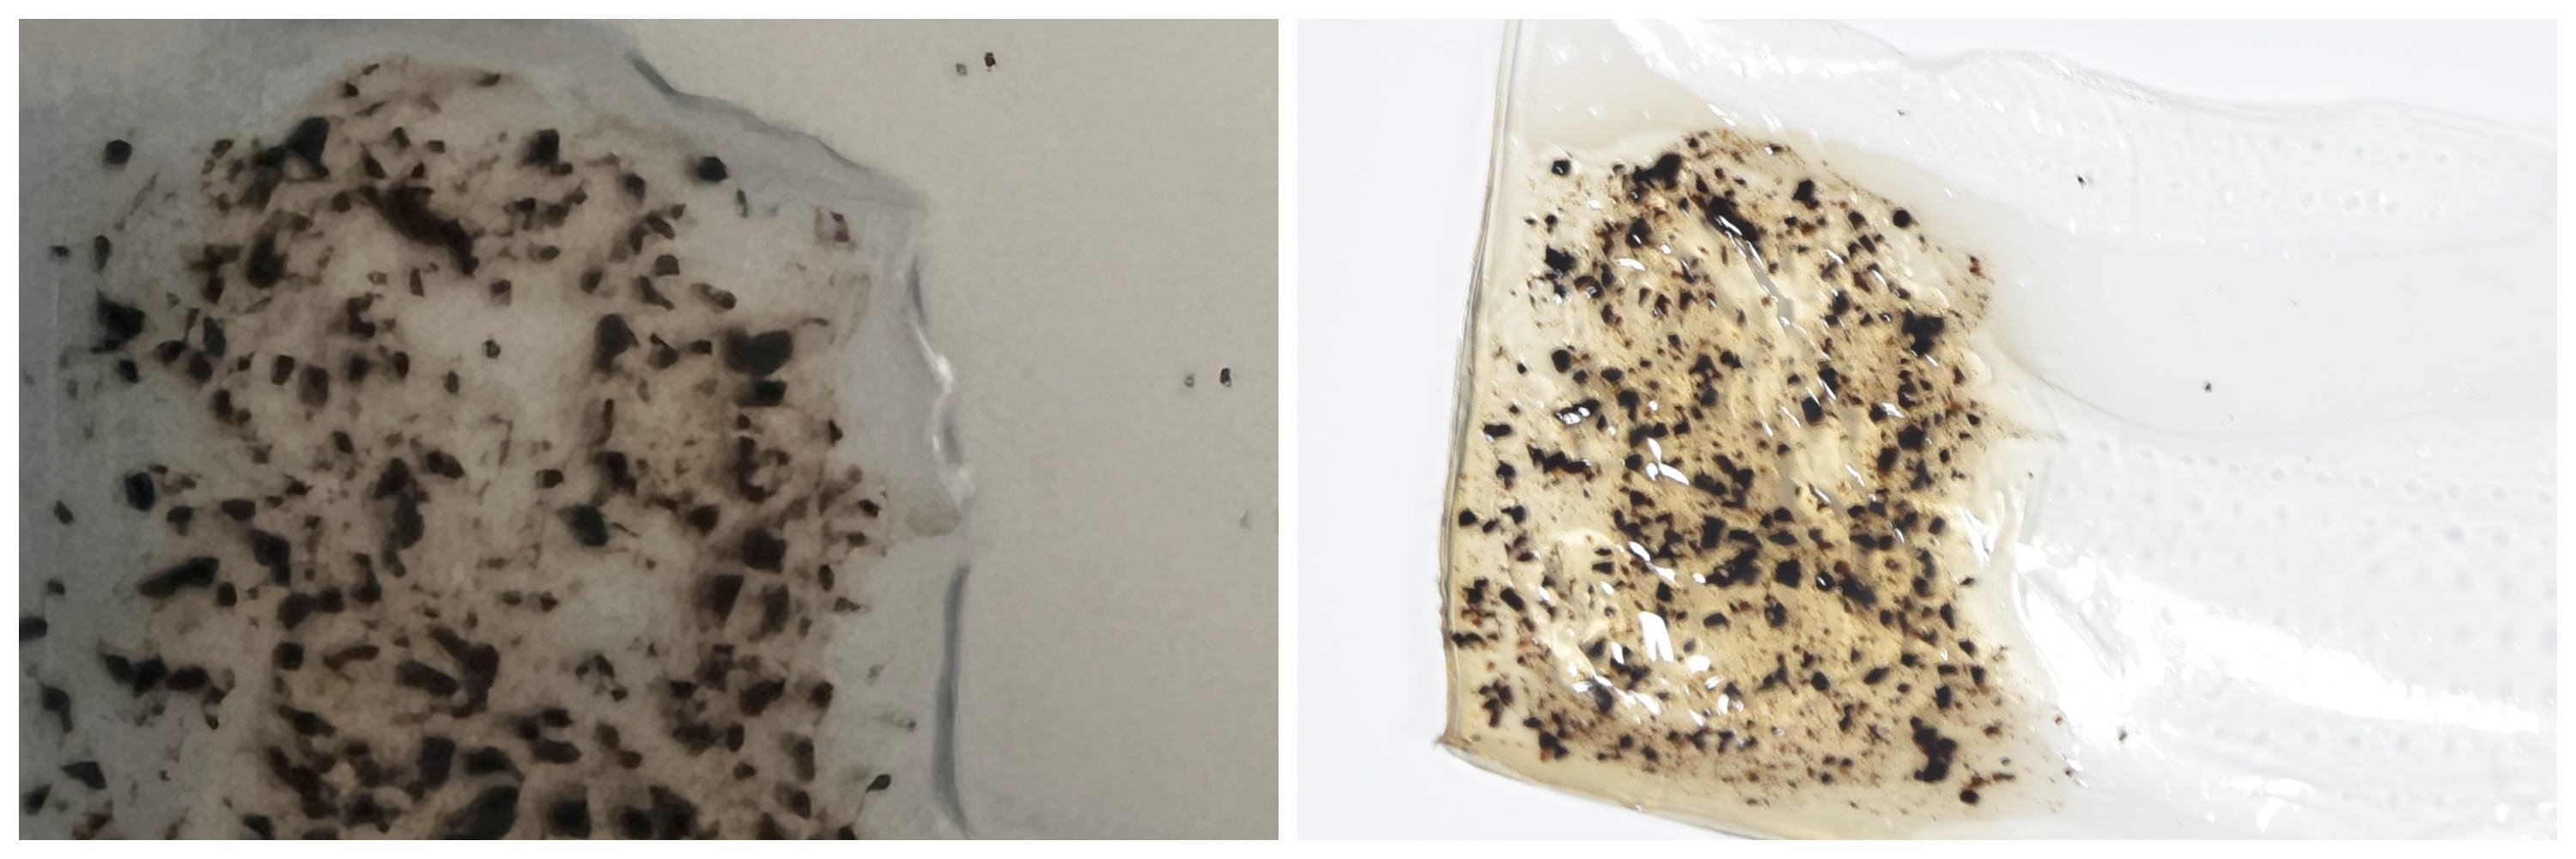
Texture:
I thought I made it a little thick, but after 2 days of leaving it, it became thinner and became a nice flexible material. When I moved it when it was initially thick, it was weak against bending and broke easily. He created a pattern using a laser and tried to cast it into an acrylic mold to create a patterned material, but it was difficult to remove.
2Recipe#2 Flexible Agar Foil 2
* Agar 5g   (Kanten)
* Glycerine 30g
* 250ml water
* cup
* scale
* spoon
* mold
* Measure agar in the cup
* Pour water into the cup and stir it with a spoon.
* Boil for 2 minutes. I used the microwave. Stir occasionally. A large cup is better to avoid spills.
* Measure Glycerine, then pour into the agar liquid. Stir it.
* Pour into some molds
* Leave it around one hour ( room temperature )
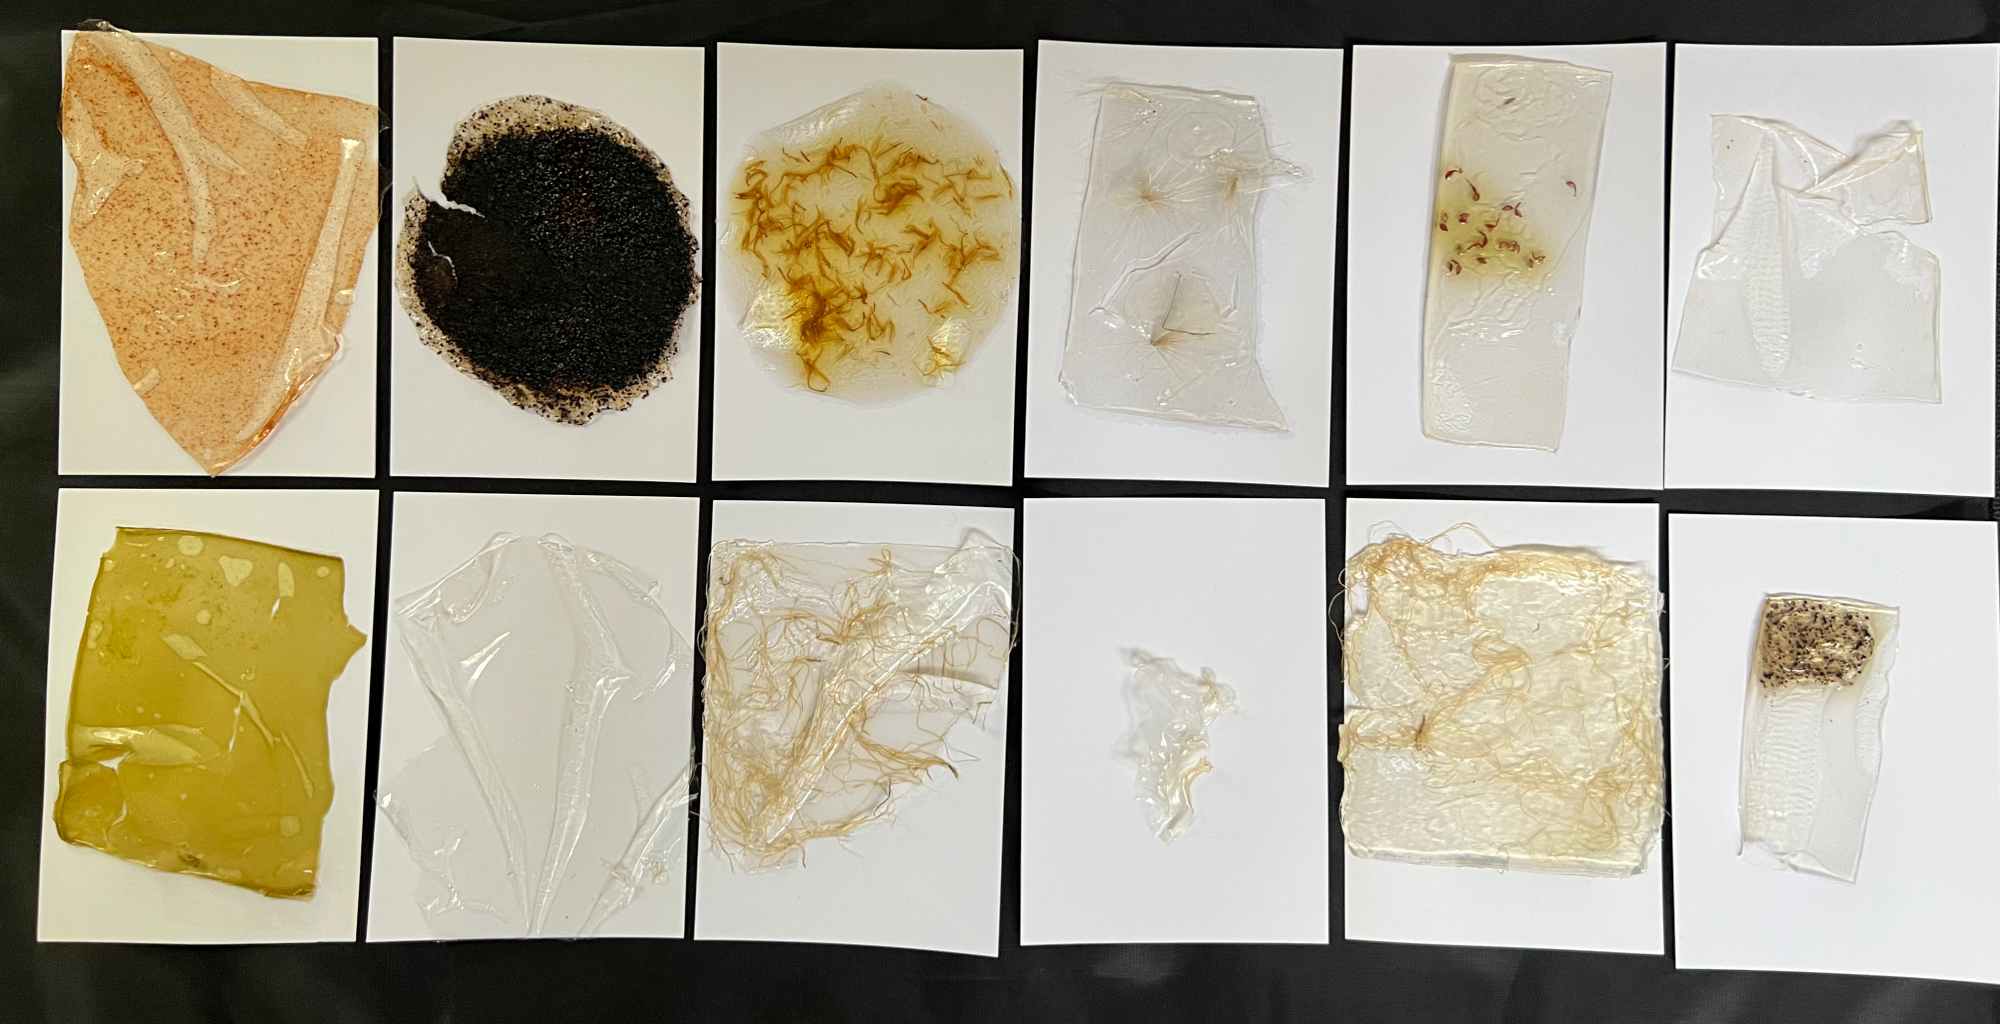
No additions / Corn string

Paprika/ Green tea
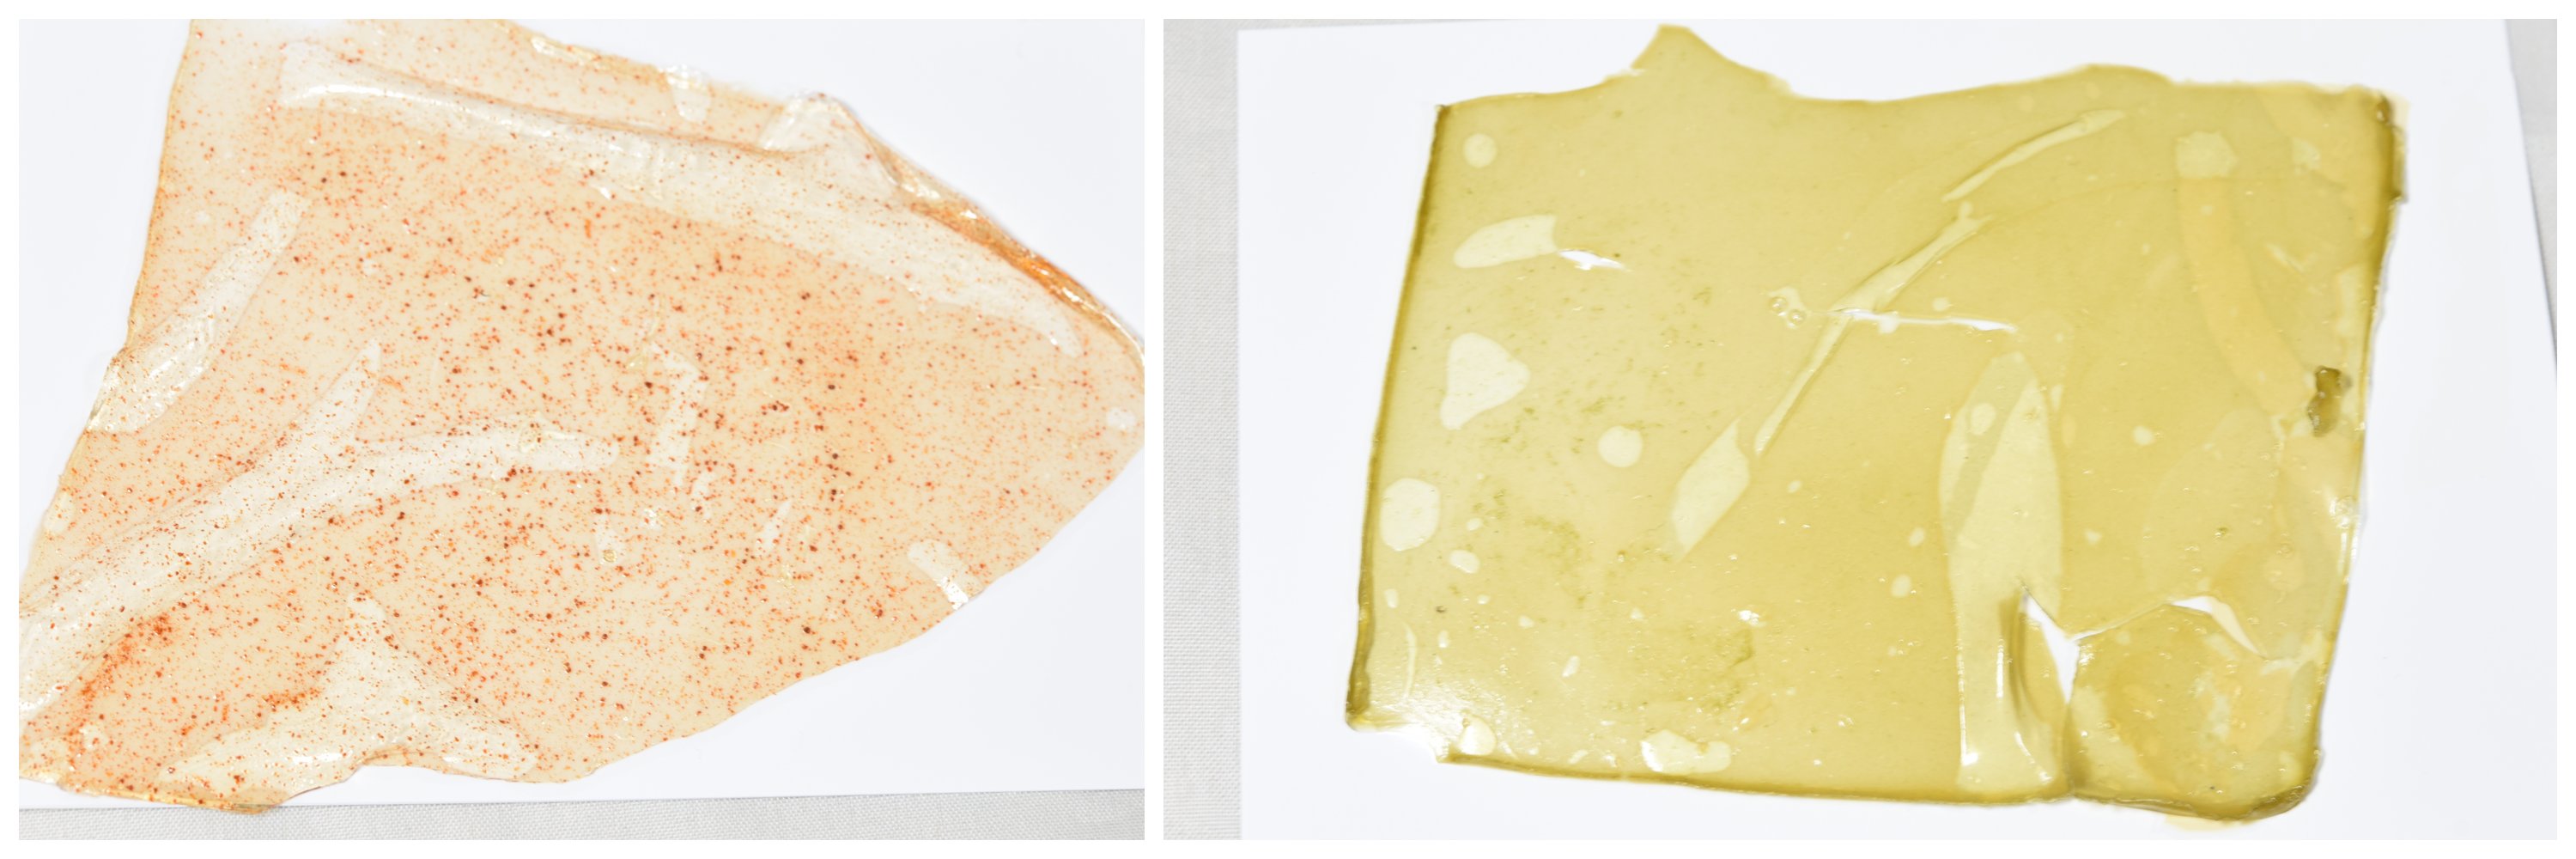
Flower seed
Coffee / Safflower(leftover of dyeing)
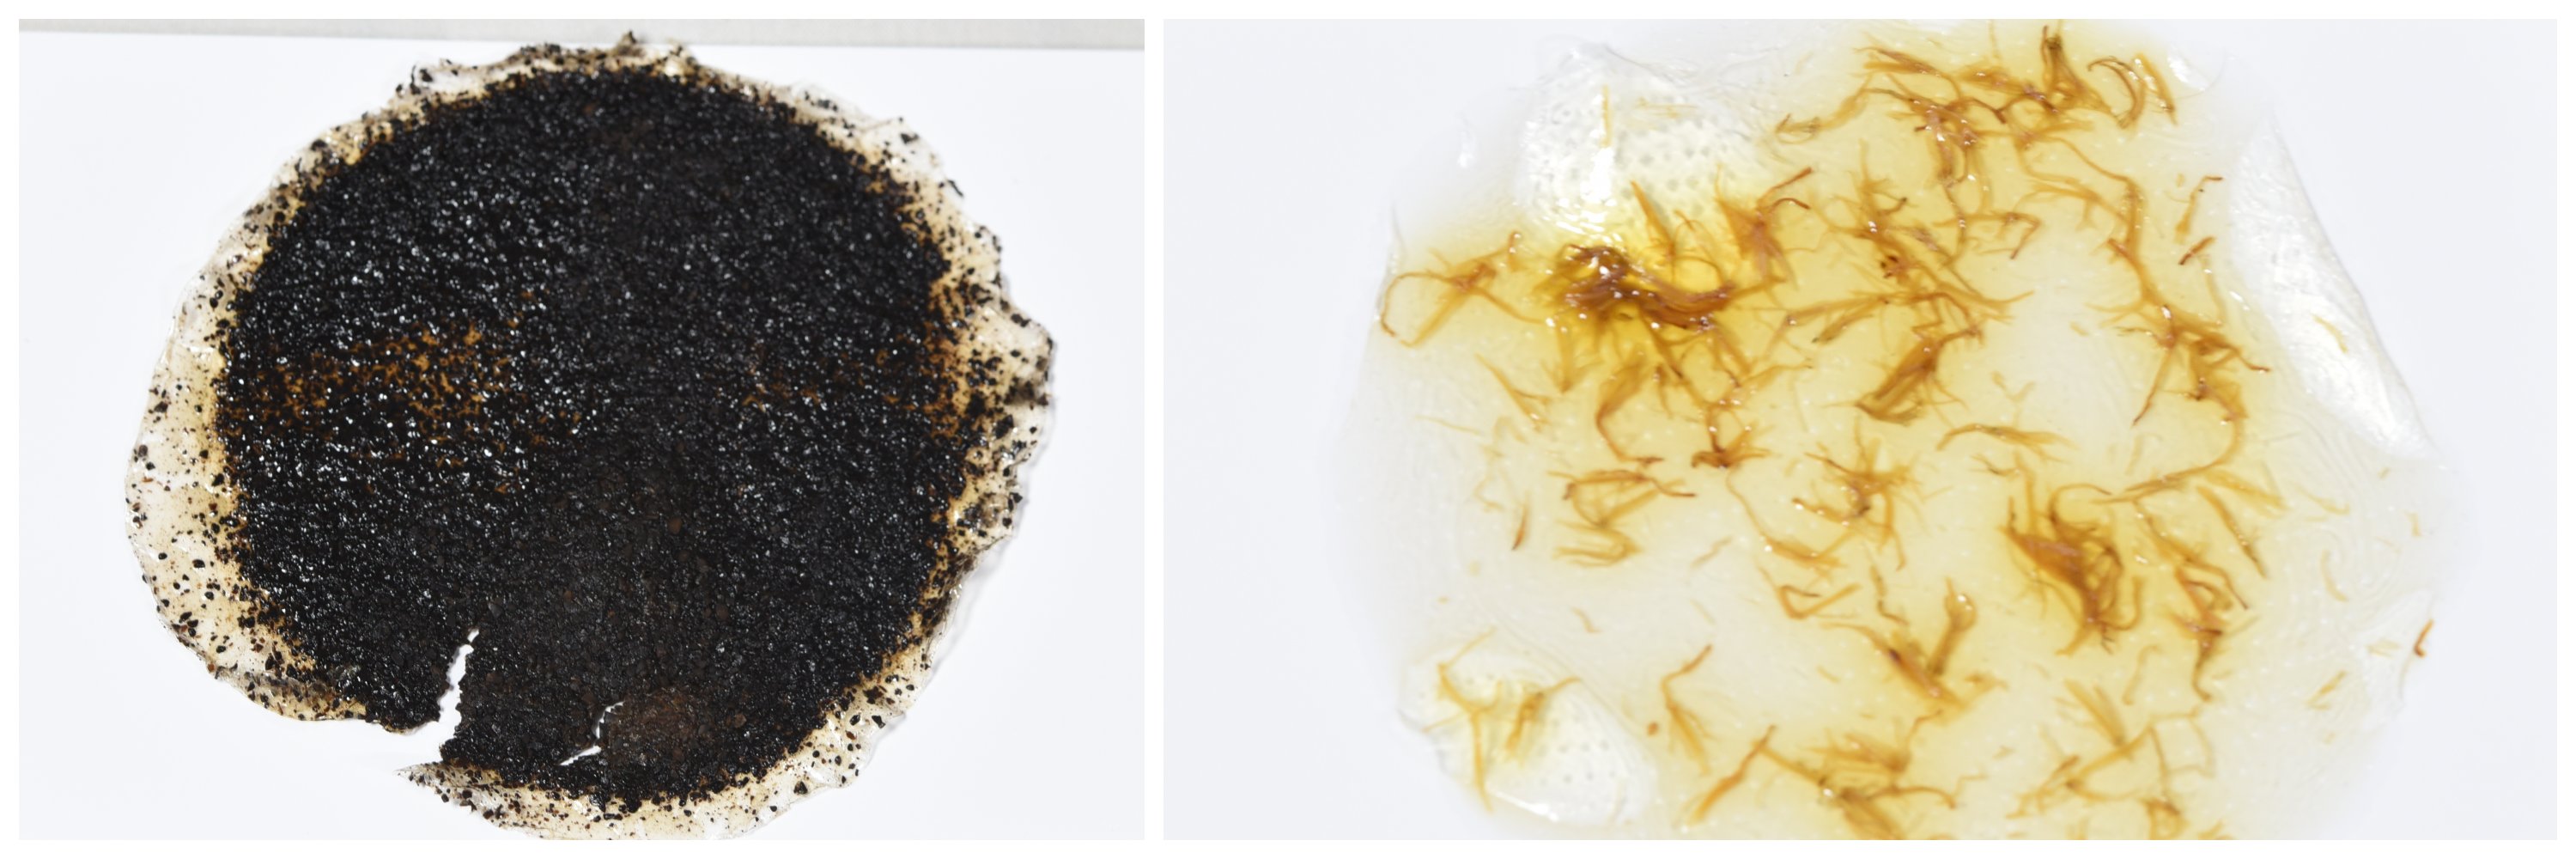
Texture:
- It stretches well when pulled.
- Feels wet even when dry
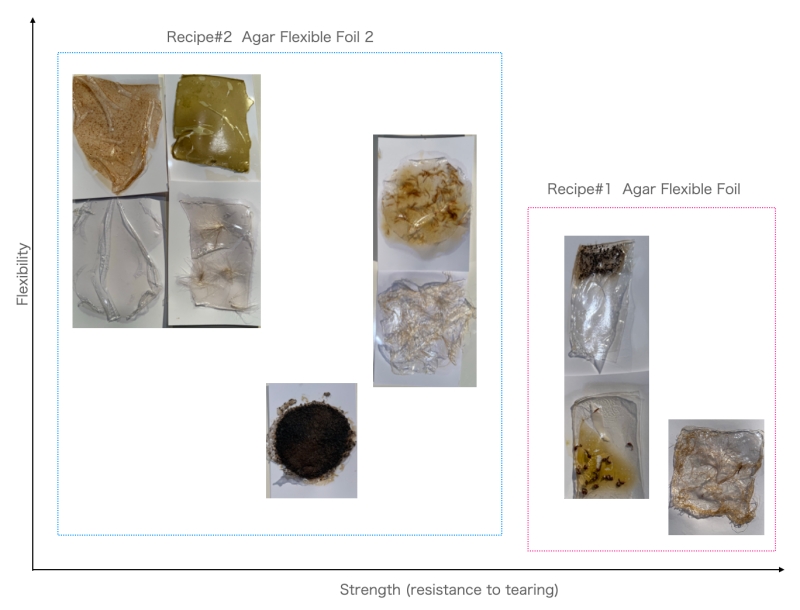
Diagram of strength (resistance to tearing) and flexibility
Plastic
3Recipe#3 Agar Plastic
* Agar 2g   (Kanten)
* Glycerine 1.25g
* 200ml water
* pan
* scale
* spoon
* mold
* Pour 200ml water into a pan and mix 2g Agar.
* Boil for 2 minutes.
* Measure Glycerine, then pour into the agar liquid. Stir it.
* Pour into some molds
* Leave it around one hour ( room temperature )
I made a mold out of acrylic to add texture to the surface. However, it broke when I tried to peel it off, so I could only remove a portion of it.


Methyl Cellulose
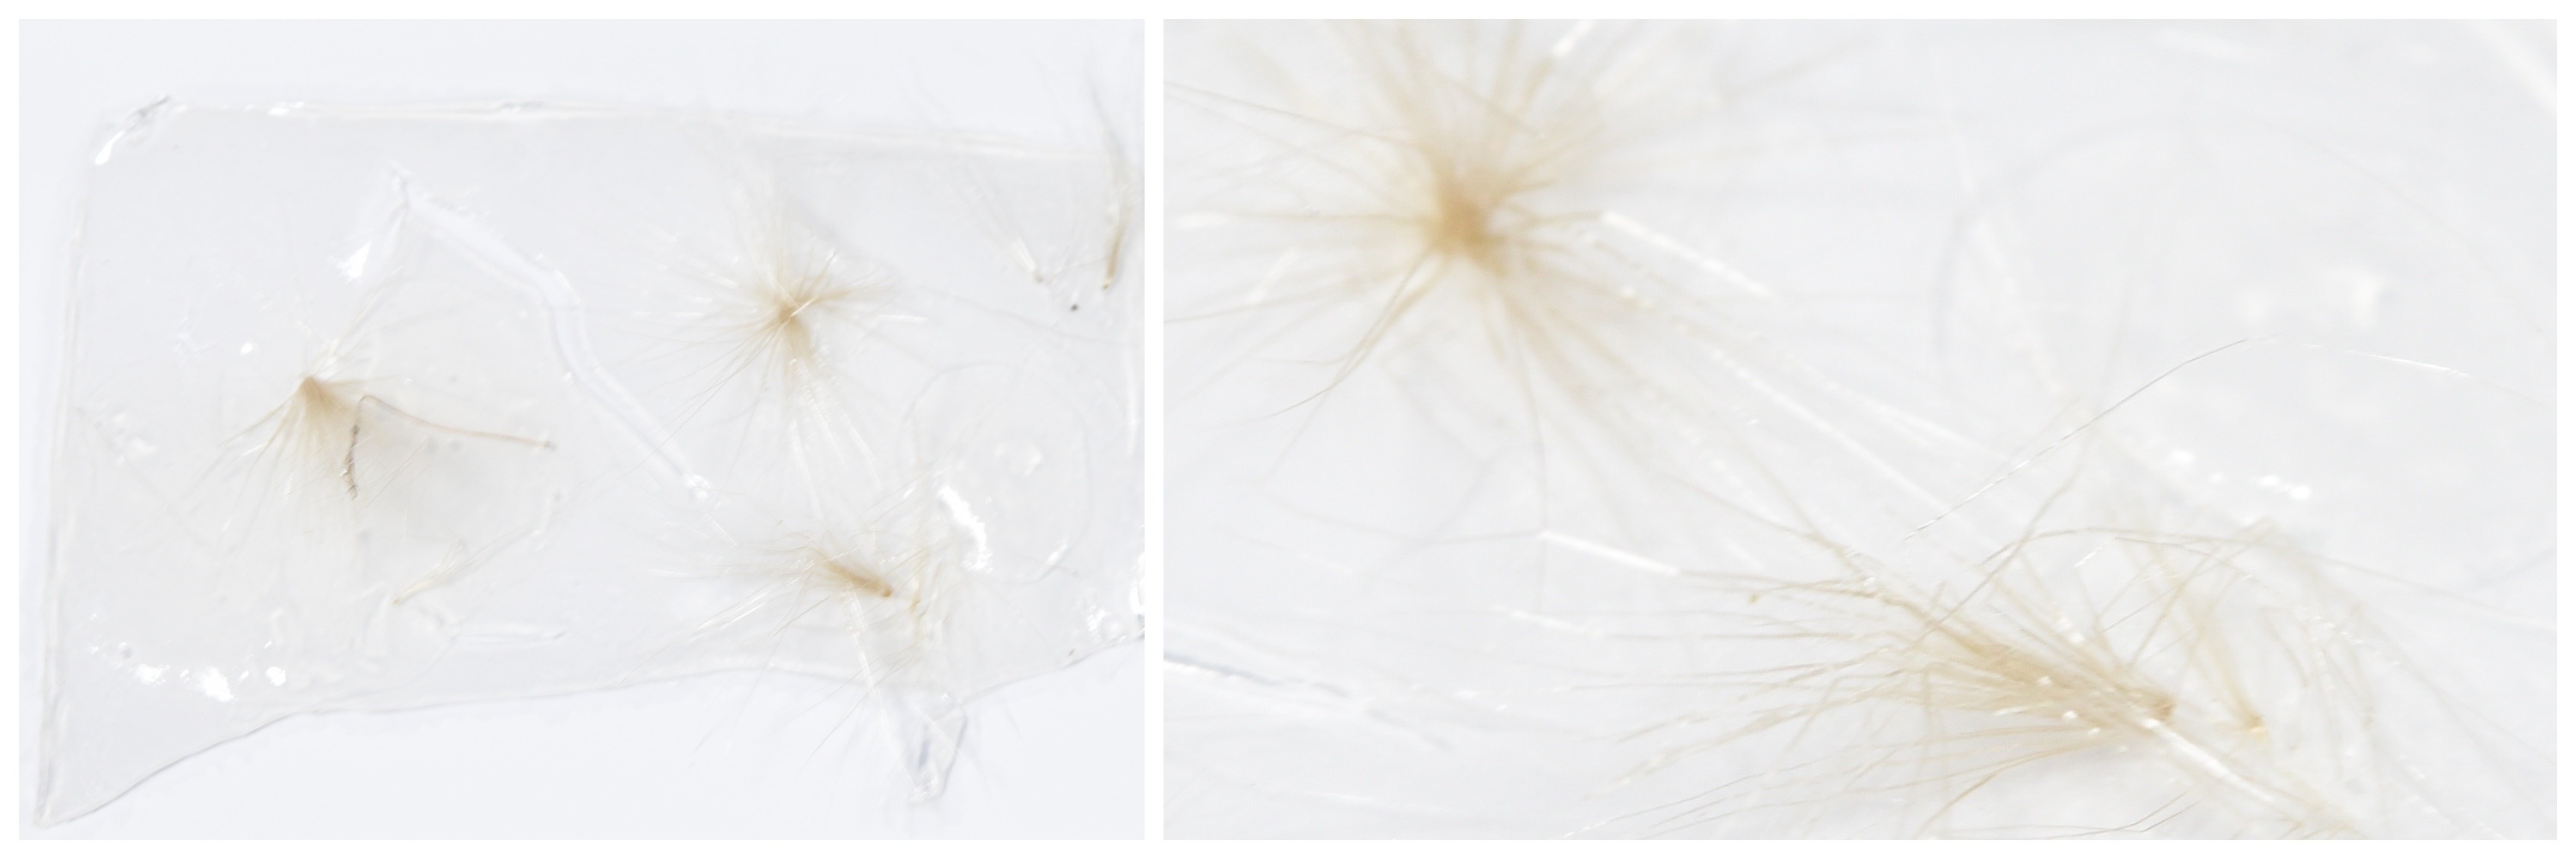
BIO-PAPER
4Recipe#4 Methyl cellulose Paper
* Methyl Cellulose 0.8g
* 100ml water
* turmeric 1/2 tea spoon
* flower tips
* cup
* scale
* spoon
* Hot plate
* Measure the Methyl Cellulose in the cup
* Pour water into the cup and stir it with a spoon to dissolve.
* Put turmeric into the half of the liquid (option)
* Pour it on the hot plate
* Put flowers on the surface (option)
* Keep low temperature ( around 75-90°C)
* Leave it until dry ( around one hour)
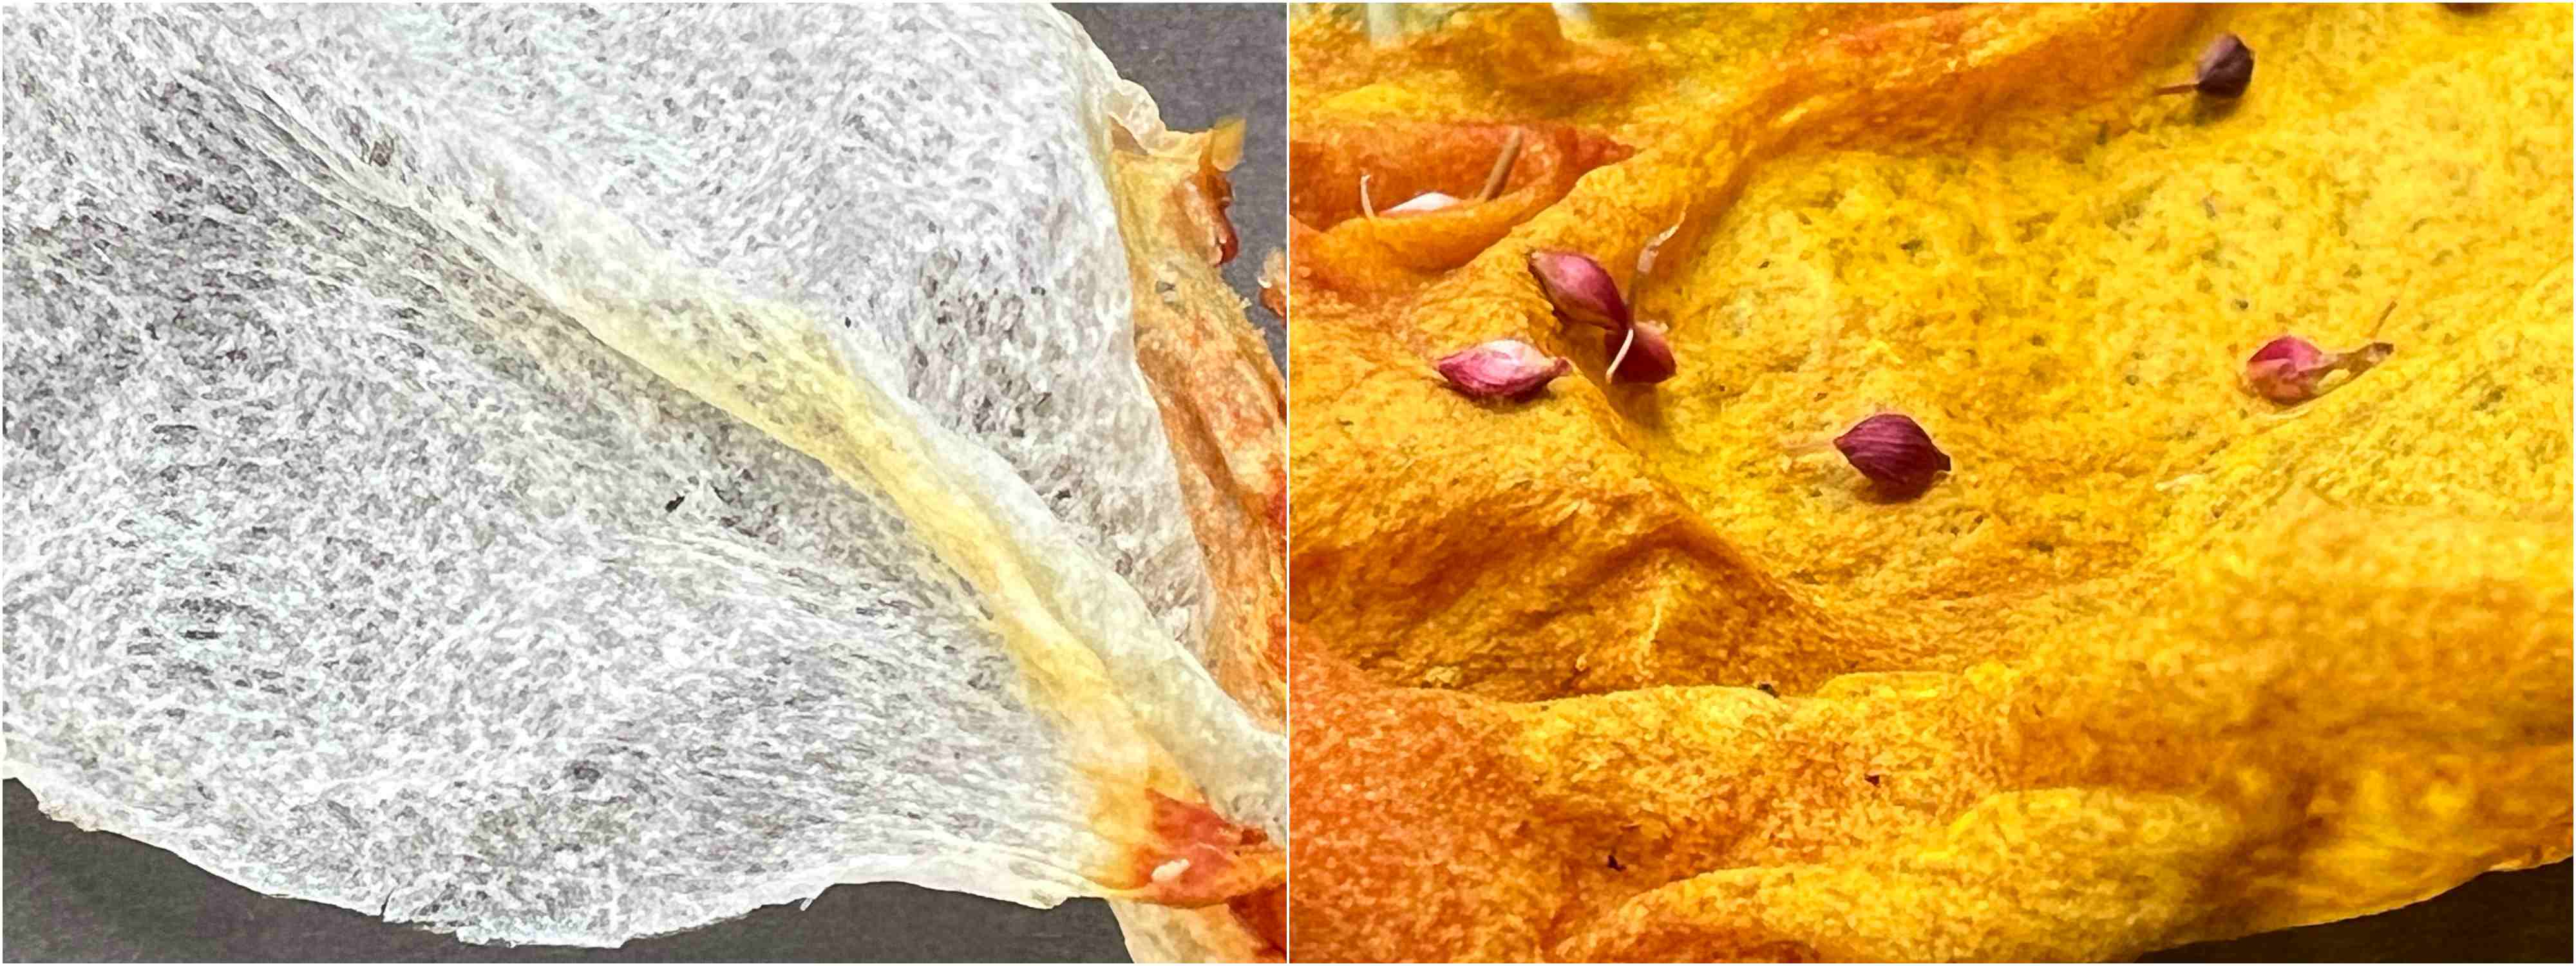
When a liquid is heated on a hot plate, it gradually dries and becomes rounded around the edges. After heating for about 1 hour, it will shrink as shown below.
 We need to think of ways to prevent it from curling, such as putting weight on it (this will make it harder to dry).
Texture:
- Feels like rough paper. It is thin and will tear easily if you pull it lightly.
- It dissolves immediately when added to water.
- Strong against heat. For example, there is no change even if you apply hot air from a hair dryer.
Alginate
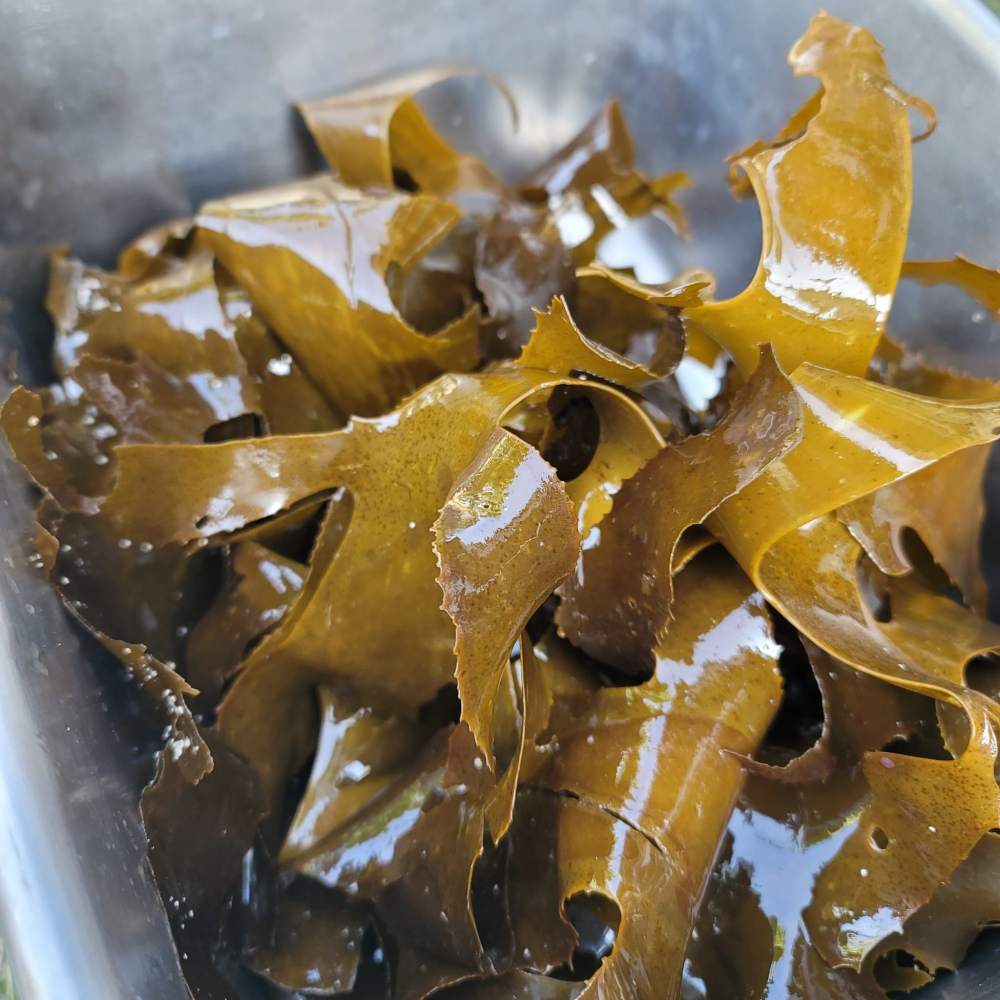
Our instructor, Riko-san, went fishing and found the seaweed, Kajime. He boiled it with baking soda to extract the alginate. So I challenged the natural ingredients! I referred to the following recipe of class note.
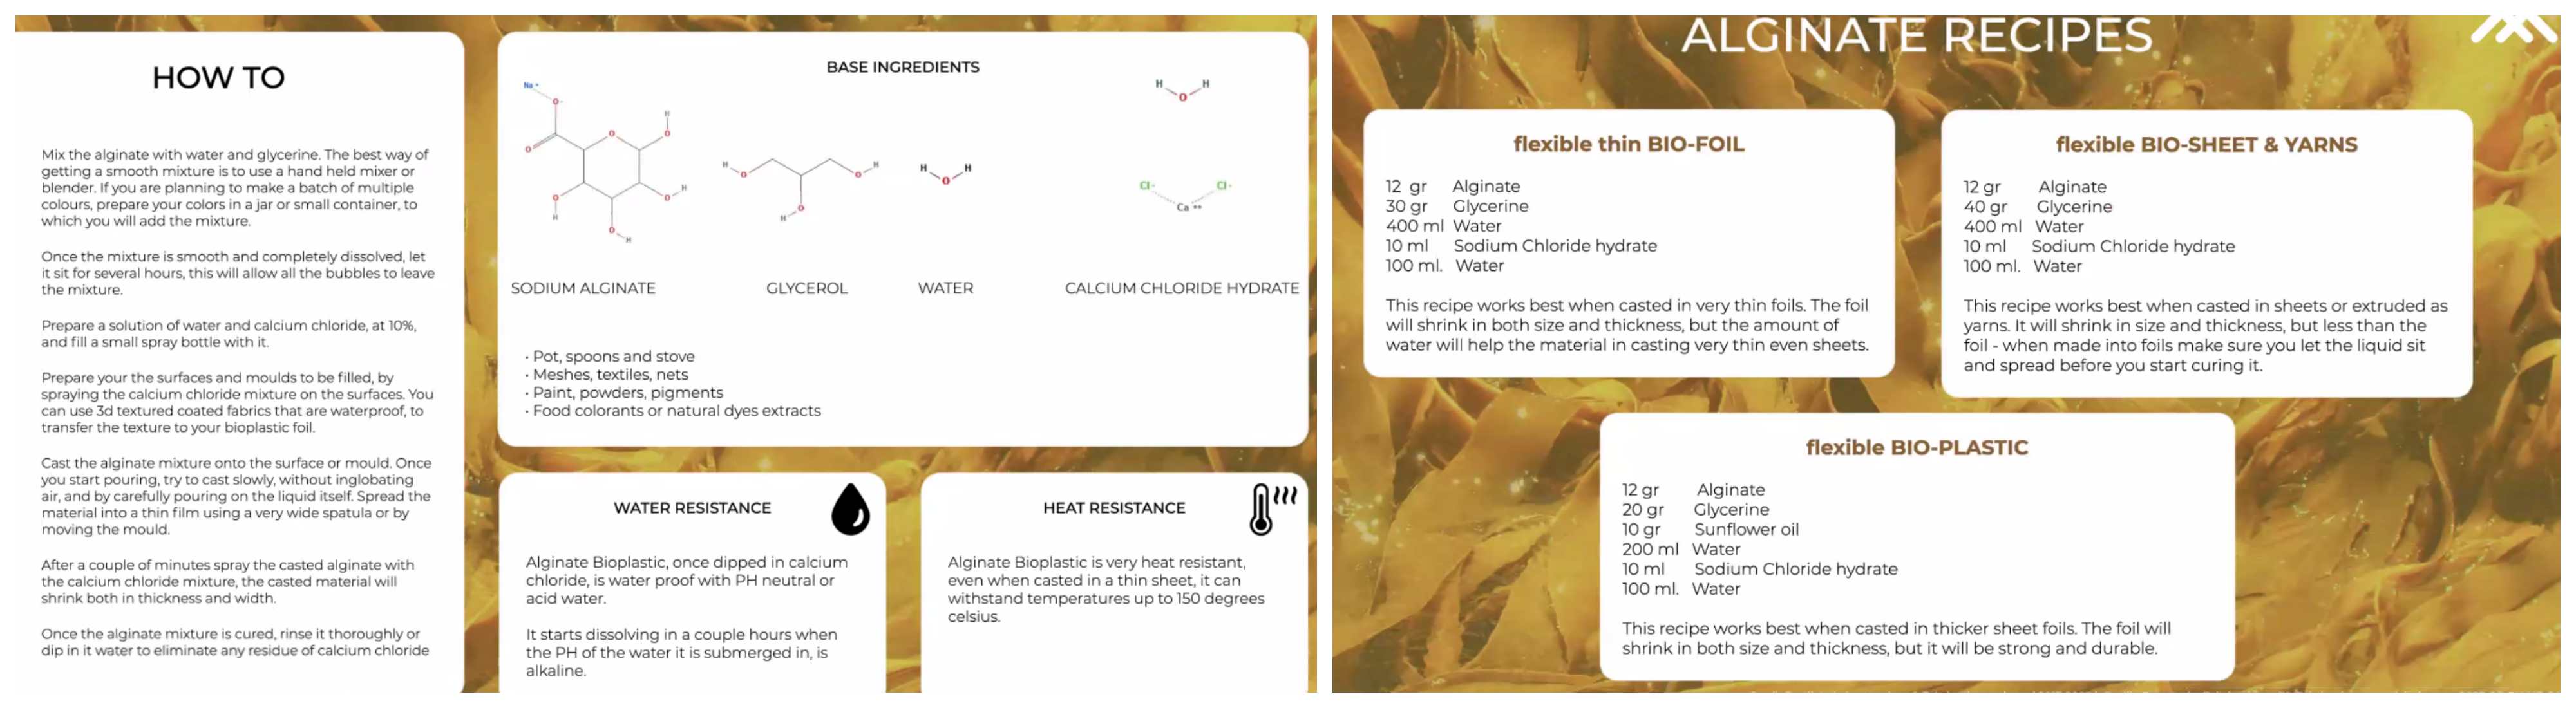
* Alginate Liquid  12g
* Glycerine  30g
* Water 400ml
* Salt 10g + Water 100ml
* scale
* spoon
* cup
* Spray bottle
* mold
* Mix Water 400ml and Alginate and stir it.
* Add glycerine and stir it. I didn't use blender because the alginate liquid is very smooth.
* Make Sodium Chloride hydrate ( salt 10g + water 100ml)
* Spray the Salt water (Sodium Chloride Hydrate?) on the mold.


I left it for 2 hours, but it didn't harden at all. Alginate was already in liquid form, so I halved the amount of water, but it did not solidify.
I found out one reason. Mina, a student of Fablab Kamakura, taught me that the Sodium Chloride Hydrate is necessary in stead of salt water.
So I sprayed the Sodium Chloride Hydrate liquid ( Sodium Chloride Hydrate 7g - water35ml) on the mold, then poured the alginate liquid, and sprayed it over the top.
A thin white skin-like substance formed on the surface, but it did not harden completely. It's difficult to use natural ingredients, but I'd like to keep trying and adjusting recipes.

Kombucha
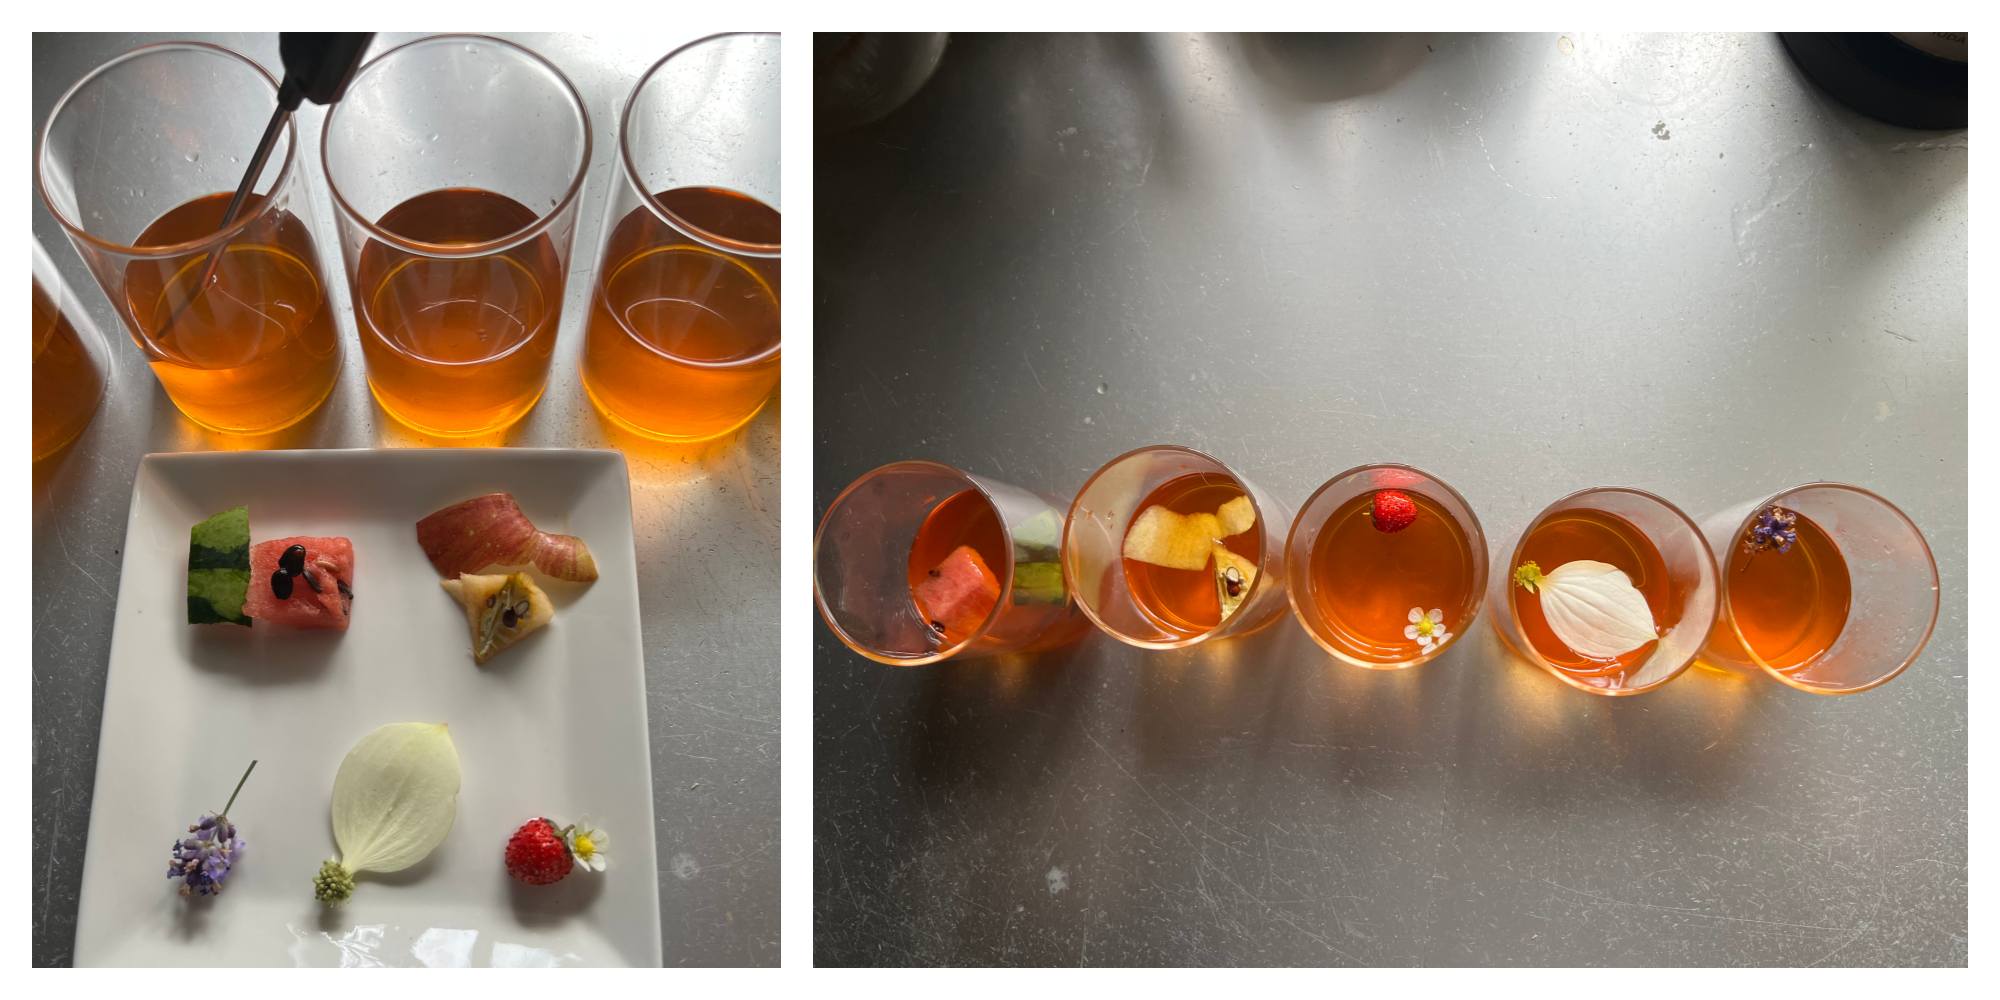
Trial without scoby > failure
It was my first time trying kombucha. It seemed like I could buy Scoby, but he was experimenting to see if he could make it without Scoby, so I decided to try it too. The recipe is: Dissolve sugar 35g in 500ml hot water, then add 60ml vinegar, then divide into clean jars and cool down. I put watermelon skin, apple skin and seeds, strawberry flowers, Yamaboshi flowers, lavender flowers. Cover the jar with cotton cloth. But unfortunately a sort of skin was not created. Kombucha requires acetic acid and yeast. Both are found in nature, I guess not enough yeast at home. Plants like coconuts are rare in Japan.

With scoby
I got a Scoby from my instructor, Rico-san. I tried to grow it with black tea recipe below.
5 Recipe#5 Kombucha Black Tea
* Scoby
* 2 bags of Black tea
* 1/4 cup Brown sugar
* 500 ml water
* Glass jar
* scale or measuring cup
* spoon
* cup
* cloth
* Wash glass jar thoroughly and pour boiling water over them or boil the jar.
* Put tea bags in the jar, then pour 500ml hot water
* Put sugar into the tea. Stir it with a spoon to dissolve.
* Leave it to cool to room temperature
* Put sucoby in it
* Cover the jar with cloth
* Place the jar in the clean and warm space
After 8 days
According to Rico-san, Scobys need sugar to grow and should be changed every week. It takes more work than I expected
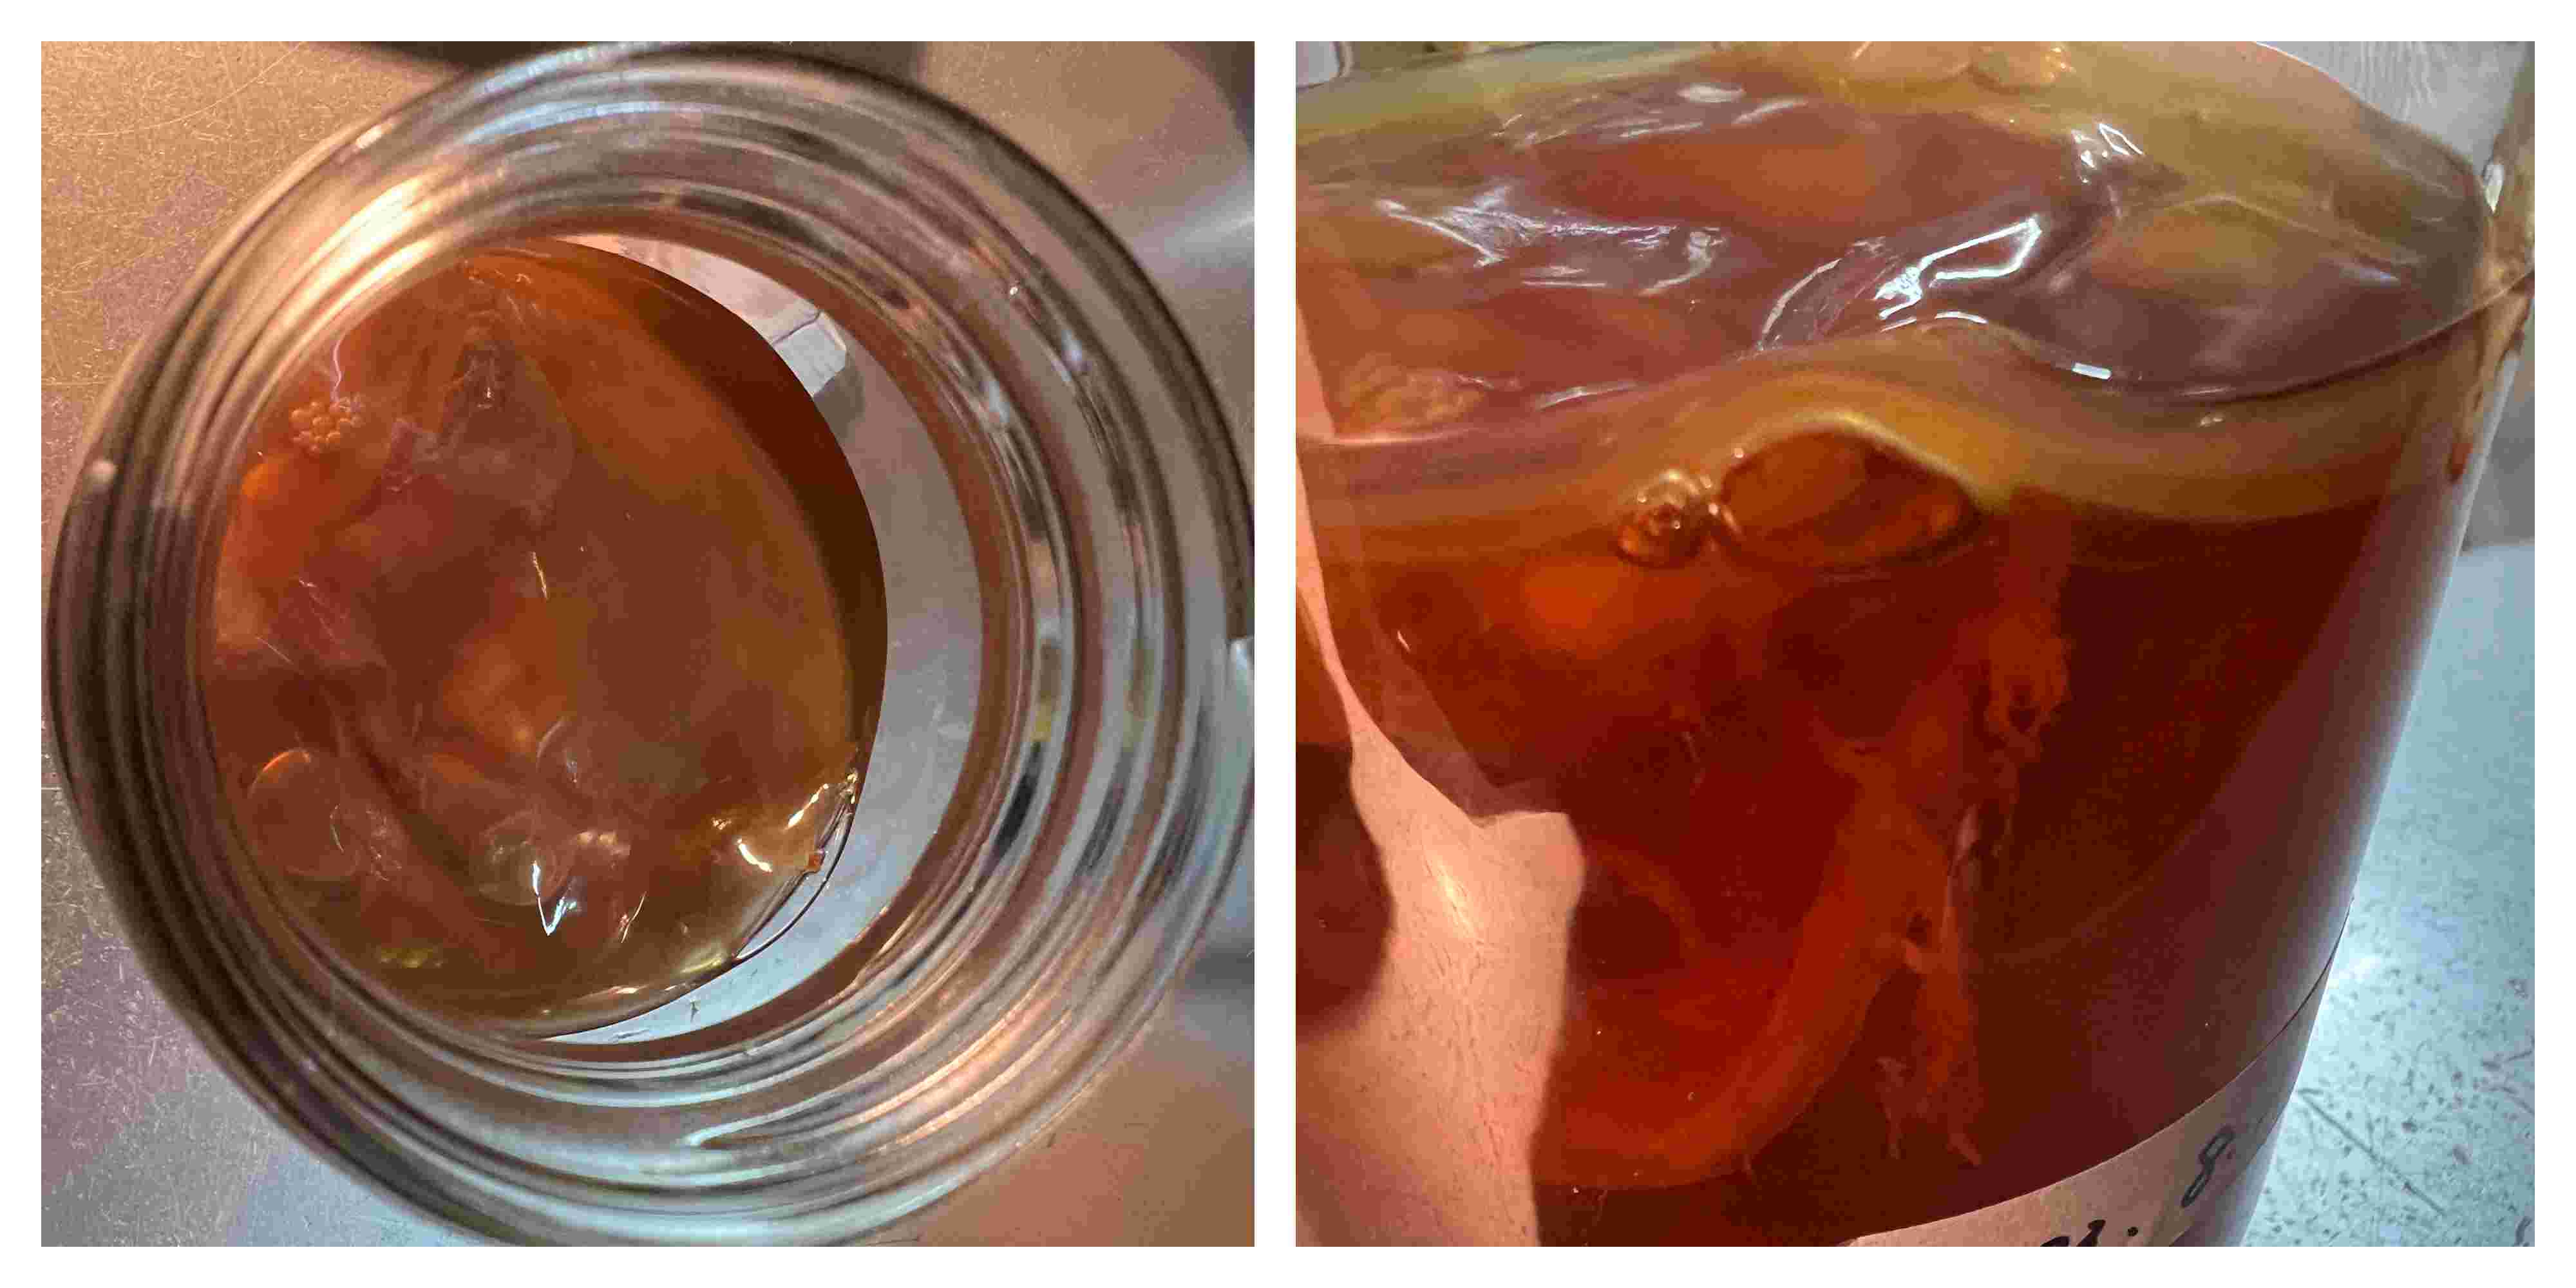
After 13 days

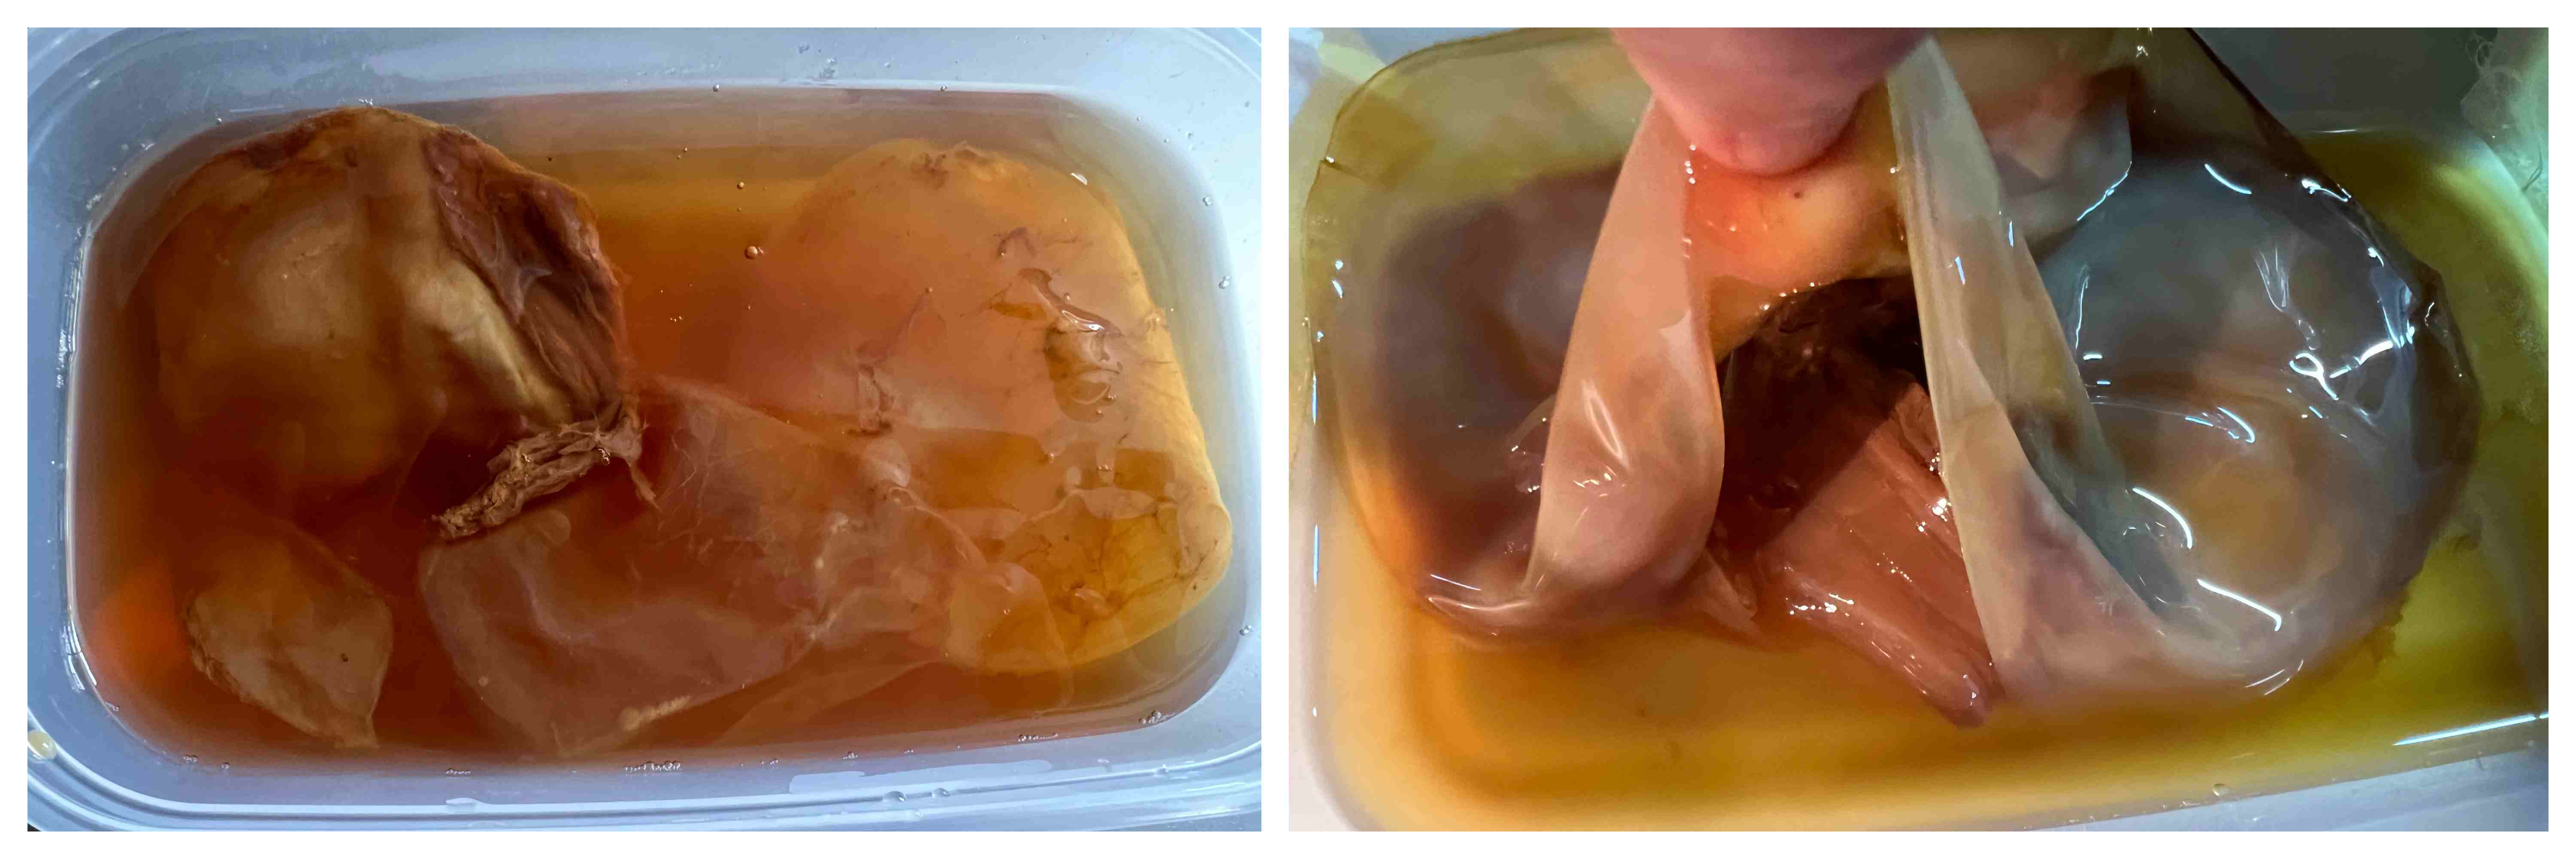
I wanted to make it larger so that I could use it as leather in the future. According to research, plastic containers are not recommended for beverages. Maybe it's because it changes with acid. This time I wasn't looking for a drink, so I put it in a 10cm x 15cm plastic container. Left image is first one, right is after 30 days.
I put the rectangle one in a larger container, 25cmx 34cm. After 10days, very thin skin has formed. At the moment, the room temperature is still over 20 degrees, so I haven't used the heater. I'm looking forward to seeing it grow.
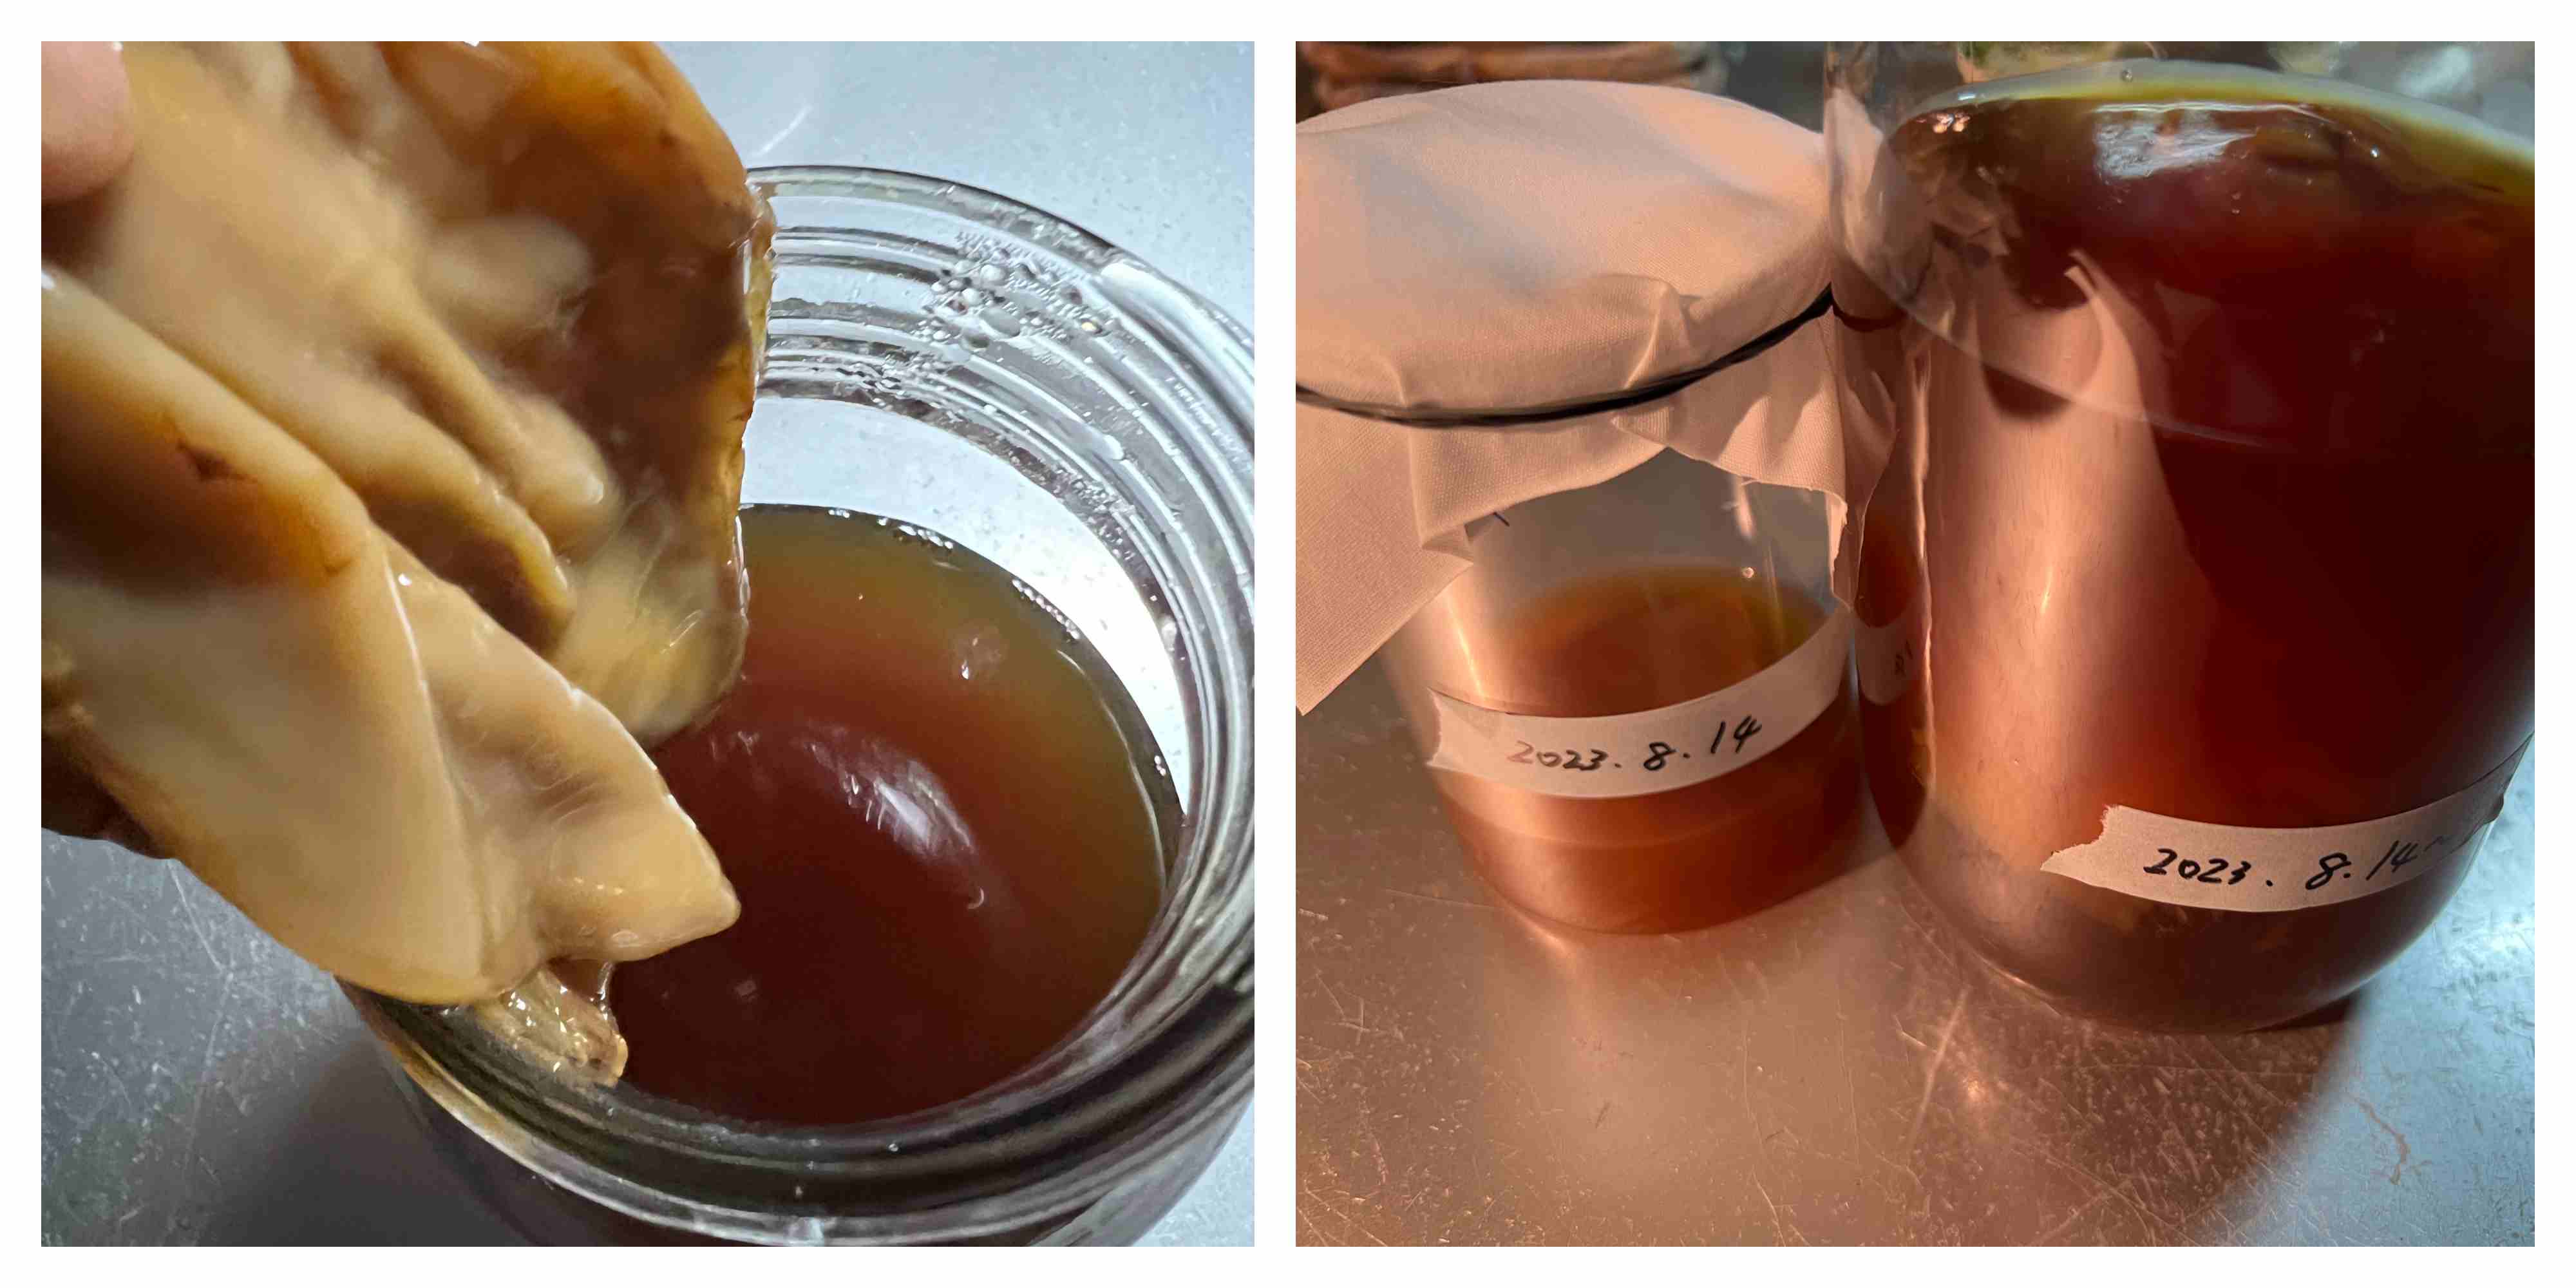
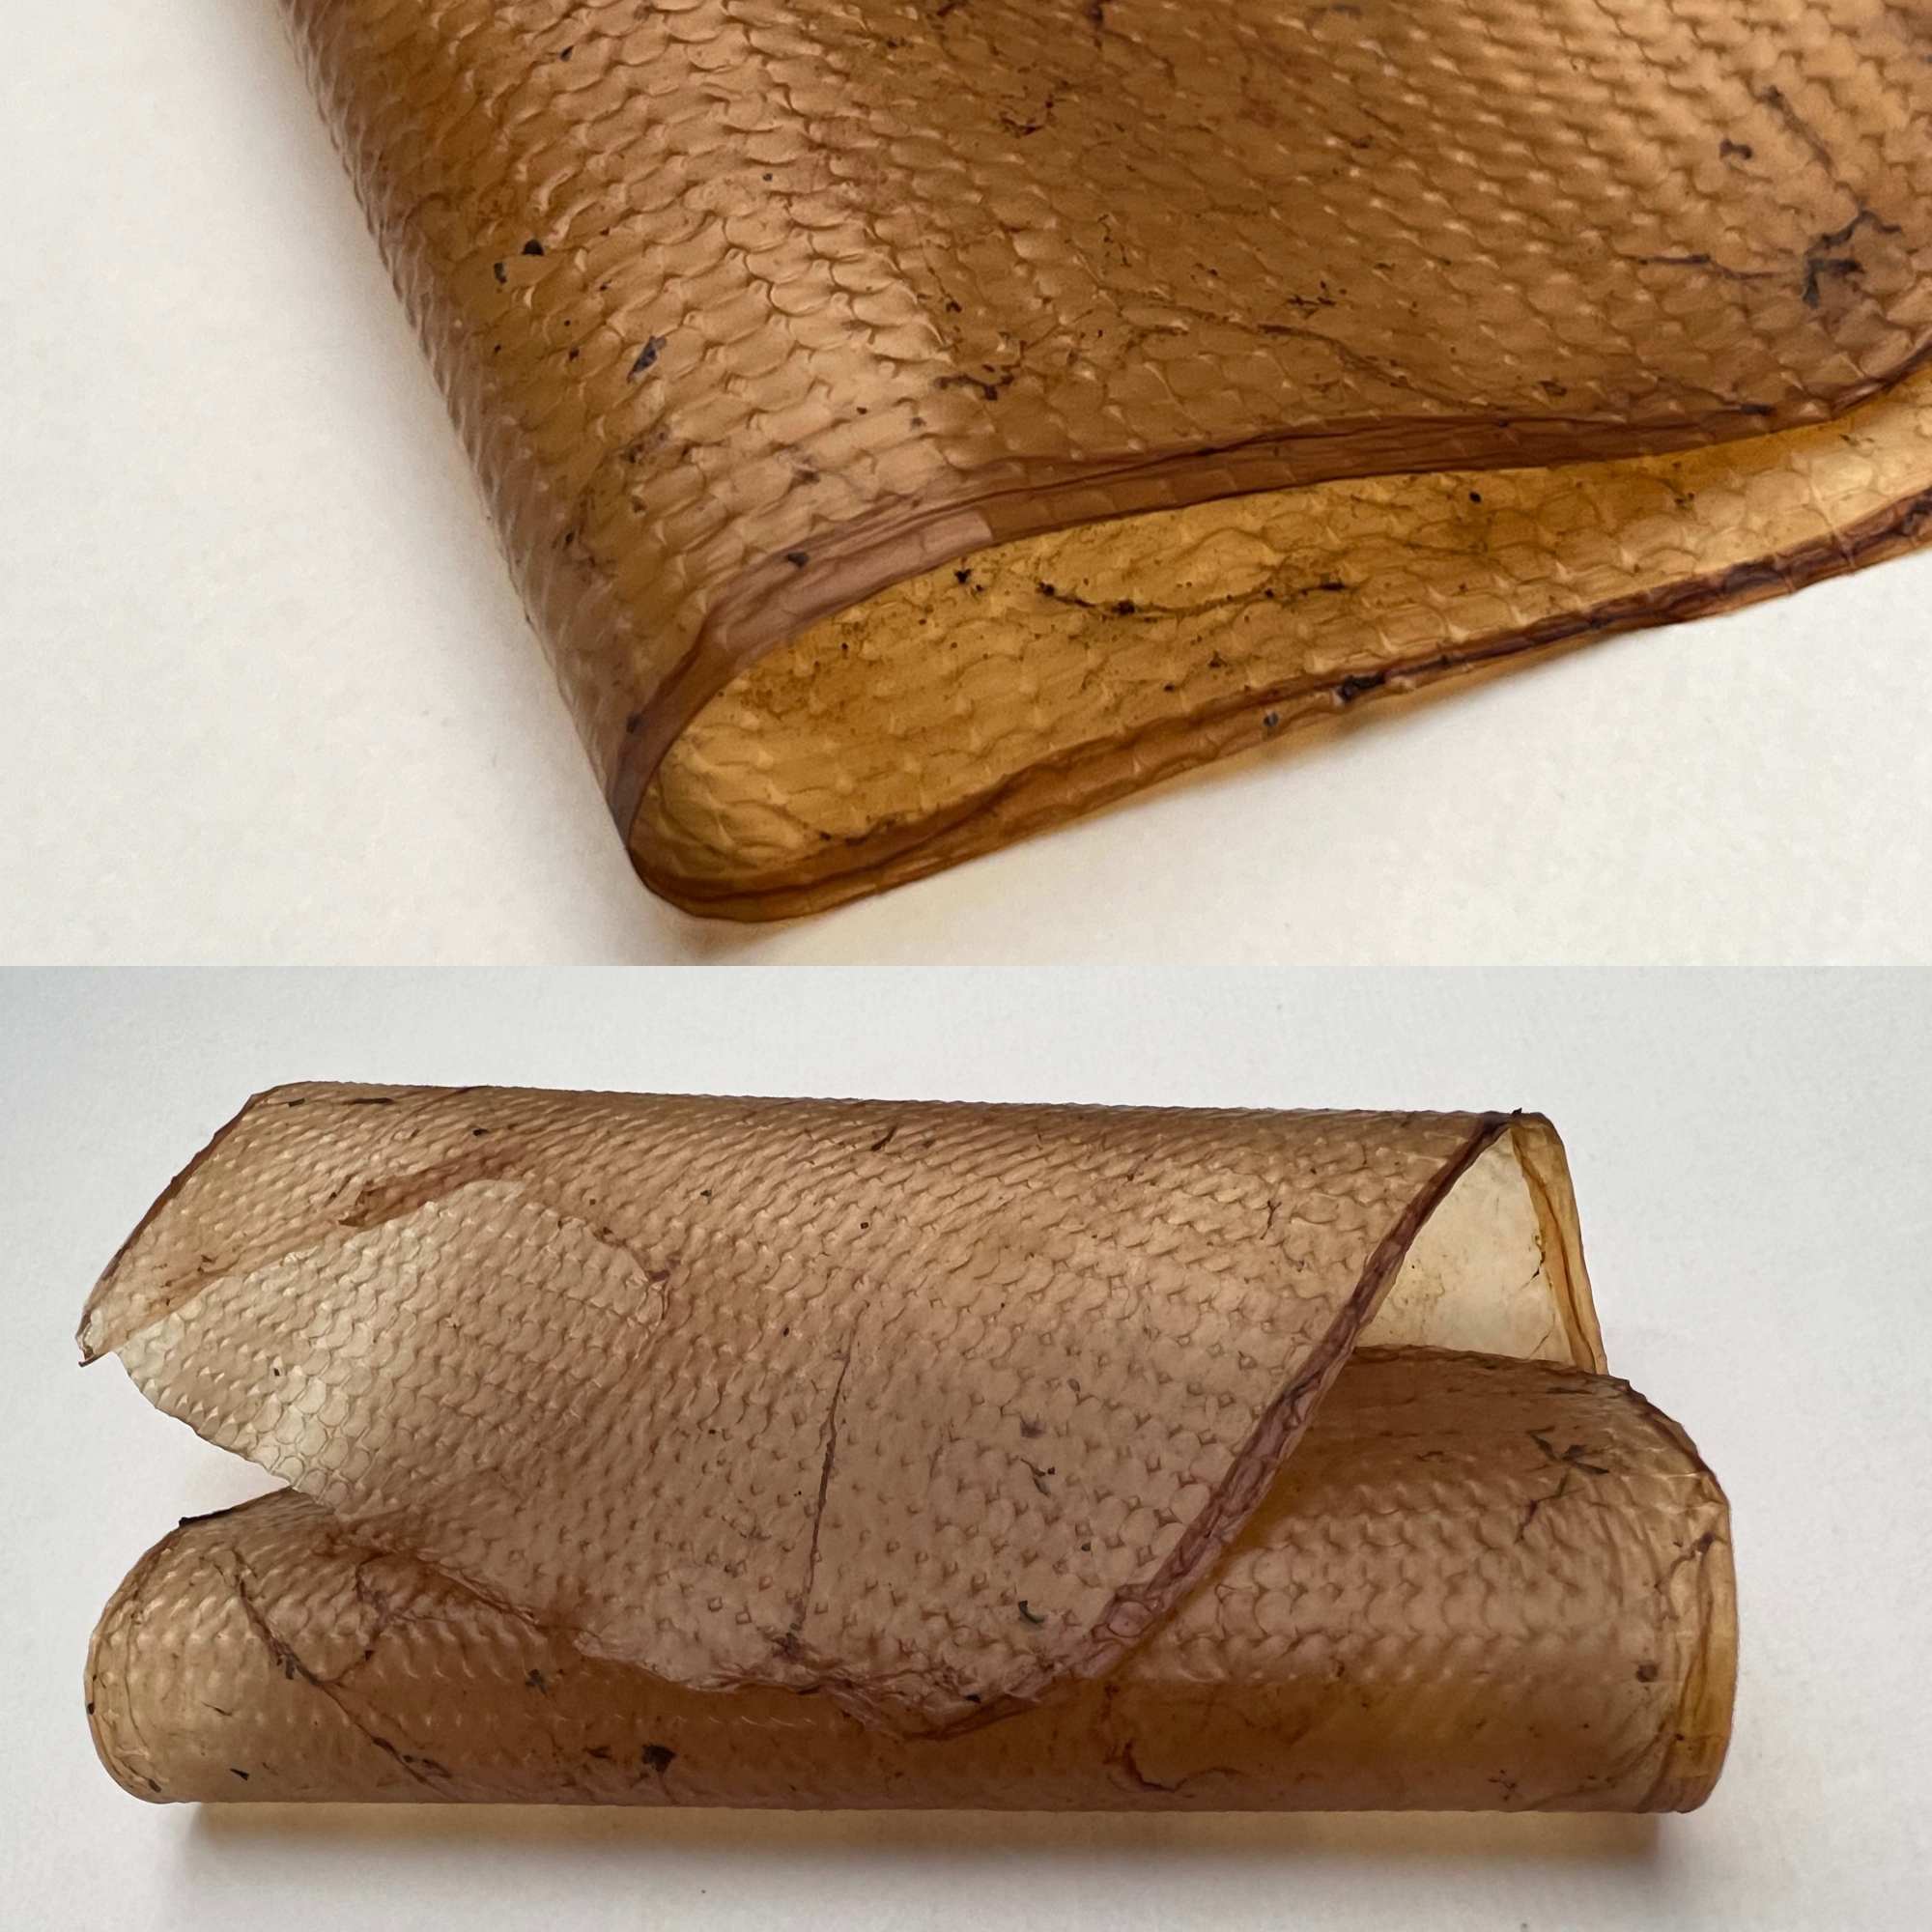
Dry scobies
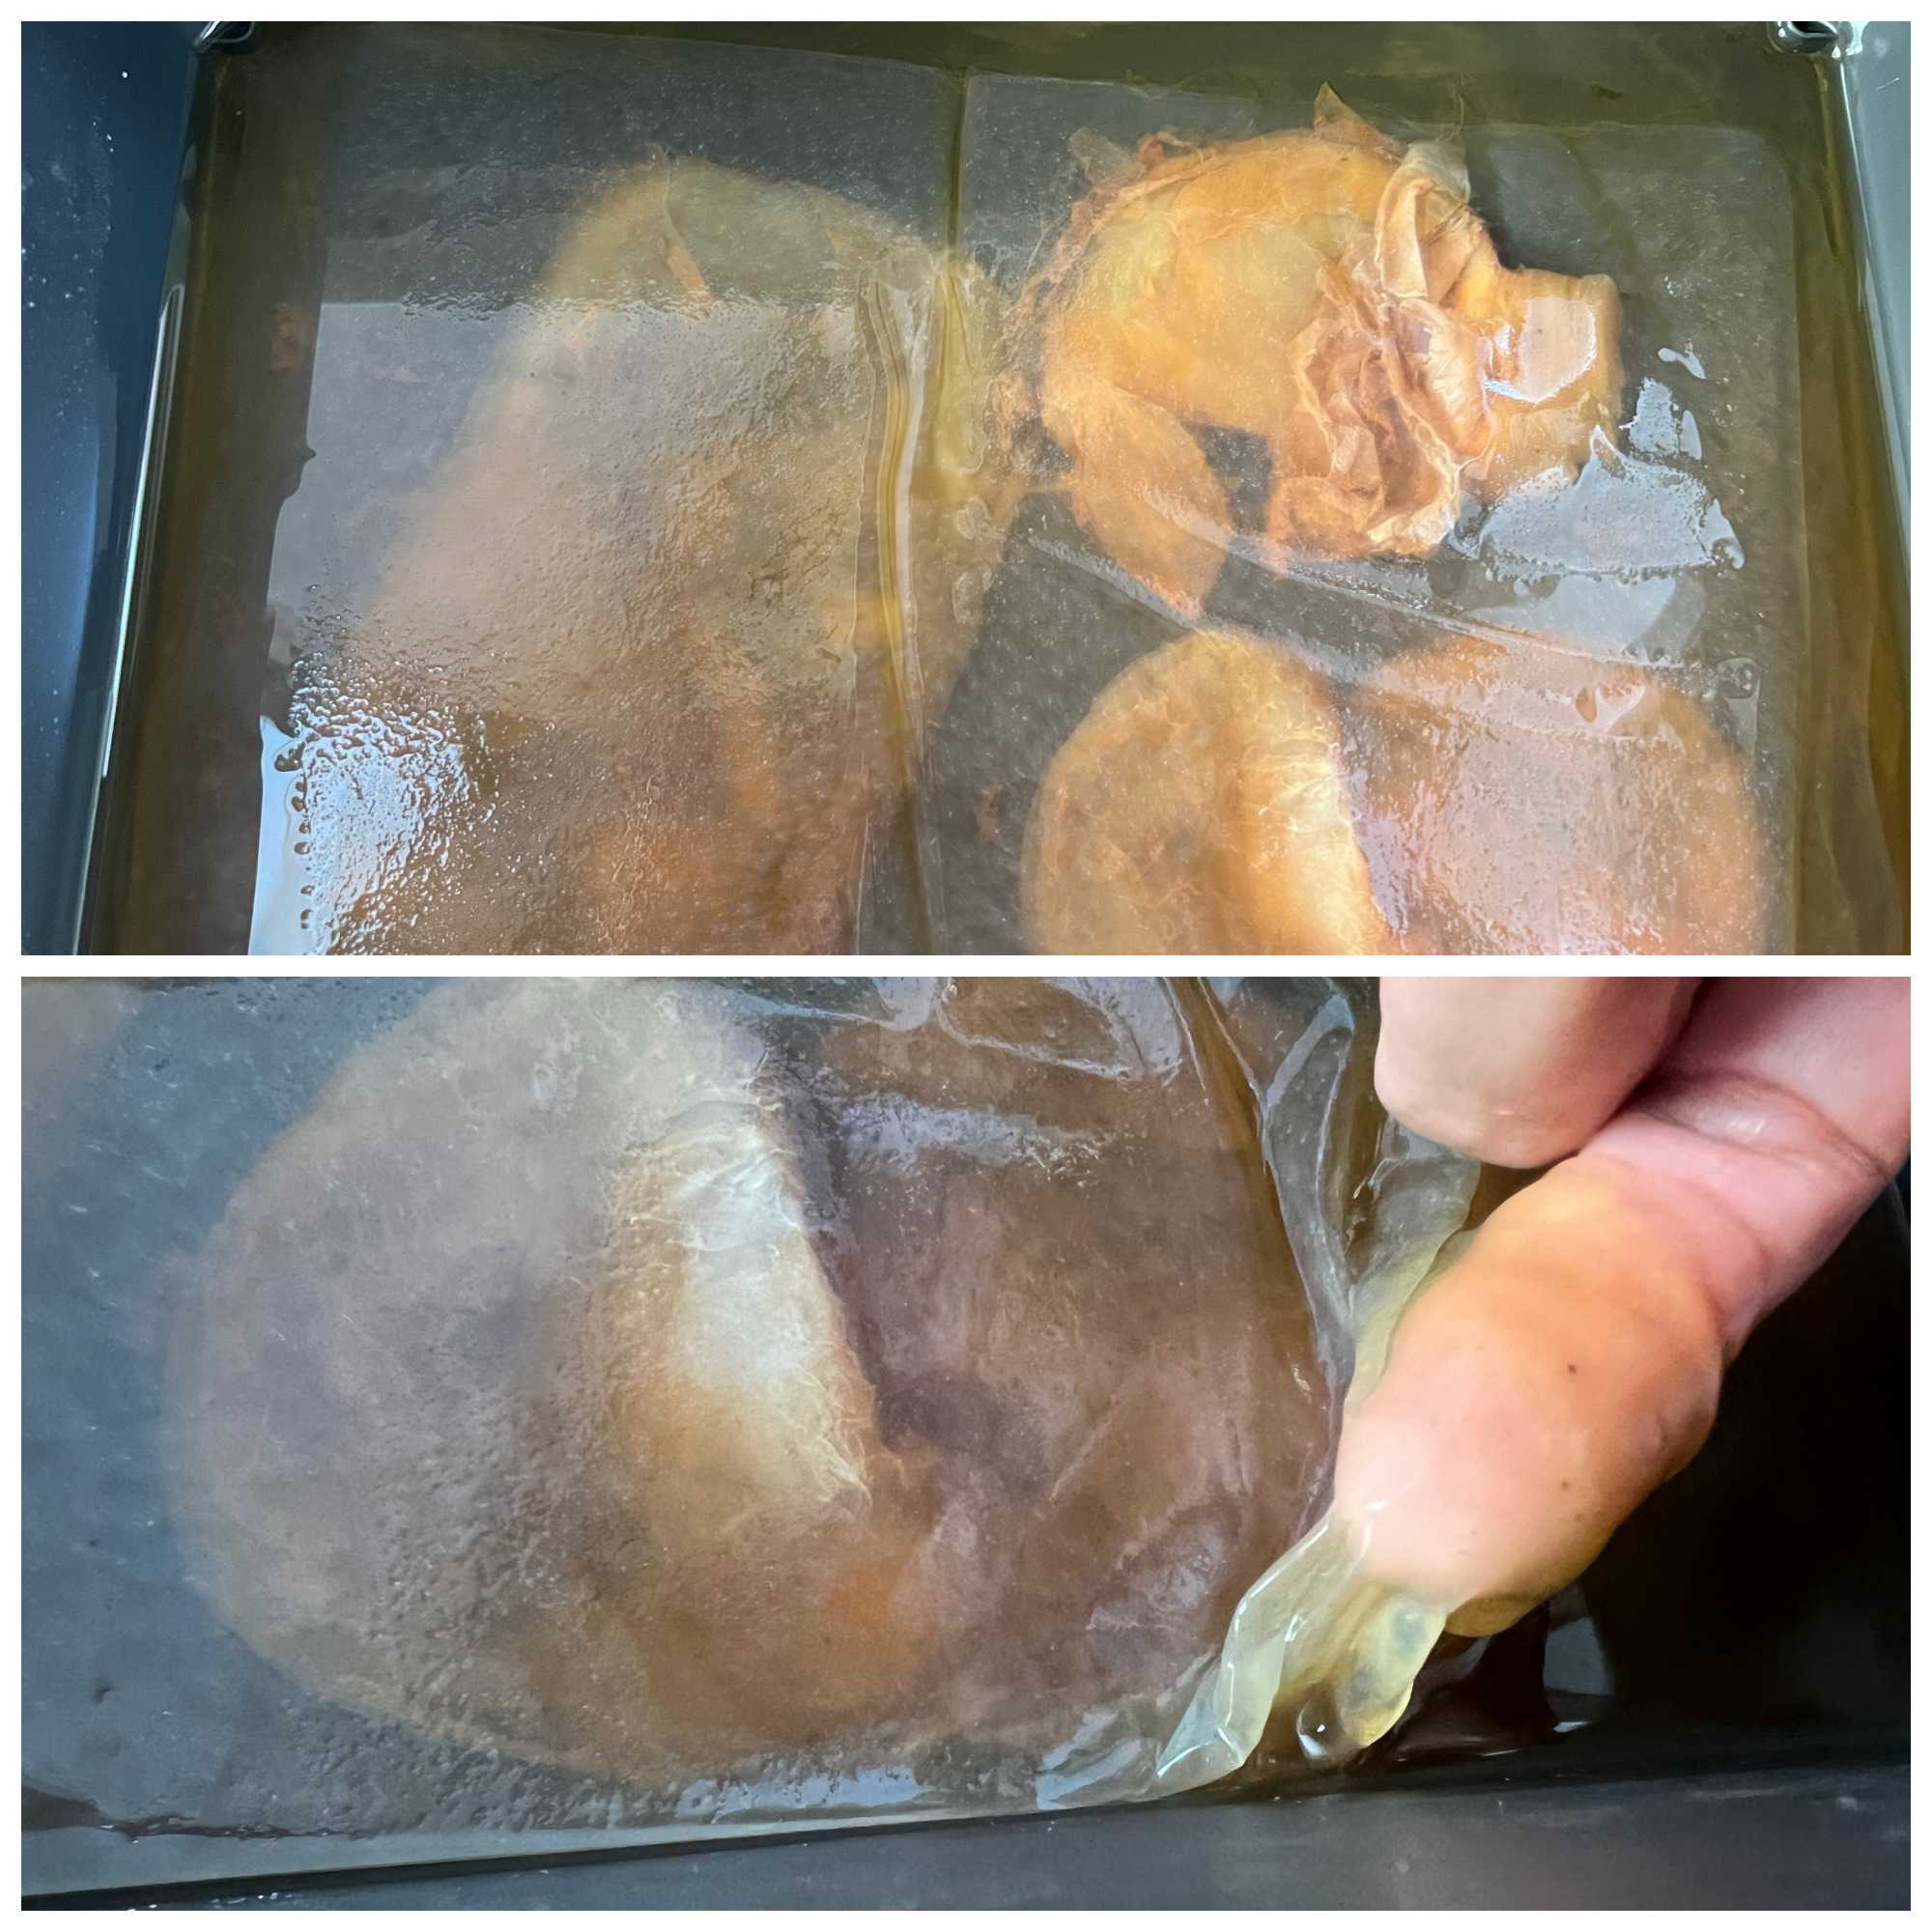
These two were in the same glass bottle, but the one on the left is the one that was there from the beginning, and the one on the right is a new one, so they are different in color. The right side is thicker and has layers, so I peeled it off and made it into two.
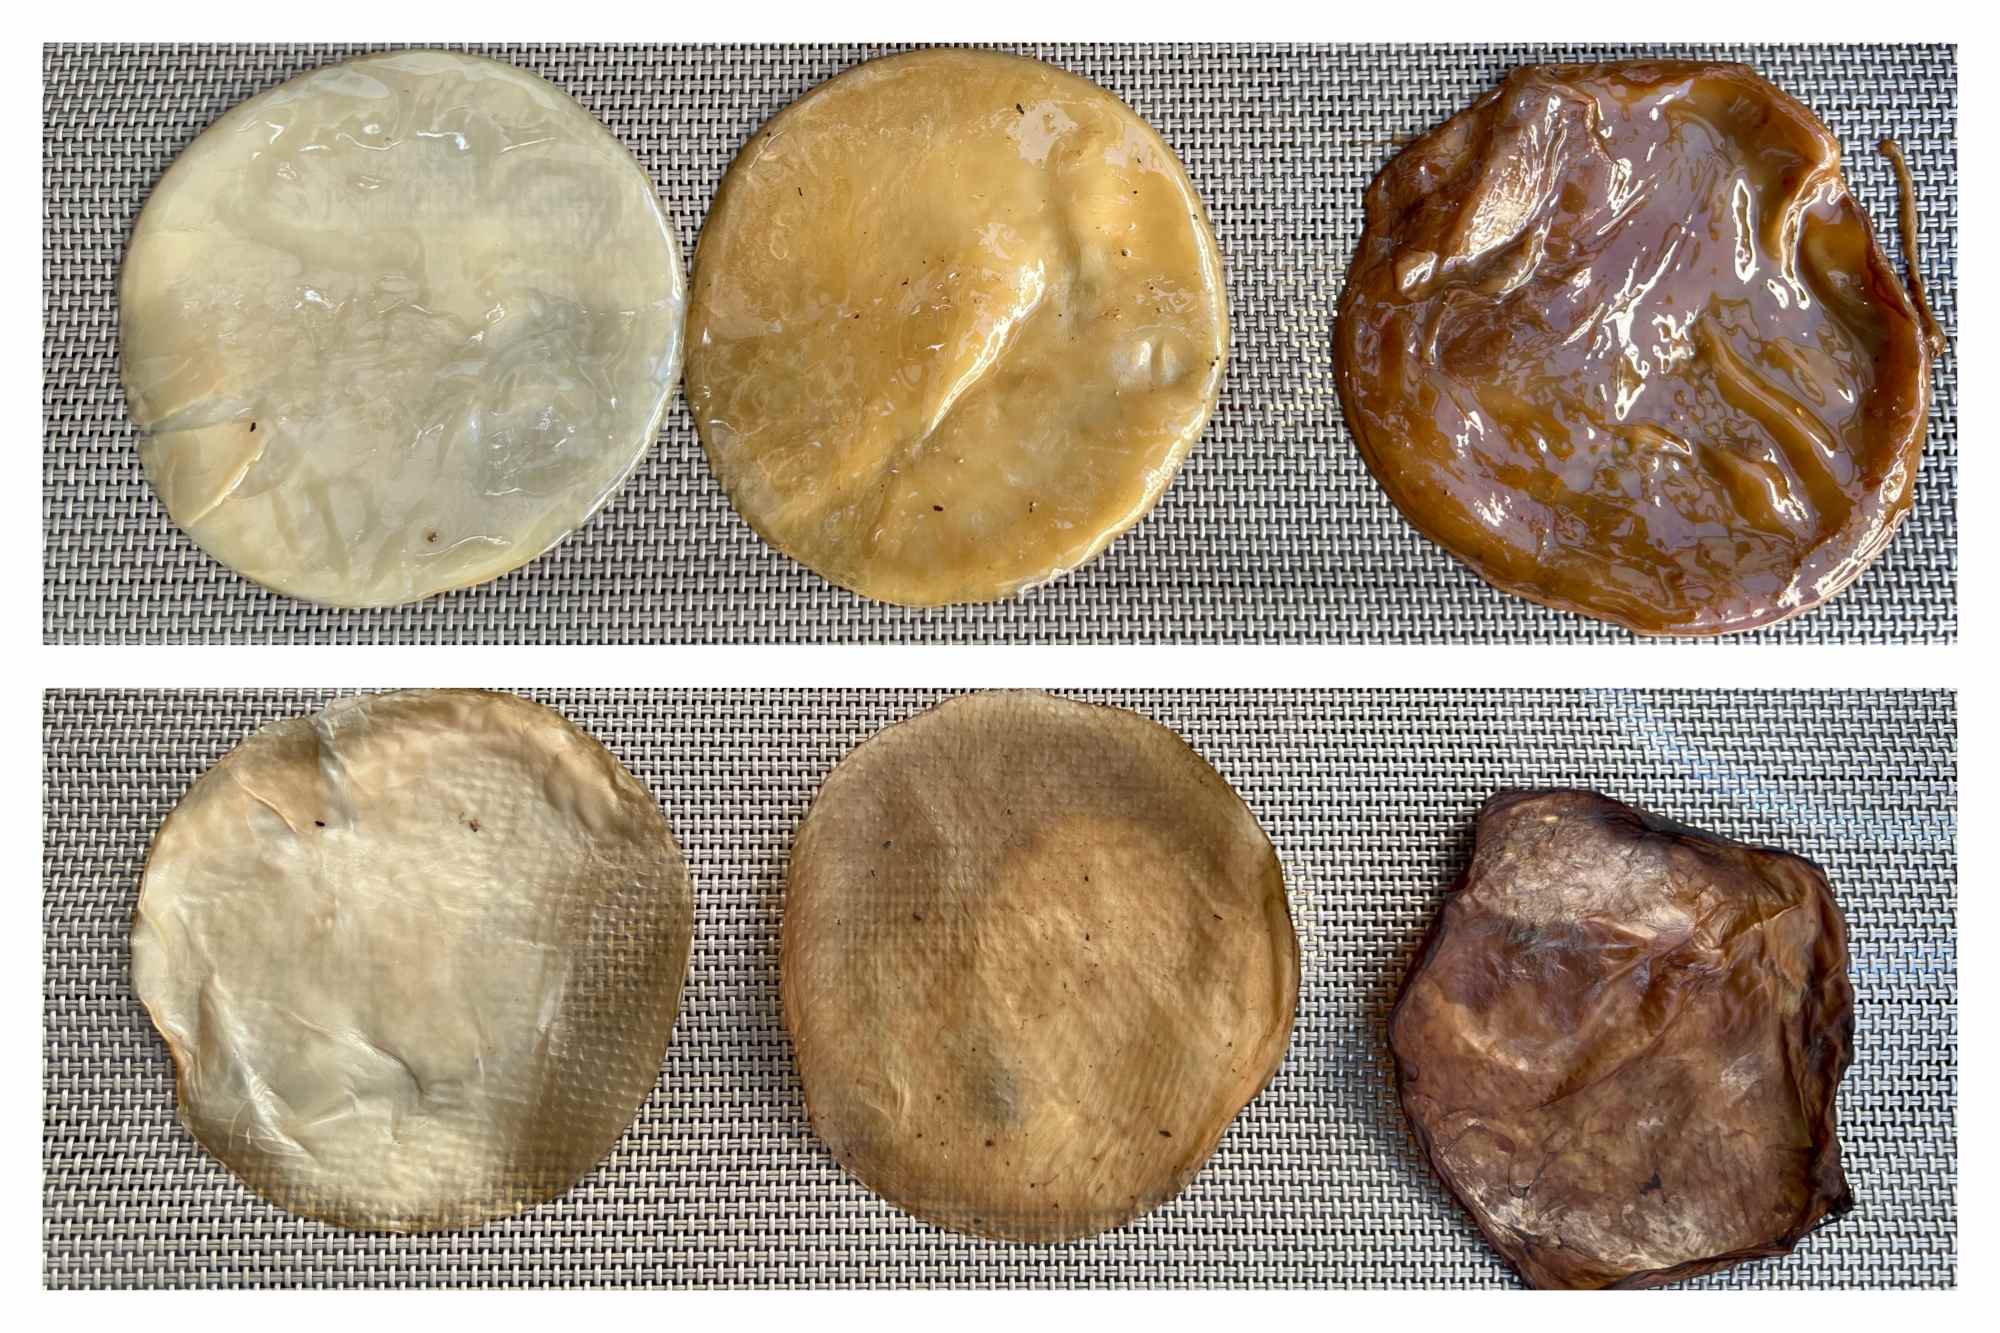
I dried it outside. The top is the initial state, the bottom is after one night.d
I also dried rectangle one 10cm x 15cm.

Different ingredients
I tried different ingredients instead of black tea.
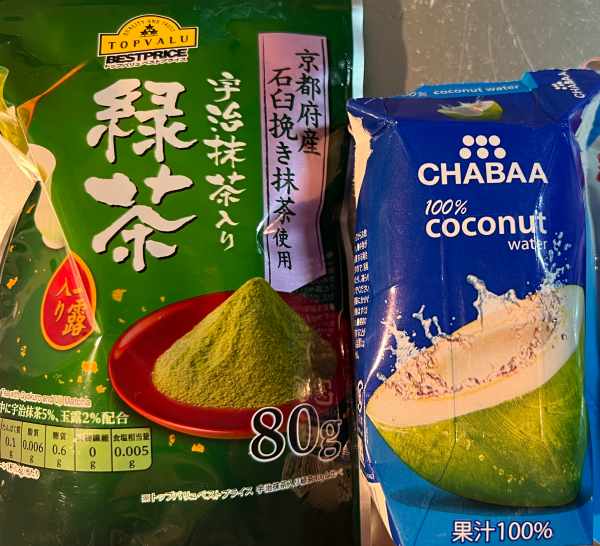
6 Recipe#6 Kombucha Green tea
* Scoby
* 0.8g green tea powder
* 3 tea spoon sugar
* 200 ml hot water
* Glass cup
* scale / measuring cup
* spoon
* cloth
* Wash glass jar thoroughly and pour boiling water over them or boil the jar.
* Put green tea powder in the cup, then pour 100ml hot water
* Put sugar into the tea. Stir it with a spoon to dissolve.
* Leave it to cool to room temperature
* Put scoby in it
* Cover the jar with cloth
* Place the jar in the clean and warm space
Coconut water
7 Recipe#7 Kombucha Coconut Water
* Scoby
* 180ml pure coconut water   (natural sweetness)
* Glass cup
* cloth
* Wash glass jar thoroughly and pour boiling water over them or boil the jar.
* Put coconut water in the cup
* Put scoby in it
* Cover the jar with cloth
* Place the jar in the clean and warm space
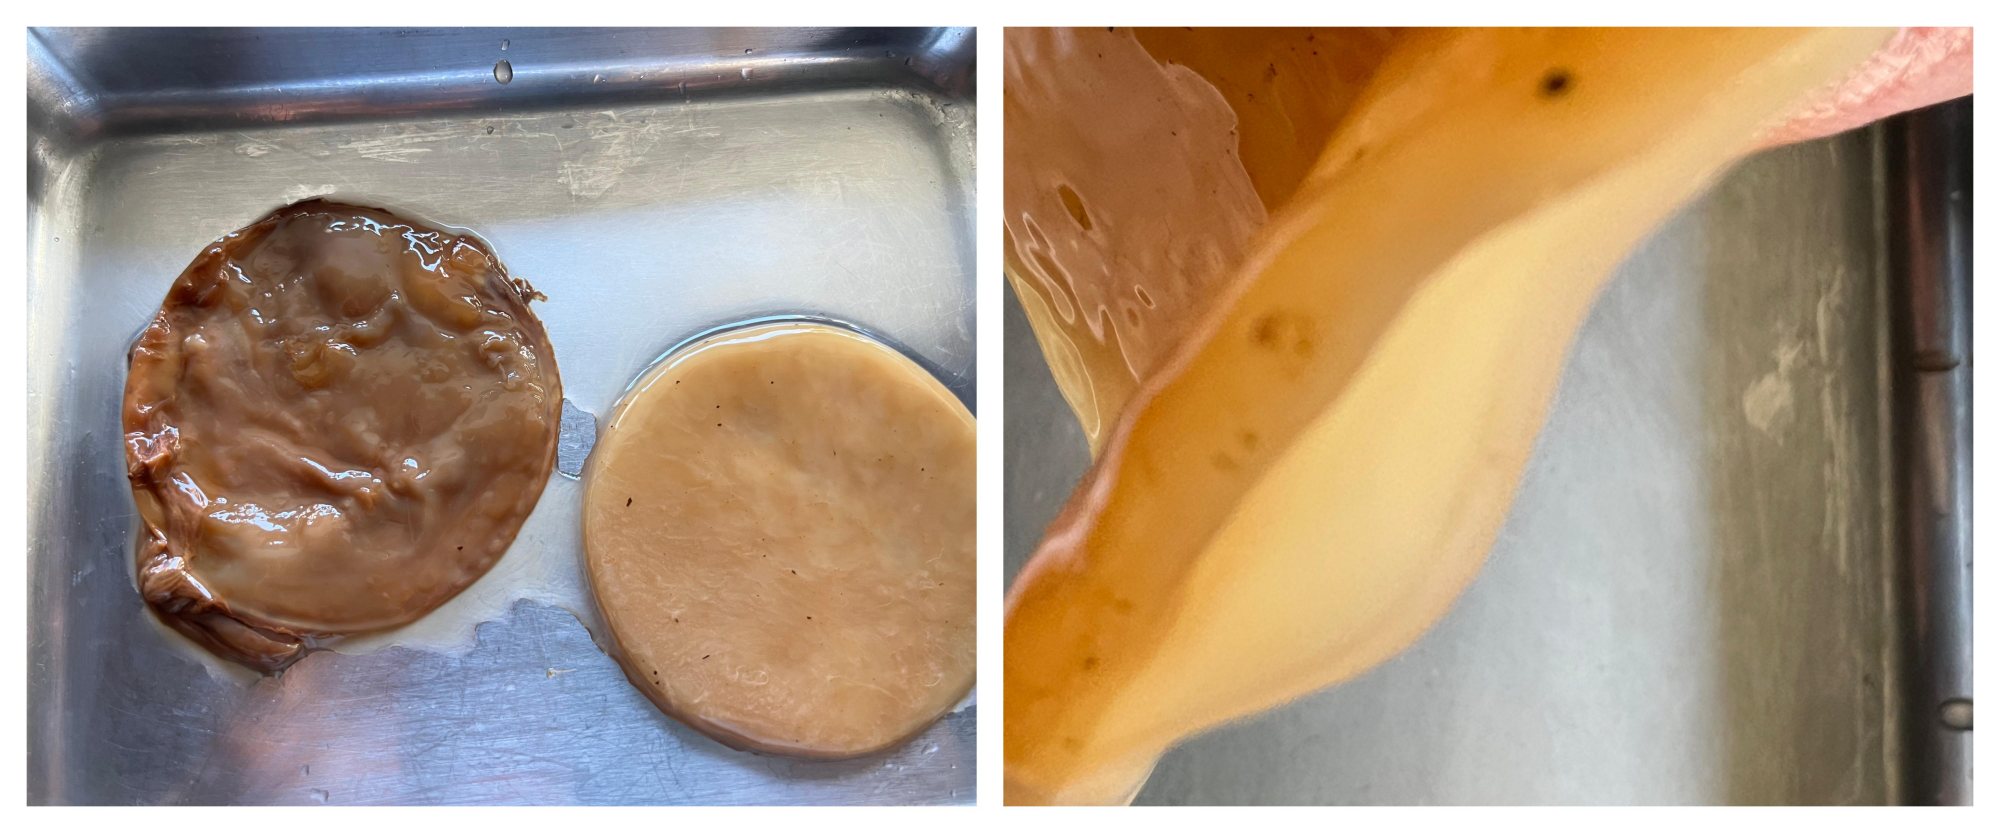
After 10 days, thin skin was growing. The green tea on the left had pale yellow color. The coconut water on the right had transparent color. (The brown part is original scoby).
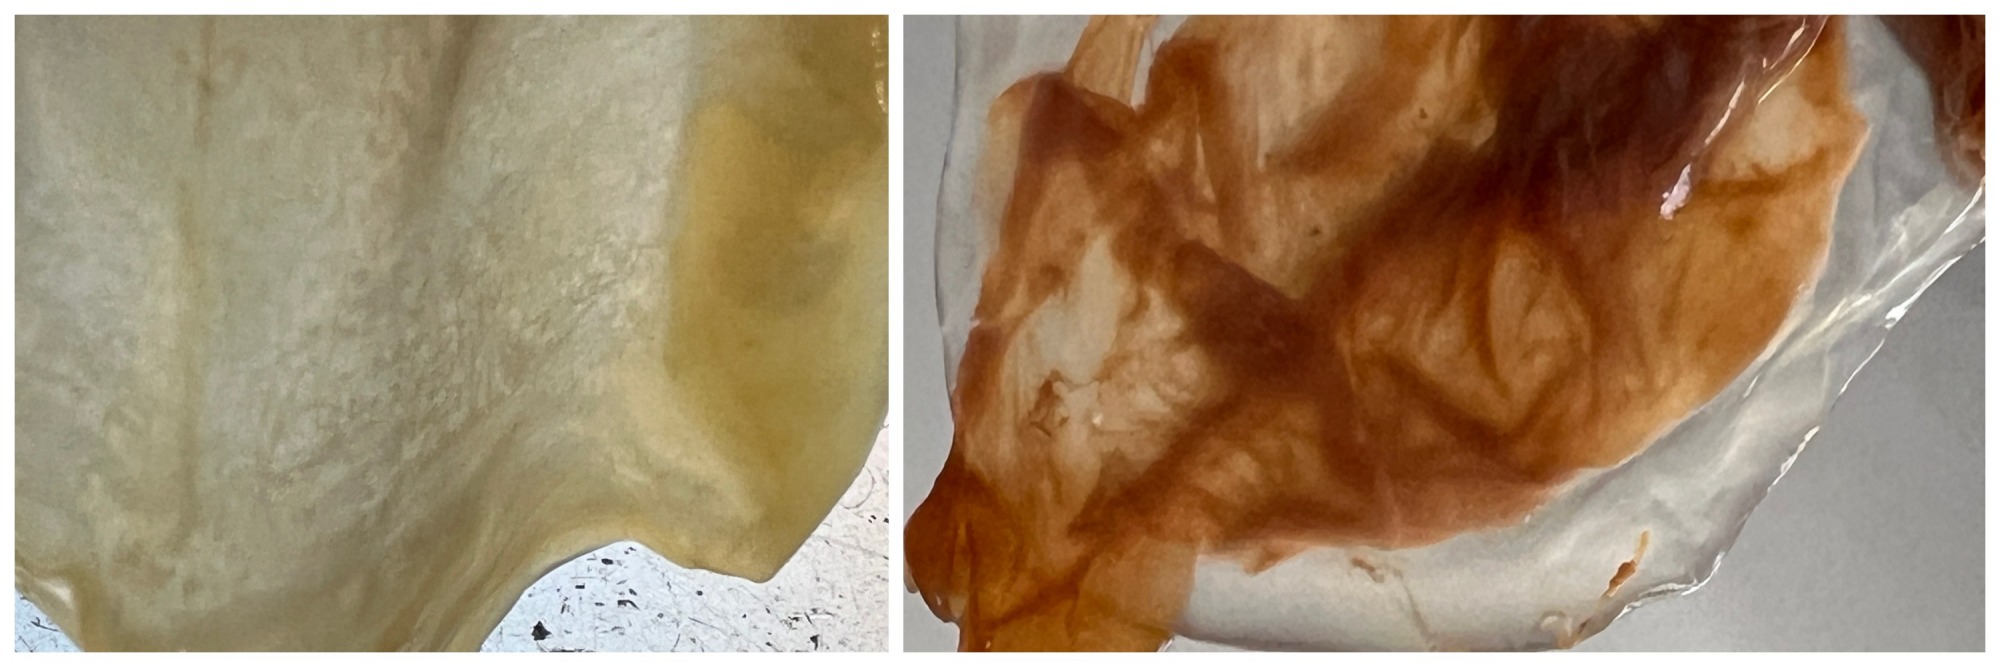
We can use different recipes depending on the purpose. The characteristics of the dyeing may also be different.
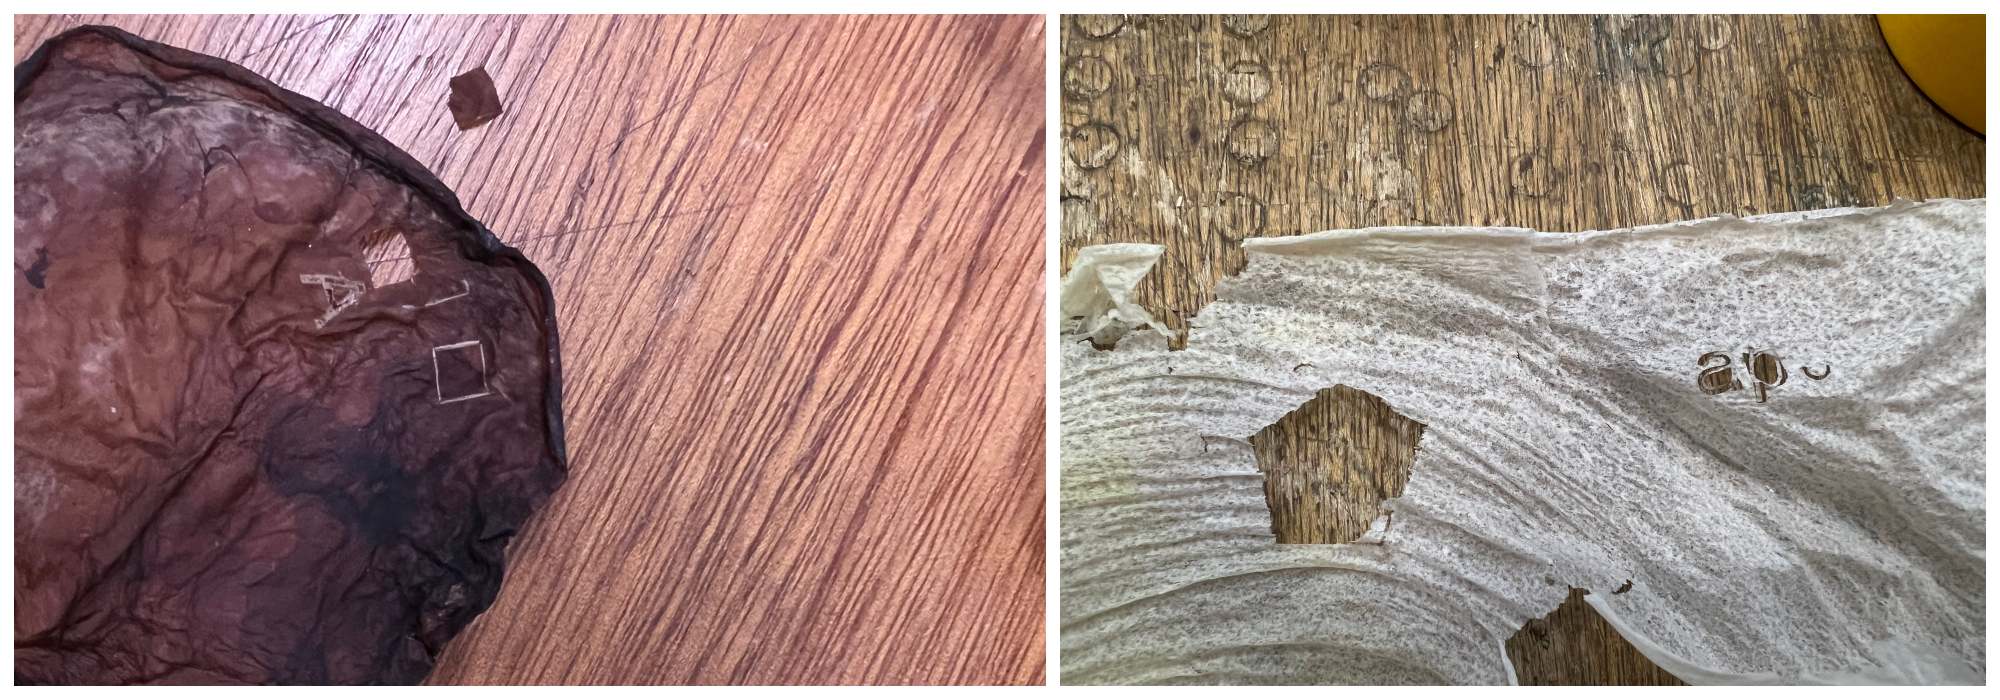
Laser cutting / Engraving
For the leather processing parameters, I referred to Alessia Pasquini's document.
Parameter
-
Kombucha leather #1
- Vector : Power 50 / Speed 50
- Raster : Power 50 / Speed 60
-
Methyl Cellulose paper
- Vector : Power 50 / Speed 70
- Kombucha leather #2
- Vector : Power 80 / Speed 30
- Raster : Power 50 / Speed 60

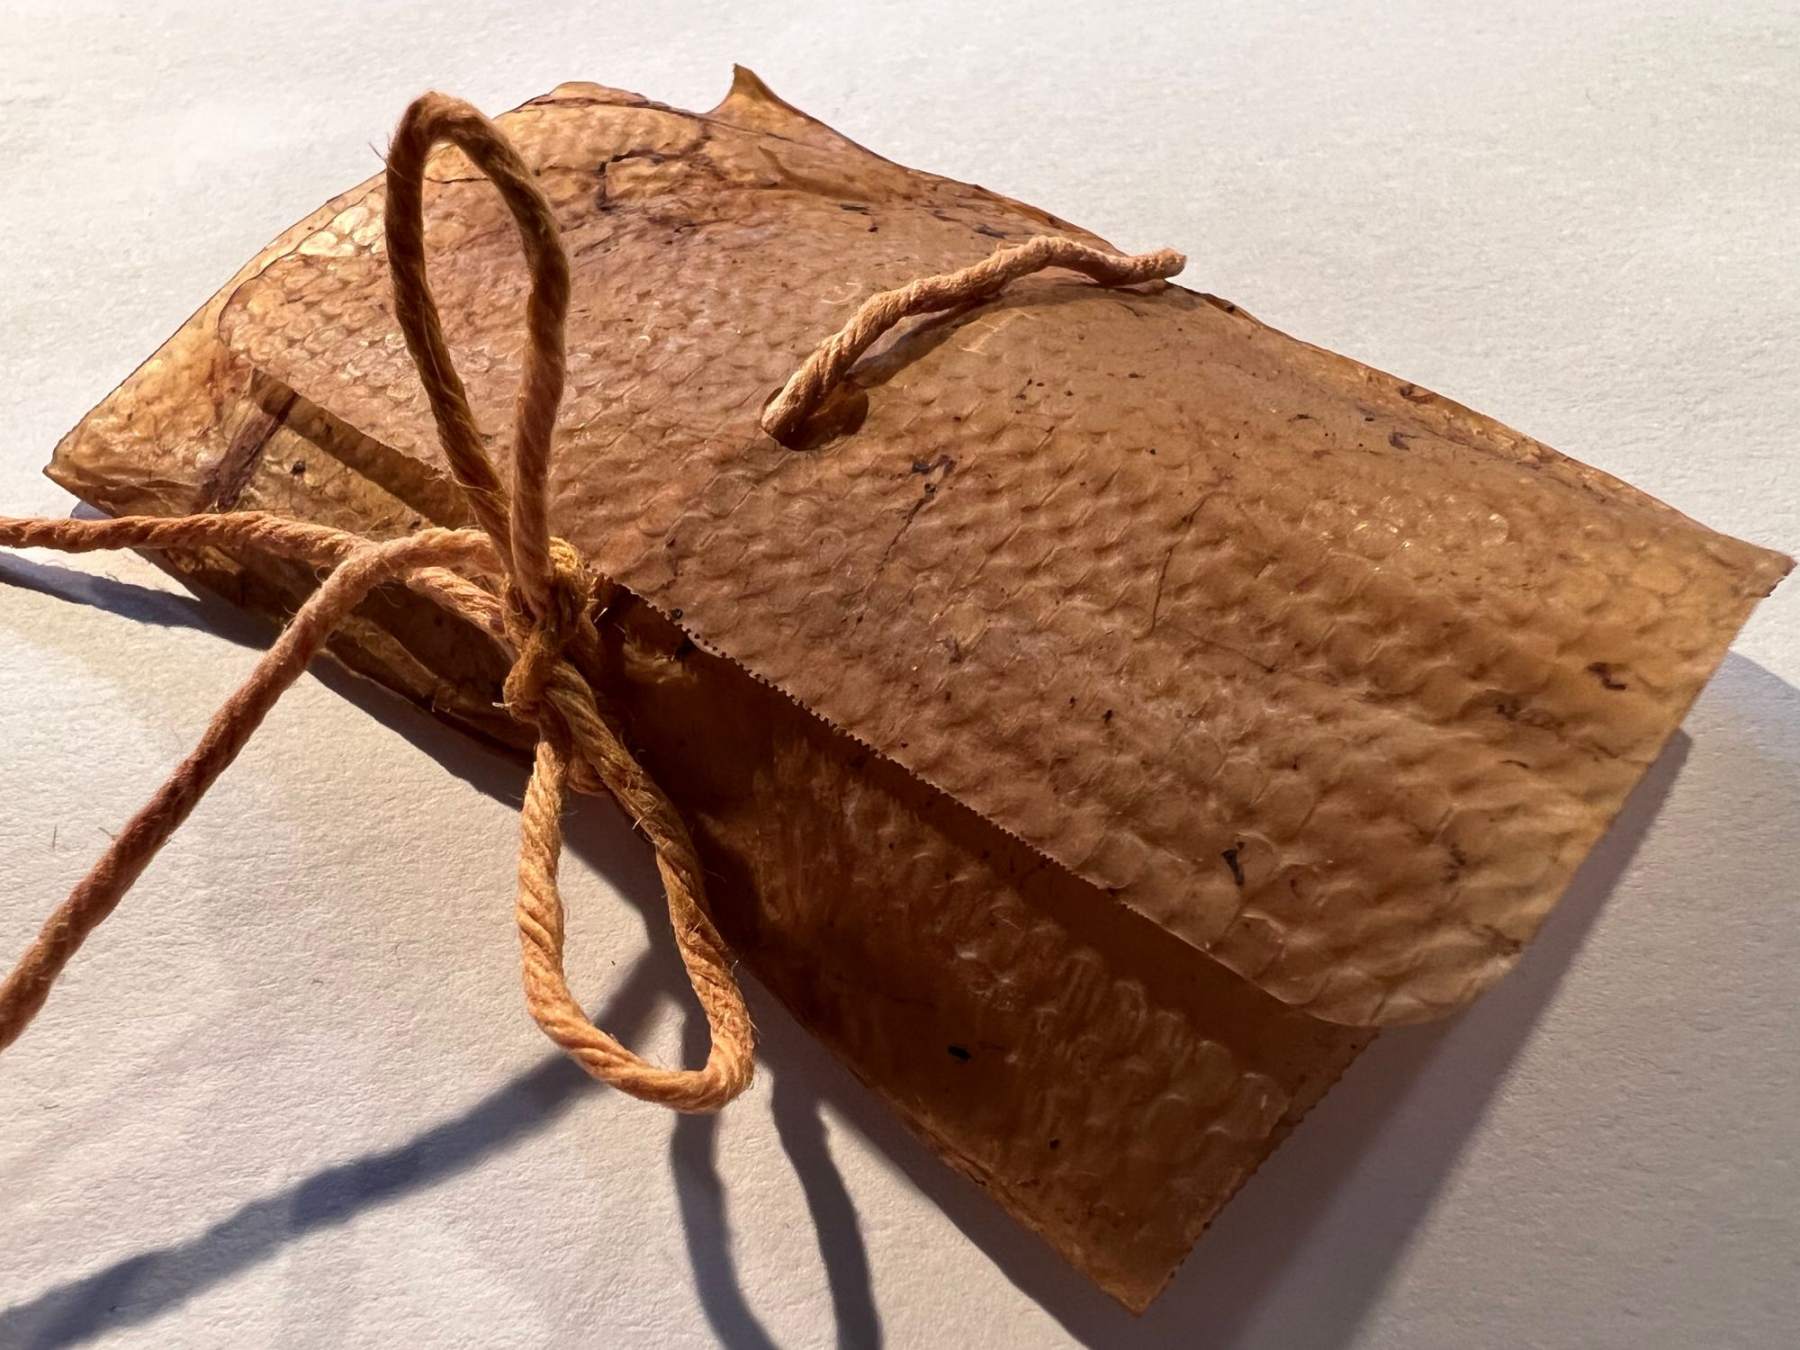
I decorated the Kombucha leather with thread that was dyed at week 4.

My Learning outcome
-
Agar and gelatin were often used in making sweets, but I had never thought of making BIO-Material. This time I mainly learned about BioPlastic using Agar. By changing the composition and filler, materials with various textures can be created to suit the purpose. It also changes depending on the thickness and type, and the texture changes as the days pass. I would like to try other Ingredients next time
-
I learned techniques for growing Kombucha. I enjoy growing materials myself and the time I spend growing them. However, the drawback is that it has a slight vinegar smell. This time I tried using a thin Scoby, but I would like to try dyeing something a little thicker or larger.