12. Skin Electronics
Learning outcomes
- Research skills: the participant has acquired knowledge through references and concept development
- Design skills: the participant learnt to program a microcontroller, design circuit and schematic
- Fabrication skills: the participant is able of integrating inputs and outputs in a microcontroller project
- Process skills: Anyone can go through the process, understand it and reproduce it
- Final outcome: Is the assignment is assembled, functioning or tested
- Originality: Has the design been thought through and elaborated?
Student checklist
- Document the concept, sketches, references also to artistic and scientific publications
-
Design a “skin-circuit”, exploring the replication of the examples below or:
- the Skin masquerade party project
- the Twinkle Nails project
- interactive tattoo
- explore how to create a new skin electronics accessory.
- Document the project and included all source files and all materials used
-
Upload your design files and source code
- Make a video with your skin electronic working
- Make a short performance/concept of your project functioning (extra credit)
Research

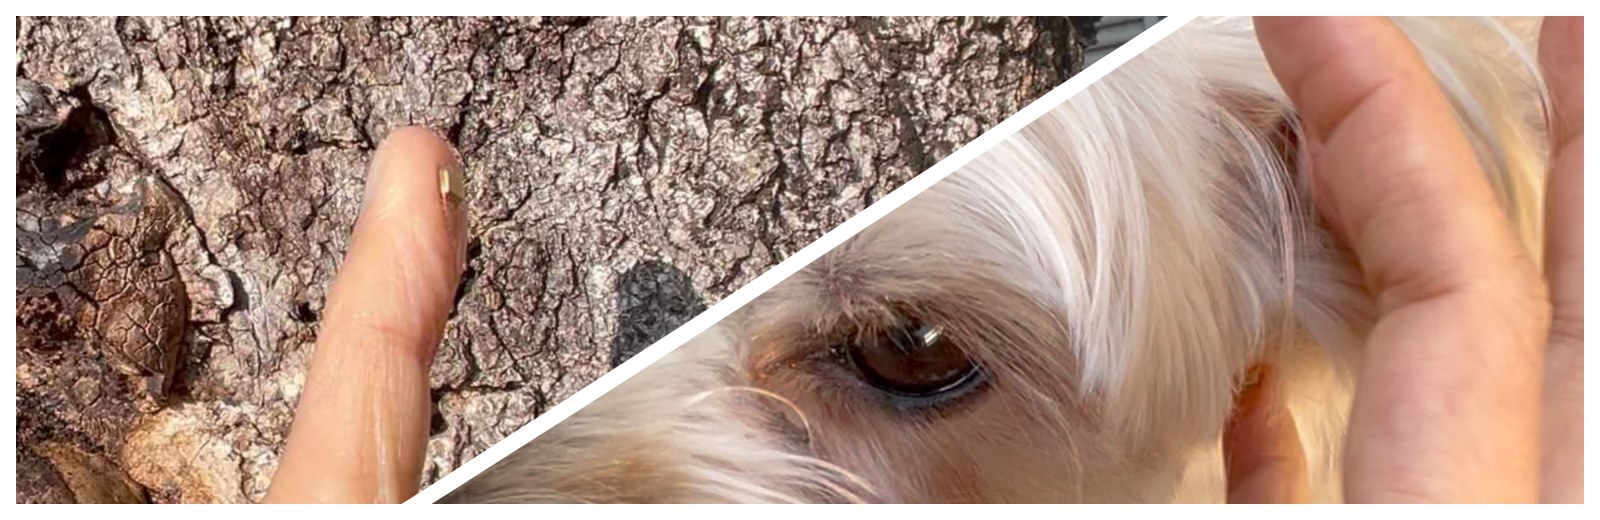
In addition to humans, I also observed the skin of trees while walking. There are various textures.

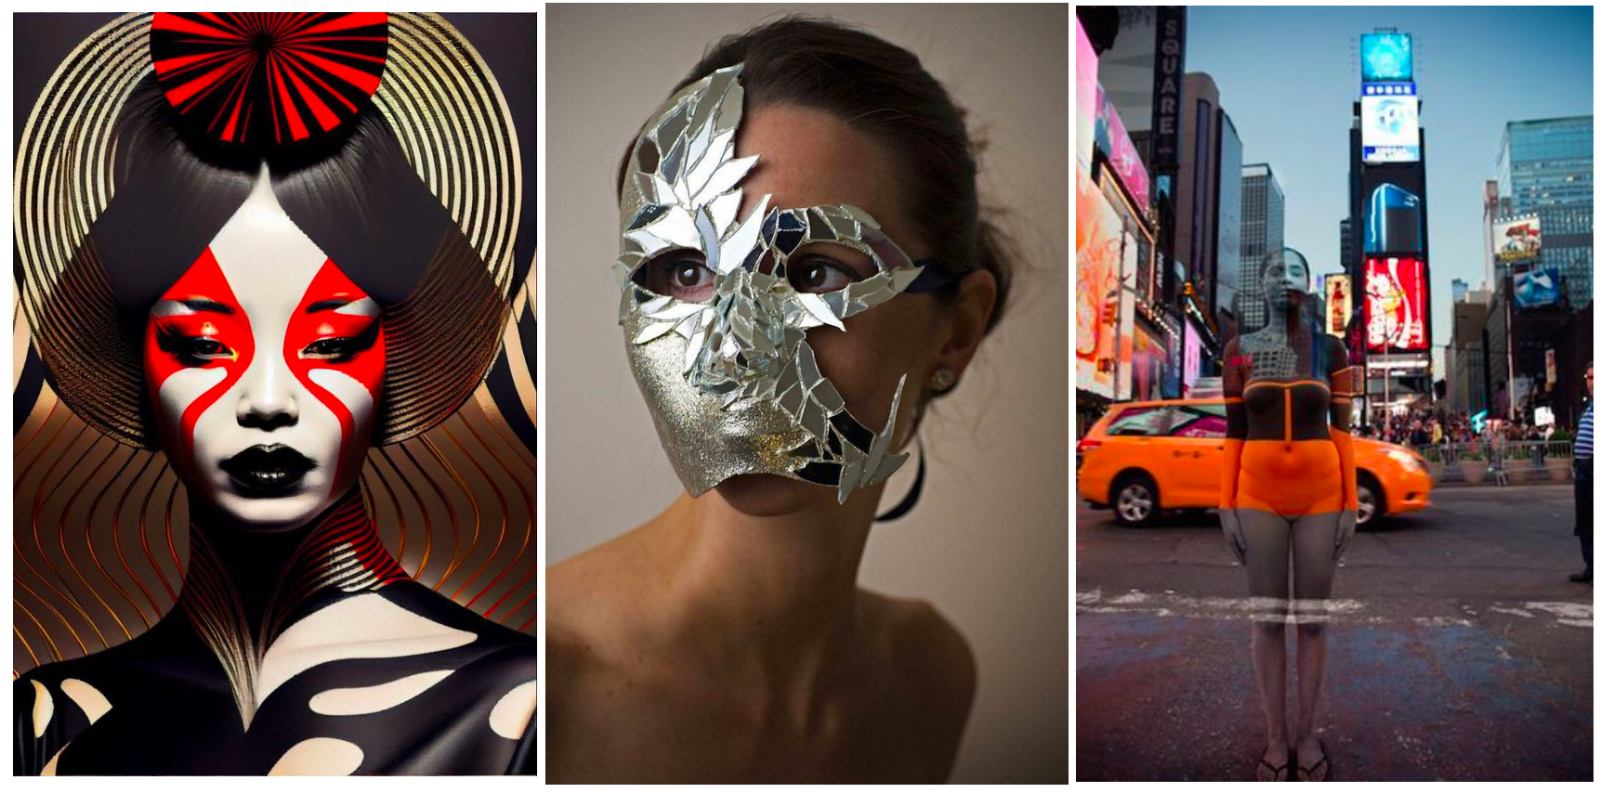
References & Inspiration
After taking the class, I came up with some ideas for skin electronics. This time, I would like to try expanding the experience.

- TECHTILE Tool kit
I had previously attended a TECHTILE Tool kit workshop and used this as a reference. This is a tool that uses a contact microphone to record tactile sounds and plays them back through speakers.
Control of one's existence. optical camouflage, etc.
Link1
Link2
Link3
Process and workflow
I designed the skin device:
- Expand my tactile sensation and feel it with tone ( Microphone and Speaker)
- Control my existence and relationships with others by touching my hair. (Conductive thread and half mirror)
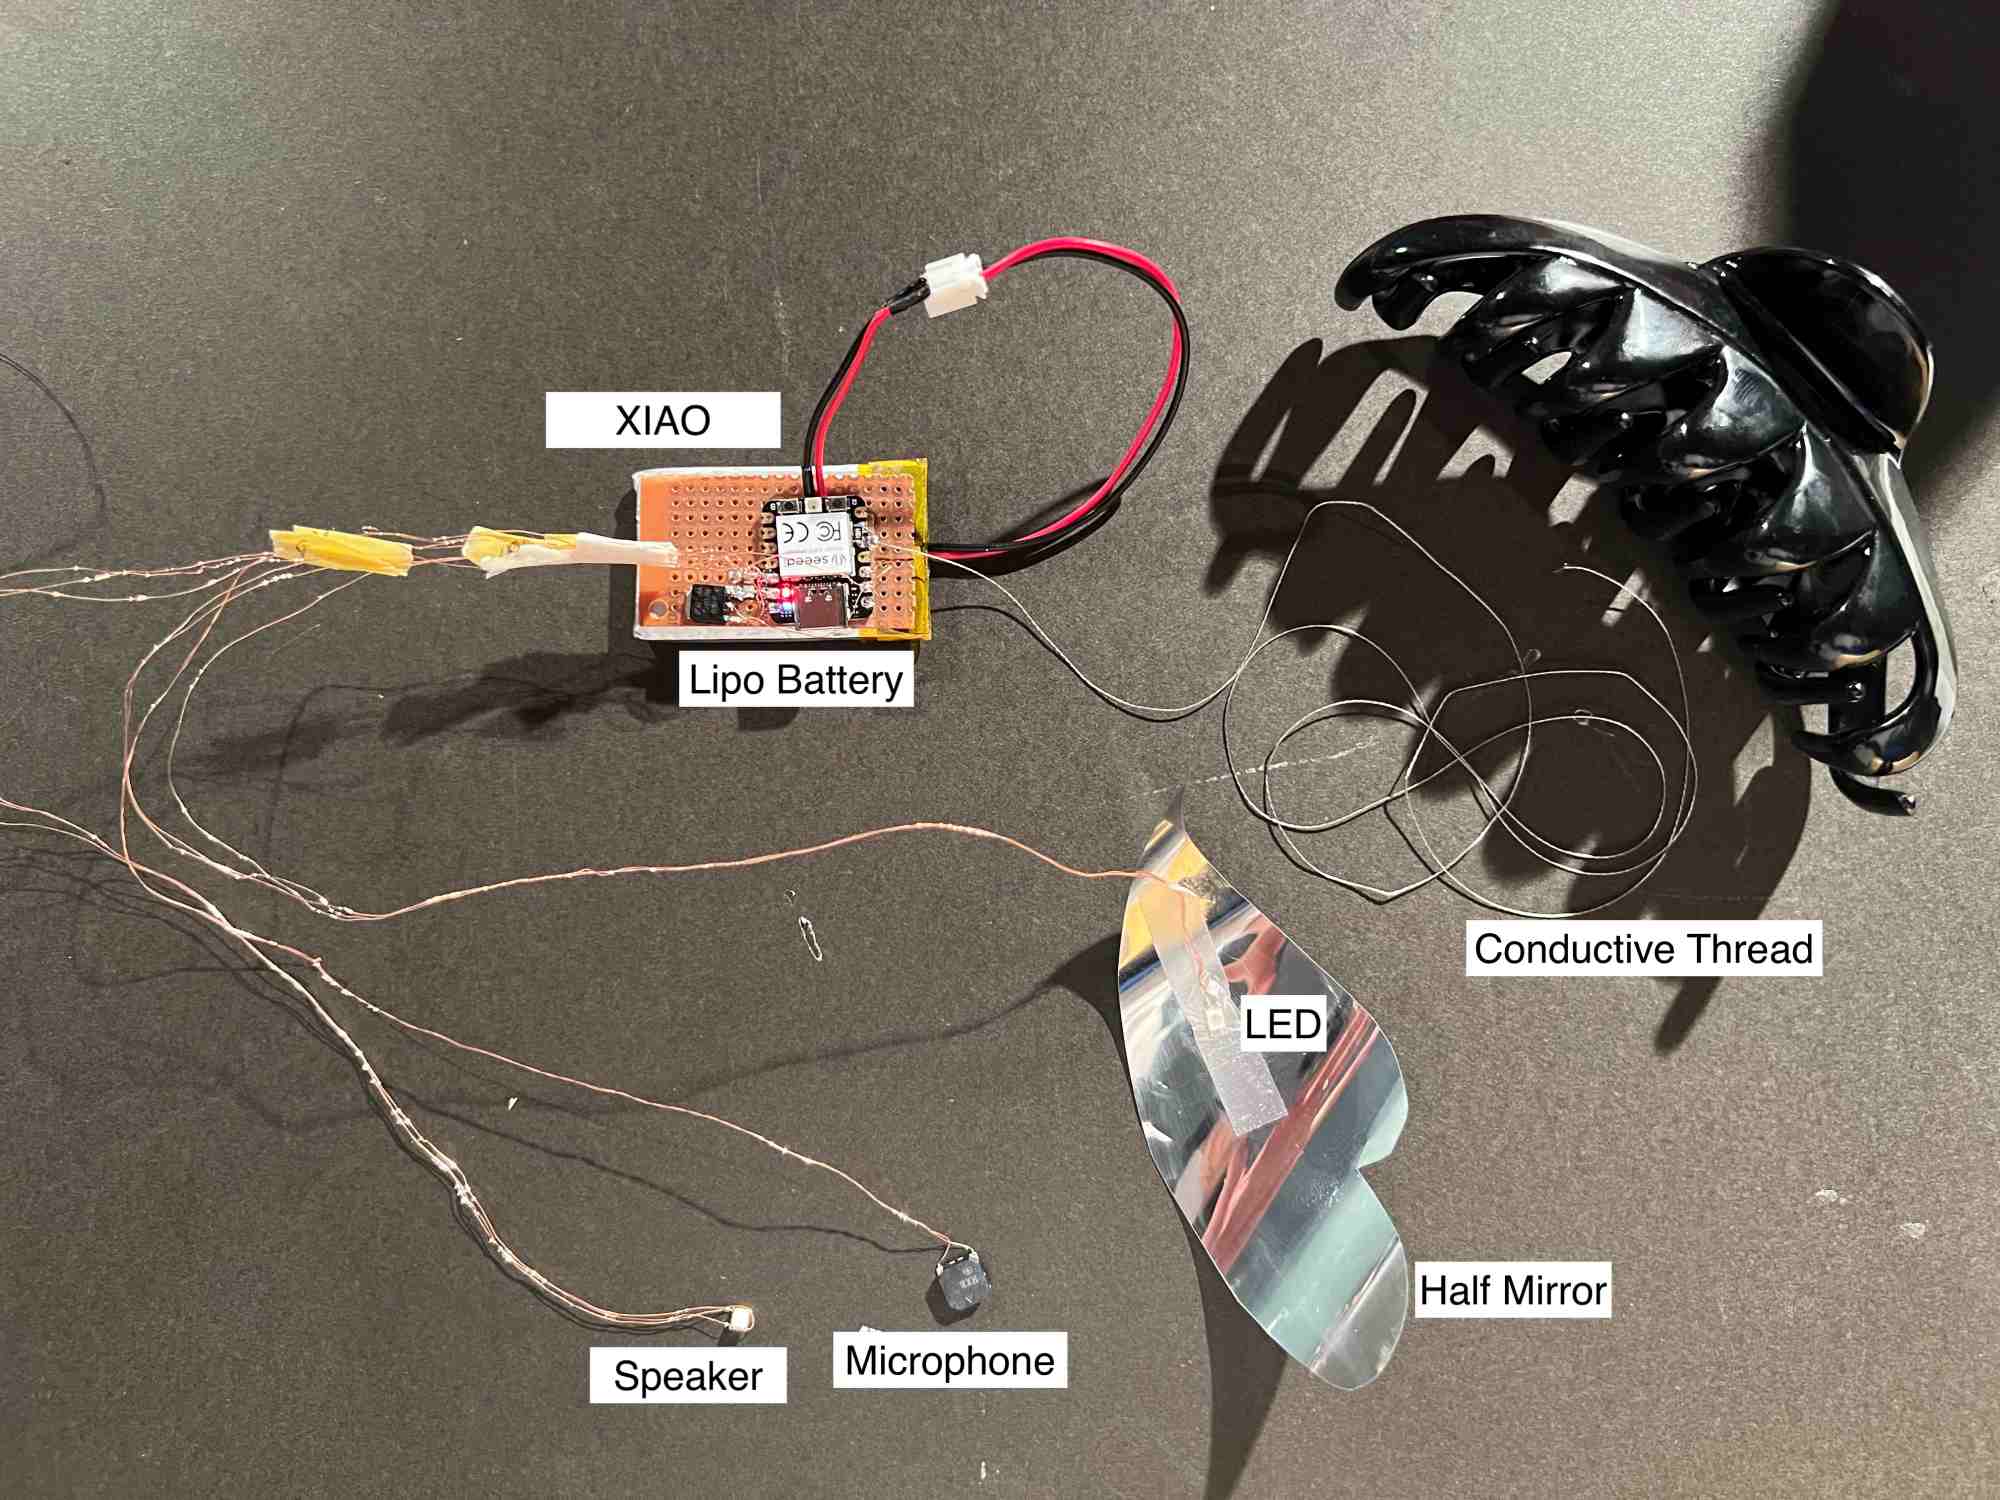
Tools & Materials
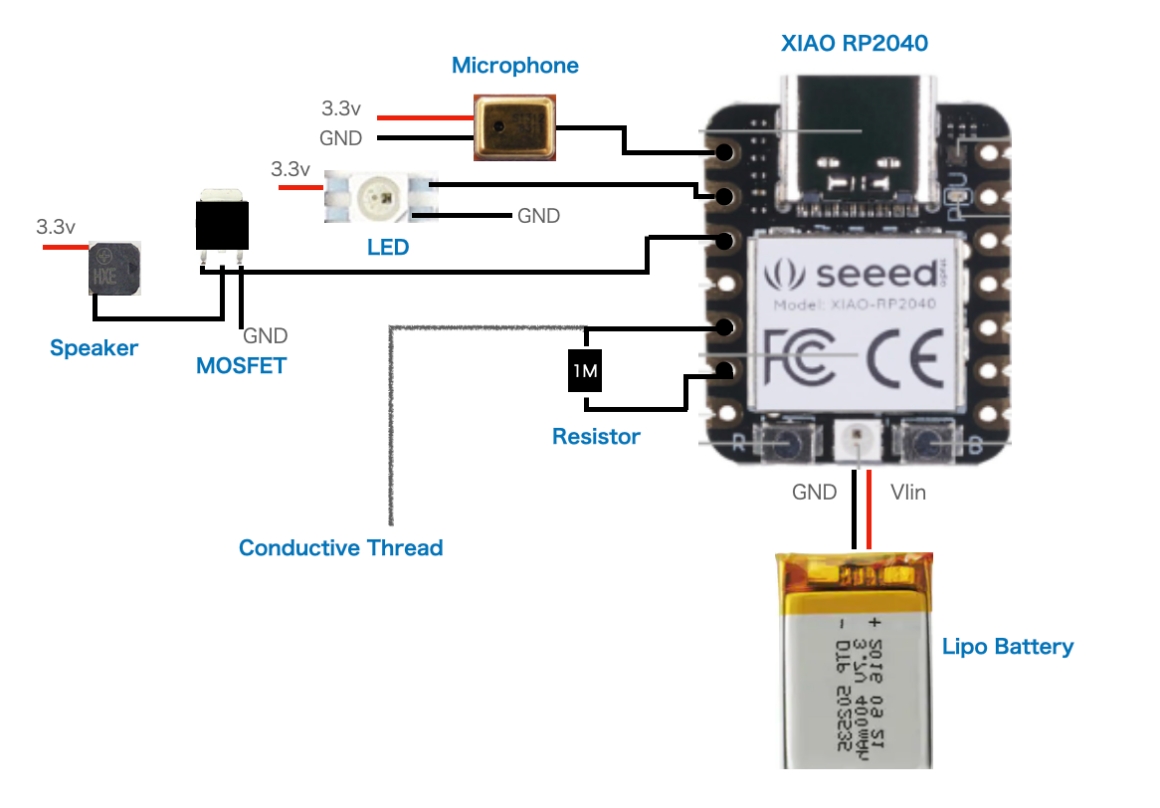
- XIAO RP2040
- Microphone
- Speaker
- NeoPixel
- Conductive Thread stainless steel 0.27Ω/cm
- Half Mirror Film
- MOSFET RFD16N05LSM9A
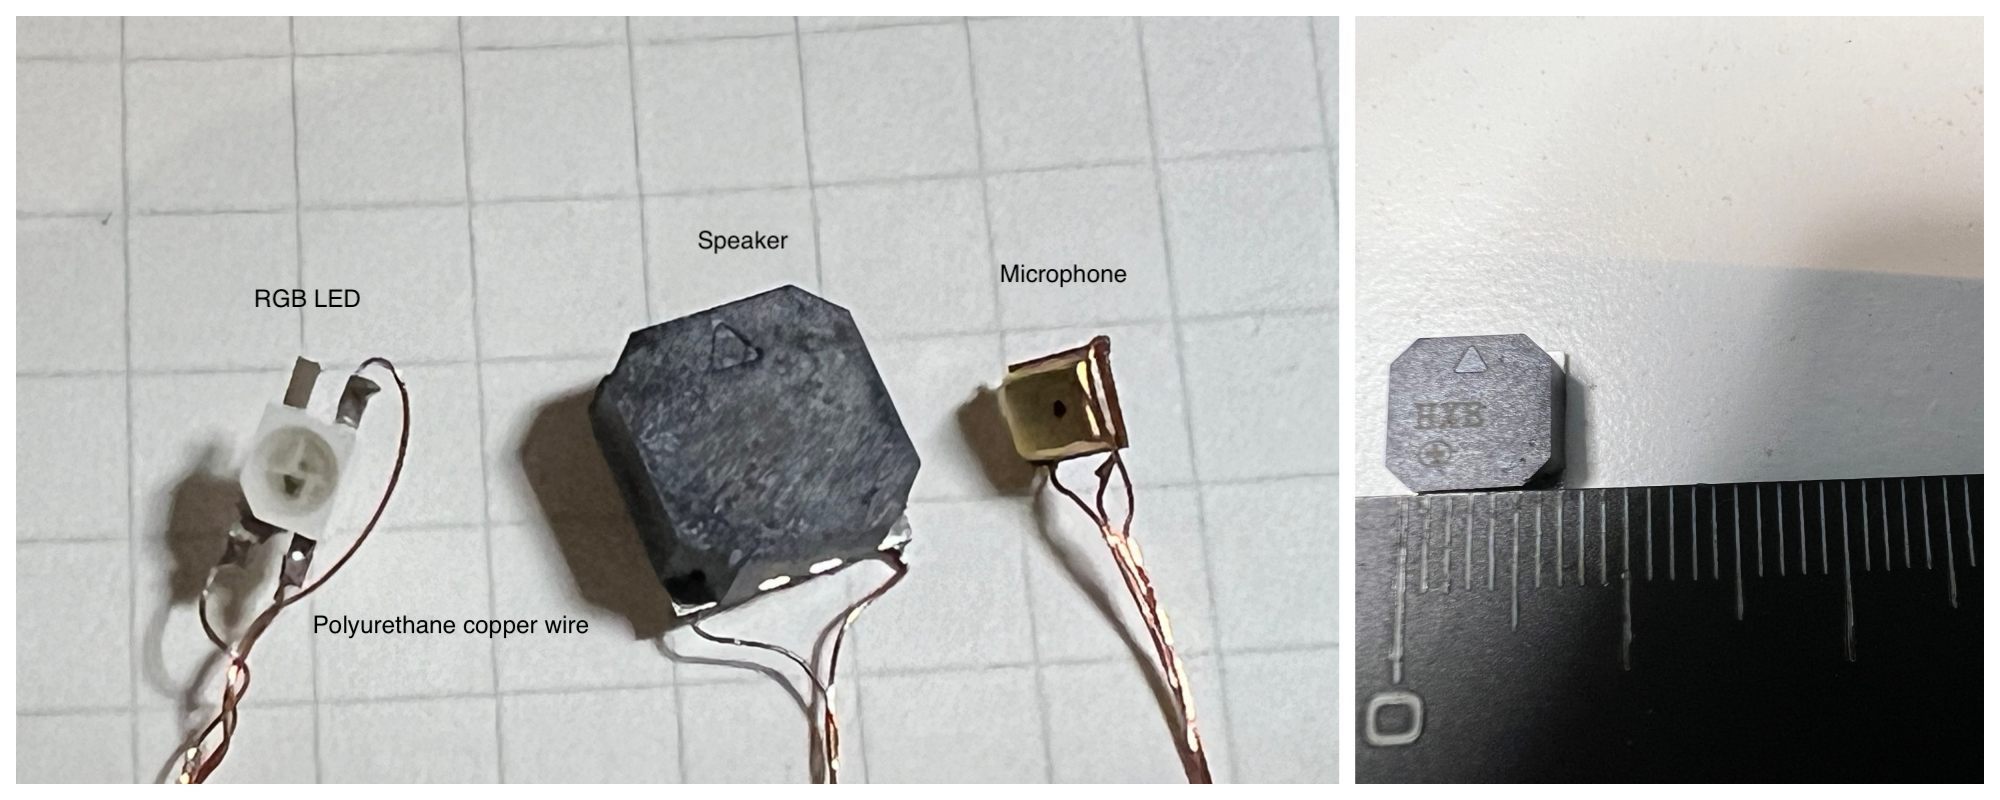
- Polyurethane copper wire 0.16mm
- Resistor 1MΩ
- Tape
- Hair clip
- Arduino IDE
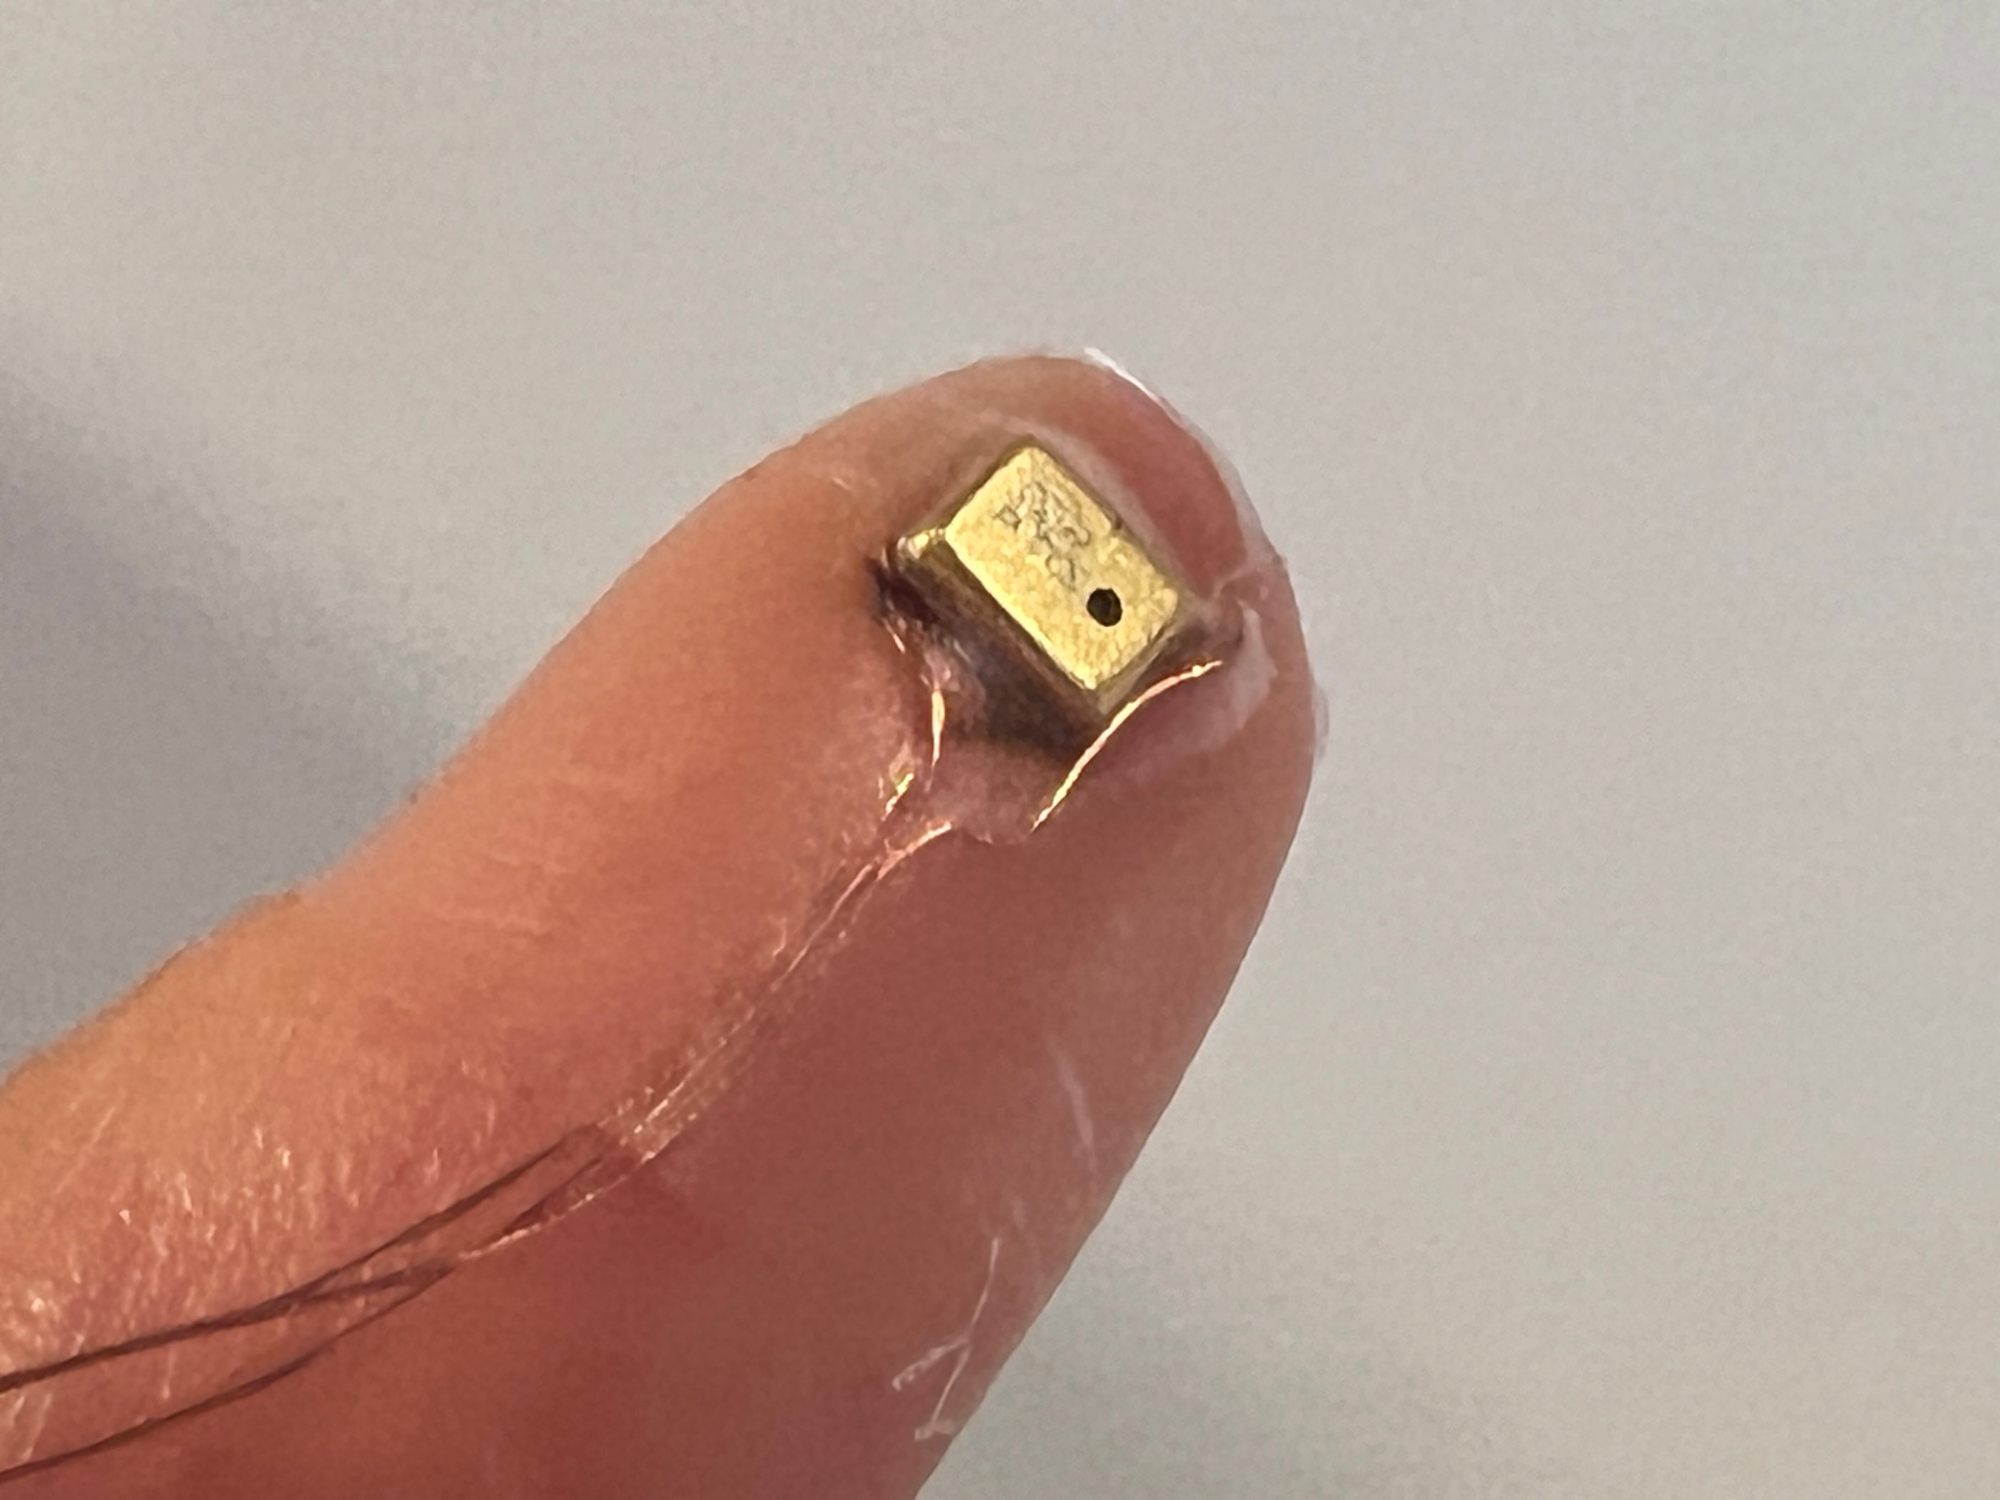
Circuit
Surface mount parts
Haptics Test
Microphone was attached on my little finger to feel texture.
Difference by material
I checked the microphone waveform using Arduino IDE's serial plotter.
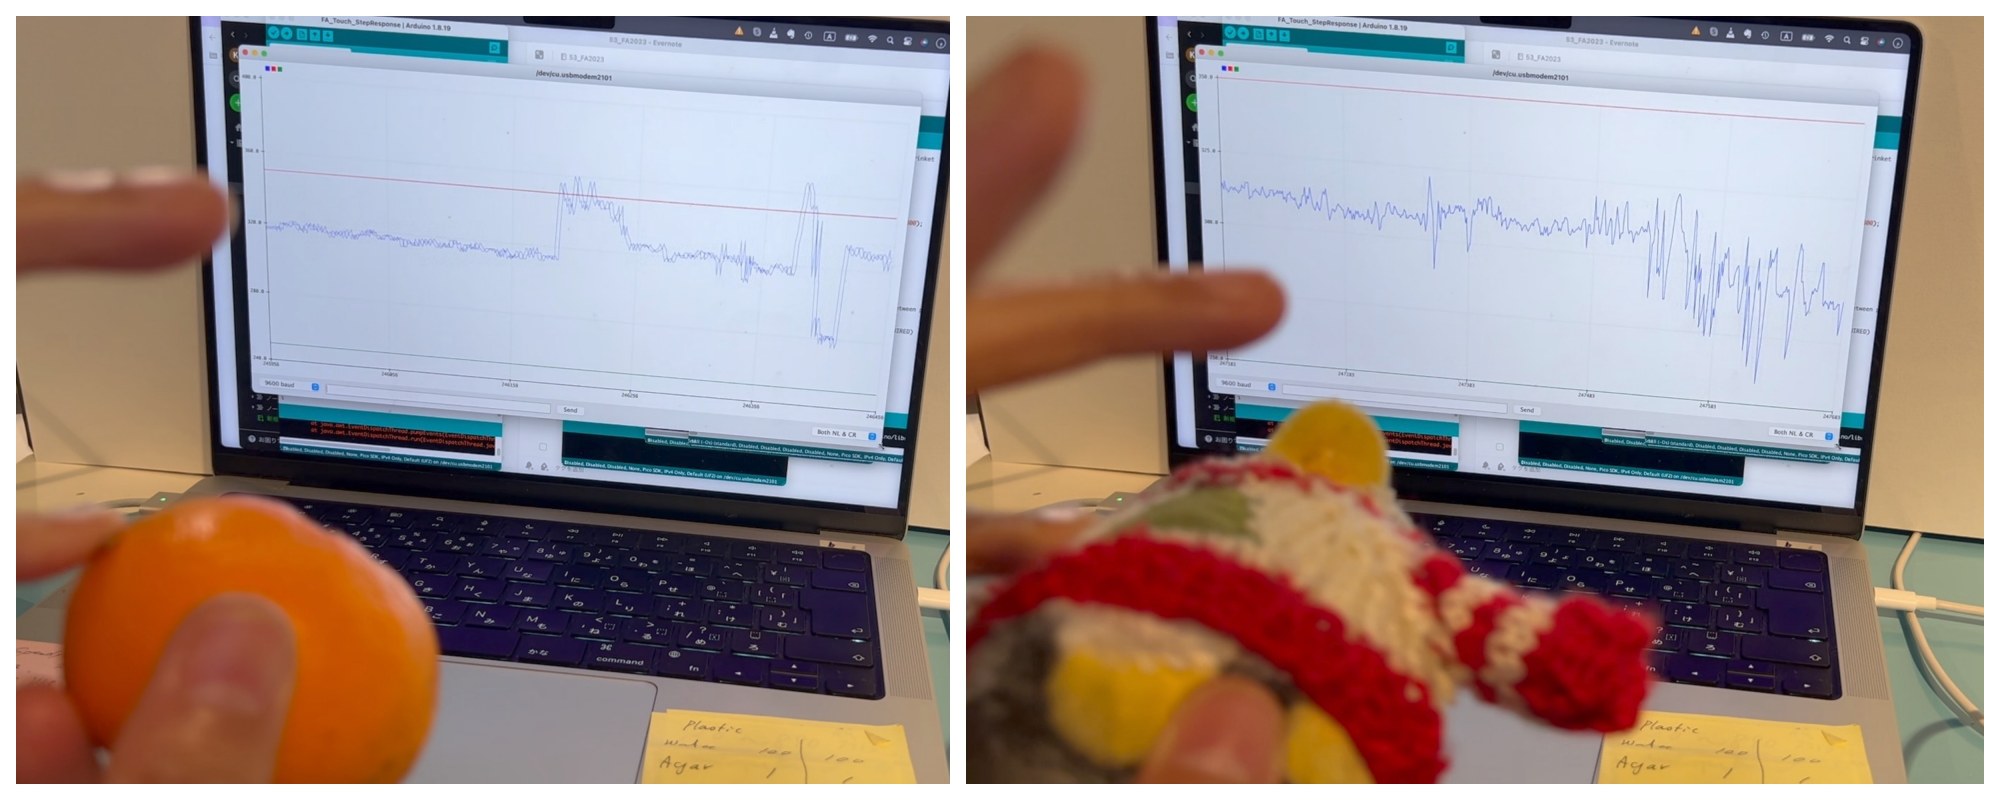 Difference by gesture
It was found that the waveform clearly changes depending on the gesture. It would be interesting to learn and recognize shapes.

Haptics & Speaker
First I tried to use analogWrite to output the analog input of the microphone. It is good as raw data.
// val = analog input of the microphone
 analogWrite(spPin, val);
Next, I tried converting the analog input of the microphone to the frequency of Arduino's Tone function and outputting the sound from the speaker. It gets a little more comfortable. Depending on the purpose, I ended up mapping the microphone input to a musical scale frequency.
// val = analog input of the microphone
 tone(spPin, val, 500);
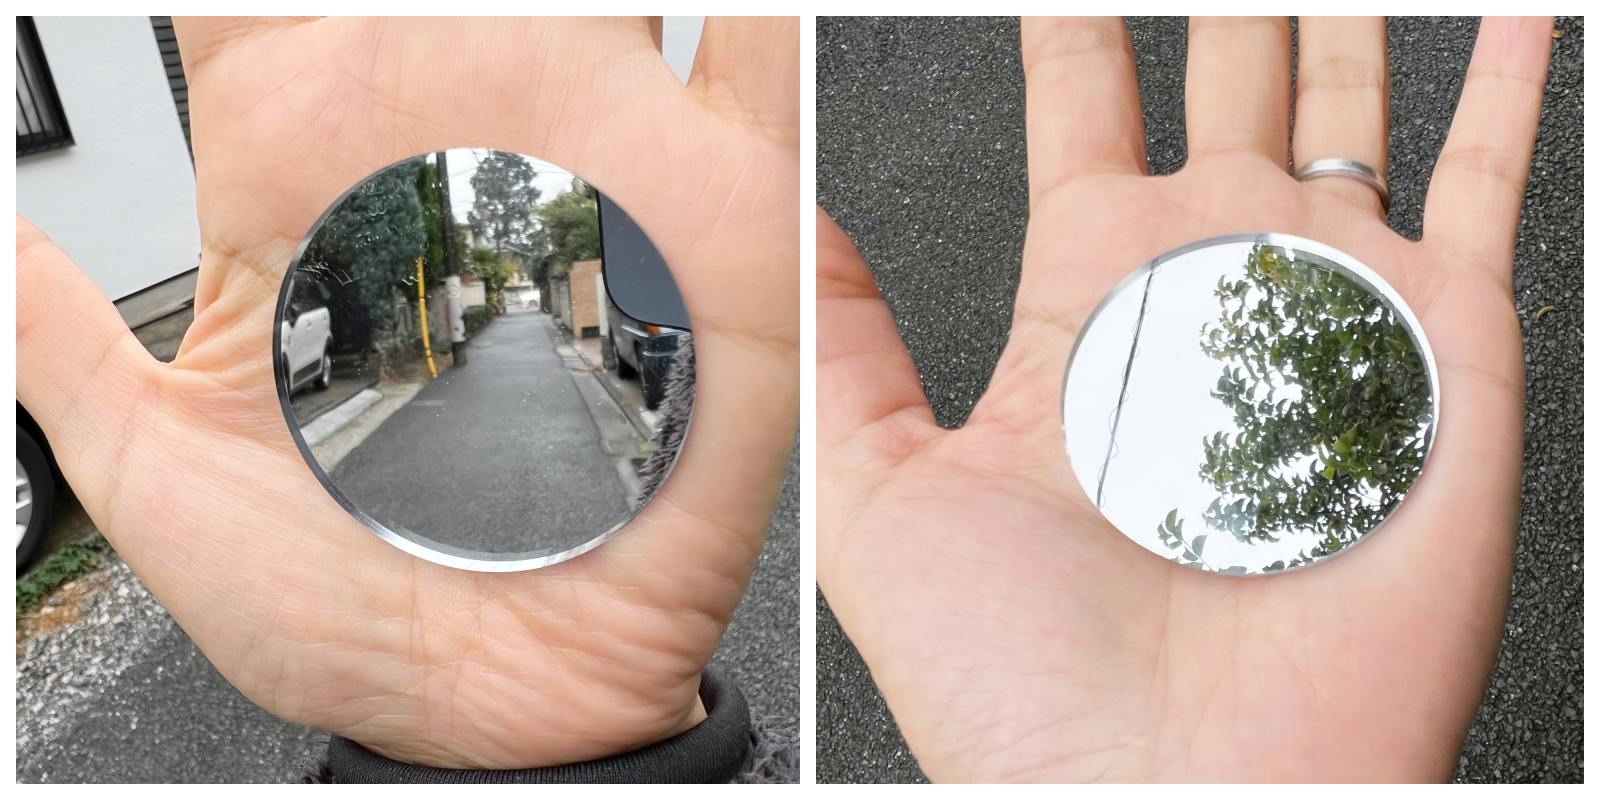
Mirror skin
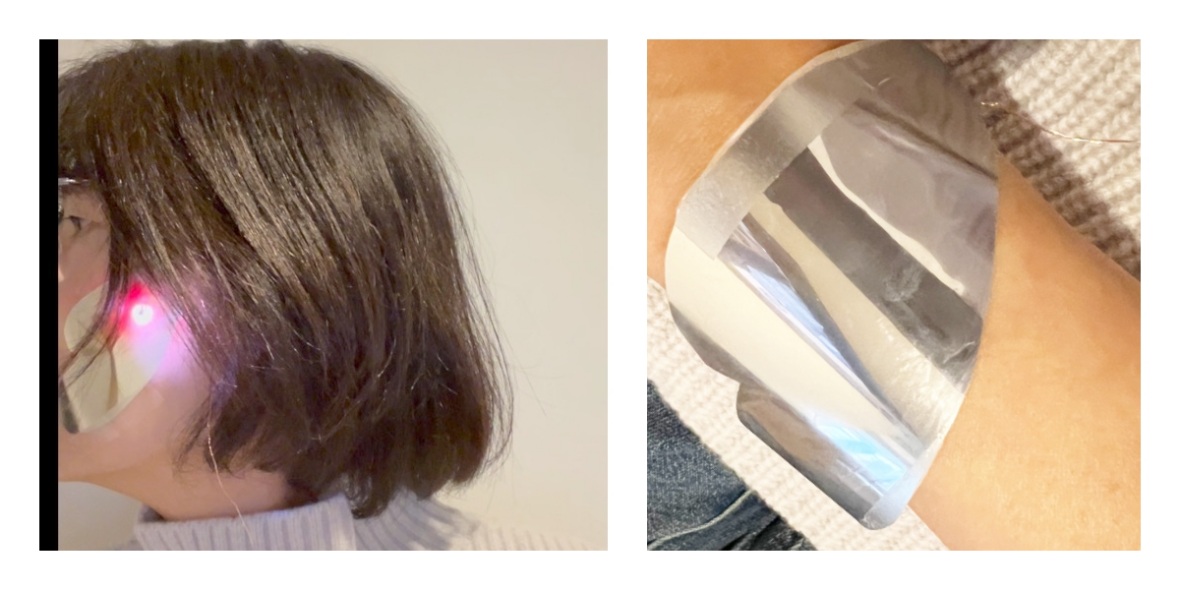
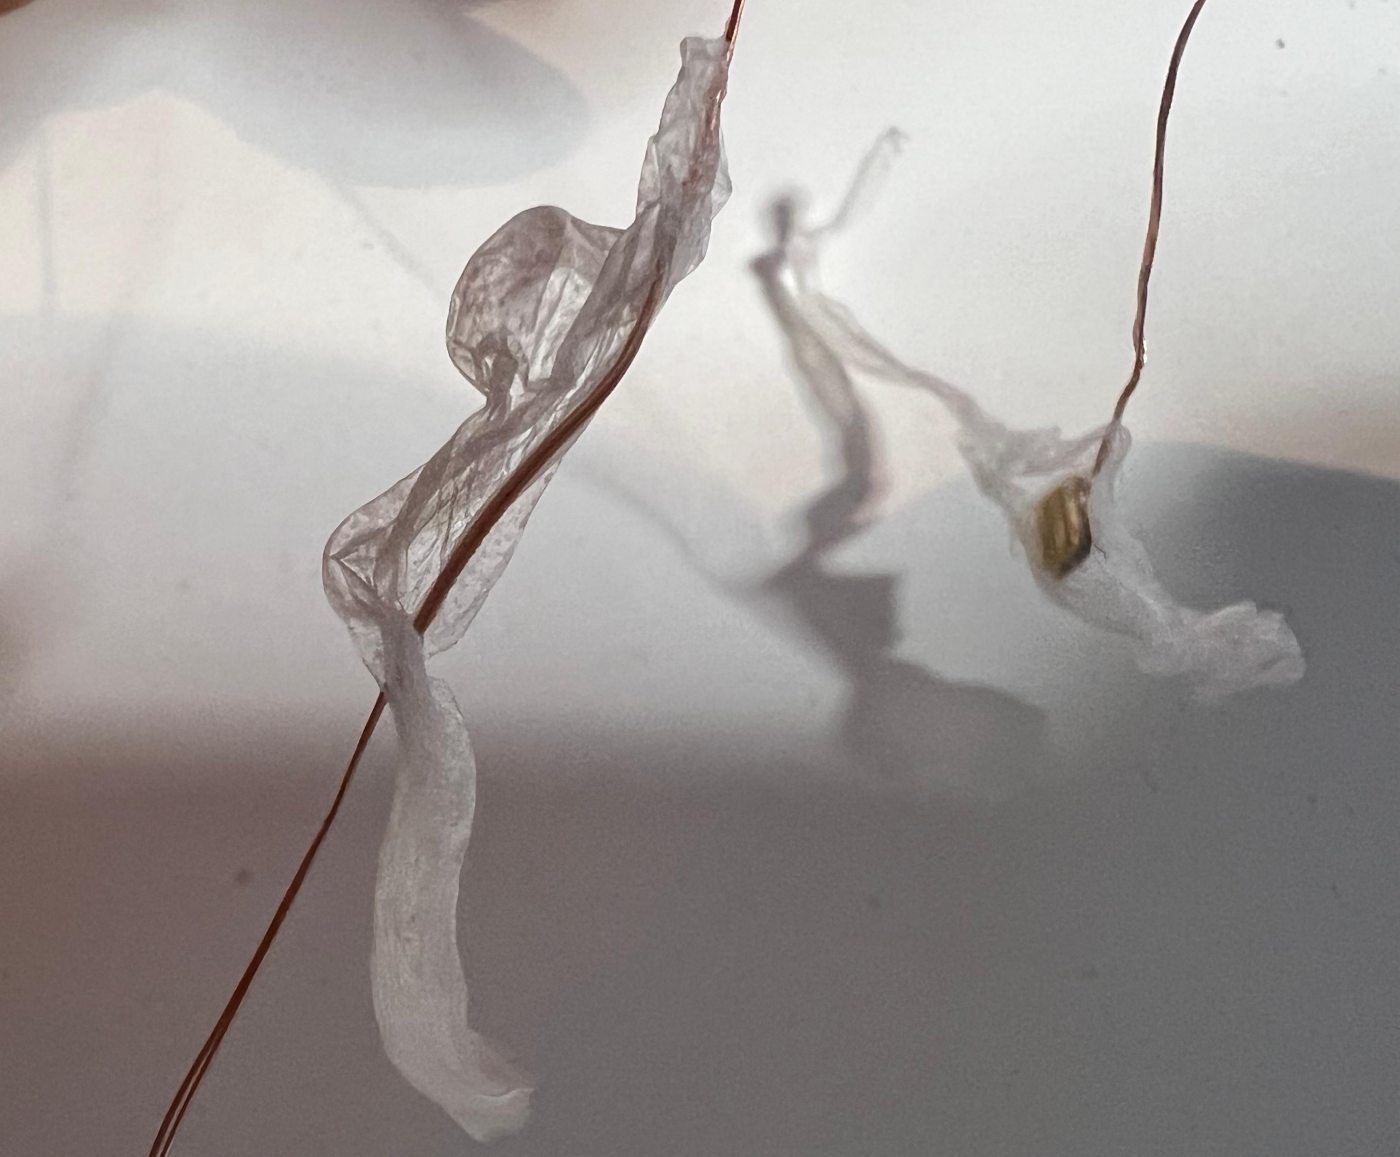
Rapid trial using a round mirror. It's like having a hole in my hand, allowing me to see scenery from different angles. When I feel down, I tend to look down, but seeing the sky in my hand might lift my mood! I tried talking to Mina by putting it on my cheek, but I found that I couldn't see her face in the mirror easily. The face has a complex 3D shape and angles, so it requires control such as sensing and position adjustment to match the opponent's direction.
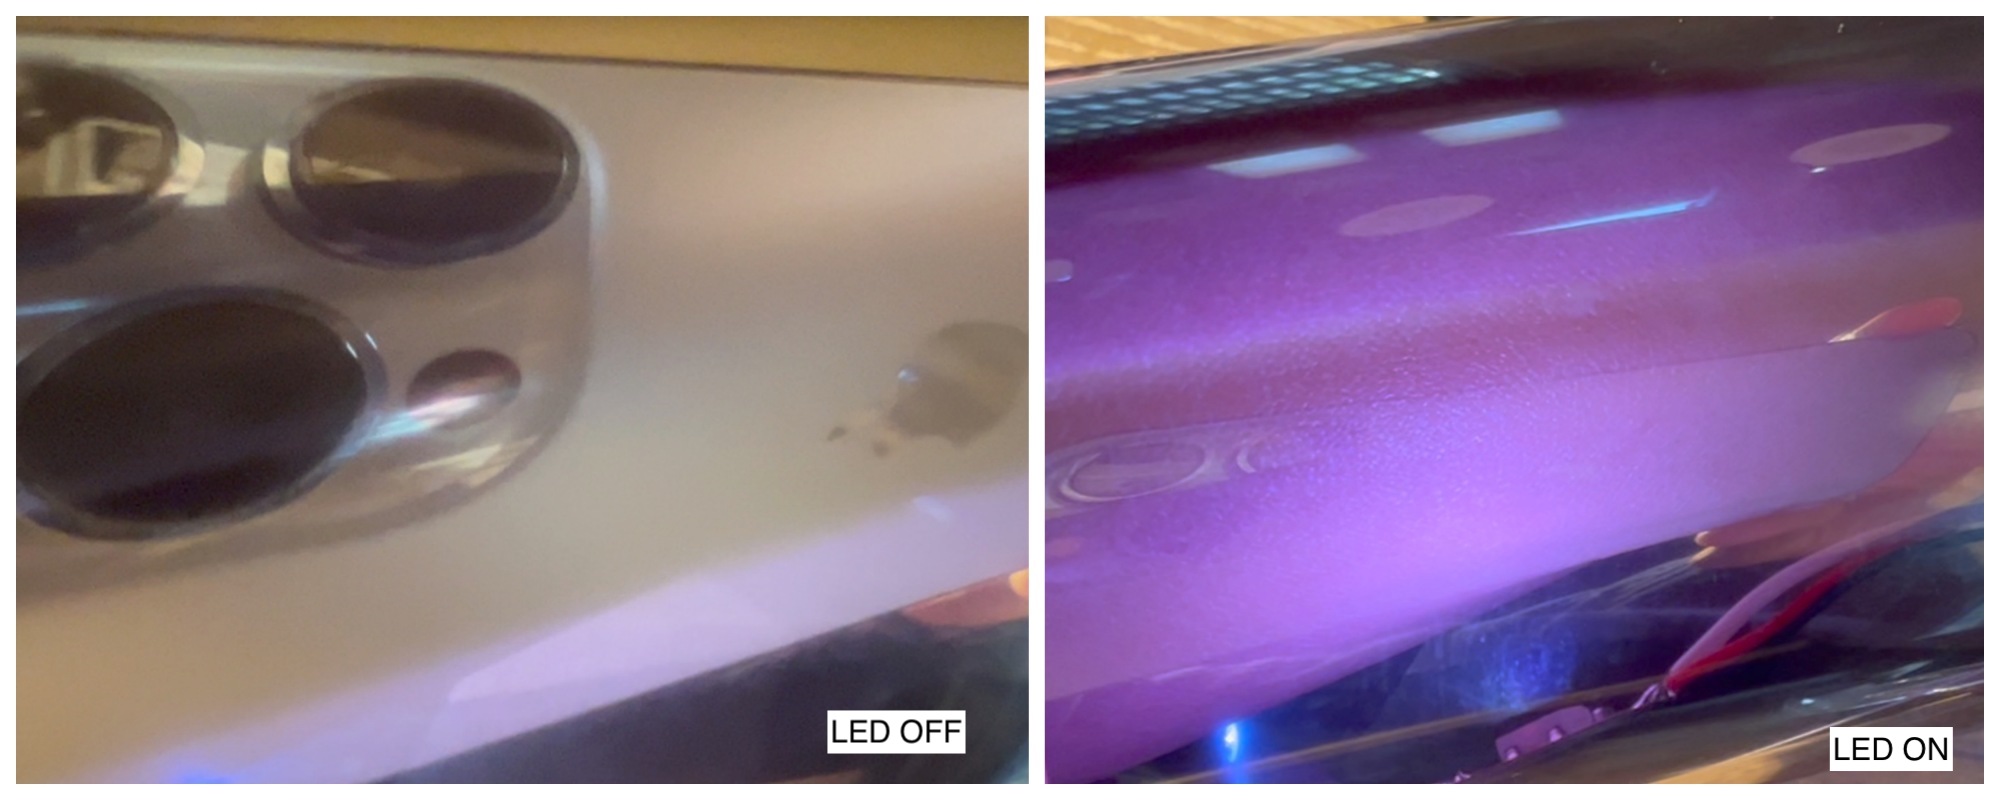
This was the first trial of the half mirror. The half mirror was wrapped around my wrist. At first you can see the iPhone taking the picture, but when the LED is turned on, the skin of wrist was visible as follows.
Touch & LED
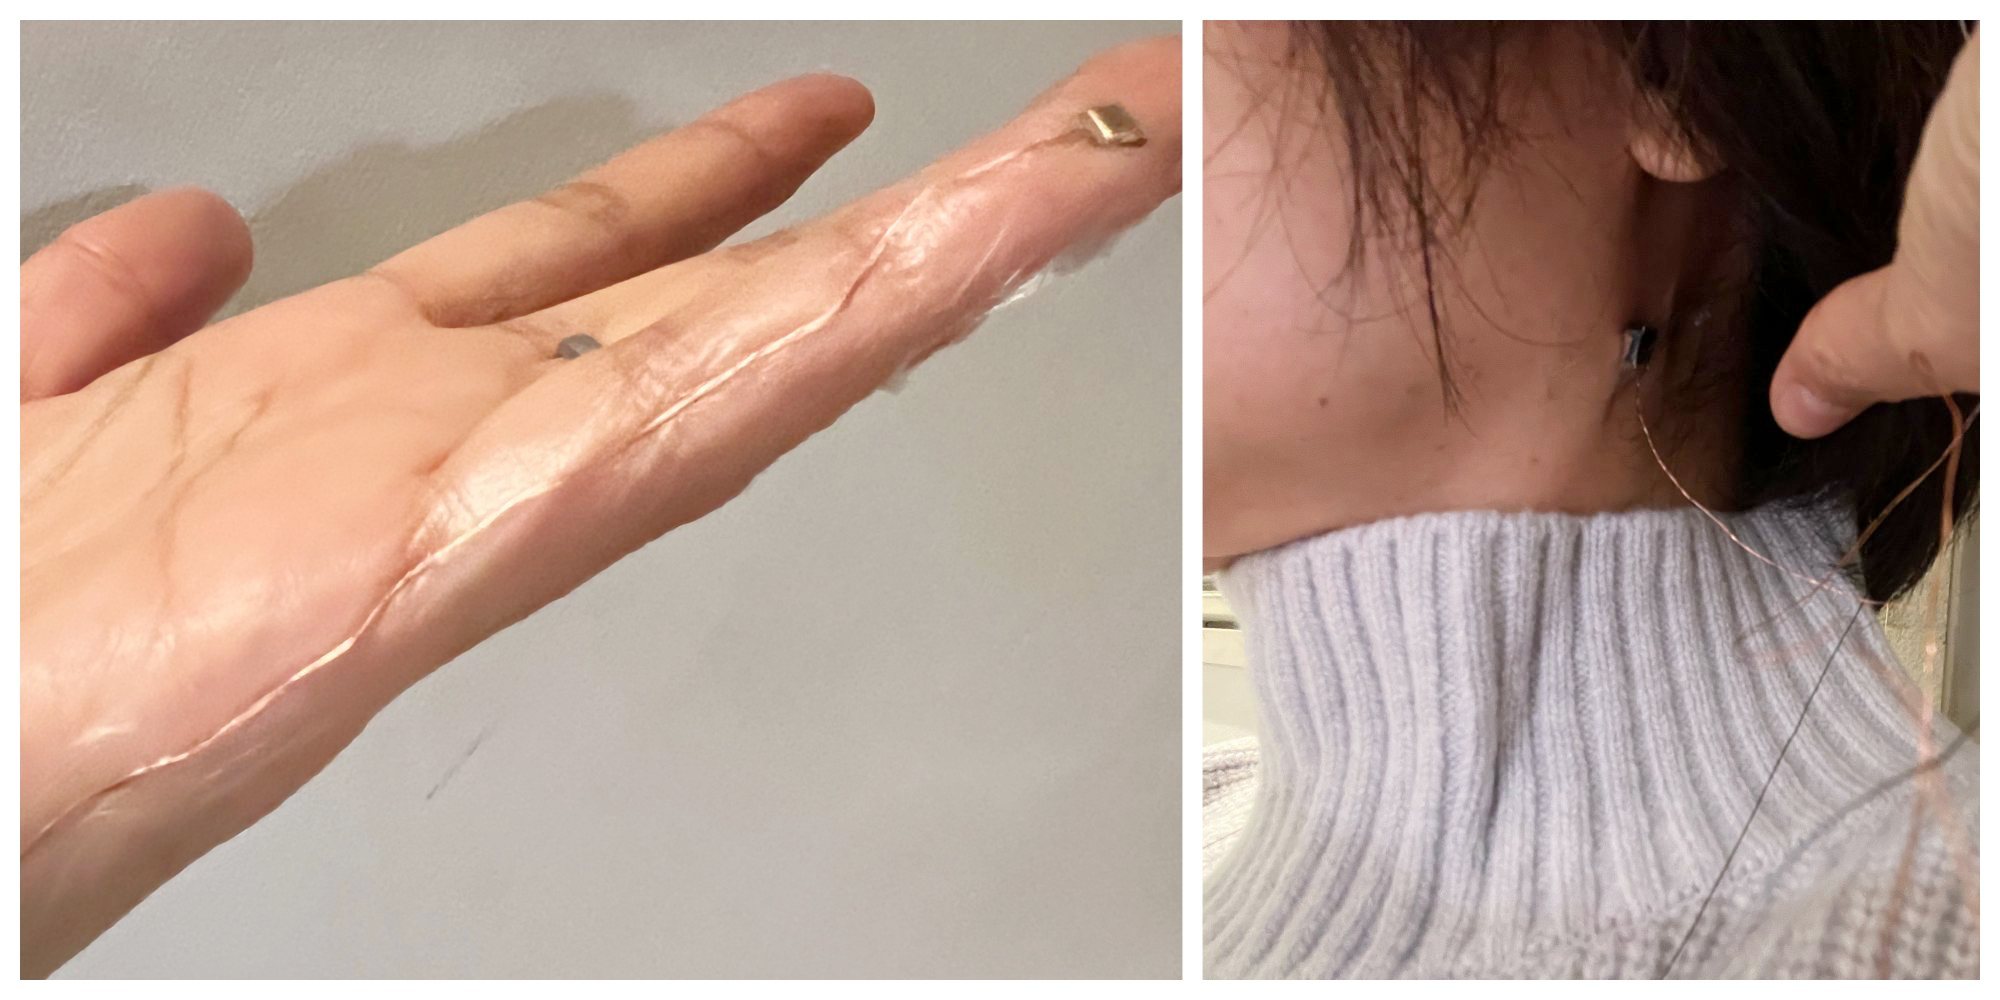
In class, there was an example of inputting by touching hair. Using this as a reference, I attempted touch input using conductive thread as hair. As I tried touch function at E-textiles week, referred the circuit.

Integration
The problem is where to place the microcontroller.
I put the circuit inside a hair clip referring to the class video.
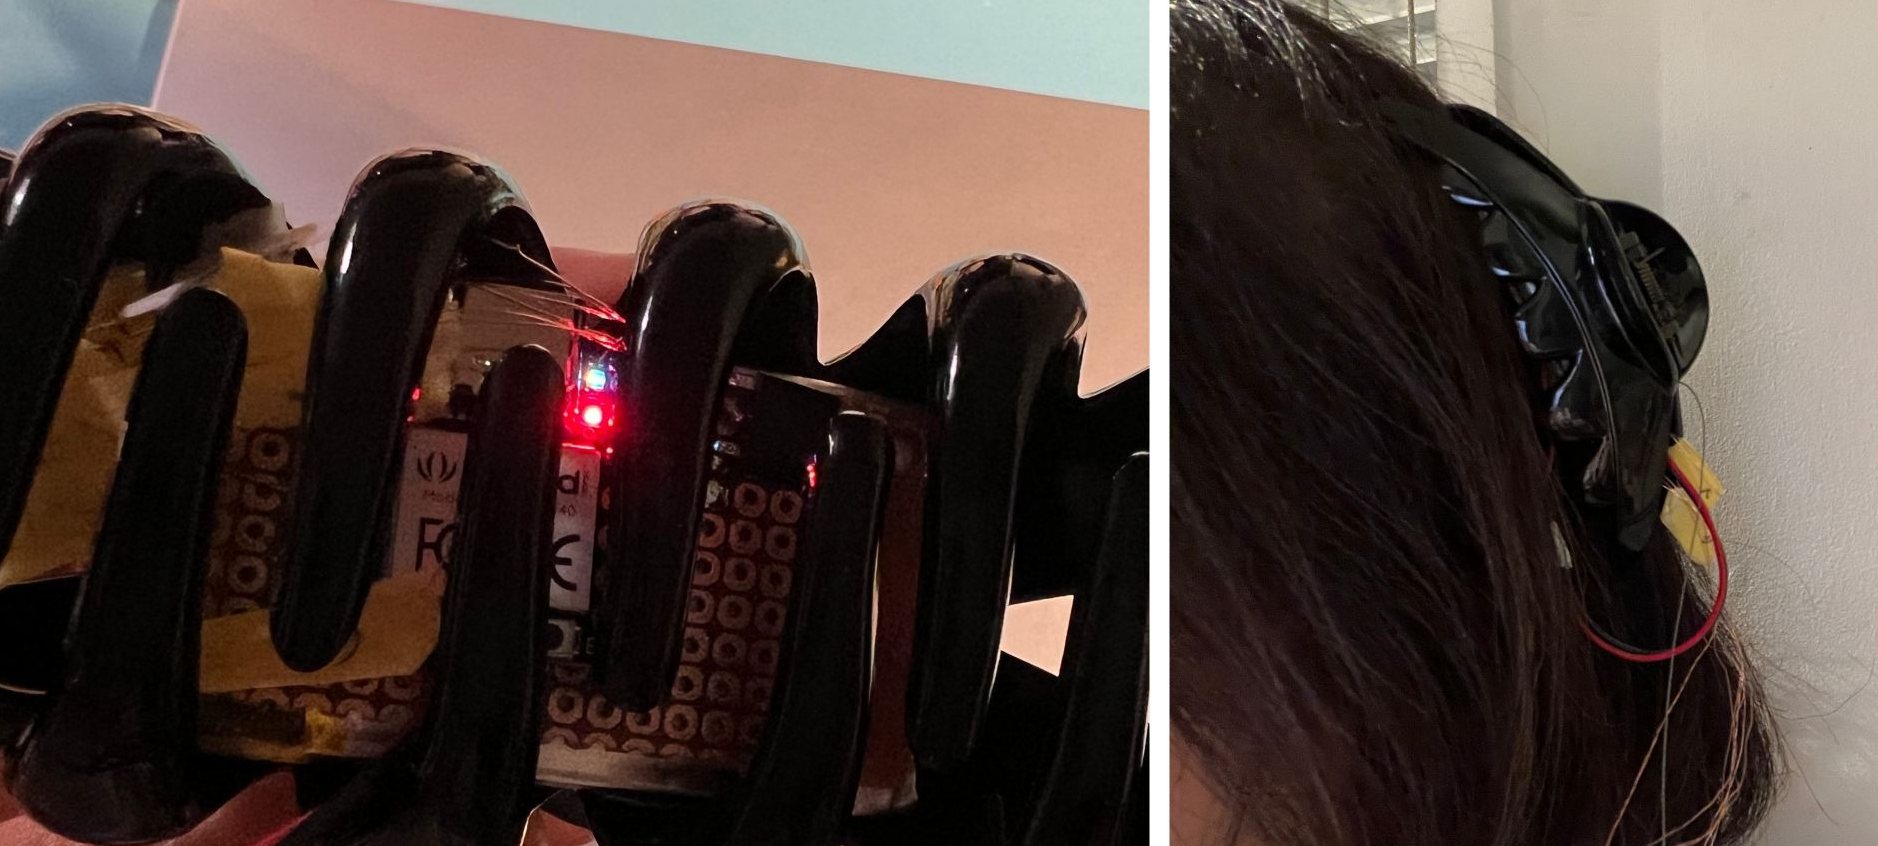 The microphone and speaker were secured with thin pharmaceutical waterproof wound tape.
 I attached an LED to a half mirror and shined the LED toward my face, but I couldn't see my skin clearly. Maybe it's too much of a point light source. I felt it was easier to see when it was attached to my wrist.
The thin tape blended into the skin and was suitable for SkinElectronics.

However, when I removed it and tried to reattach it, I encountered problems such as it getting tangled in the copper wire and not being easily removed, causing the copper wire to break.
Feel the skin of non-human


Program
Arduino Code
/**************************************************
   Week12  Skin Electronics
***************************************************/
// NeoPixel
#include <Adafruit_NeoPixel.h>
#define PIN  27       // Neopixel pin  RP2040  D1=GPIO Pin27
#define NUMPIXELS 2 // Number of NeoPixels
Adafruit_NeoPixel pixels(NUMPIXELS, PIN, NEO_GRB + NEO_KHZ800);

// Microphone
#define micPin 26 // A0 GPIOD0=Pin26
const int BufLen=10;  // buffer size
int micBuf[BufLen];
int bufIndex = 0;
int micVal=0;
int micBase=0;       //Initial value

//Speaker
#define spPin 28 // GPIO D2=Pin28
int mScale[]={131,165,196,262,330,392,523,659,784,1047}; //C#3, E#3, G#3,  ---

//Touch
int f=0;//フィルタ用変数
const int outPin = D5;   //XIAO RP2040
const int inPin = D4;  //XIAO RP2040
int onVal=200;
bool ledOn=false;

void setup() {

  //NeoPixel setup
  pixels.begin(); // INITIALIZE NeoPixel strip object (REQUIRED)
  pixels.clear(); // Set all pixel colors to 'off'

  //Mic Setup
  pinMode(spPin,OUTPUT);

  //Touch setup
  pinMode(outPin,OUTPUT);  // send pin
  pinMode(inPin,INPUT);  //receive pin

  micBase=iniMic();
  Serial.begin(9600);
}

void loop() {
  dspLed();
  chkMic();
  chkTouch();
  delay(10);
}

void dspLed(){

  if(ledOn){
    // The first NeoPixel in a strand is #0, second is 1, all the way up
    // to the count of pixels minus one.
    for (int i = 0; i < NUMPIXELS; i++) { // For each pixel...

      // pixels.Color() takes RGB values, from 0,0,0 up to 255,255,255
      pixels.setPixelColor(i, pixels.Color(255, 255, 255));
      pixels.show();   // Send the updated pixel colors to the hardware.
    }
  }else{
    pixels.clear(); // Set all pixel colors to 'off'
    pixels.show();
  }
}

int iniMic(){
   long sum=0;
   for (int i=0; i<30;i++){
    sum += micVal=analogRead(micPin);
   }
   return (int)(sum/30);
}

void chkMic(){
  micVal=analogRead(micPin);
  micBuf[bufIndex]= micVal;
  bufIndex=(bufIndex+1)%BufLen;
  int fVal=meanF();
  // Serial.print(micVal);
  // Serial.print(",");

   Serial.print(fVal);
   Serial.print(",");
   Serial.print(350);  // For stabilizing Arduino serial monitor screen
   Serial.print(",");
   Serial.println(250);  //For stabilizing Arduino serial monitor screen

   spOut(fVal);
}

int meanF(){
  long sum=0;
  for (int i=0; i<BufLen; i++){
    sum+=micBuf[i];
  }
  return (int)(sum/BufLen);
}

void spOut(int(val)){
//  tone(spPin, val, 500);  //
  //int a = map (val, 220, 350, 0,10);
  int a = map (val, micBase, 350, 0,10);

 tone(spPin, mScale[a], 500);  //
}

void chkTouch(){
  int a=0;   // Capacitance change amount

  // Output High to outPin
  digitalWrite(outPin, HIGH);
  // Count until outPin goes HIGH when finger touches
  while (digitalRead(inPin)!=HIGH){
    // count
    a++;
  }

  delay(1);
  //delay(2);

  // Output Low to outPin
  digitalWrite(outPin, LOW);

  //filter to smooth the values
  f+=(a-f)/2;
  f>onVal? ledOn=true : ledOn=false;

//Serial plotter  (Avoid automatic alignment of vertical axes)
/*  Serial.print(f);
   Serial.print(",");
  Serial.print(300);
   Serial.print(",");
  Serial.println(0);
*/
}
Findings
- The difference between Wearable and Skin Electronics was difficult. The first idea I came up with was mostly wearable. I think I have come to understand the difference through assignments.
- Unlike prototyping using a breadboard, mounting using surface mount components and copper wire was difficult. Also, placing the wire from the little finger to the head was more difficult than expected. I would also like to try wireless.
- I was interested in how my senses could be expanded by a device that assimilates to the point where I don't even realize I'm wearing it. This time I was only able to make an initial attempt. Since this is the last assignment, I wish I could have expressed it better. . . So, continue the trial:
- Feedback of microphone input to the skin (cheeks, etc.?) using vibration
- Gesture recognition with microphone input
- Half-mirror control linked to my emotions and the emotions of the other person