9. Soft robotics

Learning outcomes
- Research skills: the participant has acquired knowledge through references and Concept development
- Design skills: the participant has learnt through sketches, 2D and 3D modeling, Parametric modeling and electronic skills, simulation
- Fabrication skills: the participant is able of executing from file to production workflow, molding and casting, vinylcutting, laser cutting
- Documentation: Anyone can go through the process, understand it and reproduce it
- Final outcome: Is the project assembled, functioning and complete
- Originality: Has the design been thought through and elaborated?
Student checklist
- Document the concept, sketches, references also to artistic and scientific publications?
-
Make a soft robotic sample, develop the pattern for the Inflatable and draw a sketch of the air flow:
- build a pneumatic wrist brace (basic level) or
- build a Soft Gripper (intermediate level) or
- build and document a Pneumatic, digitally controlled system, electronics schematic, electronic control and code (advanced level)
- design your own version of an inflatable / soft robot
- Experiment with different materials, such as silicones, 3d printing, parchment paper, thermoadesive vynil, TPU fabrics, bioplastic, document your achievements and - unexpected outcomes
-
Make a small video of your inflatable/soft robot working
- Upload your digital design files (if any)
- Build the electronic circuit to control your inflatable/soft robot (extra credit)
Research
This robot that instructor Rico-san taught us has a simple shape but moves very cutely. It is made using a 3D printer that can print multiple materials at high speed while switching from one nozzle. It seems like you can make origami robots and various soft robots by printing different materials.
This was introduced in class. Depending on the pattern and the air injected into the artificial muscles, the fabric magically changes its shape.
I love this group of organisms. These are all printed at once (in an integrated form) with the exception of the motor using a powder modeling 3D printer. It has amazing organic movement with one simple DC motor.
The below is the Coffee-filled robotic gripper using jamming technology. It can be flexibly adapted to the shape of the object being grabbed. I want to try it!
References & Inspiration
Process and workflow
Inflatable @ nylon bag
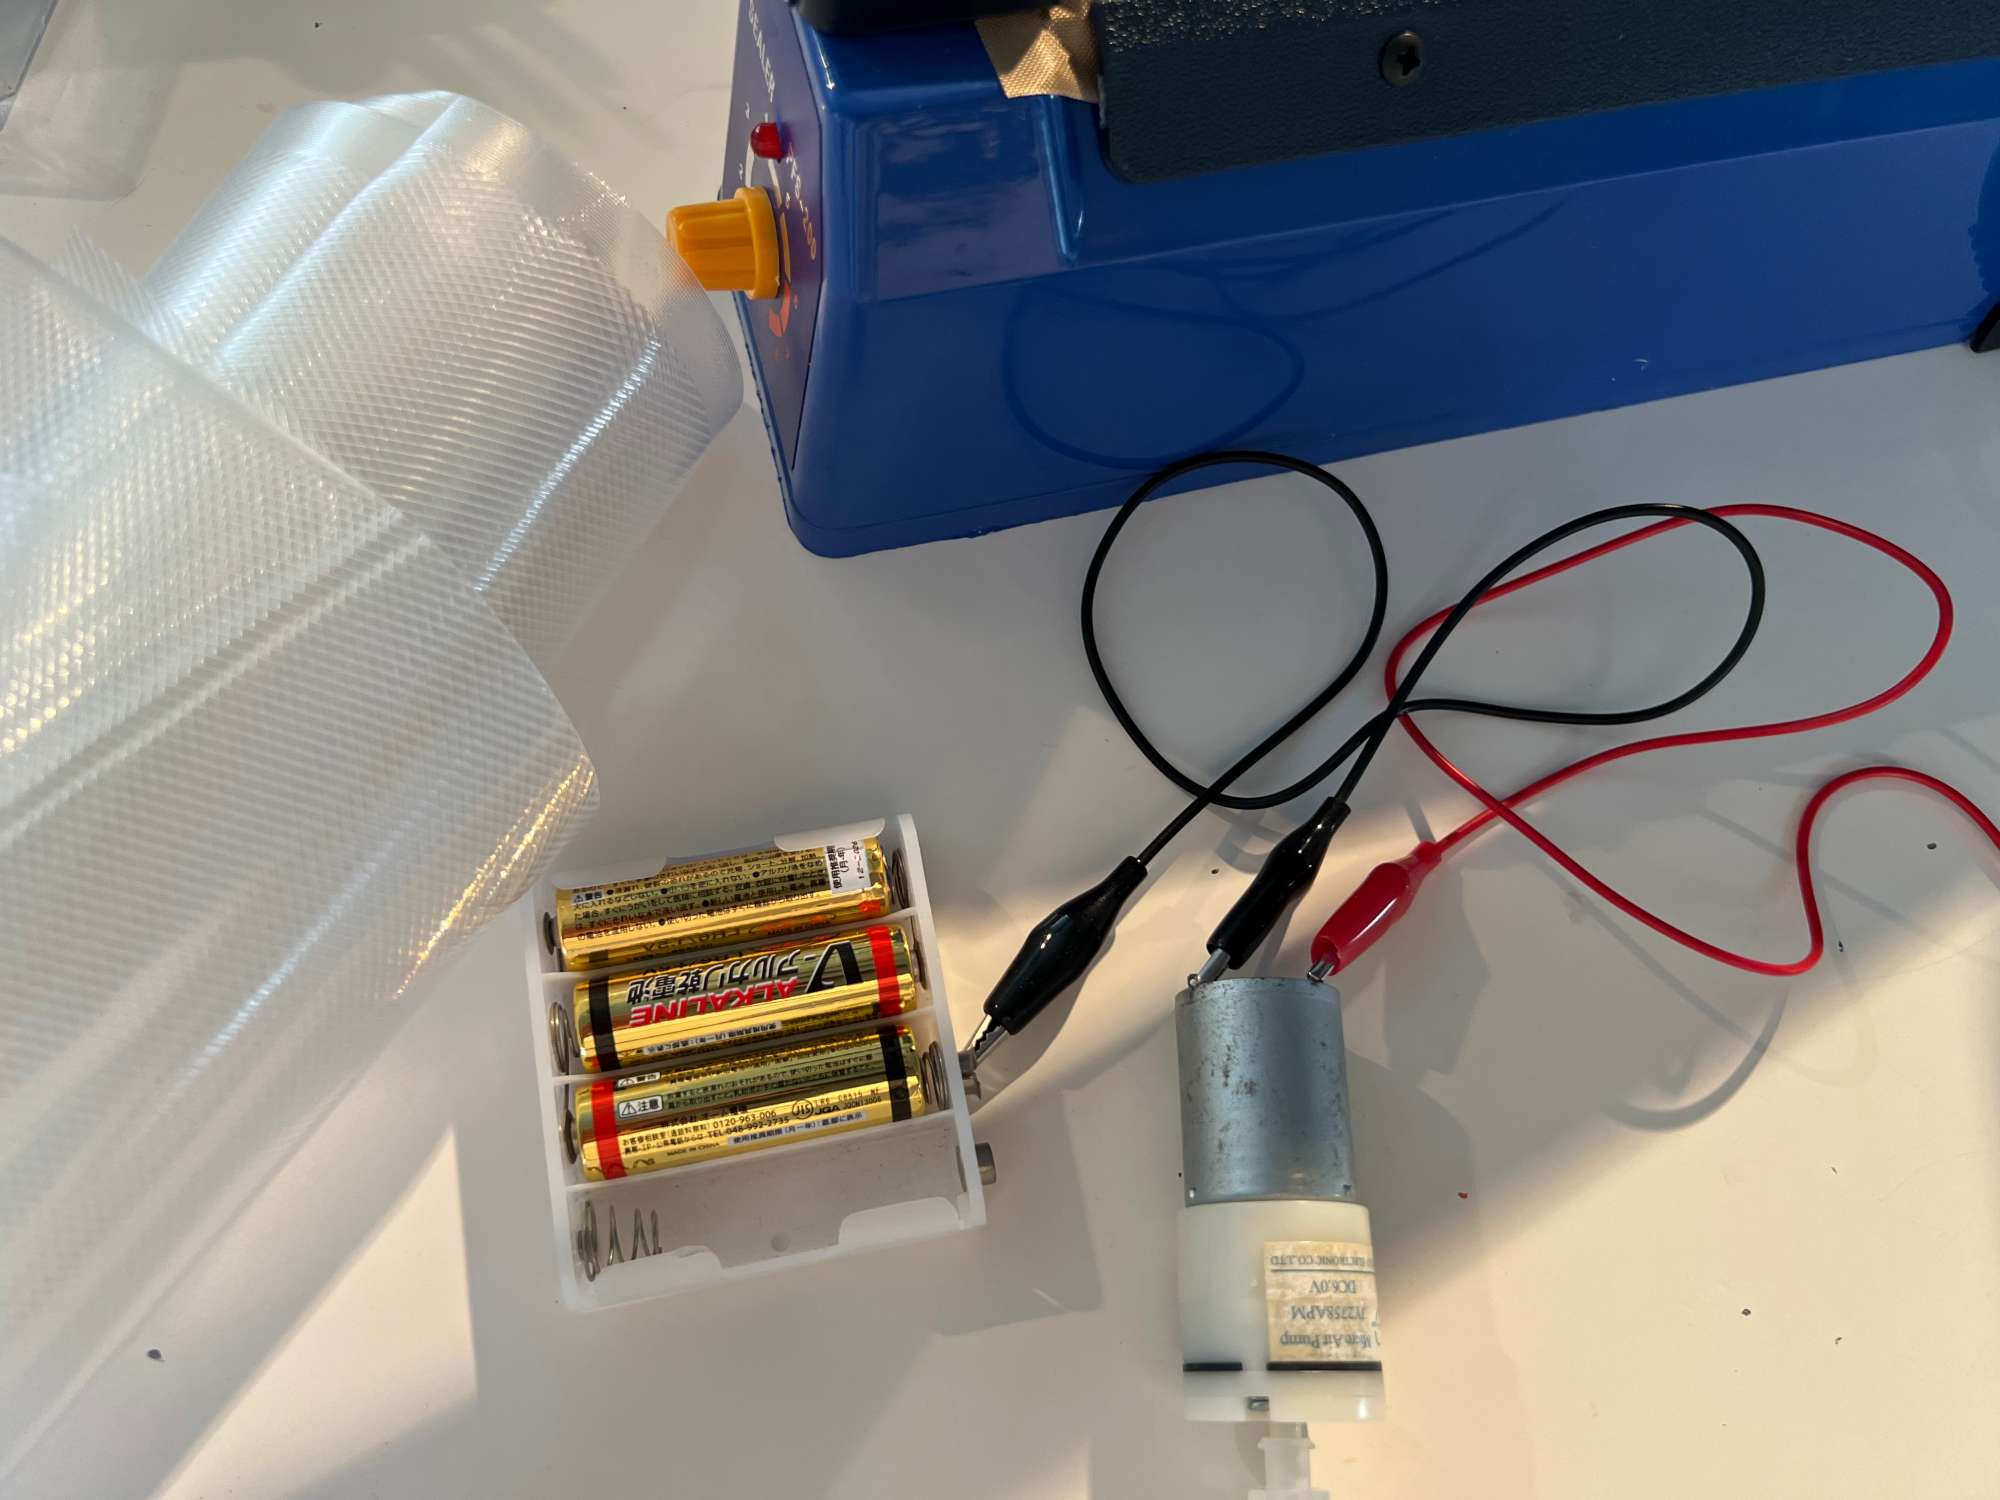
Tools
- Nylon bag for vacuum packing
- Sealer
- Paper
- Pump + Batteries
STEP
1. Design and print a pattern
2. Use a marker to trace the pattern onto the nylon bag.
3. Seal along the pattern
4. Place paper between the sealer and the nylon bag to prevent the air passages from being sealed.
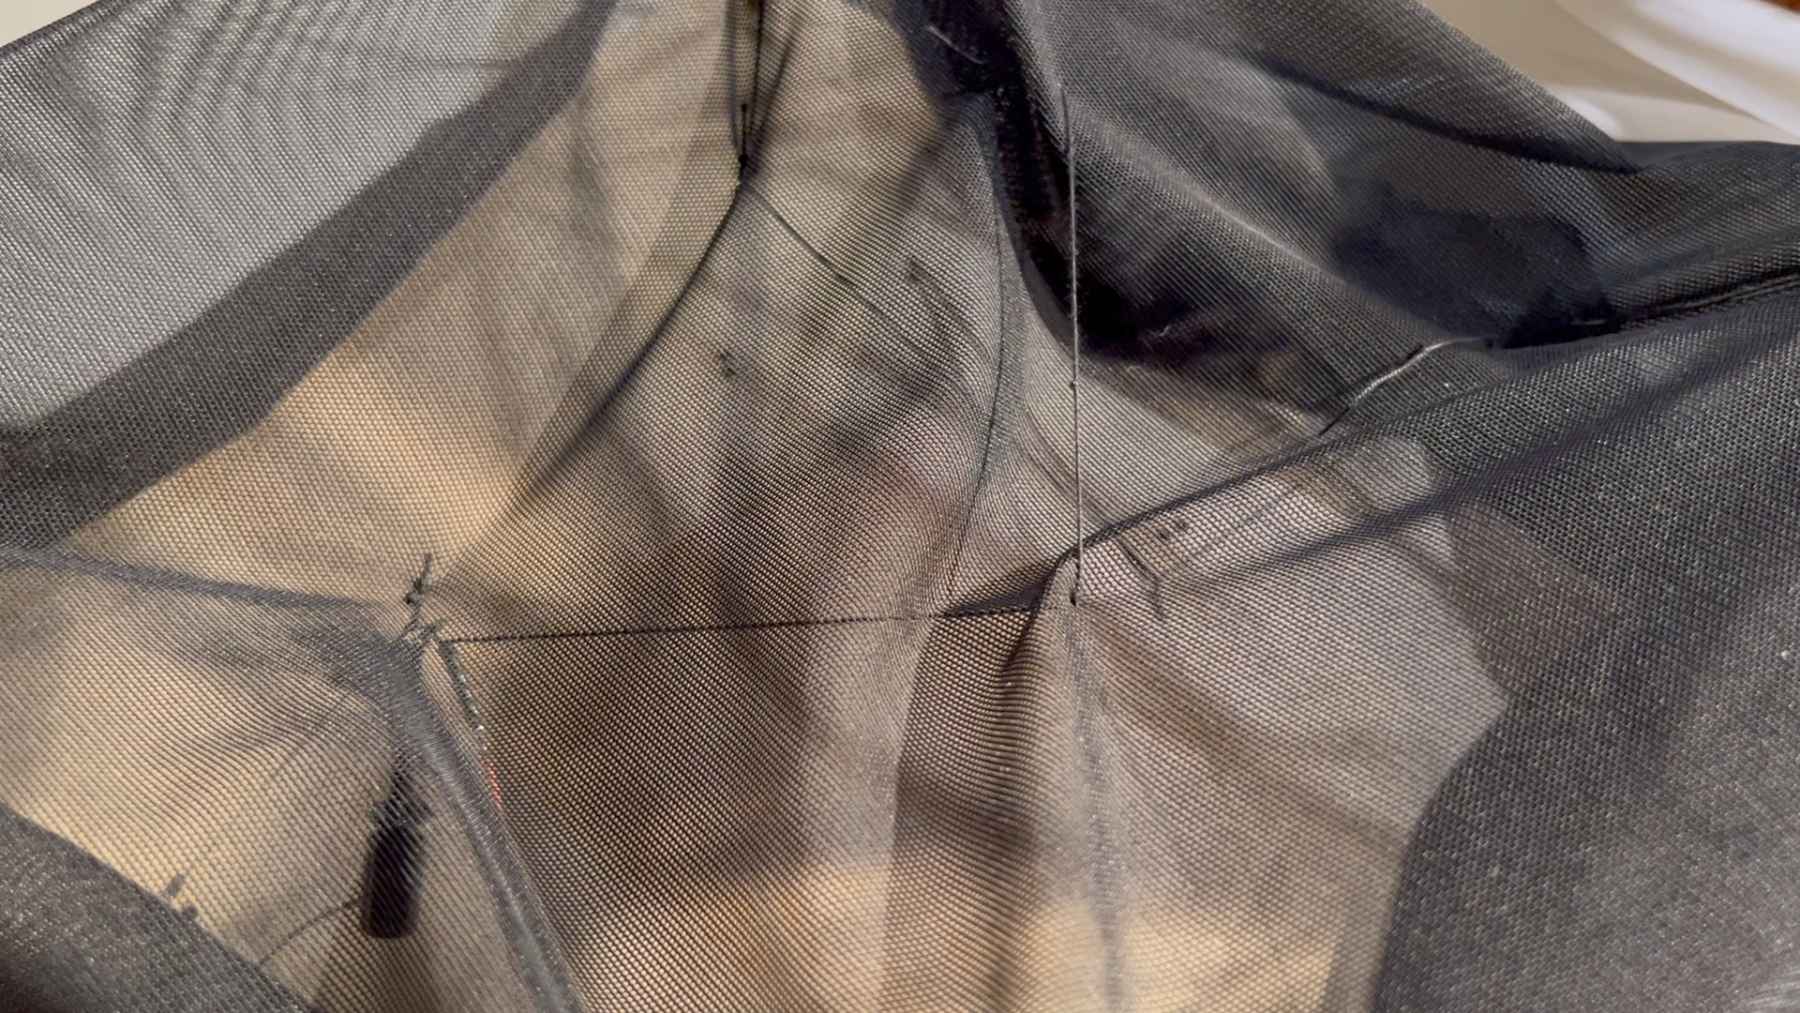
Diagonal Pattern
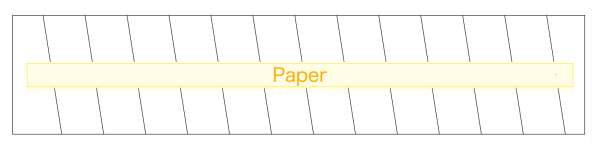
The air flow is as follows.


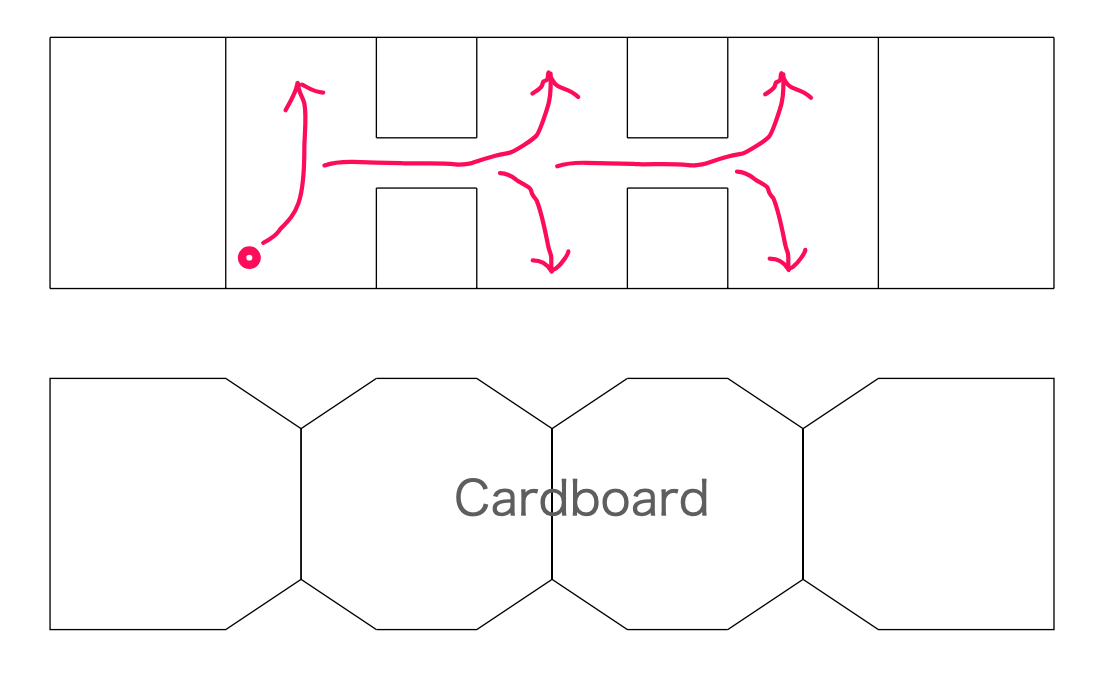
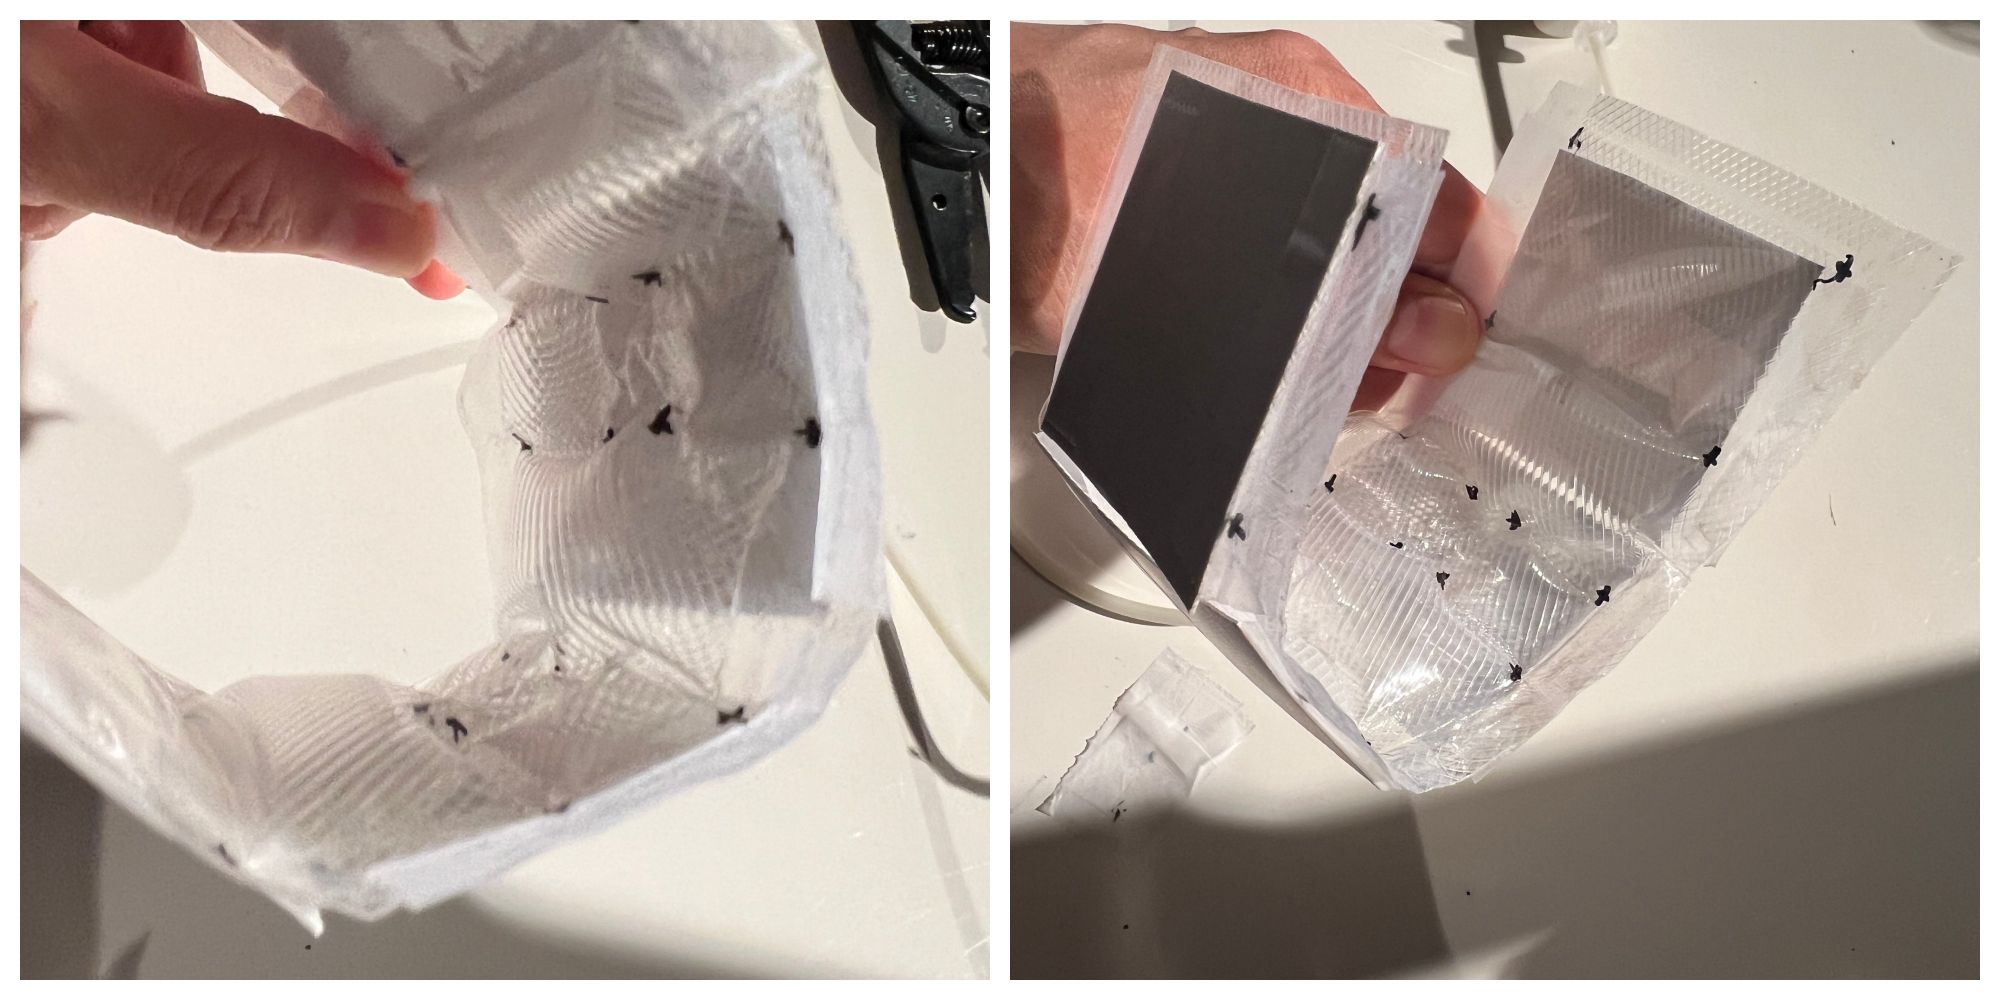
Paper and Square Pattern
Attach a piece of cardboard over the sealed nylon bag. It bends like this because the inflation on one side is restricted.
Inflatable @ Silicon
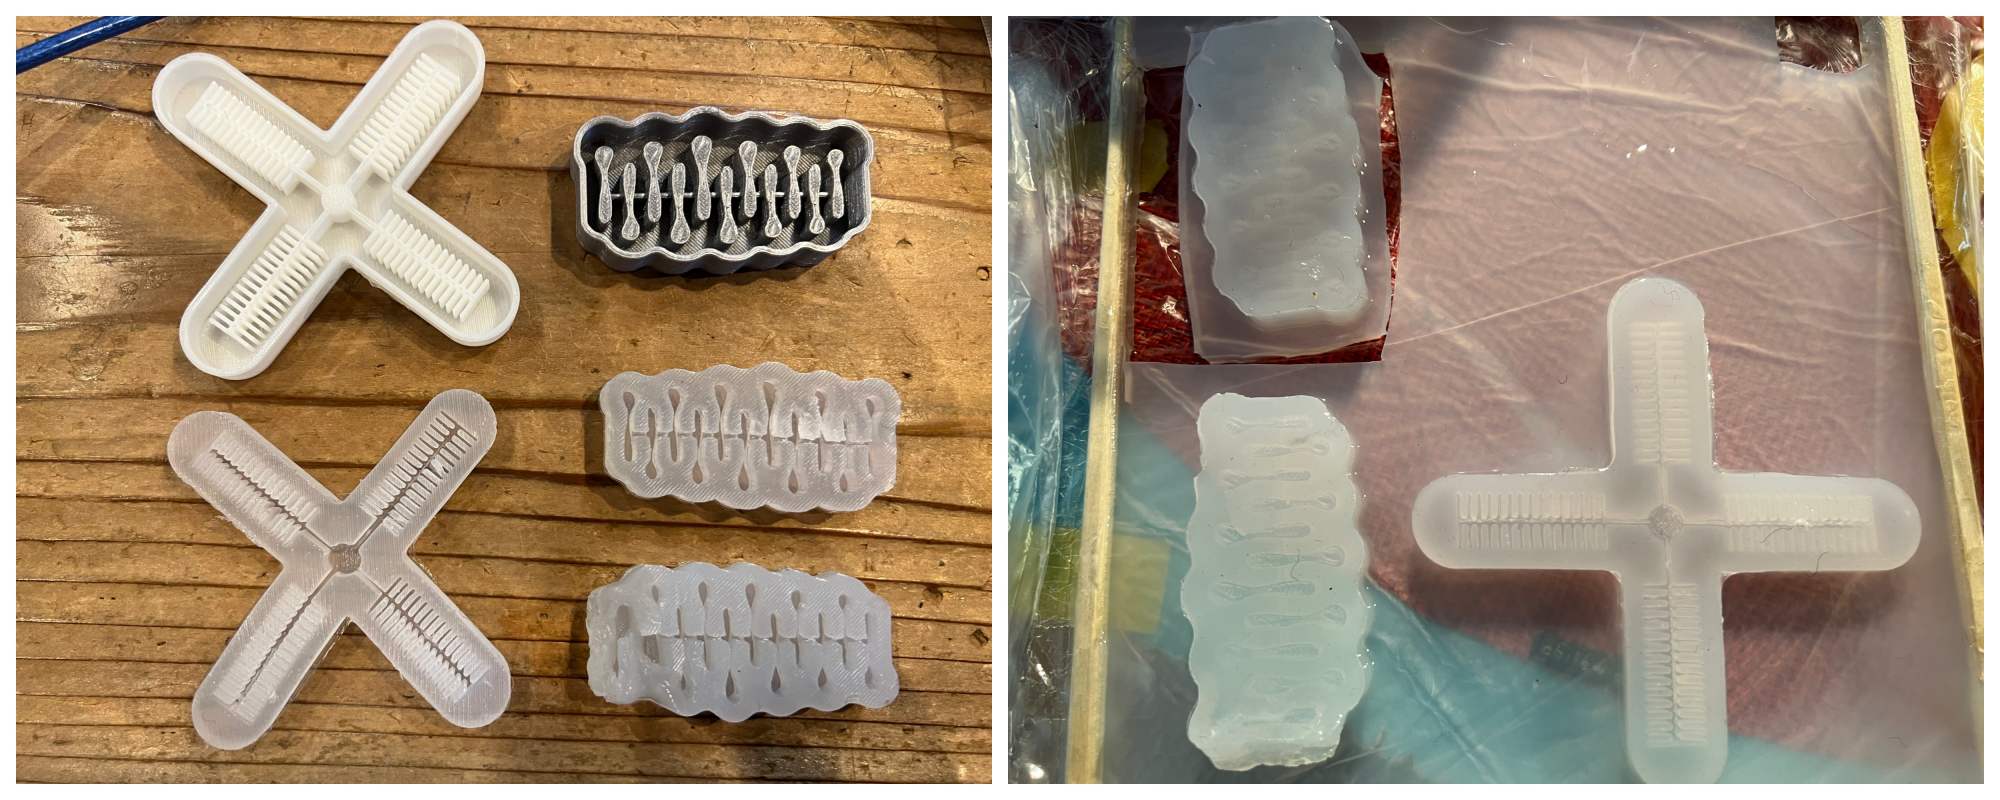
 I referred to the Fabacademy Adrian's work and printed the wendy mold. And also I used the gripper mold I made at Fabacademy to try another approach. Last time, I used cloth on one side to create different harnesses, but this time I'll try using silicone on both sides.
Tools
- Silicon: Ecoflex 00-30
- 3D Printer : Prusa
- cup, gloves, stir stick, Scale
Step
- Prepare the mold and silicone for the sheet used for sealing.
- Measure equal amounts of Ecoflex liquid A and liquid B.
- Mix them together and slowly stir with a stick.
- Pour the silicone into the mold and sheet frame. Tap the mold to remove air bubbles.
- Leave it for 4 hours. It hardens better in a warm place.
- Remove from mold.
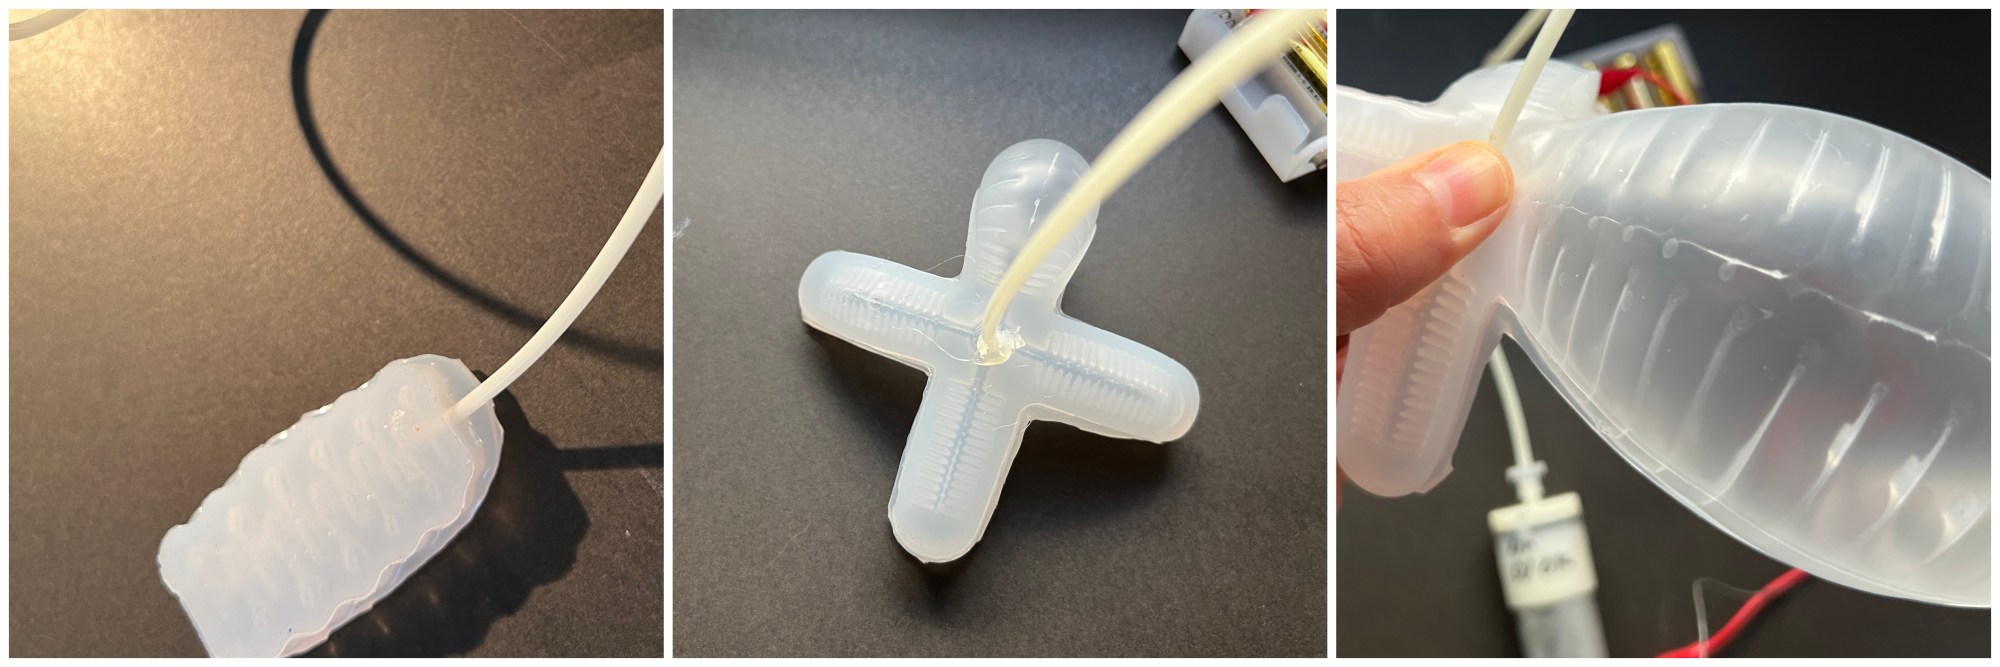
- Mix EcpflexA/B to make a seal. Place the piece removed from the mold on the sheet and apply silicone to the border.
- Leave it for 4 hours. (Please check the hardening time as it depends on the environment)
- Pump air into it.

Artificial Muscle
Fishing Line
I tried making artificial muscles using fishing line.

Tools
- Fishing Line: Diameter=0.9mm
- Clip
- Mini router
- stainless steel mesh
- Hot plate
- Weight : 500ml pet bottle s 2
STEP
- Tie a clip to both ends of 50cm of fishing line.
- Extend one end of the clip and insert it into the mini router.
- Attach the unbent end of the clip to an S-hook, etc.
- Turn on the router and rotate it while keeping it taut. Once the coil begins to form, move closer to the S-hook while maintaining tension. This is difficult and can cause cuts and tangles.
- When the coil is finished, stop the router and hold the coil with your hand to prevent it from returning.
- Clip it to the steel net while maintaining the tension.
- Place on hot plate at 170 degrees for 30 minutes
This is called Annealing and alter the structure of the nylon to keep it's spring. - Cool it down.
 Result of the muscles. The two above are made from fishing line with a diameter of 0.9mm and work as shown in the video below. I made the bottom two with thinner diameter ones as a trial, but they sometimes break or don't stretch, so I need to make adjustments.

There were MANY failures during curling(left) and moving(right).

Movement evaluation
A 50cm fishing line became about 10cm long by coiling it. When I hung 1 kg water of plastic bottles, the artificial muscle stretched. When heated with a heat gun, it shrunk by about 3 cm as shown in the video.
SMA
Tools
- SMA BioMetal
- Arduino UNO
- Arduino IDE
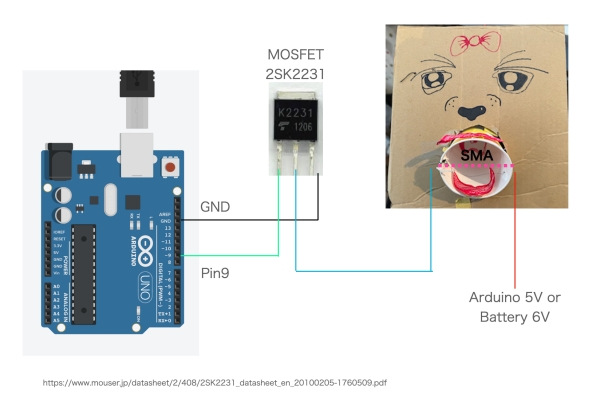
- MOSFET, Breadboard,
- Fabric
Face
Mina and I decided to play with the SMA while we waited for the silicone to harden. It comes in coils and is soft and easy to unroll at room temperature. When an electric current is passed through it, it becomes hard, and a strong force causes it to shrink back to its original length. Easy to control with PWM. I like how it moves organically without any sound.
Circuit
Code
/**********************************
 *  SoftRobotics  Face
 **********************************/

const int pin1 = 9;
int maxVal=255;

void setup() {
}

void loop() {
   analogWrite(pin1, maxVal);
   delay(random(100,1000));
   analogWrite(pin1 , 0);
   delay(random(500,5000));

}
Fabric
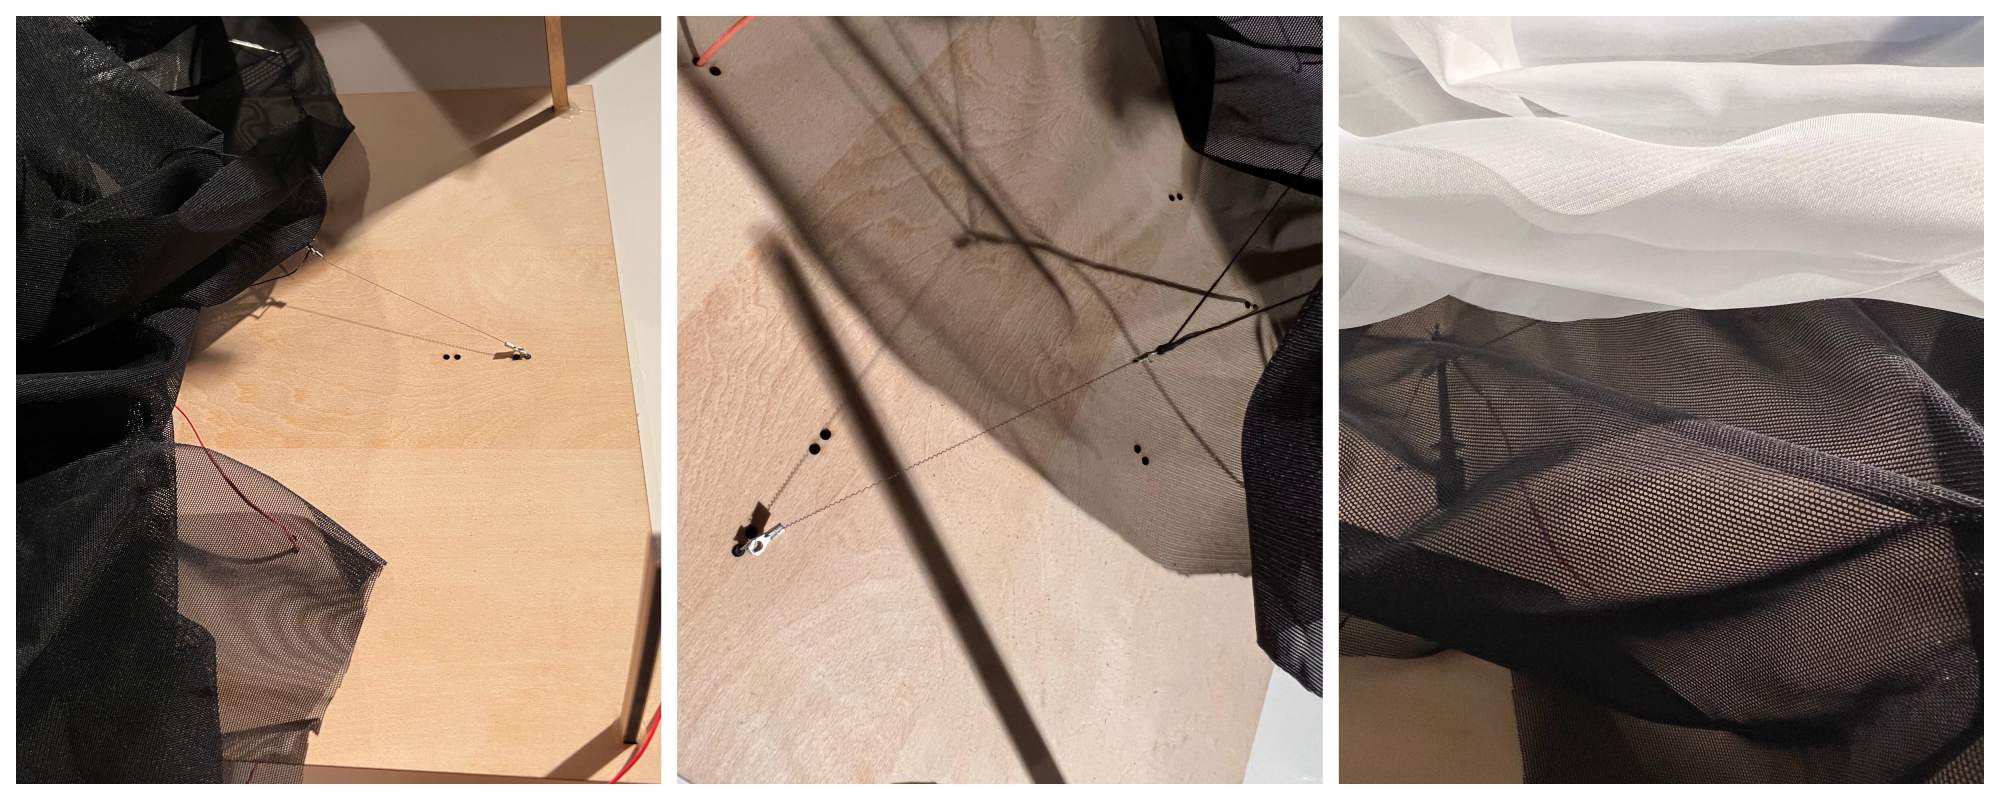
I tried another expression using Fabric x SMA. Its structure was to erect pillars on boards, cover them with cloth, and then stretch SMA between the boards and the cloth. This time I used two SMAs. In order to be able to move as many places as possible, I attached multiple threads to the end of the SMA and tie them to the cloth so that one SMA can move many places. This black cloth is stretchy. I then placed a white cloth over it to convey the expansion and contraction.

Code This is almost the same as the Face above, but with two SMAs. One side of the SMA was connected to the output of the MOSFET, and the other side was connected to the 6V battery.
/**********************************
 *  SoftRobotics  Face
 **********************************/

const int pin1 = 9;
const int pin2 = 10;

int maxVal=255;

void setup() {
}

void loop() {
   analogWrite(pin1, maxVal);
   delay(random(300,2000));
   analogWrite(pin2, 0);
   delay(random(300,2000));

   analogWrite(pin1 , 0);
   delay(random(500,5000));
   analogWrite(pin2 ,maxVal);
   delay(random(500,5000));

}
Fabrication files
- Inflate pattern
- Silicon mold1, mold2
- SMA Face Arduino code1
- SMA Fabric Arduino code2