6. BioFabricating Materials
Crafted materials
This week's assignment was really difficult to complete in an organized way. My work week was really busy and i only had one day where i could be at the lab. This meant i needed to get organized enough that i could just arrive at the lab and execute the recipes. But i didn't know which ingredients were available to me. So i decided to gather a lot of different recipes and to decide which one to make once i got to the lab and had a good visual on the ingredients.
Tools
- Class lecture
- Pot
- Stove
- spoon
- blender
- Scale or measuring Tool
- Molds, textiles, textures
Custom molds
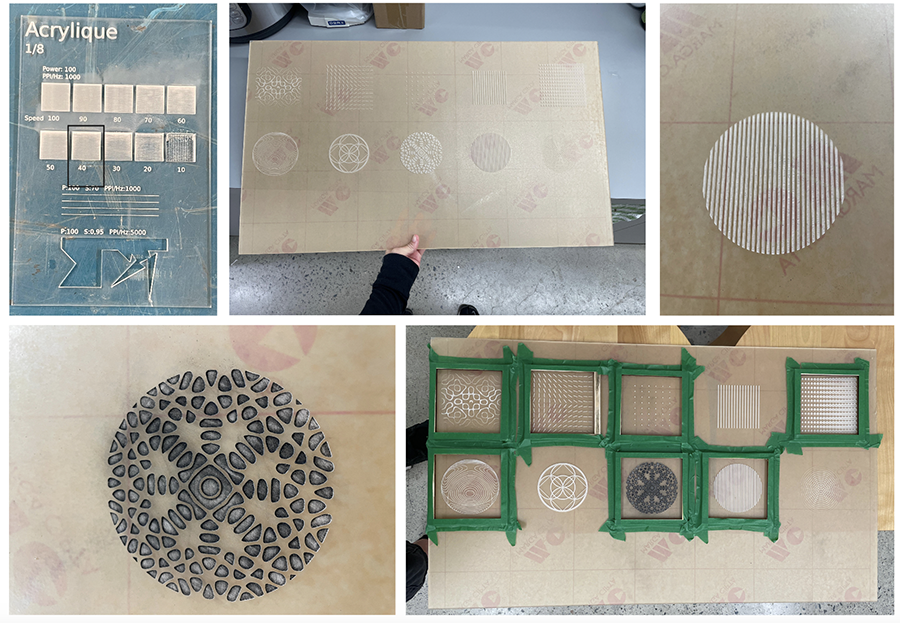
I knew I wanted to try some kind of texture on my material so I started out by laser etching an acrylic plexiglass sheet with some artwork I had.
Here are the laser settings:
Trotec Speedy 300
Material: Cast acrylic plexiglass (etching)

Power: 100
Speed: 40
PPI/HZ: 1000
Passes: 1
Air assist: On
Z-offset: Manual
RICE STARCH RECIPE ATTEMPT
There was rice starch at the lab, but i didn't have a recipe for this. However, I did have a corn starch recipe so I decided to follow this one, and switch out the corn starch for rice starch.
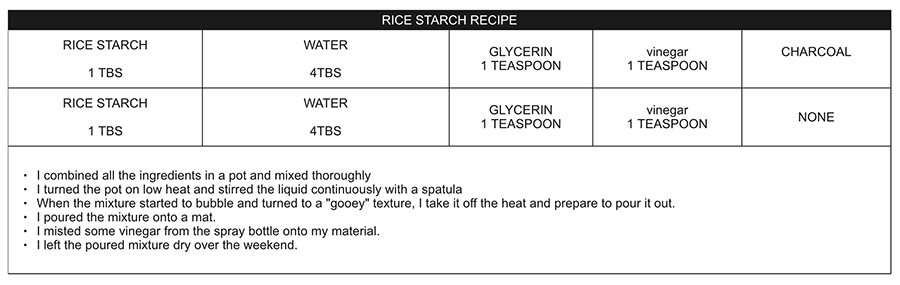
As I was gathering the ingredients, I open the rice starch pouch and realised it was not starch, but rice. This meant i had to go through the additional steps of boiling the rice with water and making the starch. I was stressed and pressed for time and couldn't find a clear recipe for this process online. I decided to just keep going, try something and hopefully i will figure it out.

Then I tried to follow the corn starch recipe with the starch i harvested from the rice. As you can imagine, it was not a success. It did not solidify and became more like a sticky jelly. I think it might be because the starch recipe ir for powdered starch and i was using a hydrated starch mix.
ALGINATE RECIPE ATTEMPT
In parallel to this rice starch mess, I was also attempting an alginate recipe I found here.
Here's an overview of this recipe:
 I slightly modified the recipe from the original and used vinegar instead of sodium chloride because i heard vinegar worked better.
Here i am measuring and combining my ingredients in a pot.
 The recipe didn't need any heating or boiling, it only called for mixing the ingredients with a hand mixer or blender, and letting the mixture sit for an hour or so to remove the air bubbles.
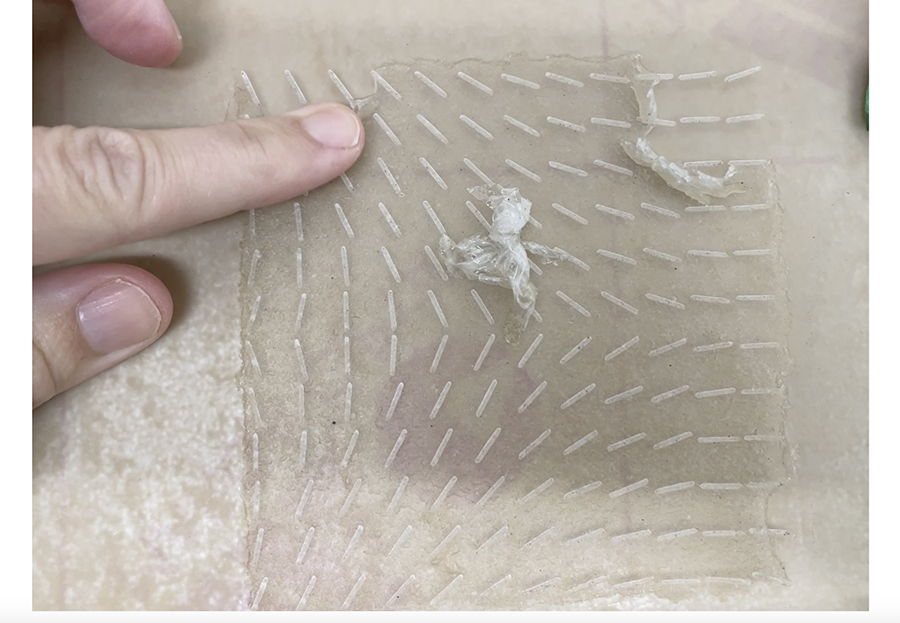
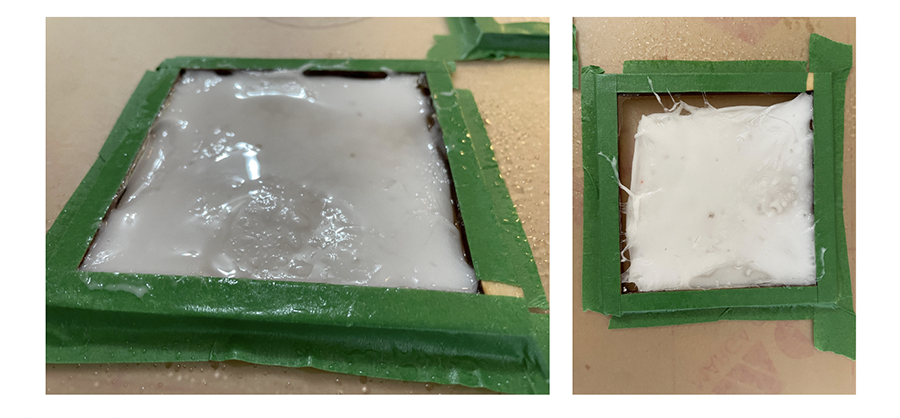
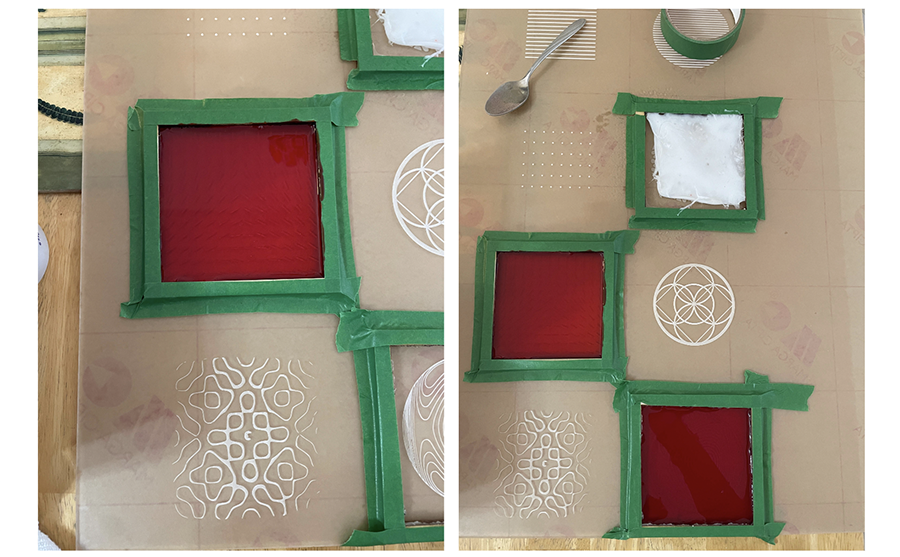
After letting it sit for an hour, I poured half of the mixture onto a baking tray, mixed with charcoal powder.
And the other half, I poured onto my textured mold. I sprayed both all of the mixture with vinegar.

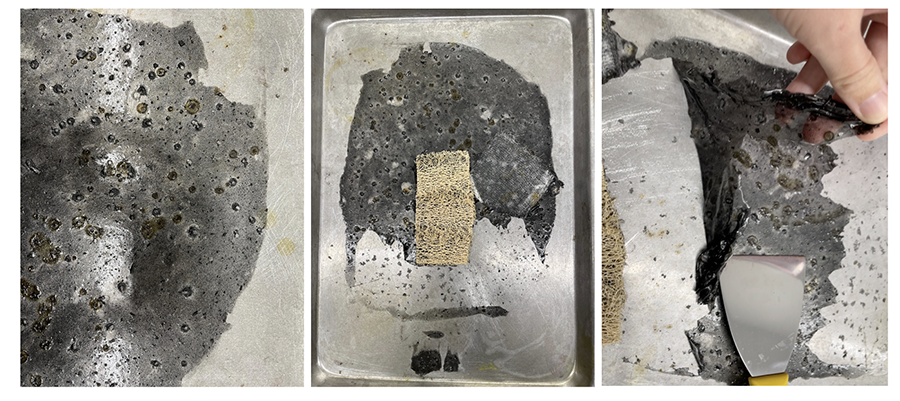
I let it dry over the weekend and came back to the lab monday morning to find the following results:

The aesthetic is really beautiful but it is really fragile, thin and sticky. I don't think it ever solidified. So I think I made a mistake somewhere along the way, probably using the vinegar, which was not part of the initial recipe. Thinking back, i should have also tried a sodium chloride mixture, so that i could compare results, but i din't think of it.
ALGINATE RECIPE RE-DO
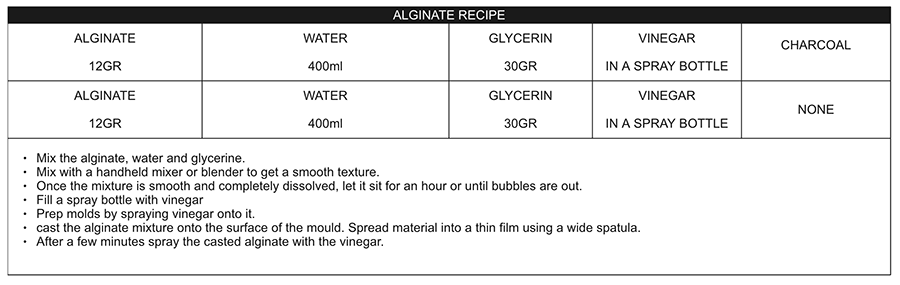
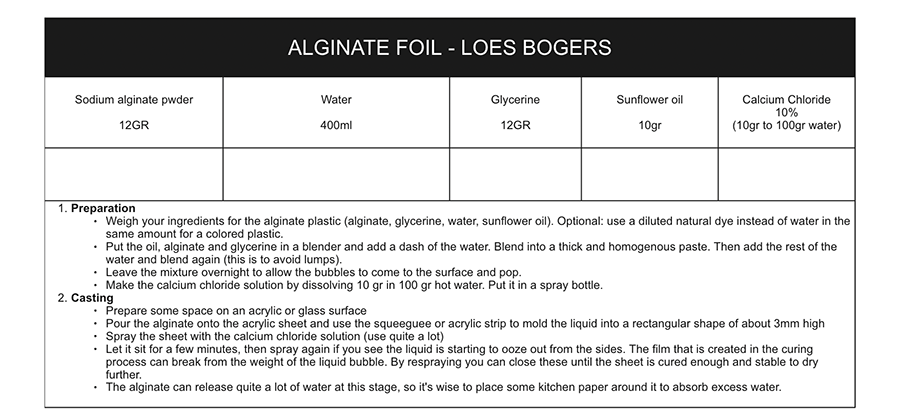
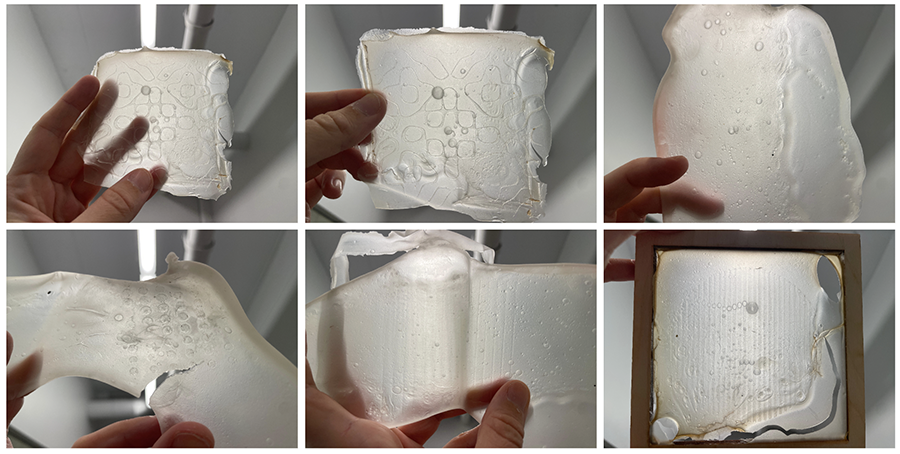
I decided to take home some of the lab's equipment so that i could redo some recipes in my own kitchen, at my pace and with a better ability to focus. This time i decided to try Loes Bogers alginate bio foil recipe, changing the ratio but following the recipe word for word.
Here is the recipe:
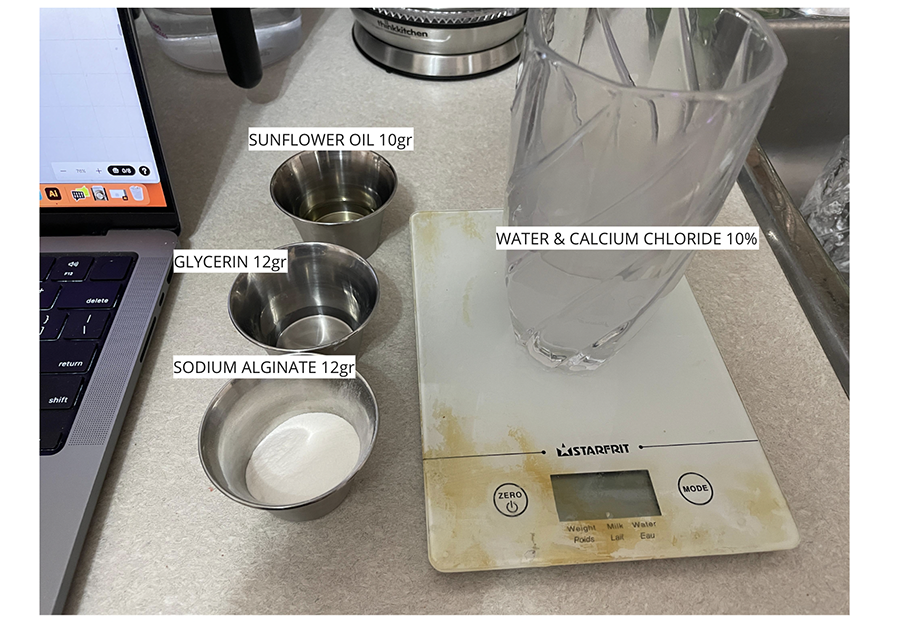
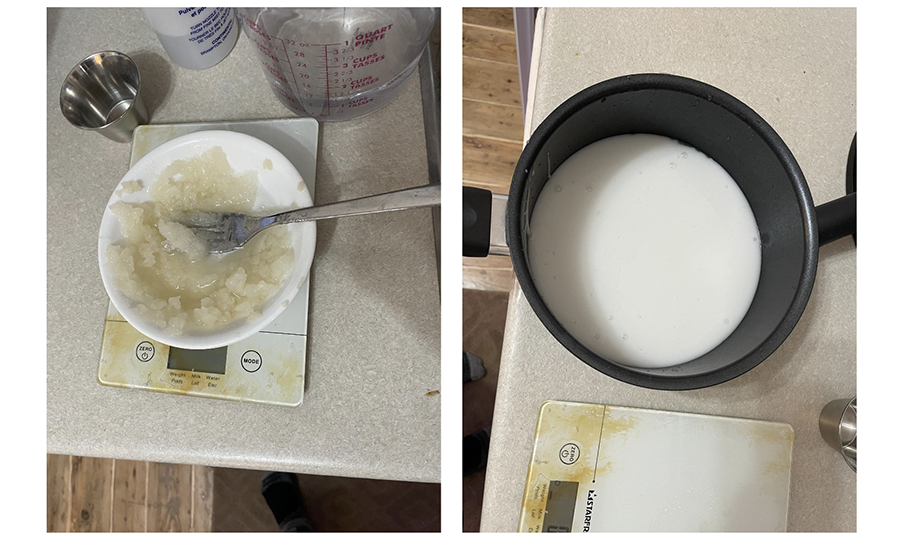
Here are some process photos.
GELATIN RECIPE
Now, I'm happy my alginate bioplastic worked out, but i would like to try a bioplastic using a different polymer base. There was gelatin at the lab and i found a gelatin based recipe from Loes Bogers again. You gotta love Loes, she does a great job of documenting, it's very clear and organized.
Here is the recipe i followed, the instructions are recopied from Loes Bogers:
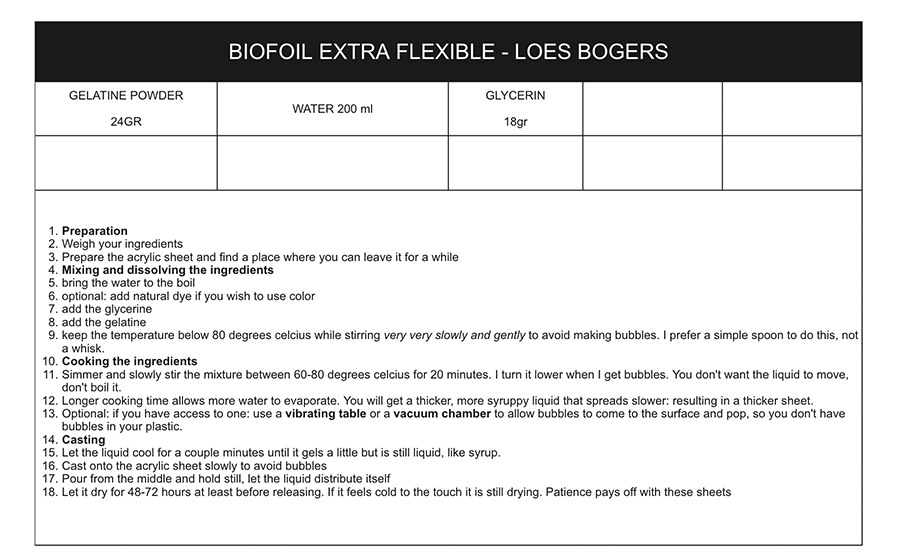
I simply brought the water to a boil and added my glycerin and gelatin.
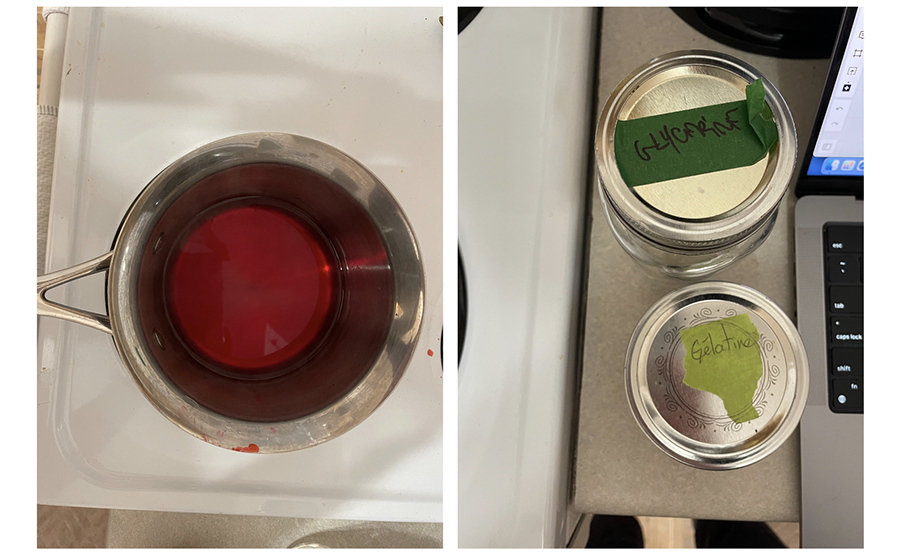
Once the ingredients are all mixed in i gently stirred on low heat, letting it simmer until it gets to a syrup like consistency. When it feels like a syrup, i took it off the heat, let it cool down for 5 minutes and poured i into my molds.
This recipe never solidified and I think it's because of the gelatin was sweetened. I did some research into this and found a video that confirms this result. In the video, they try out 3 gelatin recipes. The ratios are all the same, the only difference is the type of gelatin used: neutral sheet gelatin, neutral gelatin powder and a sweet gelatin powder. As you can see at 3:15, the sweet gelatin recipe doesn't produce a manageable plastic.
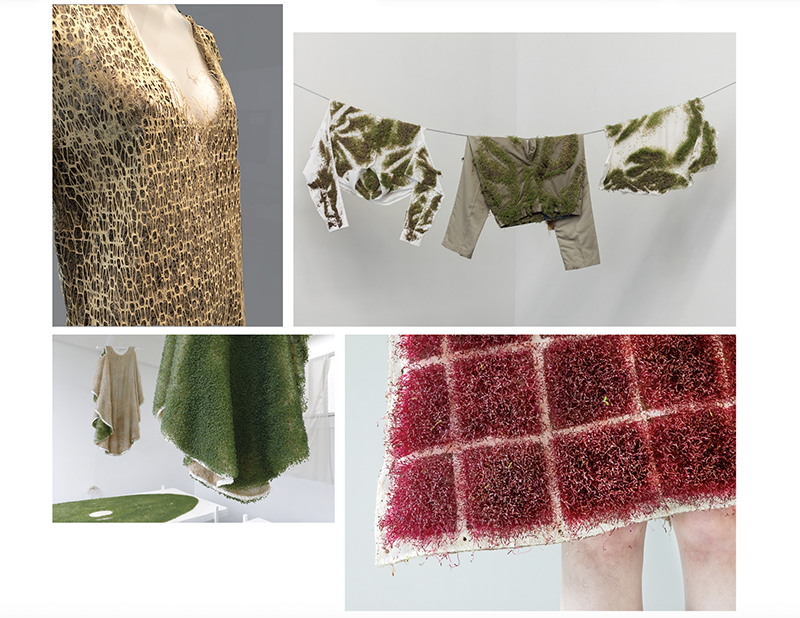
Grown materials
For the grown materials i was very inspired by the textiles created by root systems which were shown during the weekly lecture. I want to figure out how to direct the growth of the roots into a pattern.
Tools
- Grow lights
- Black chia seeds
- flat tray, preferrably made of clay
- Mesh or other textile
- Laser cut acrylic mold
Process
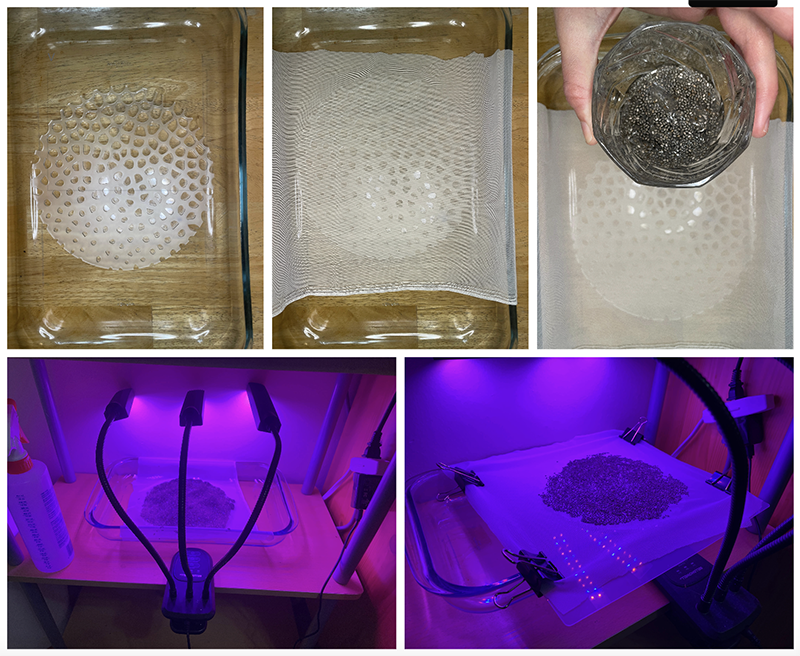
I wasn't exatly sure how to go about this as i couldn't find any instrucitons online for how to do this. So my instructor Annie recommended i do a rough trial where i place different things at the bottom of a tray, and try to grow something onto it. I thought that was a good place to start. I also decided to use chia seeds, since i could easily buy it at the local grocery store.

I found some an instructables post on how to sprout chia seeds and loosely followed this. They recommend covering the seeds, so i covered my plate with something that would let the light through, clear cling wrap. I got some grow lights from the local hardware store and set up a spot on a shelf where i could let it do it's thing.
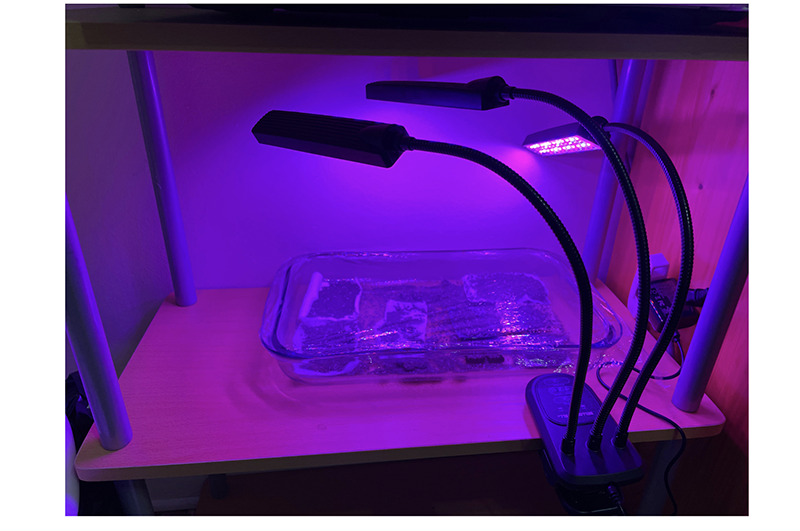
Here I check up on them every now and then:
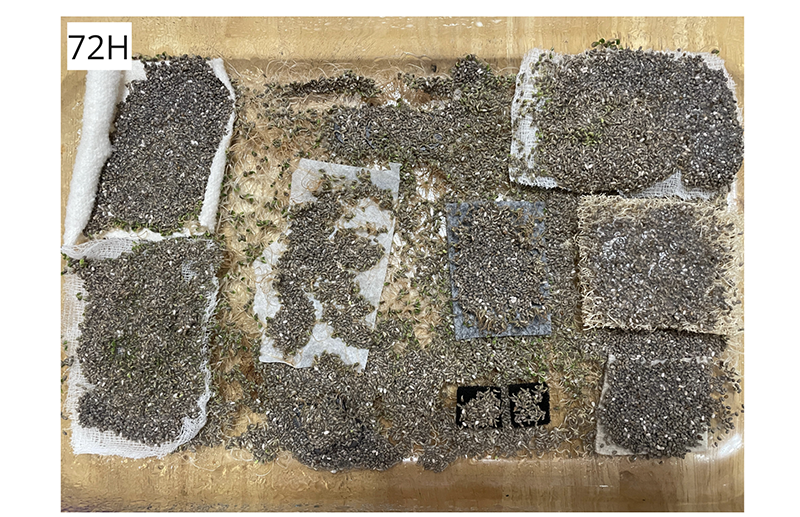
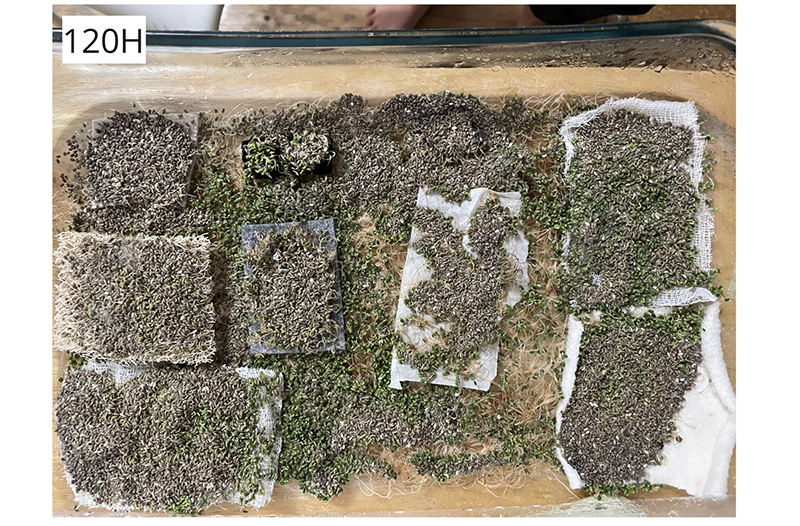
Results
| Material pic | Material | Observation |
|---|---|---|
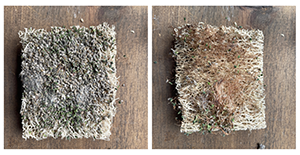
 |
Woven wool | The chia seeds did not sprout |
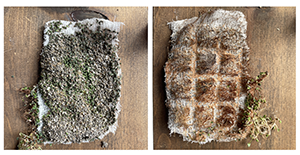 |
Gauze + plastic with recessed shapes | Some seeds have sprouted (not all), the roots penetrated through the gauze and the roots arranged themselved in the pattern of the plastic container. Promising! But the roots are a rotting |
 |
Gourd sponge | Some seeds have sprouted (not all), the roots penetrated through the grouds structure. A lot of mold growing on this sample |
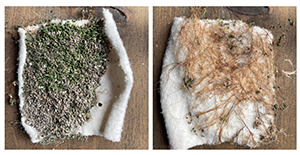 |
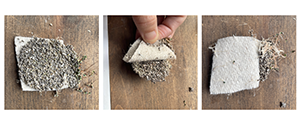
Cotton fleece | Half of the seeds have sprouted. The roots have penetrated the material through the laser cut holes only. |
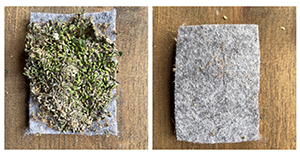 |
Felt | Most of the seeds have sprouted on this one. The roots have not penetrated the material. |
New trial
Based on the rough trials, I decided to redo another round and use a plexiglass mold (i created during the soft robotics week: download file here 2) in the same way i used the plastic gum package. That first trial was not perfect because the roots were rotting, but I'm not sure how to fix that yet, so one thing at a time.
Results
Coming soon