Process
Ideation: Hands-on materials experiments
I started out my ideation process by making quick & dirty swatches by hand. Here are some of things i tried:
- Hand slicing with an exacto blade
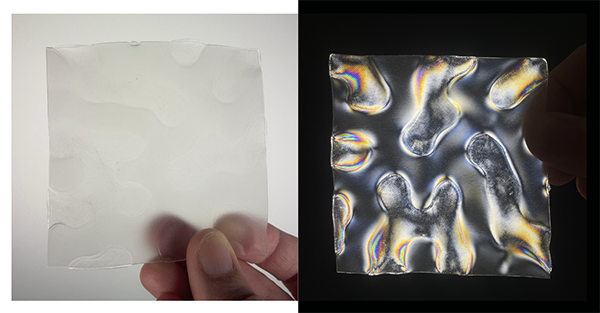
- Heat pressing textures onto materials
- Hand cutting fringes
- Stitching
- Weaving
- Stretching
- Layering
- Twisting
- Mixing small parts into the drying bioplastic (self made gelatin bioplastic)
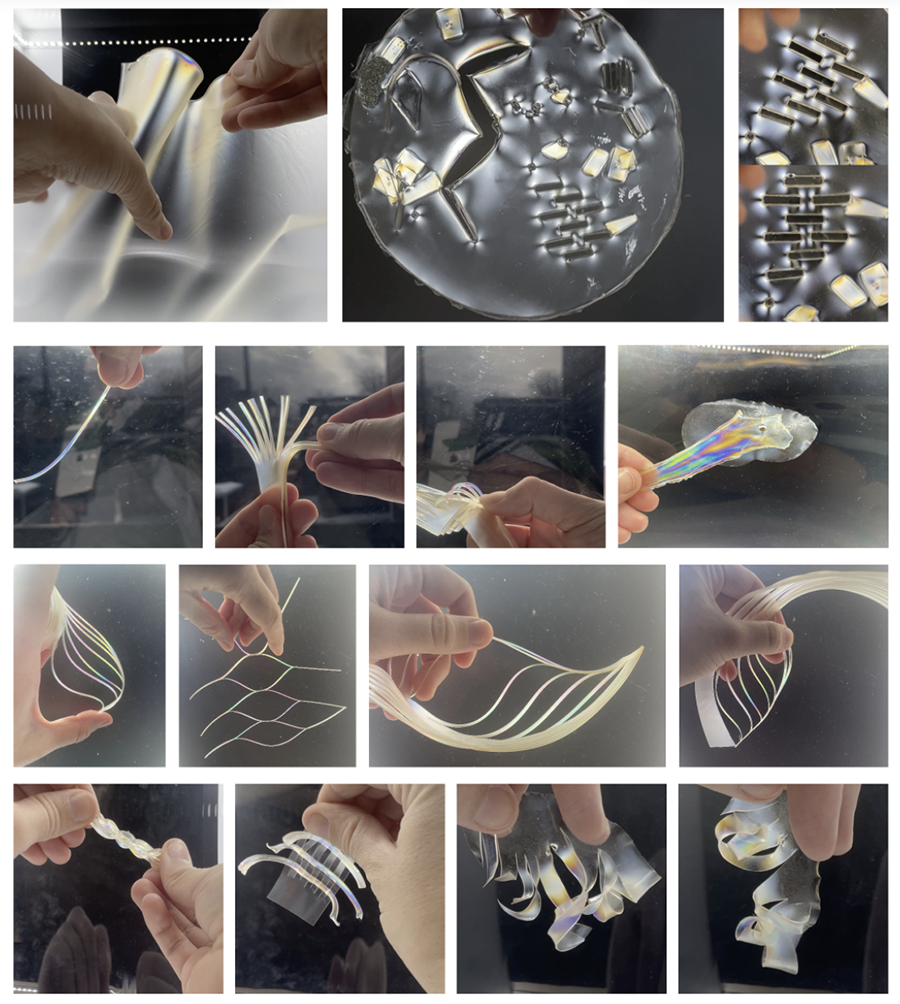
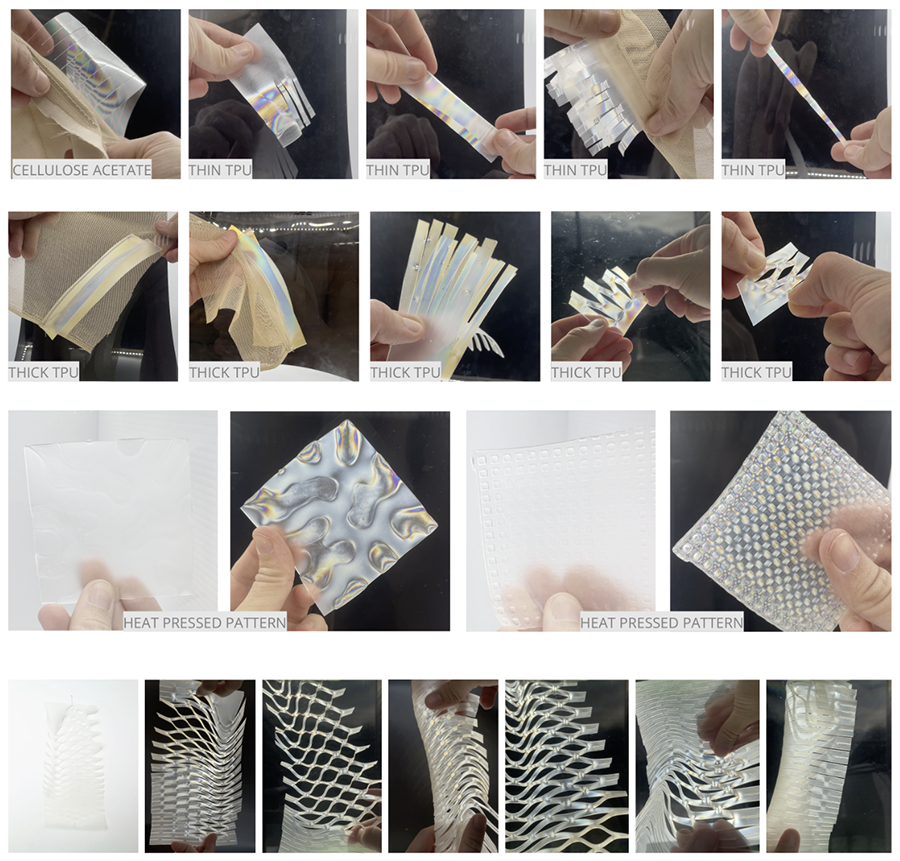
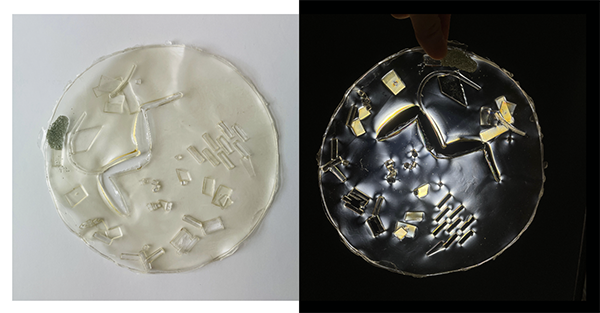
Here i am documenting some of my favorite explorations with and without filters:

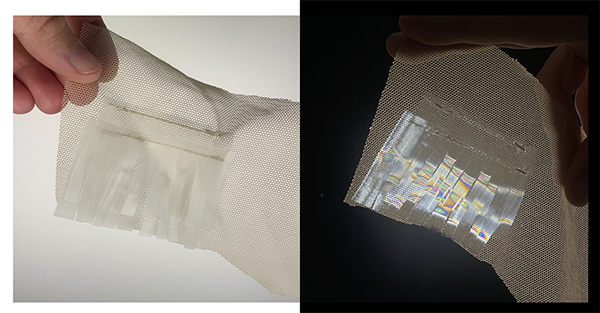

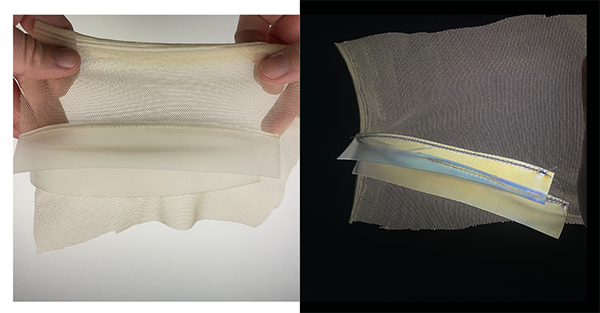

Key learnings made from this quick material exploration:
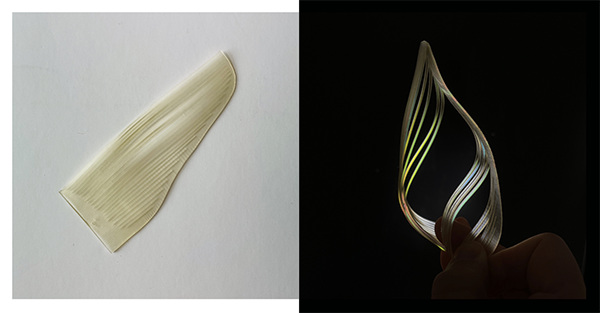
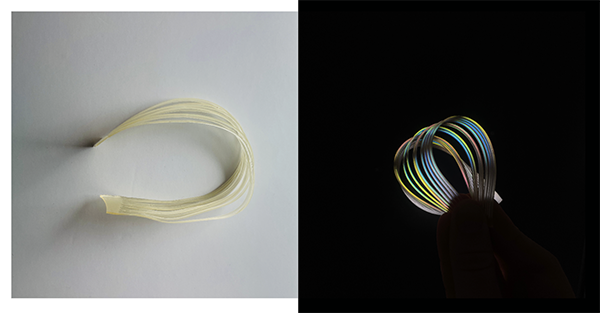
- All of the materials reacted differently under cross-polarized light, but most materials showcase colors when they are being stressed: pulled, stretched, heated.
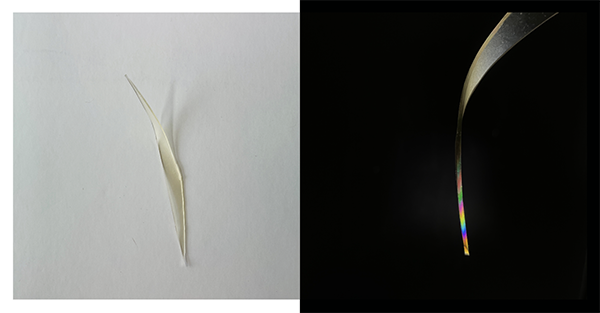
- For the gelatin bioplastic, the color effect can be observed in it's cross-section. The best way to observe this is by slicing the material in thin strands. I am particularly interested in exploring this slicing methode because i see the opportunity to combine my love for kirigami using computational design. I am deciding to focus on this for the next phase of my project.
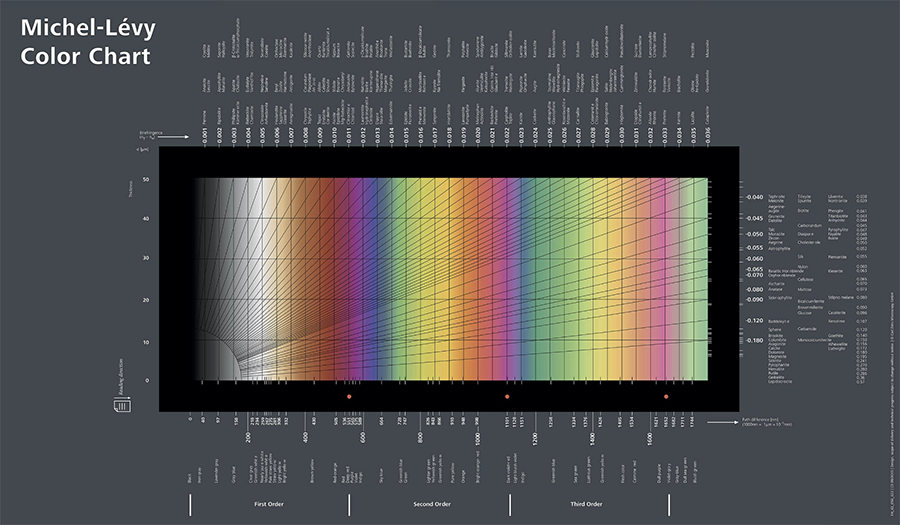
- The last sample in which we can see the Michel-Levy interference color chart points to a correlation between material thickness and color. I think it is probably possible to program the desired color by choosing the thickness of the slice.
Form finding with computational & draping
This workflow is happening in parallel to bioplastic material exploration, which will be tackled further down this page. I've decided to start using computational design to explore different geometries that lend themselves to the act of slicing material. Of course, as I mentioned, kirigami has already been a huge influence on my work, so this is the perfect opportunity. Since I don't yet have full sheets of bioplastics ready, I am going to conduct this initial exploration with substitute material, for this, I bought a plastic shower curtain from a pharmacy.
I knew which effect I wanted to explore first, and was able to find an existing script, made by Stepan Drunks, a designer in Tel-Aviv. He has made his script available on github for anyone to use, it's called Living loop generator. So thank you Stepan!
Since I am combining draping and computational design, I decided to keep the artwork relatively simple to begin with. My thinking is that draping adds a dimension that is very difficult to predict. It's a very physical and intuitive process which requires some trial and error.
The goal of this initial exploration is to begin understanding how i can incorporate these kirigami cut artefacts into an garment. I am missing a key ingredient here, the gelatin bioplastic and the polarized light. So, this is an exercise that helps me ideate, but it's not giving me the full picture. I need to start using gelatin bioplastics to create my artefacts and i need to start observing them with polarized light.
Gelatin bioplastic study
Now I will focus on gaining an understanding of the gelatin based bioplastic. I started exploring a basic recipe that has been documented by a few people such as Cecilia Raspanti and Loes Bogers. I followed Loes Bogers instructions on how to make her gelatin biofoil.
Goals for this study
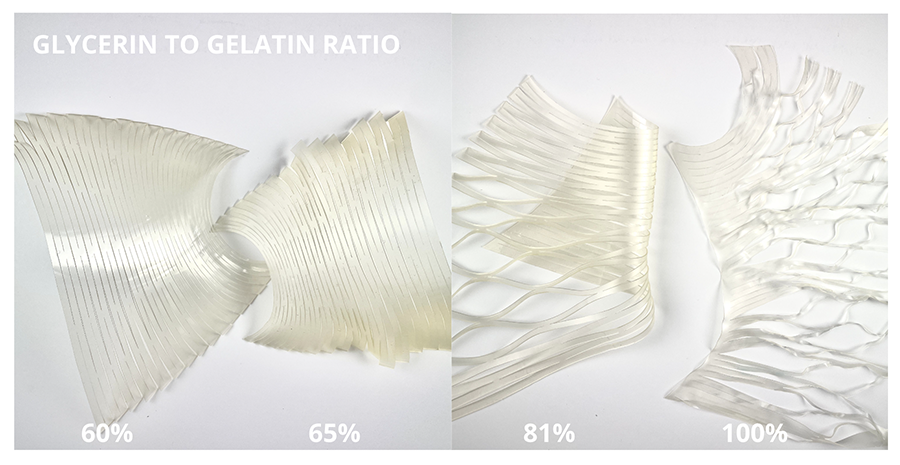
- Gain an understanding of how the gelatin-glycerin ratio affects the outcome of the material hardness.
- Observe how the material thickness influences the handfeel.
- Create a table that will help me calculate the amount of ingredients I need in order to create a larger sheet with a specific thickness and hardness.
- Create a mini library of swatches I can refer to for future work.
Materials and tools used
- 16 square plastic organizers They were less expensive at the dollar store, it cost about 20$ for 16.
- Knox gelatin and Yogti powdered beef gelatin
- Glycerin
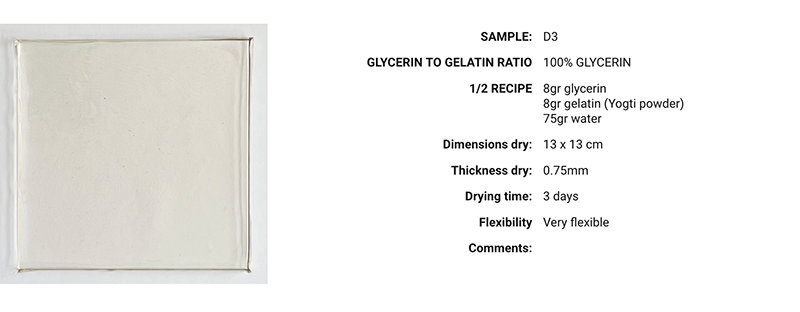
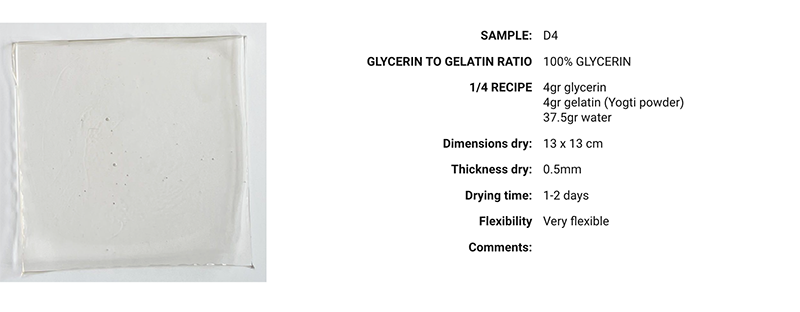
Results
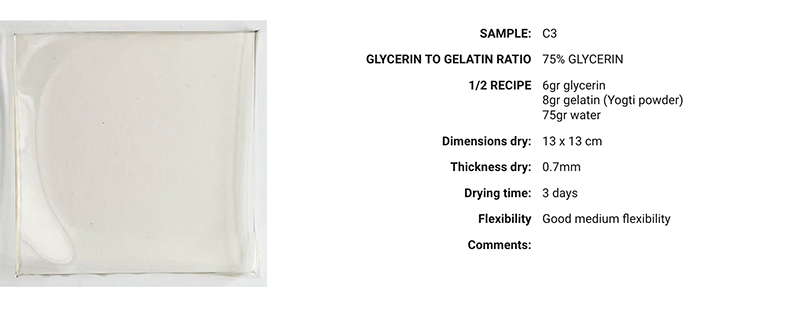
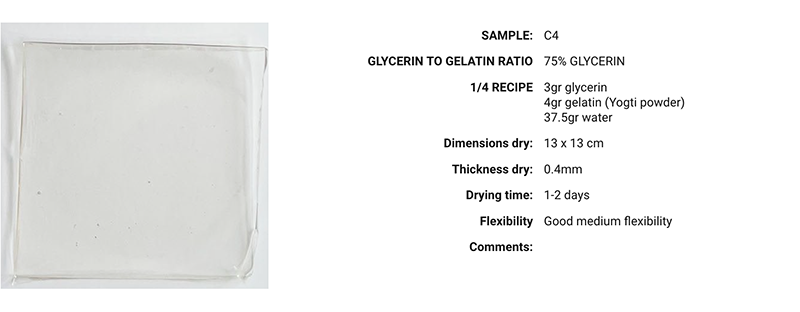
Below layout is a visual overview of the study, quickly informing which variables i tweaked: Gelatin-glycerin ratio and material thickness.
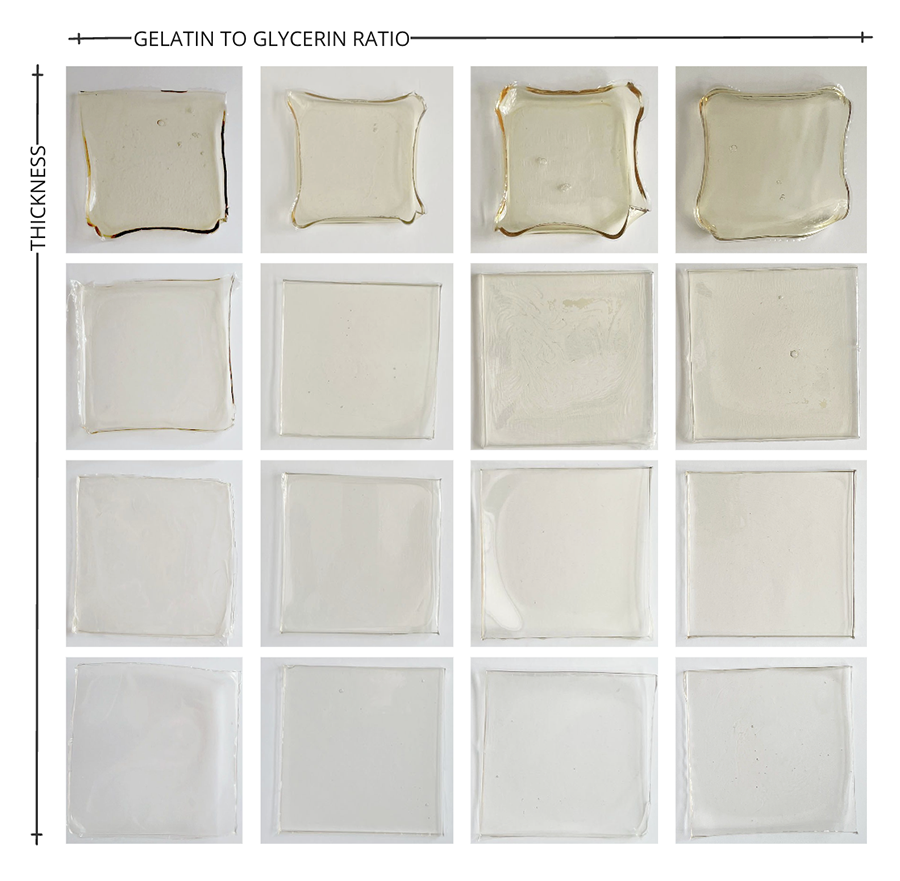
Below is a slightly more detailed overview documenting the ingredient quantities.
From left to right, i varied the glycerin-gelatin ratio: the left has a 0.25-1 ratio and the right side has 1-1 ratio.
From top to bottom, I varied the quantity of ingredients: at the top is the full recipe and the bottom is 1/4 of the recipe.
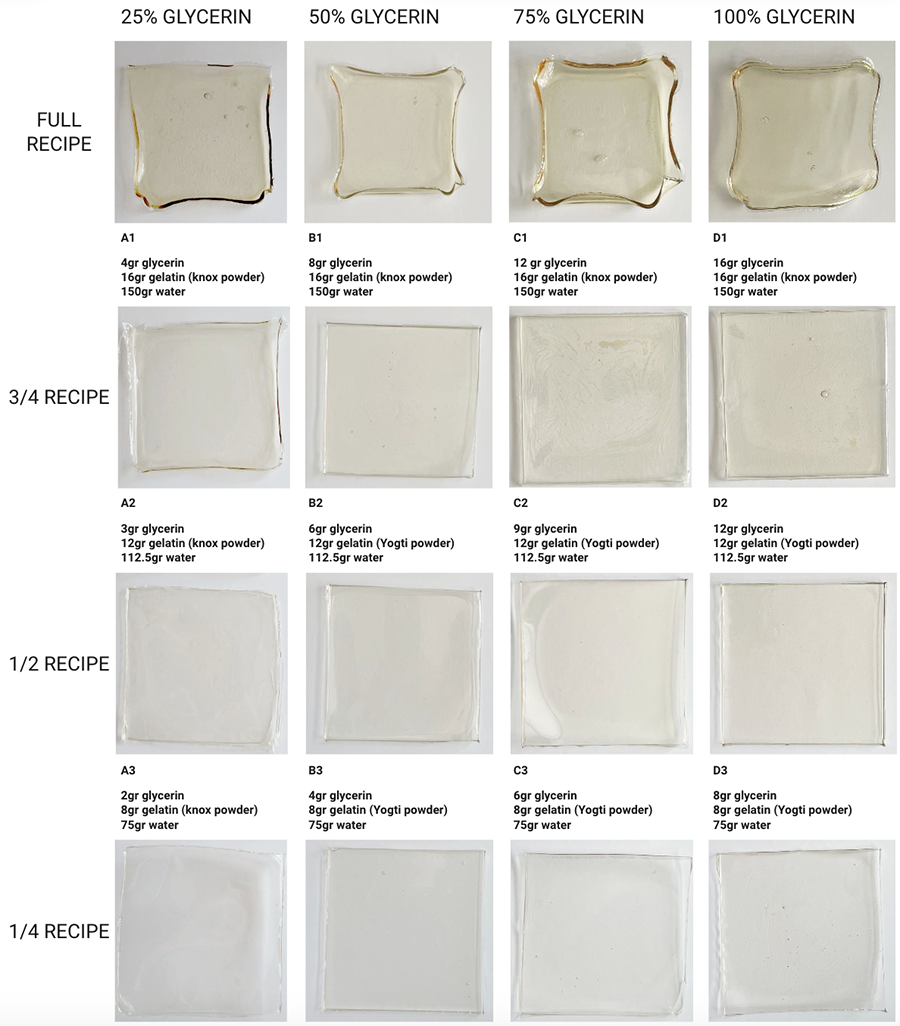
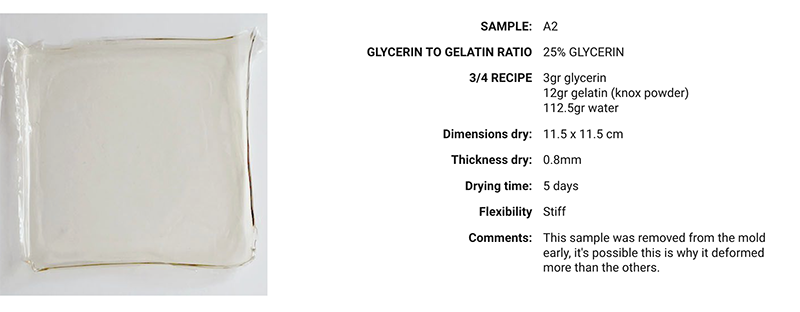
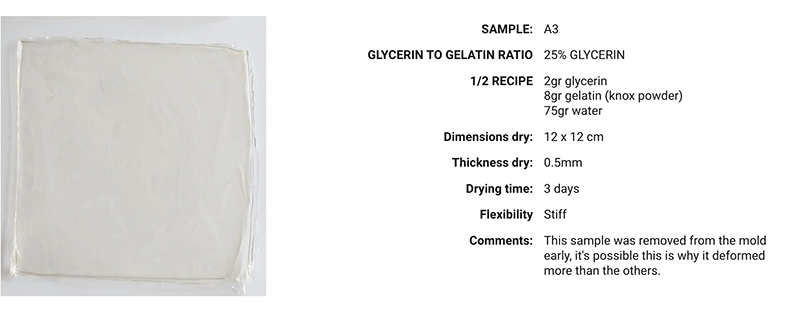
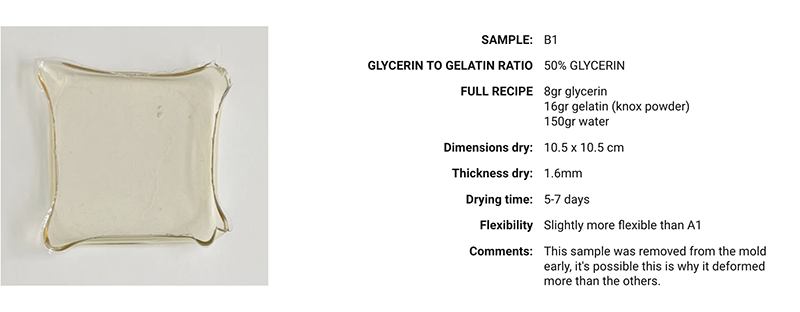
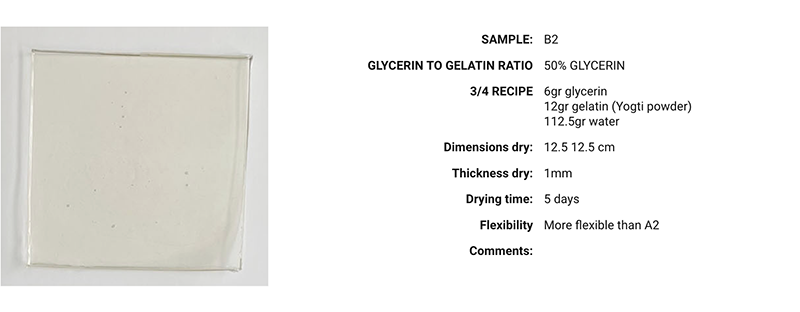
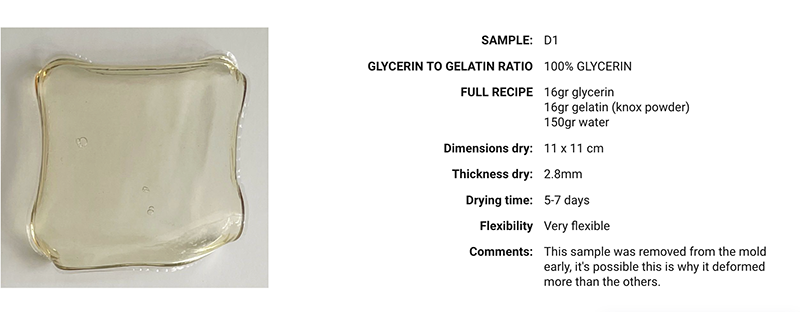
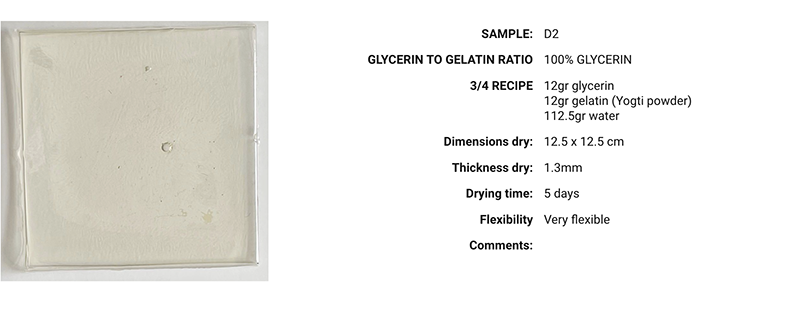
Below layout documents each swatch more specifically:

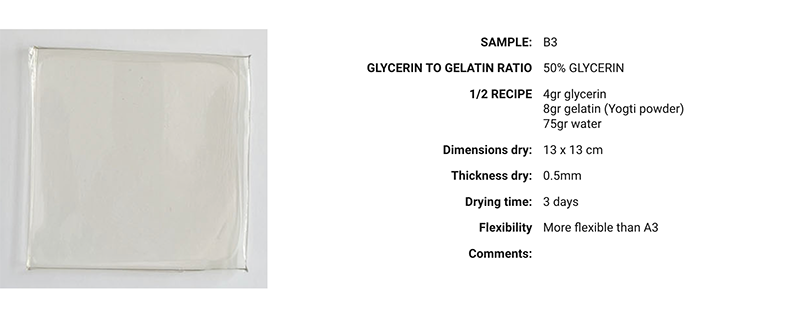
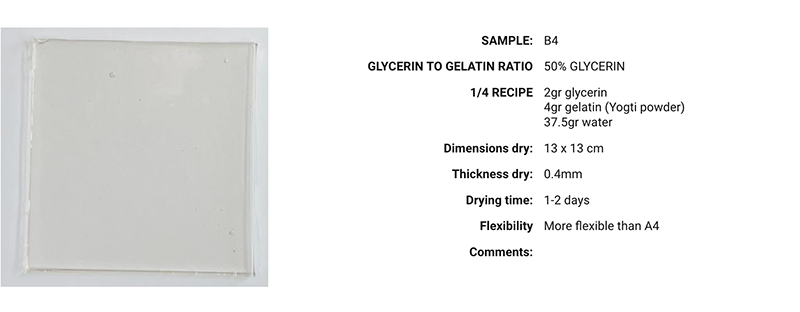
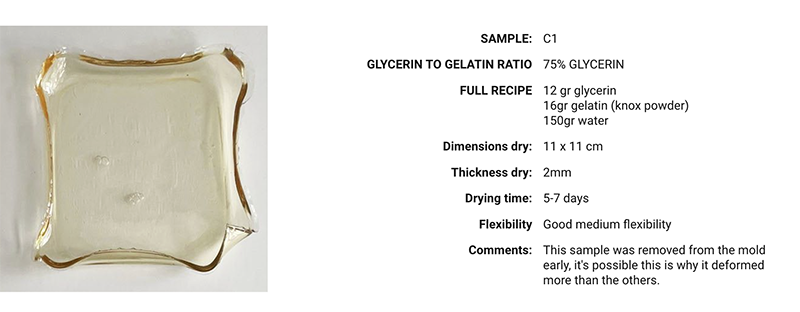
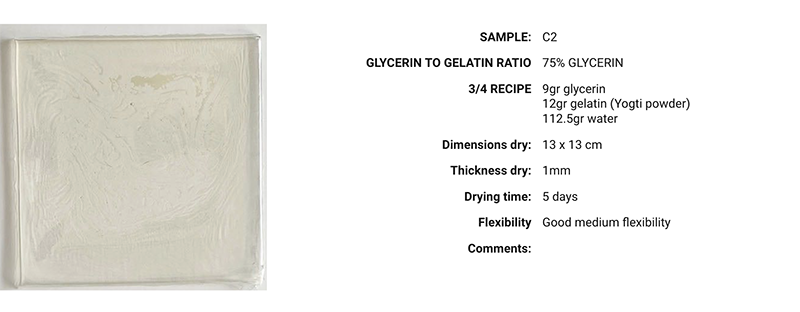
Key learnings of this exercise
- I already knew this from reading other people's recipes, but it is different to experience it physically: less glycerin creates a stiffer material and more glycerin creates a softer material.
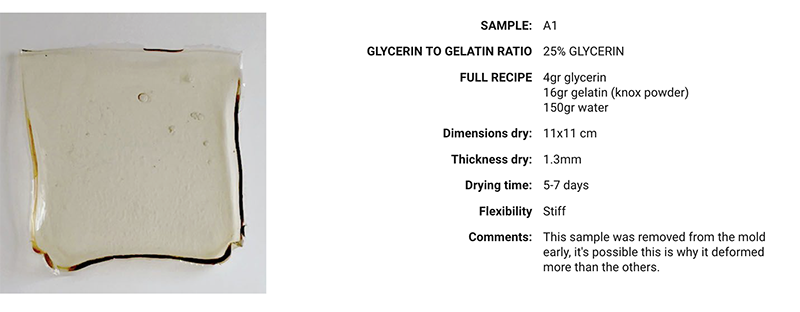
- Removing the material from the mold too early makes it shrink and deform more. Samples A1, B1, C1 and D1 have all been removed too early and they curled up and shrank a bit more than the other ones. Leaving the material longer in the mold creates a more consistent material.
- This gave me a good idea of which thicknesses and hardnesses i wanted to try for the artefacts i wanted to create.
Artefact creation process
Now that i've done initial explorations into computational design, draping and bioplastics, I can combine these workstreams together in order to bring the concept exploration to the next level: artefact creation. Let me preface this by saying it is very difficult for me to present this work in a linear way, because in reality it did not happen this way. I kept going back an forth between ideating, designing with grasshopper, draping, creating bioplastics, etc...
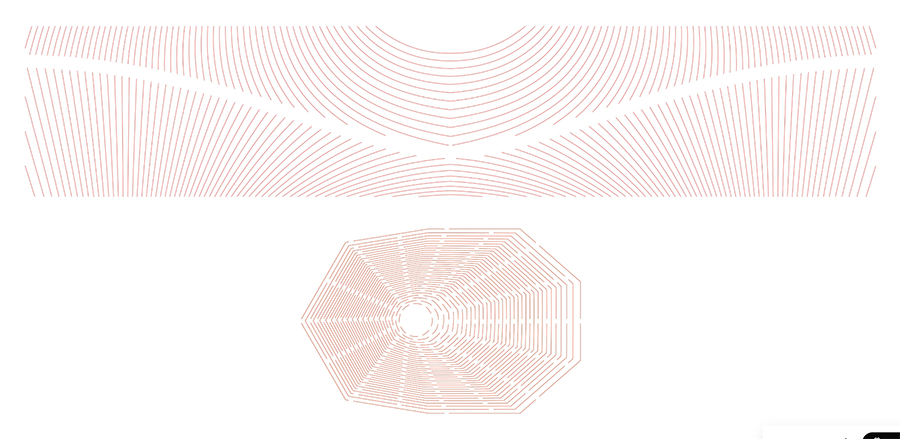
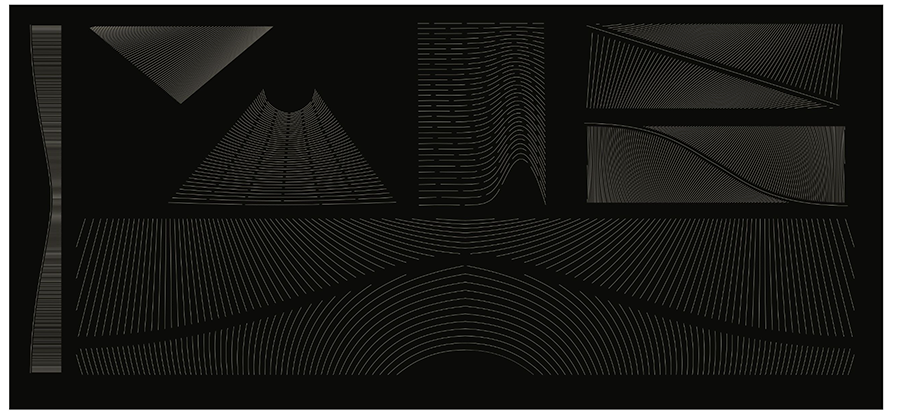
Computational design
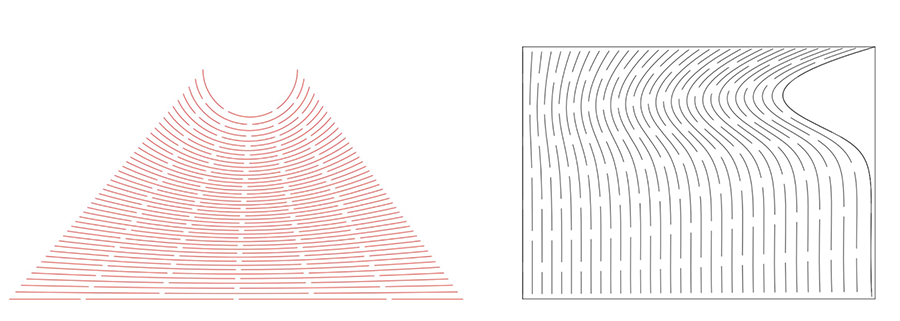
I've decided to present all the designs I've tried into one page overview. Here are the fabrication files. As mentioned before, the designs are focused around the act of slicing. Here are some of the things I am considering while desinging:
- Spacing between the lines
- Length of the lines
- Orientation
- Overall blending of the lines
Digital fabrication
One of the questions i needed to tackle was how to cut out these designs into my bioplastic sheets. My first thought was to use a laser cutter since that is so easy but i had a hard time getting the edge to be nice and crisp. The gelatin bioplastic is very sensitive to the heat and the laser cutter just damaged the material and left pretty intense burn marks. The laser cut sample didn't show any color when observed with polarized light. My intial hand-cut samples were done with a exacto blade so I realized I need to use something that is closer to a blade: the vynil cutter.
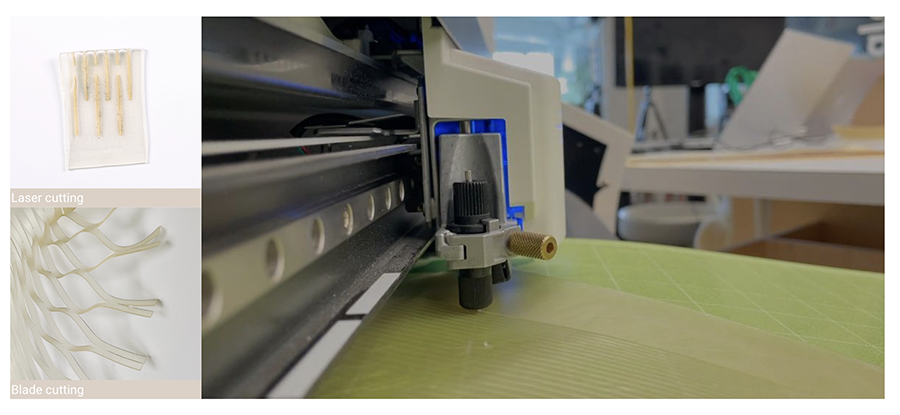
Learnings made using the ROLAND GS-24 vynil cutter:
- Make sure the material stays in place: Laminating the material to a tacky matt did the trick. Note: I had to tape the corners of the material because during a first trial, the corners released from the matt and got jammed in the machine.
- Multiple passes are needed: Most of my materials were on the thicker side (1mm), therefore more pressure is needed in order to cut through. The max pressure of the Roland GS-24 cutter is 350gr and that was not enough to get through. This means multiple passes were necessary and this can be done using the overlap feature.
- Cutting non-uniform thickness is tricky: I had one sheet that ended up being very uneven and that was problematic because I think different thicknesses require different pressure settings. The thinner areas were more likely to deform, so they required less pressure, but the thicker areas required more pressure to get through the material. So, i had to use higher pressure if I wanted all the material to be cut through, but this ended up creating drag on the thinner areas. I didnt really figure out a solution for this.
Settings:
Vynil cutter: Roland GS-24
Material: Gelatin-glycerin bioplastic
Thickness: 1mm

Speed: 6cm/s
Force: 350gf
Overlap: 10
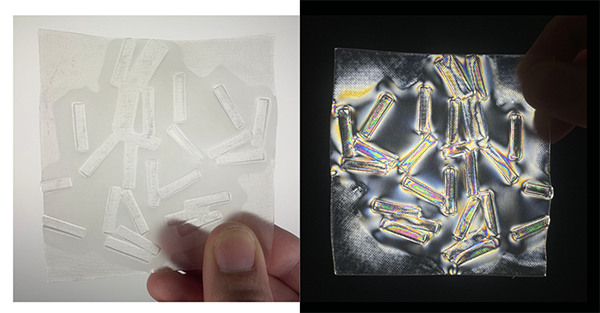
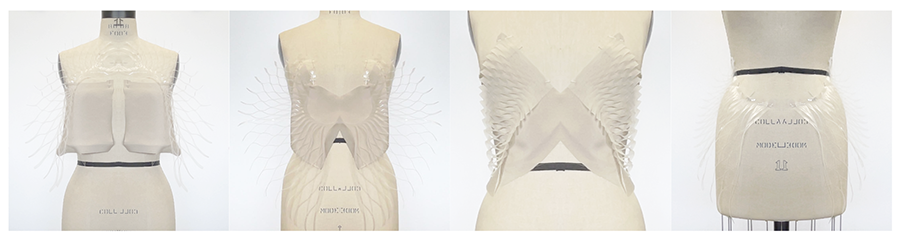
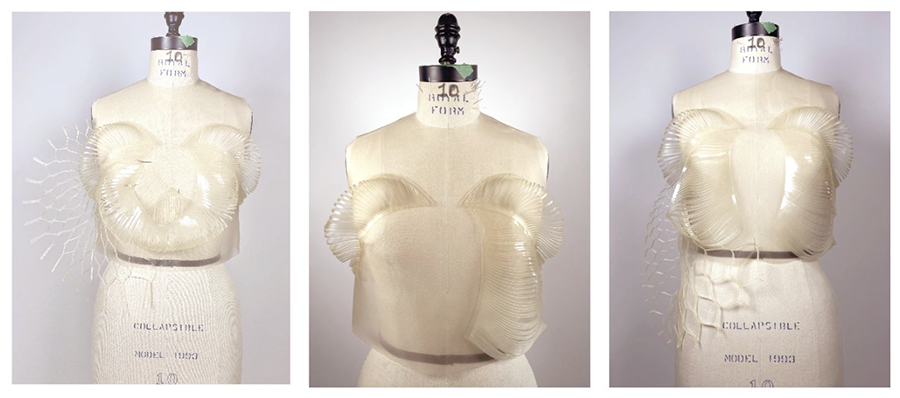
Resulting artefacts
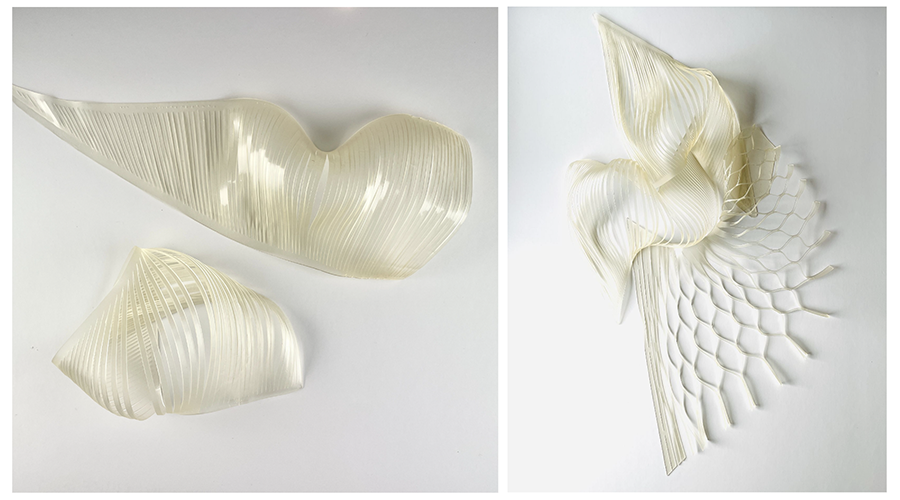
After a month of tweaking various variables such as material hardness, thickness, texture and finish, artwork line spacing, length and shape, I produced a good amount of artefacts. Below image shows 4 artefacts, all using the exact same artwork but with different material hardness and thicknesses.
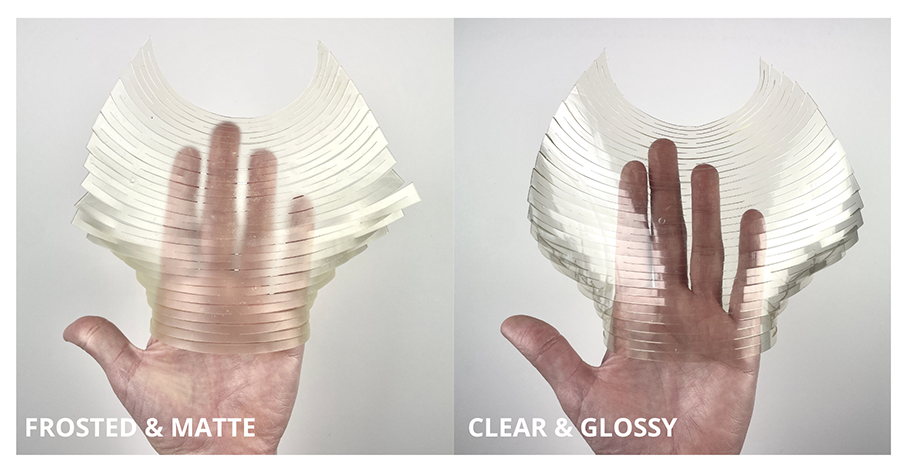
I didn't explore textures in depth, I only made glossy and frosted finishes, I wanted to keep it pretty minimalist an simple but I would like to explore this furhter in the future. I quickly felt that the frosted finished samples would be perfect for my project because, in my opinion, they have a very high-end refined look, which i like.
Below are some different artworks:
Biofabrication process overview
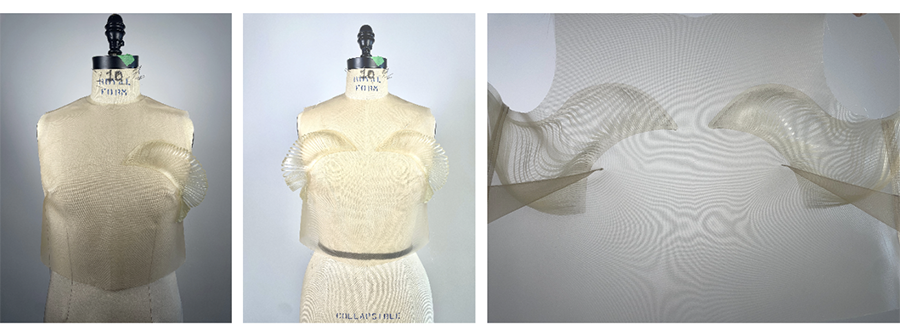
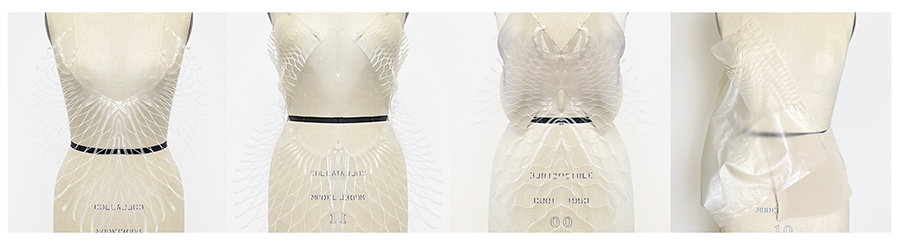
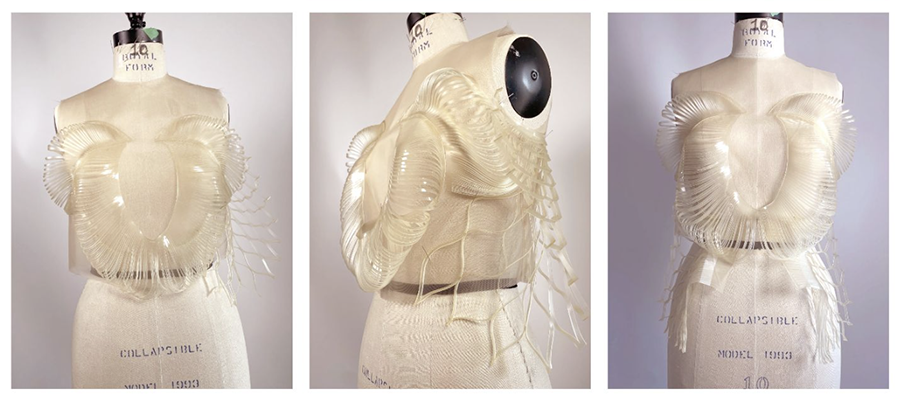
Final draping exercise
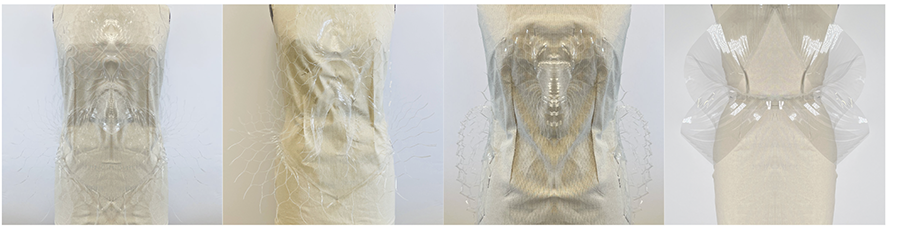
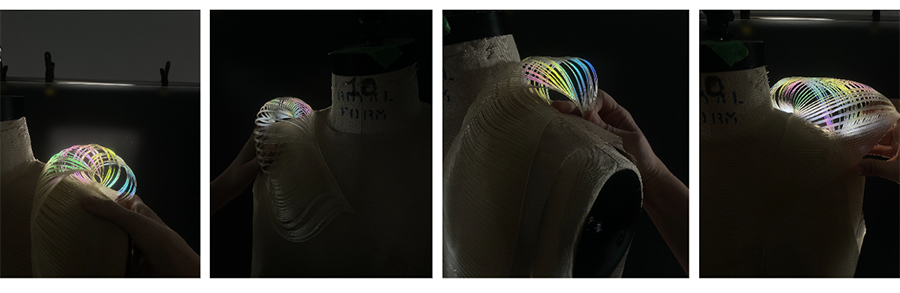
This is the final part of my project. Until now, i have been creating bioplastic artefacts, as many as i could, in order to be ready for this final step. This is where it all comes together. This is the time to play around with the artefacts, drape them and make some final decisions. I really wanted to have draping be a part of the process because it's a practice that i deeply love.
This process involves using dressmaker pins to pin the artefacts to the dressform and exploring the different forms the material can take. This it a lot of trial and error, pining and unpining, taking a step back and observing, repeat until you are happy with the result. To me, it's such a satisfying process, a lot more interesting than sketching and results in more creative outccomes.
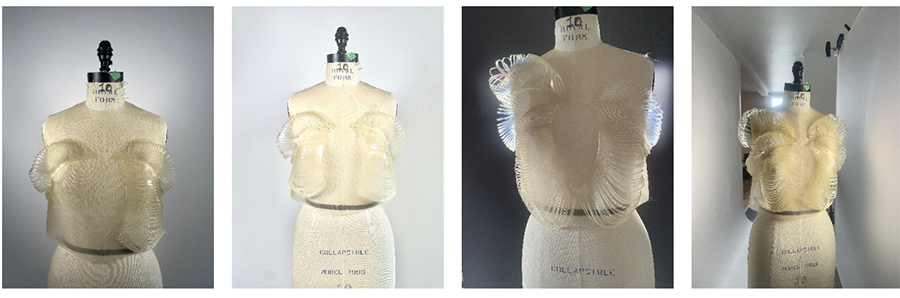
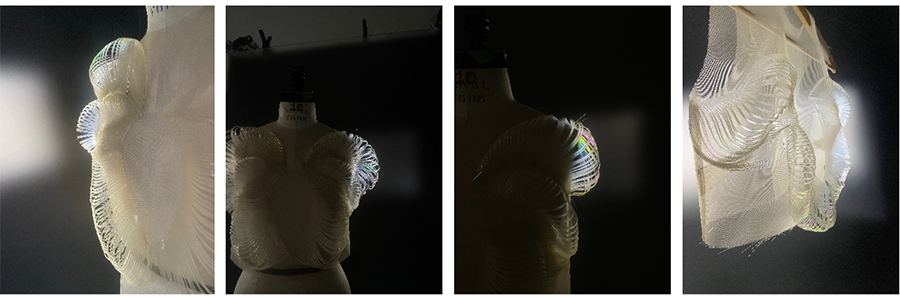
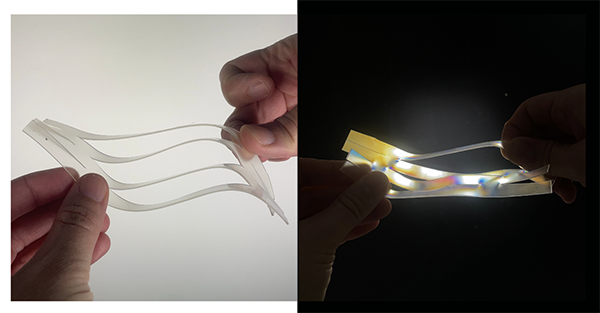
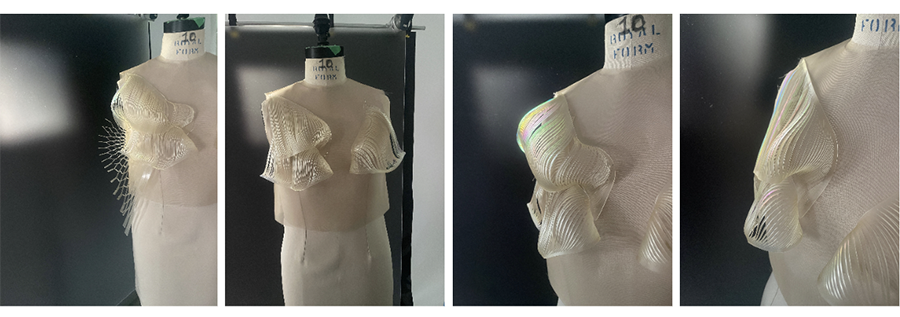
The fun part of this draping session is that i get to observe the result both in daylight and in polarized light.
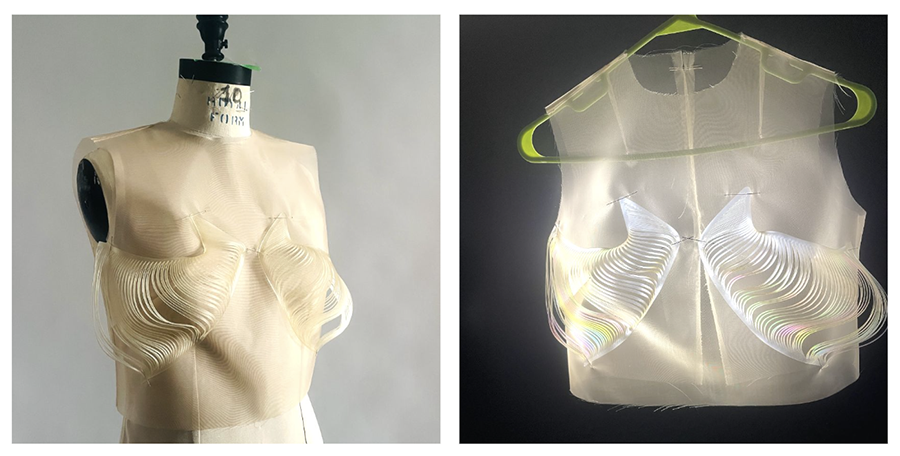
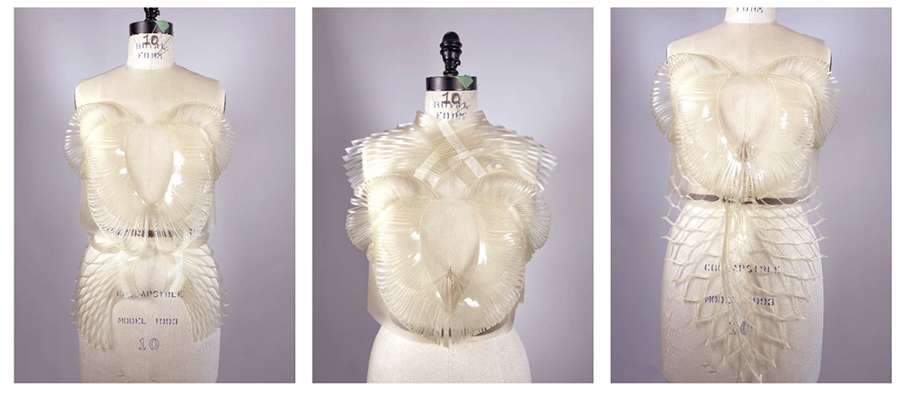
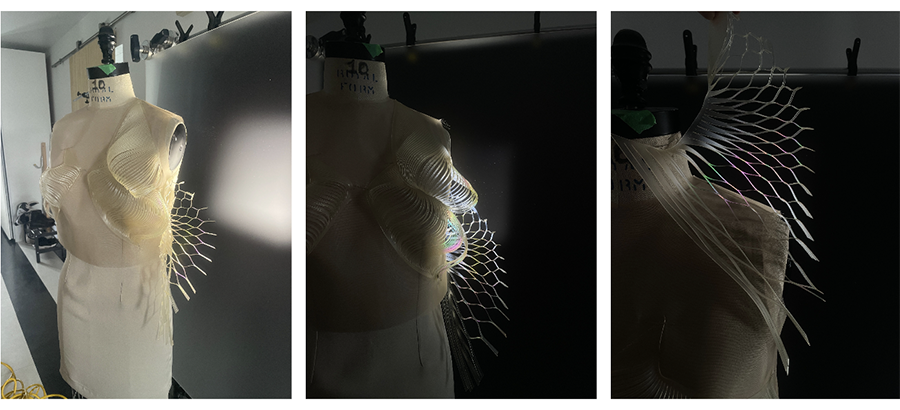
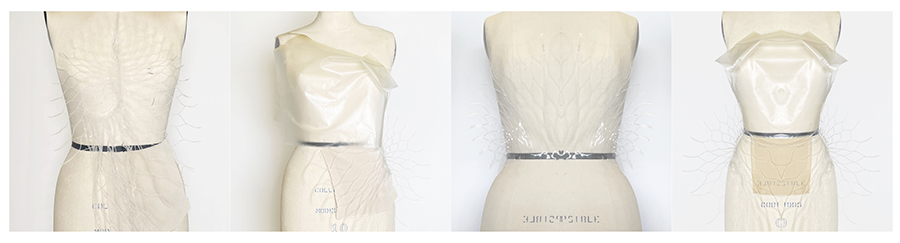
Final design fabrication
After pinning and experimenting for a few days on the dressform, I finally found something that i liked. Now it's time to commit and hand stitch everything to the crinoline base. For sure, the hand stitching is not ideal, if i had to redo another prototype, I would engineer it and plan. But this is a bespoke project and hand stitching is the simplest way to create this garment in the moment.
For the base of the garment, I used a beige/translucent polyester crin. It was not ideal but it was the best I could find in the Montreal fabric stores. It would have been nicer to find something finer and with a bit of stretch, more like a tule maybe.