10. Open Source Hardware - From Fibers to Fabric
Research & Ideation
I started out this week's assignment by researching and gathering some inspiration. I really liked this machine created to wrap pieces of wood with yarn and glue. As the gleu dries, the wrapped yarn creates acts as a joint by containing and keeping the pieces of wood together.
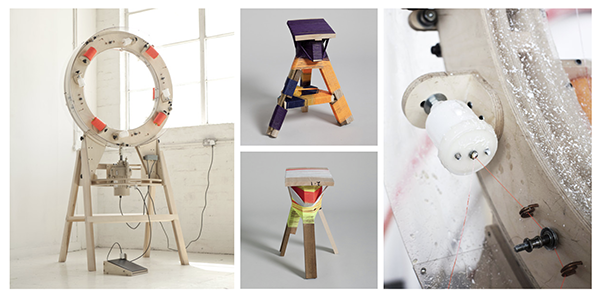
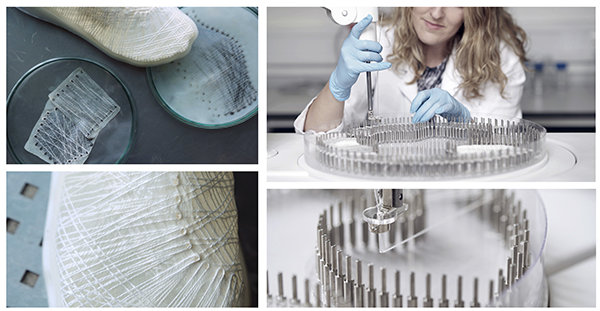
I was inspired by the work of Jen Keane using yarn that has been robotically woven around pins and used as a scaffold to grow bacterial materials.
Another string art inspired concept by Studio Besau Marguerre where they create objects by solidifying the yarn with resin.
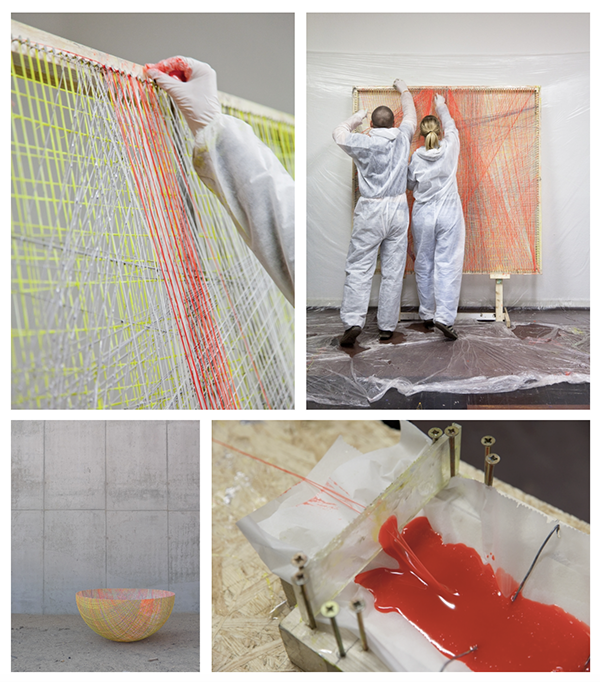
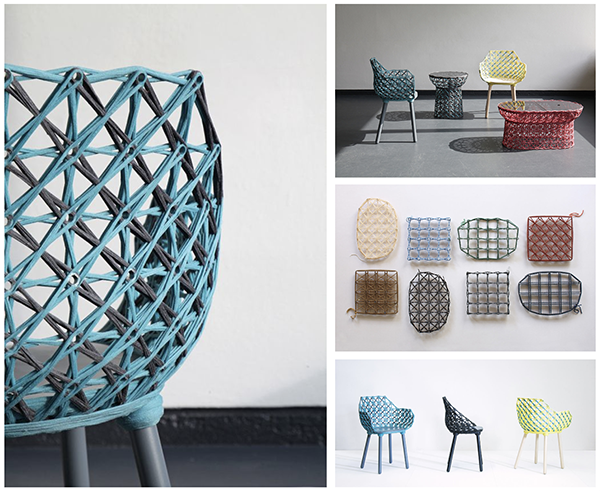
I like this furniture, also created by solifidying yarn with resin. The pattern they created is pretty cool and the mix of colors is interesting.
Process
I knew that i wanted to create something with string art and to eventually have it be automated with a 3d printer, but I wasn't sure where to begin and how it would all come together. It all felt a bit overwhelming and not realistic for one person to do on their own in one week. So, I worked in small steps, starting with the most simple thing to test, and then slowly adding complexity. The pegboard idea was the enssential part of the overall concept, so i thought it would be good to start there. And i told myself: if the only outcome of the week is the pegboard, i will be happy. If i get to the automation part, great, if not, no big deal.
Pegboard
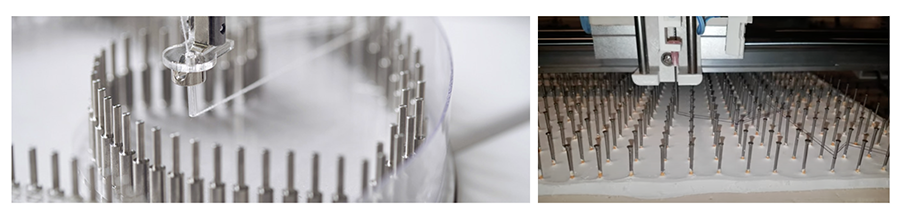
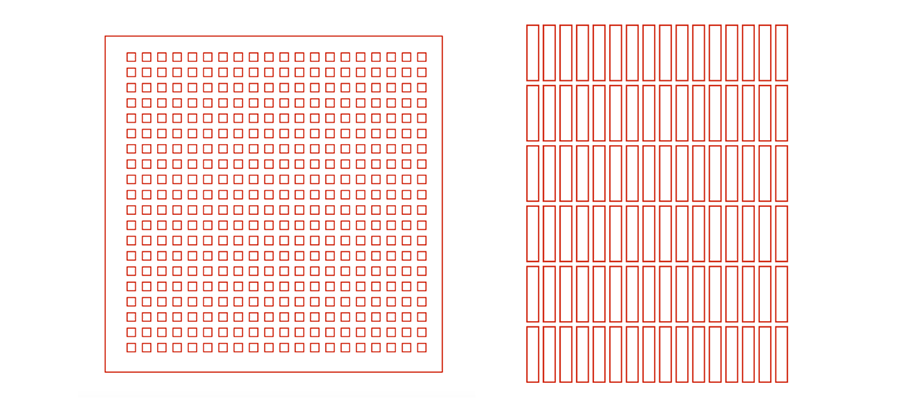
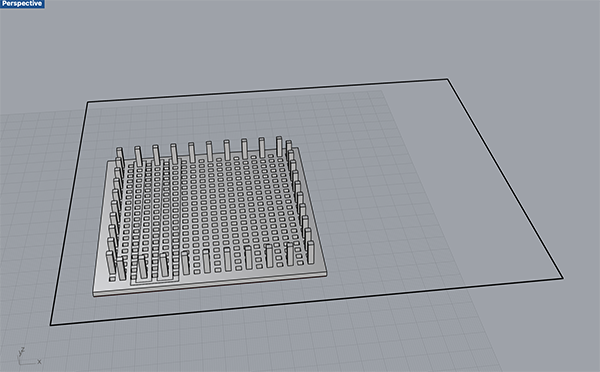
I decided to start out by desiging a pegboard with the materials i had on hand at the lab. I used 2.8mm acrylic plexiglass, but wood can also work. I made the design very simple to begin.
I cut out a small piece before comitting to the full file, just to verify if the joints work and adjust the artwork to accomodate for the kerf.

Download file here 1
Dispenser Tool
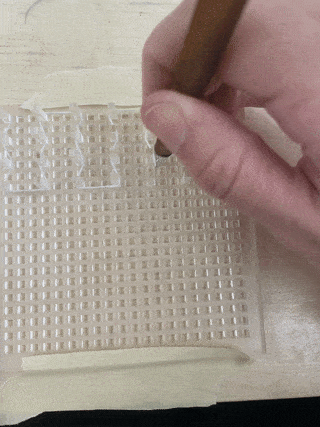
Once i had an initial pegboard idea prototyped, i wanted to create something that would allow to thread the yarn around the pegs. I had seen a brilliant hack online, where people use deconstructed pens to create string art. I thought this would be a good starting point. And in the back of my mind, i was thinking: "i have seen 3D printers hacked with pens before, so maybe this can be a simple way to automate the threading of the yarn with a 3d printer".
Here i'm using a pen to string the yarn around the pegs. It's working pretty well.
I also had the idea of creating a dispenser of some kind. Annie and I talked about 3D modeling something that attaches to the pen, some kind of reservoir. But, that felt a bit too complicated to start with, i wanted to start even simpler, by trying it out with the pen.
Textile swatch trial
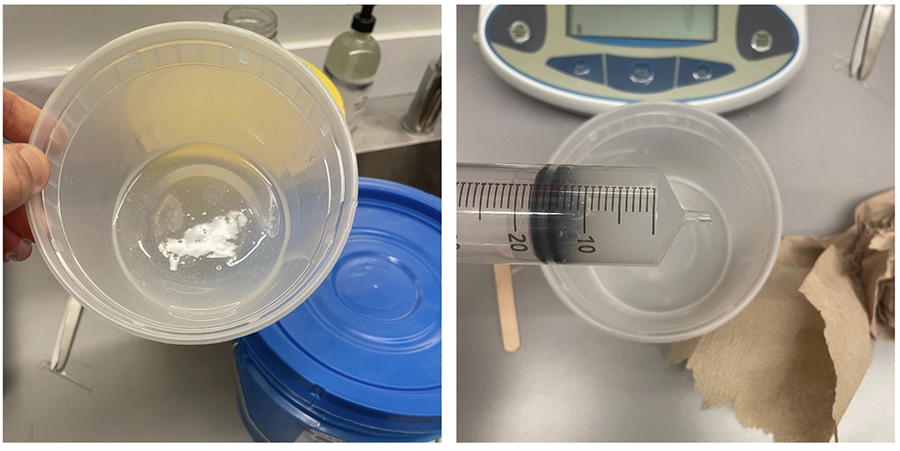
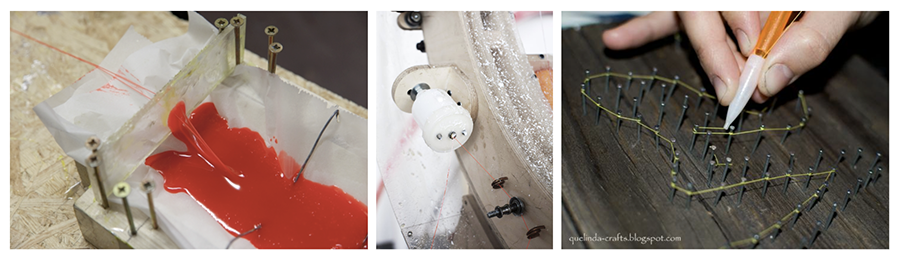
So I whipped up some silicone, injected my pen with it, and gave it a try.
I think the pen worked well, but the silicone ran out pretty quickly, so I want to use something that has a bigger reservoir. Also, the opening diameter of my pen was 0.7mm and it was not allowing the silicone to fully coat the yarn. The yarn was coming out slightly coated with silicone, but not enough. So I also tried a pen with a bigger diameter.
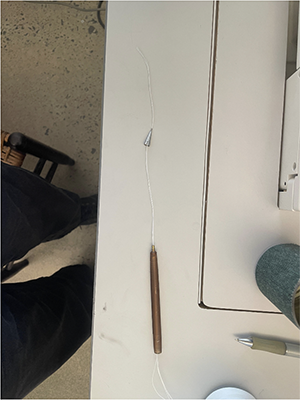
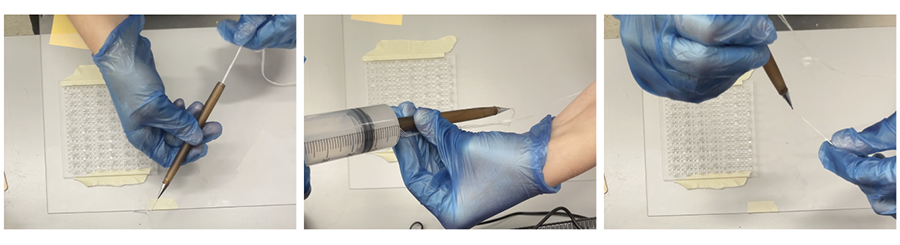
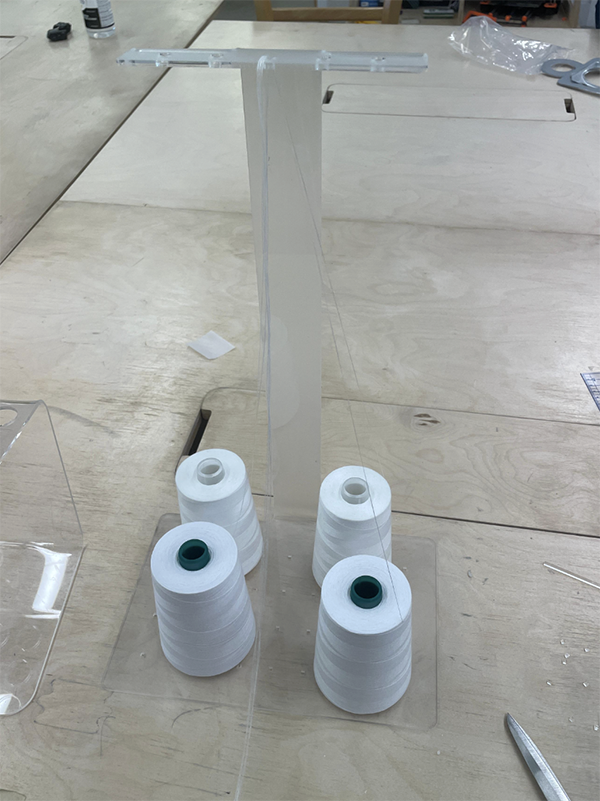
In the video i am managing the yarns with my hands, but they keep getting caught so I have to figure something out for this. I want to create something similar to the thread holders on sewing machines.
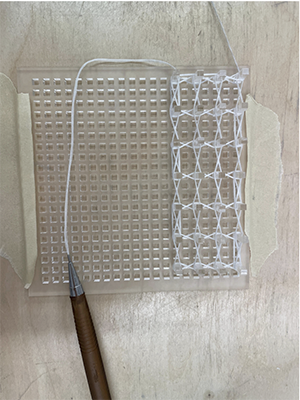
Here are the swatches after 1-2 hours of drying time. I'm happy with this test and want to move forward with this concept.

Thread holder
As i mentioned, I had to hold the yarn up while i was stringing it around the pegs, so now i need to design something that will hold it up for me. I designed something extremely simple that can be laser cut and heat bent with a heat gun.
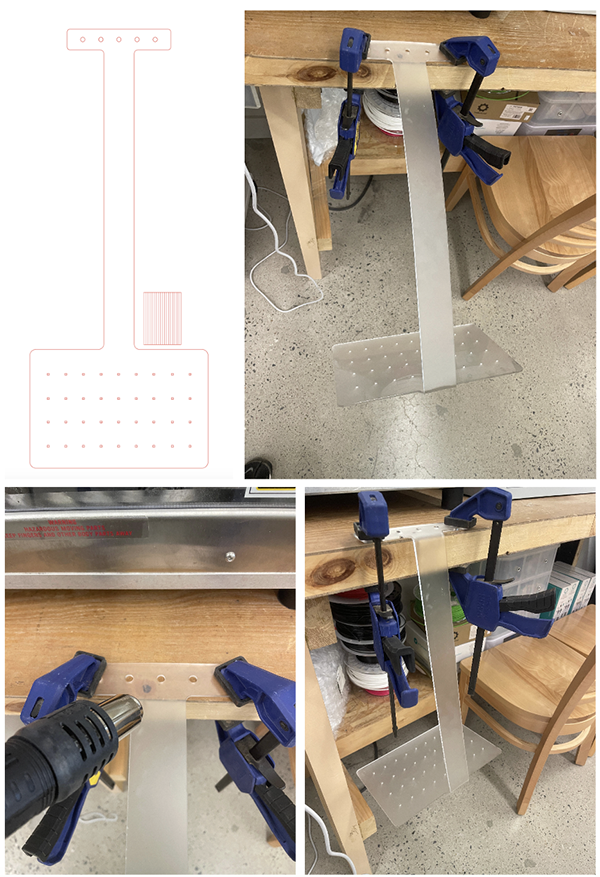
Download fabrication file here 3
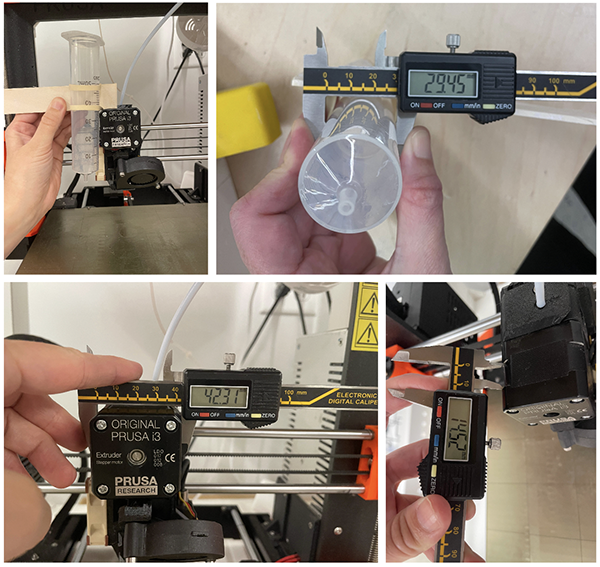
Syringe attachment
I found a syringe at the lab and realised this would be a perfect tool to use as the opening is narrow and the volume accomodates for a lot more material than the pens. So now i need to figure out how to attach it to a 3d printer. I researched how some people have hacked their machines to accomodate syringes and i found one example specifically done on a prusa, it's called the MIYAGI extruder. Luckily it's open source and i found the github page where I downloaded a 3d model of their adapter. It was not exactly what I need but i can rework this model and make it work for what I want to do.
Next, in order to 3d model something that will attach to the prusa printer head, i need to take some measurements.
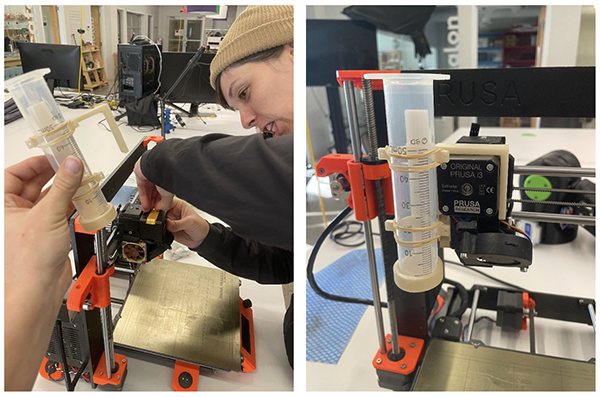
Here's the 3D model I created:
Here I'm placing it on the printer head and i needed some double sided sticky tape in order to secure it.
Download fabrication file here 2
Stringing with the printer
Next, If i want the printer to string the yarn for me, i have to create a path it will follow.
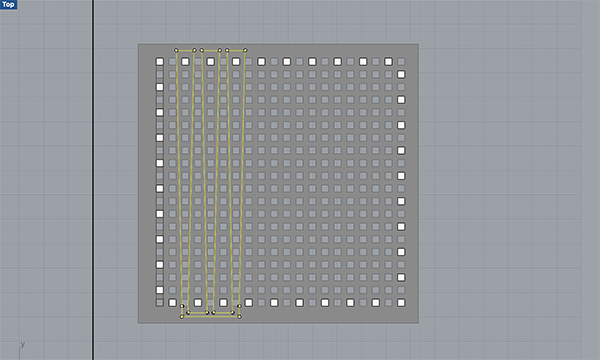
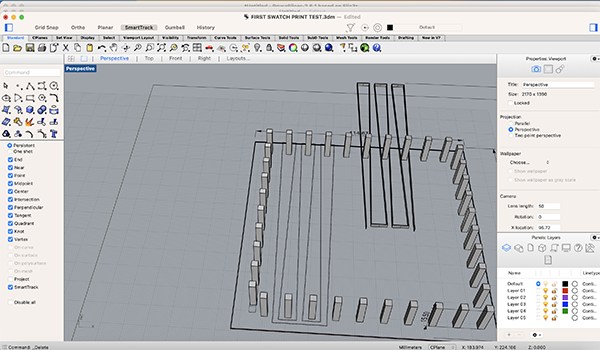
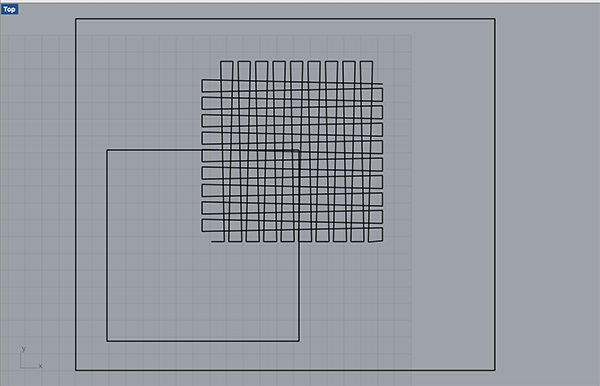
I started out by importing my pegboard file in rhino and extruding it to the same height as my physical pegboard. I also added the specific pegs i am chosing to place on my pegboard.
Here I am drawing a very basic and rapid path for my yarn to follow. I made it very simple because i wasn't sure how it would work and didn't want to spend too much time doing this.
Now I measured the offset of my syringe in relation to the printer's extruder.
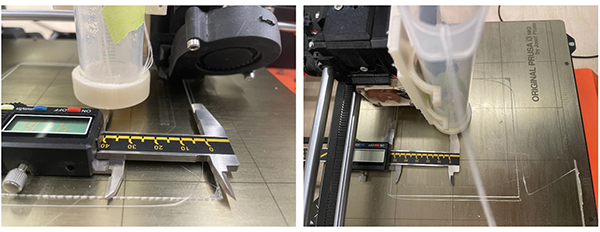
In my file, i need to offset the path by the same ammount as the syringe offset.
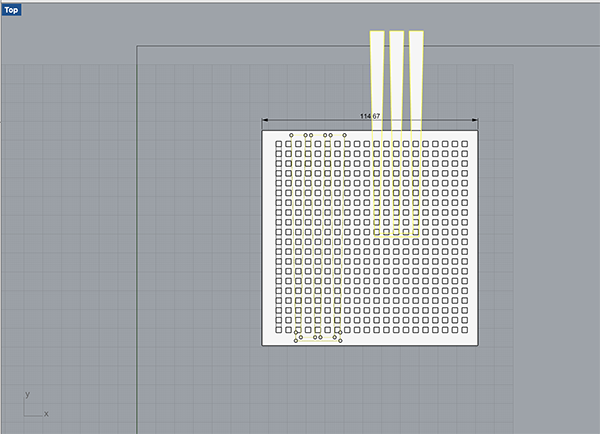
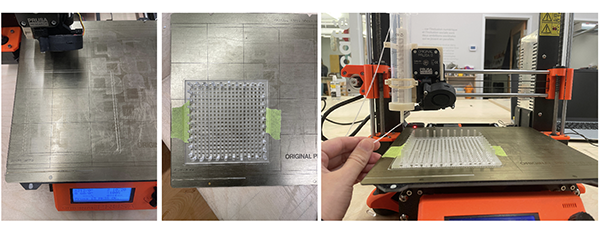
Then i sent this to the Prusa slicer software and sliced away. I kept the square so i could locate where to place my pegboard.
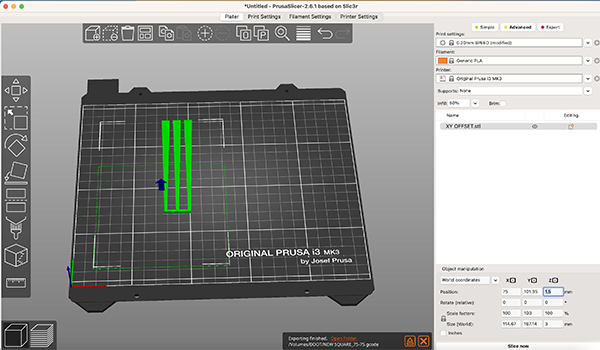
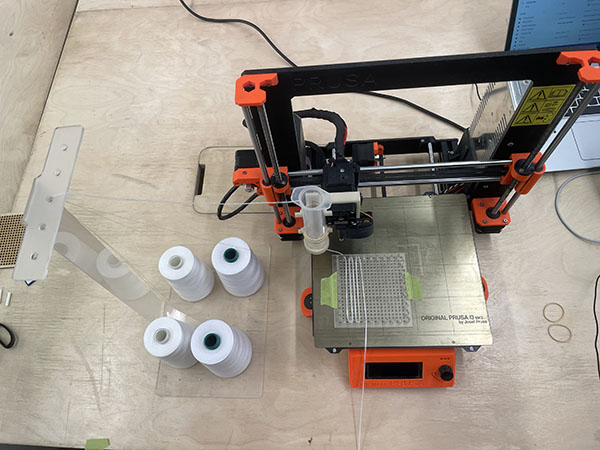
I start by printing the square with PLA on the printer bed. Once that is done, I can place my pegboard in this location and tape it down.
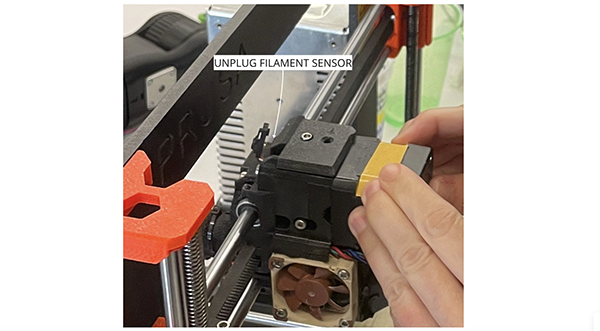
Annie helped me disconnect the filament sensor on the printer so that I could print without filament. The sensor detects if filament is present, and if there isn't filament, it won't print. So, disconnecting it fixes this issue.
Here's a first trial of my path. As you can see it gets all tangled and crashes. I realised that i extrued the path as a full shape, so it is not following the exact path i created. Duh!
So now I redo my path and give it 0.25 width and height, just slightly bigger than the nozzle extrudes (0.2)
YES!!!!!
Download the path file here 45
Full setup
Next steps
This is as far as I could get in a week. But, maybe i can keep this going to the textile scaffold week or my personnal project. Next steps, I would like to increase the complexity of my path. I'm wokring on a full swatch. The difficulty I'm having is that i have to create a path that doesn't cross. The second layer needs to be a bit higher than the first, or else the syringe tip will get tangled in the first layer.
Things to improve
- flat tip syringe head instead of tube. Thinner and will be able to go between the pegs.
- Look for different pegs, surdier?
G-code failures
I also spent a significant amount of time trying to figure out how to export directly from rhino with grasshopper. I downloaded the plug-in Mamba and got stuck multiples times trying to figure it out. I might almost be there...not sure.
Here are the options I found for generating G-code in 2D:
- 2D G-code generation in grasshopper
- 2D Gcode generation in inkscape
- Mamba plug-in for grasshopper manual
BoM
Materials
| Qty | Description | Price | Link | Notes |
|---|---|---|---|---|
| 1 | Blunt tip needles | 8.59 $ | https://www.amazon.ca/Precision-Applicator-Bottles-Dispensers-Acrylic/dp/B0B4DD2CT8/ref=asc_df_B0B4DD2CT8/?tag=googleshopc0c-20&linkCode=df0&hvadid=580578477766&hvpos=&hvnetw=g&hvrand=17937180975925773770&hvpone=&hvptwo=&hvqmt=&hvdev=c&hvdvcmdl=&hvlocint=&hvlocphy=9061029&hvtargid=pla-1969372862144&mcid=bf22acafe64c31cebce1dcbe6c12ede1&th=1 | |
| 1 | Steel dowel pins | too much $ | https://www.mcmaster.com/products/pins/dowel-pins~/undersized-dowel-pins/ | find alternative |
| 1 | Acrylic plexiglass | 18.00 $ | https://www.piedmontplastics.com/products/cast-acrylic-p95-sheet | |
| 1 | 60ml Syringe | 14.99$ | https://www.amazon.ca/Gufastoe-Pack-Syringe-s-Industrial-Scientific/dp/B085Y1PF5L/ref=sr_1_14_sspa?keywords=syringe&qid=1703029047&s=electronics&sr=1-14-spons&sp_csd=d2lkZ2V0TmFtZT1zcF9tdGY&psc=1 |