2. Digital Bodies
Global lecture with Anastasia Pistofidou from Fab Lab Barcelona.
This week is dedicated to create a 3D Mannequin using 3D scanner and software to acquire a 3D model.
How can to obtain a 3D Model?
- 3D model it from scratch.
- Scan it your body.
- Download one already made.
- Or Generate it with data.
Inspirations
Mannequins arms and hands are always an intense way of expression. They can be a piece of art themselves.
Their position makes us imagine interacting with the objects.
We can use them for many things: show gloves, rings, wallets and purses.
Or use it just for decoration.
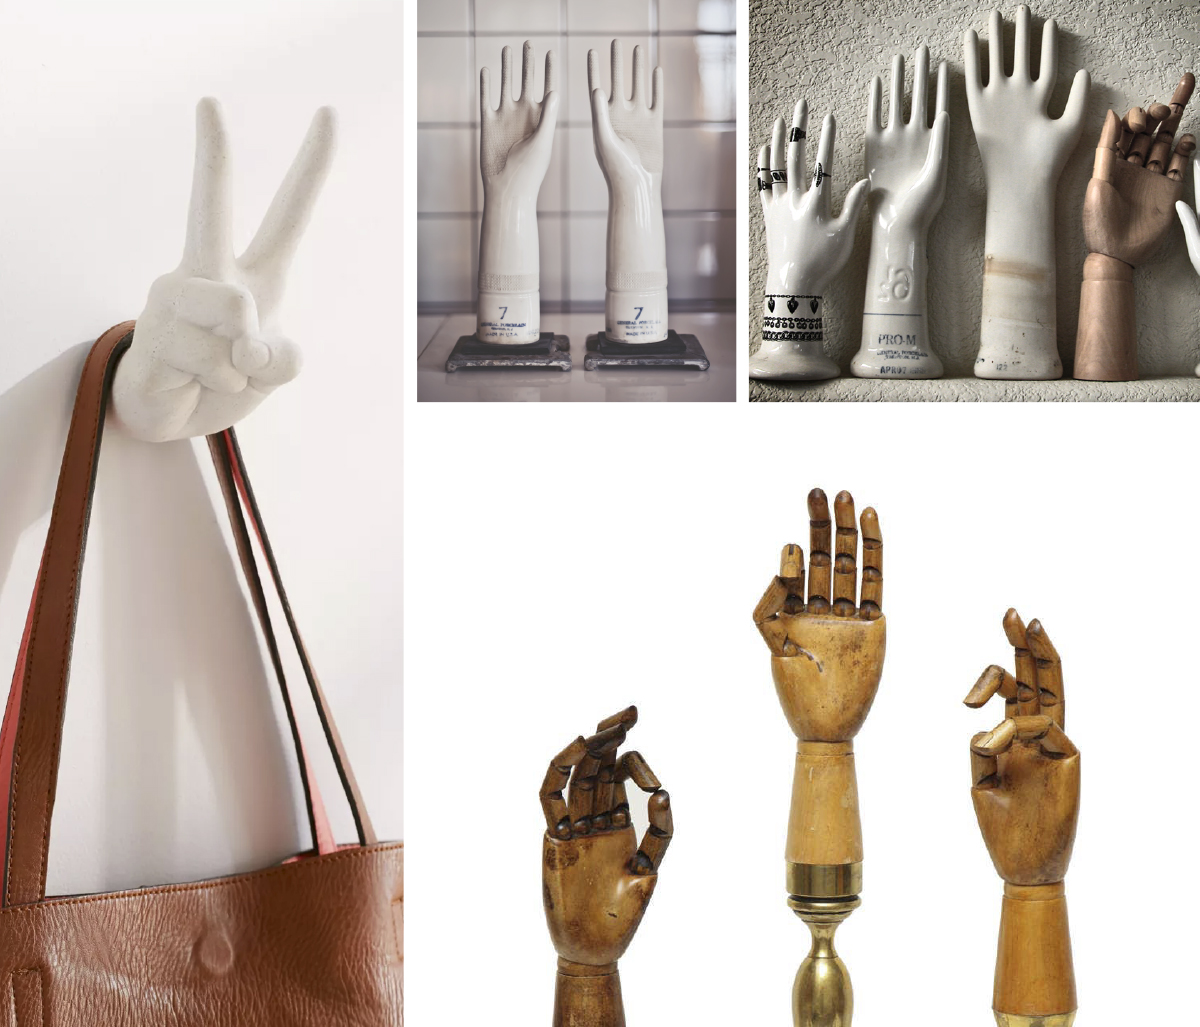
Hands mannequins inspirations - vision board
Pictures clockwise: Peace Sign Wall Hook from Urban Outfiters; Hands mannequins from Patricia Whitewarth Daniels/Hand a Day; Ceramic gloves from honeypielivingetc.blogspot;
Wooden Articulating Glove Displays With Brass Mounts, from 1stDibs
Our collegue Nanditha recommended me this beautifull movie. This Movie by Robert Bresson explores realy well the expression of hand
Hands of Bresson, by Robert Bresson, 2014
Margherita Soldati recommended me this book about Hands: The Thinking Hand: Existential and Embodied Wisdom in Architecture, by Juhani Pallasmaa (ISBN:978-0-470-77929-3)
Process
The idea was to create an Hanger with the arm and hand.
As a sculpture to put on the step door hall, where we could also be used to hang necklaces, a purse or a keychain.
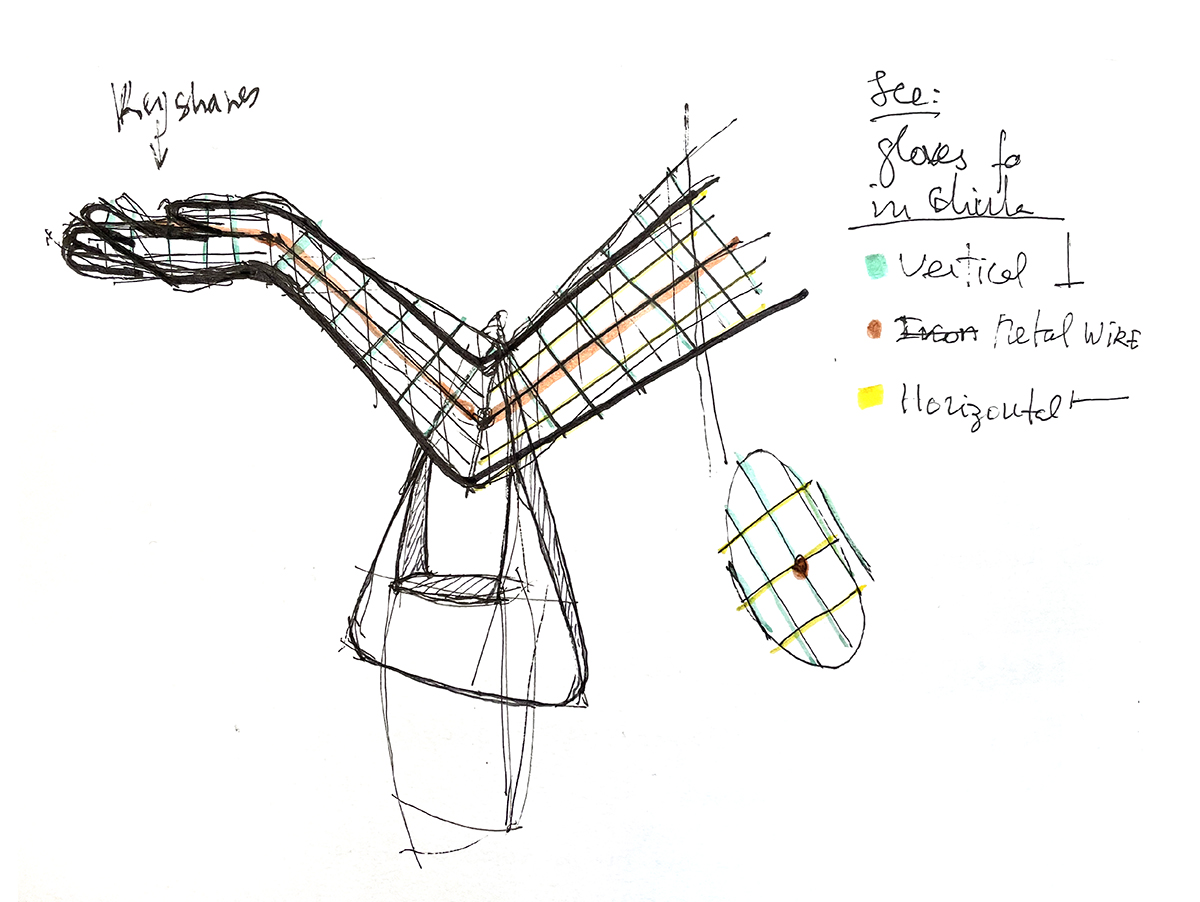 Arm and hand Hanger, Idea Drafting, Carolina Delgado
3D Scanner
3D scanner apllications:
- Computer Vison - Peopole and objects; 3D Scene reconstruction
- Interaction - Gesture-based user interfaces and Gaming/character animation
- Medical - Respiratory gating and ambulatory motion analysis
Processes available:
- Laser triangulation
- Photgrammetry
- Structured light
- Contact-based
- Laser pulse
We used the SKANET app (only runs on Window) with SENSE reader.
We can either out the person or object on a rotation plate.
Or Rotate aroun the person/object.
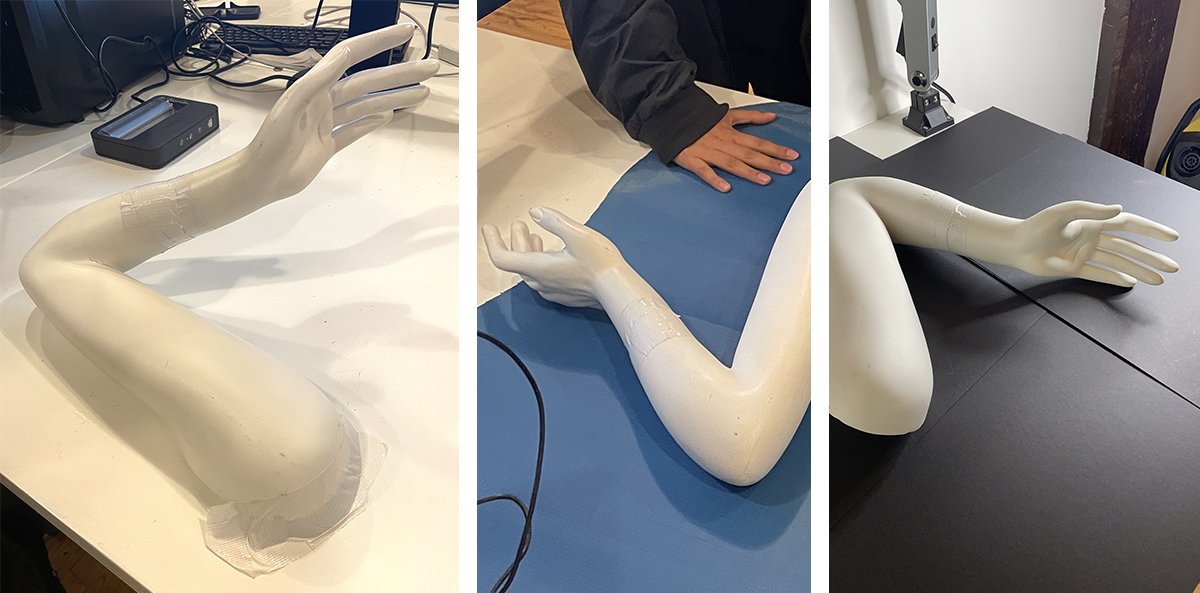 Testing SENSE scanner with Mannequin Arm, Carolina Delgado
Result
We tried different light sets and backgrounds but made a lot of errors reading the mannequin arm. It always created a non-readable zone and mixed with the environment.
SENSE Handheld 3D scanning with 3D Systems from Intel is a hand scanner, with cable. It slowly takes pictures and measures depth so it can create a 3D file on teh SKANECT.
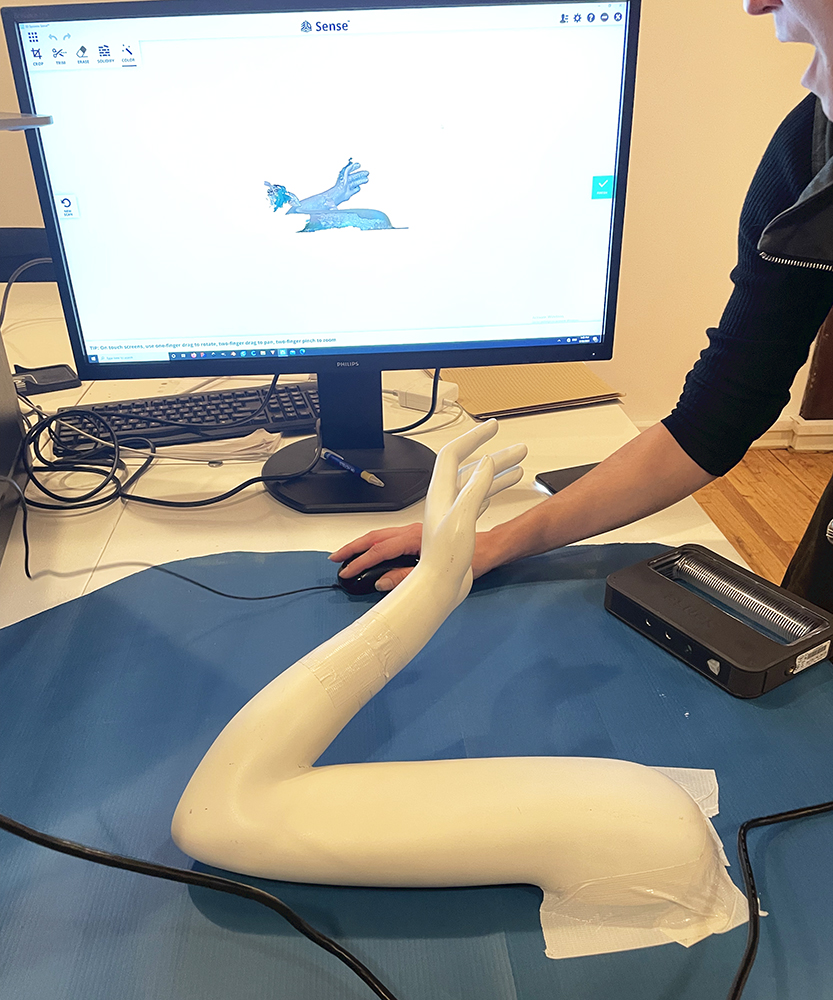
Mannequin arm scanning with SENSE, Carolina Delgado
Make Human tutorial
Testing the software, following the lecture tutorial, I've made a 3D of myself.
- Modelling Menu: Main - Choose gender/ female; Put my age/ 44; Weight/ percentage; Height / 163 (not accurate); also muscle, proportions and caucasian. On gender, face, torso, arms and legs, I adapted to my body shapes
- Geometries Menu: I chose the hair type, eyes, eyebrows and eyelashes
- Materials Menu: I chose the middle caucasian female and gave colours to the hair and eyes
- Pose Menu: I chose a stay position that I uploaded from Community menu/ download assets/ standing/ Harvey_fashionCloseUp2 (walking and talking on the phone)
My Body in 3D
Myself in 3D - Make Human, Carolina Delgado
Rhino
Torso
- Open Obj rested on Make Human. Confirm scale.
- In this case was in cm so I Scaled to 10 times.
- Select and Delete extra objects - ponytail, eyes and eyebrows
- MeshtoNurbs - transform the Material from Mesh to Nurbs polysurfaces.
- It created two objects - select the Mesh and move ir from the place.
- Select the Polysuface and center it.
- Box - create a cutting object on center
- BooleanDifference - select
- Select final Polysurface - Save as .OBJ and .STL
3D Torso, Carolina Delgado
Open Arms
I changed the pose in Make Humam so I could have the arm in the right position - open.
The arm on the first test was not seating in a plane base, so I went to Make Human again, and rotated.
Second 3D with open arms - Make Human, Carolina Delgado
The arm on the first test was not seating in a plane base, so I went to Make Human again, and rotated.
* Pepeated all the steps, but now using Boolean Difference to trim.
3D with arms open, in Rhino, Carolina Delgado
Slicer for 360
Arm
My firt imported arm reveled to be with an angle problem on the shoulder cut.
* This was me testing fo Slicer for 360.
* I tested possybilities, but than It would be better to correct on Rhino. I than trimed the base.
Sliced Arm, in Slicer for 360, Carolina Delgado
I final got to the conclusion that there will be fingers cuted, so I choose to accept only errors on the biger pieces.
* Select every one and checked it could be corrected later, cuted or glued.
Sliced Arm - 2nd model, in Slicer for 360, Carolina Delgado
File to Laser Cut
In Rhino import the .dxf made in Slicer (I scaled 10% on Slicer to 500 mm hight):
* Import DXF.
* Close lines - Select each piece of cut objecs and join. Group all.
* Delete numbers. Join the slices names.
* Select each piece of cut objecs and join.
* Put groups of same colour in a layer and name it.
* Export the file as AutoCAD Drawing Exchange (.dxf).
* Copy to a USB pen.
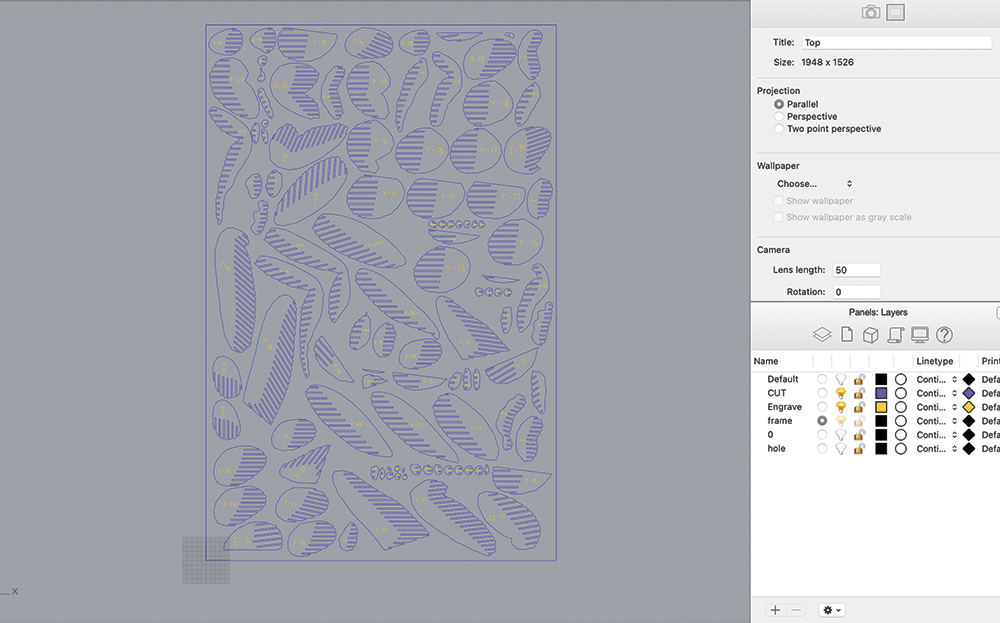
File to Export to LaserCut, Carolina Delgado
Laser Cut
Get to know your Fab Lab Rules. These are the main ones:
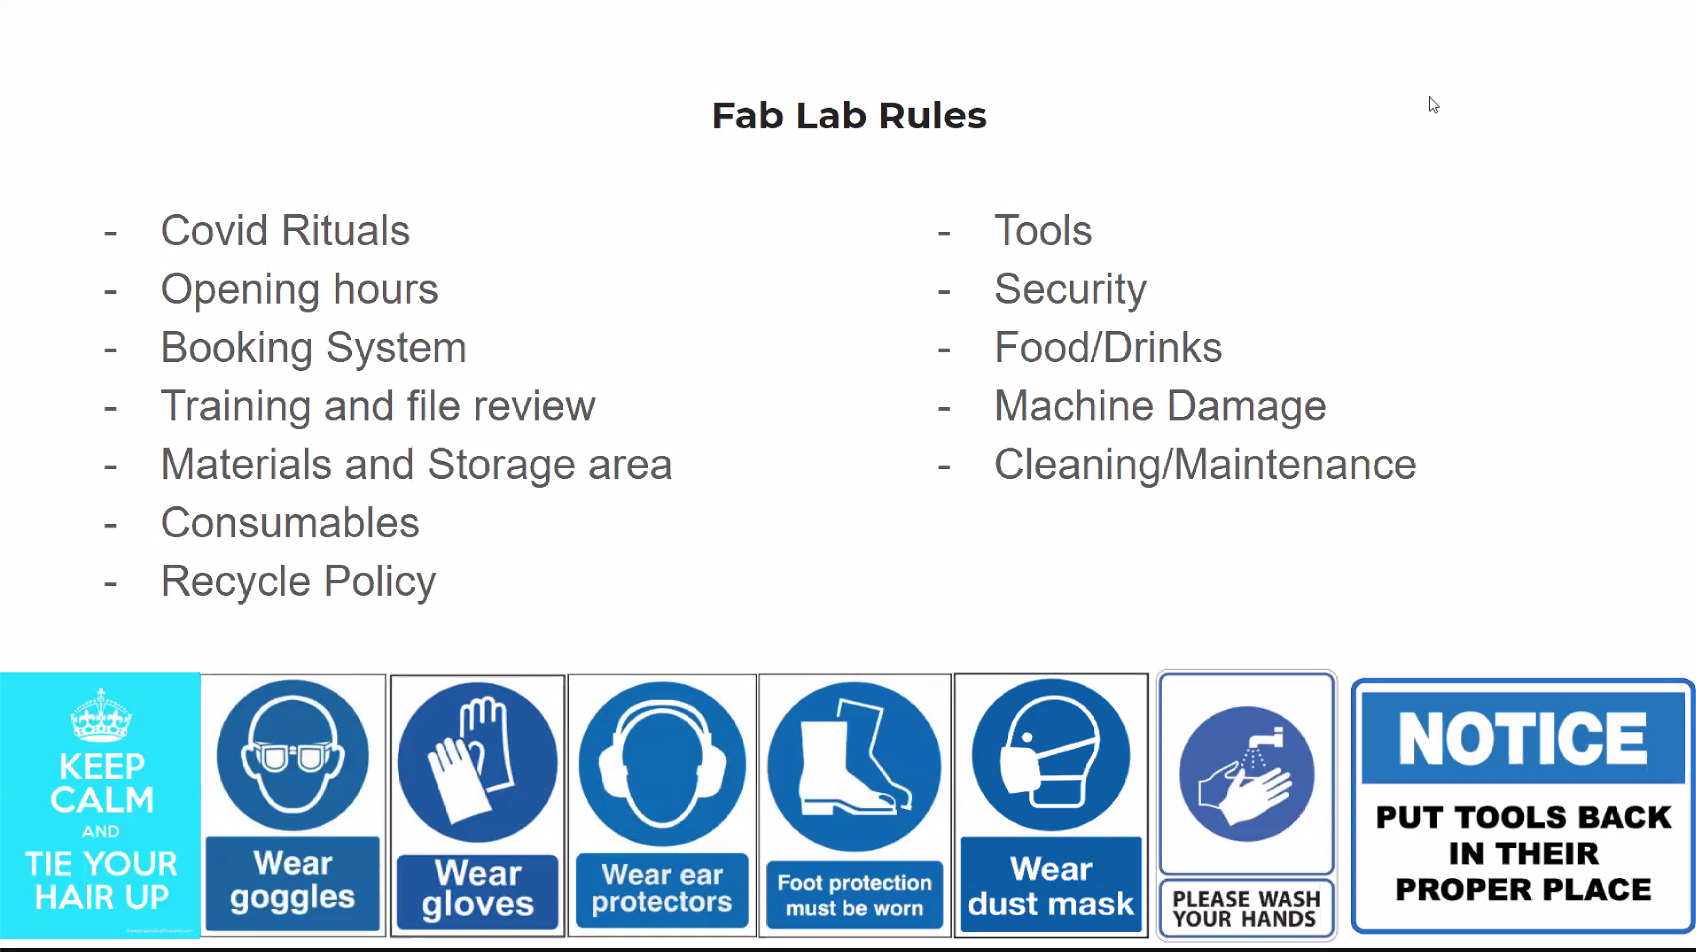 Fab Lab Rules, shared by Anastasia from CBA MIT
Materials
It is recommended that you use cardboard, wood or polypropylene for your mannequin.
According to Beatriz Sandini, it is easier to start with waffle cardboard. Afterwards, if the project results, perfect, you can invest in another material.
Check for test samples on your Fab Lab to have some ideas from were to start.
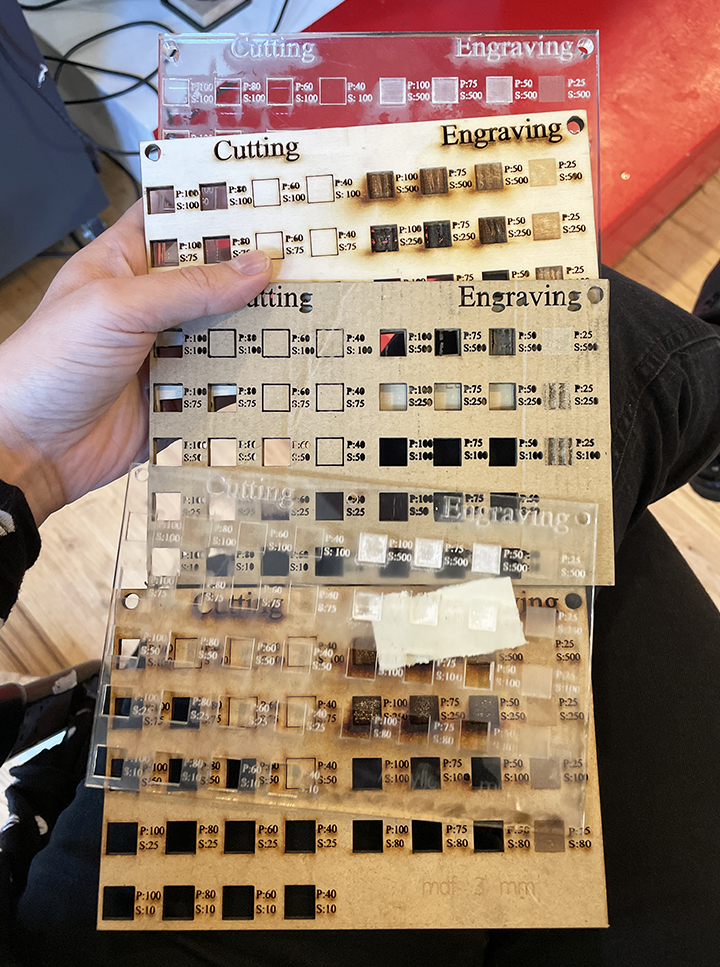 Cutting and Engraving board samples, from Fab Lab Amsterdam, Carolina Delgado
Beatriz Sandini recommended:
"For mannequins 1/2 size (just torso or miniature), depending on the technique (you will see them on slicer):
3mm thick wave cardboard for stacked / cross
0.5/1mm thick cardboard for folded / polygonal."
Safety rules
- Never leave the red area and the machine alone.
- Always follow the check list - steps.
- Álcool to clean the machine screen and buttons.
- Spray Water just to spray in fabric before cutting or as extinguisher
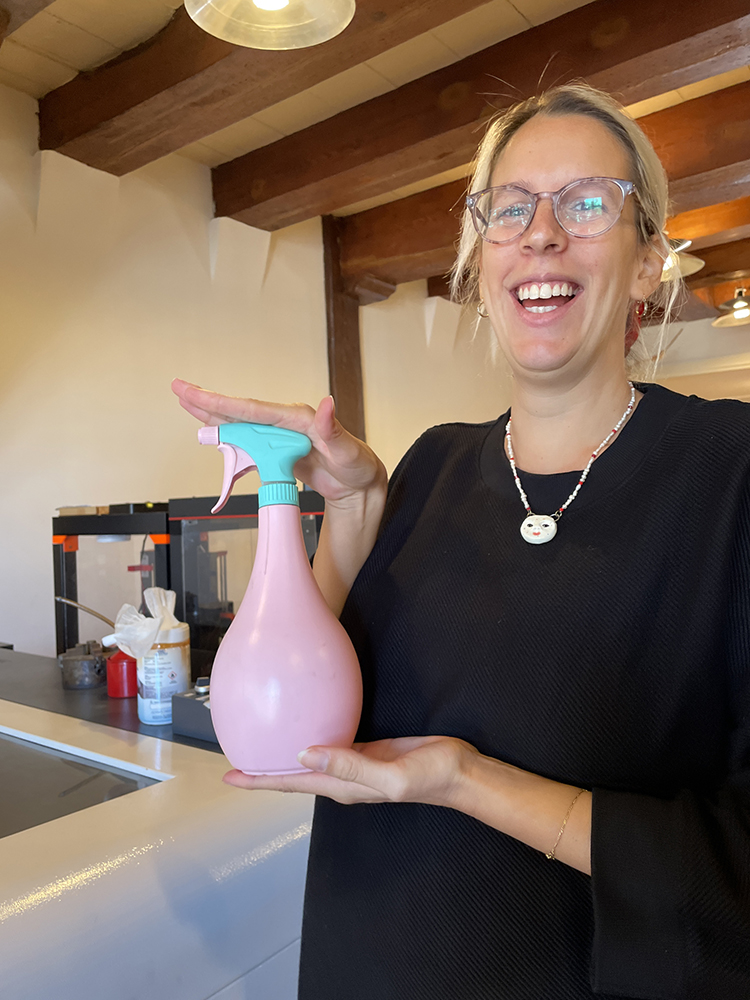 Bea showing the Water Spray, Carolina Delgado
- Turn on computer and plug USB with the work.
- The computer ask for a password at login but in this case it’s none, press enter
- Create a folder for your work and import dxt from the Pen
- Open Light burn - software
- Import your file Test
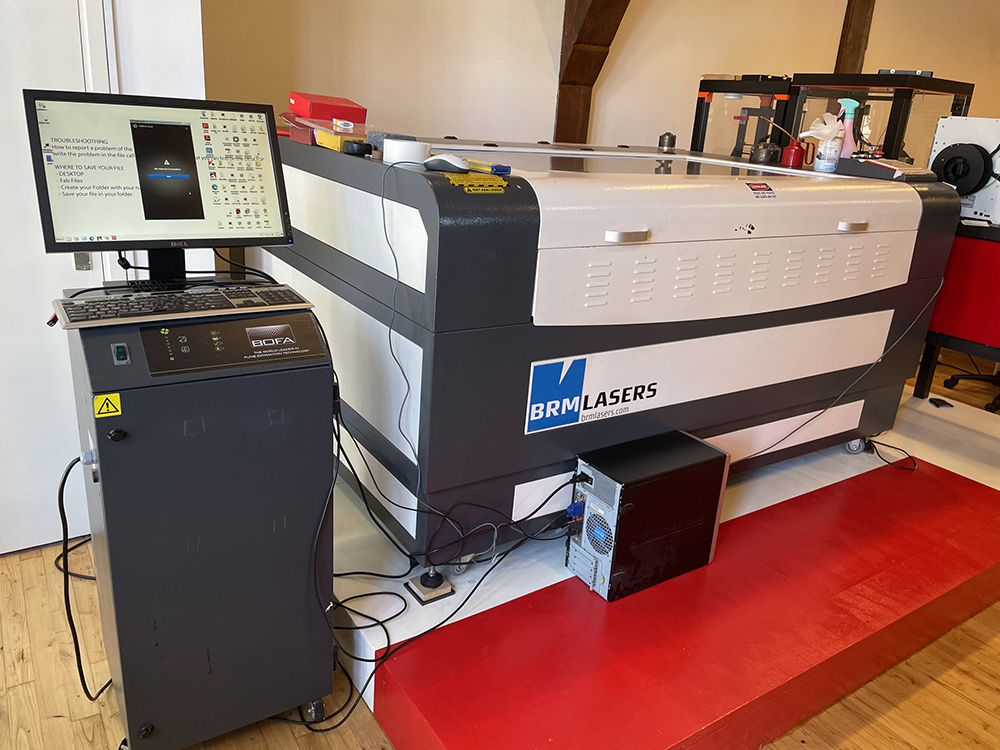 Working area - Air blower, Lased Cut Machine and red area,Carolina Delgado
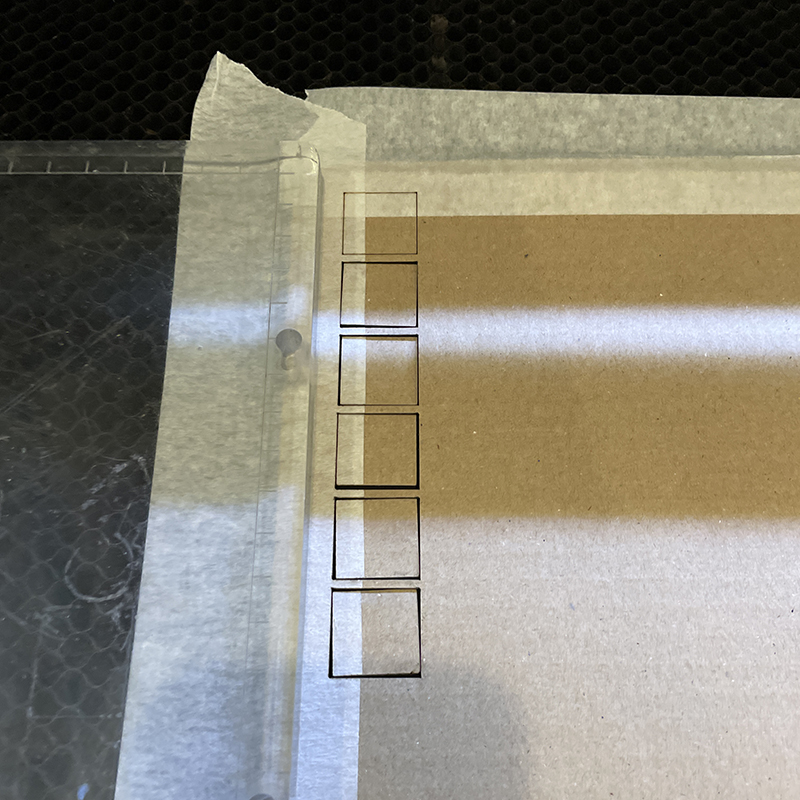
Squares for cutting test - and it must be also in the table view inside of grid zone.
Select the object and confirm the dimensions in millimetres. If you need to scale it, select all and lock with and height, then put new measures.
- Menu Arrange: group, flip horizontally and vertically to put on the right place
Bea exported the squares in different colours means layers (not like Adobe AI or photoshop).
Name our layers correctly (this doesn’t mean the layers makes that, you have to programe after) * Cut| Text | Engrave
- Change the order of layers on the arrows
This will be the ordering that Laser will cult.
- Speed - how quickly - mm for second
-
Power - cutting heat - from 0 to 100%
-
Test differences on your test squares or part of your designs
Use max and minimal power depending on corner complexity; start with the same amount for both:
Mode:
- Line - cutting
- Fill - engrave removes material inside
- Output - green/on
- If you want not to cut some layers, our red/off on the output
- Show - visible
- Air - it’s always on, we have to use it on the machine
- Measure your material to confirm if the measurements are correctly. Cardboad was 2,75 (sold as 3 mm) and tou can put oN this case 3 mm on the software.
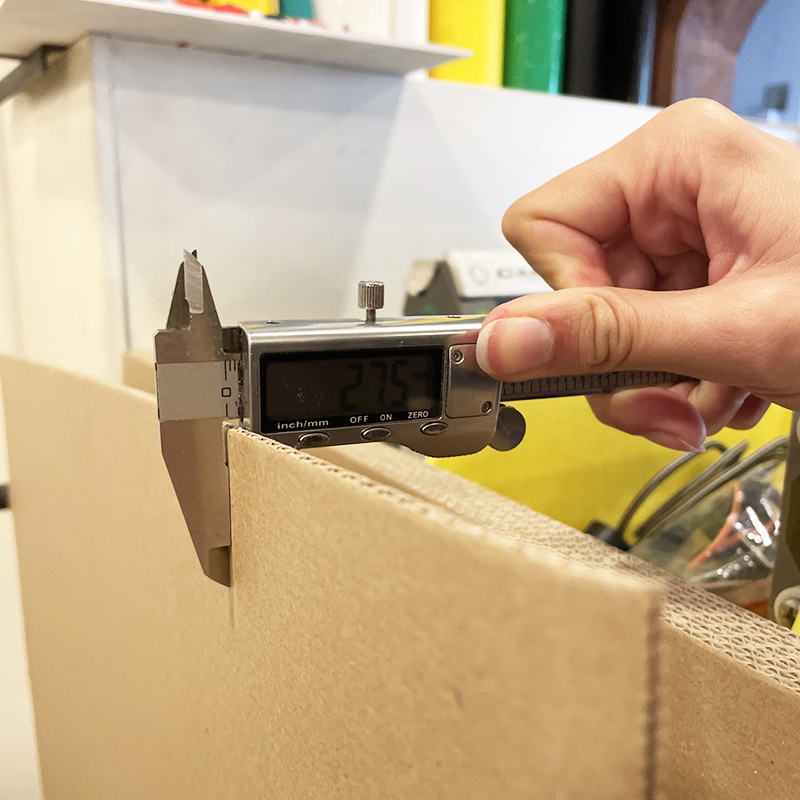 Measuring the cardboad, Carolina Delgado
 Fix the material to the table, Carolina Delgado
- Open using both hands to open the top
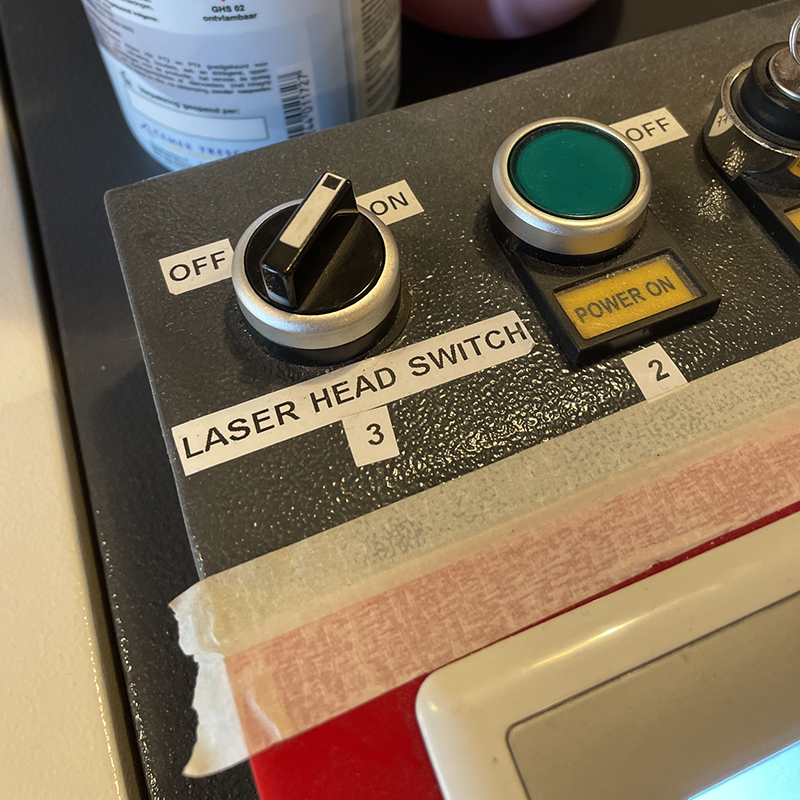
- Turn it on following the numbers:
- 1 turn the key
- 2 push the green button
-
3 swich on the machine
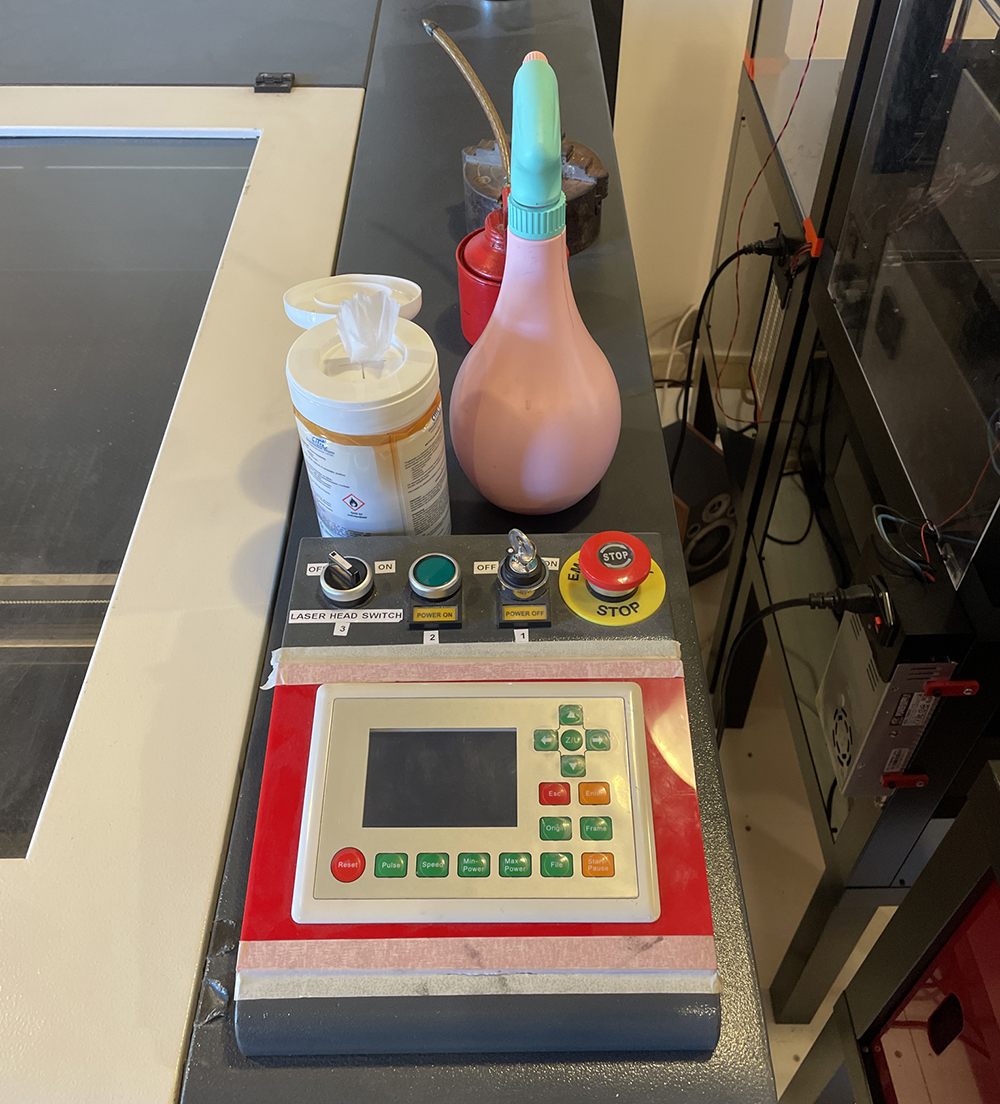 Lased Cut control center
 -
Check it the design the green anchor point.
- Then set the machine to we’re is your start
- Start from top to right (ideal) - Move the arrows
- Move the laser head and the Z moves the bed
- You can also do it on the machine
- Position the laser point to back
- Set the origine of the material
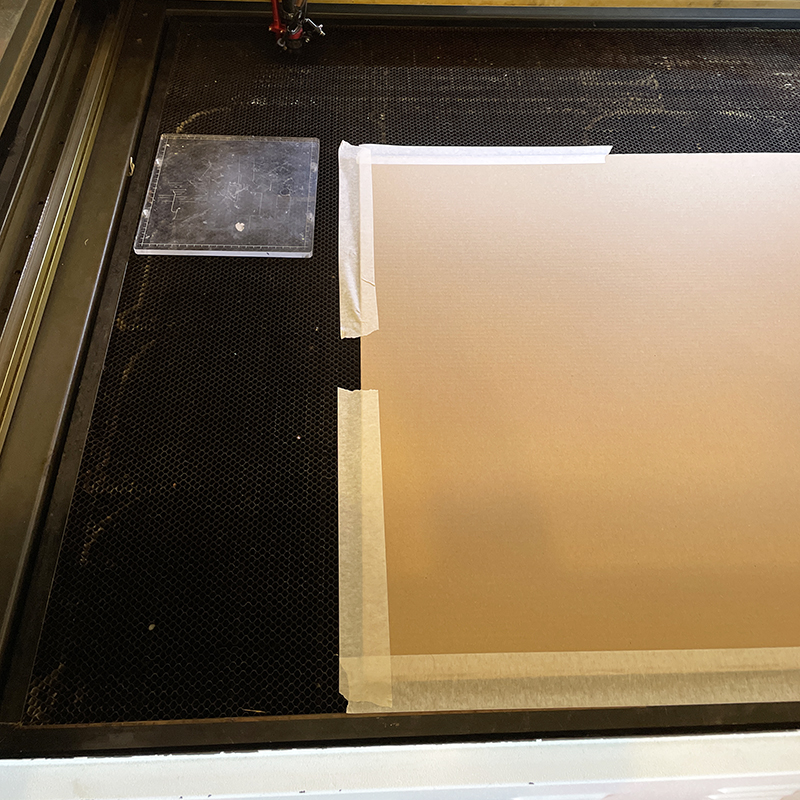
- Use low high object to grab the material to the bed
- Set the anchor using the optimal high
Open the bolt to adjust better, scratches but doesn’t stick/ test all four corners and in middle of the material Before taping the cardboard on the bead we can test the laser points and bed because it is not even.
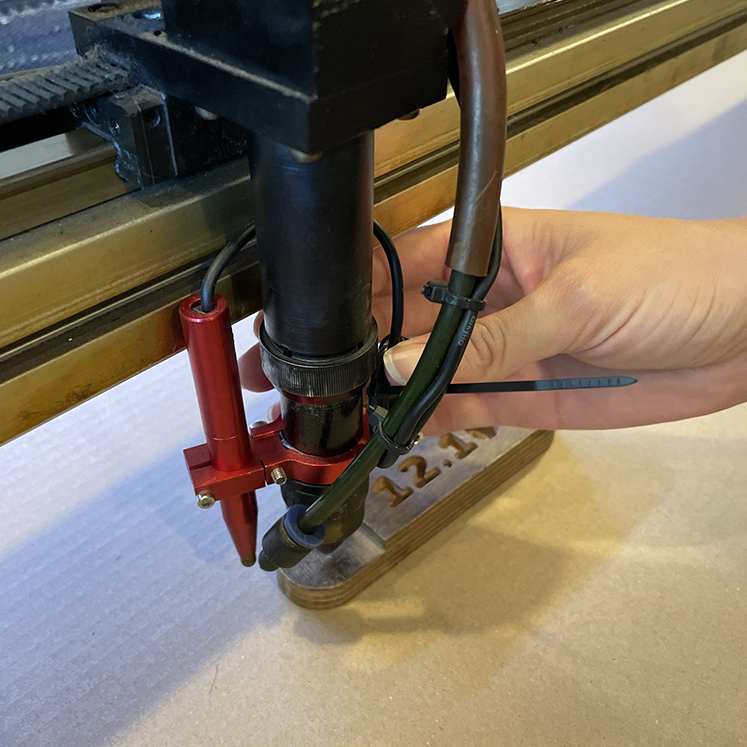
Manual adjust of the noozle, Carolina Delgado
Press origin on the machine control:
 Lased Cut main control buttons, Carolina Delgado
Or on the computer:
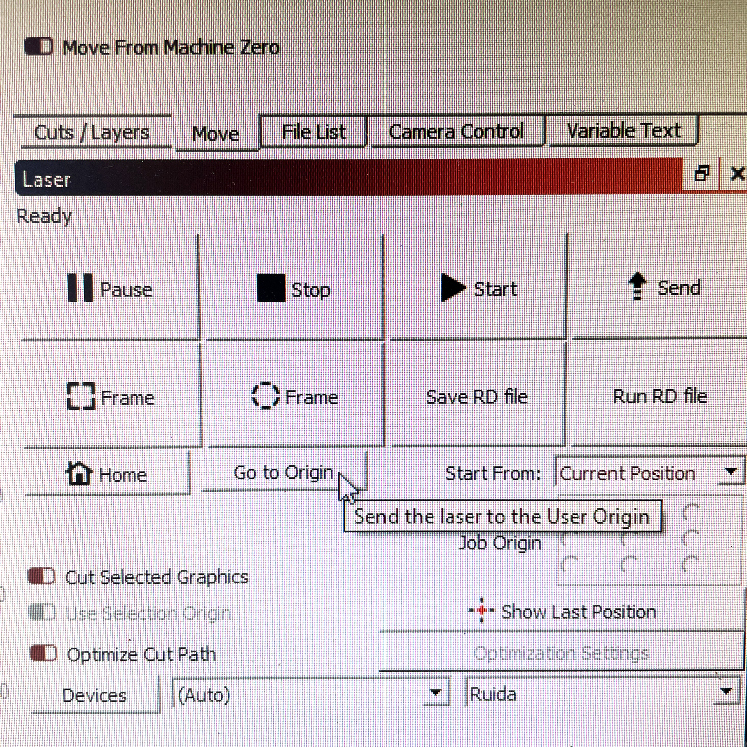
Origin on computer, Carolina Delgado
Start from: current position
Set 4 things
* Material
* Laser point height
* Anchor point
* File
On the machine: press file/ select file/ enter
Close the door -pull a little to your self with both hands
Turn the ventilator - fume extractor
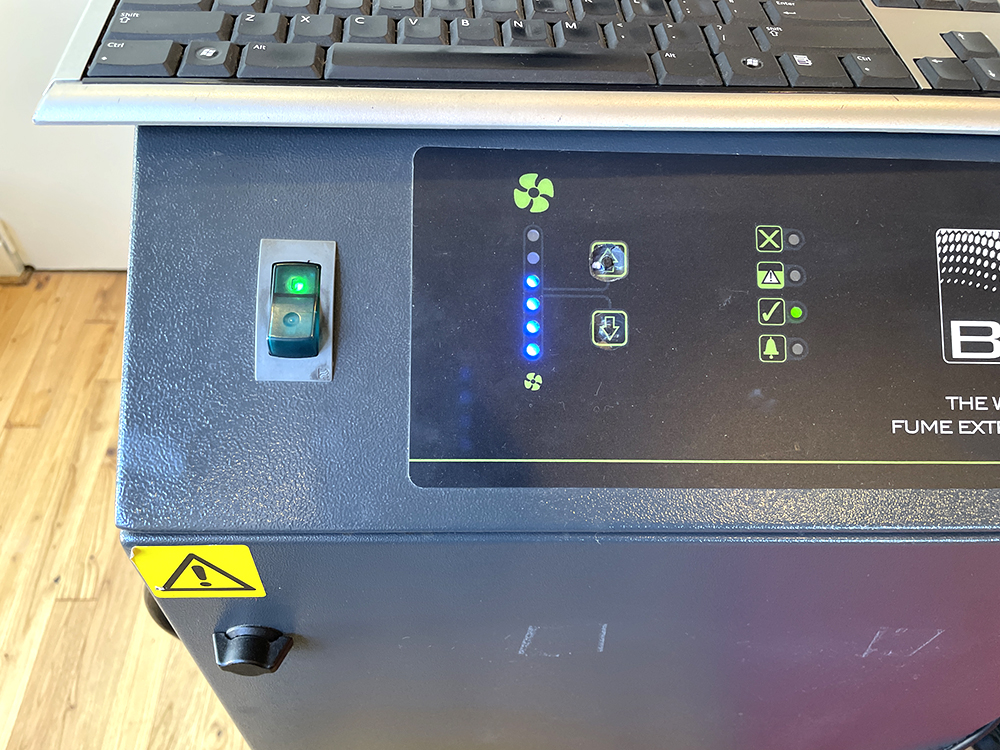
Ventilator, Carolina Delgado
Turn the laser head switch
Button to switch on, Carolina Delgado
Start button / and pause if necessary
Esc / cancels all the work
Test the material with different power and speed
Leave the fume extra for 1 min
Turn of the laser switch
Final Notes:
* P100/ S50 to Cut - mode Line
* P30/ S10 to Type - and select Fill in the mode
Results
Project assembling
The final laser cut cardboard resulted in 110 pieces.
- Make groups of pieces by shape and axis: Z and Y pieces.
- Start SLICER menu assembling and following the steps using the arrows on the bottom menu.
- Ask for help - more hands will be handy.
- Be very patient.
Hanger Arm assembling on SLICER for 360, Carolina Delgado
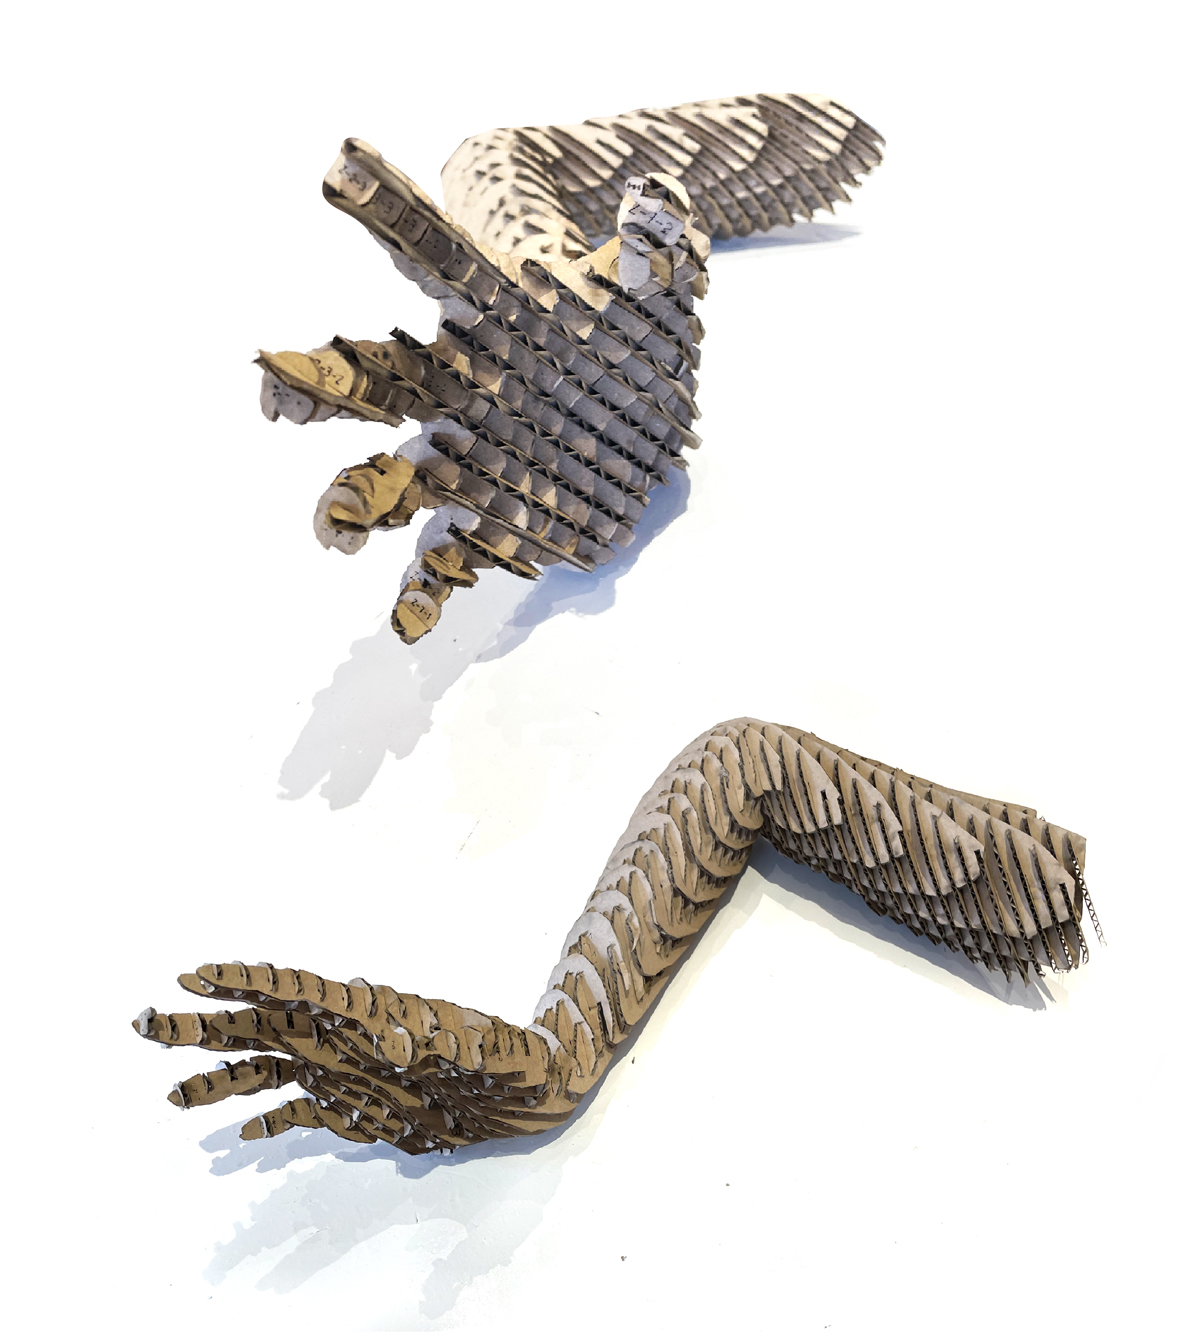
Hanger views, Carolina Delgado
References
Software
MakeHuman - download free software here
RHINO - download software trial here
SLICER for Fusion Autodesk - download software trial
CLO3D - sign in for download software
Regard3D - download software trial here