The Alginator
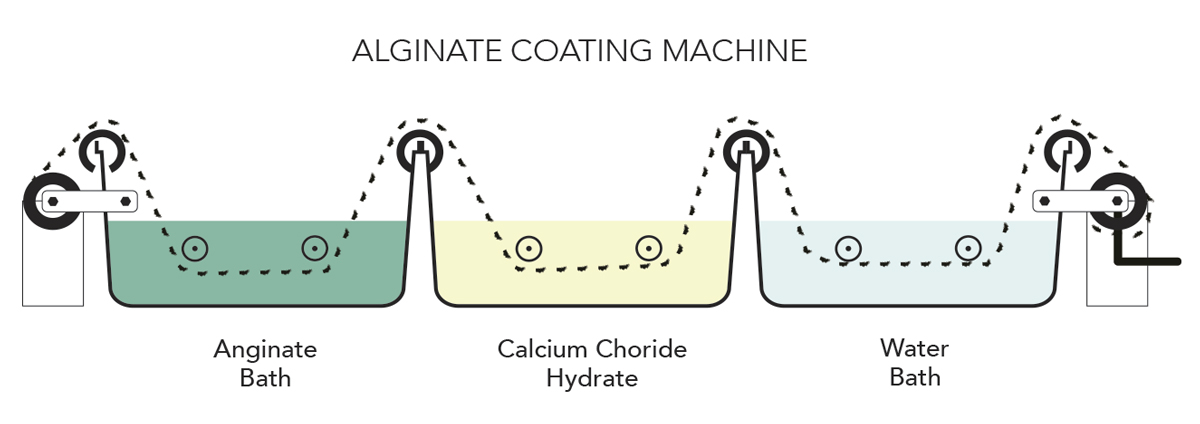
To make lots of meters of alginate coated algie yarn it was needed to create a faster dip-in machine with the needed 3 different baths.
I started with a first draw of the parts that I needed, and then I collected simple materials anyone could use to create in a simple and fast process.
Mainly there are 3 techs: 1. Bath boxes assembling | 2. Roller tubes in knitting needles | 3. Yarn reels with a crank.
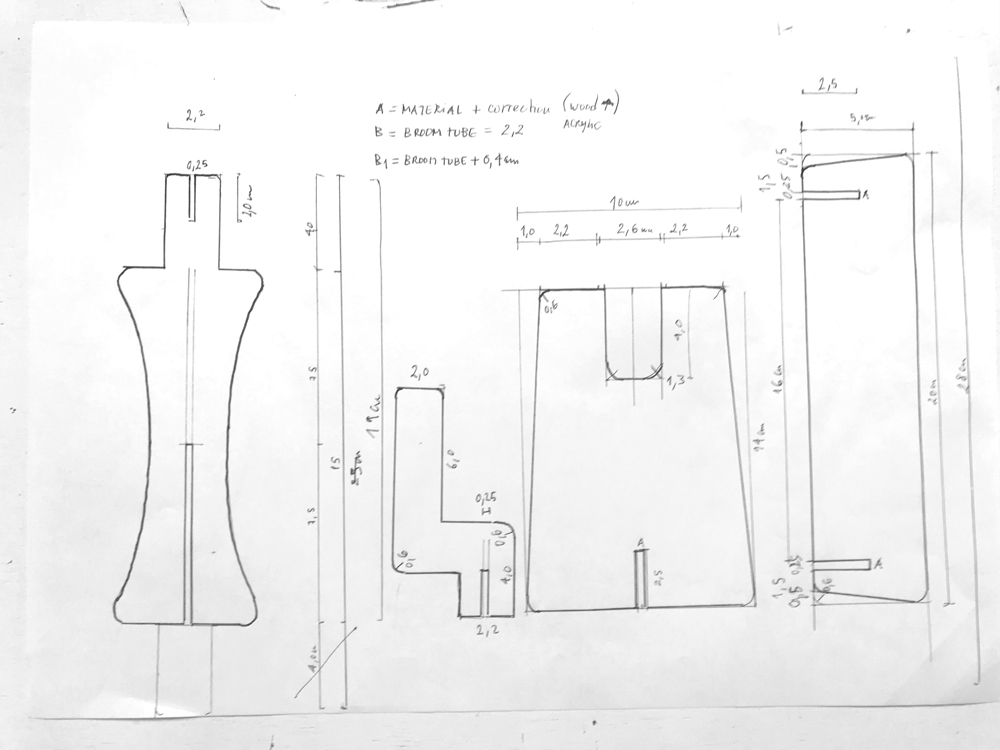
First I made drafts of what I needed. Then I made pen drawings in a paper, in real size, to better understand the final sizes.
As a proportion, I used the size of the broom tube (2,2 cm and 2,0 cm hole) and the short sizes of the plastic boxes (18 cm approx.). After selecting the wastes of acrylic to use in the lab, I downsized so I could make all the pieces in the same thickness (3mm).
After the first sketch of the Alginator, I decided that the crank should not be attached to the tanks allowing to use different sizes of plastic box tanks, and also for the free handling of the crank.
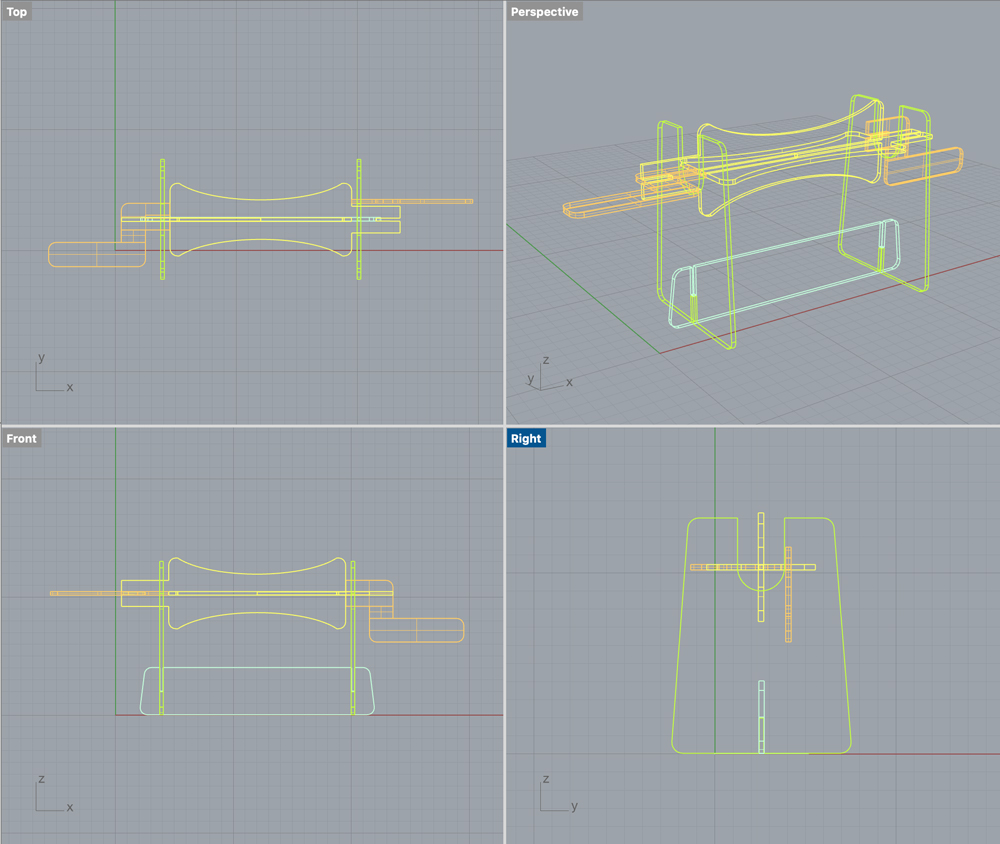
Finally, the technical drawings were made in 3D Rhino and exported to dxf.
 First draft for the Alginator, Carolina Delgado
Process
Materials
3 plastic boxes | 6 Kniting needles of 5 mm | 3 steel broom tubes | 1,5m of Ruber huse (2mm) | 3mm Acrylic board 50cm x 30cm | Silicon Pistol| Soldering iron | LaserCut machine
1. Bath boxes assembling
- With scissors or a knife cut 4 tubes of hoose with 26 cm.
- Then cut the in the longitudinal middle.
2. Roller tubes in knitting needles
- Cut the broom tubes with 27 cm. We need 6.
- Make a card mark with the size of the shorter side of the boxes. Mark the dots for the holes to put the knitting needles (4 cm from the bottom and 3 cm from the edges. Put the card inside the box and with a marker point the holes.
- Make 5mm holes using a soldering iron.
Alginator tanks assemble, Carolina Delgado
3. Laser Acrylic Yarn bases and a crank
- Cut a tube with 30cm to make a base for your yarn cone. Cut 2 pieces of 6cm of huse for the hadles of the crank.
- Create the files using Rhino and Illustrator and export as dxf.
- Laser cut them.
- Assemble all the pieces together.
- Finish the crank handles with 2 pieces of ruber huse with 8cm.

Alginator Crank 1, Carolina Delgado
Rhino
General parts were made using Rectangle, then fillet (0.6 or 1.3). Extrude all the pieces 3mm (or the size of your material). BooleanDifference - selcect the polysurface to substract from, enter,(check delete input: on ) select polysurface to substract with, enter. (It's not cutting? Make shore that they are extrusions and not curves, and that they are on the same layers and level.) Export as dxf. I open after in Adobe Illustrator because the file was on 3D and I had to make it in 2D (clean the surface lines).
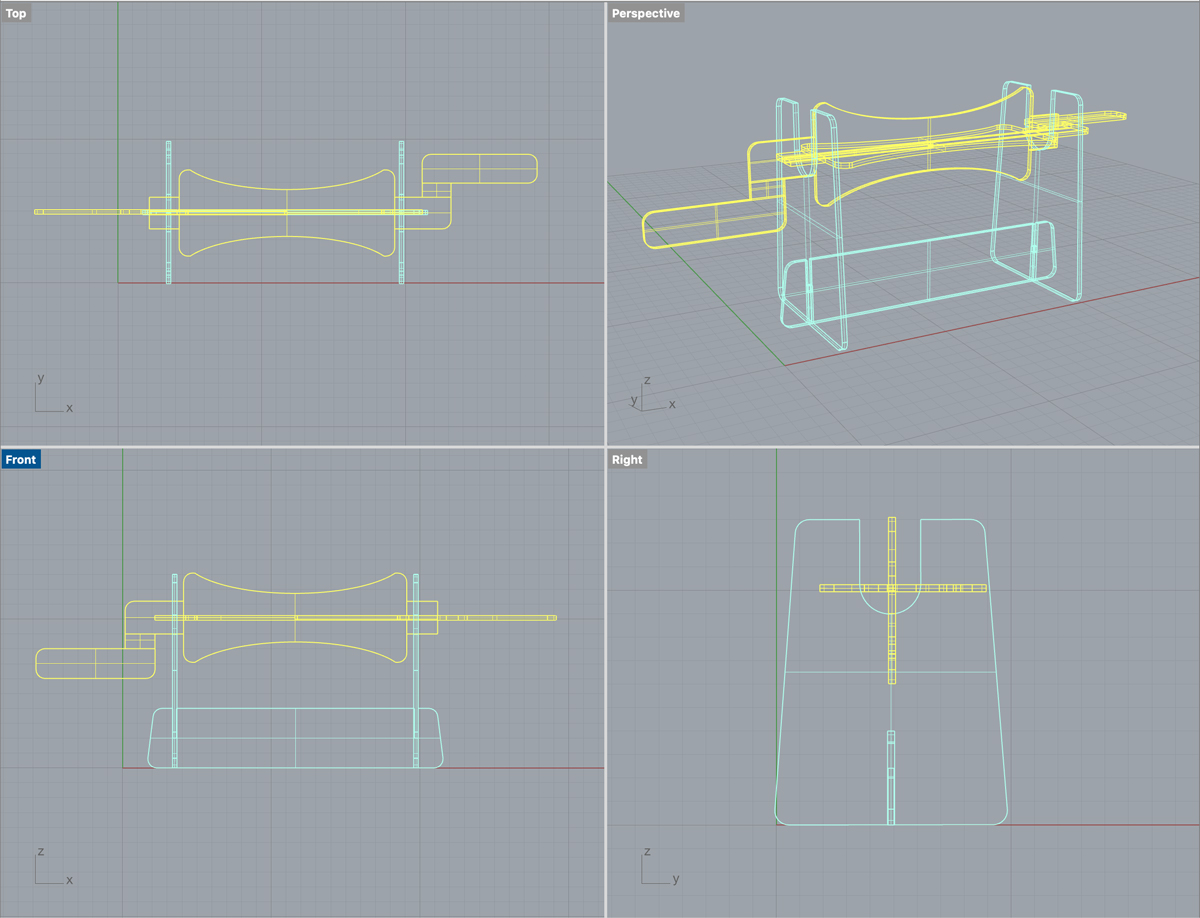
Alginator Crank views, Carolina Delgado
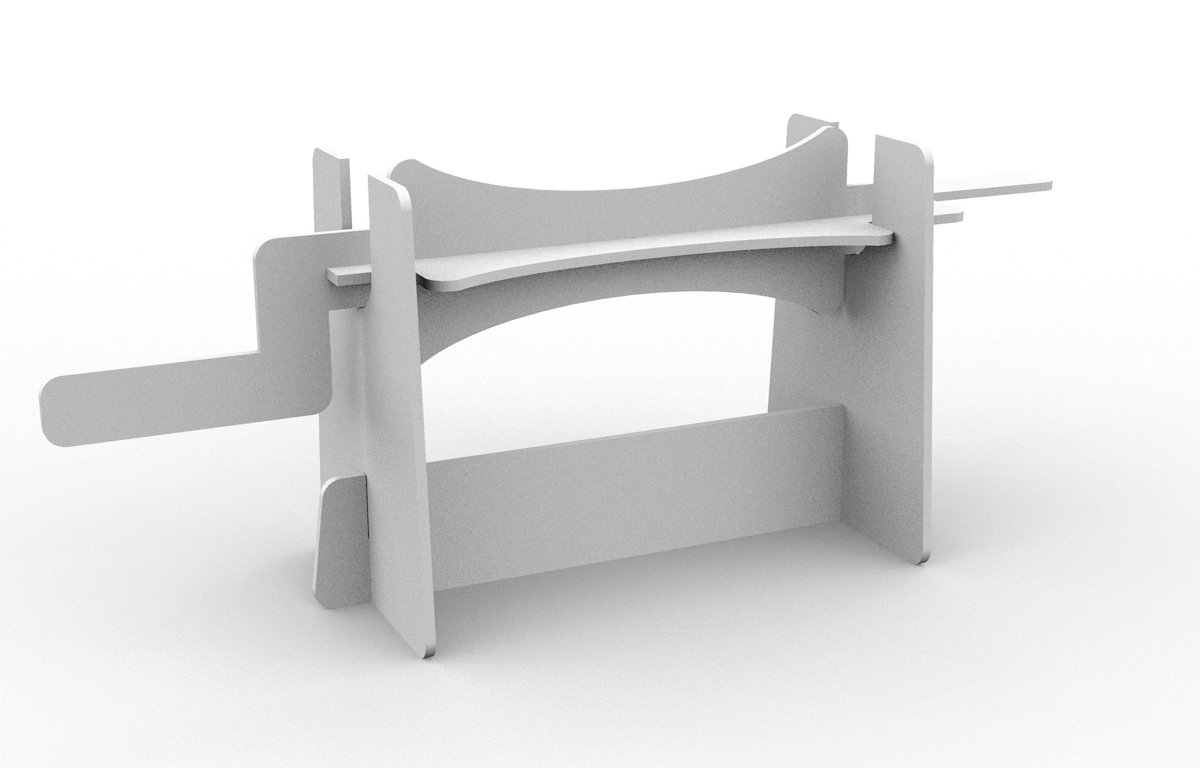
Alginator Crank 3D, Carolina Delgado
Laser Cut Acrylic
To make the crank and the yarn bases was chosen to use Acrylic instead of wood (cheap but not waterproof). First was made a test for the contractions of the material on the joints. The acrylic board had 3mm and I made a scale of 3.4/3.2/ 3.0/ 2.8/2.6.
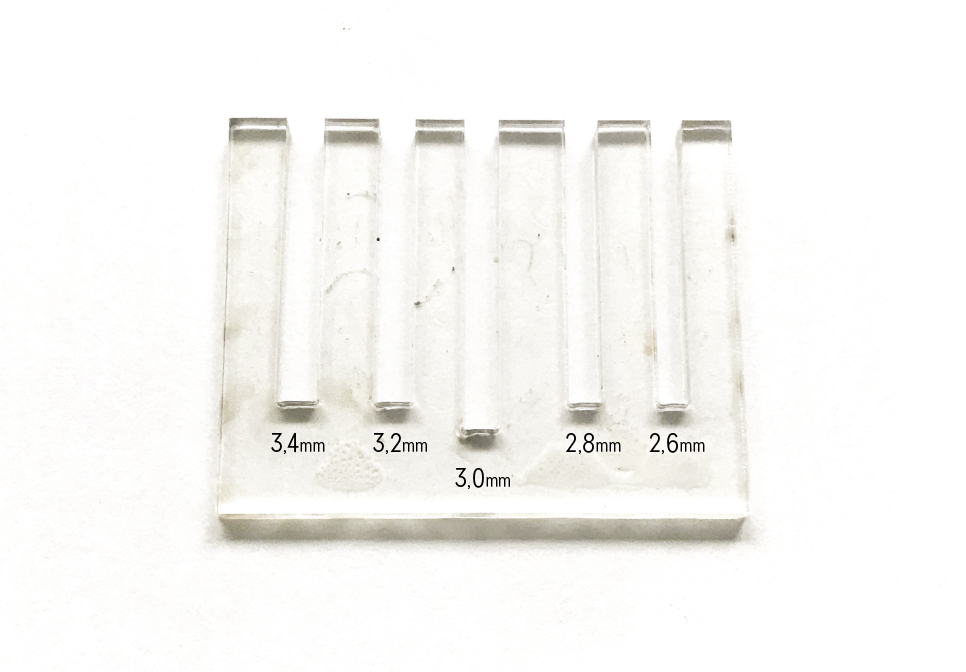
Joints thickness test, Carolina Delgado
- Speed 100
- Power 25
- Corner 20
- Mode: cut
1. Put the Acrylic on the machine.
2. Turn on the machine on the Key. Then Power On (button green).
3. Turn the ventilator on (green button on the black block). Warning! Never leave the machine unwatched!
4. Using the arrows of the machine Anchor the laser head on the corner of the Acrylic [to reset press ESC].
5. Use heavy woods or metals to fix the material (I did not need this).
6. Put the laser head manually on the spot.
7. Press Test.
8. Don't forget to download /upload your file to the Laser machine after deleting the previous work done by the same.
9. Close the tamp with both hands.
10. Switch on air bomb to filter the air.
11. Laser Schitch on!
12. Press Start.
13. Is the job done? Wait a minute to turn off the ventilator.<br
14. Turn of the Laser and switch off the power.
15. Open the door using both hands, remove pieces and let it clean.
Testing the acrylic joints resulted better on the 0,26 mm but still had some space. Therefore, I finished the 3D pieces with 0,25 mm joints.
The boards were leftovers from other works, so I had to plan different files and cut them apart.
Note: there was a problem with the file. I open the dxf in the Illustrator and simplified the lines (in Rhino they were surfaces and we need only curves). The test I made for cut and measure of the joints worked, but for some reason, the lased cut burned a lot of the pieces.
Therefore, I guess, the other problem with the file was the stroke measure? Or I need to change the power?
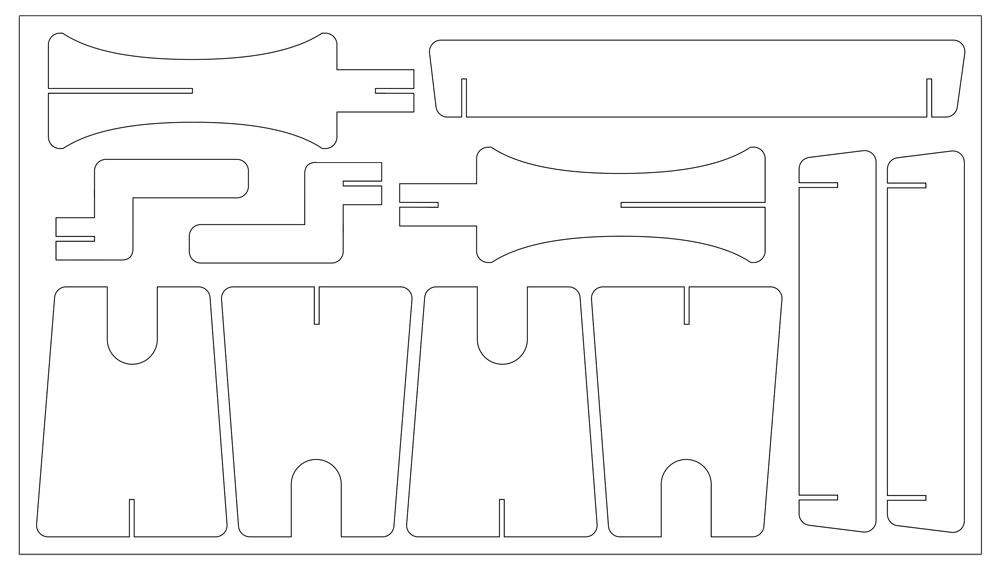
I made a final file in Ai with the cutting plan on a 50cm x 30cm board. This one includes: * a Crank with a yarn base for the coated yarn * an uncoated yarn base (21 cm) * extra feet for the uncoated yarn base for bigger cones (28 cm)

Alginator Crank and Yarn bases Cutting plan, Carolina Delgado
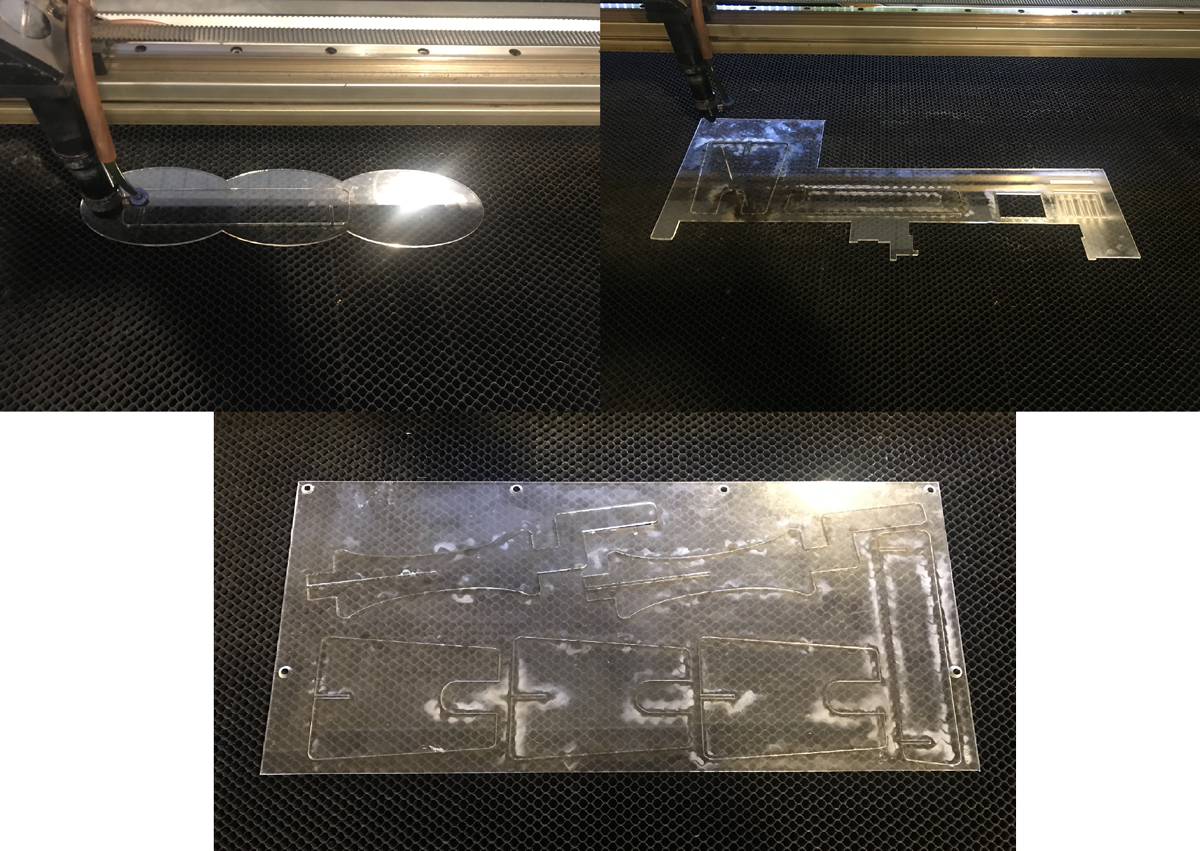 LaserCut Acryclic leftover boards, Carolina Delgado
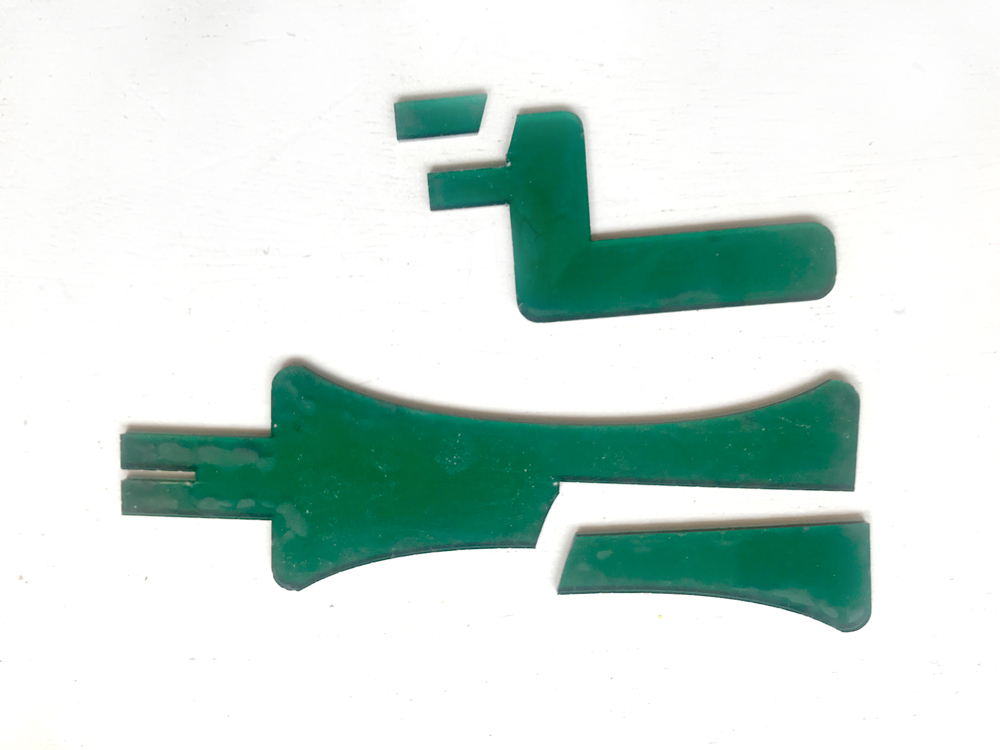
First Results
 The Alginator - first test, Carolina Delgado
The acrylic was cut without the plastic protection and the lines were perhaps very complex for the cut.
So I needed to make a new cuting plan in illustrator and cut it again. Also, Marguerite sugested that I cut the crank removable from the bioyarn bobine.
Next step is to recreate the new crank and Laser cut again.
 Alginator Crank 2, Carolina Delgado
Rhino
To create lines of all the pieces instead of surfaces, I used the Split and the Join menus:
- Command Split, then select the object to cut, press enter. Then select the object to cut with, press enter.
- Select the intersected lines and delete them.
- Command Join (puzzle icon), select all the lines and enter. This way you will have a close line instead of a group of open lines.
Alginator Cutting plan 50x28cm, Carolina Delgado
Alginator new Crank views, Carolina Delgado
Alginator cutting test 2, Carolina Delgado
This second laser cut test when assembled broked a lot (it was bigger then my sample test and burned less, so the joints were smaller) so I had to make a new plan with larger joints (3 mm). Also, I keeped the plastic protection and reduce the power to 80 so it did not burn so mutch. But it breaked some pieces on assembling, therefone it was needed a new test.
Final work with 3mm on the joints
I repeated the design with larger joints so it did not crack so much. I also bought a new type of acrylic helder at Dokter Plexiglass and asked and the shop how to LaserCut better. He told me that Power 65 was enough for this thickness, and also this sheet is double side protected.
Alginator final version, Carolina Delgado