5. E-Textiles and Wearables I
To start to work this week I read a little about arduino an open-source electronic prototyping platform enabling users to create interactive electronic objects, and start with an arduino starter pack.
I tried several connections and reactions.
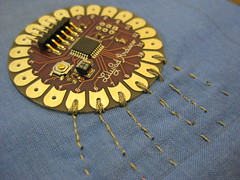
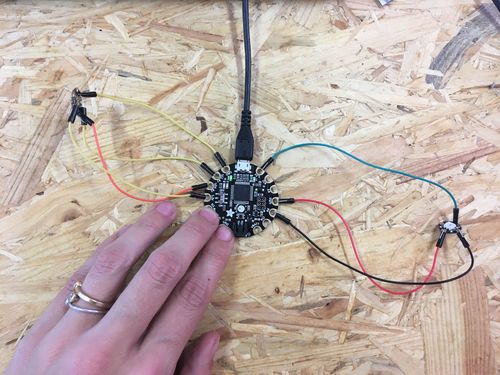
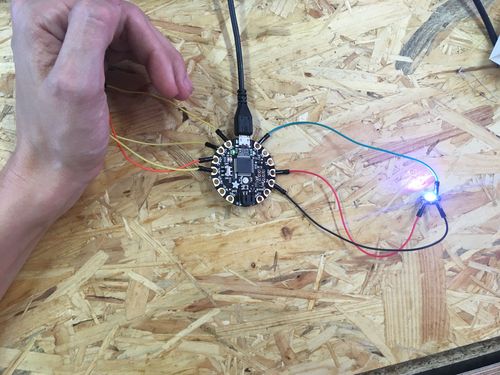
I work with hard/soft connections, connections between soft e-textile to the hard electronics. In the following projects, the soft connections were made with conductive thread attached to the Flora board pin with small node.
 credit https://www.kobakant.at/
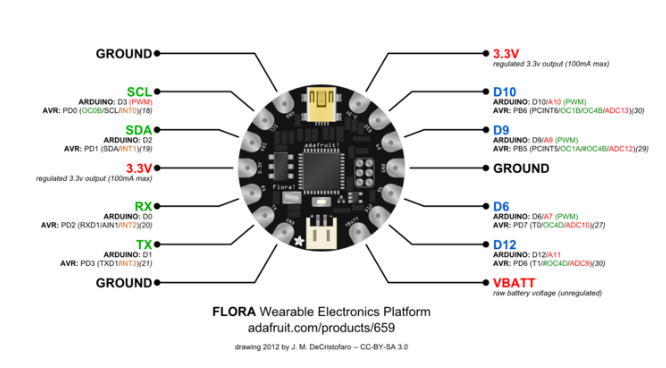
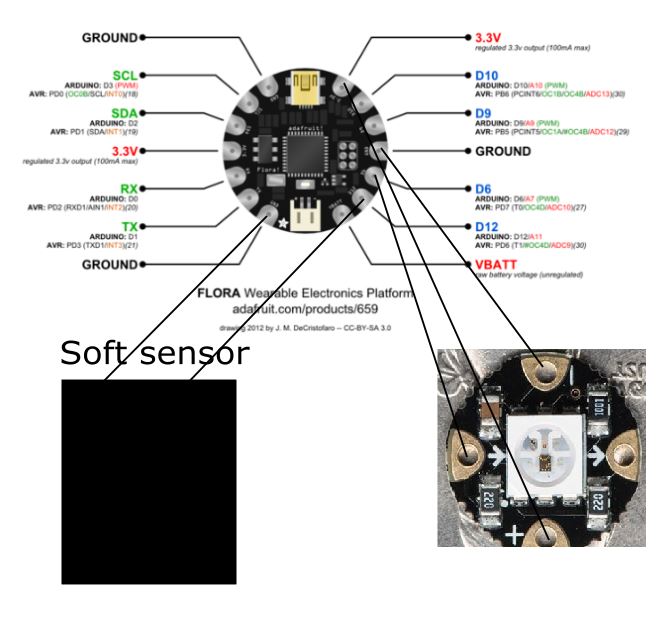
The most important in order to code and make the connections was to know the pinout diagram of the Adafruit Flora electronics, a wearable electronic platform that I used.
Research
These are the connections I tried :
- Button on/off
- Lux sensor
- Pressure sensor
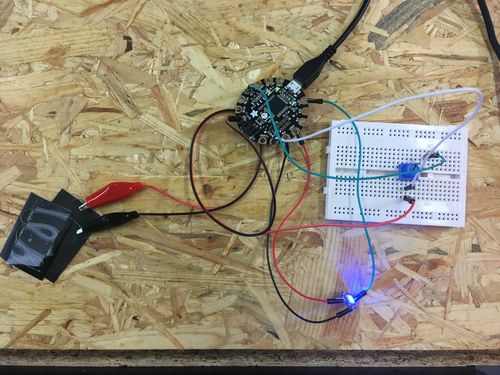
- Stretchable sensor
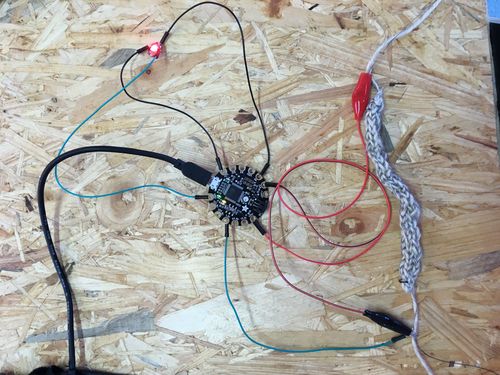
For this one I knit a common yarn thread with a conductive thread and try to see how the tension in the knit cord could affect a led color. The knit sensor yarn depends on how well the short steel fibers touch each other: make physical contact for electricity to travel through. Changes in resistance are due to changes in these contacts: the surface area (due to pressure) that is touching each other.
On the Adafruit website there is a lot of examples and code. It was very useful for me to be able to code all the examples.
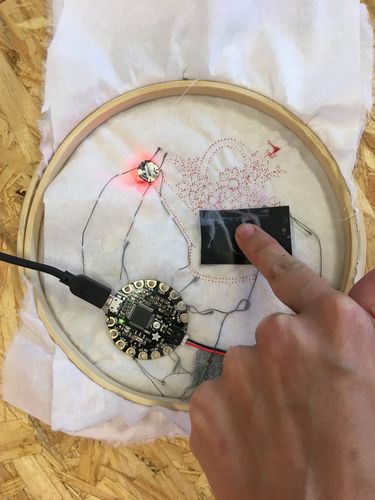
Pressure sensor
For this project I used the embroidery machine to make a draw,
I made a pressure sensor using conductive thread and Velostat (pressure sensitive sheet)
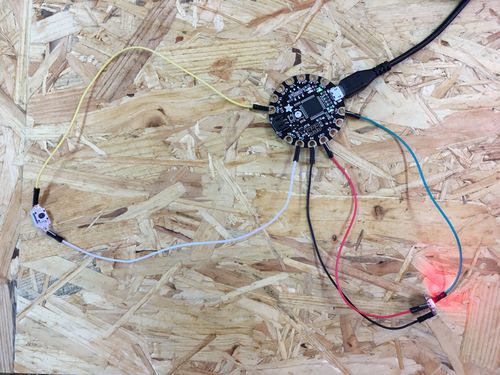
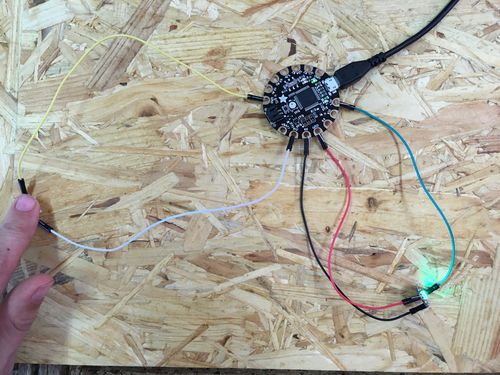
The led color is changing depending on the pressure,
Blue, when it's untouched, green soft touch and red for high pressure.
To get the right resistance range, I had to obtain a resistance with the multimeter test and read the sensorValue in Arduino IDE to be able to see the range variation and put the right sensor range in the code.
[code]
#include <Adafruit_NeoPixel.h>

const int analogInPin = A11;  // Analog input pin that the potentiometer is attached to
Adafruit_NeoPixel pixels = Adafruit_NeoPixel(1, 6, NEO_GRB + NEO_KHZ800);
int sensorValue = 0;        // value read from the pot

void setup() {
  // initialize serial communications at 9600 bps:
  Serial.begin(9600);
 pinMode(12, INPUT_PULLUP);
  pixels.begin();
  pixels.show(); // Initialize all pixels to 'off'

}

void loop() {
  // read the analog in value:
  sensorValue = analogRead(analogInPin);
  // print the results to the serial monitor:
  Serial.print("sensor = " );
  Serial.println(sensorValue);

if (sensorValue < 200){
pixels.setPixelColor(0, pixels.Color(255, 0, 0));
           pixels.show();
}
          else if (sensorValue > 200 and sensorValue < 500){
  //Serial.println("leds triggered");
pixels.setPixelColor(0, pixels.Color(0, 255, 0));
           pixels.show();

          }
          else if (sensorValue > 500){
  //Serial.println("leds triggered");
pixels.setPixelColor(0, pixels.Color(0, 0, 255));
           pixels.show();
}
delay(100);

}

[/code]
Contact sensor led
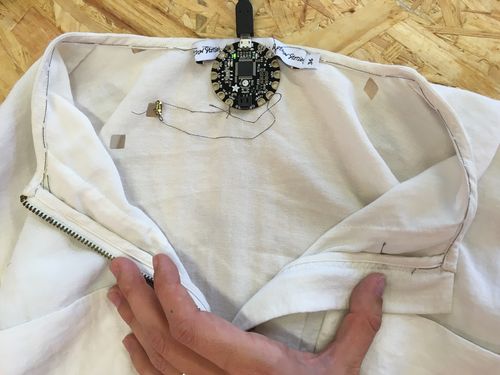
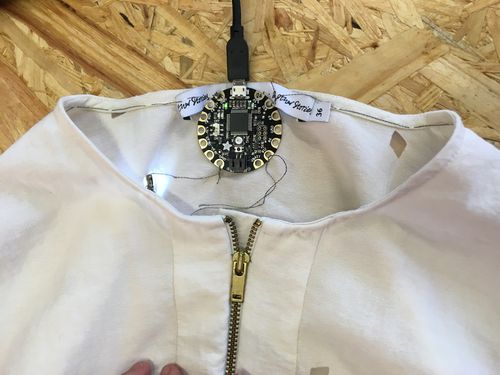
For this project I wanted to try the zip contact.
I sew the Flora board on the back of the shirt and then, using a conductive thread, sew one thread from the power pin of the Flora board to the zipper and a another one from the ground pin of the Flora board to the zipper.
The code is a button on/off code, on when the zip is closed, off when the zip is open. When the zip is closed, the circuit is closed and the current can pass from the power pin to the ground pin and then lighting the Led.
[code]
// constants won't change. They're used here to
// set pin numbers:
const int buttonPin = 10;     // the number of the pushbutton pin
const int ledPin =  12;      // the number of the LED pin

// variables will change:
int buttonState = 0;         // variable for reading the pushbutton status

void setup() {
  // initialize the LED pin as an output:
  pinMode(ledPin, OUTPUT);
  // initialize the pushbutton pin as an input:
  pinMode(buttonPin, INPUT_PULLUP);
}

void loop(){
  // read the state of the pushbutton value:
  buttonState = digitalRead(buttonPin);

      Serial.print("buttonState = " );
      Serial.println(buttonState);
  // check if the pushbutton is pressed.
  // if it is, the buttonState is HIGH:
  if (buttonState == HIGH) {
    // turn LED off:
    digitalWrite(ledPin, LOW);

  }
  else {
    // turn LED on:
    digitalWrite(ledPin, HIGH);

  }
}
[/code]
For a nice result the conductive thread should be covered by a biais.
Conclusion
I found it very hard to get neat hard soft connections with the conductive thread. I think that integrating the design in the drawing and sewing it with the machine could have given a cleaner result.