9. Textile as scaffold
CNC Mold
I made a mold from a grasshopper tutorial that I found on this very nice website Parametric house
All the CNC tutorial is at the bottom of the page.
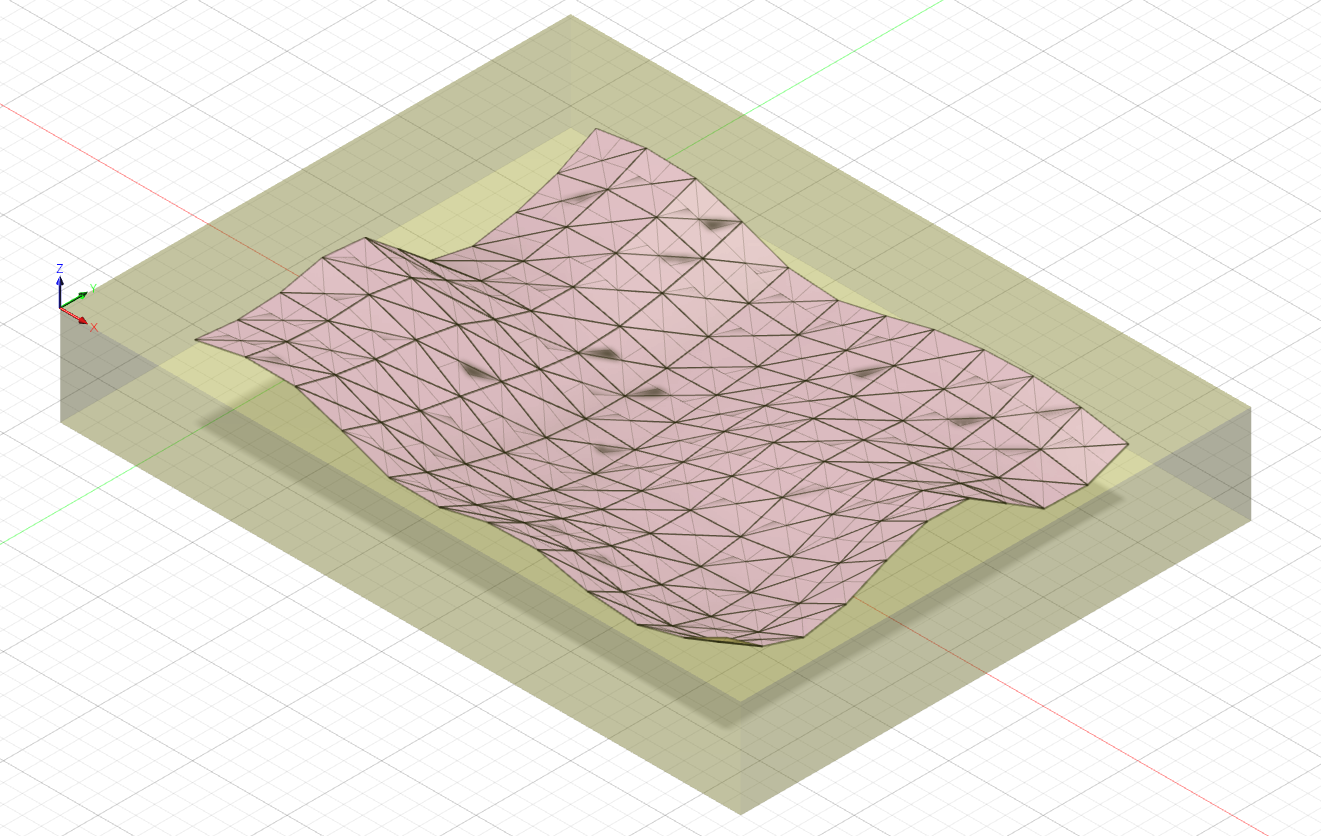
I made a roof shape, and then exported the 3D model into Fusion and exported the model to the CNC machine.
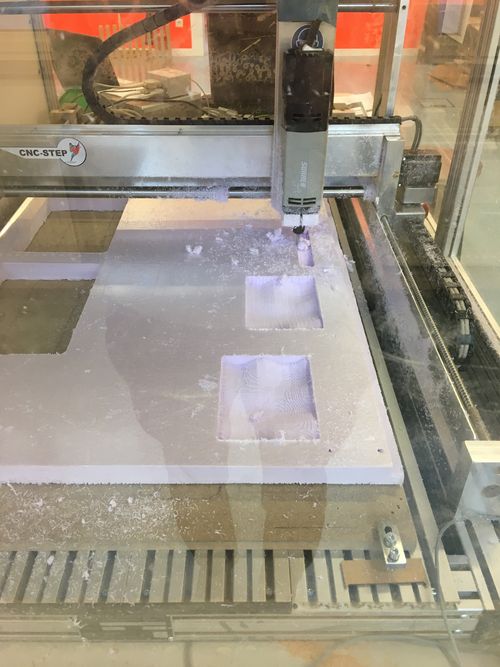
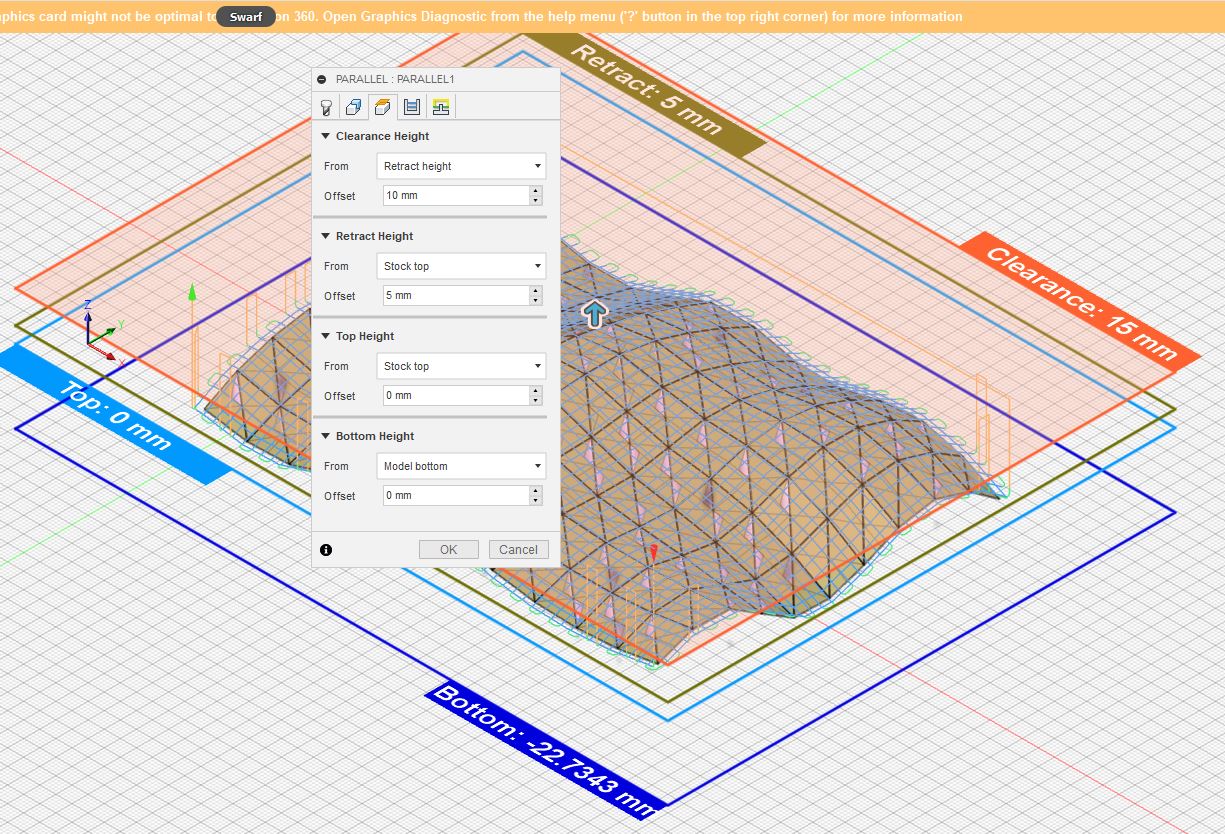
To make the cut, in the manufacture workspace I tried two different cutting ways.
First the adaptative clearing, but the result was not looking as expected. They were too many levels.
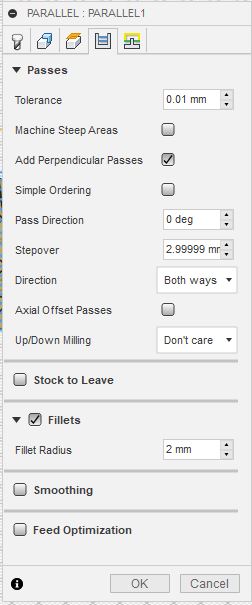
I then try the parallel 3D, both ways. The result was way better. Here is the CNC file and the obj file
I made a mold of both sides of the shape.
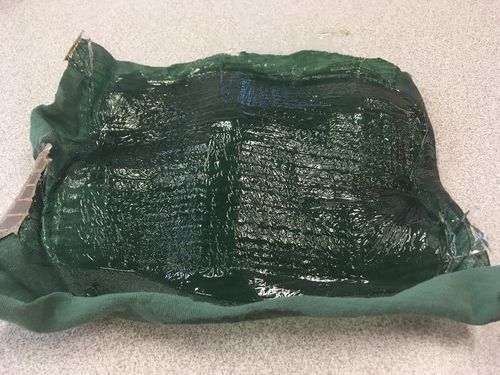
I used this mold with fabrics and Epoxy on a first try, and Fishglue on another one, to give the mold shape to the fabric.
Epoxy
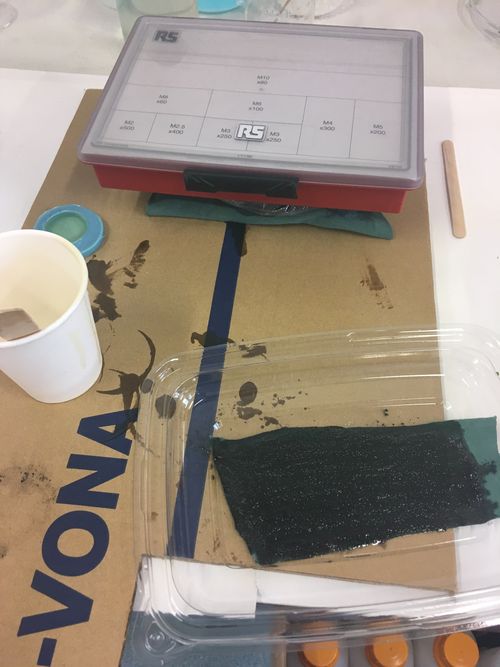
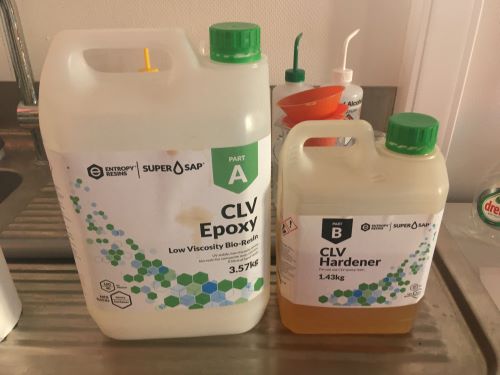
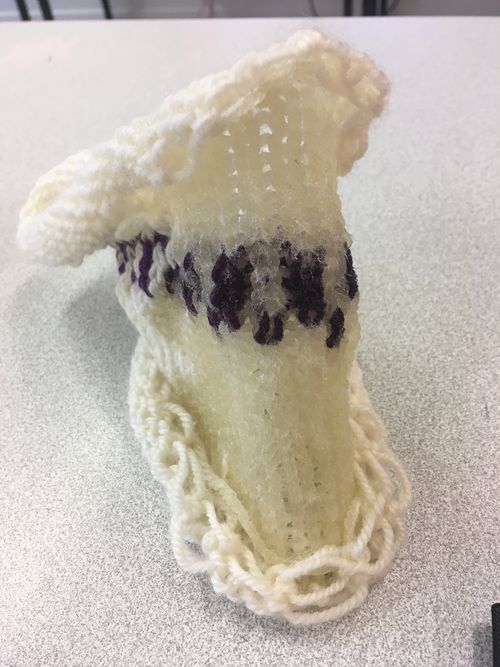
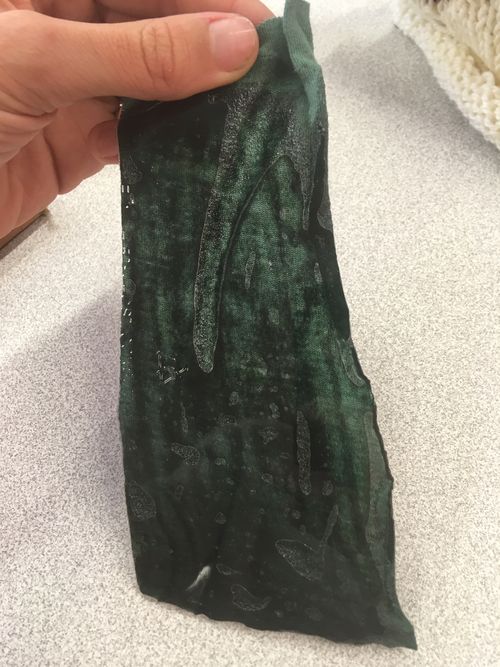
I worked with SuperSap CLV Vlear Epoxy Bio Resin and tried different application, first on a knit piece, then a flat stretch fabric and last stretch fabric form in the mold.
To be able to use the epoxy resin, it's necessary to follow safety rules detailed in the safety datasheet to read before utilisation. Work in a ventilated placce, with gloves, eyes protection, blouse and protection of the workplace.
Here is the workflow I used to make the composite fabric.
- Prepare the fabrics, the plastic wrap, the gloves, the mold, ... everything needed before starting mixing epoxy.
- Cover the mold with plastic wrap, it makes it easy to demold. Epoxy does not adhere to plastic wrap.
- Mix resin and hardener 100:40 by weight using a digital scale.
- Mix by hand for 2 minutes.
- Take off the bubbles in the resin but depressuring the preparation.
- Use a brush to put resin on the fabric.
- Close the mold to apply pressure on the layed fabrics soaked in epoxy.
- Demold after 12h.
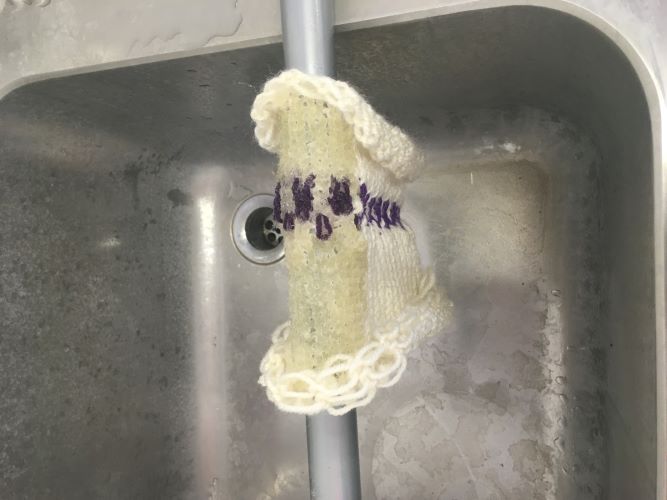
Knit piece :
Flat stretch fabric :
Stretch fabric in the mold :
Wood textile
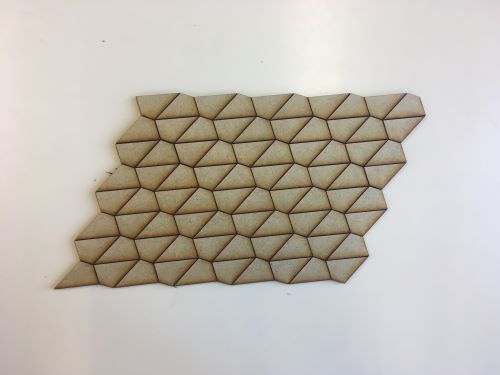
I worked with the wood textile and grasshopper patterns to make wood textile.
First one is a pattern easily generated with the add-on Paraketeet on Grasshopper. This pattern is quadrilateral tiling.
The second pattern is a vonoroi cell pattern with attractive points.
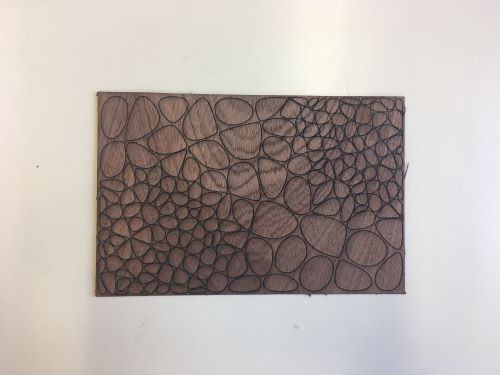
I glued the 2 wood pieces on a fabric and made several tests on the Epilog Laser cutter Legend Elite Mini+ laser cutter in order to cut all the wood without cutting the fabric (parameters : speed 24% and power 82%).
Once the power and speed are calibrate it's easy to get a nice result.
To cut the wood textile piece from the fabric I made 2 contours with differents laser parameters to be able to detach the fabric piece on the external sides.
For the first one, the wood is thick and the result is nicely flexible. The second is of a very thin layer of wood so the result is flexible but not because of the cut.
Bee wrap
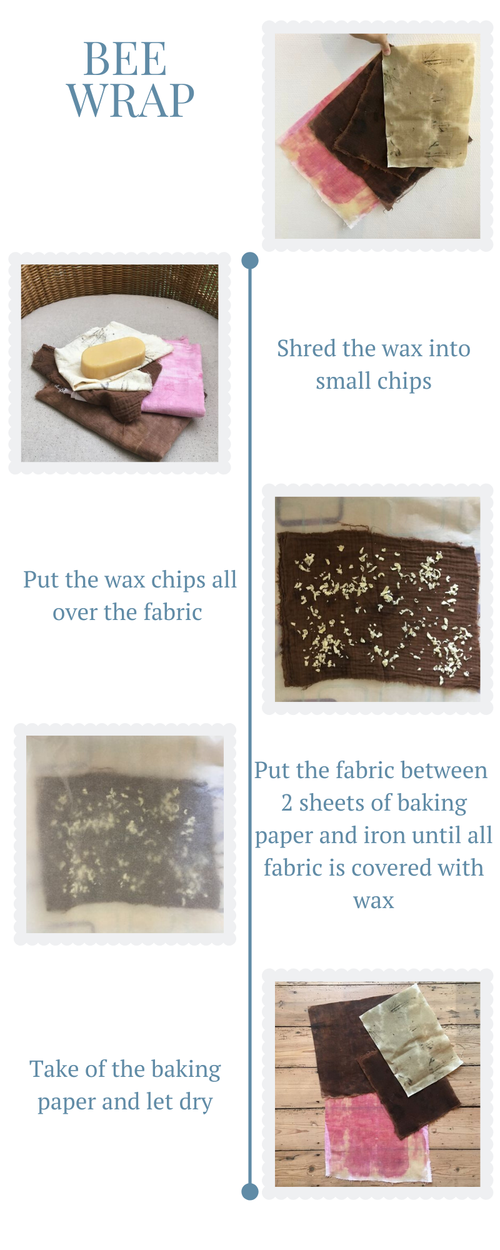
The result is a straight fabric that can be used to cover bowls and plate in order to store food, this can replace plastic sheets and it's reusable.
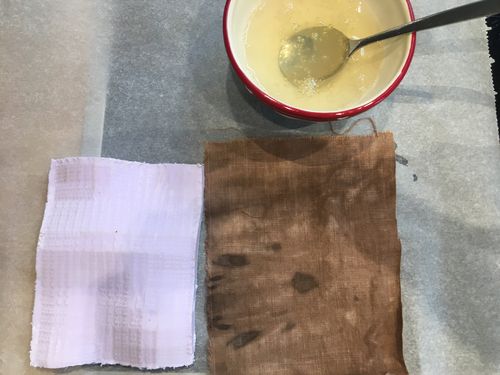
Fish glue
I used fish glue in order to harden fabric, fish glue is a natural glue made from fish parts containing collagen, keratin, or elastin.
I used a piece of natural dye fabric that I made.
The fish glue was solid, so I started by putting the fish glue chips in cold water for two hours and after that I heated it until all the glue was diluted.
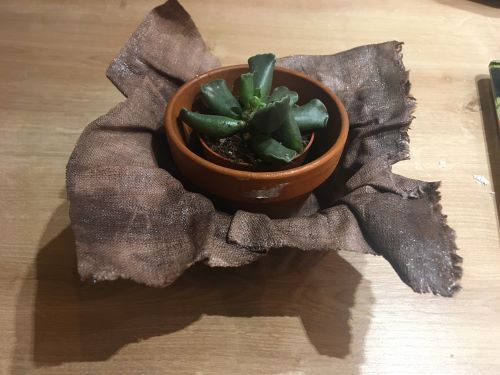
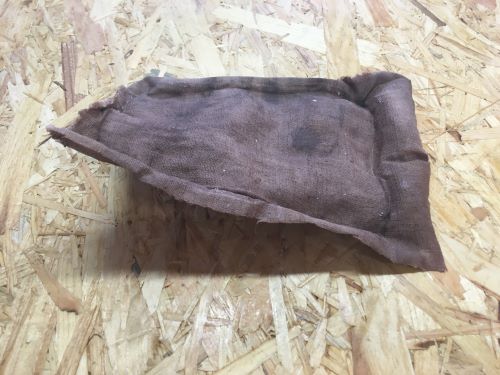
I applied the fish glue with a pencil on a piece of fabric and let dry the fabric one in the plastic mold made for the mycelium, the other one on the foam mold.
I took 2 days to dry and here's the result, a hard fabric that can be used as a plant pot.
Alun Crystallization
I worked with the Alun preparation.
I followed the course recipe.
- Start preparing a saturated solution by putting alun in hot water until alun stop to dissolve
- Filter the solution and let rest for one night until small crystals appears
- Make an other saturated solution
- Take a crystal and put it on the yarn thread
- Put the yarn thread with the crystal into the second saturated preparation
- Crystals start to appear on the thread
- Take off the yarn letting a little of yarn with cristal in the preparation.
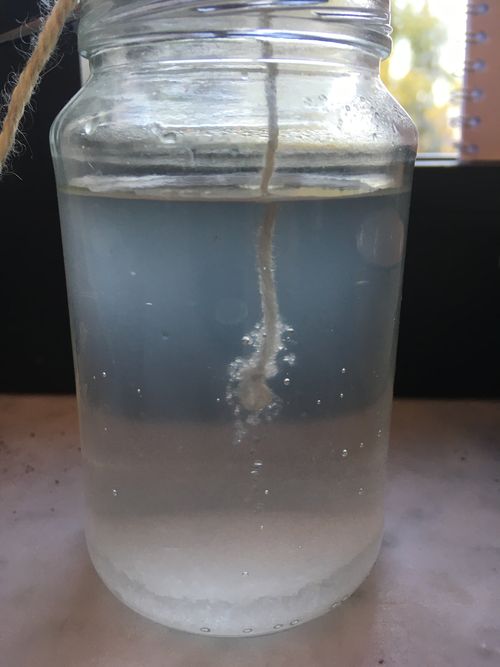
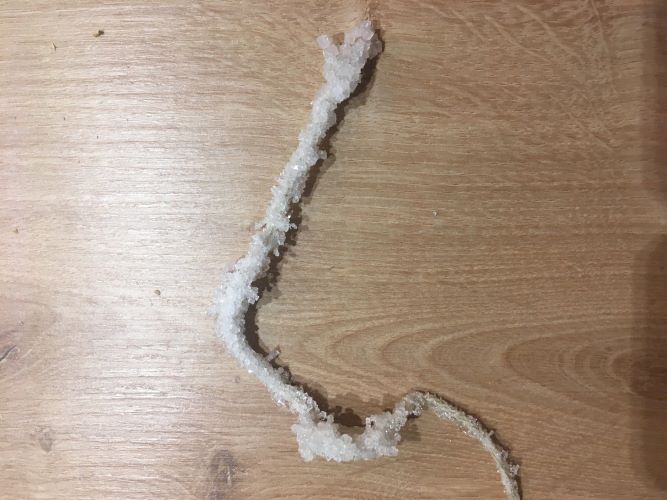
I found it hard to get a nicely spread crystal but I liked the result.
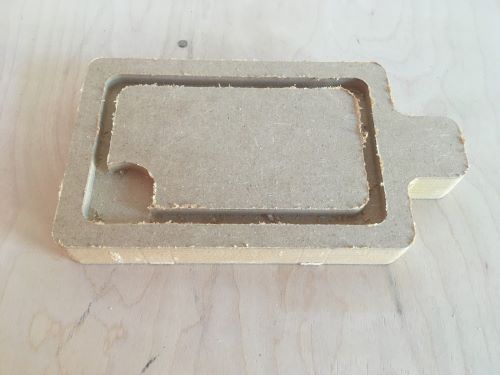
CNC Machine tutorial
On the 14th of November I followed a CNC course.
First part of the course was on fusion 360, a 3D modelling software, how to process to export a 3D model to the CNC machine
The test model was a wooden cut board,
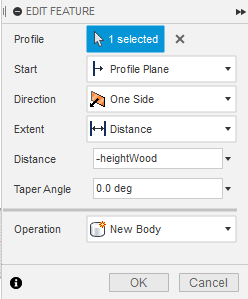
First advice was to make the pocket depth relative with the material thickness to be able to change very quickly the model depending on the material.
- Model
The 3D model for the test was already made.
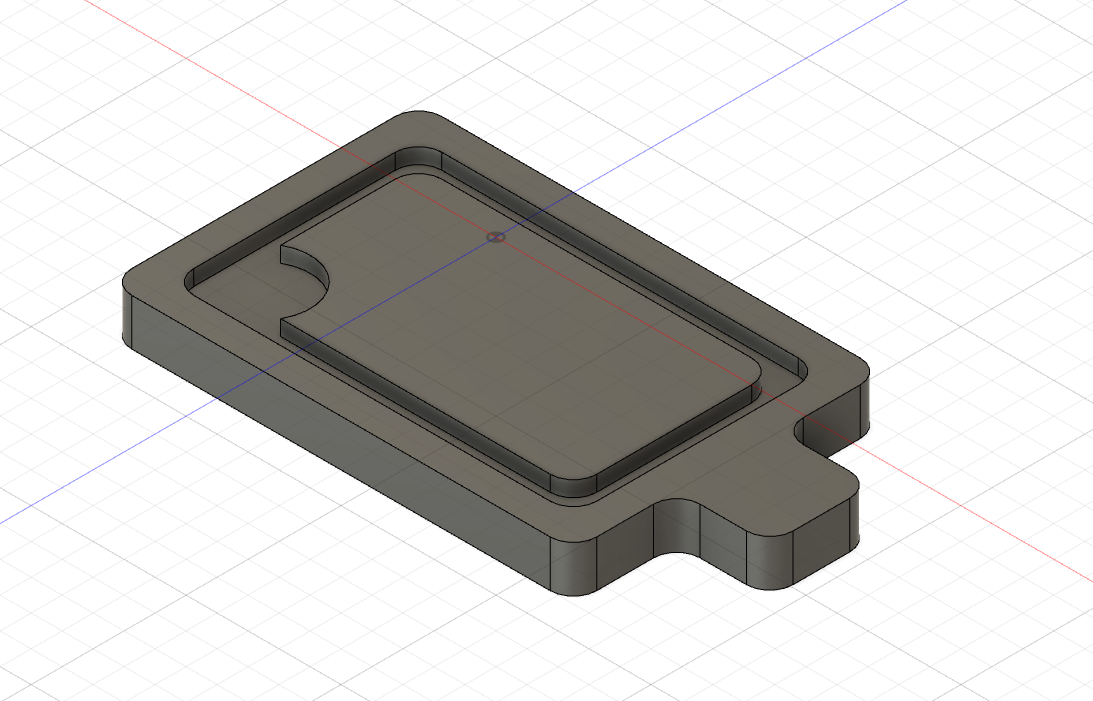
The following step was to create the stock model. The stock is the piece that will be cut in order to create the desire model.
It's a simple rectangular new body, the thickness is equal to the material that will be cut.
- Manufacture
Then go on the manufacture Fusion workspace to set the CNC print.
- Setup
Click on new setup, you will be able to choose the work type, here milling

Choose the cutting base point

- Stock
On the setup page click on stock and the define the stock body.

The setup is done.
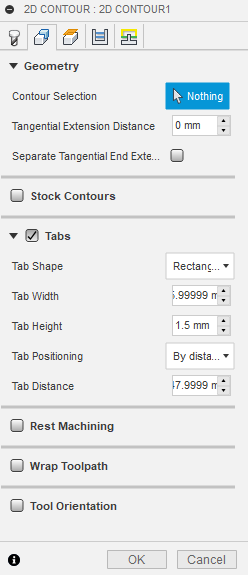
- 2D contour and pocket
For this example, it was only a 2D cut. 2 cut where defined by :
- 2D contours for the sides
- 2D pocket for the gap on the board
When you click on the 2D work, first page is the tool selection.
- Tool
Create a new tool, base on the one that will be used. It's necessary to enter the geometry details of the cutter.
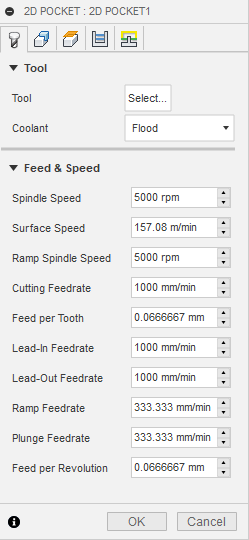
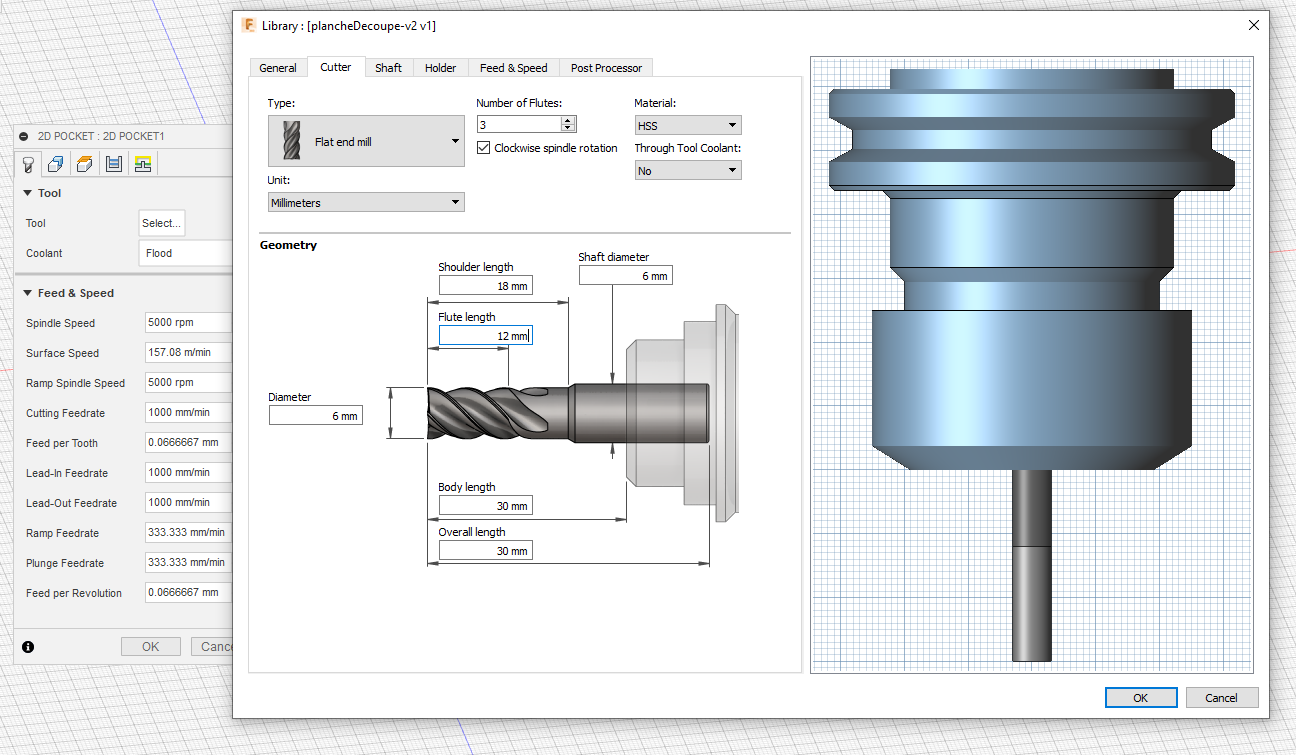
After that depending on the material that will be used to cut the model we entered the feeds and speeds using this tool. This tool is american so its working in inches, one simple way is to change the metric system in fusion to inches, enter the values and return to meter.
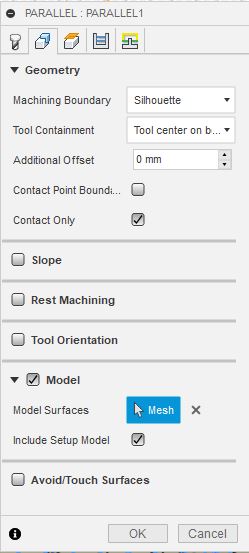
- Geometry
Select the model surface
- Heights
- Passes
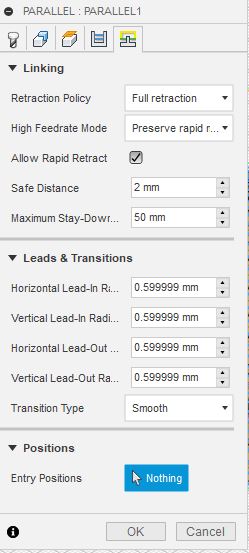
- Linking
- Simulate
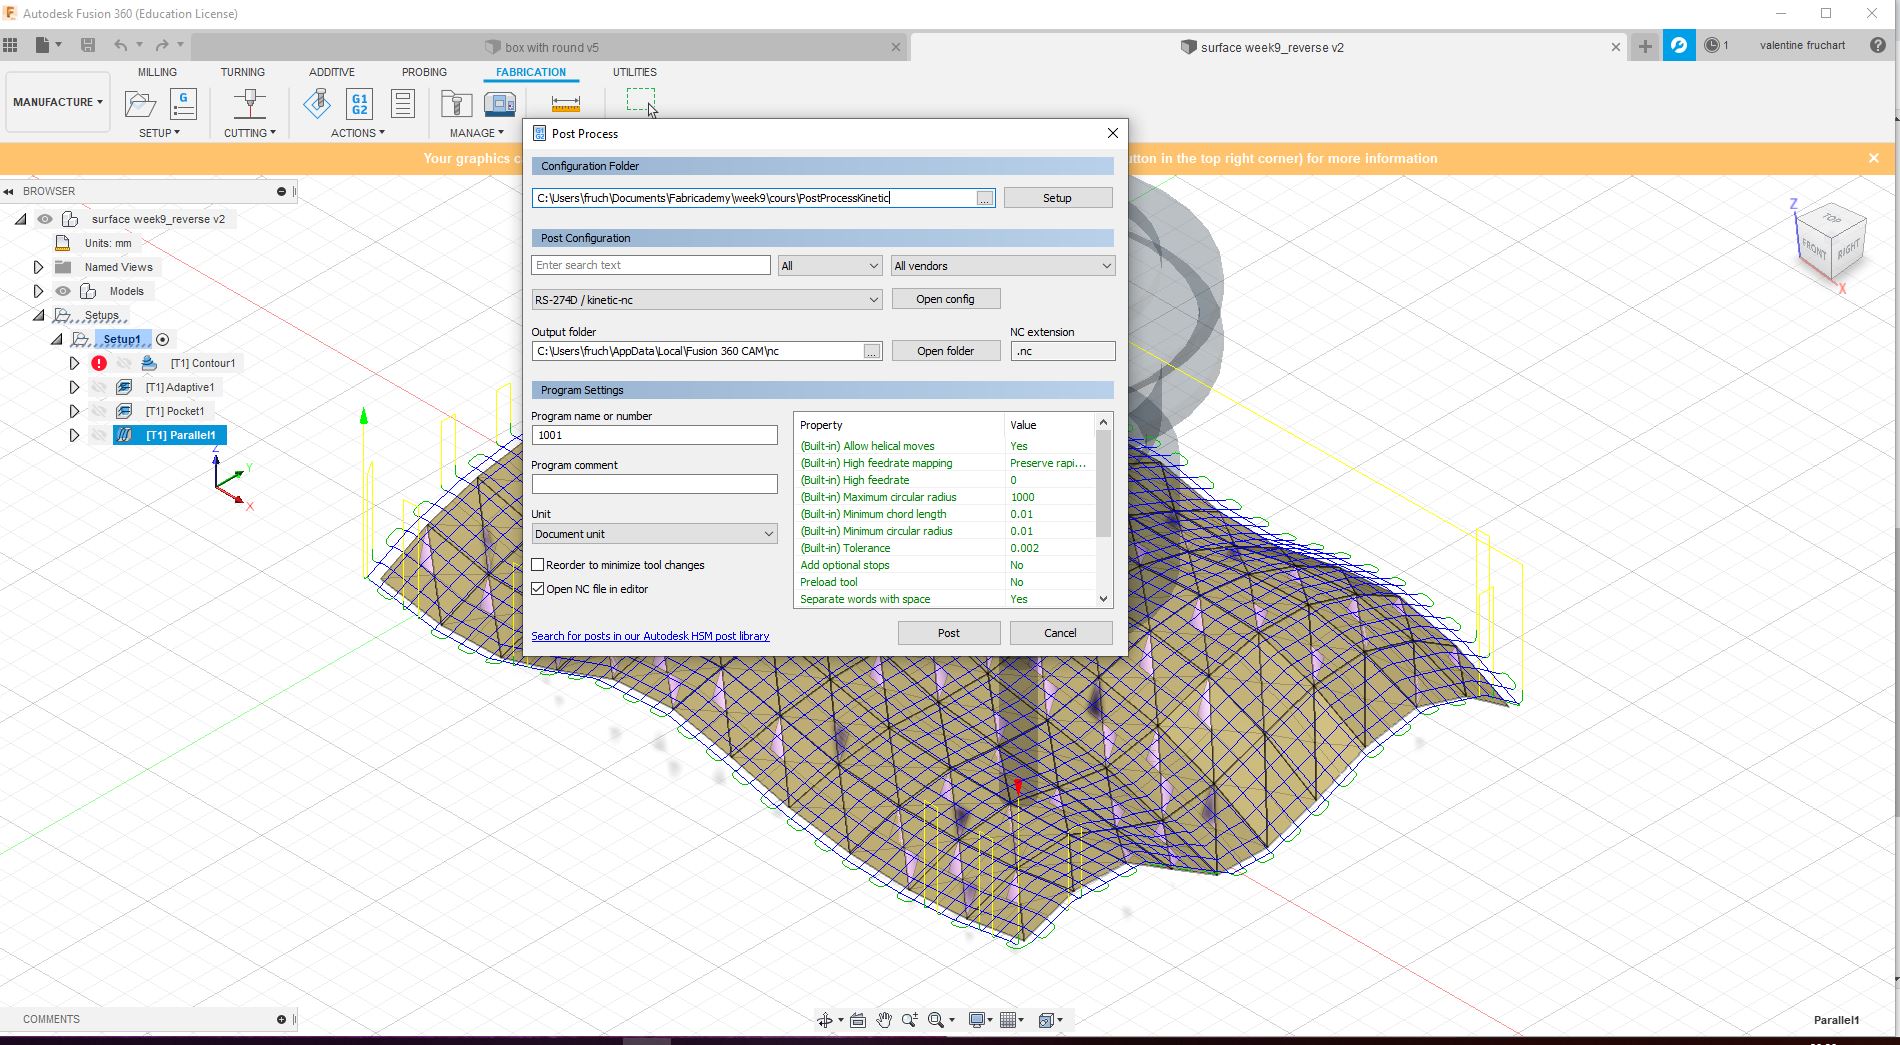
- CNC
The CNC machine has a computer interface. The NC file is downloaded on the interface software. The start position is defined and the CNC cut started.
- Result