Design
Illustration
Technical Drawing
Sketches
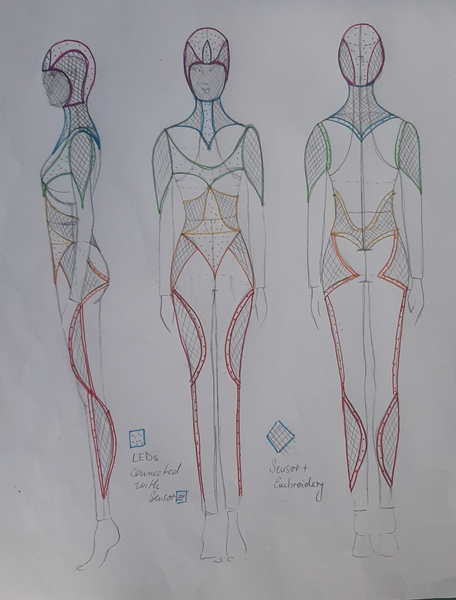
In this first design of the outer appearence of the suit with embroidery sensors and LED postions, I considered the analysis I made with the performer to start designing.
Material
Fabric
The Fabric I will be Using is a strong black Jersey of viskose and polyester Mix for the first layer where I will attach the circuit and LEDS. The fabric also function as a security layer for the circuit and capacitve sensor. It will be saving from and taking up the sweat very well.
The outer layer will be a golden knitted lurex that is also used as a capacitive sensor and also will be attached with extra decorative conductive embroidery that are used as capcitive sensors connected to LEDs and for sound modification.
Electronic Components
- 1st Flora plus capacitive breakout for 7 embroided sensors (programmable LED Neopixels and Strips) or just sound and light together (sewable LEDs one colour)
- 2nd Flora plus audio breakout? for 7 embroided sensors (Sound)
Sound output - Bluetooth: ESP32, Adafruit bluefruit LE: does that work with sound or add the audio breakout? - Wifi - RF (using some arduino or guitarist´s transmitter reciever)
- 1 Powerbank for ca. 250 LEDs
-
1 or 2? Powerbank for the capacitive Sensor
-
Connections with stainless steel conductive thread
-
Whole Body lurex Sensor with conductive thread all seams
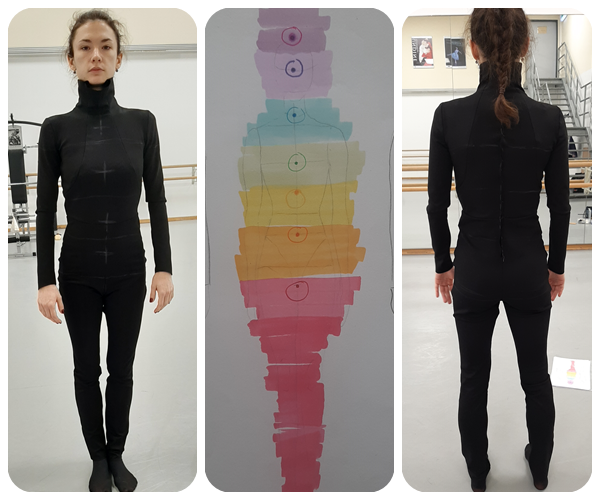
User Analysis
Week Five & Six
To define my design, where I want to put the decorative touch sensors and inputs or outputs I met with the performer of my costume to analyse and talk with her about the movements and the spots on her body that are comfortable to be touched while moving
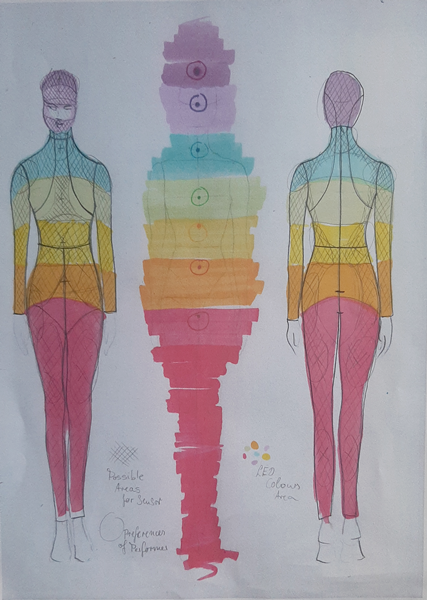
After meeting up with the performer and doing the analysis of her movement and discussing the areas where it is possible to touch I made that sketch that represent the areas of the chakras (LED lights and Sensors)
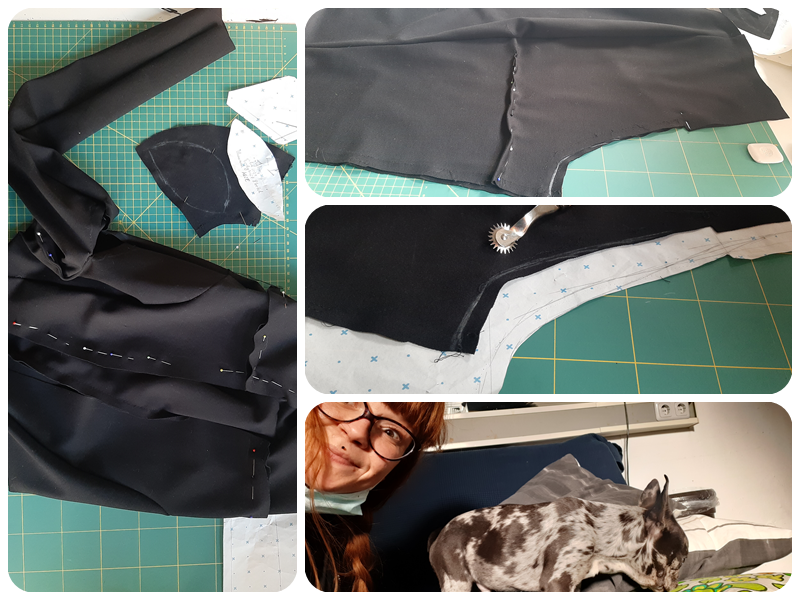
Pattern Cutting
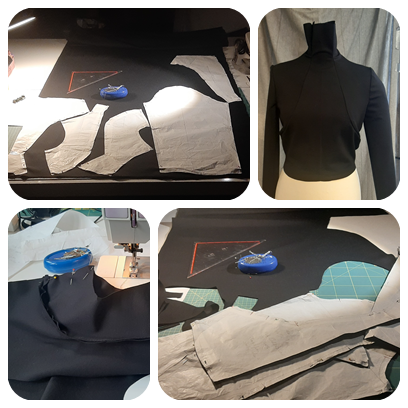
I used a pattern I already made a few years ago for my graduate collection. It is a catsuit that has dividing seems and a cap for the head.
Fitting
Week Five & Six
1st Fitting
2nd Fitting
3rd Fitting

Making it Wearable
Prototype
Week Three & Four
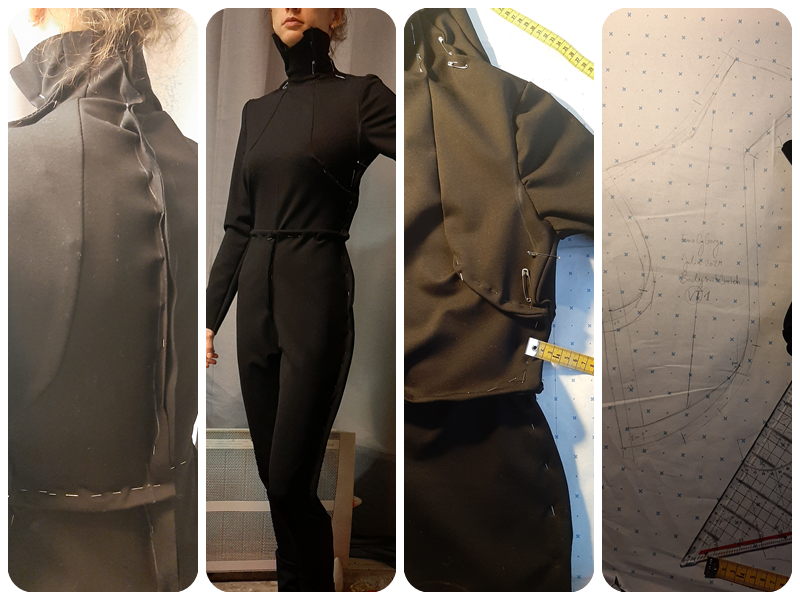
To test the code and circuit with the final material I started to make the first layer shirt out of the black jersey and made a sleeve from the lurex with the wire embroidery attached to it.

For the outer layer with the knitted lurex I used conductive stainless steel thread and closed it roughly by hand to test it as a capacitive sensor
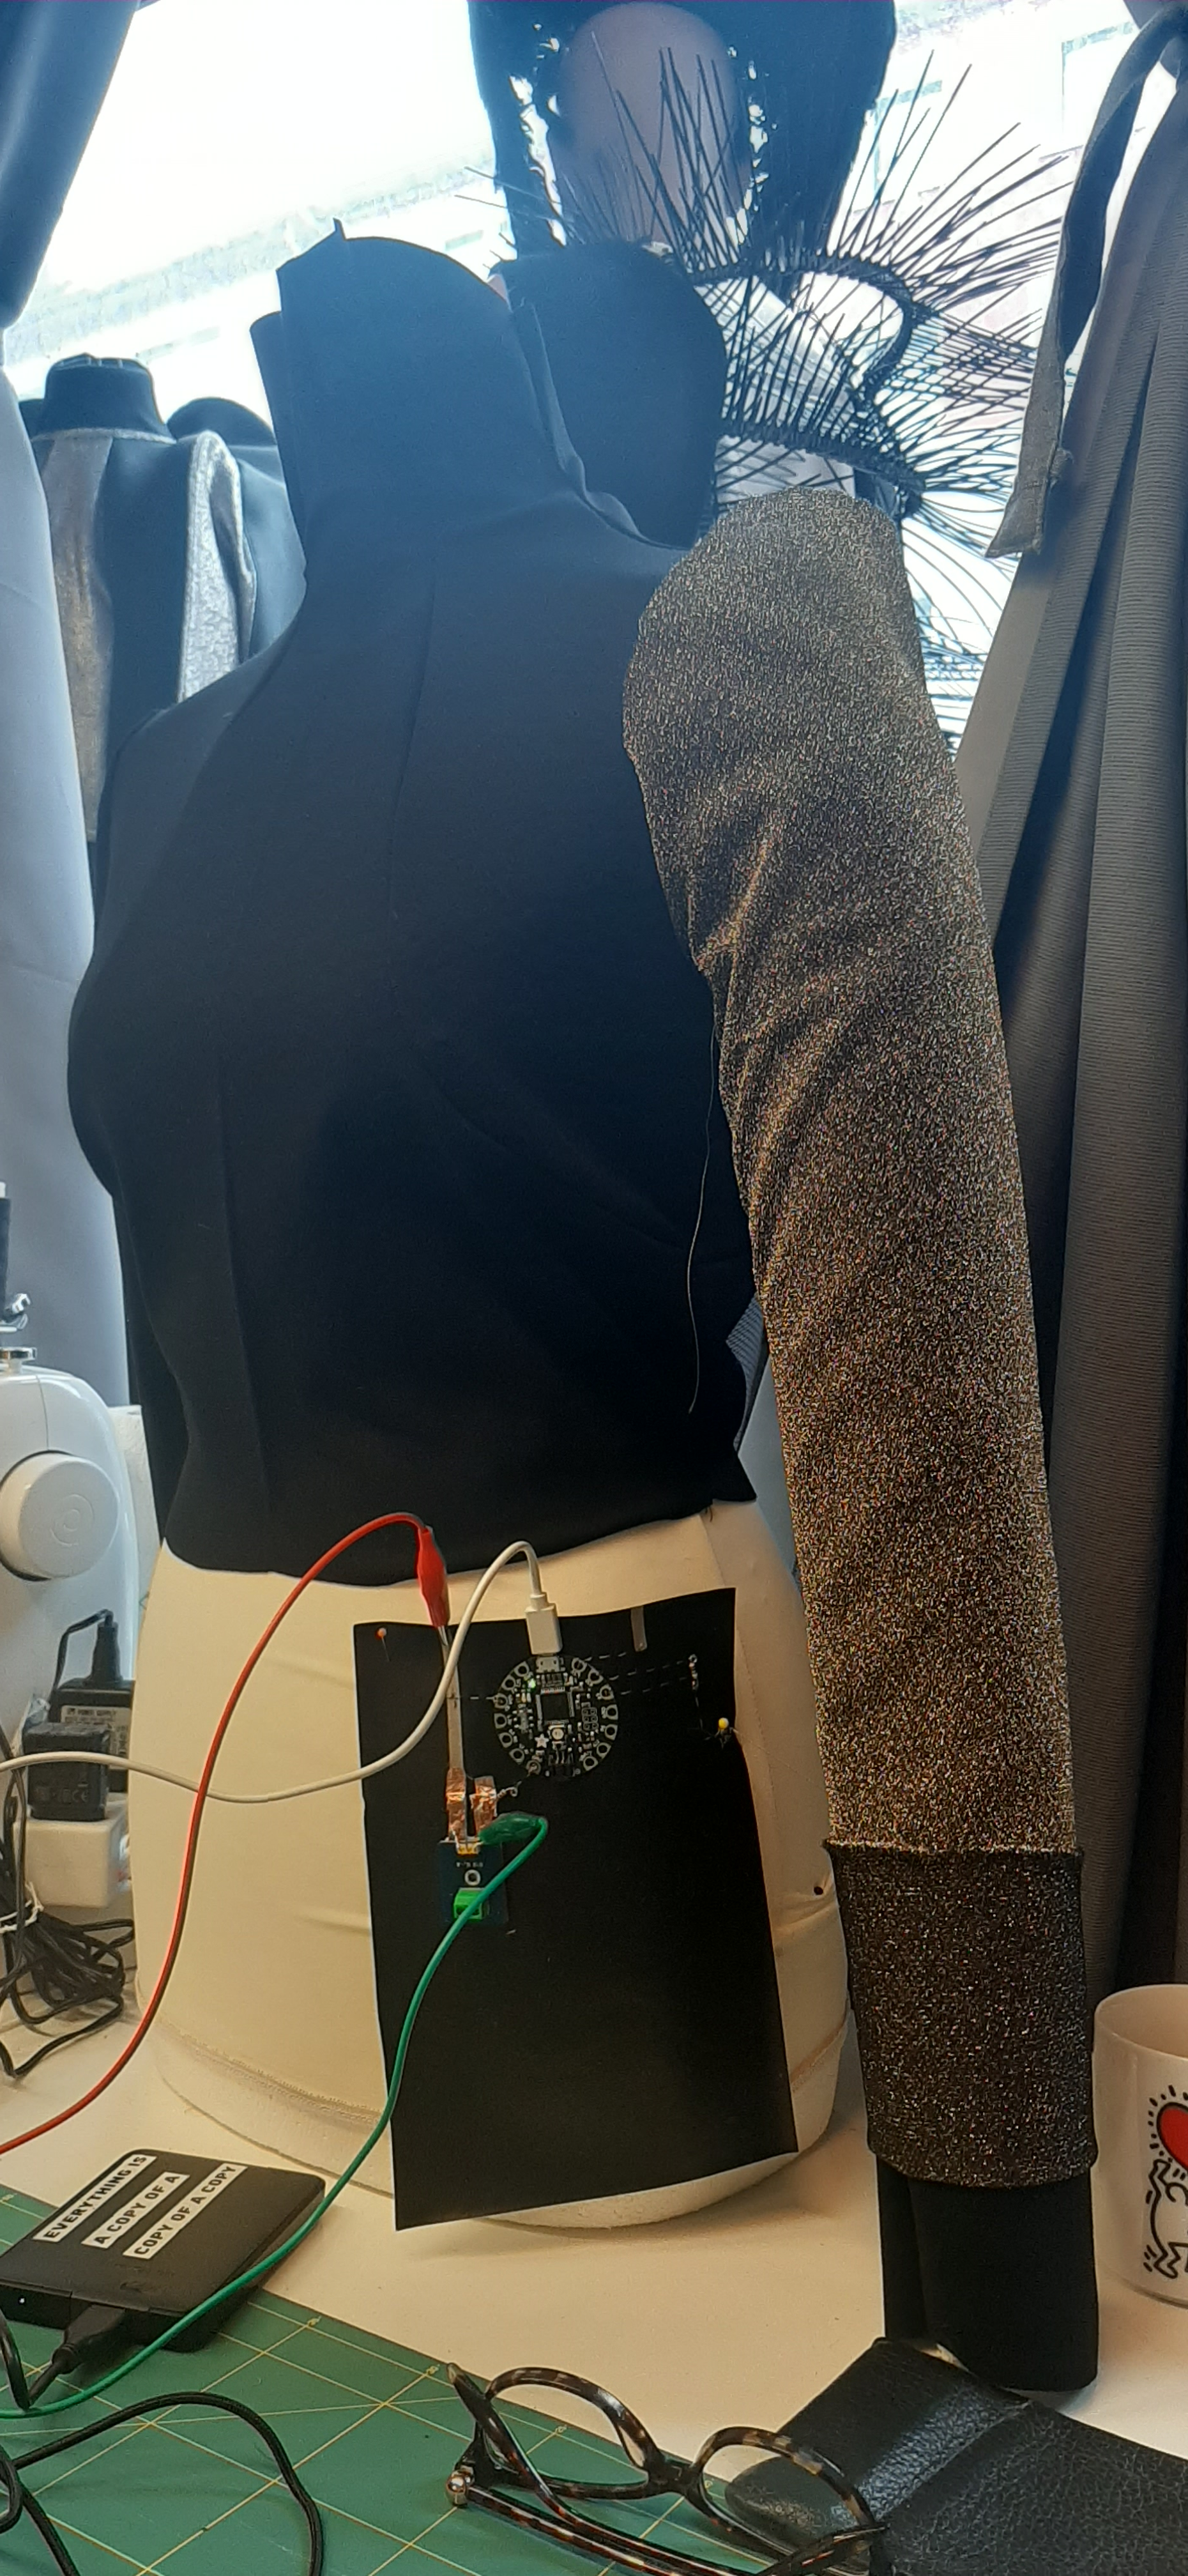
connecting my proto circuit to the touch sensitive sleeve: video of how it works
Circuit
Embroidery
Troubleshooting

After the Mentoring session on 2nd of March with Afroditi, she told me it is important to have layers that insulate the wearer body from the capacitive touch. She also recommended to use pressure sensors for the embroidery instead of the sensitive touch sensor. That leaded me to do some experimentation with my material and the layers for the capacitive sensor first to see how the sensitivity behaves.
Bill of Materials
| Qty | Description | Price | Link | Notes |
|---|---|---|---|---|
| 1 | Material one | 22.00 $ | http://amazon.com/test | Order many |
| 1 | Material two | 22.00 $ | http://amazon.com/test | |
| 1 | Material three | 22.00 $ | http://amazon.com/test | |
| 1 | Material five | 22.00 $ | http://amazon.com/test | |
| 1 | Material eight | 22.00 $ | http://amazon.com/test | |
| 1 | Material twelve | 22.00 $ | http://amazon.com/test | |
| 1 | Material eleven | 22.00 $ | http://amazon.com/test |