13. Skin Electronics
This week we discovered wearable options for and on our skin.
Digital Collaboration
For the last assignment me and paul, both lonely single nodes in corona times, decided to work together and collaborate for making a electronic skin prosthetic. Me having a home office lab in Essen and him in an quiet empty fab lab in London. Him really good in rhino 3D and me really good in pattern making and fashion. It was a match and sure more fun and work together. We were communicating over skype or screensharing and supporting each other and discussing about design issues and ideas.
Our final outcome was a similiar prosthetic. At first we had a few ideas and checking our sensor stock. But for one week it was a bit too much enthusiasm. We tried out a pulse sensor, so we could match or recieve our heartbeats "in your face"! But the pulse sensor was not so satisfing and the coding was way too much work on top. The pulse sensor only reacted on fingertips, maybe we had to change the sensitivity, what so ever... I also wanted to create bubbles cause I thought the idea of glowing bubbles I could call it cyborg acne...so nothing real esthetic.
Sketch and 3D Modeling
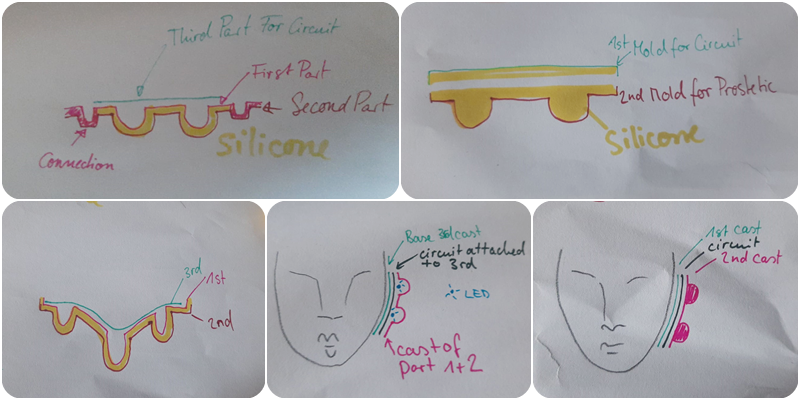
As I had a clear imagination of how we have to build up the negative shape of the mold so it would work I made a few sketches to understand the principle.
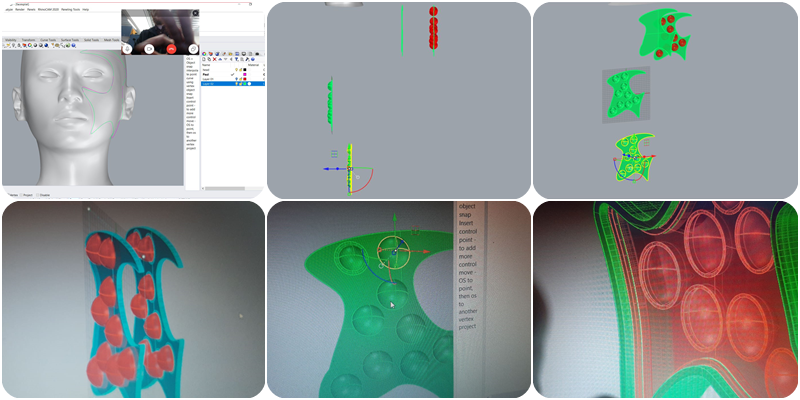
We started together designing a shape on the make human head to create a real size like shape. Paul has more possibilities in his lab and came up with scanning his head to create a shape that actually fits him and could go around his beard, while my beard is growing more on the forehead... After creating the shape on the face, we had to flatten it so we actually could print it and also the silicon cast is so elastic that it would go back around the face. Paul had to save my model in the end cause I made so many commands and couldn´t go back to simplify it. On the other hand I had to convince Paul in design and material imagination. So we actually had a great ballance in our strengths and weaknesses.
Casting and Circuit on the Prosthetic
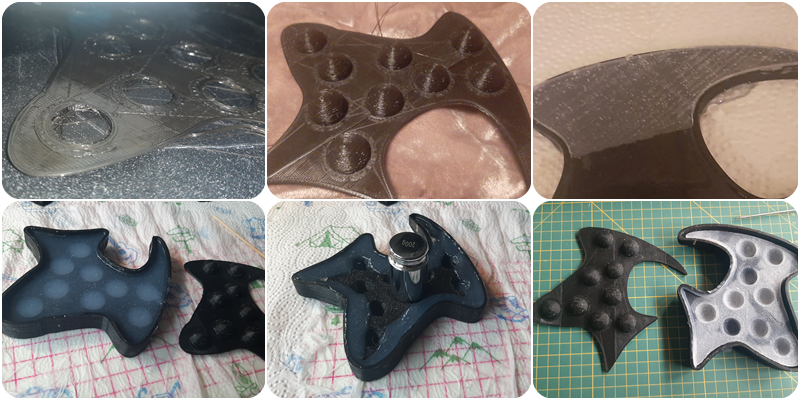
After 3D printing the final mold in my bathroom the last night before our christmas party presentation day, so I could sleep, the casting actually was the same pocedure as in week 12 for soft robotics. In those pictures I repeated the casting with clear silicone.
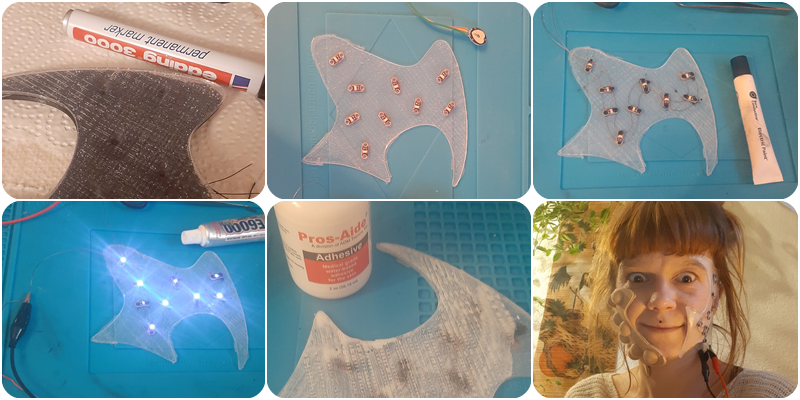
I thought it was great to use uninsulated conductive thread and connected it with electric paint to the flat sewable LEDs, until I had a short wearing it on my face while plus and minus were touching and nearly started fire. After that experience I decided to put some insulation tape around the open ends. To present I just connected it to arduino on my laptop and put a few basic arduino LED codings through it. The electric paint is also not very stable. Some easier methods like thin cables or emailled wires soldered to the LEDs would be a better solution. A battery and a microcontroller could be attached in the neck. For holding the heavy silicone prosthetic a special sfx makeup glue is very good. In general I would make the mold walls a bit lower, like 1mm, so you don´t have such a thick and heavy prosthetic. Or even use liquid latex and brush it layer by layer into the mold until you get the desired wall thickness.
Changes
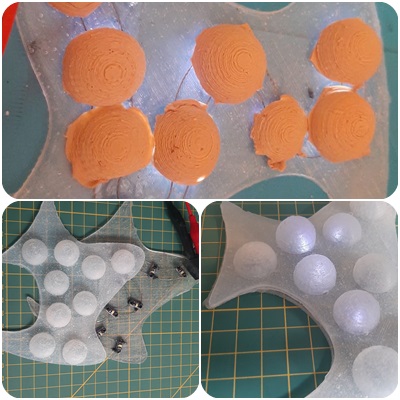
My first casting I wanted to make it light skin tone so it kinda blends in my skin and looks like a disease, the cyborg acne. I used too much silicone colour. I added like 3 drops and it was way too much so it wasn´t see through anymore and the lights were blocked. One tiny drop would have been enough for that. So I repeated the casting with clear silicone.