1. STATE OF THE ART, PROJECT MANAGEMENT AND DOCUMENTATION
Anyway, Fabricademy happened!

I can't even measure how happy I am to be a part of this and how grateful I am for the SolidWorks scholarship, which fulfilled a dream of mine.
As the program is networked, all documentation and evaluation are done online. So our notebooks are our websites, and the more documented the better, not only for your own assessment and learning in the course, but also for disseminating open knowledge to others.
-
Gitlab – The static site generator (make it easier to build a static website) used to publish our websites. We edit using a langage called Markdown, through a tool called MkdDocs, that compiles our markdown to HTML.
-
Nueval – Platform on which we upload our documentation to be evaluated.
-
Mattermost - Chat with students and teachers to share learning, doubts and debates.
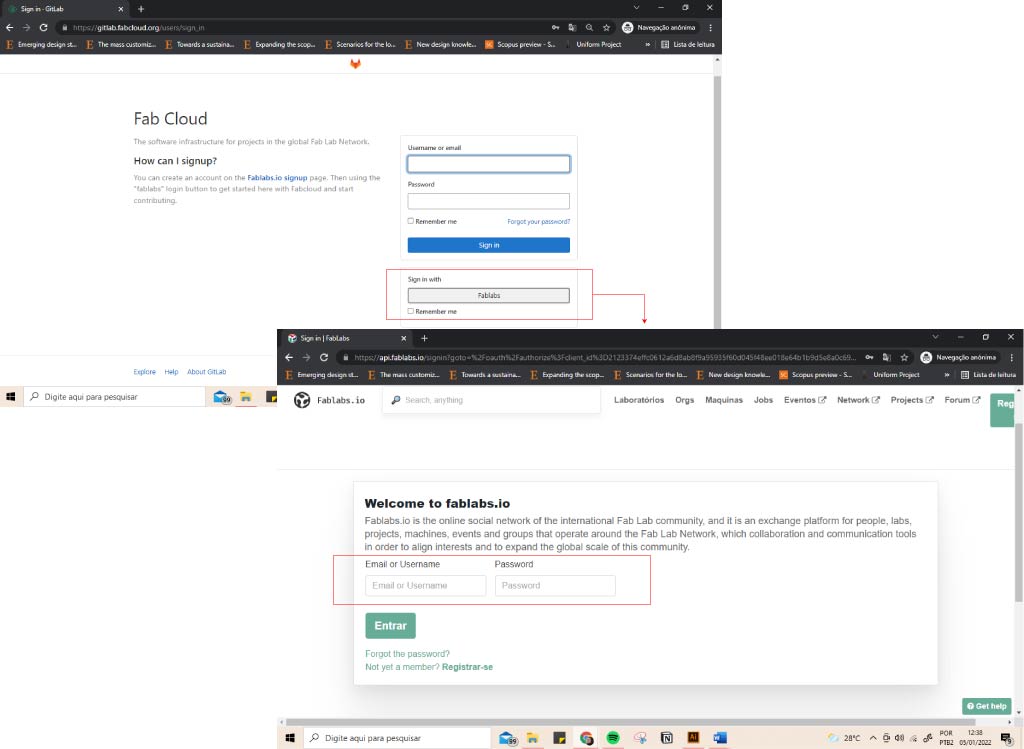
LOGIN
To login to GitLab, access is done through the login that already exists on the FabLabs.io platform, by clicking on the sign with Fablabs, the site directs you to the page and you just need to enter your registration. The process is the same for Nueval.
To login to Mattermost, the process is similar, but access is done through the existing login on the GitLab platform instead of using FabLab.io.
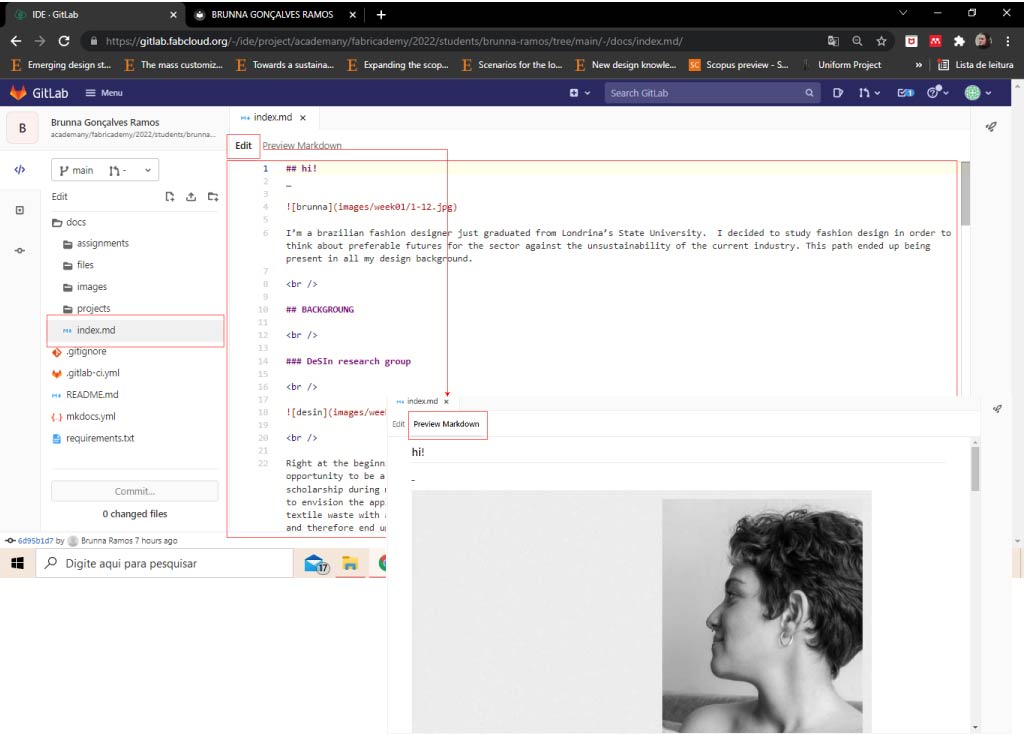
EDITING CONTENT ON GITLAB
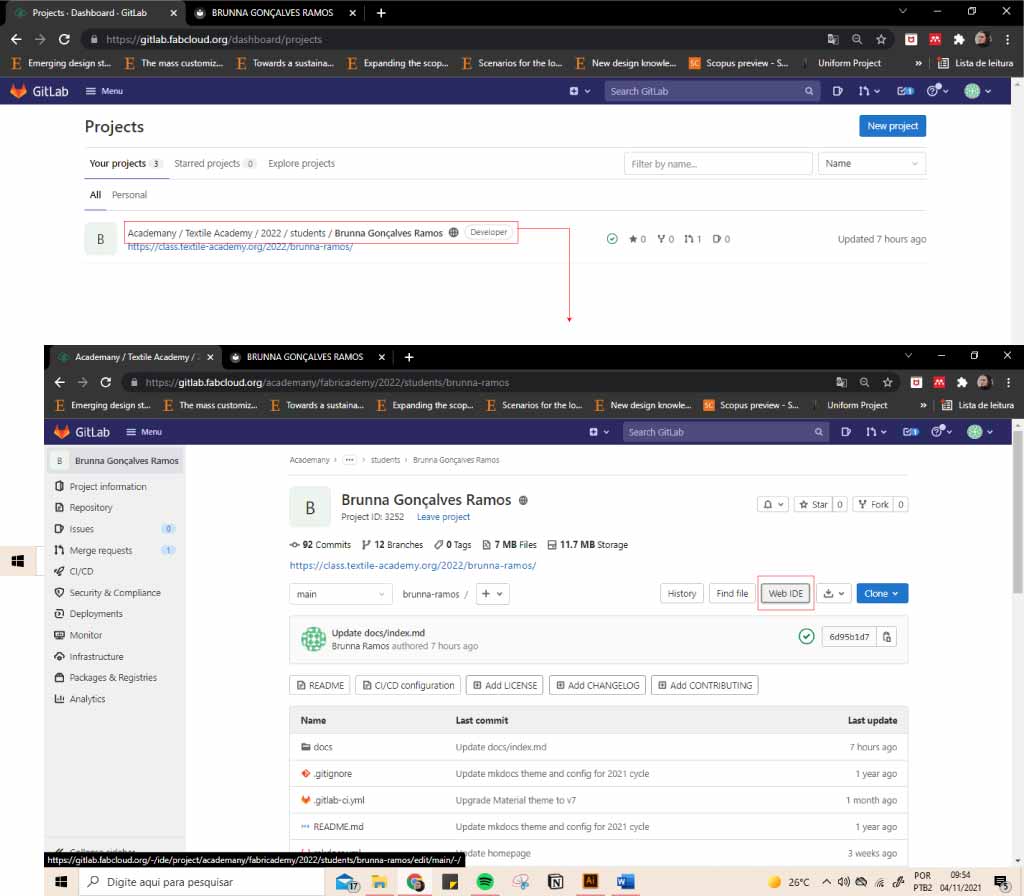
This is the page that appears when logging in, and we click on the indicated area (WEB IDE) to be able to edit the content.
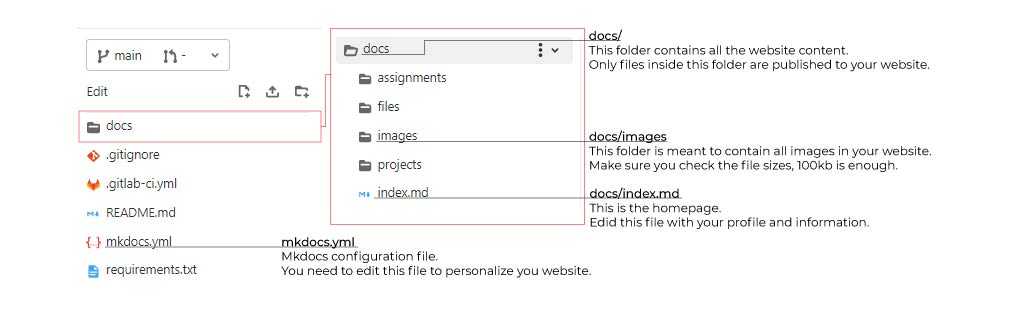
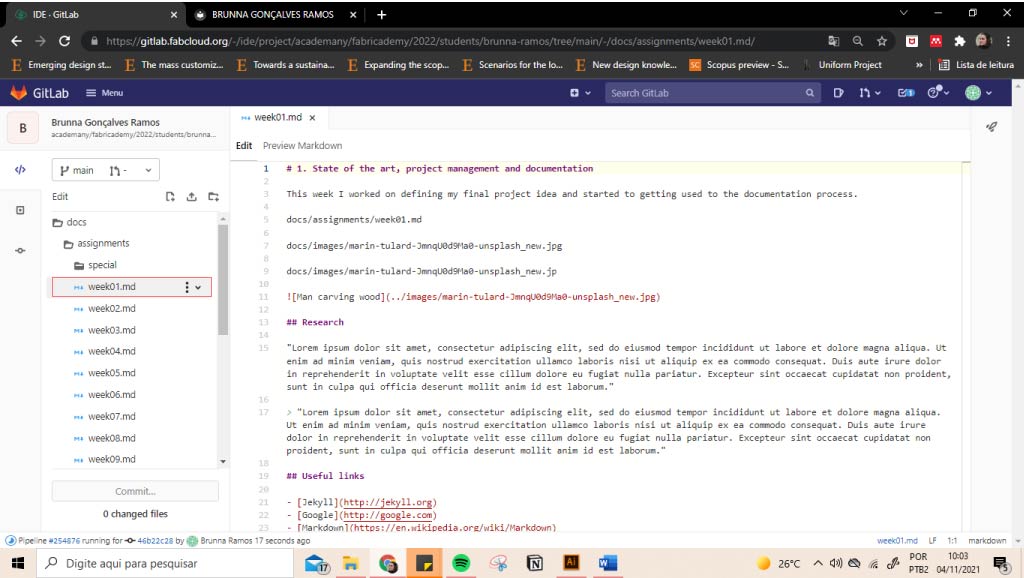
Weekly assignments are edited from the assigments folder within docs. Images for the entire site are in the images folder. And the home page content is edited in index.md inside docs.
styling the page
I started by styling my page (this is done in mkdocs.yml). Here, I wanted to keep the visual language of my portfolio which has a minimalist style.
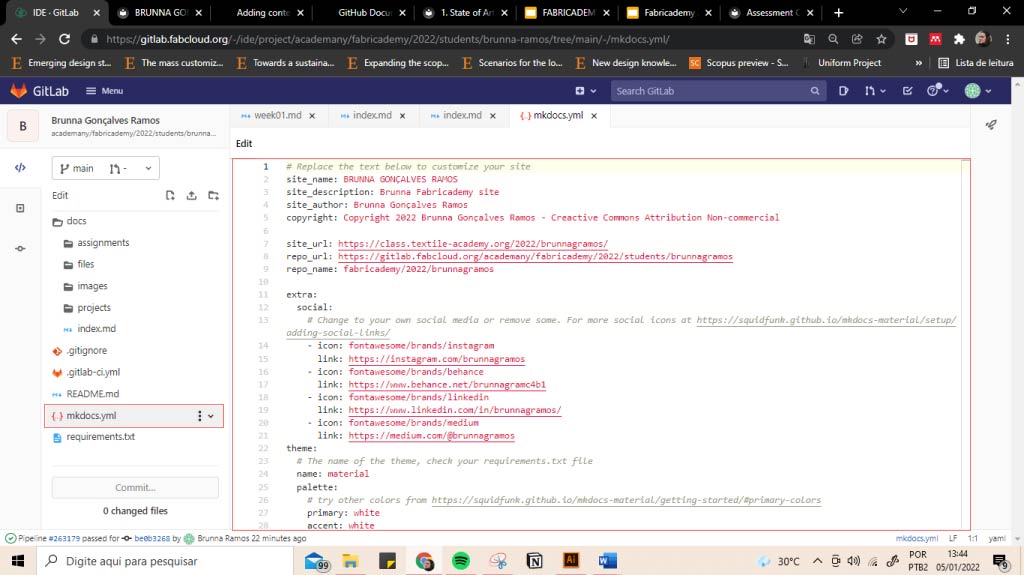
As this is my first contact with programming, I decided not to change the theme and make complicated functions! I just changed the background color (white) and put the writing in black in the regular Montserrat font (must be a [google fonts] font (https://fonts.google.com/)).

I also added some icons from my social networks to the bottom of the page.
# Replace the text below to customize your site
site_name: BRUNNA GONÇALVES RAMOS
site_description: Brunna Fabricademy site
site_author: Brunna Gonçalves Ramos
copyright: Copyright 2022 Brunna Gonçalves Ramos - Creactive Commons Attribution Non-commercial

site_url: https://class.textile-academy.org/2022/brunnagramos/
repo_url: https://gitlab.fabcloud.org/academany/fabricademy/2022/students/brunnagramos
repo_name: fabricademy/2022/brunnagramos

extra:
  social:
    # Change to your own social media or remove some. For more social icons at https://squidfunk.github.io/mkdocs-material/setup/adding-social-links/
    - icon: fontawesome/brands/instagram
      link: https://instagram.com/brunnagramos
    - icon: fontawesome/brands/behance
      link: https://www.behance.net/brunnagramc4b1
    - icon: fontawesome/brands/linkedin
      link: https://www.linkedin.com/in/brunnagramos/
    - icon: fontawesome/brands/medium
      link: https://medium.com/@brunnagramos
theme:
  # The name of the theme, check your requirements.txt file
  name: material
  palette:
    # try other colors from https://squidfunk.github.io/mkdocs-material/getting-started/#primary-colors
    primary: white
    accent: white
  font:
    # See available fonts from https://fonts.google.com/
    text: Montserrat Regular
    code: Montserrat Regular
  icon:
    # Read about icons at https://squidfunk.github.io/mkdocs-material/setup/changing-the-logo-and-icons/
    logo: material/library
    repo: material/gitlab
  features:
    # See more about the navigation at https://squidfunk.github.io/mkdocs-material/setup/setting-up-navigation/
    - navigation.tabs

plugins:
  - search
  - git-revision-date:
      enabled_if_env: CI

# See more extensions at https://squidfunk.github.io/mkdocs-material/reference/
markdown_extensions:
  - admonition
  - codehilite:
      guess_lang: false
  - toc:
      permalink: true
The final result:
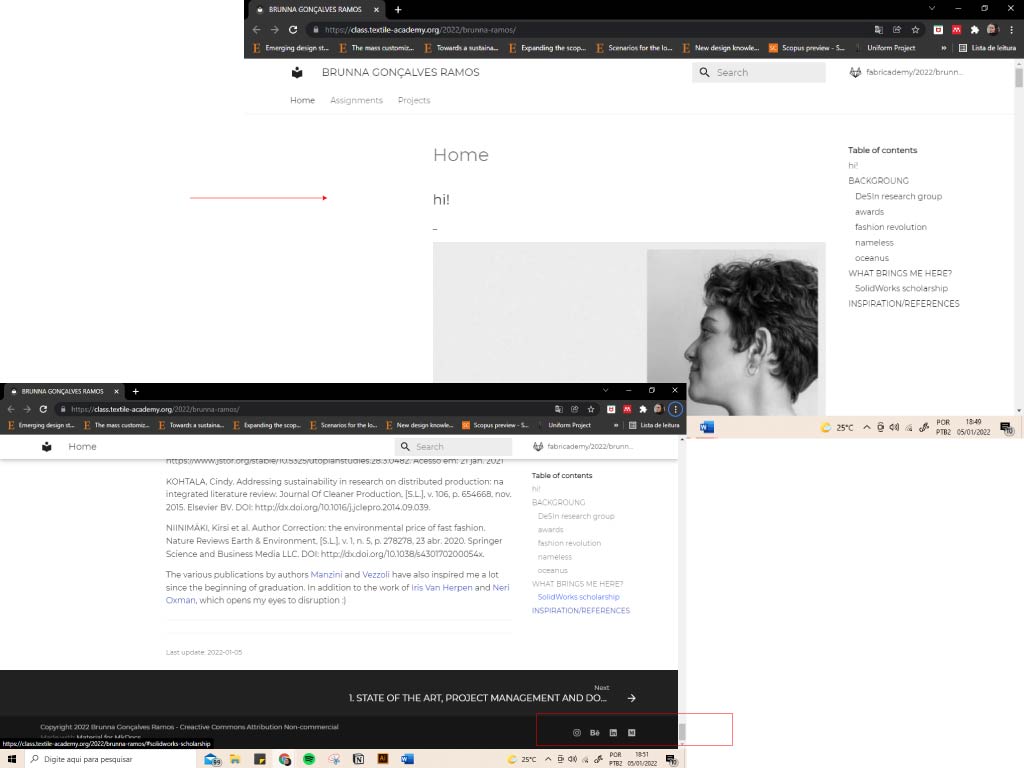
WRITING IN MARKDOWN
To edit the content of the page, we modify in the "edit part". The Preview Markdown shows you how it's getting, without having to commit. I started writing in Home (../index.md), but assignments are written in (../assignments/week01.md), changing only the last part as the weeks go by.
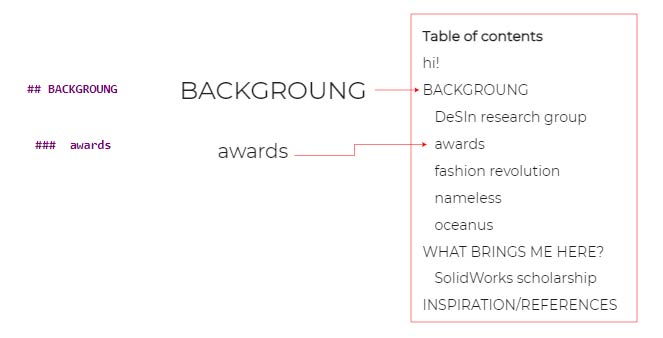
headings
we use # to make the headings. They form a summary in the right of the page.
# EXAMPLE

## EXAMPLE

### example
To organize my site's content, I established the pattern: upper case for titles, lower case for other subtitles.
The first one (#) gives the page's name (i.g. STATE OF THE ART, PROJECT MANAGEMENT AND DOCUMENTATION).
empashis
To bold, italicize, or strikethrought the text.

screenshot from github
centered text
we type:
<p align=center>some alternative text</p>
e.g:

screenshot from fabricademy documentation tutorial
adding a new line
To add a new line we type:
<br />
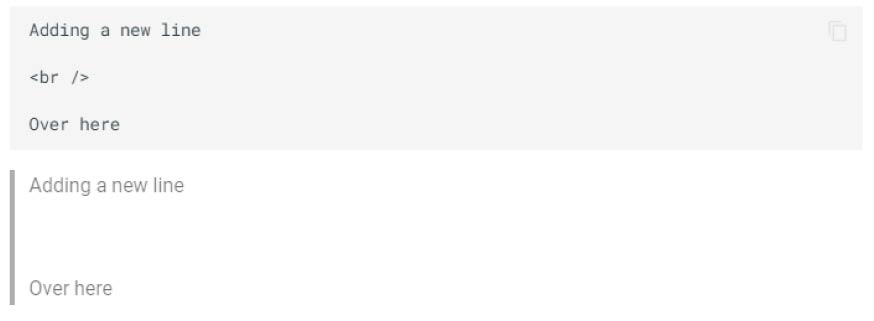
screenshot from fabricademy documentation tutorial
I used this feature a lot on my home page, to space the titles, text and images. So the visual information was better arranged.
adding a space
To add a space we type "****".
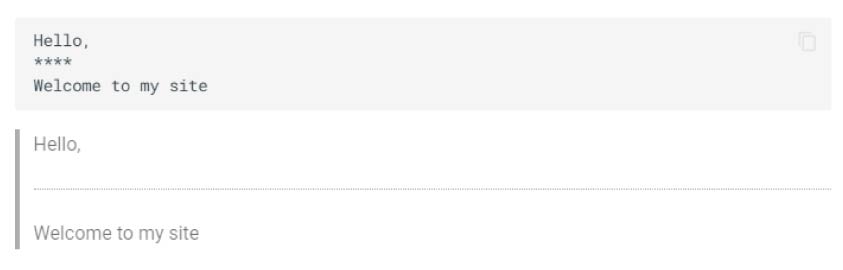
screenshot from fabricademy documentation tutorial
to-do list
To create a to-do list, we put "- [ ]" before the text. To mark a completed task we use "- [x]". Example:
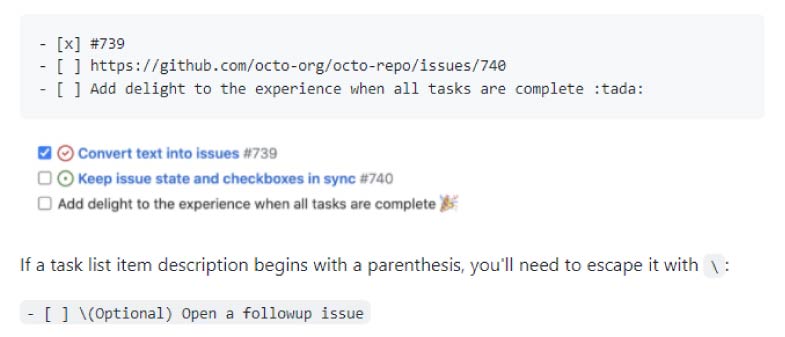
screenshot from github
topics
To crate a list we use "-" or "*".
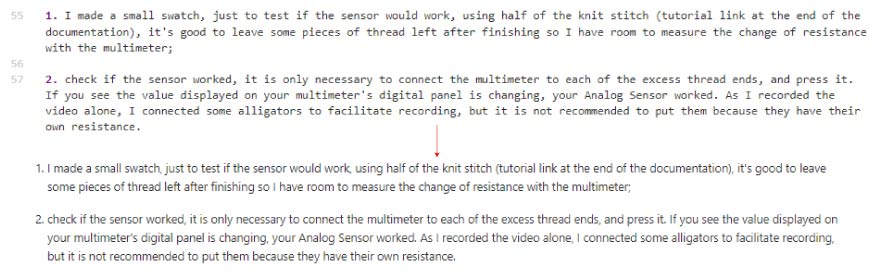
numbering
The same ideia is used for numbering, but using "1." in order.
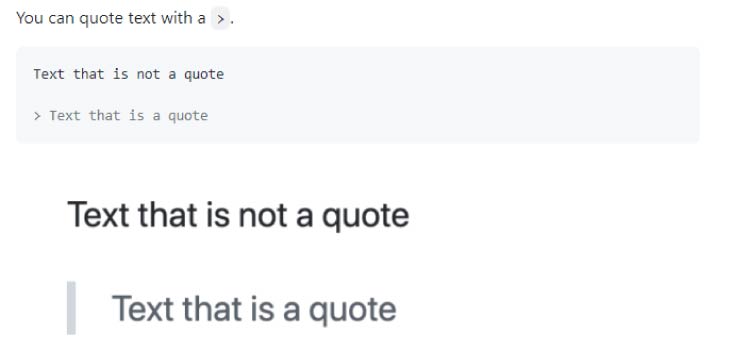
quot
To quot just add > before the text.
screenshot from github
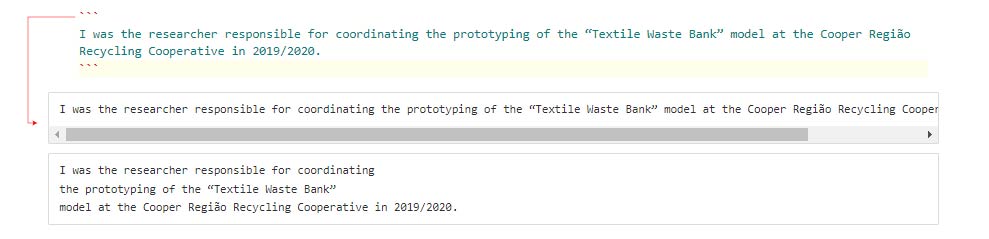
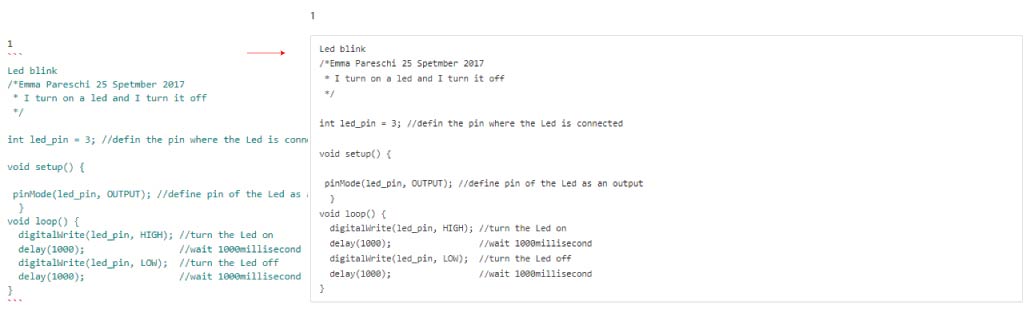
quoting code
To quote a code, just insert it between back-quotes (`). With only one back-quote (before and after), the text will not be formatted. With three (``` - before and after) the information will be formatted.
Not formatted:

Formatted:
tables
We create tables with vertical bars | and hyphens -. Example:
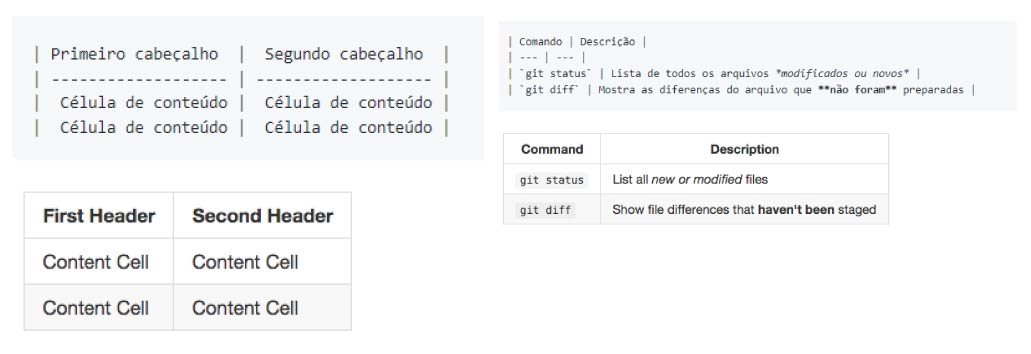
screenshots from github
| :) | ||||
|---|---|---|---|---|
| this is a table!!! |
links
To inline a link use the text in "[ ]" and after put the link into the parentheses ( ).

screenshot from github
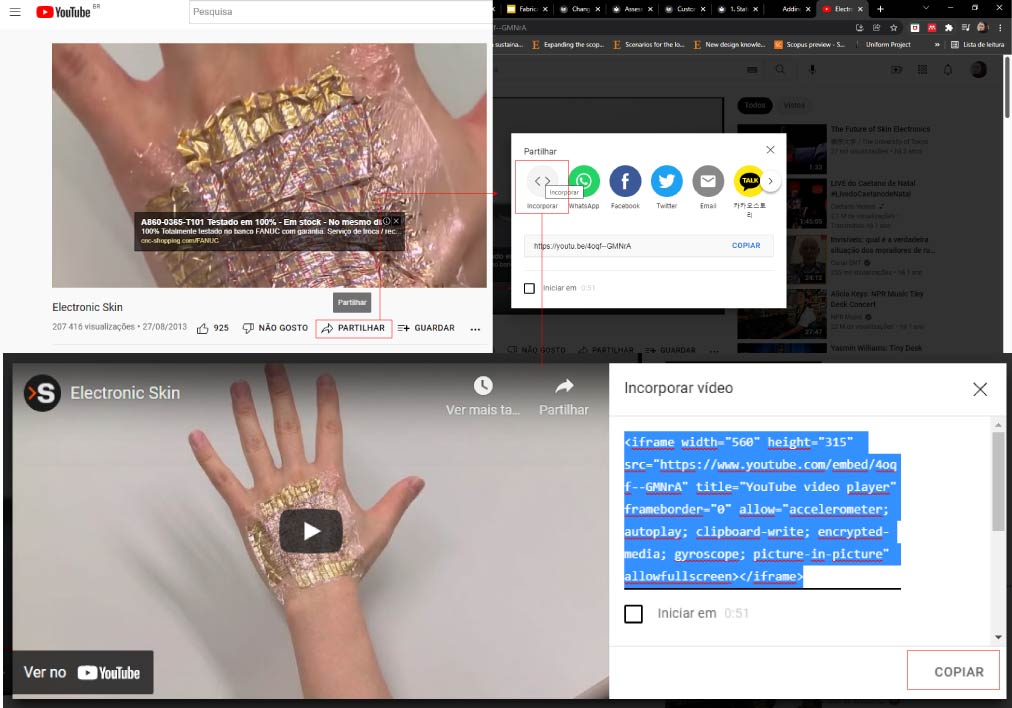
embedding a video
To embed videos we copy and paste the code that appears (on youtube and vimeo) when we click in share > embed.
youtube:
vimeo:

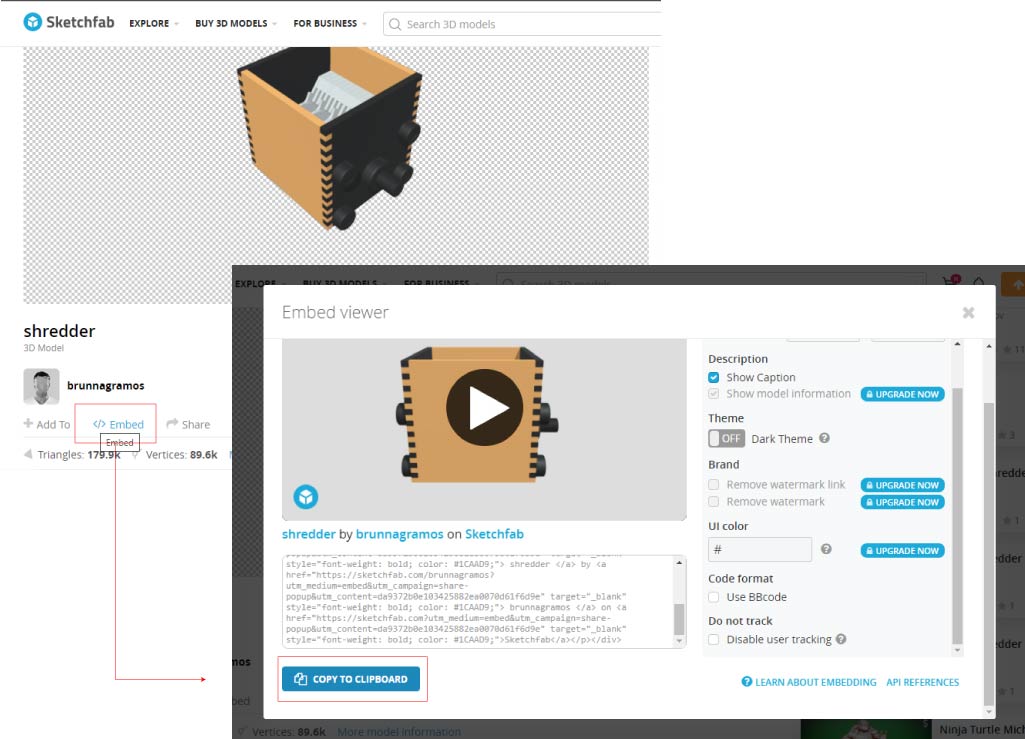
embedding a 3D model
To embed 3D models on mkdocs we do the same process we do with the videos, using the sketchfab platform. We copy and paste the code that appears when we click in embed.
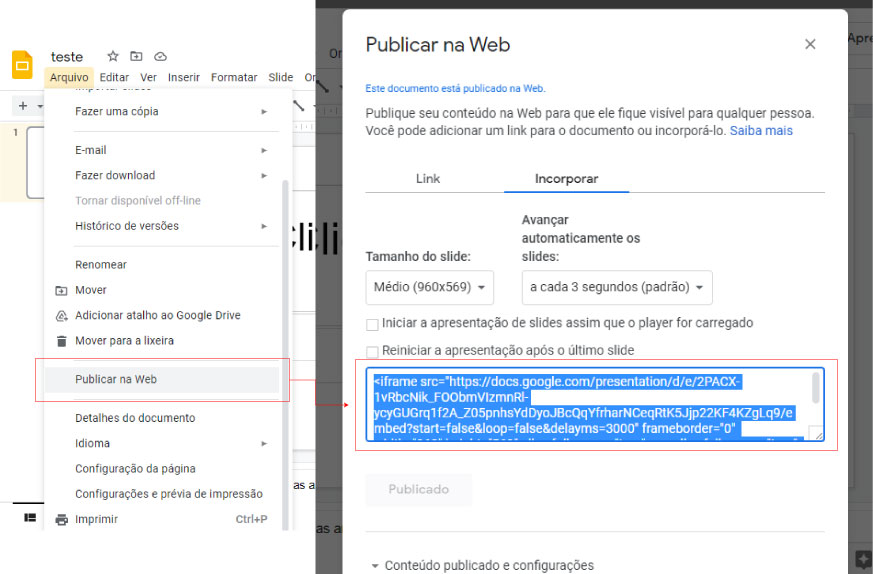
embedding a Google Slide
Again, the process is similar to the last two. In Google Slides, click in folder > Publish to the Web > and embed the link. Now it's just copy and paste the code that appears.
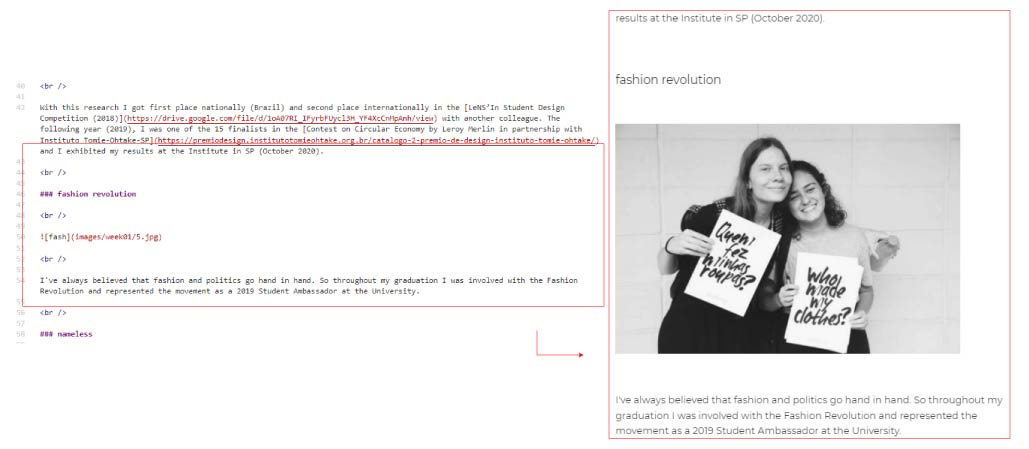
adding images
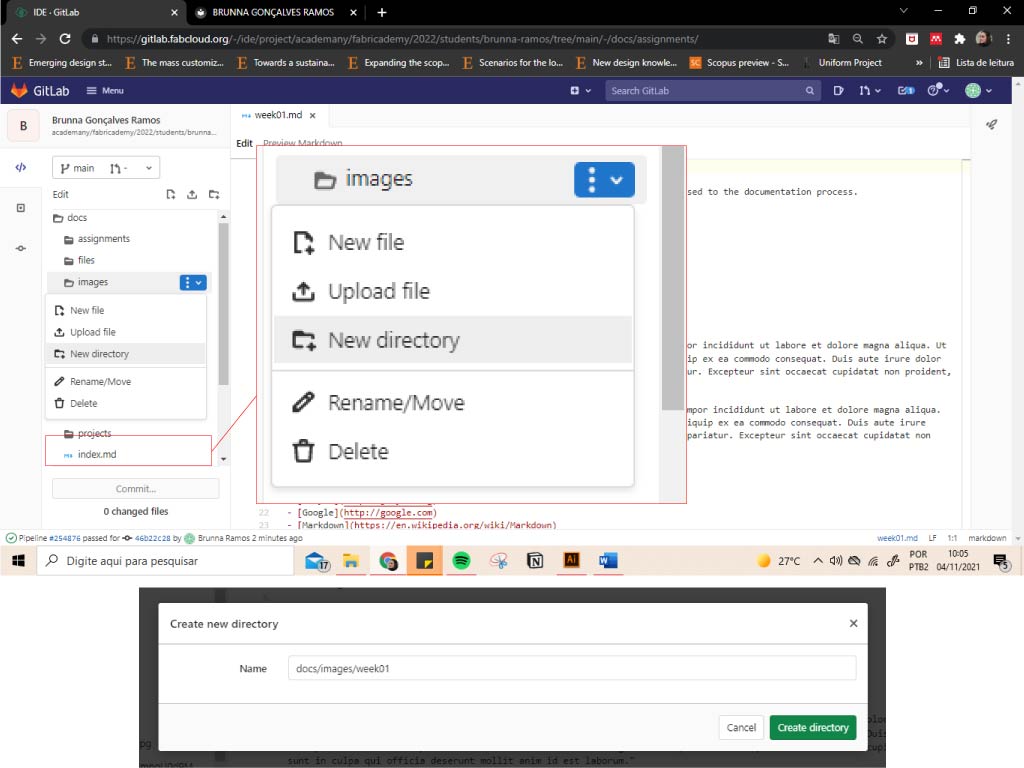
To add images we need to place them in another folder inside the docs>images folder, ie (../images), to organize the files. For example, to save the images for the assignment 1 - week 01 documentation, I create the week01 folder, inside the images. We do this by right clicking on images and then selecting new directory.
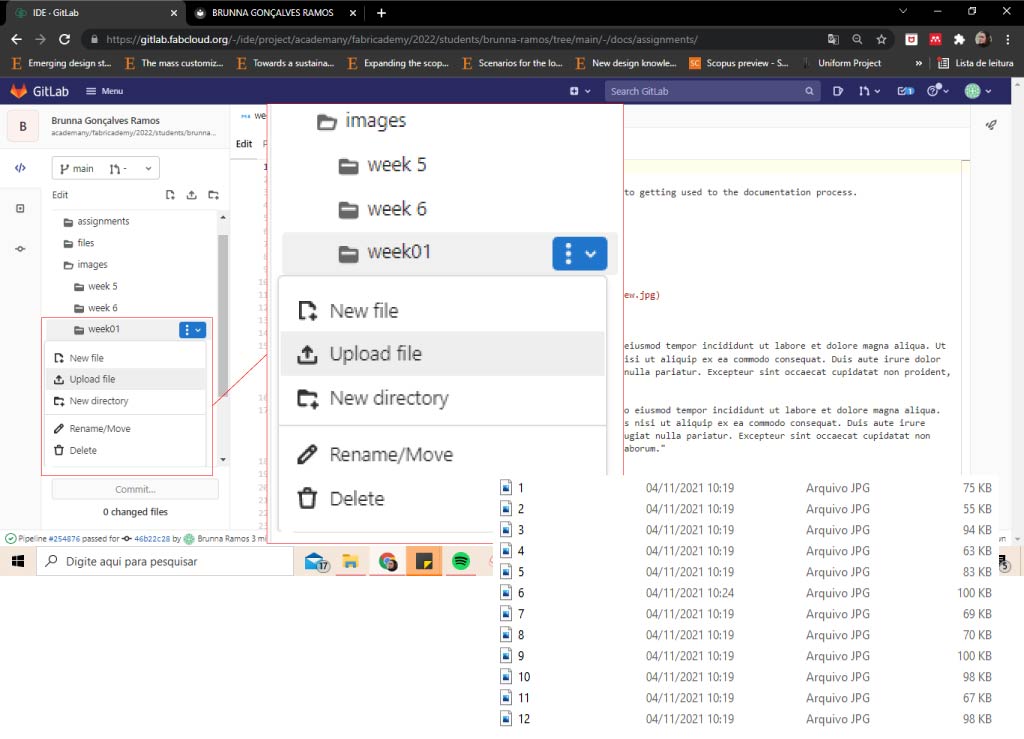
Once a new folder has been created within images, we click on upload files and upload the desired images. This can be done all at once. Images must have a maximum limit of 100kb.
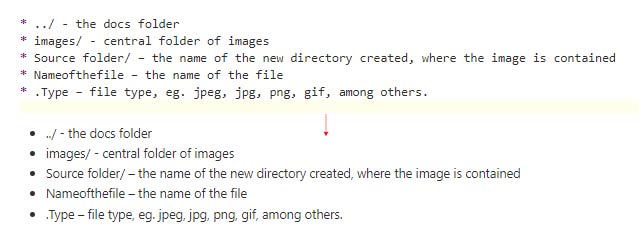
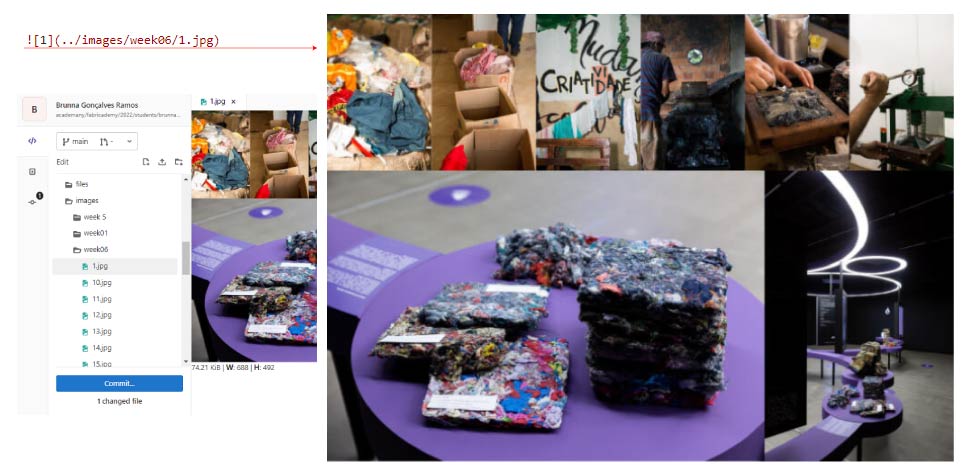
For the image to appear correctly we must write:

Being:
- ../ - the docs folder
- images/ - central folder of images
- Source folder/ – the name of the new directory created, where the image is contained
- Nameofthefile – the name of the file
- .Type – file type, eg. jpeg, jpg, png, gif, among others.
adding files
The process is similar to add images, but instead of doing the process in the (../images) folder, we do it in (../files).

some files types: SVG, EPS, PDF, DXF, STL, ...
commiting
To save all changes, we commit. We always select commit to main branch.
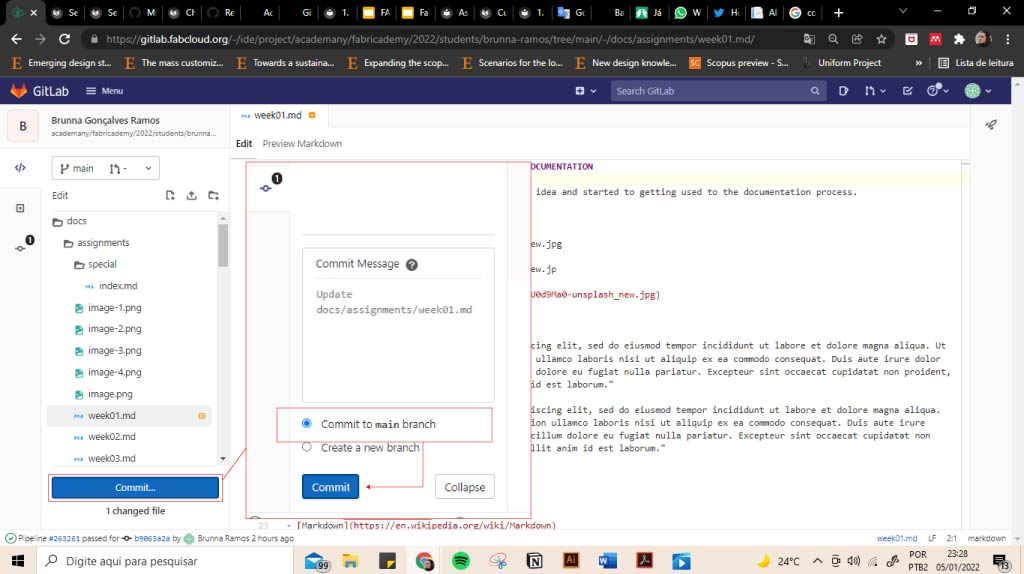
Tip: always commit as you edit the page, so you don't run the risk of losing edits due to some problem
SOME TIPS ON HOW I ORGANIZED
- Build inspiration folders on Behance/Pinterest.
- Write before in docs (while not getting used to gitlab). For example, I thought a lot to do "what brings me to Fabricademy"... writing on the outside helped me.
- Arrange all images in the order you are going to use, before publishing. In Illustrator, Inkscape, Photoshop, canvas. This allows us to export the size we want.
- If you still need to compress the image, Tiny JPG,I Love Img.
- Name files and images by numbers in the sequence of use (e.g. 1.jpg, 2.jpg, ...).
- Always make the commit.
- Look at past work in the Fabricademy repository to see what has been done and learn from past experiences.
As for inspirations for the final project, I really have no idea! Maybe continue with Textile Waste research, but I'd like to explore Fabricademy further before thinking about it!
REFERENCES
Adding content with Markdown - Fabricademy docuementation tutorial
Basic writing and formatting syntax - Github
Creating and highlighting code blocks - Github
Fabricademy Class 1: State of Art
Fabricademy 2021 - GitLab:mkDocs intro
Material for MkDocs - Changing the colors
Material for MkDocs - Changing the logo and icons
Material for MkDocs - Customization
Organizing information with tables