6. BIOFABRICATING MATERIALS
SOME REFERENCES PROJECTS
For this week, some reference projects inspired me: as the algae-based bioplastics by Carolyn Raff and all its systematization and organization of research in circular samples, the experiments with Kombucha by Moya Hoke and Lorena Trebbi, the Kombucha recipes to drink by Rose Maya on youtube (which explains everything in such a didactic way), the bioplastics based on Alginate by Bela Rofe and the conductive biomaterial developed by Fab Textiles.
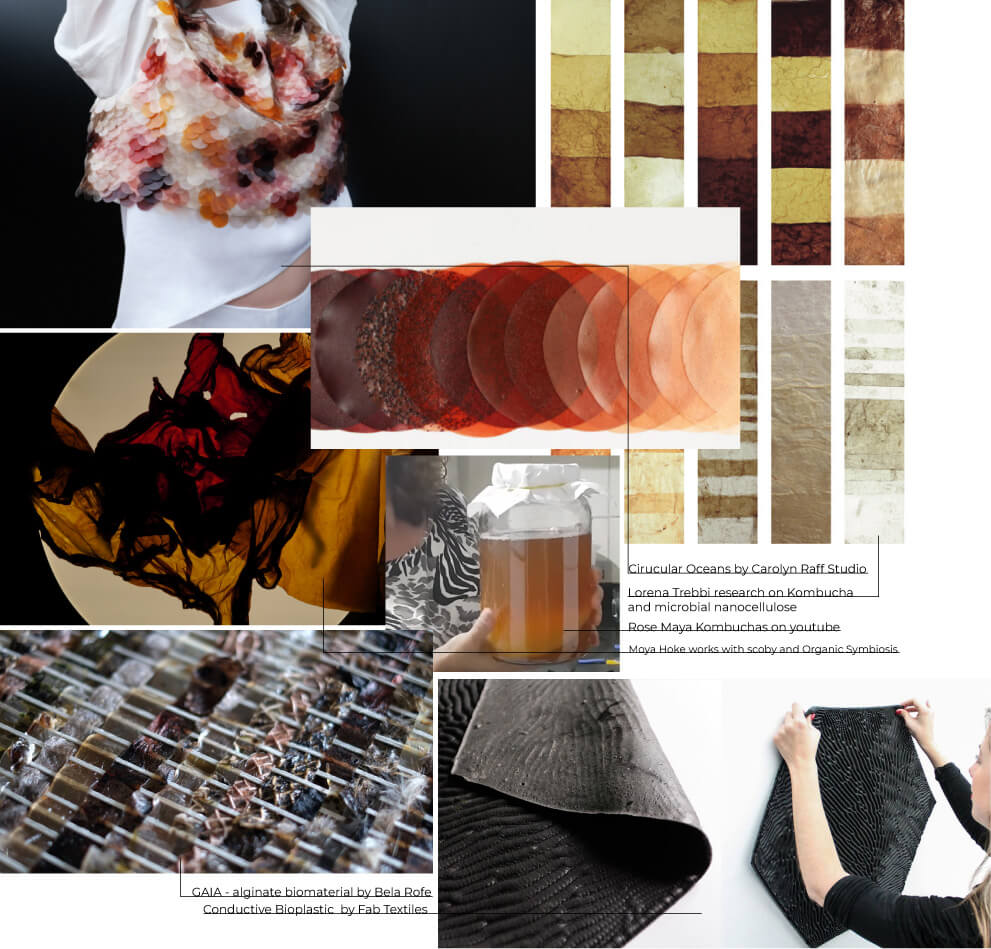
There were so many references found and commented on in class that I decided to organize them in a visual reference panel.
CRAFTED MATERIALS
alginate bio plastic + textile waste
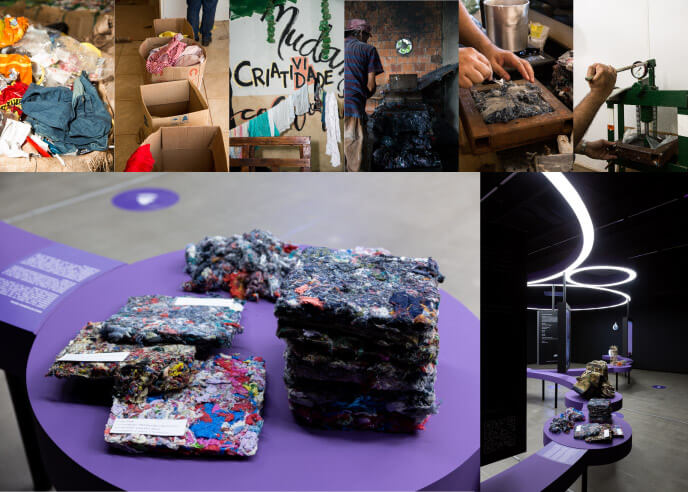
This week I wanted to continue an old research on thermal and acoustic insulation boards made with textile waste and binders. The research is part of the DeSIn Research Group – Design, Sustainability and Innovation that I was part of throughout my graduation. The group aimed to build a model for the collection, separation and final disposal of textile waste in a recycling cooperative, more specifically post-consumption/post-use waste, which is not provided for in the country's legislation and therefore ends up being classified as waste by the recycling cooperatives and sent to landfills.
The “Textile Waste Bank” model was prototyped at the Cooper Região Recycling Cooperative in 2019/2020. All textile waste that arrived in the space was sanitized, sorted by type of fiber (natural, mixed and synthetic) and removed from trim, then fragmented by a shredding machine. In the end, we made boards for thermal and acoustic insulation (aimed at civil construction) by pressing shredded textile waste into molds with starch or conventional glue. However, we didn't go very deep into the product results, just the business model and system details, so material efficiency tests, as well as research on the flammability of the plates, were not done. We stopped at the problem of textile waste being flammable so that its application could be dangerous.
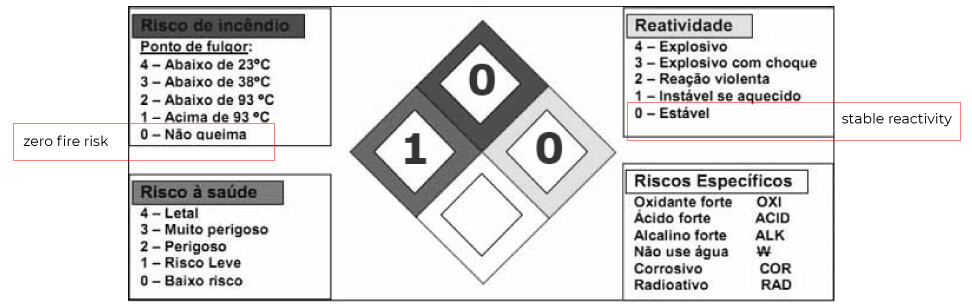
When I saw in class that alginate is a material with good resistance to heat and water, I wanted to test it with the textile residue to see the material's anti-flame potential. Still, I wanted to add a non-flammable compound to have an extra guarantee on the non-flammability of the material and Anastasia suggested Alum.
I found this - Site of a Brazilian University (UNESP) that works as a Database where you can search for the characteristics of some substances, these were the data about Alum:
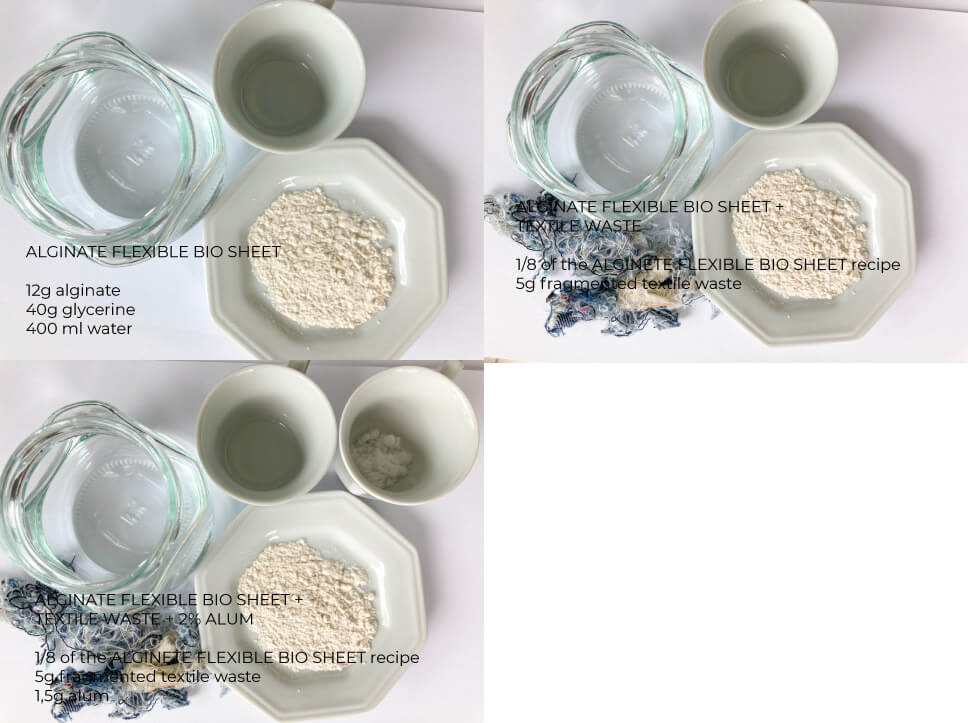
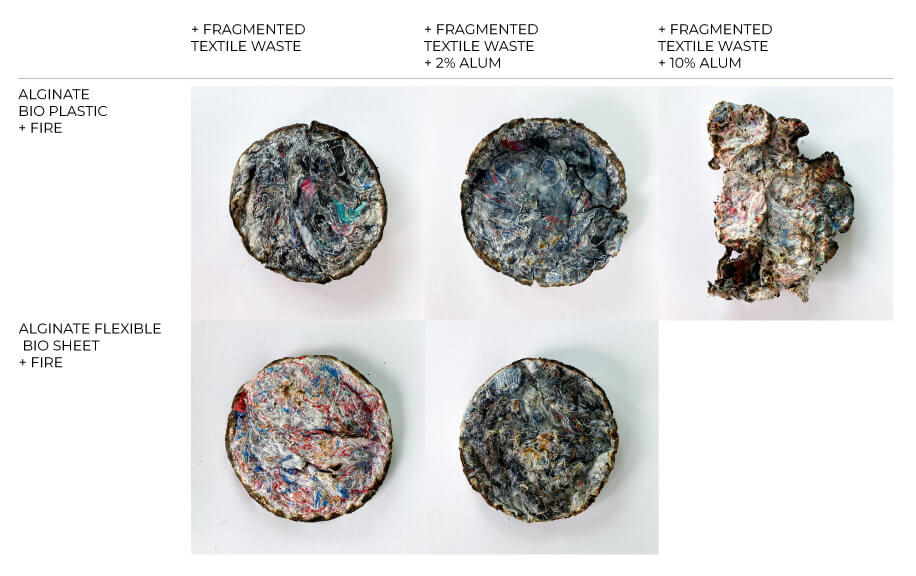
So, I tested two different recipes with Alginate (bio plastic and flexible bio sheet), without and with Alum, with variations in quantity.
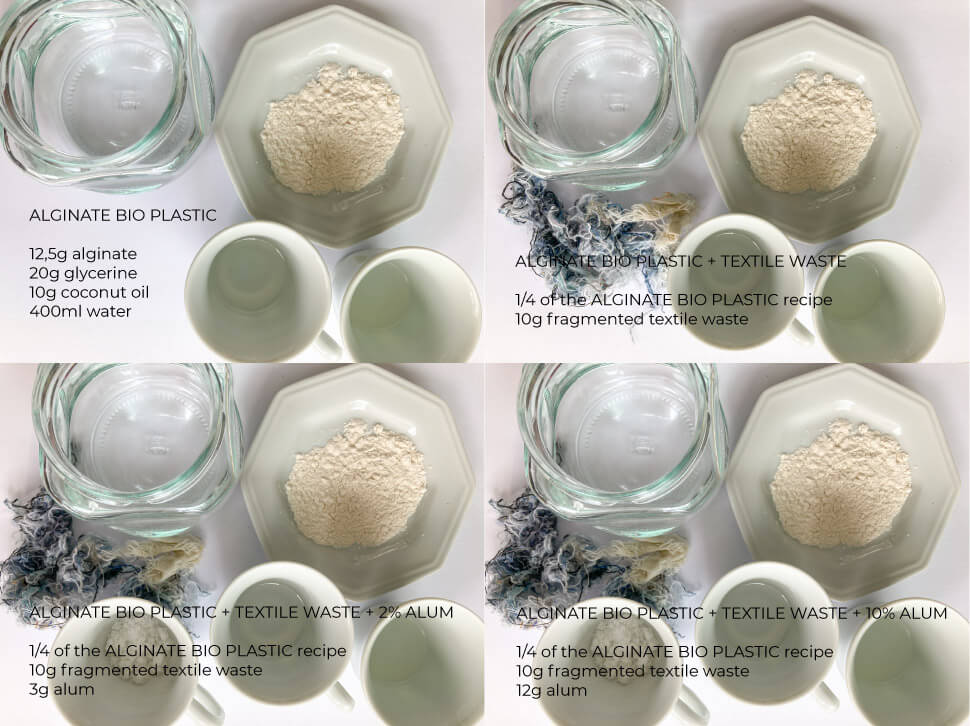
*The original bioplastic recipe called for sunflower oil, I ended up replacing it with the same amount of coconut oil.
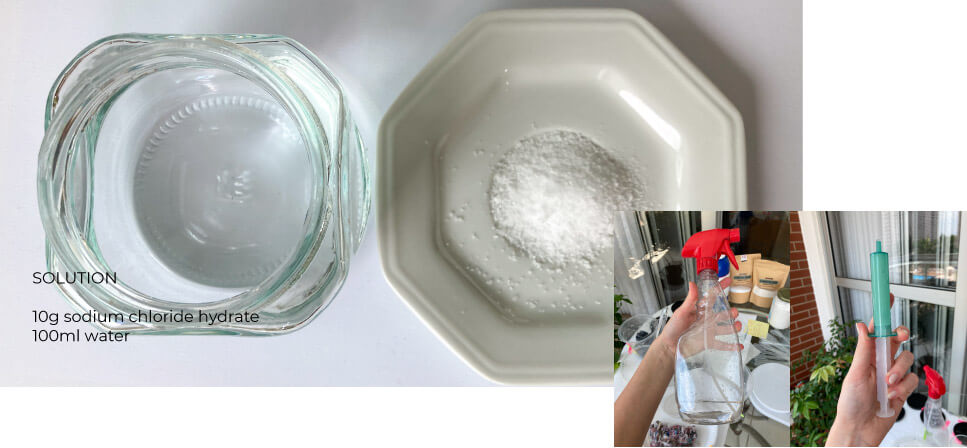
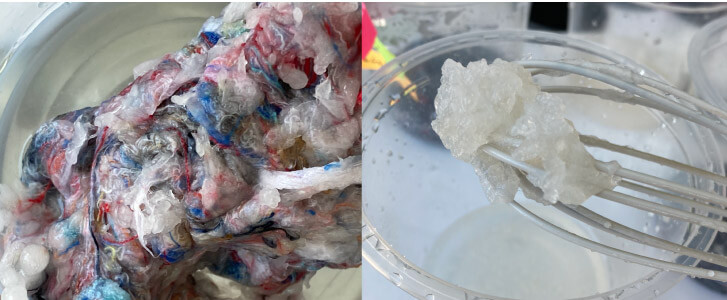
It is necessary to splash Calcium Chloride Solution under the ready-made alginate recipe into the mold, so a spray bottle can help. When we put the alginate mixture into a syringe and pour the solution into a cup, we can make strands of different thicknesses.
I started mixing the alginate by hand, but this recipe is heavy and I had to switch to a hand mixer.
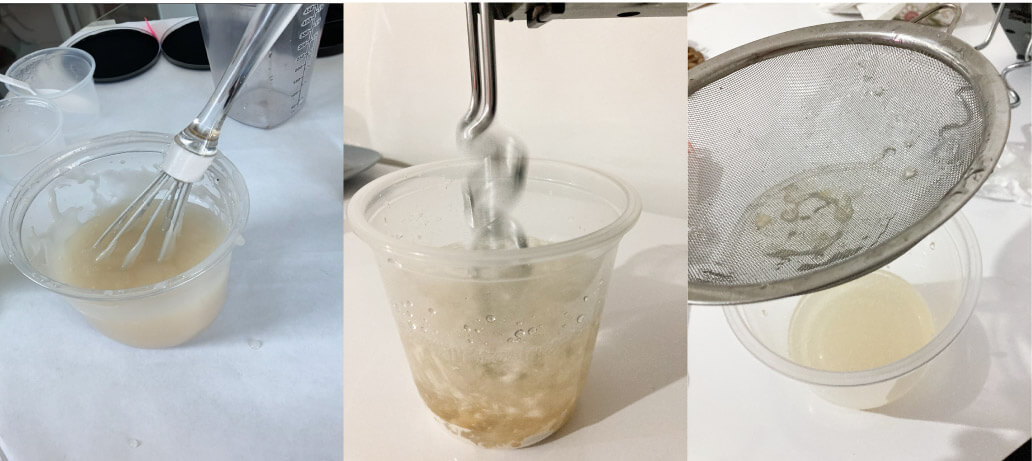
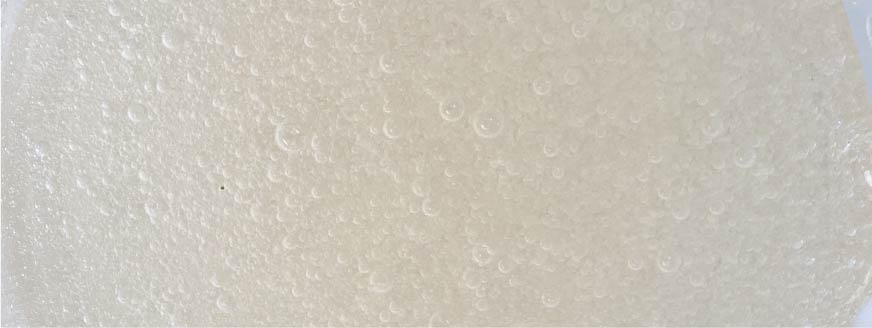
As the alginate takes time to mix, it ends up making a lot of bubbles. So it's better to sift to shape it.
At the time of the research group, we used a manual press to press the boards with textile residue and binder. However, as I didn't have one in my house, I pressed two pots of the same size well using the top one as a “lid/press” (last photo) after spraying the calcium chloride solution onto the mixture.
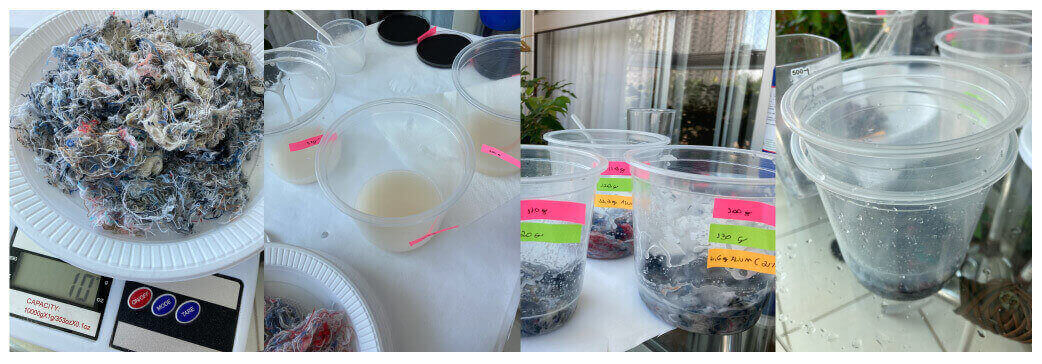
At first I was adding alum diluted in water to the mixture with alginate and ready-made textile residue, but I noticed it was coagulating the mixture. So I decided to test it by mixing alum (10%) with the bioplastic and then adding the residue, but it clotted anyway.
So for the second bioplastic recipe I just made the recipe adding 2% alum under the total weight (for these tests I made smaller amounts), as it only coagulated a little. For these tests I also sprayed the calcium chloride solution.
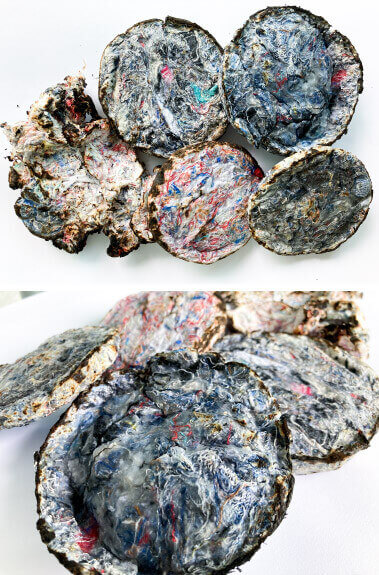
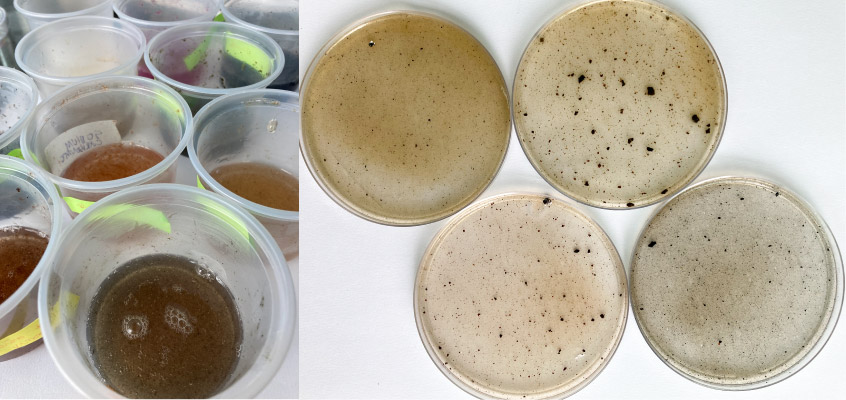
Those were the samples I got:
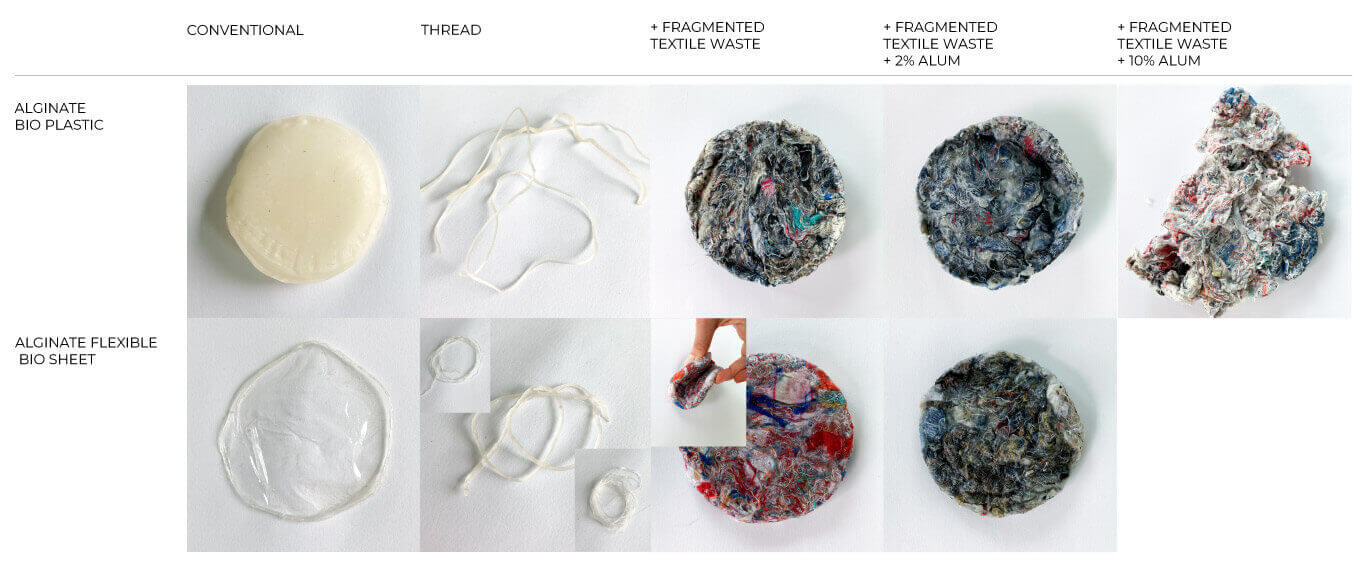
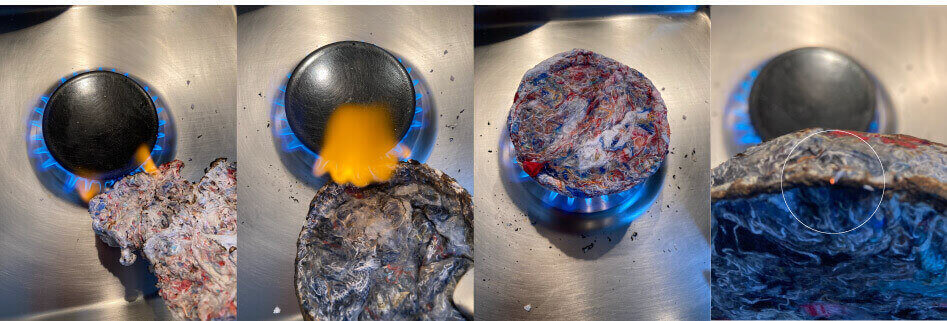
Finally, for the material's flammability tests, I placed the samples directly over the fire. They didn't spread flame, they just charred from direct contact with fire. One of the samples (with 10% alum) began to form embers, but soon went out.
These results made me happy, as I saw that there is a bioplastic alternative for us to consider in our research on thermal and acoustic insulation boards, even though the tests performed were simple. The research still needs larger experiments, including the actual application of the plates (in original size) in a test construction and calculations about the thermal and acoustic efficiency of the material.
alginate bio plastic + biochromes pigments
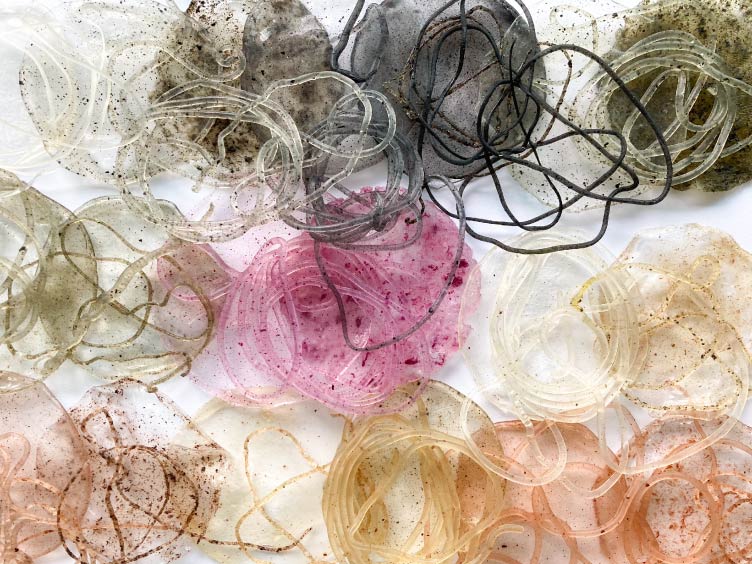
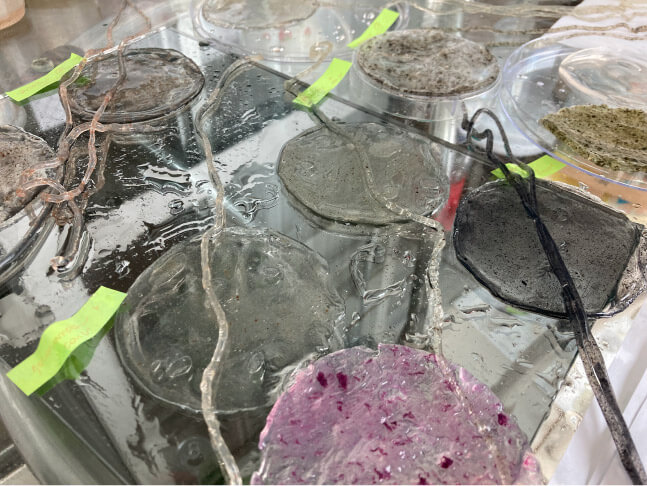
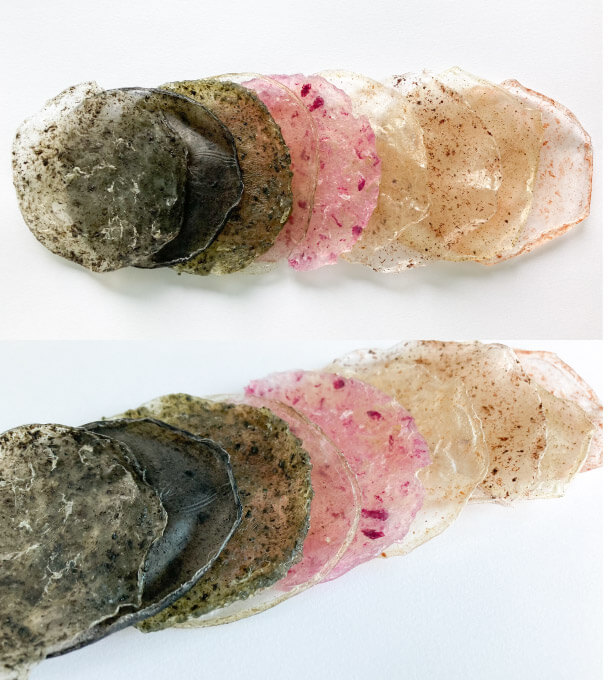
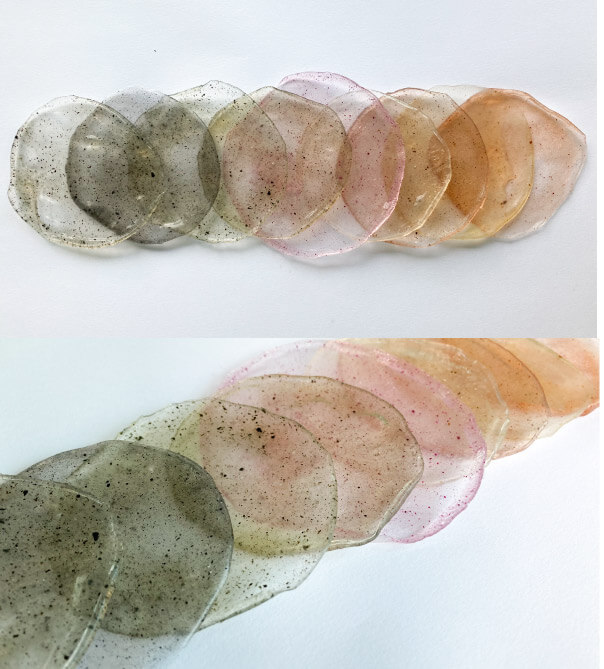
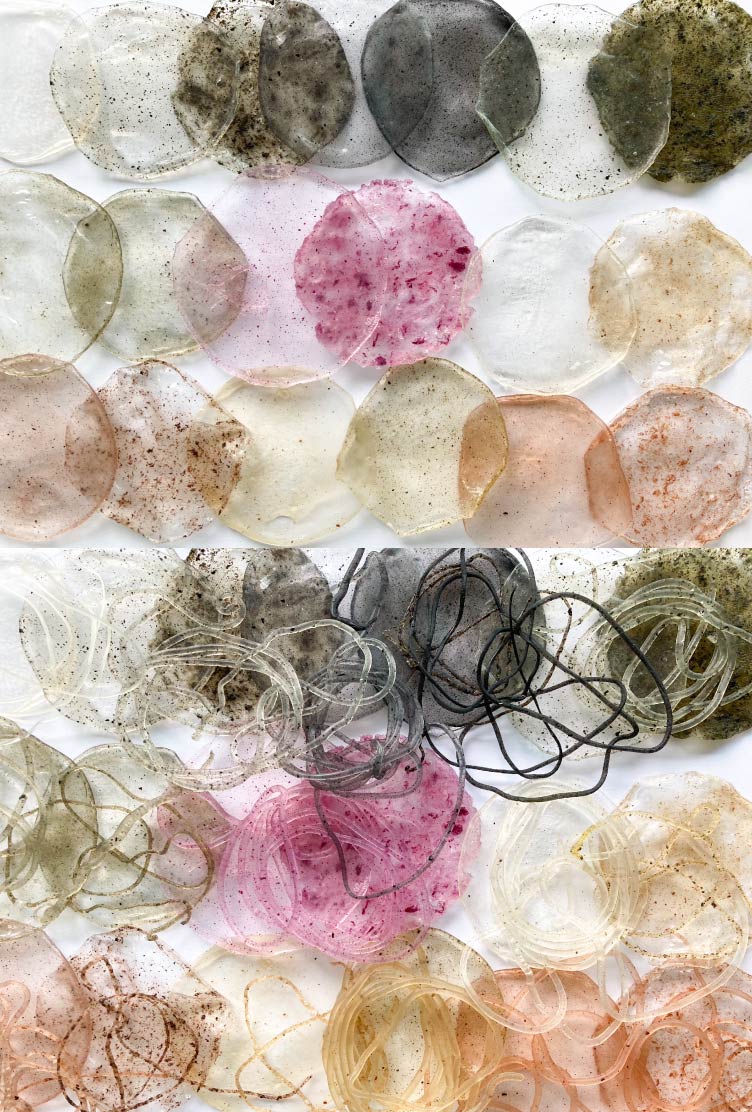
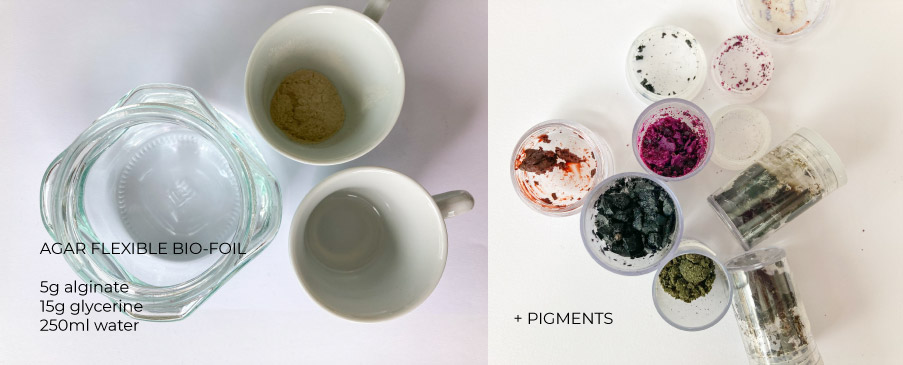
I also wanted to test a third alginate recipe, this time using 9 pigments from week 4 over Biochromes. For this, I used the Flexible Thin Bio-foil recipe (with the calcium chloride solution sprayed later).
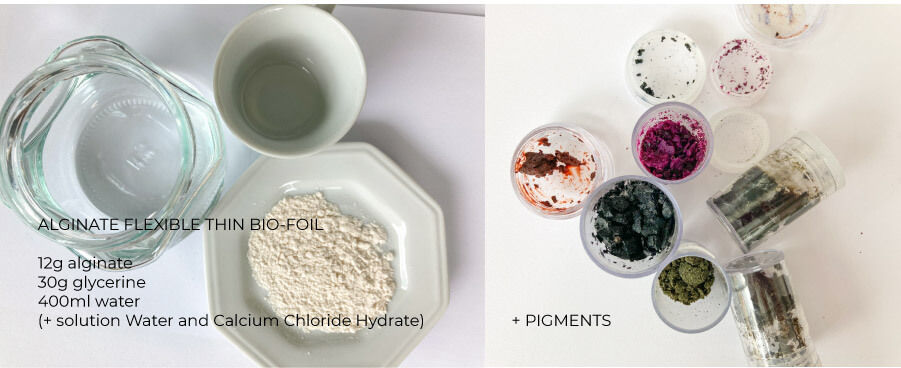
In my first test, I divided the recipe into 10 parts, diluted the pigments in vinegar and added the mixtures. I used petri dishes as molds, a spray to pour calcium chloride, and a syringe to make yarn by pouring the material into a glass of calcium chloride solution. Some recipes curdled, but not all, with those that curdled a lot, it was not possible to make thread (Iresine and mate herb).
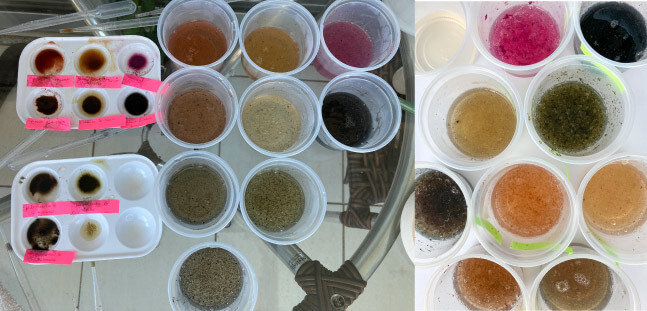
When I finished, I realized the reason for the clotting, I saw that I was confused. The recipe for coloring bioplastics is just pigment + heat. We use vinegar to dilute pigments in fabric dyebaths. Therefore, I did one more test with this bioplastic recipe, doing the same processes, but diluting the peppers with direct heat into the mixture, as indicated.
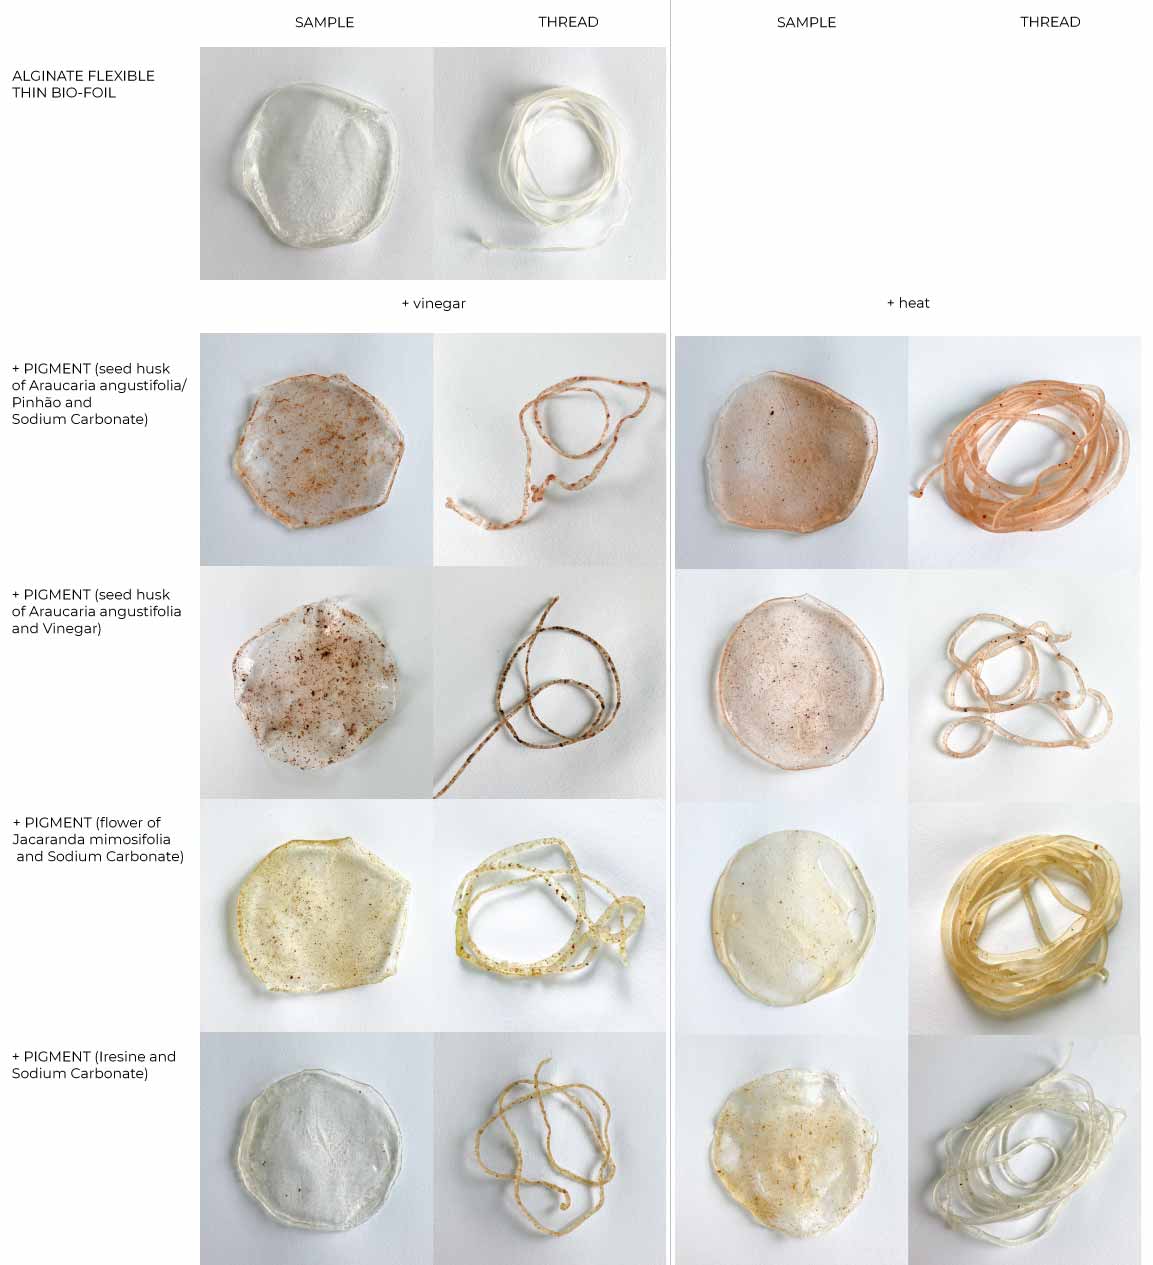
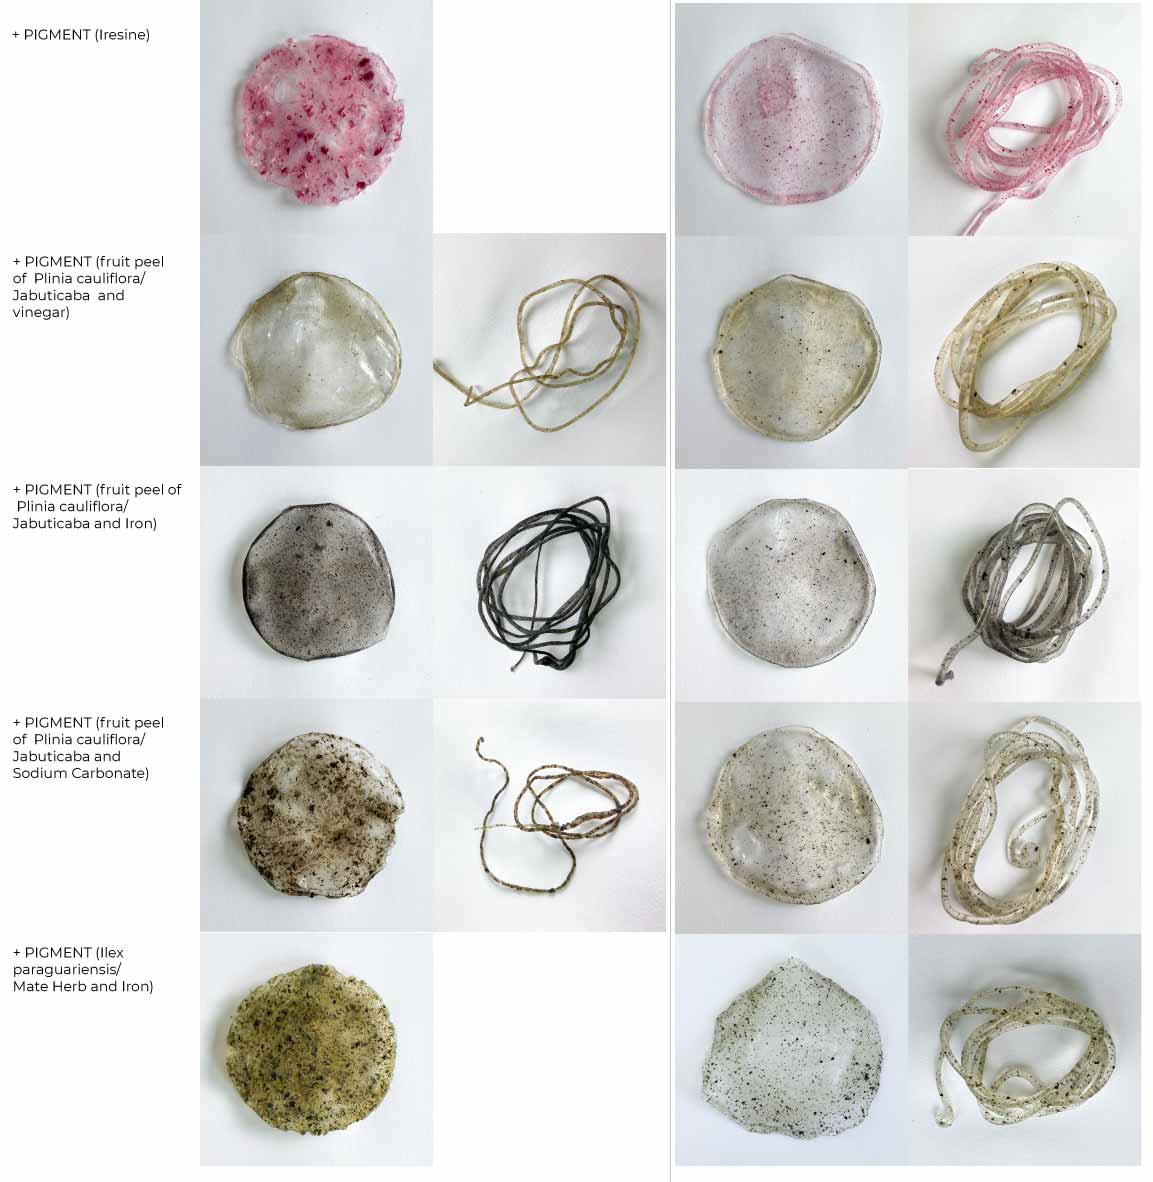
Table with images in higher resolution here
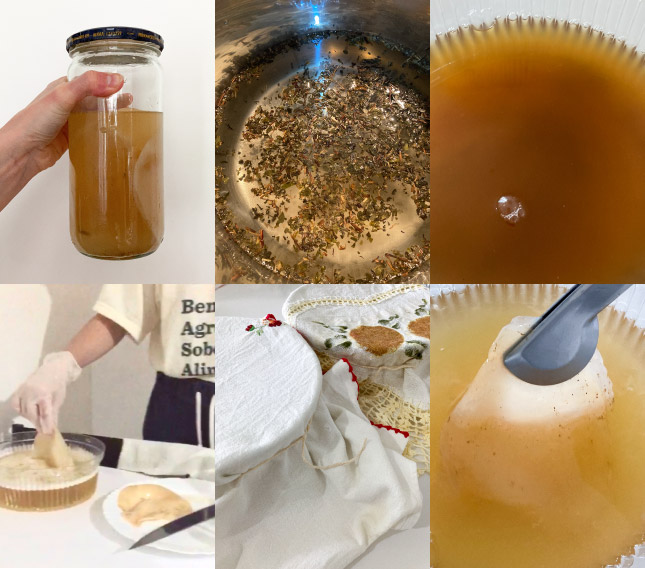
process of making alginate bioplastic
agar conductive bioplastic
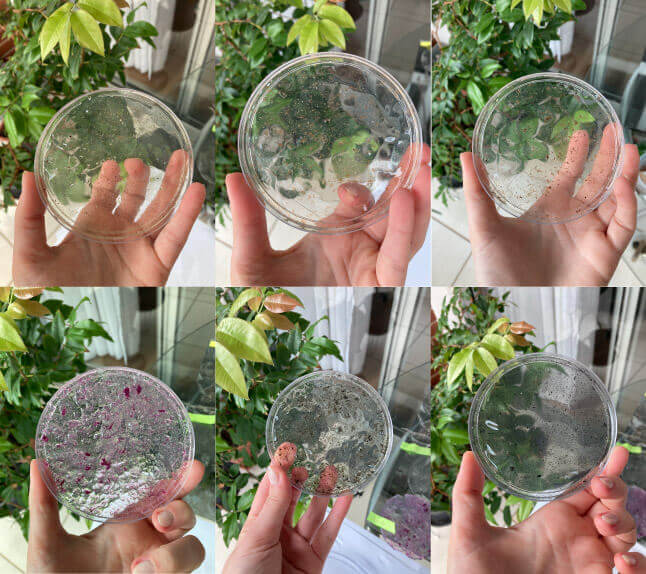
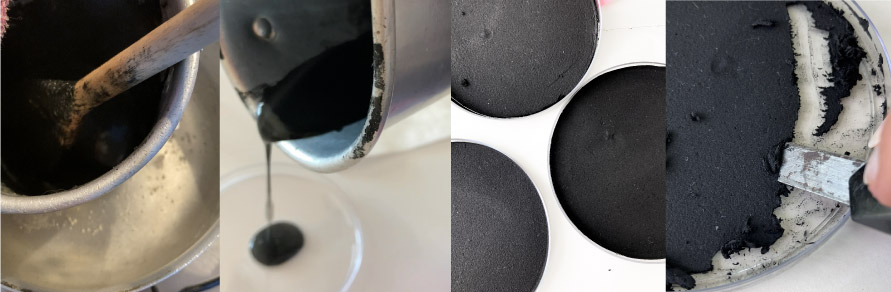
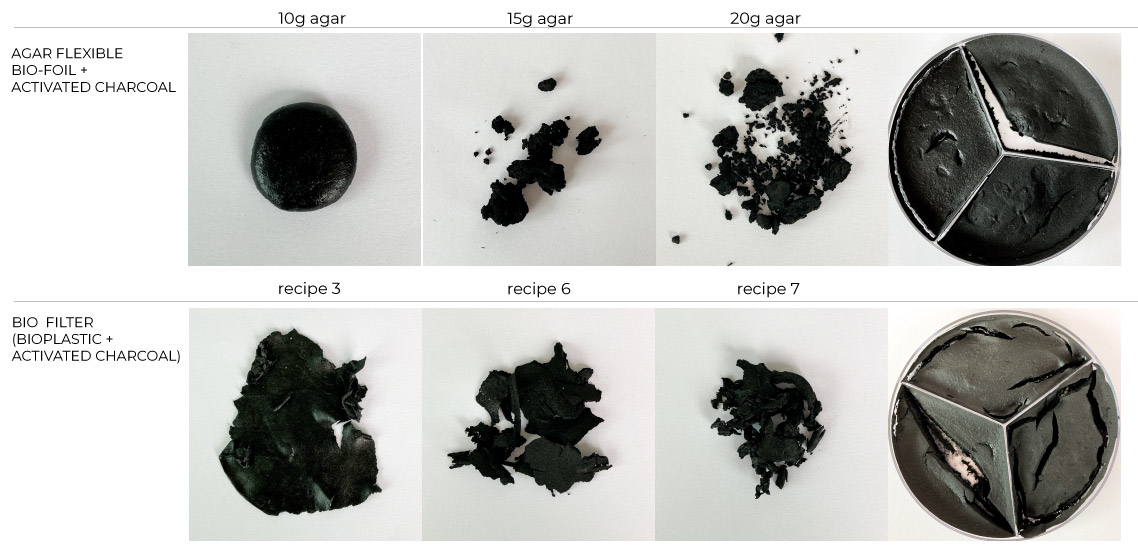
During week 5 on e-textiles, Anastasia sent some suggestions to Angela in a conversation about alternatives to Velostat/Eeontex. Among them were some bioplastic recipes I would like to try to prepare myself for Wearables week. The material consisted of a mixture of water, gelatin, glycerol and activated carbon, but wanted to test a vegan alternative. So I used the Agar Flexible Bio-Foil recipe (1/2 for each test) with a different amount of activated charcoal (10g, 15g and 20g) in three trials.
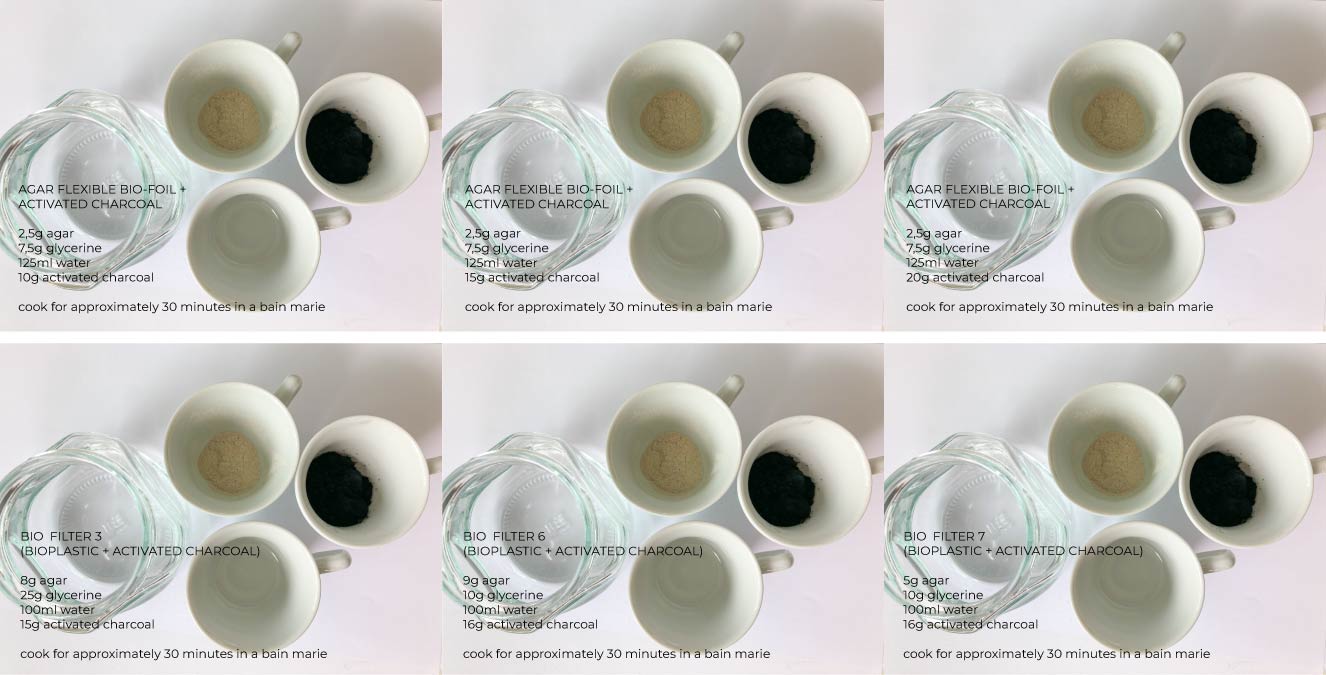
However, the materials were not conductive and even though they were dry, they did not plasticize and did not come off the petri dishes I was using as molds.
So, I made new tests based on 3 original recipes, but considering 1 third of the amount of gelatin indicated to make the substitution with Agar (conversion I use in cooking).
This second attempt did not work either, again when drying the agar it did not plasticize and was not conductive.
agar flexible bio-foil + biochrome pigments
As the samples didn't plasticize, they were just dry or with a clay-like appearance, I decided to test the original recipe for Agar flexible Bio-Foil + the pigments from the Biochromes class, to find out if the problem was my Agar. In this process, I also prepared the recipe in a water bath and when finished, divided it into glasses to add the pigments diluted in hot water to the final mixture (I used the colors left over from the alginate tests), then poured it into the petri dishes that I used as molds.
This third attempt did not work either, again when drying the agar it did noy plasticize, so I suppose that the problem is my agar.
GROWN MATERIALS
kombucha
I had never worked with kombucha before and I confess that I was very afraid of killing my colony of bacteria by contamination!
It was interesting to see the community that exists behind the bacteria because of the kombicha drink. I got the scobys on the same day that I had planned to make the recipe in a facebook group, and the person who donated it to me was very helpful in helping me if I had any questions about how to make the recipe.
When I saw the short talk tutorial on kombucha, I decided to make two recipes, one with green tea and one with beer. I wanted to compare the white/beige tones in the final result.

Instead of vinegar, I used 10% Kombucha starter, or kombucha vinegar.
Basically, the scoby that makes kombucha is a colony of bacteria fed by green tea and sugar, and the process of growing materials is by feeding the same between 25-30 degrees Celsius. However, some precautions must be taken, such as:
- In order not to contaminate our growth, we must always sanitize everything with alcohol 70 and then pass water in the sanitized place (so the alcohol does not kill the colony);
- Wear gloves and a mask to avoid contaminating the colony;
- Feed kombucha with tea at room temperature;
- Cover the colony with napkins, so it can breathe.
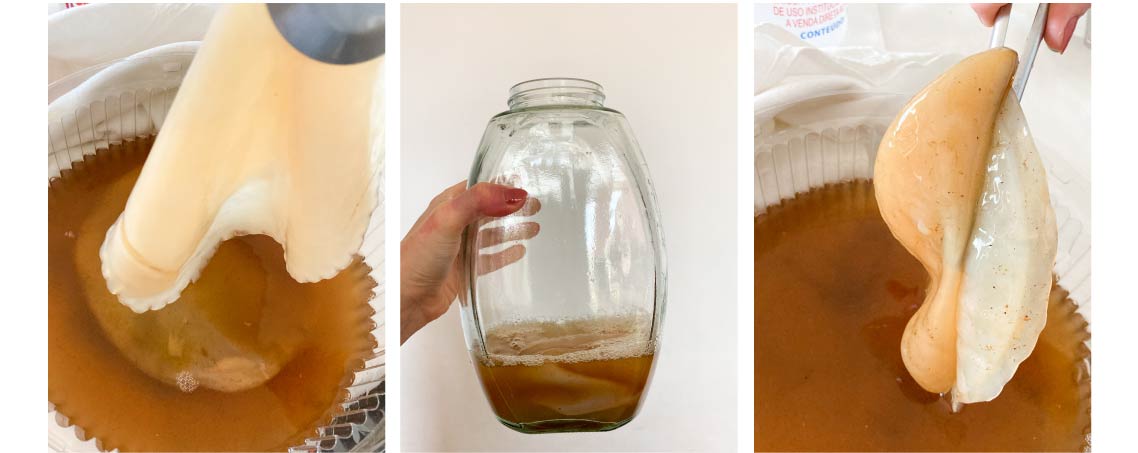
Kombucha can be grown at different thicknesses. I started on 10/28 and removed it on November 4th, aware that these were few days to grow a scoby and form a leather with greater resistance.
As soon as the days for the material to grow had passed, I did the post-treatment by washing the material with running water, applying coconut oil and letting it dry.
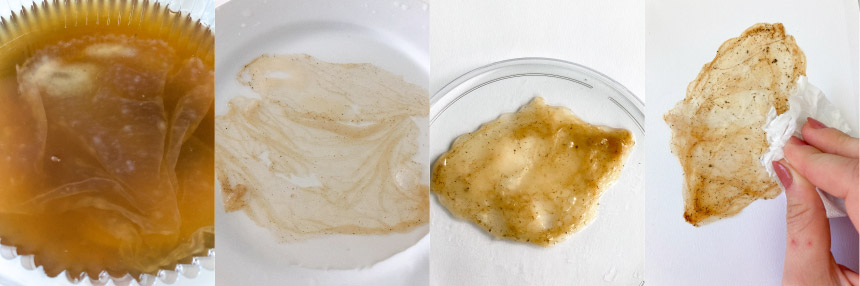
My material with beer was extremely thin and with a silicone appearance, I used the indicated tactic of when the material is very thin, folding it to let it dry making a more resistant film but it didn't work.
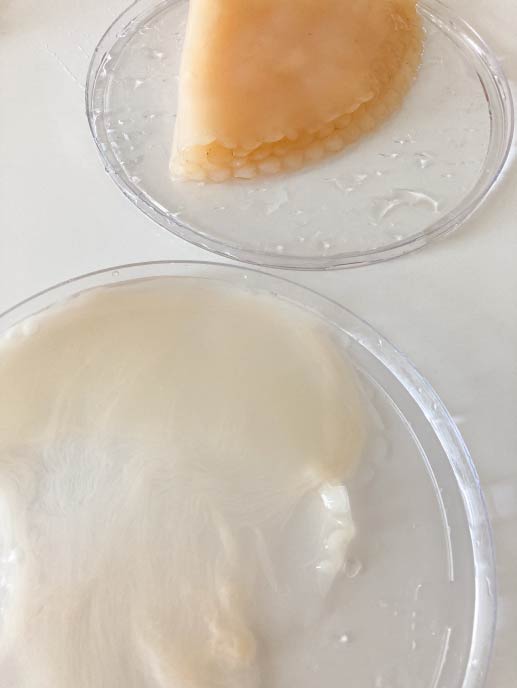
The green tea kombucha, on the other hand, worked very well, and it had the texture of the support I put on top to dry. The beer kombucha was only slightly lighter than the green tea kombucha.
Final samples:

REFERENCES
Fabricademy week 6 - biomaterials
bioplastic
Circular Oceans by Caroline Raff Studio
Algae experiment by Caroline Raff Studio
kombucha
Tutorial Microbial Cellulose by Lorena Trebbi
Fabricademy 20-21 Tutorials - Growing Materials - Kombucha
Rose Maia on Youtube - in portuguese
IN_ORGANIC SYMBIOSIS by Moya Hoke
Material Interfaces. Biological meets Digital by Lorena Trebbi