2. DIGITAL BODIES
We arrived in week two! This is actually my first week of Fabricademy so I'm soooo excited.
Fashion design works on the Human body, so we can understand this as a canvas for the professional. Within this scope, the objective of the week is to create your own body digitally, using different body scanning tools.
INSPIRATIONS
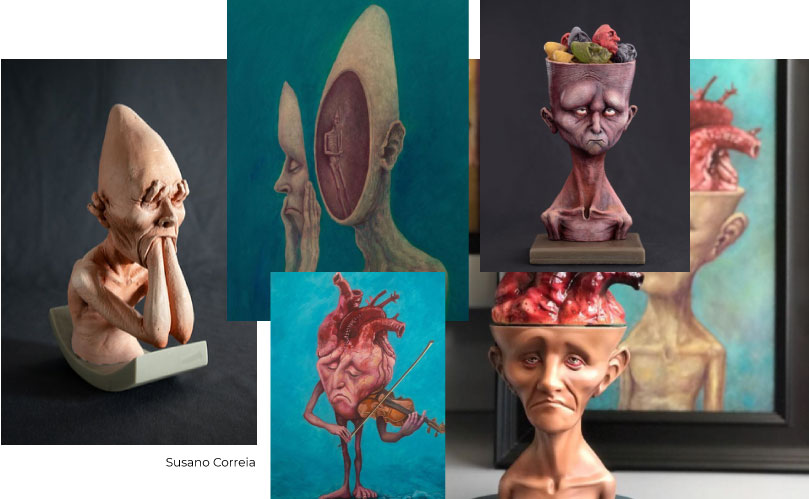
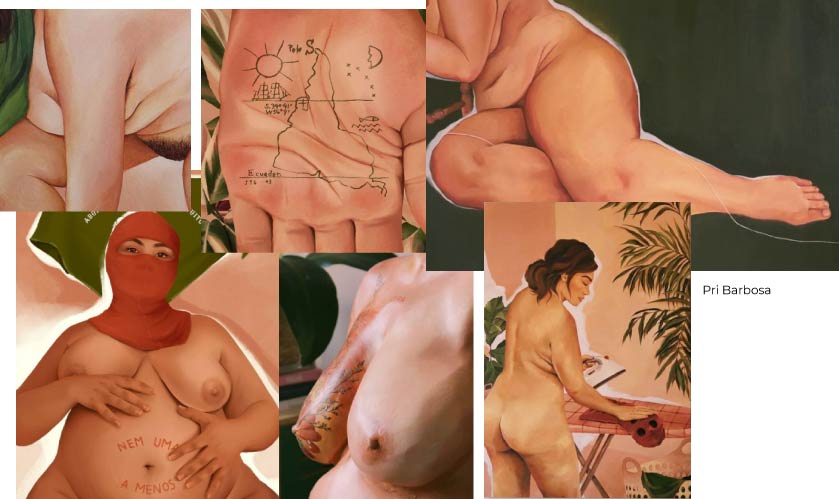
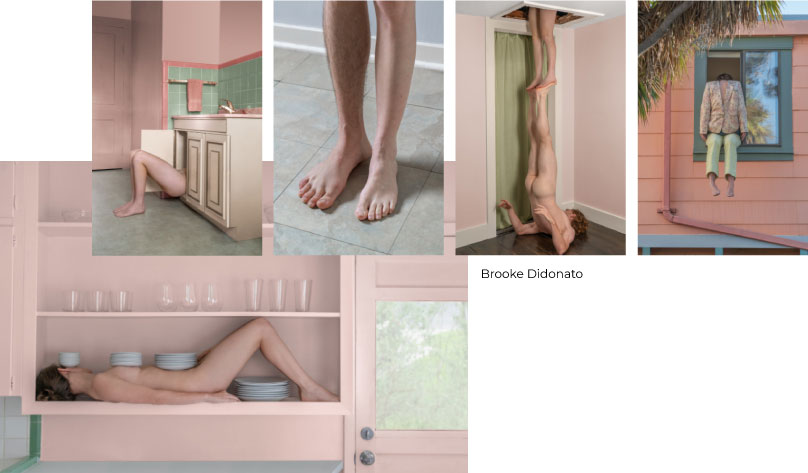
As much as they are not similar to my main idea for this week's assignment, I decided to include in the documentation the work of some professionals who I like a lot and who usually approach the subject of the human body. Two Brazilian artists: Susano Correia and Pri Barbosa and photographs by Broke Didonato.
my ideia
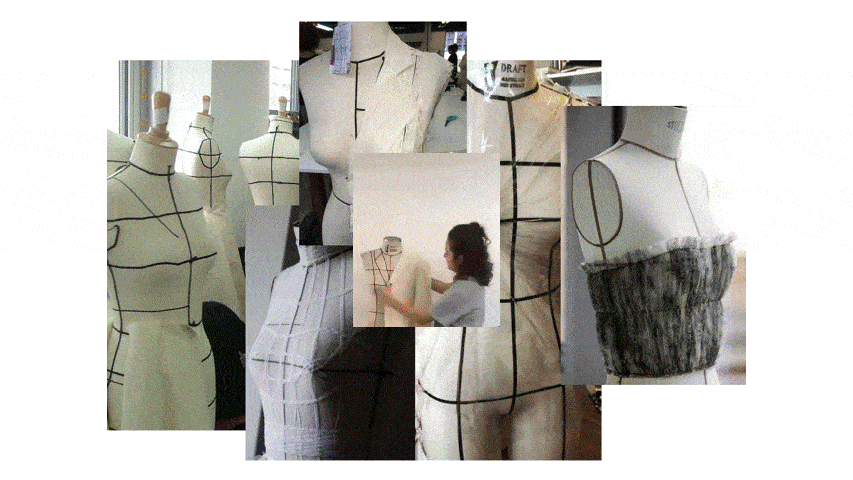
However, for this class, I decided to take the opportunity to do something I've been wanting for a long time, but never had the opportunity: my own life-size pin-up mannequin so I can make moulage, which I love, but as I only have a half-scale mannequin , I end up doing little.
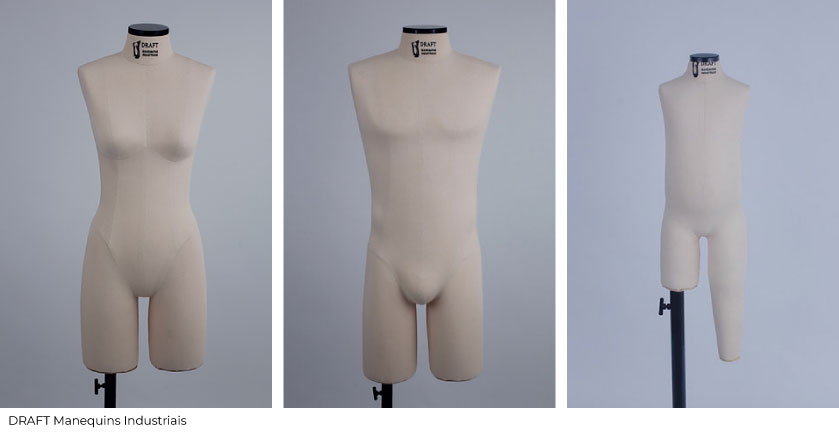
In Brazil, the main reference for moulage mannequins is the company DRAFT Mannequins, created by Eliane Radicetti 15 years ago, the products follow measurement standards obtained in her master's thesis. However, these, like most mannequins on the market, are difficult to transport. So, I would like to make one that is easily mountable/detachable due to personal needs of always needing to be traveling.
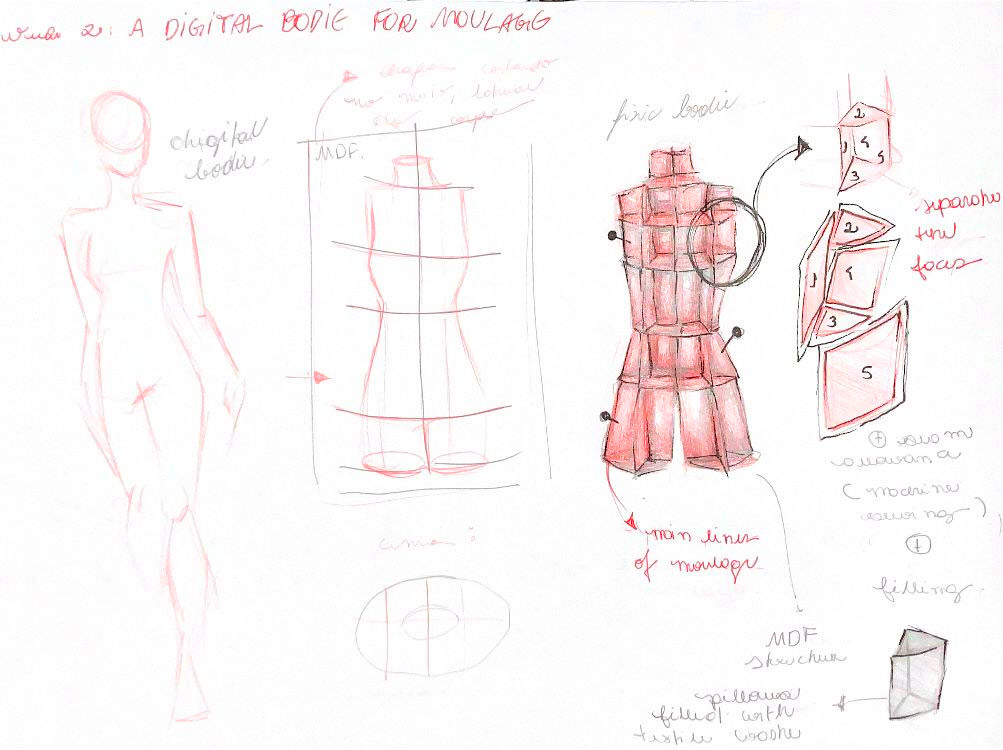
The idea is to make the base of the body in laser-cut mdf, and then fill the spaces with pillows filled with shredded textile waste (see topic DeSIn research group, in Home).
MEASUREMENT CHART
As we don't have a scanner with enough desktop space to measure a whole body in the lab, I decided to make my body in the Make Human software using the measurements from a reference table. But, in Brazil we still do not have a table of standard female measurements for the industry, as the old ABNT standard that established reference standards no longer exists and the new one is still under construction (ABNT NBR 13.377:1995).
Two options for tables are those of Sonia Duarte, a great reference in modeling in the country, and that of SENAI (National Service for Industrial Learning).
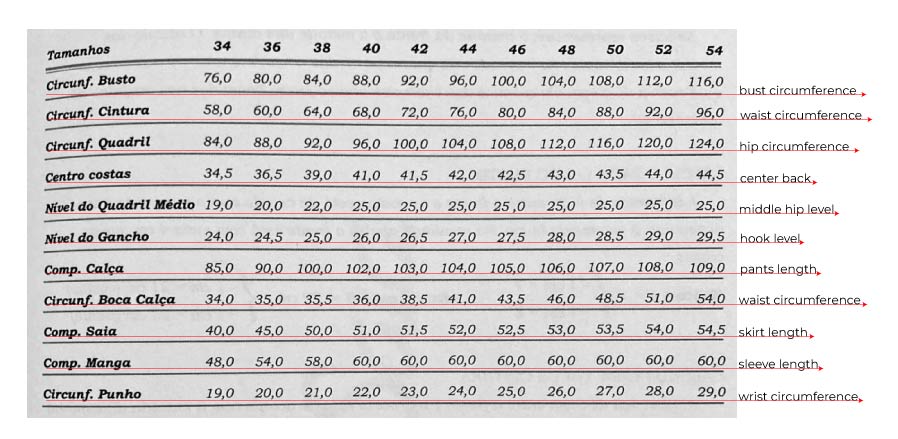 Brazilian Industrial Modeling: Measurement Tables, by Sonia Duarte
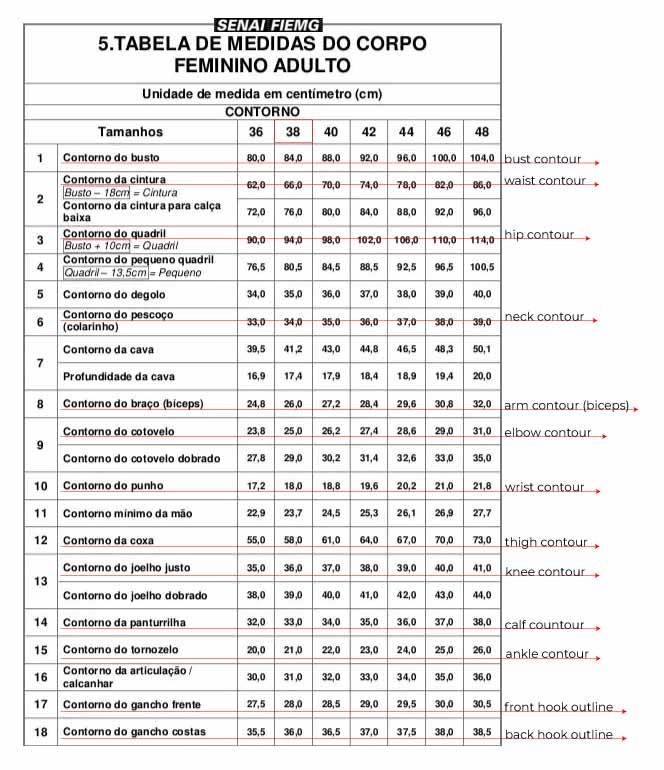
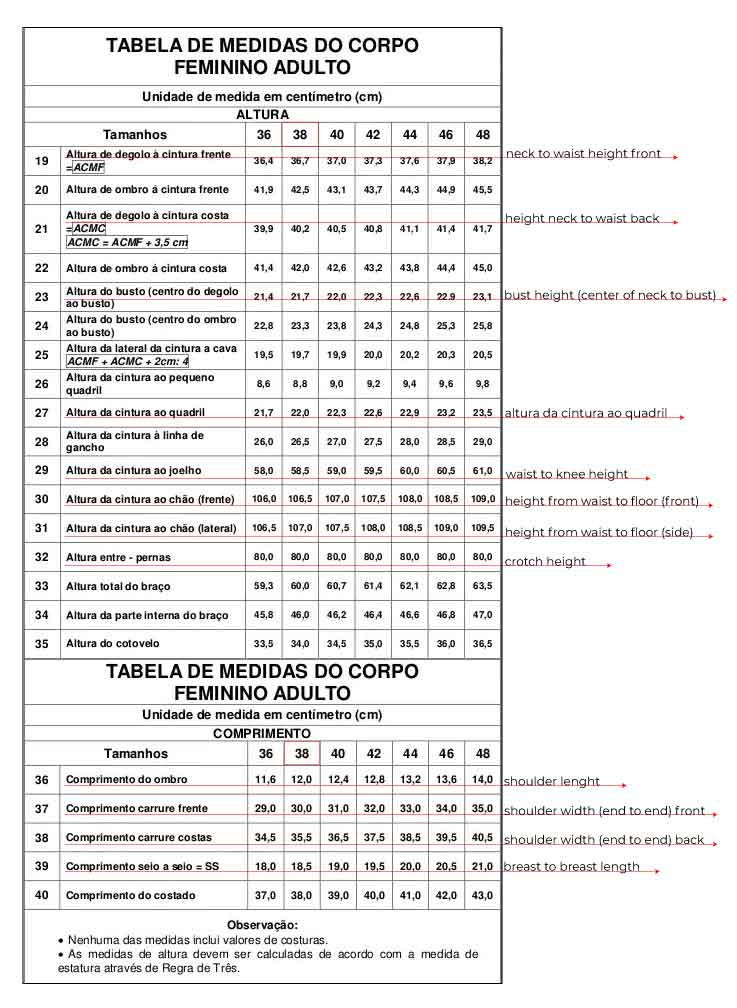
The two tables have few differences between them, with Sonia's having a little smaller measurements. As SENAI's measurement table is more complete, I decided to use it, considering the size 38.
DIGITAL BODIE: DESIGN, MANUFACTURE AND ASSEMBLY
make human
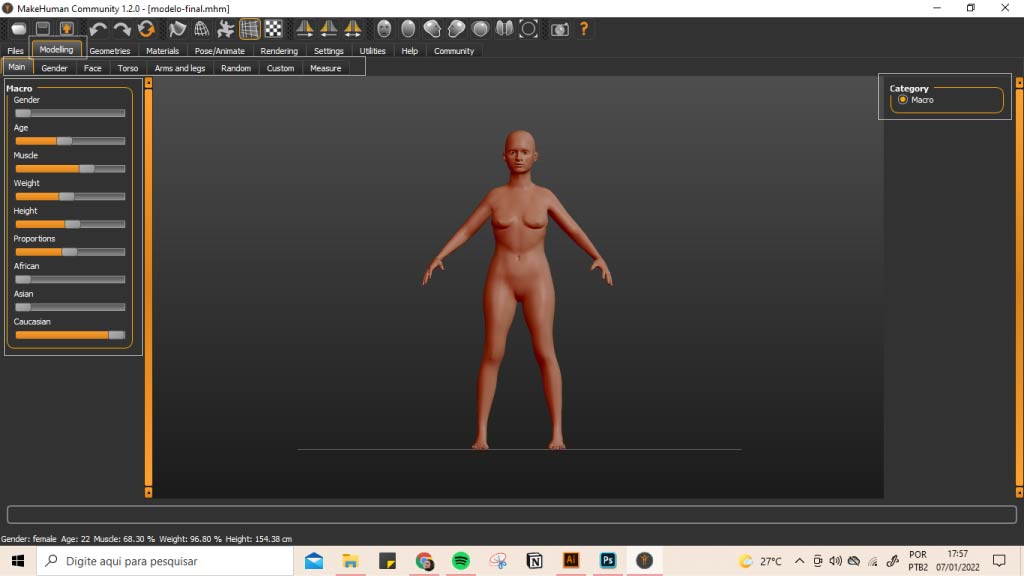
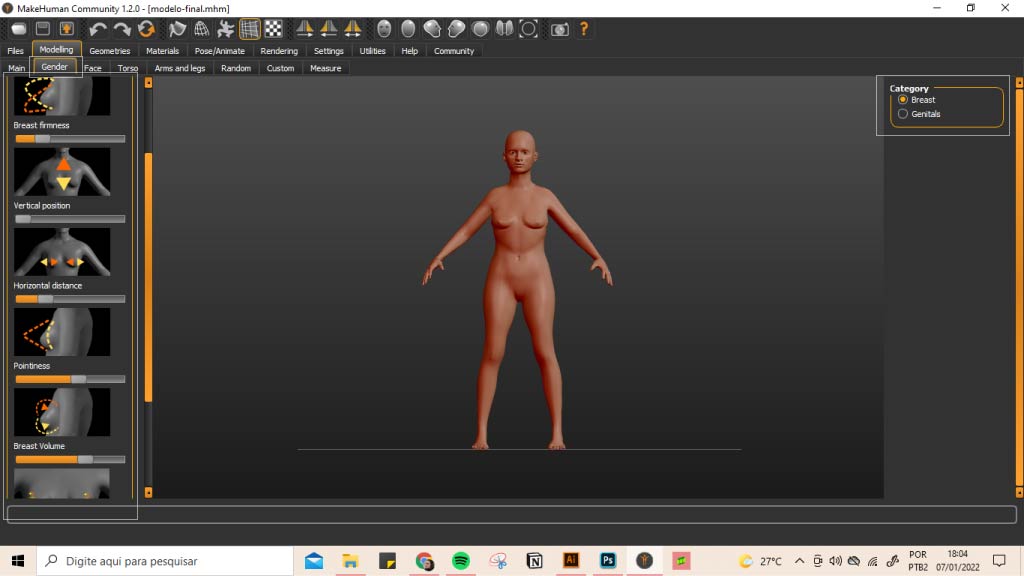
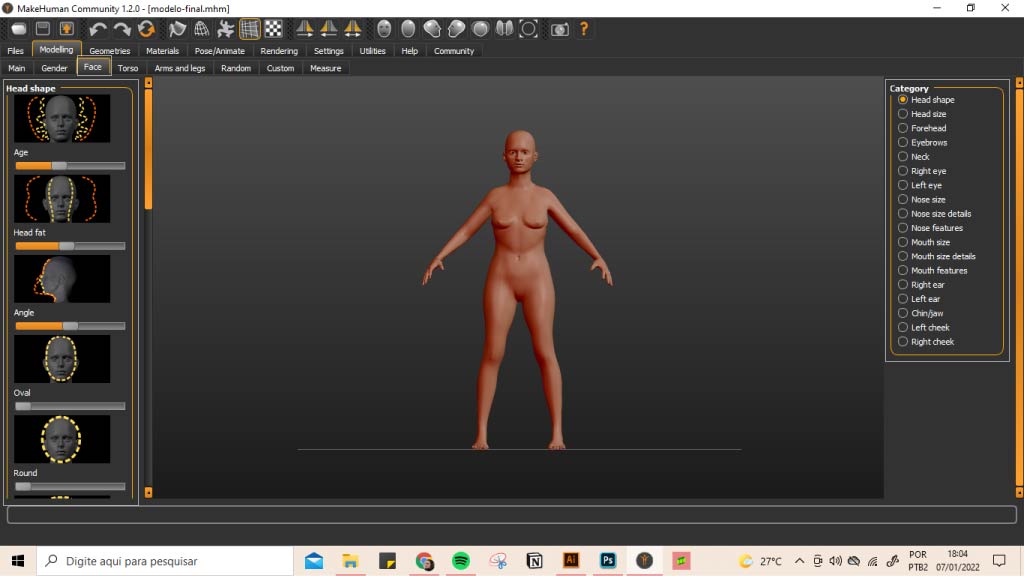
MakeHuman is an open source software that generates 3D human body models. Overall, I found the program pretty intuitive, despite having done nothing but the basic gender and measurement functions.
To model our body, let's go to the modeling area. Within this category, we have several possibilities to manipulate the body, such as: man, gender, face, torso, arms and legs, random, custom, measure. Within each of them we can make changes on the left side of the page, according to what is selected in the right part in category. Like the examples of the images below:
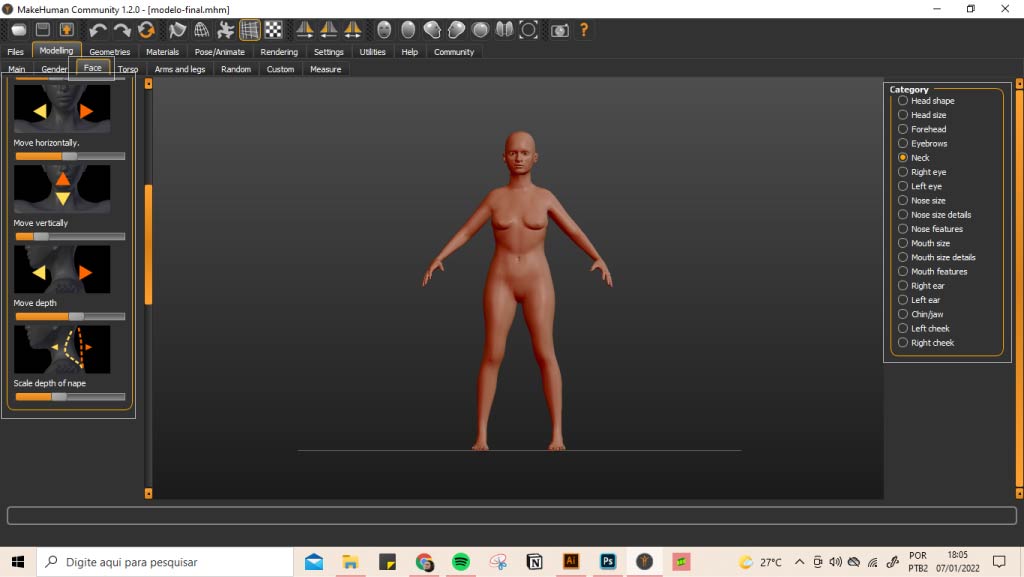
We can also put our own measurements to measure.
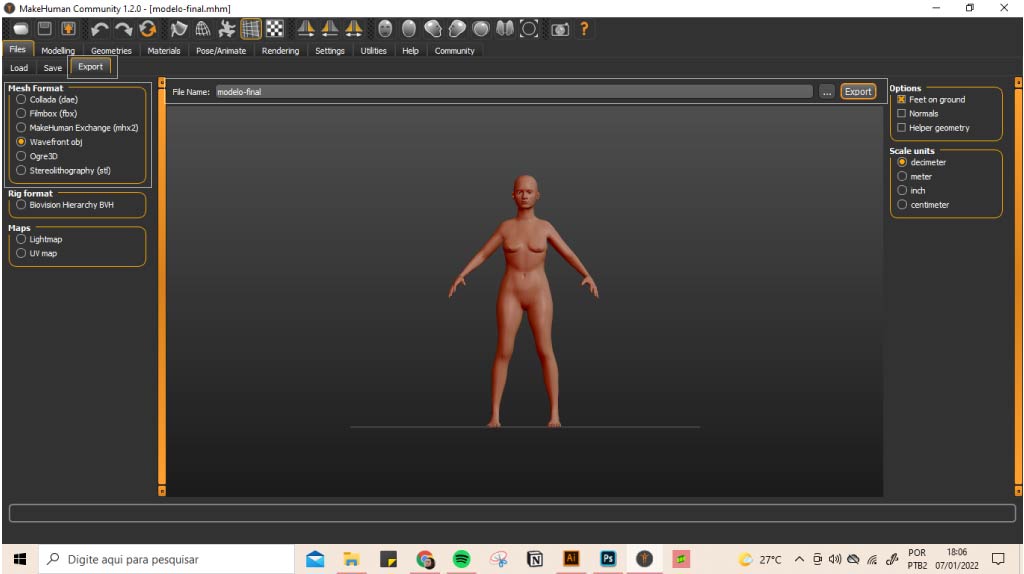
Having made the desired changes, go to files>save to save the model, and files>export to export the body. I exported in stl and obj for security.

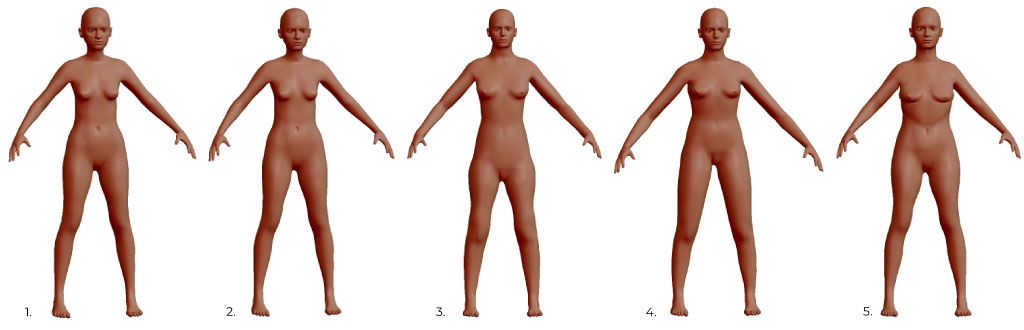
I made 5 different bodies, the fifth being the final model. The first one, without measurements and following my intuition. The second is practically the same as the first. The third and the strangest, with measurements from the senai measurement table. Here, seeing that the program is not so faithful to reality and that the measures generated by the chosen measures table did not work out as I imagined, I decided to use my own measures. This generated body 4. In the end, I made some changes because I felt it was not true to reality yet, and this generated body 5. In the latter I tried to change some measurements so that it was between my size (36) and the size of a larger number (38).
rhinocerus 3D
Rhinoceros 3D is proprietary three-dimensional modeling software, it is not open and for this work I am using the evaluation license. Here we will use the rhinoceros to close the mesh and cut out parts of the body that we don't want to be used.
I had never used the program before, and as much as I didn't find it so simple, for this task we'll only do basic functions.
The first step is to import (in import) the stl or obj file made in make human with the correct measurement units (in my case, mm).

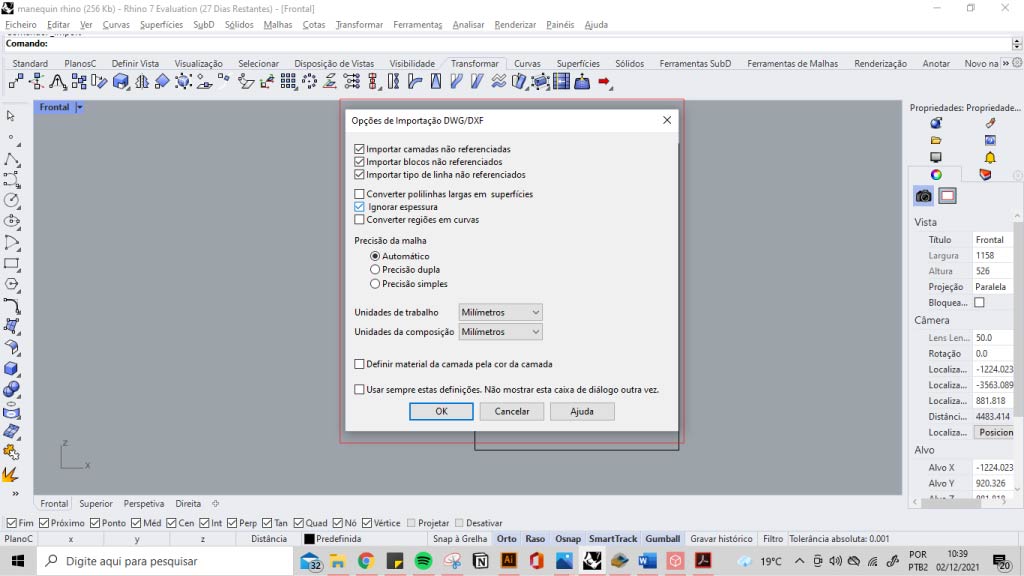
We then turn the model to the right axis with the ortho command selected.
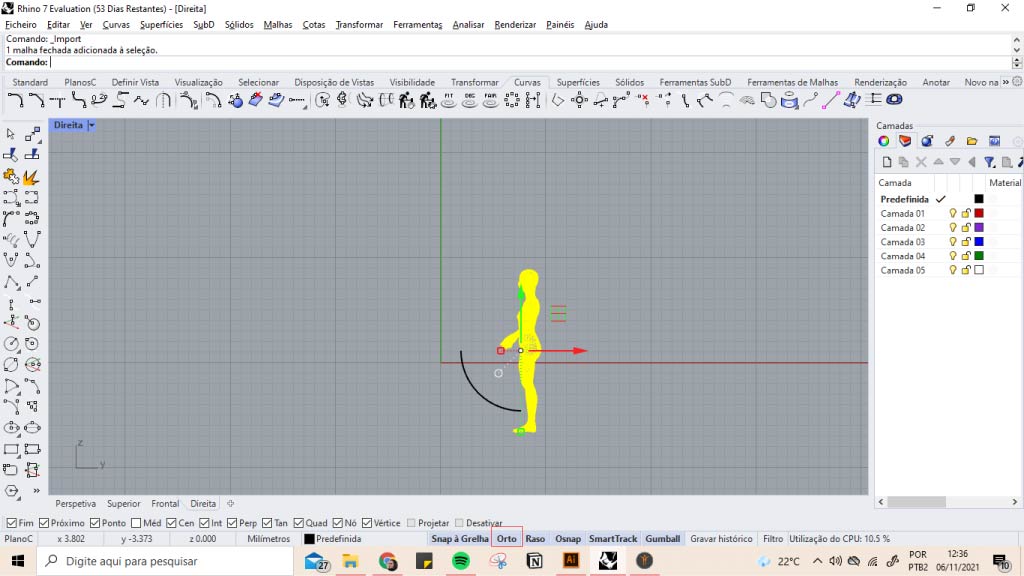
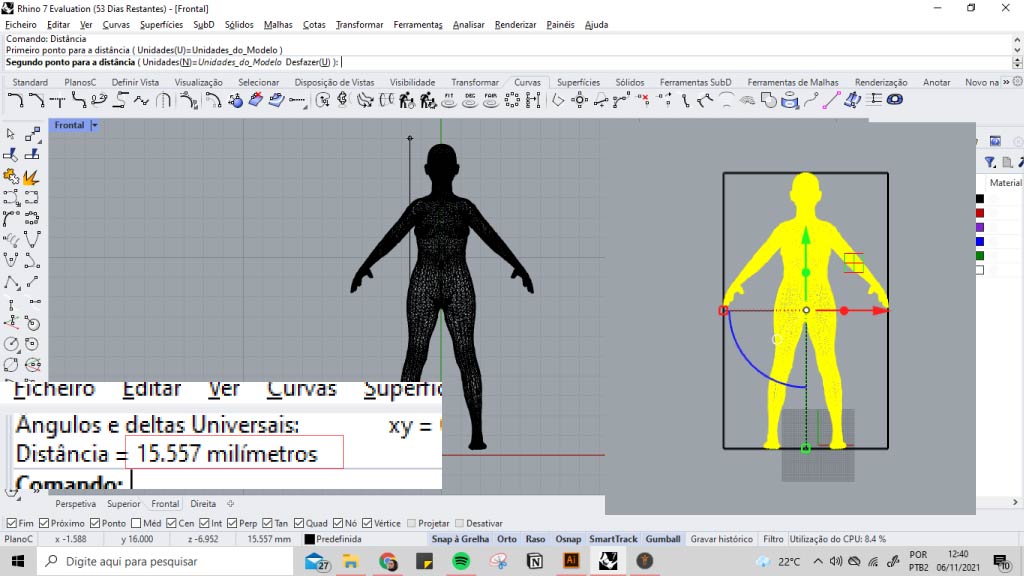
Then, we click on the body and build a box around it with the boundingbox command, to facilitate the checking of measurements. To measure we use the measure tool.
After that, we do the scale commant to scale (in my case, it was x100)...
The mouth and eyes are separated from the body in the rhino, and you can delete them by selecting and then hitting delete on the keyboard. Here it was not necessary, as I will cut off the head.
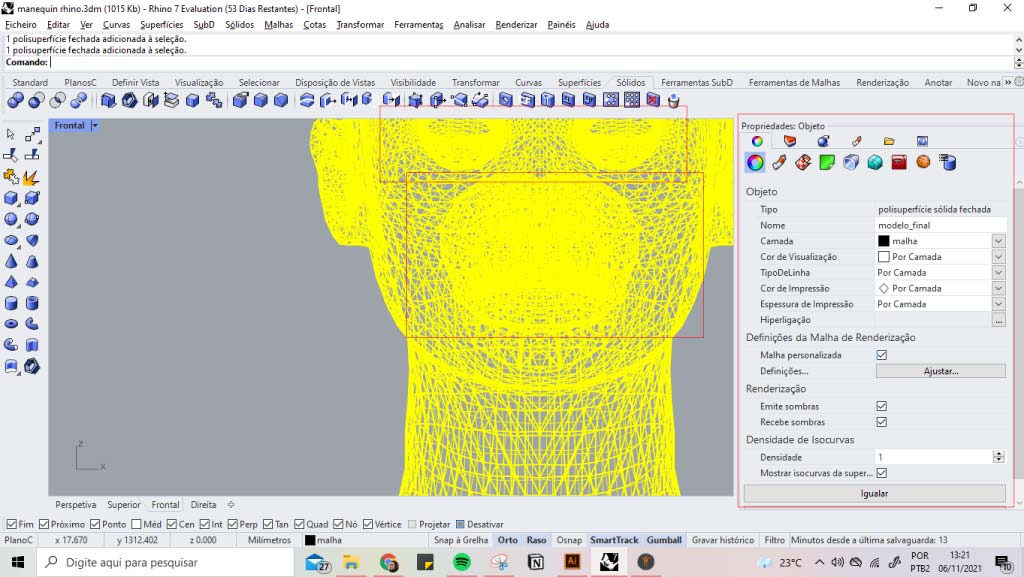
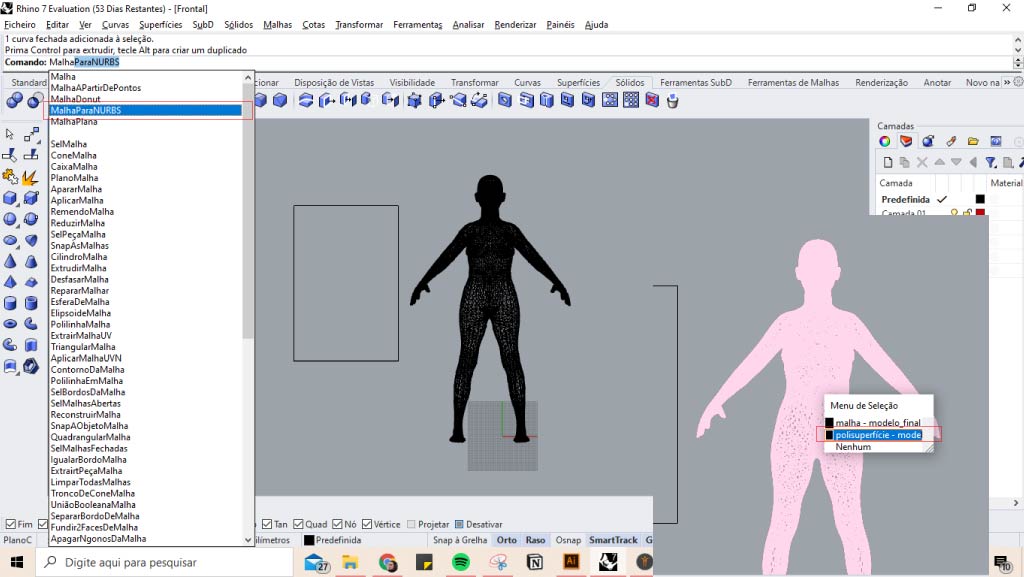
After scaling the body, we close the mesh and convert to nurbs using MeshToNURBS>polysurface.
The next step was to make a rectangle the size of the cutting area of the lab's laser cutting machine, ie 90x60 cm.
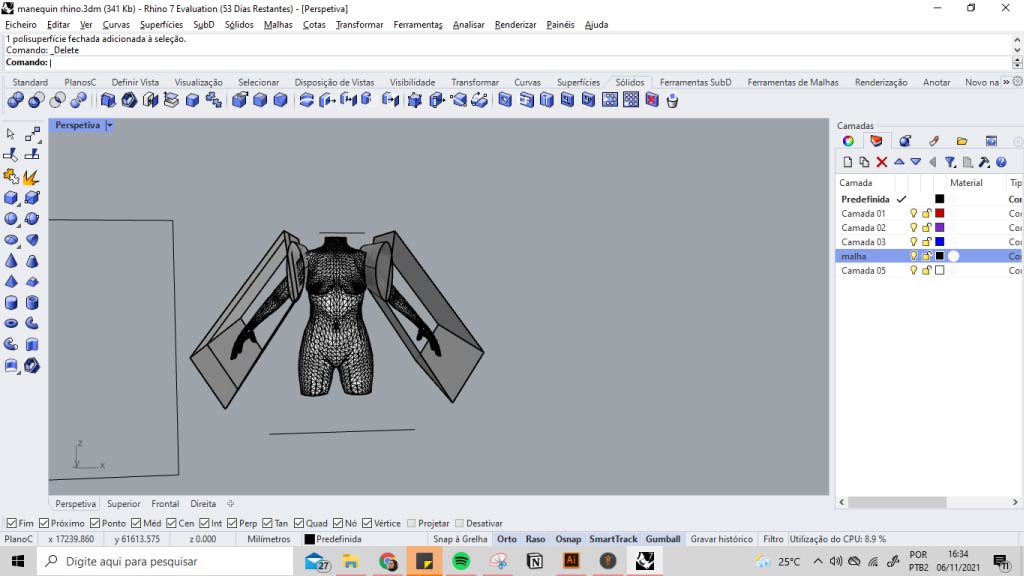
After, using the TrimMesh command, I select first the object that will cut (the rectangle), I do enter, and and afterther the object that'll cut (body). With this command I cut only the head and legs.
To make the mannequin's armhole, I made an oval shape with polyline>extrude. And then I mirrored it with the mirror command and using the built bouding box as a center reference. Then I used the MeshBouleanSplit command to remove the arm.
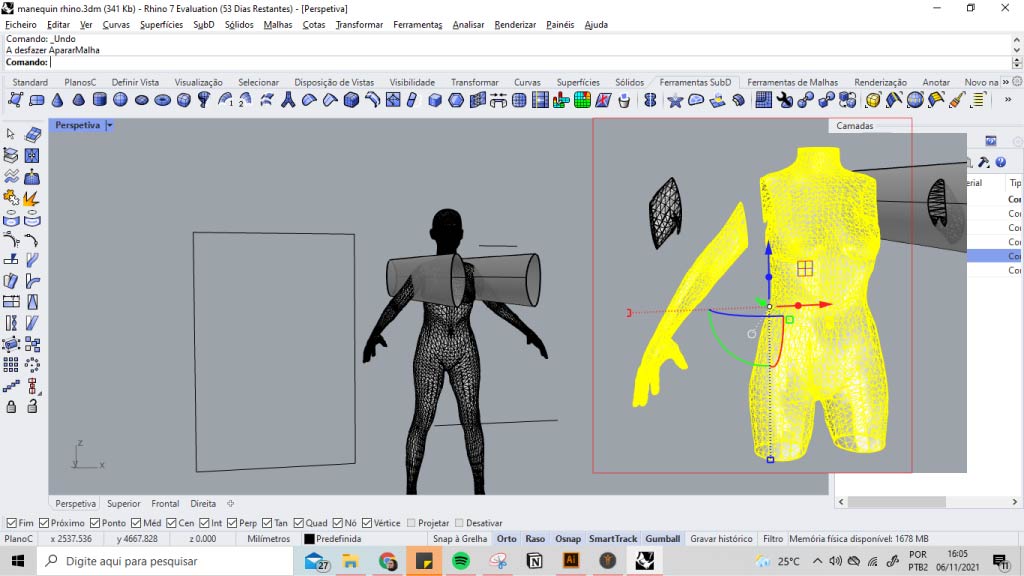
A problem that happened was that the program removed the arm only in the area intersected by the created circle. So I made a box in addition to the extruded oval shape, and repeating the same operations from the previous step (with Mirror and MeshBouleanSplit), I removed the entire arm.
Then, to close the body, I used the CAP command.
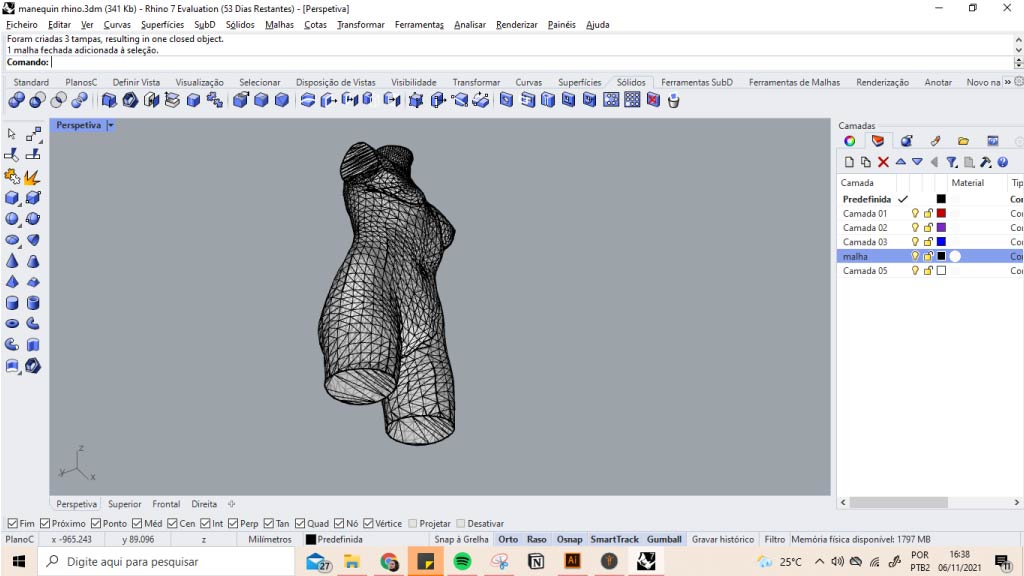
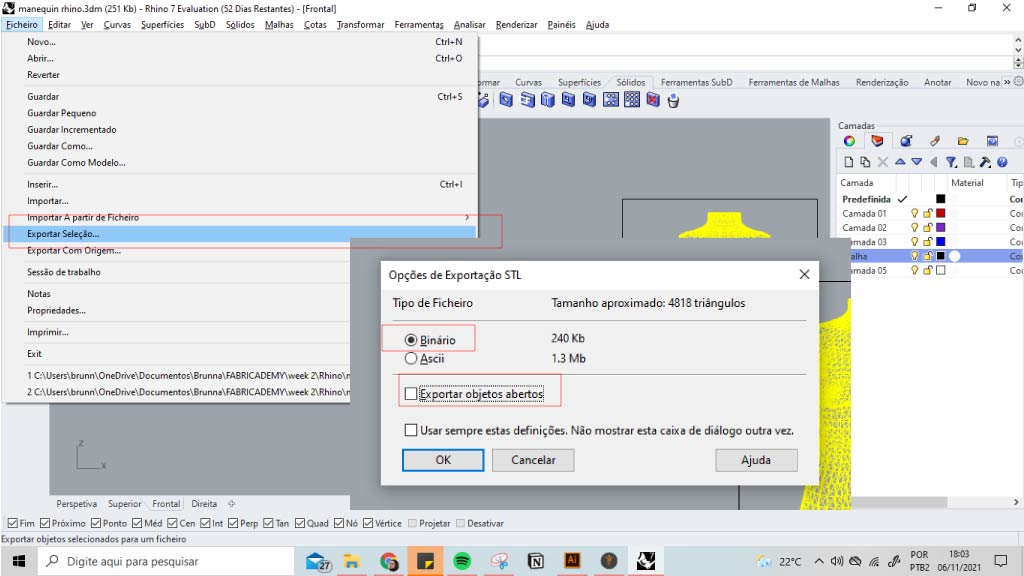
Once I was satisfied with the body created, I exported it using File>Export Selection. For this, the export open objects area cannot be selected. I exported both obj and stl for safety.
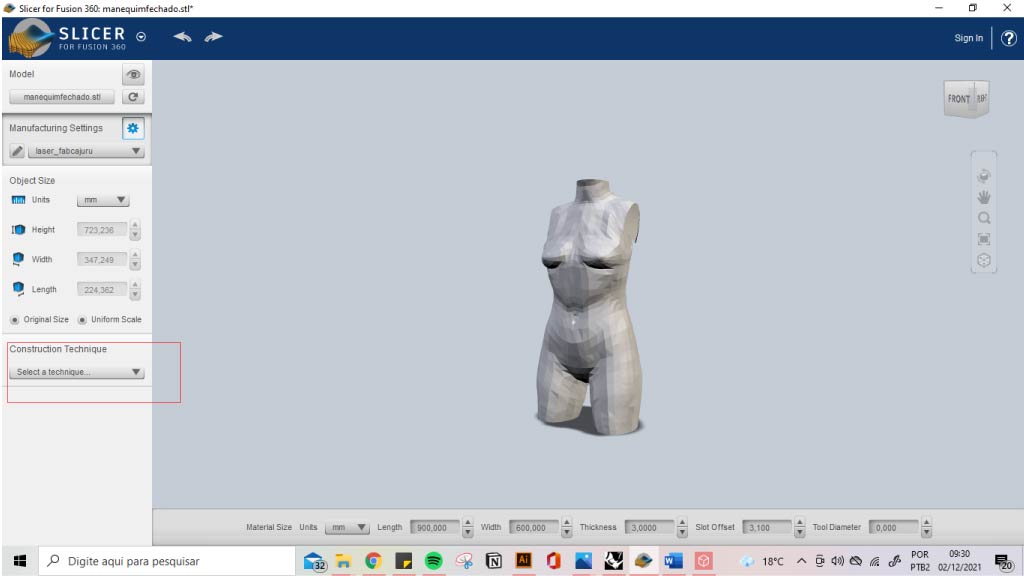
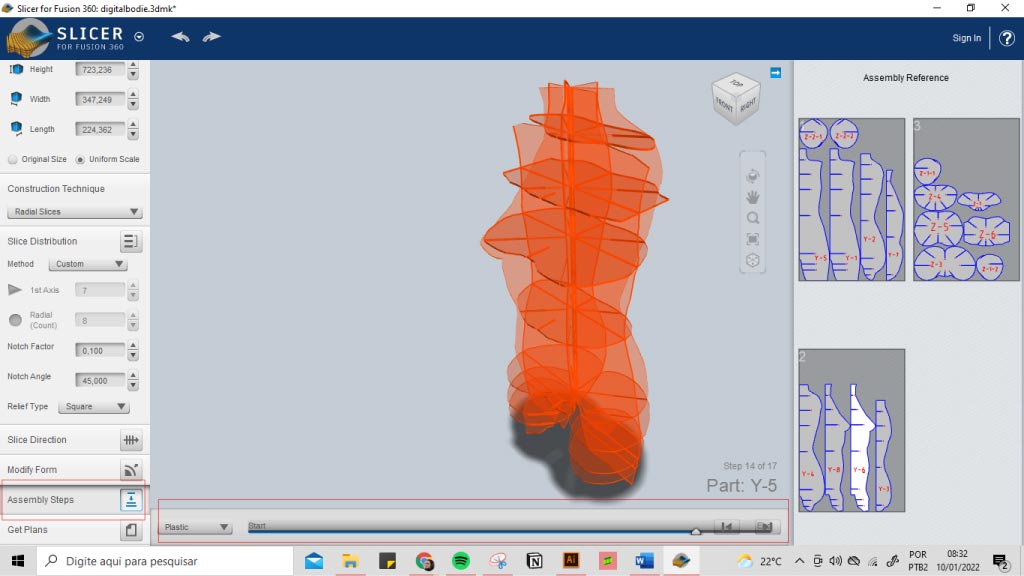
slicer for fusion 360
Slicer for Fusion 360 is open software and very useful for what we intend to do as it generates the slicing, mapping, and snapping of the model.
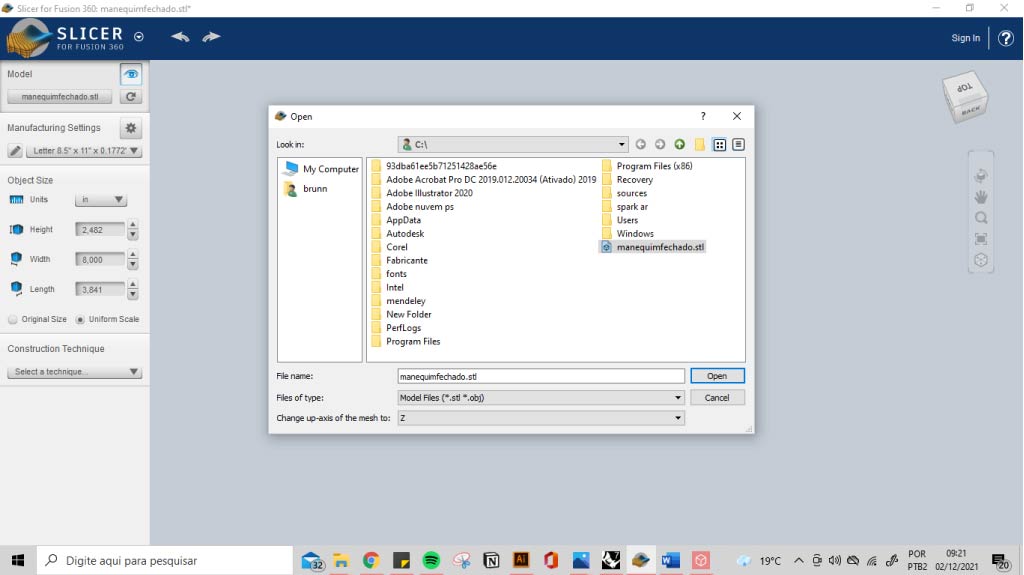
To import the body, we click on model>import and select the stl or obj file.
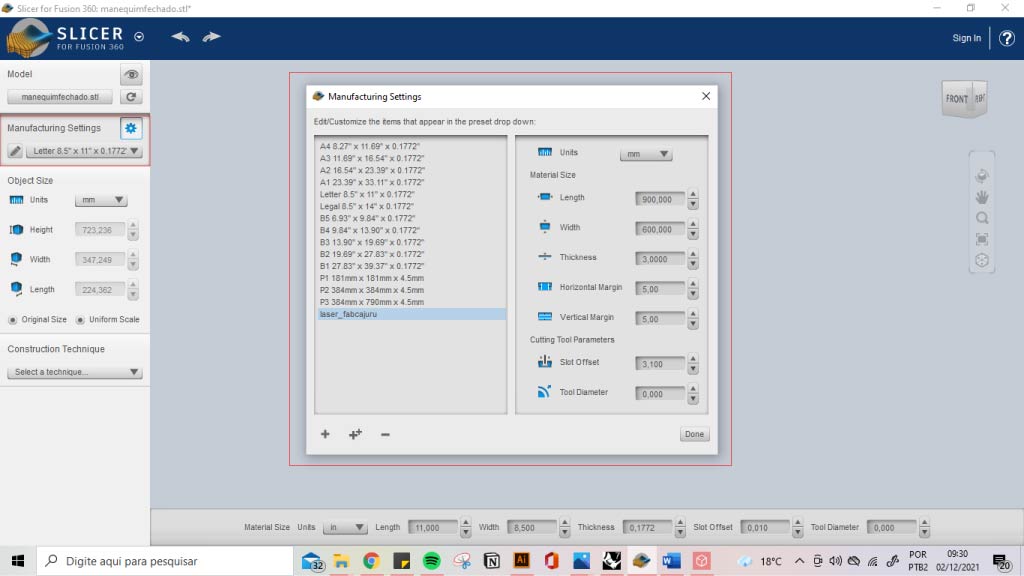
Then we click on manufacturing settings and on the + symbol in the lower right corner we put the machine specifications (lenght, thickness, material thickness). I left 5 for horizontal and vertical margins, as indicated in class. We also define the offset slot (it will depend on the thickness of your material, for example, if your material is 3mm, you may have to put 3.1mm.). The definition off the tool diameter is just for the cases that will use a milling machine, which isn't my case.
_my mdf is 3mm_
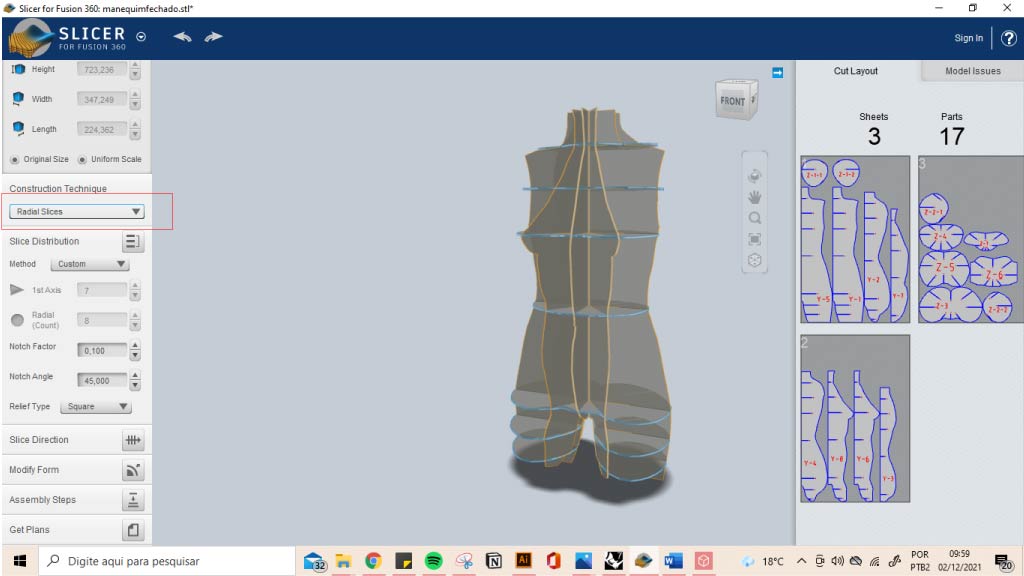
Later, we sliced our model into Construction Technique. I chose the radial slices. Here we can turn to the angle we want and add or delete faces.
My wish was to make the main lines that we use when making the moulage, being the vertical ones: center back, center front, side, princess lines fore and back (that is, passing through the center of the shoulder measurement, center of the lateral measurement and center of bust, center of measurement of lateral and center of waist, and center of measurement between measurement of center of hip and lateral). This idea worked out more or less right, because with the radial slides the princess line was not faithful and was too close to the neck at the top of the model. But it wasn't until after cutting the file that I realized that maybe it would have been better to use the interlocked slices function.
_I don't know for sure the translation from Portuguese to English of the princess line (linha princesa in Portuguese)_.
In any case, the final model looked like this:
cutting and assembling
slot offset tests
In the class undergoing Slicer for Fusion 360, Anastasia suggested that we test the fits before running the final model, for that we just cut a smaller piece of the vertical part that fits into another piece of the horizontal part, as in the image below:
However, to make the process easier, I measured just the end of the fitting cutout and made two rectangles the size of this opening to speed up the process. As in the image below:

This didn't work, as the cut-to-fit taper at the end, and I didn't notice it as I only measured the opening and not the end of it. This resulted in a model that was too hard to fit in as it had no margin, and we had to use a rubber hammer to join the pieces together. Thus, the thinner parts ended up breaking and I glued them with contact glue. So the idea of having a mannequin that can be disassembled didn't work.
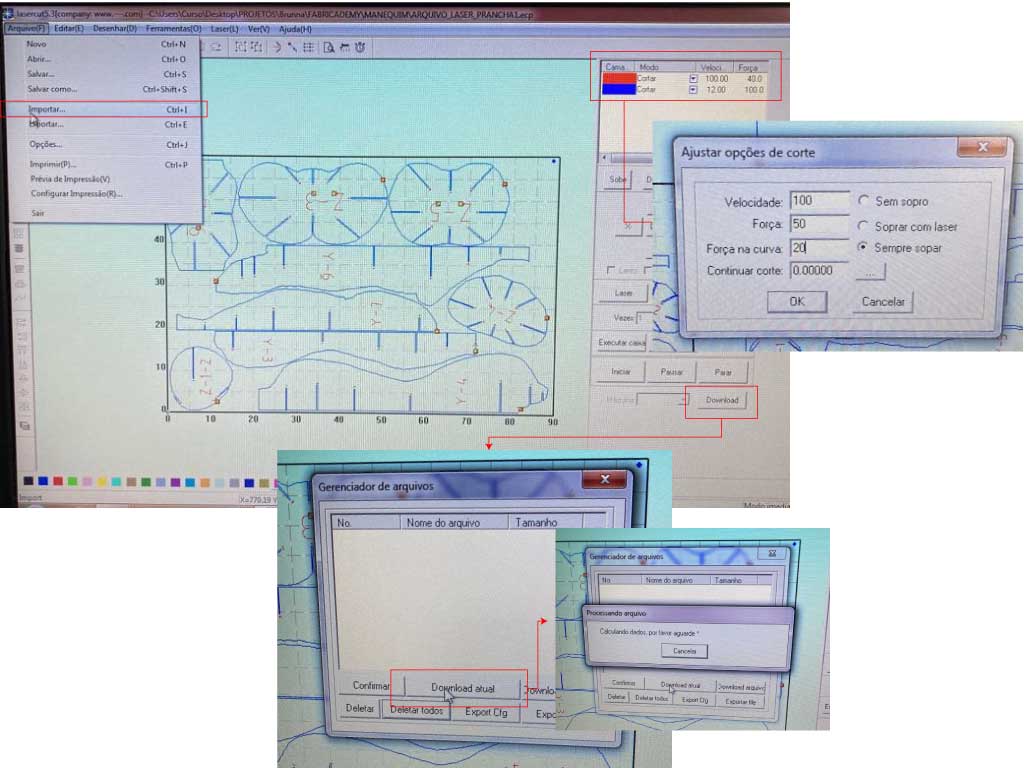
laser cutter
I had used the laser cutting machine before, but I had only cut fabric so far.

To cut mdf we fastened the sheet with adhesive tape around it because it was a little curved, and as for the parameters, fab already had some established for mdf:
| color | function | velocity | force | force in the curve |
|---|---|---|---|---|
| red | low precision cutting (to record faster) | 200 | 20 | 10 |
| blue | cut | 12 | 100 | 30 |
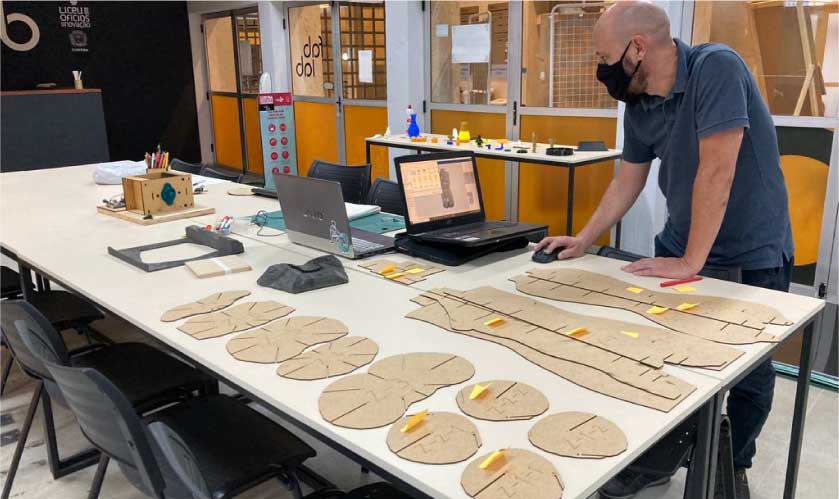
The assembly steps function in Slicer for Fusion 360 helped a lot to visualize the assembly process
We arrange the parts between horizontal and vertical, in numbered order, for easy assembly.
The parts that broke:
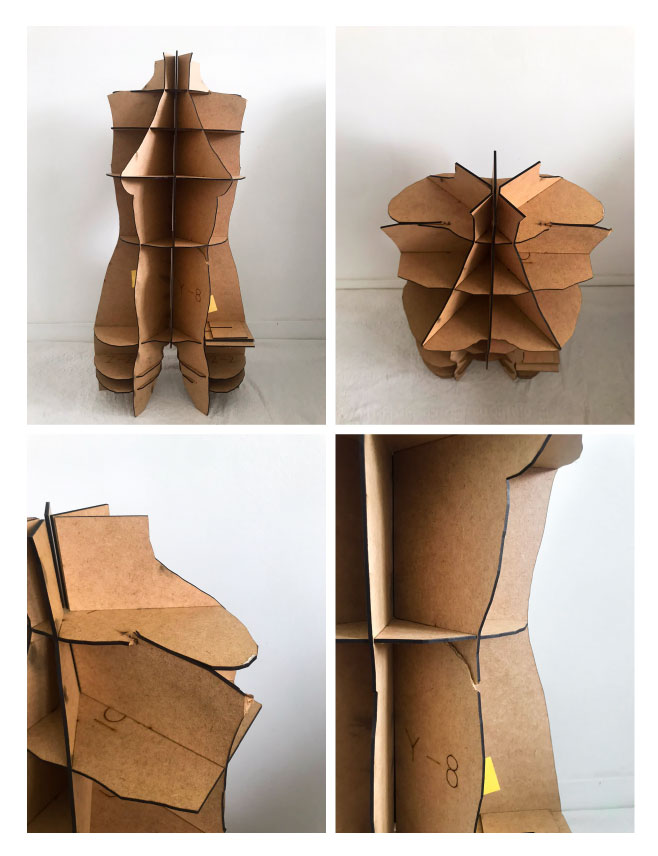
I was very happy seeing my entire body assembled, even with all the errors and unexpected events :)
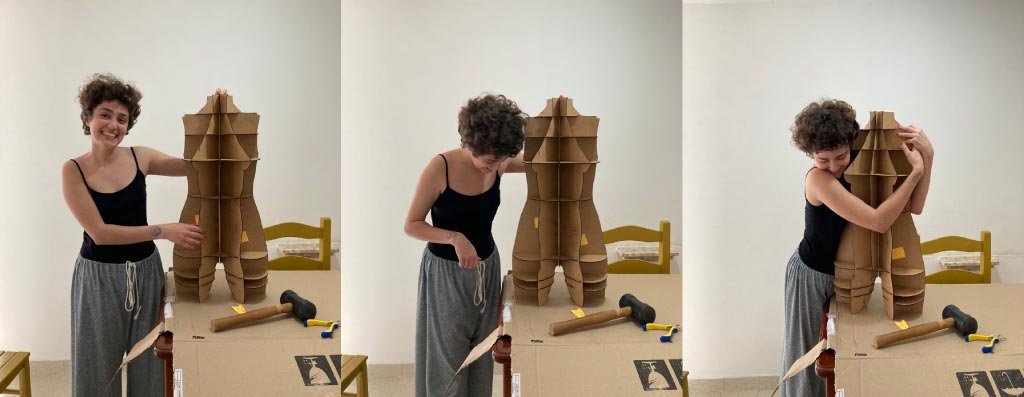
This video shows a little of the cut with the machine running, the organization of the parts and the assembly process:
ARQUIVES
The arquives of the process until now can be seen here.
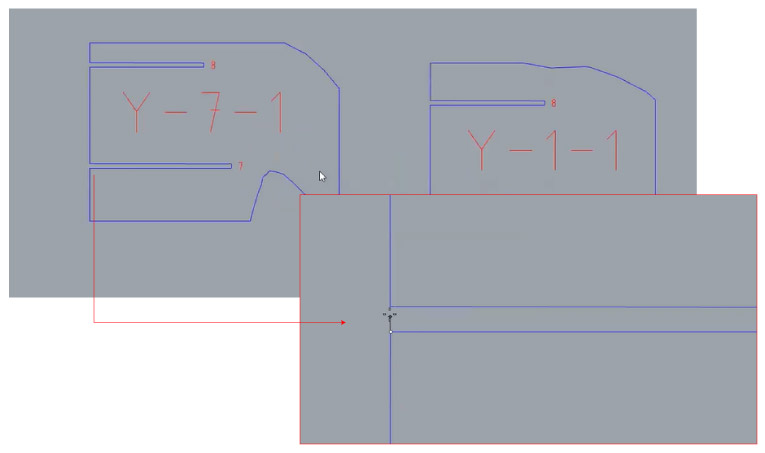
The arquives of slicer shows that we need 3 mdf's (90x60 cm) to cut all the parts, but I use 2, I manually fit each part into the laser cutter program to make better use of the boards.
COMMENTS ABOUT THE PROCESS
Searching for the different sizes ended up taking some of my time. The fit of the pieces was not perfect either, so it is very hard to disassemble following my initial idea of travel mannequins. Also, after the whole process, I didn't have time to make the files so it could be pinned. There was a lack of time planning to complete this assignment but I still intend to finish it someday!!
REFERENCES
Brazilian Industrial Modeling: Measurement Tables, by Sonia Duarte
Fabricademy Tutorial - Slicer for Fusion 360
about brazilian measurement chart - in portuguese