02 digital bodies
28th Sept-5th October 2021
2. Digital bodies
concept research
David Altmejd's work came to mind after the Digital Bodies lecture because his sculptures explore what it is to be human whilst expressing our physicalities in motion. Layer mixed media such as moulded plaster, glass, quartz and hair, he creates psychological and spiritual impressions. Here is a moodboard of his work from pictures I took at his exhibition:
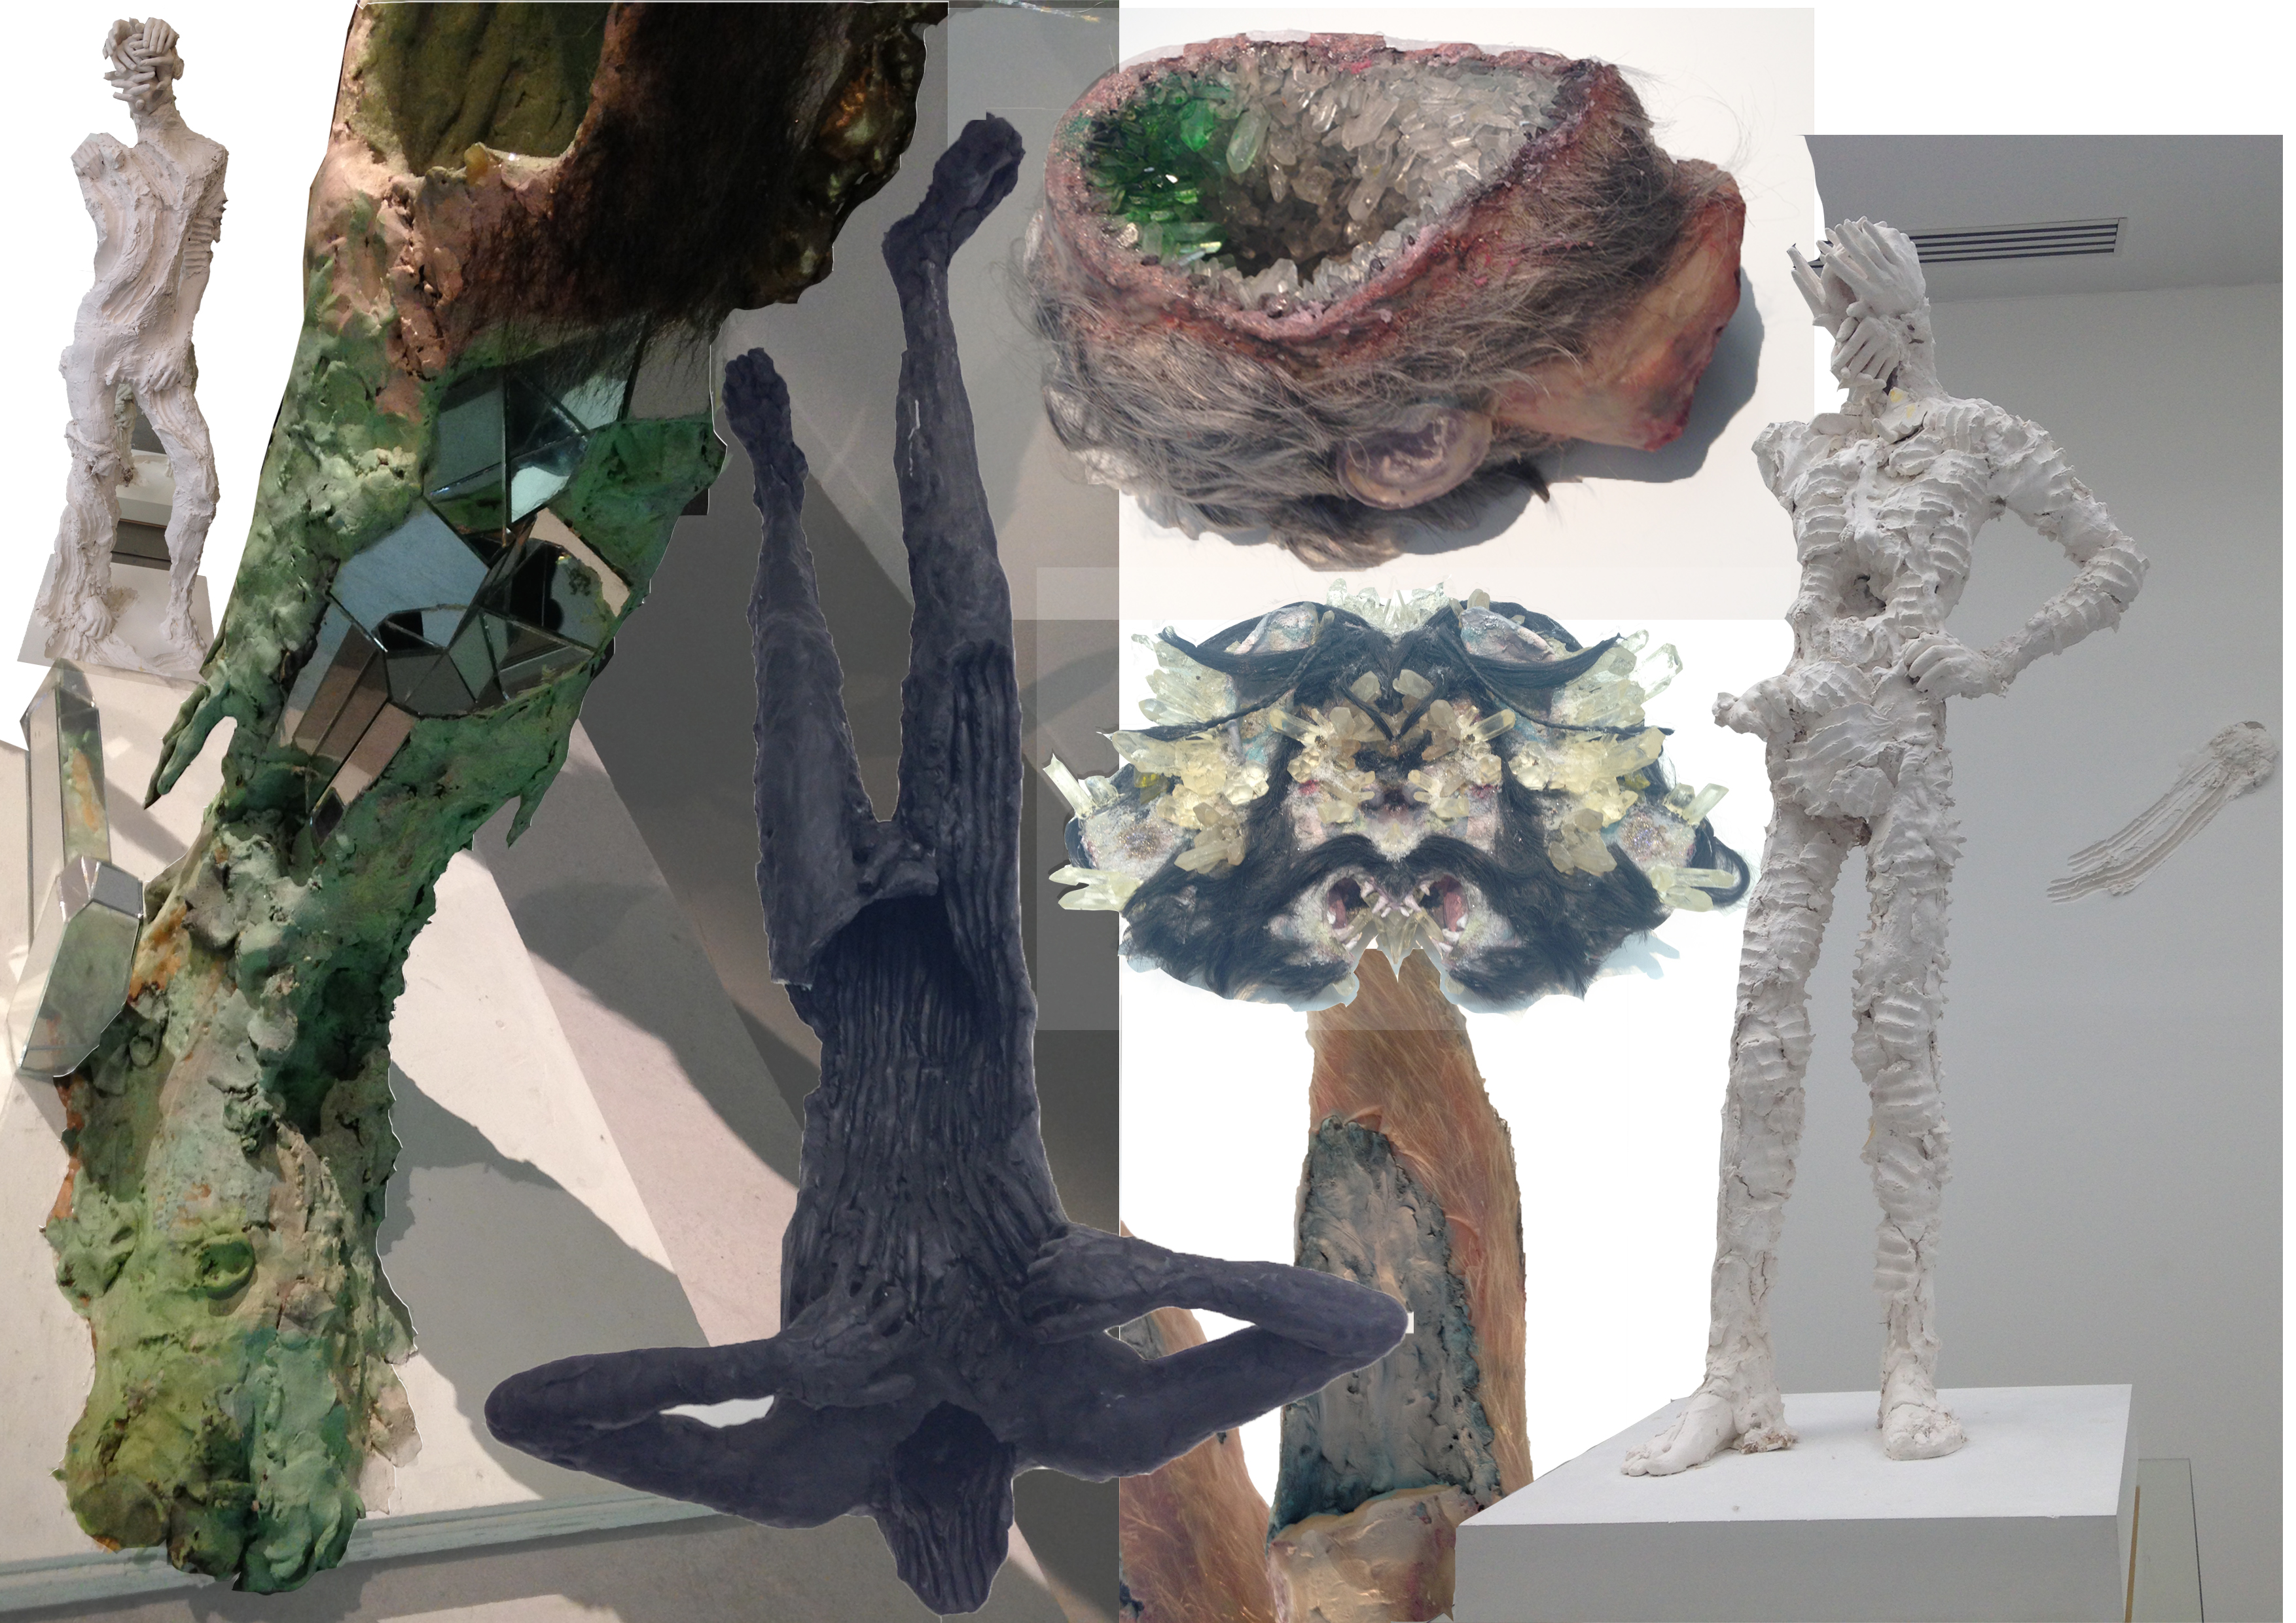
His surreal work challenges our perception of emotion and identity.
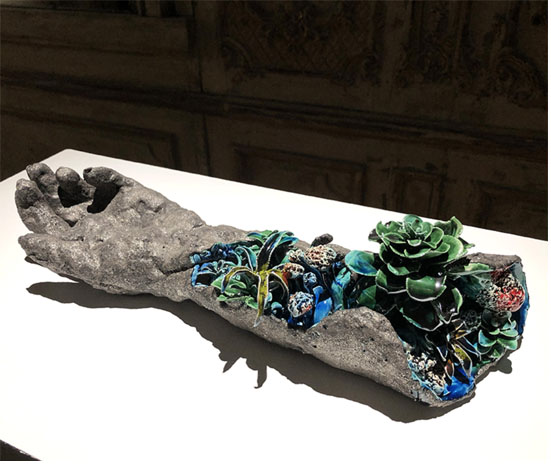 I also came across Etienne Pottier's work which similarly works with layers, intersections and texture. I like the slicing of this sculpture to show humans to be the same as plants.
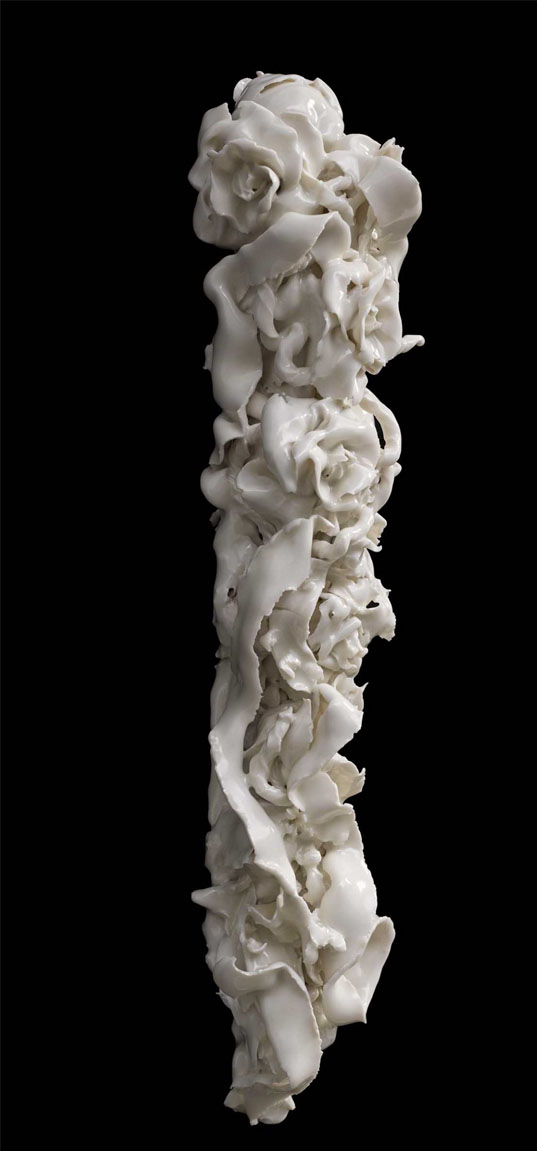 Flowers and limbs in Rachel Kneebone's porcelain sculptures evoke the motion of transformation and growth. Repeating these body parts in clusters energise the complex and determined nature of our behaviour. "My work moves around metamorphosis, change and simultaneous states, so nothing about it is fixed"
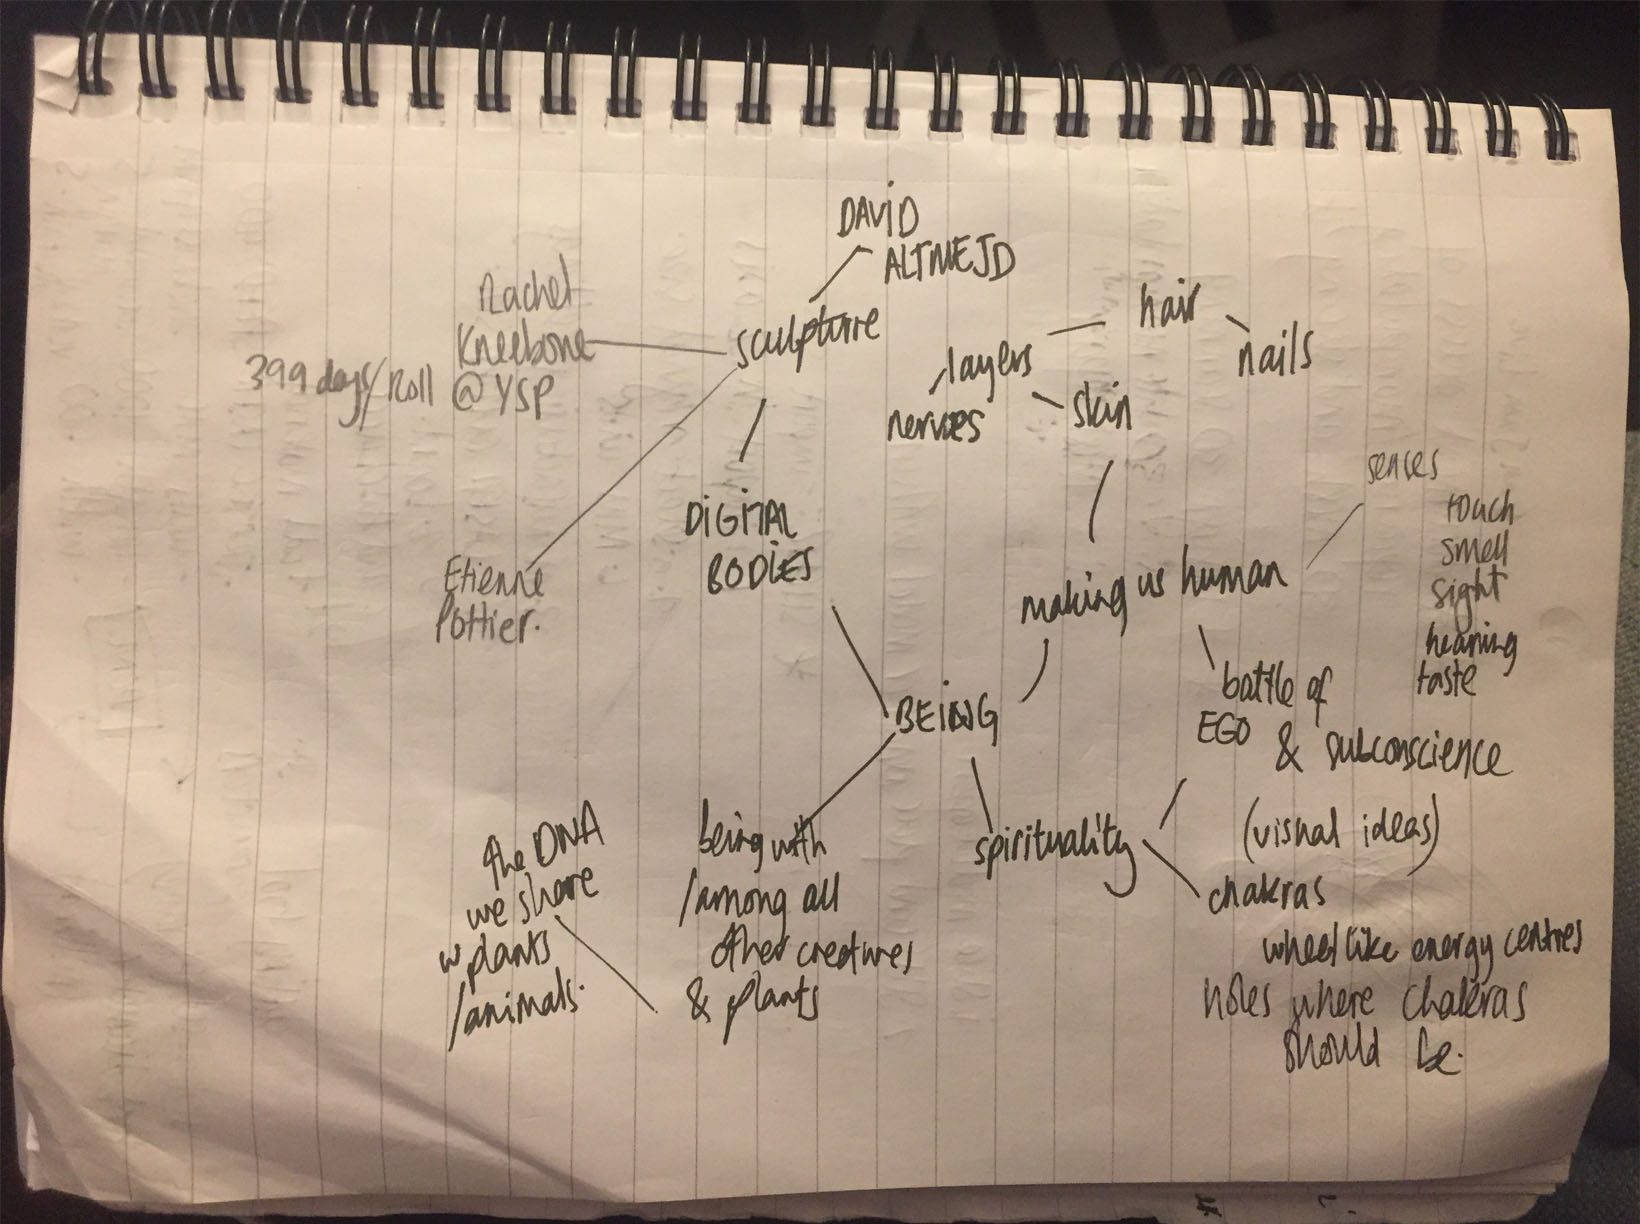
concept
mannequin mind is a canvas concept. it considers our thinking, thought processes, mentalities and indentification - as much as the comfort and discomfort of mental health. but also our levels of consciousness and relationship to the world around us. contortions of the world around us versus who we can, are, and choose to be
lasercutting
Here's what I learnt from my lasercutting training.. :
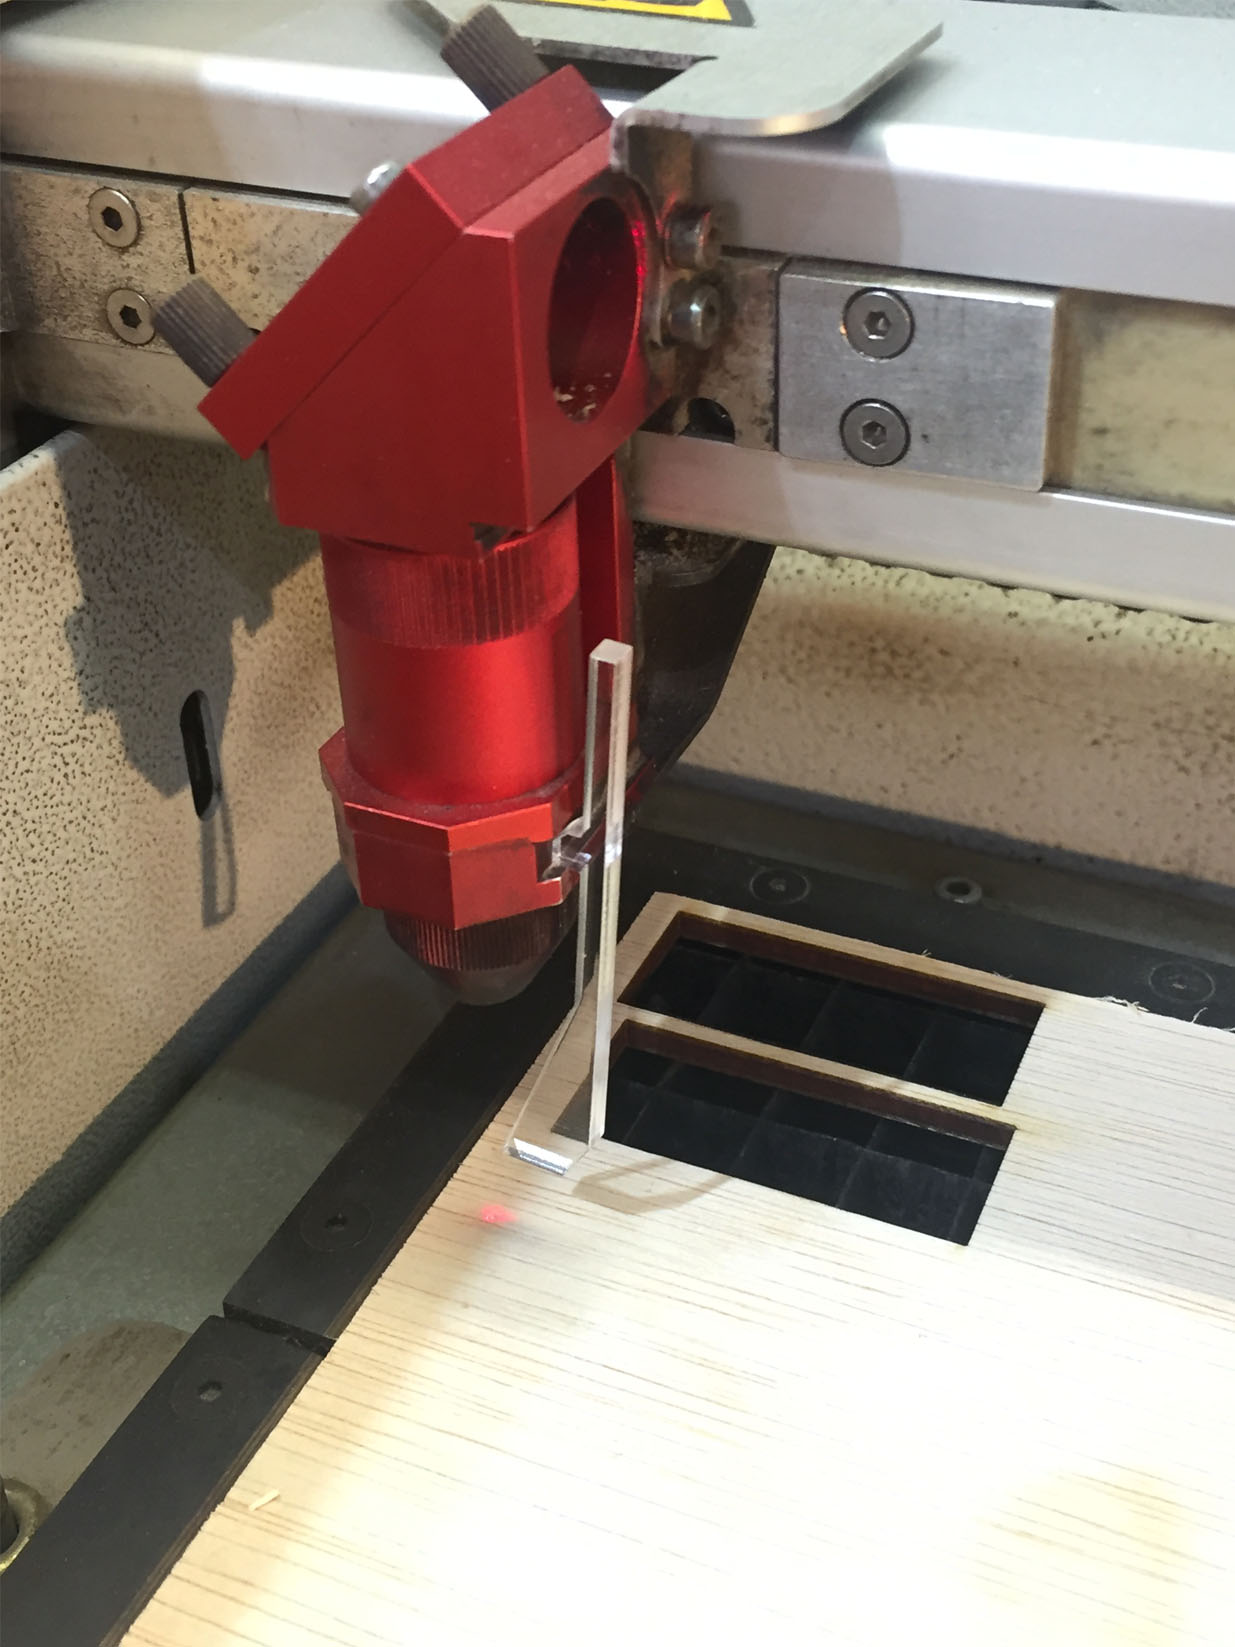
1. You always need to establish the height of the material ie. where the laser will reach the fabric: the laser beams cross over eachother and the point of intersection should be where the fabric sits.
2. This tool helps establish the right position for the laser for the heigh of the fabric
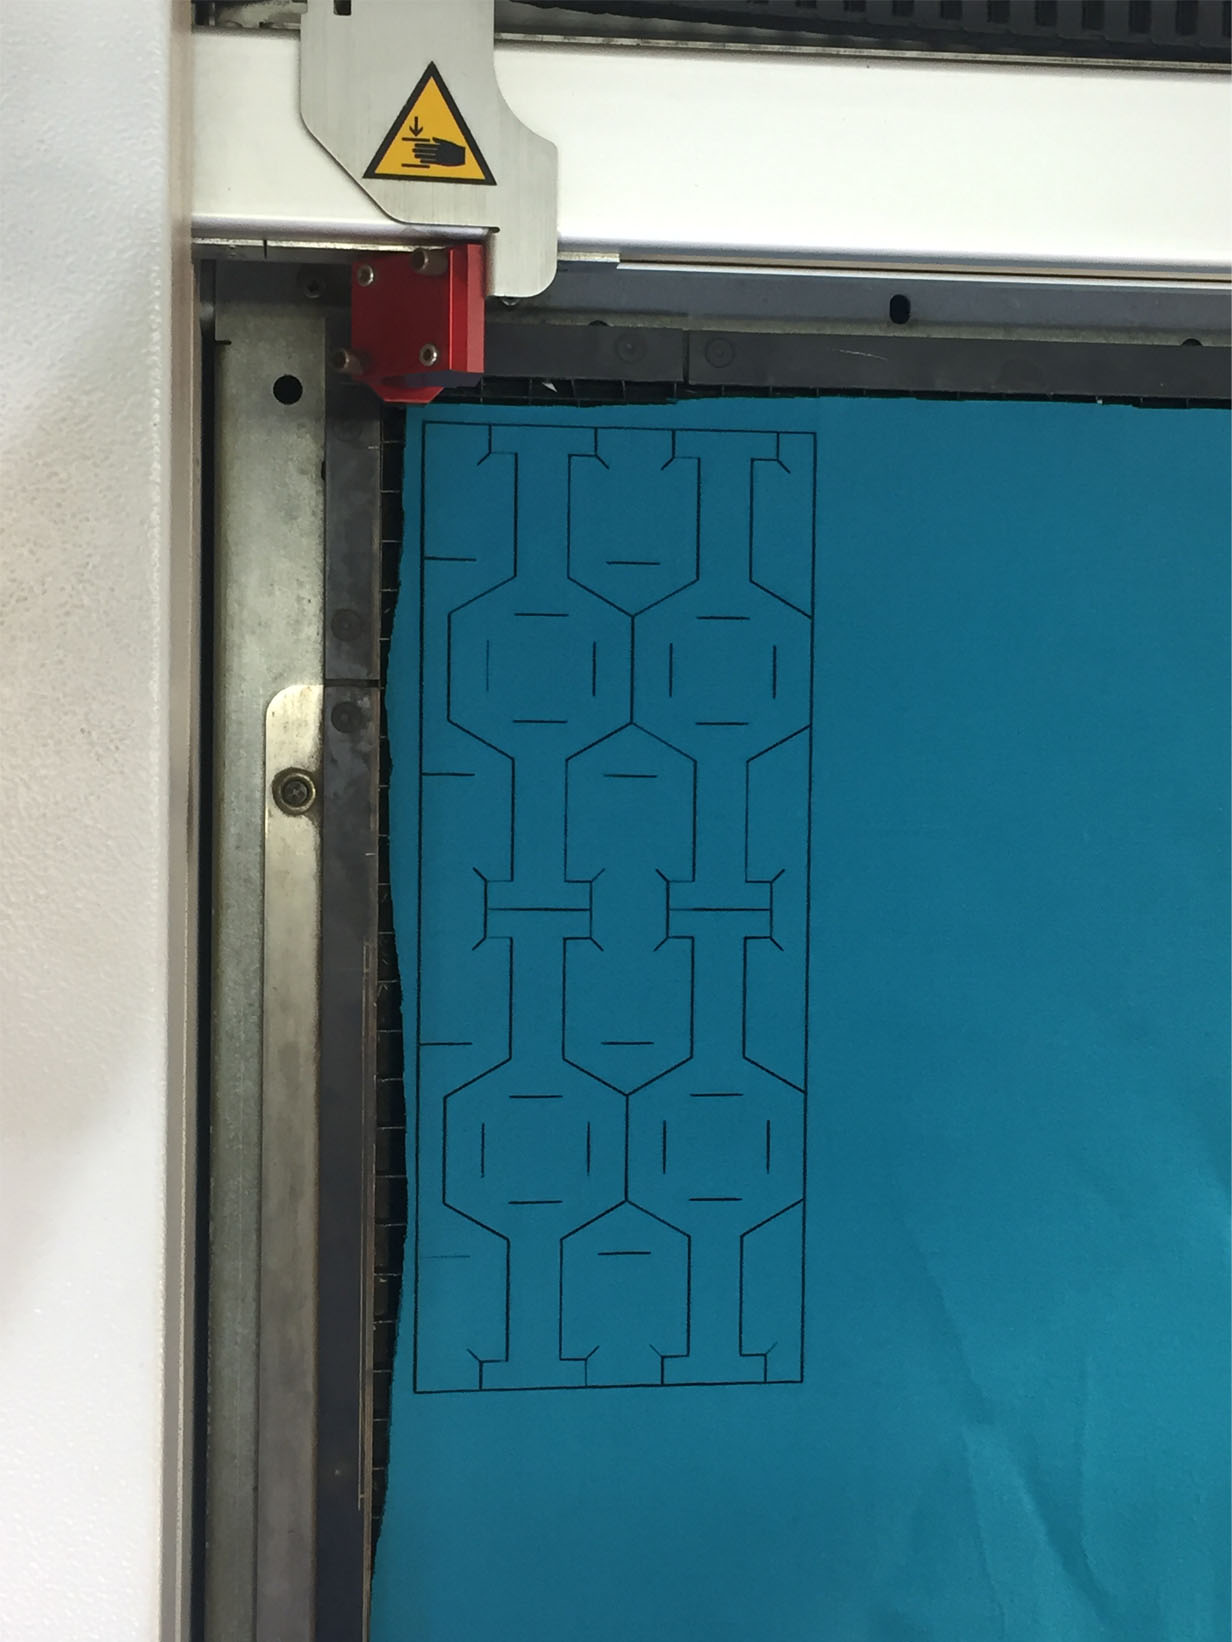
 3. For cutting and engraving, the lasercutter follows a vector format
4. For engraving the parameters should be changed so that the laser doesn't cut all the way through the material.
5. Raster = hatch to fill surface design
6. Raster is also a fuction on job control for the laser
7. The laser cutter always cuts the inner cuts first - so the inner and outer cuts should be organised by layers in Rhino before being sent to the lasercutter.
8. The ordered layers of cutting is in the Material Database section
9. The size of the lasercutter we use is 1000 x 600
10. When you send to print always select minimise to job size
- then Set View..
- move and highlight space to print and press enter
- check view/output
- select vector output
- organise the display colour to cut
- press print which will open Trotect job control:
11. Check position of laser > connect
12. Always line up laser with file
13. Material database has 3 parameters and usually you should only change 1:
- Frequency (measured in Hz) is the number of times the laser is turned on and off to burn; and depends on the material type: Manmade/plastics/wood = 20,000 whereas organic fabrics 1000
14. The board for the 3 parameter settings give an idea of what to use
3. For cutting and engraving, the lasercutter follows a vector format
4. For engraving the parameters should be changed so that the laser doesn't cut all the way through the material.
5. Raster = hatch to fill surface design
6. Raster is also a fuction on job control for the laser
7. The laser cutter always cuts the inner cuts first - so the inner and outer cuts should be organised by layers in Rhino before being sent to the lasercutter.
8. The ordered layers of cutting is in the Material Database section
9. The size of the lasercutter we use is 1000 x 600
10. When you send to print always select minimise to job size
- then Set View..
- move and highlight space to print and press enter
- check view/output
- select vector output
- organise the display colour to cut
- press print which will open Trotect job control:
11. Check position of laser > connect
12. Always line up laser with file
13. Material database has 3 parameters and usually you should only change 1:
- Frequency (measured in Hz) is the number of times the laser is turned on and off to burn; and depends on the material type: Manmade/plastics/wood = 20,000 whereas organic fabrics 1000
14. The board for the 3 parameter settings give an idea of what to use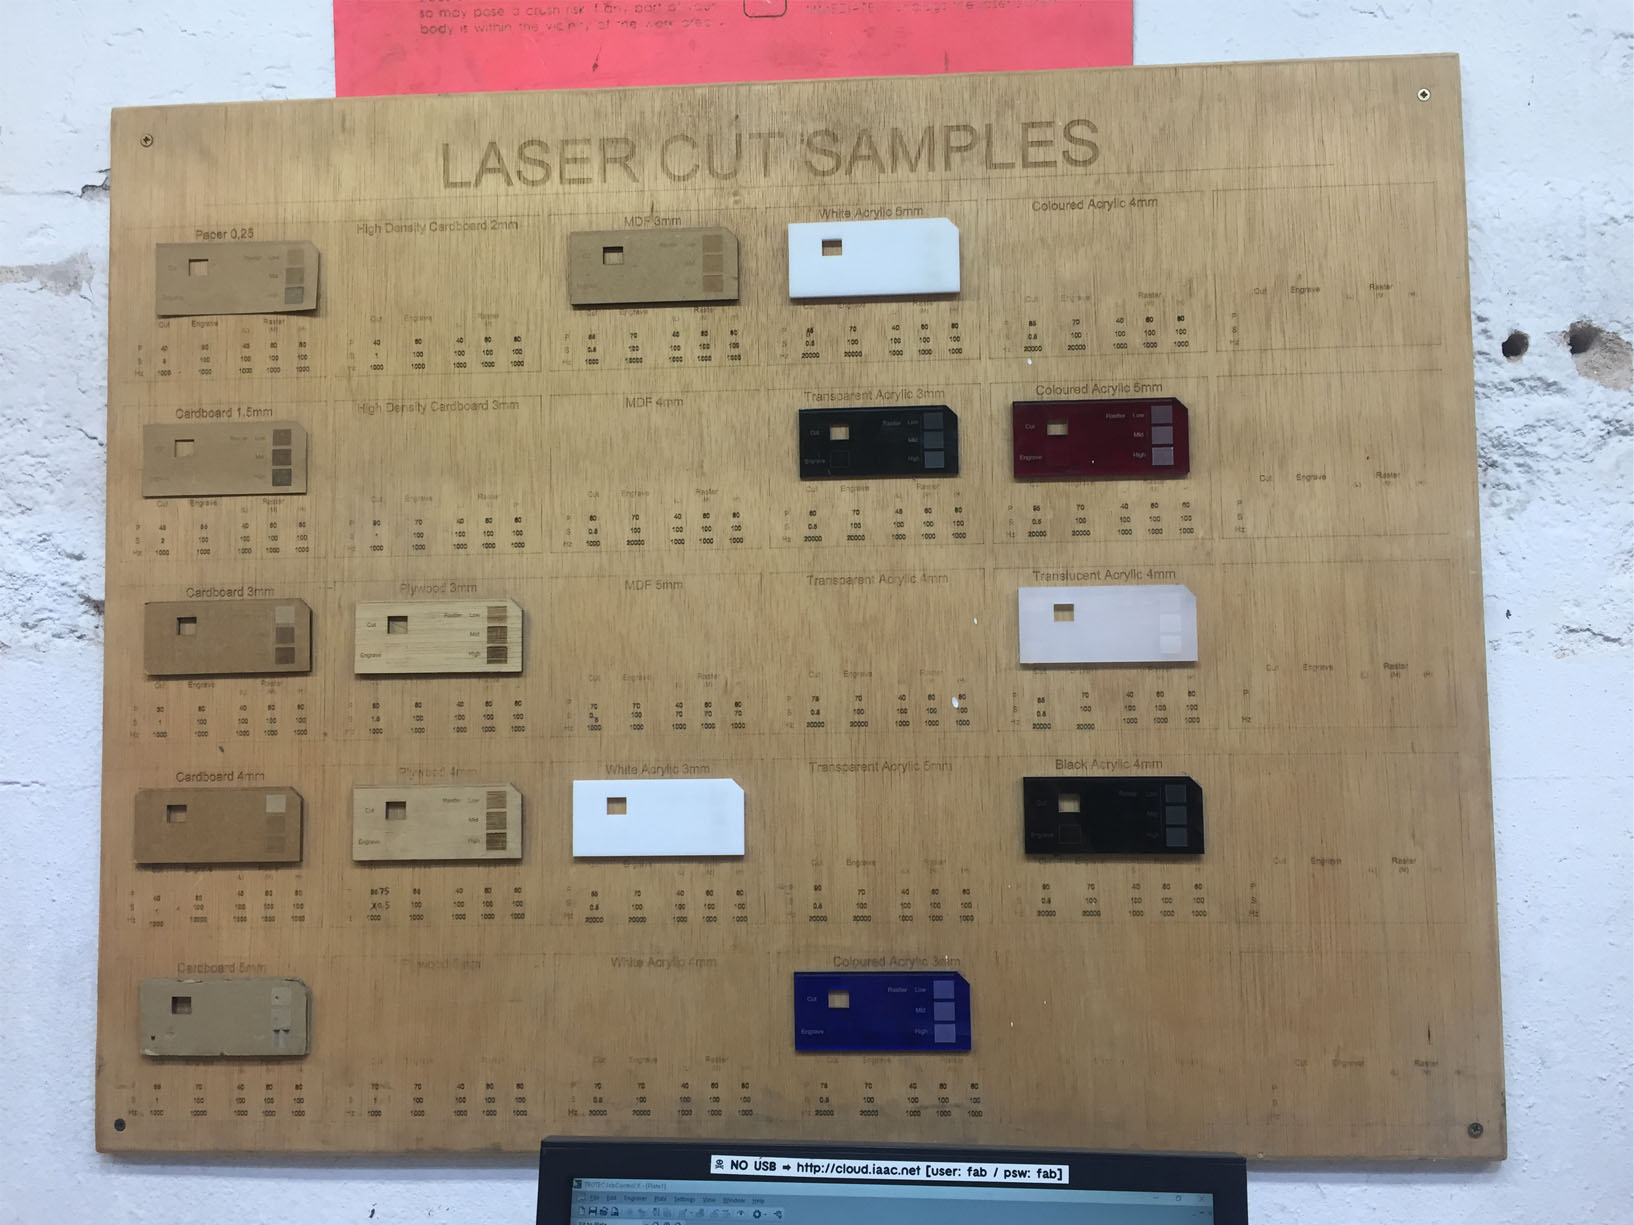 15. Always check the inner cutting first and match with the colour cutting order in layers
16. Test first! :
15. Always check the inner cutting first and match with the colour cutting order in layers
16. Test first! :
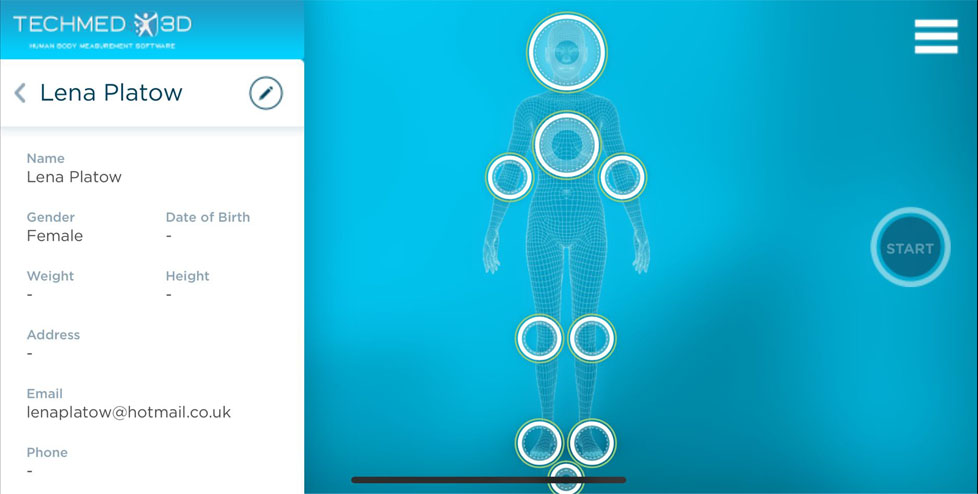
3d scanning apps
I'll be starting with open-source apps to experiment with ways to aquire a 3D model as I don't have access to a 3D scanner yet.
3DsizeMe
- This app is used for doctors - it's got a patient focus.

 -
-  -
- 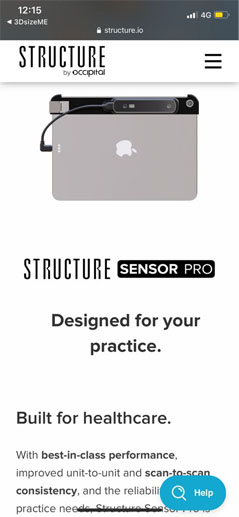 - I couldn't get further than this screen because the app requires a sensor accessory.
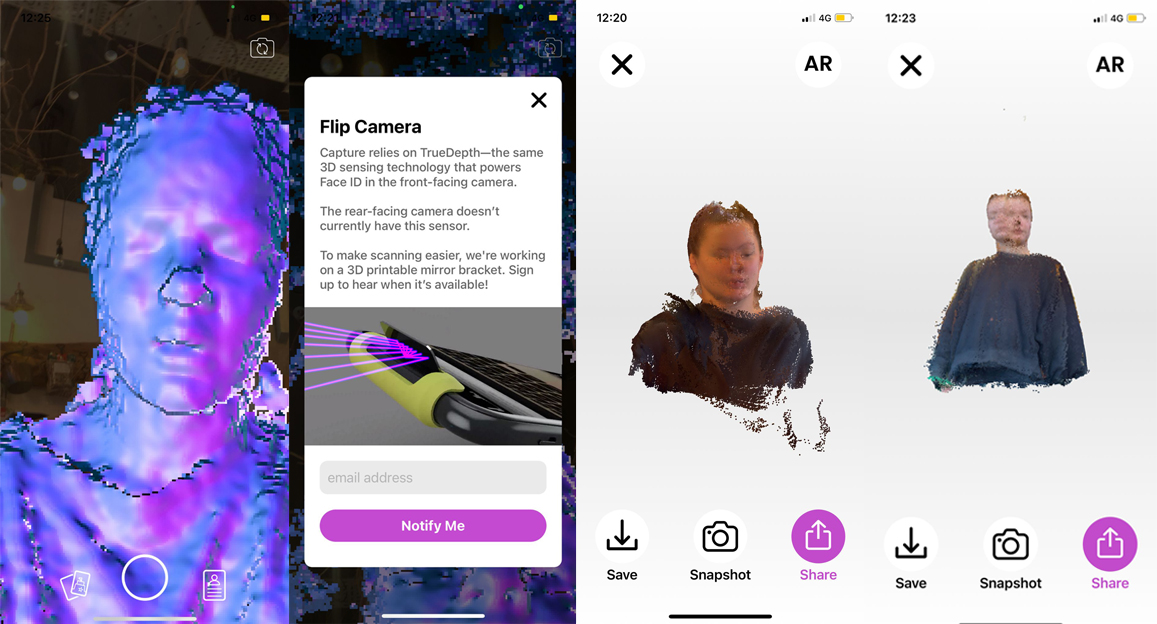
Capture
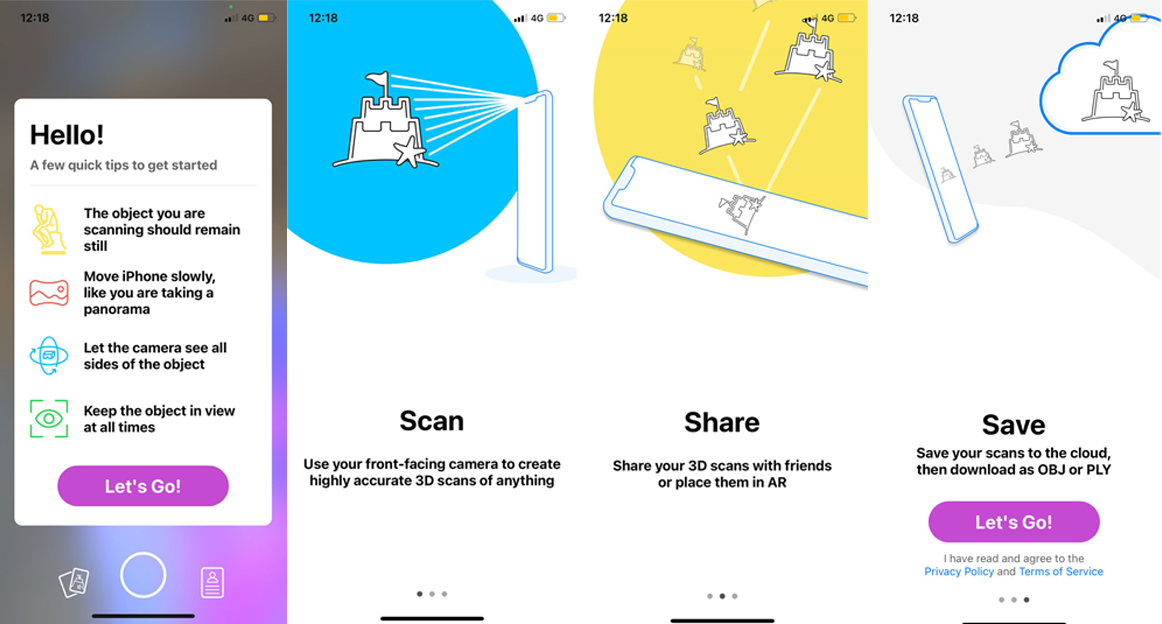
(The app used face ID technology which is only found on the selfie camera at the moment.)
The resolution wasn't great with this and it was diffucult to scan myself in this way.
Scandy Pro
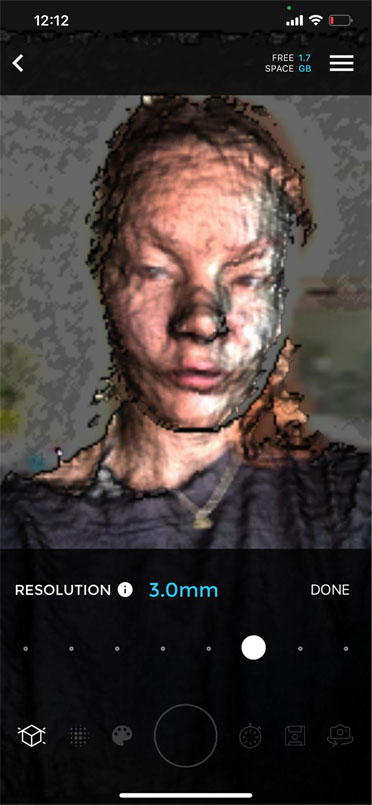
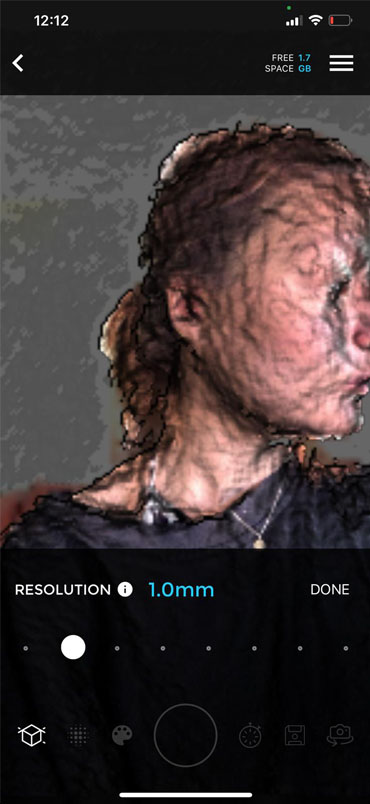
This app worked best in terms of quality and ease of use. Changing the resolution will detect forms to scan depending on how far away they are and the detail. I didn't continue with these apps because I didn't have access to them myself on the right device model.
make human
The application is quite simple to navigate.
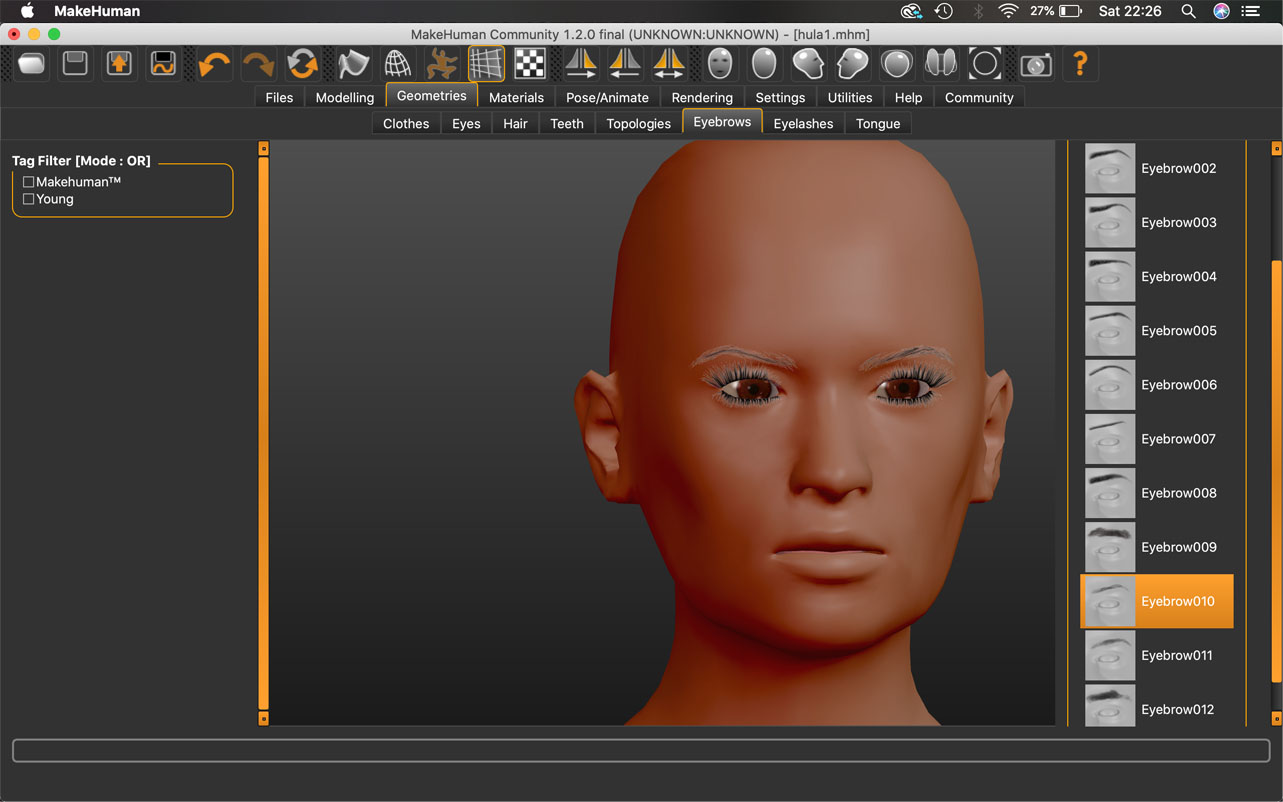
- I started with customizing the figure.
- This can be done in detail with facial features:
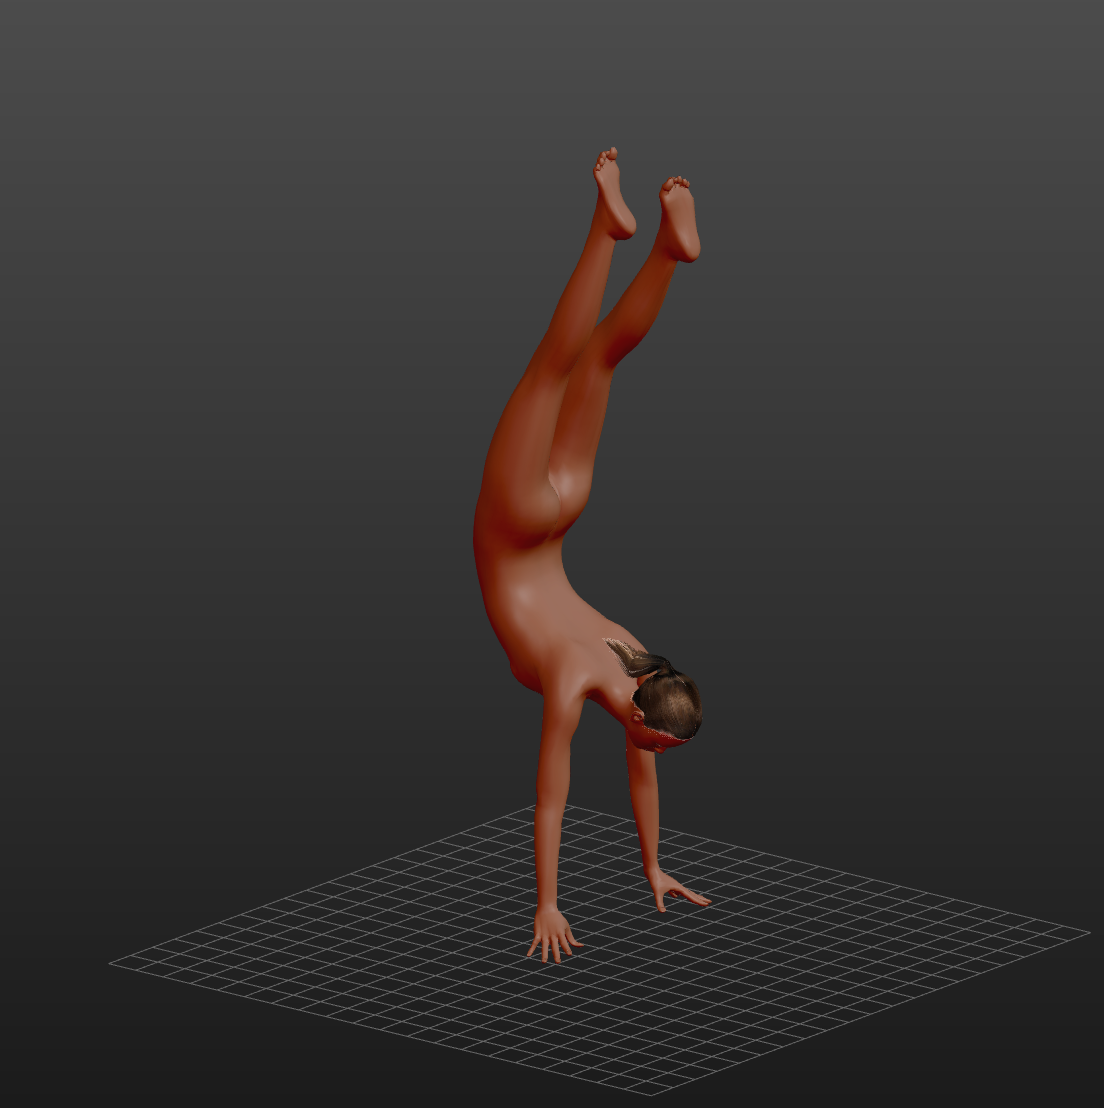
- And you can change the pose of the figure by downloading the community library where users upload poses, clothes, and hair graphics etc
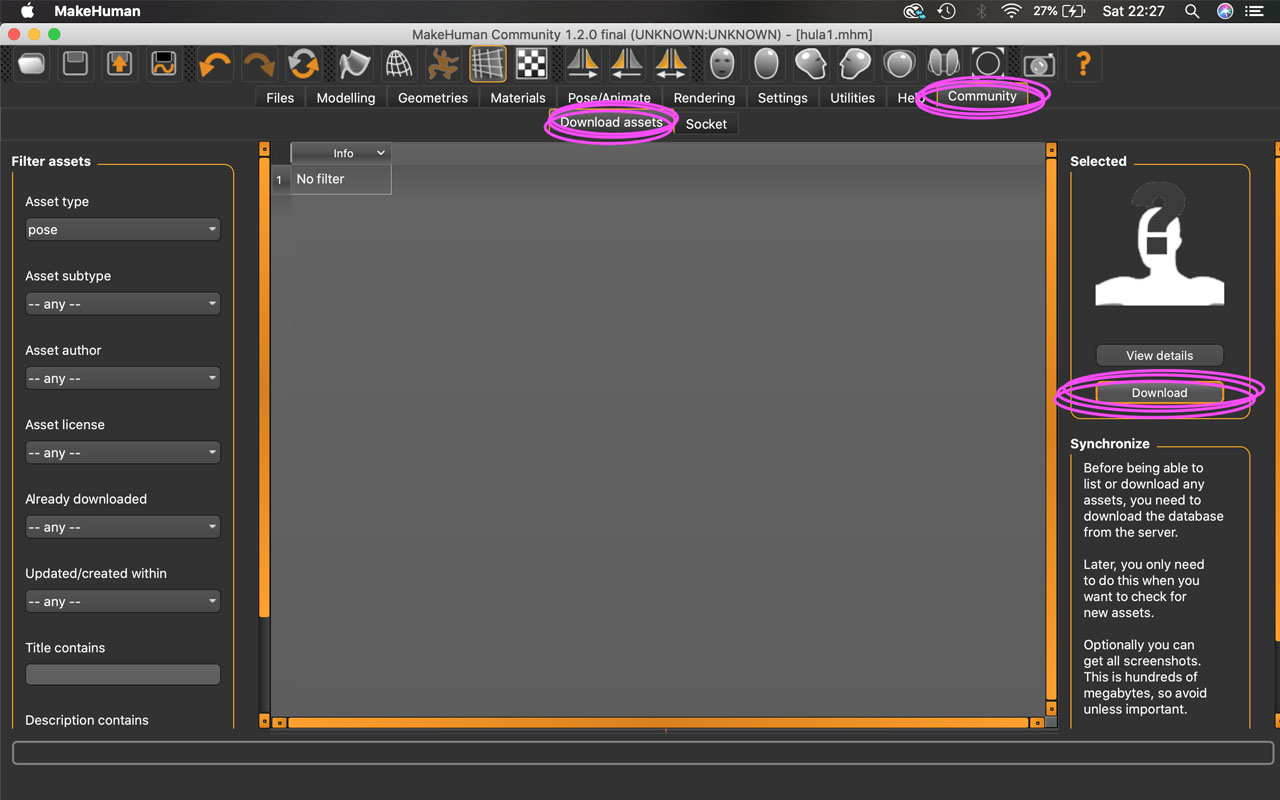
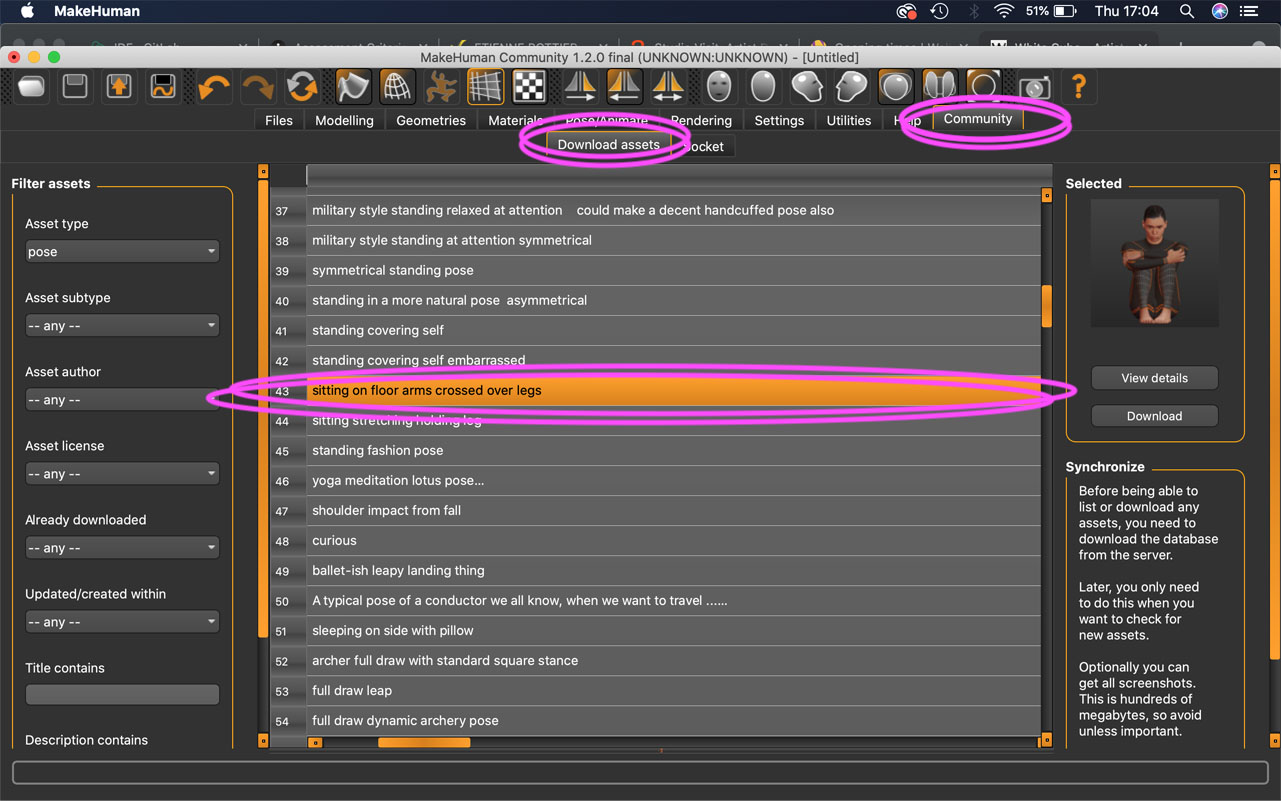 - I like that you can download these poses, and I've found them interesting for my concept
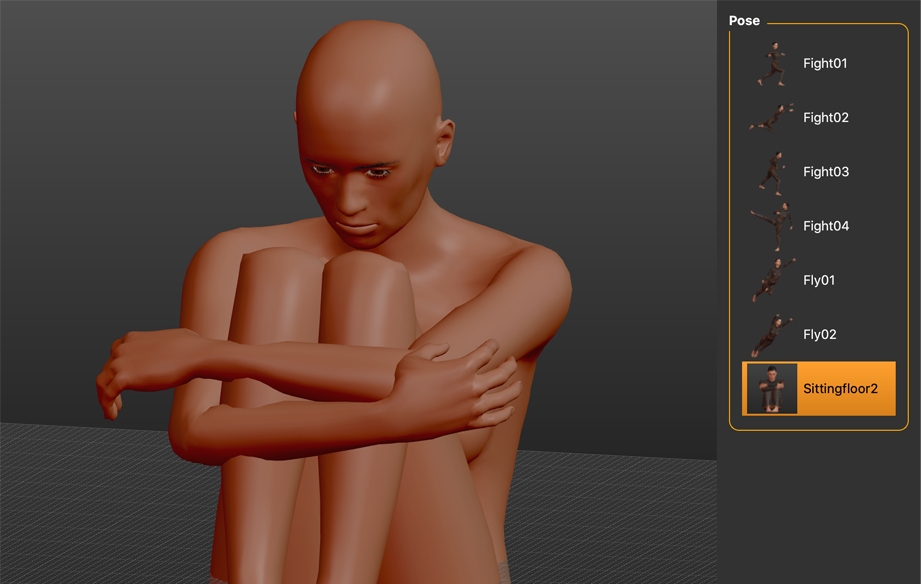

rhino
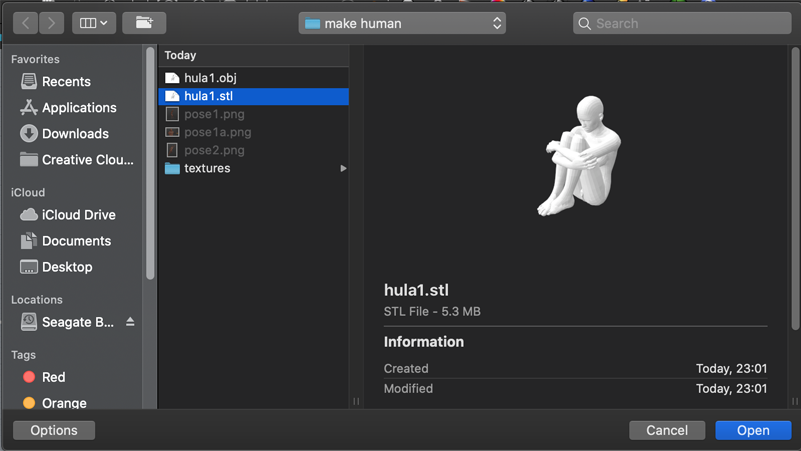
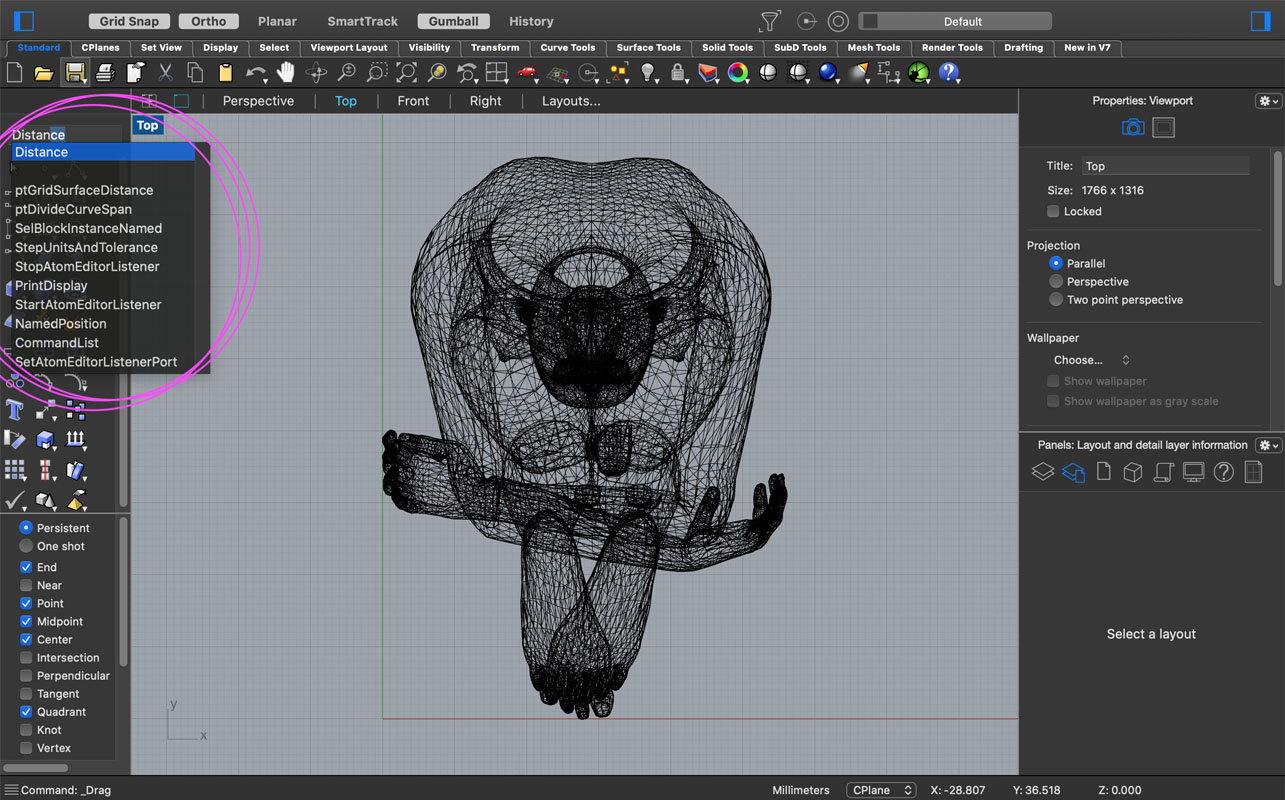
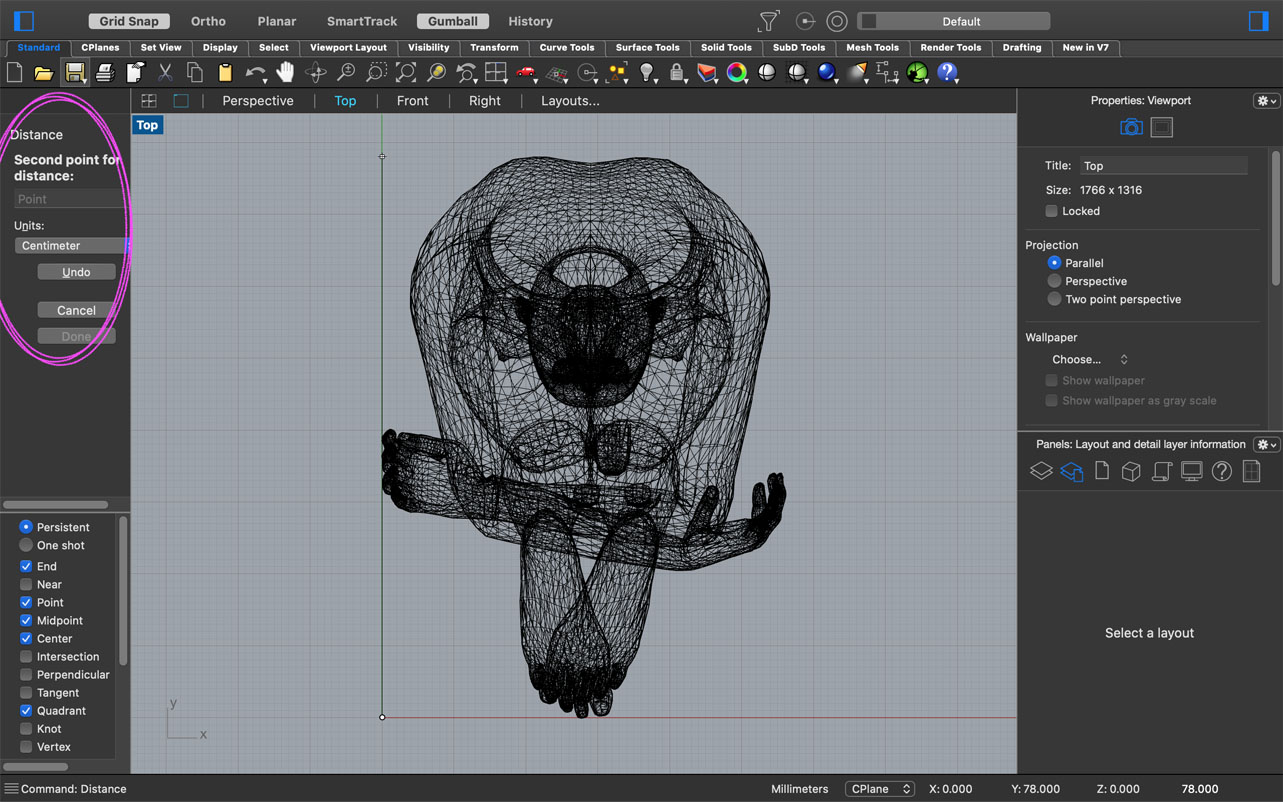
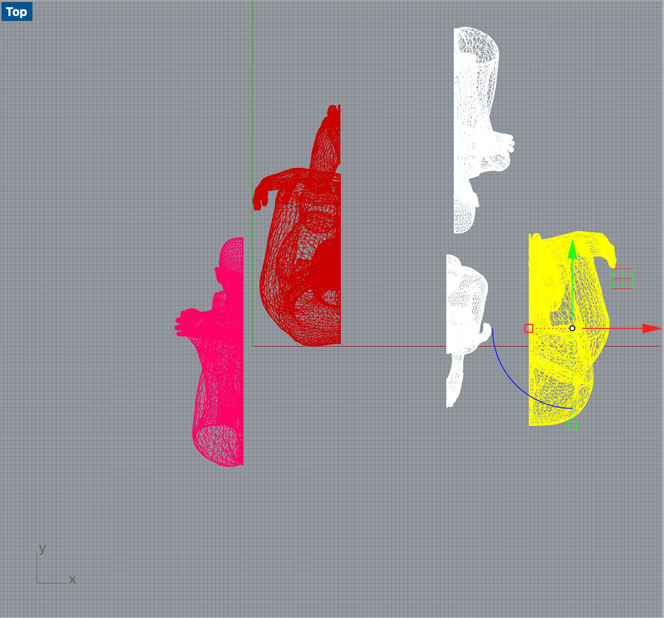
Rhino is useful for converting 3D files into workable files for a laser cutter or 3D printer.
1.  2. 2-3 : Importing the STL file from MakeHuman
 3.
3. 
- 4-7 : Rotate, measure using distance command with object in a bounding box for accuracy, scale

-

-
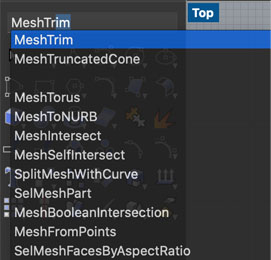
8-9 : Select all and use Mesh to NURB conversion to convert file geometry

-
-
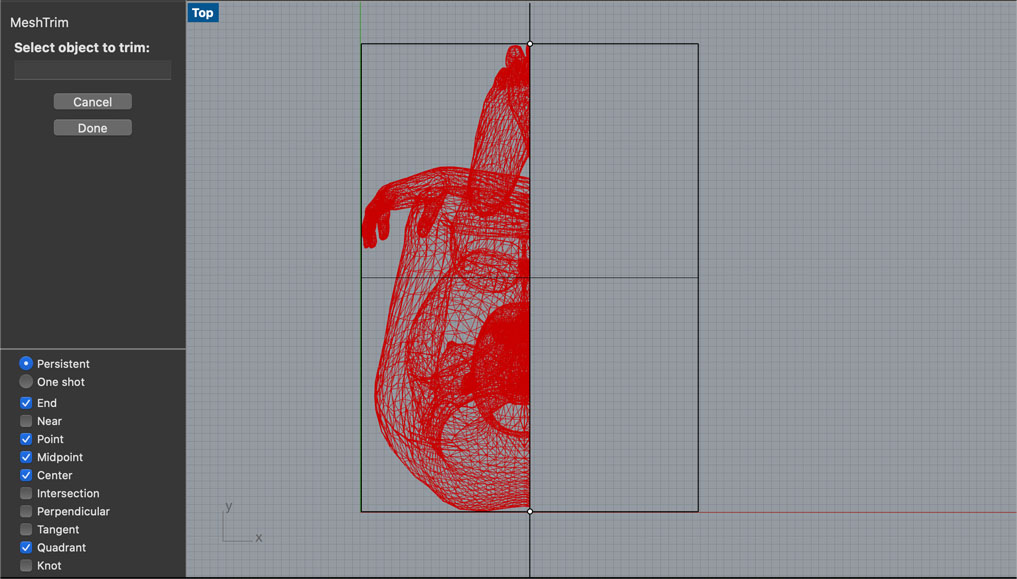
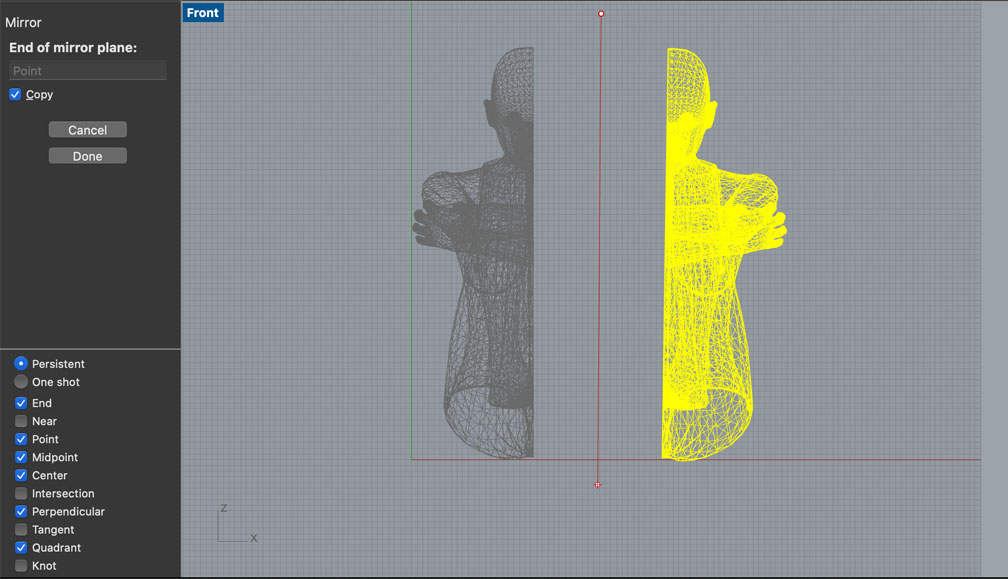
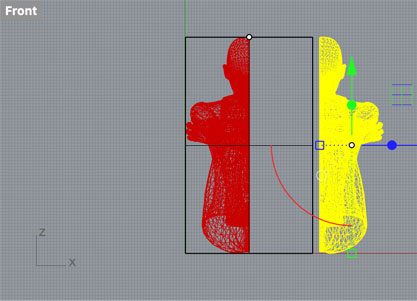
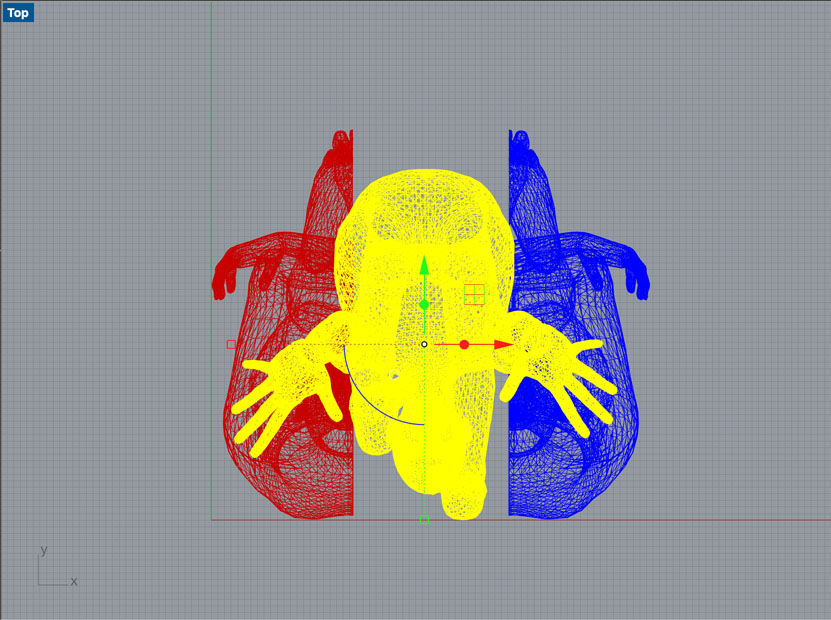
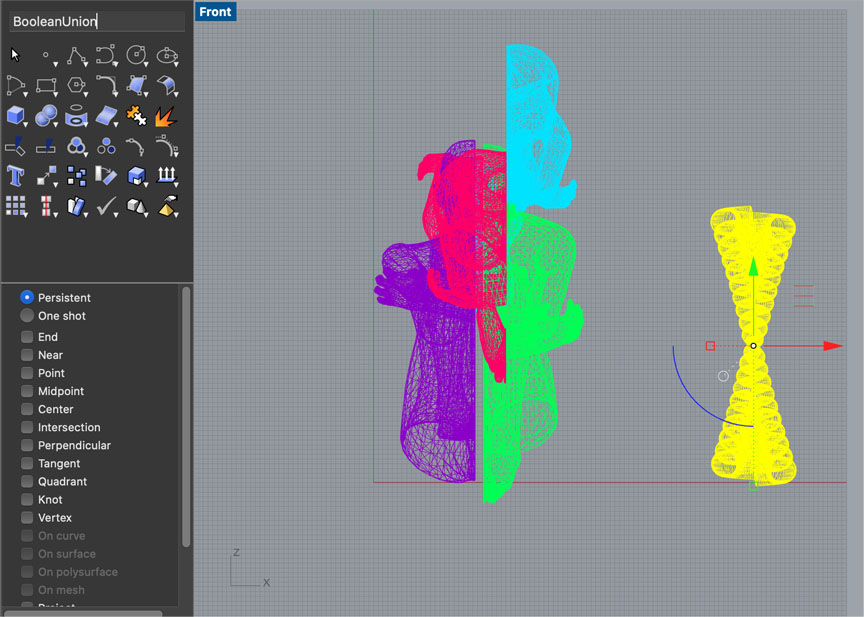
- 11-12 : Mesh, trim, mirror

-
-
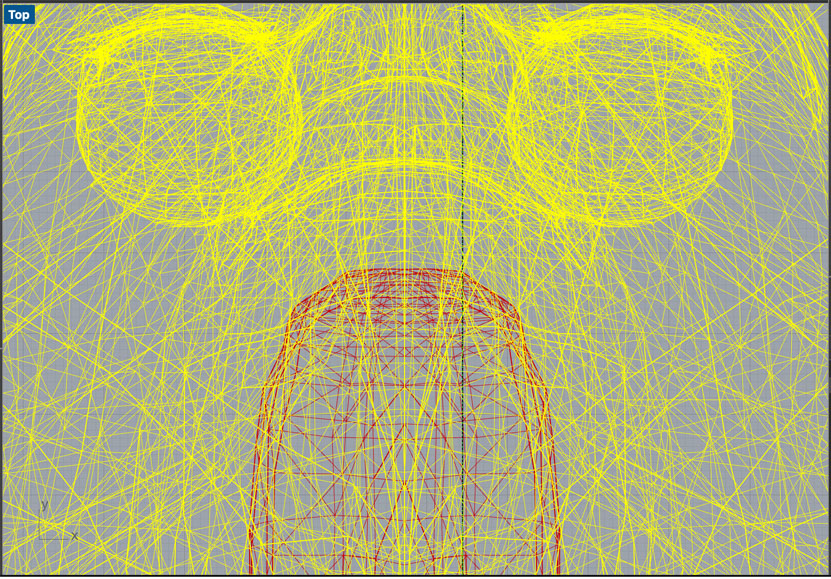
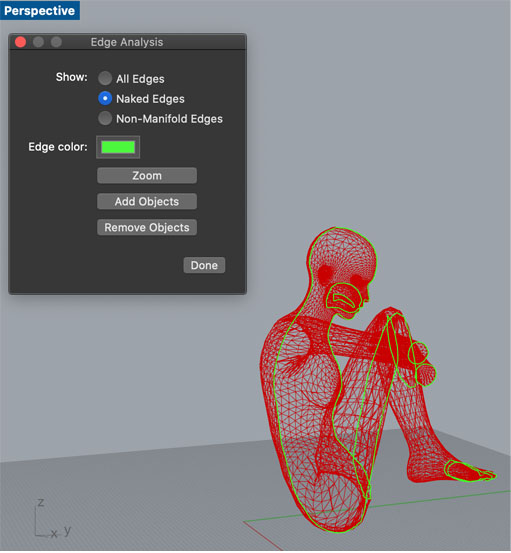
- 15-18 : Show mesh edges, cap to smoothe and flatten surfaces

-
-
-
-
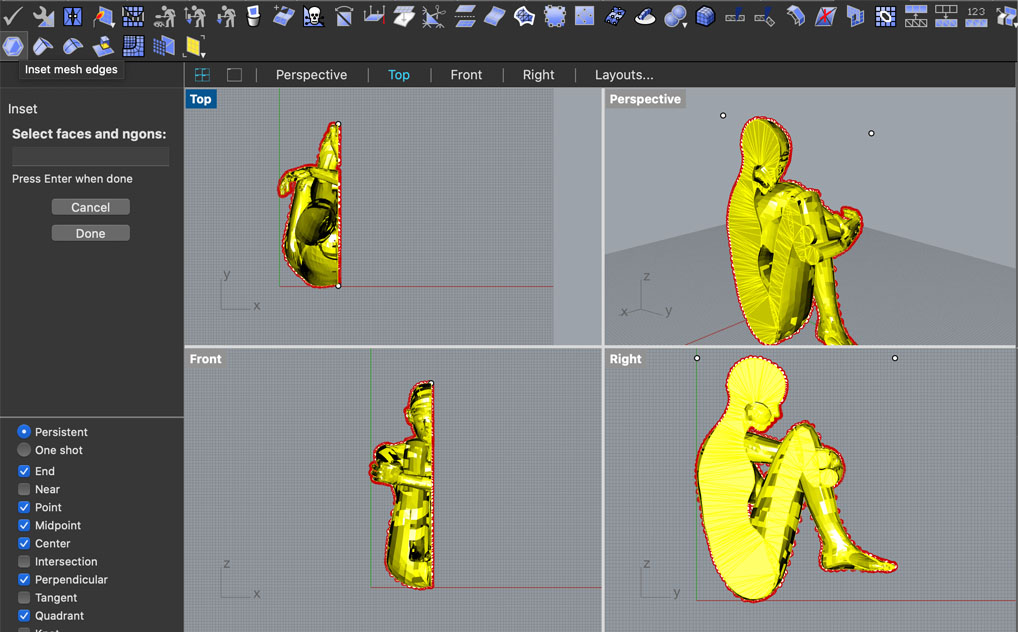
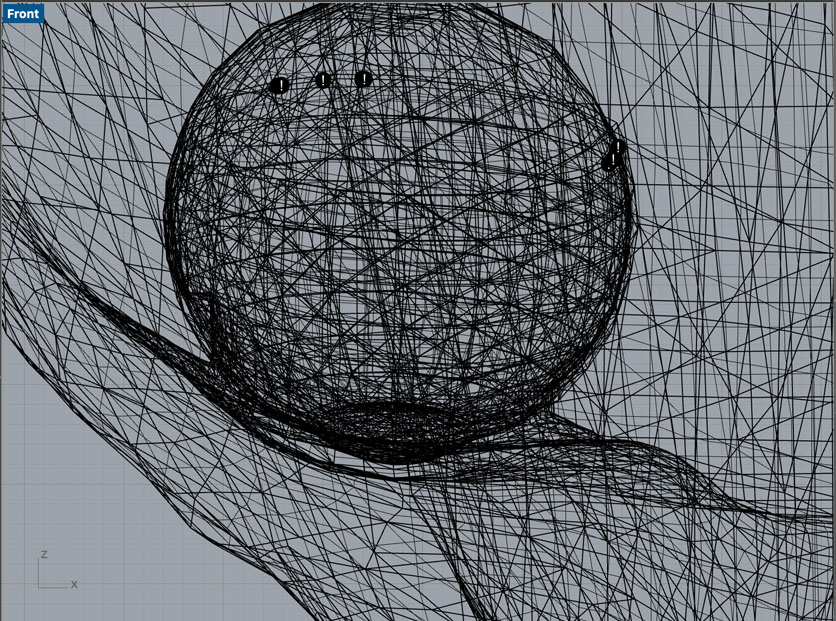
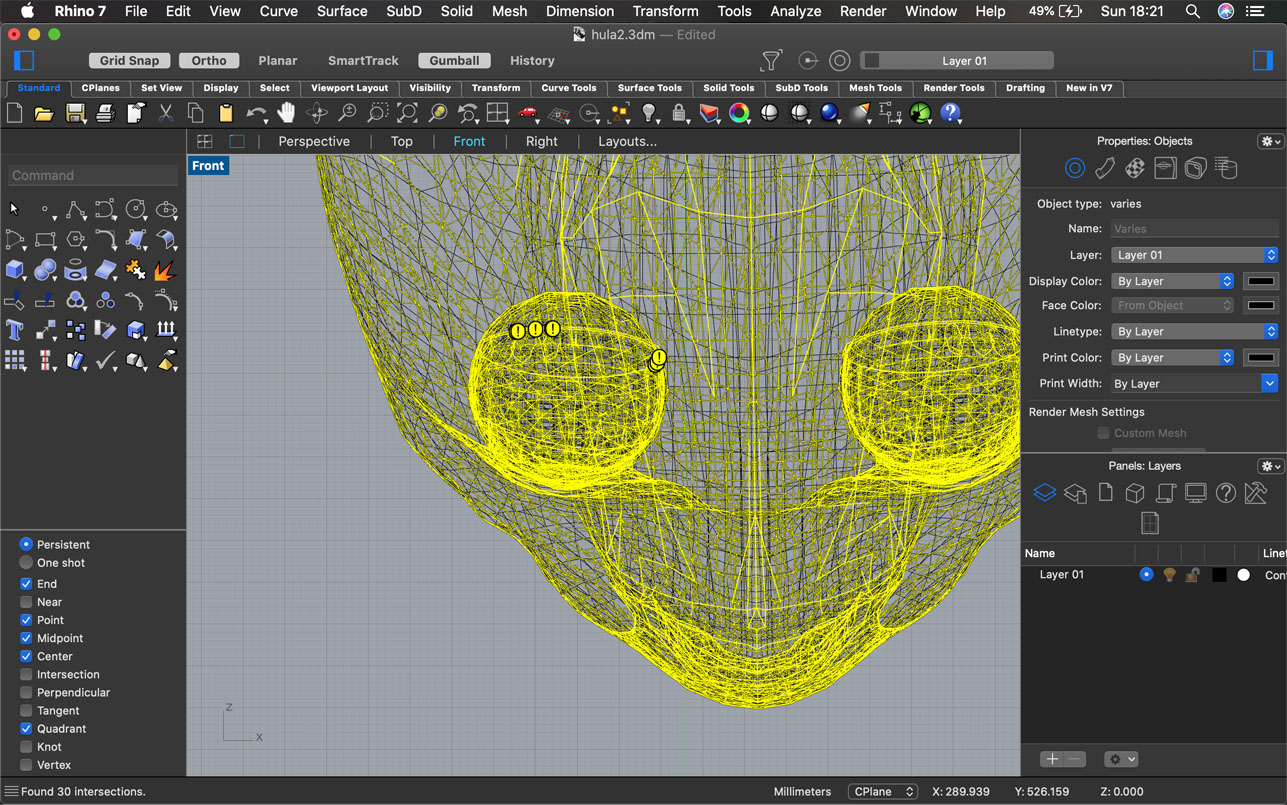
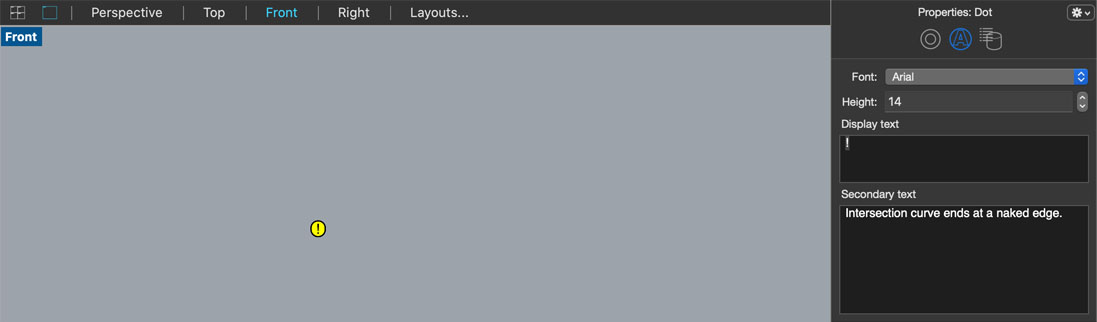
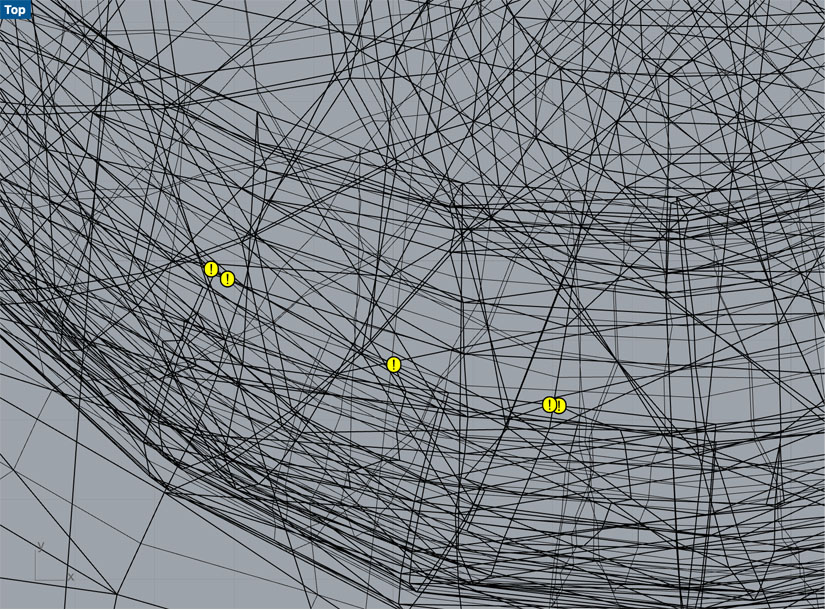
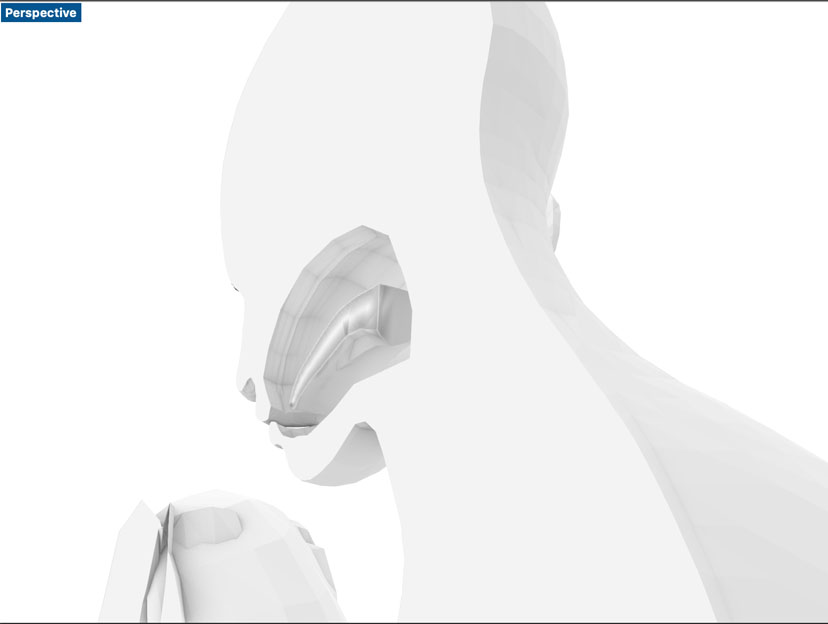
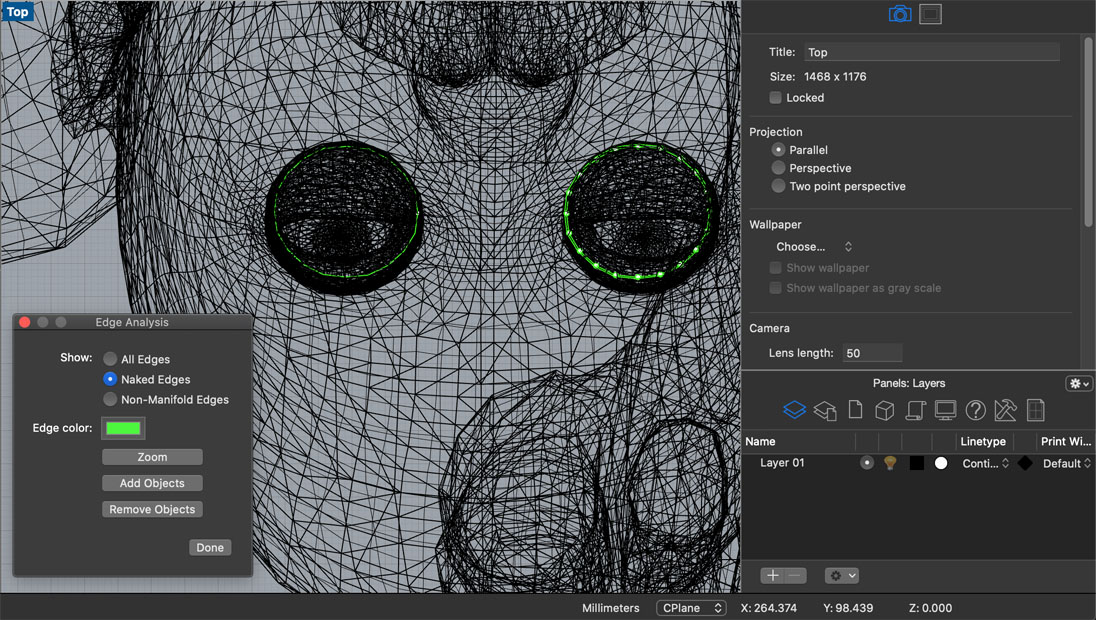
19-22: Anomalies in mesh structure, eyes. Also when I zoomed right in on these !s they are found to be text so I removed these.

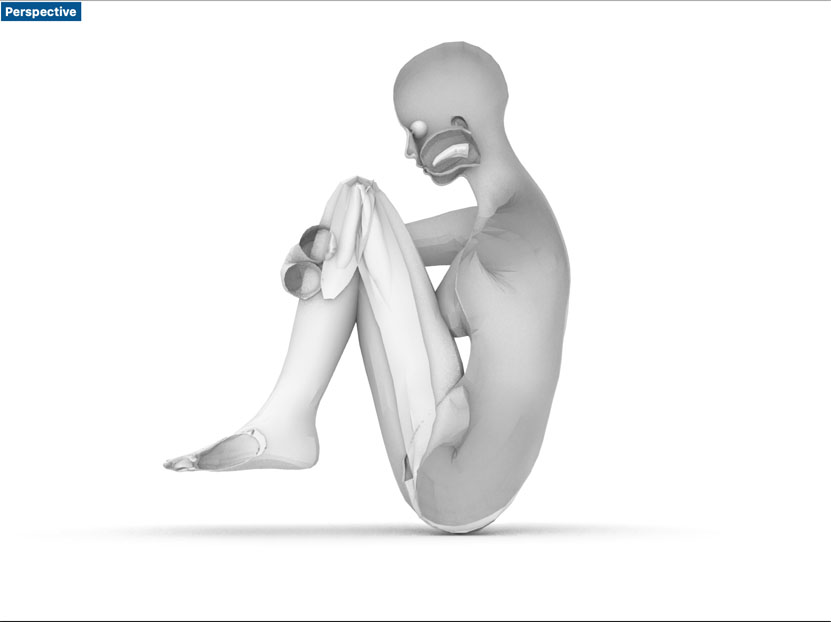
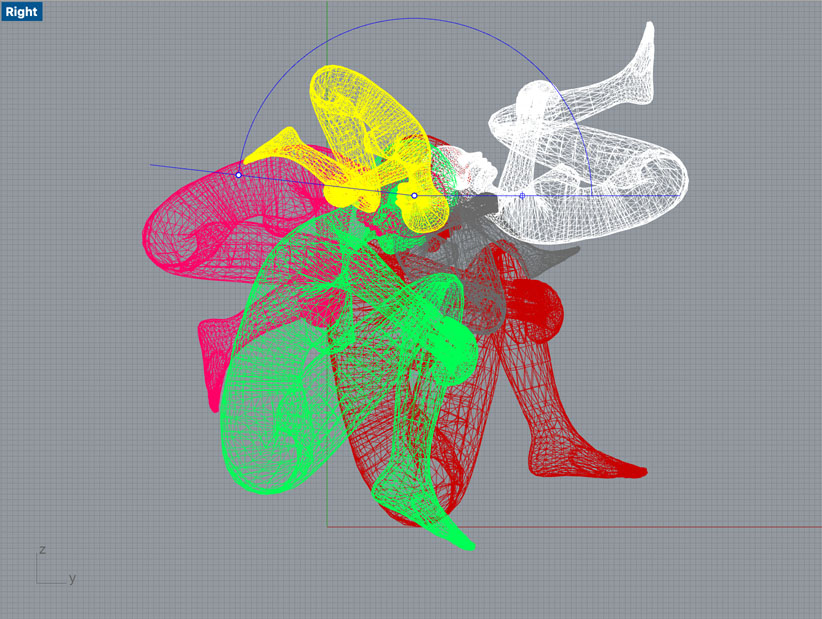
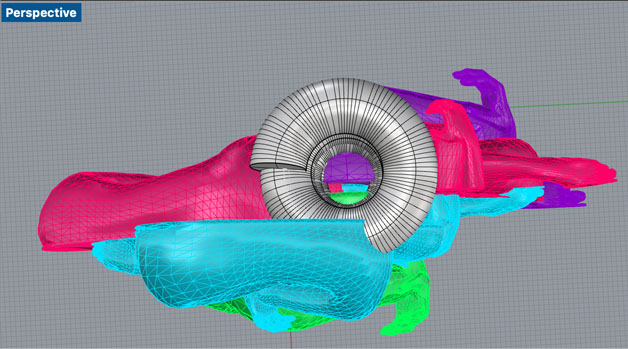
- Design development introducing a new pose for the sculpture to show transformation but decided the structure would be too big
- 27-28 : Fixing cap at intersection which missed a shape
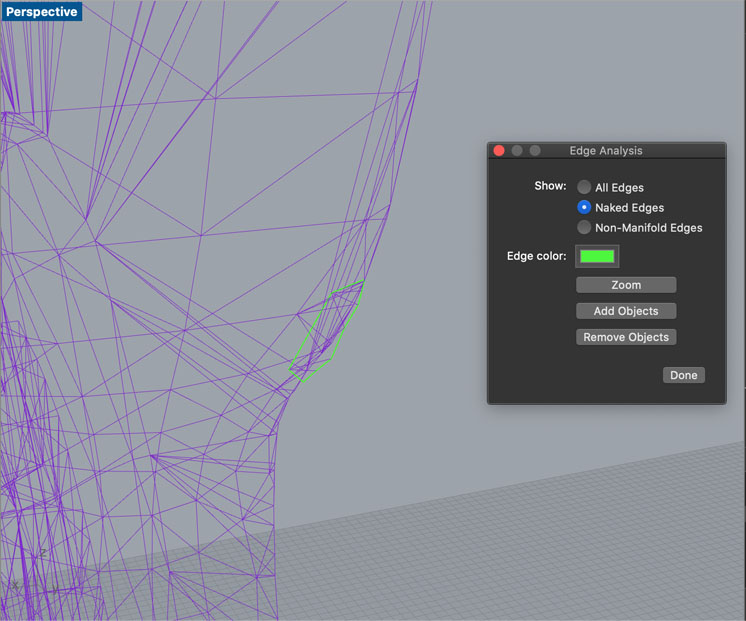
- Remove these open edges
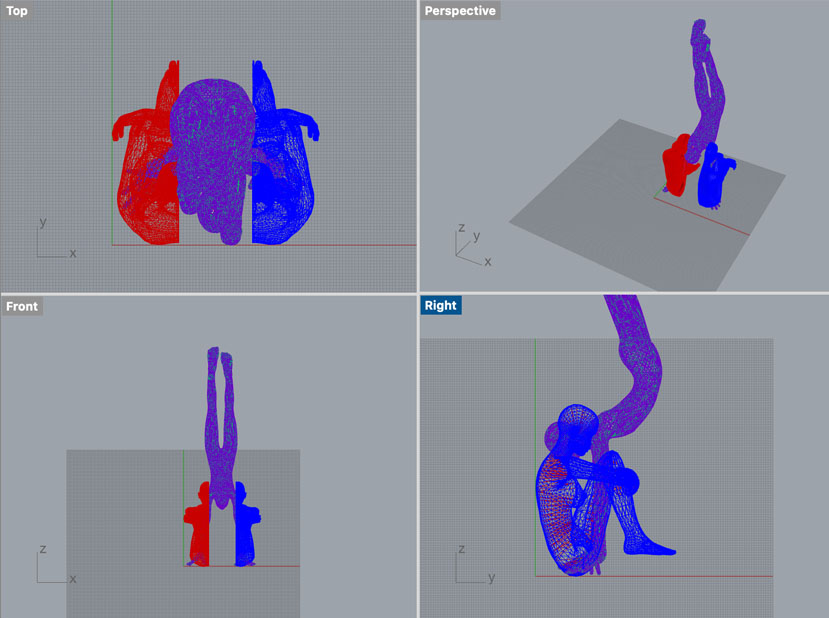
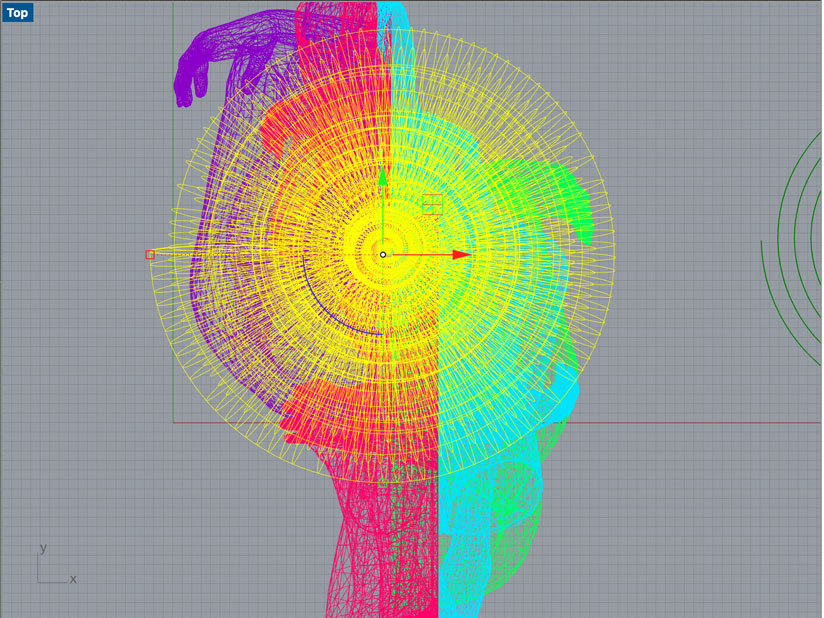
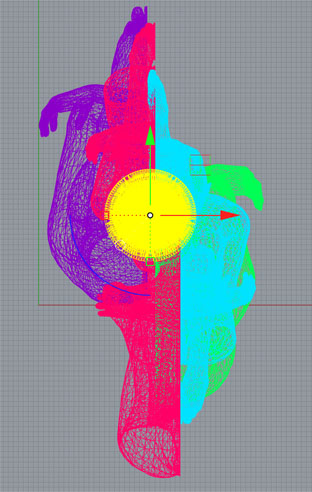
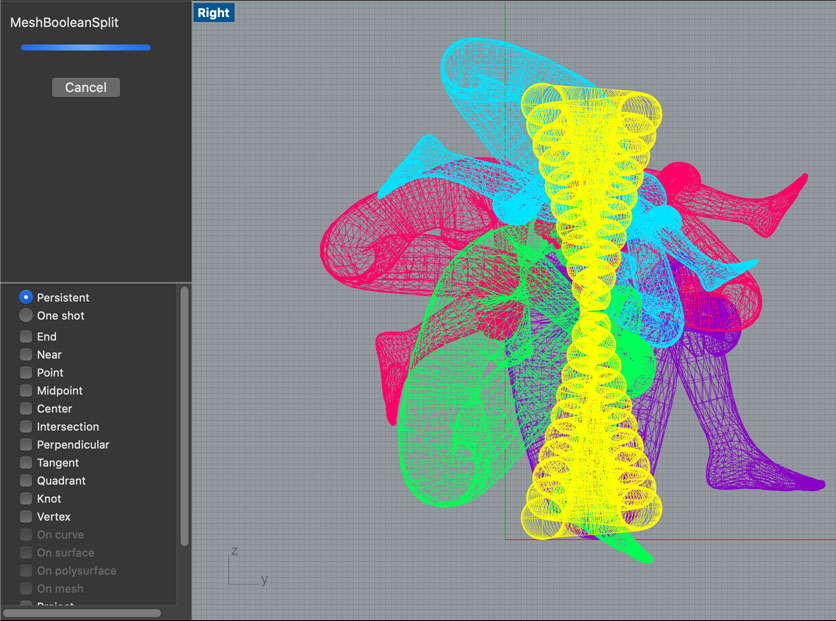
- Design development: rotating figures joined at head and introducing spiral structure to the core

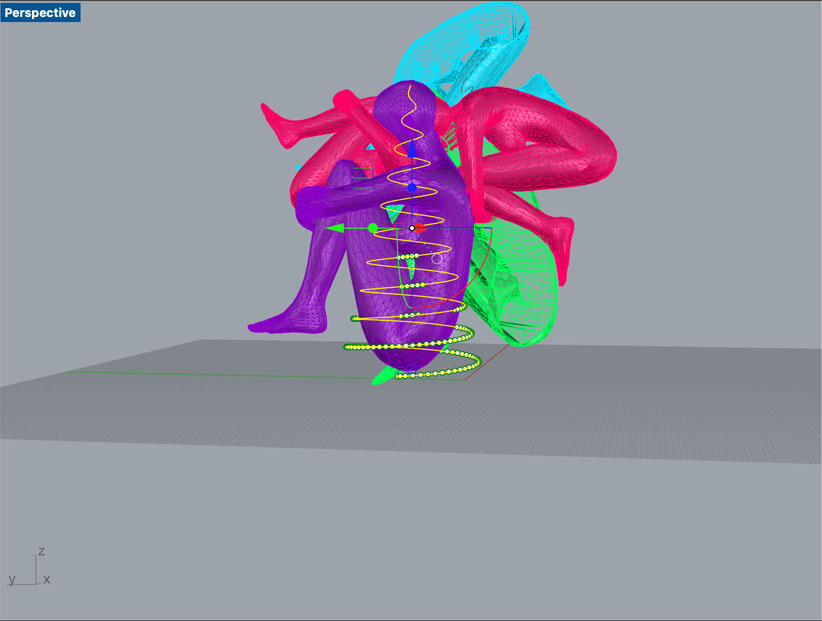
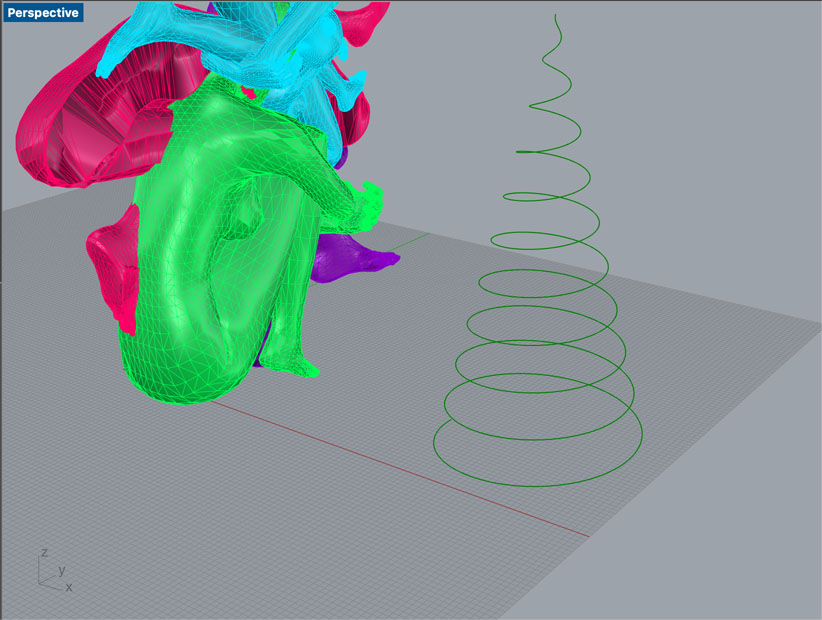
Extruding the spiral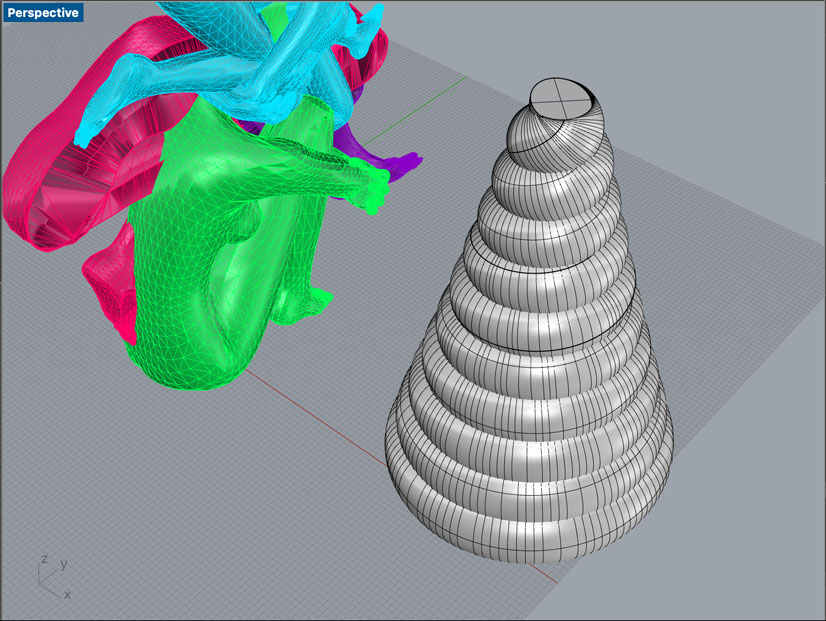
meshlab
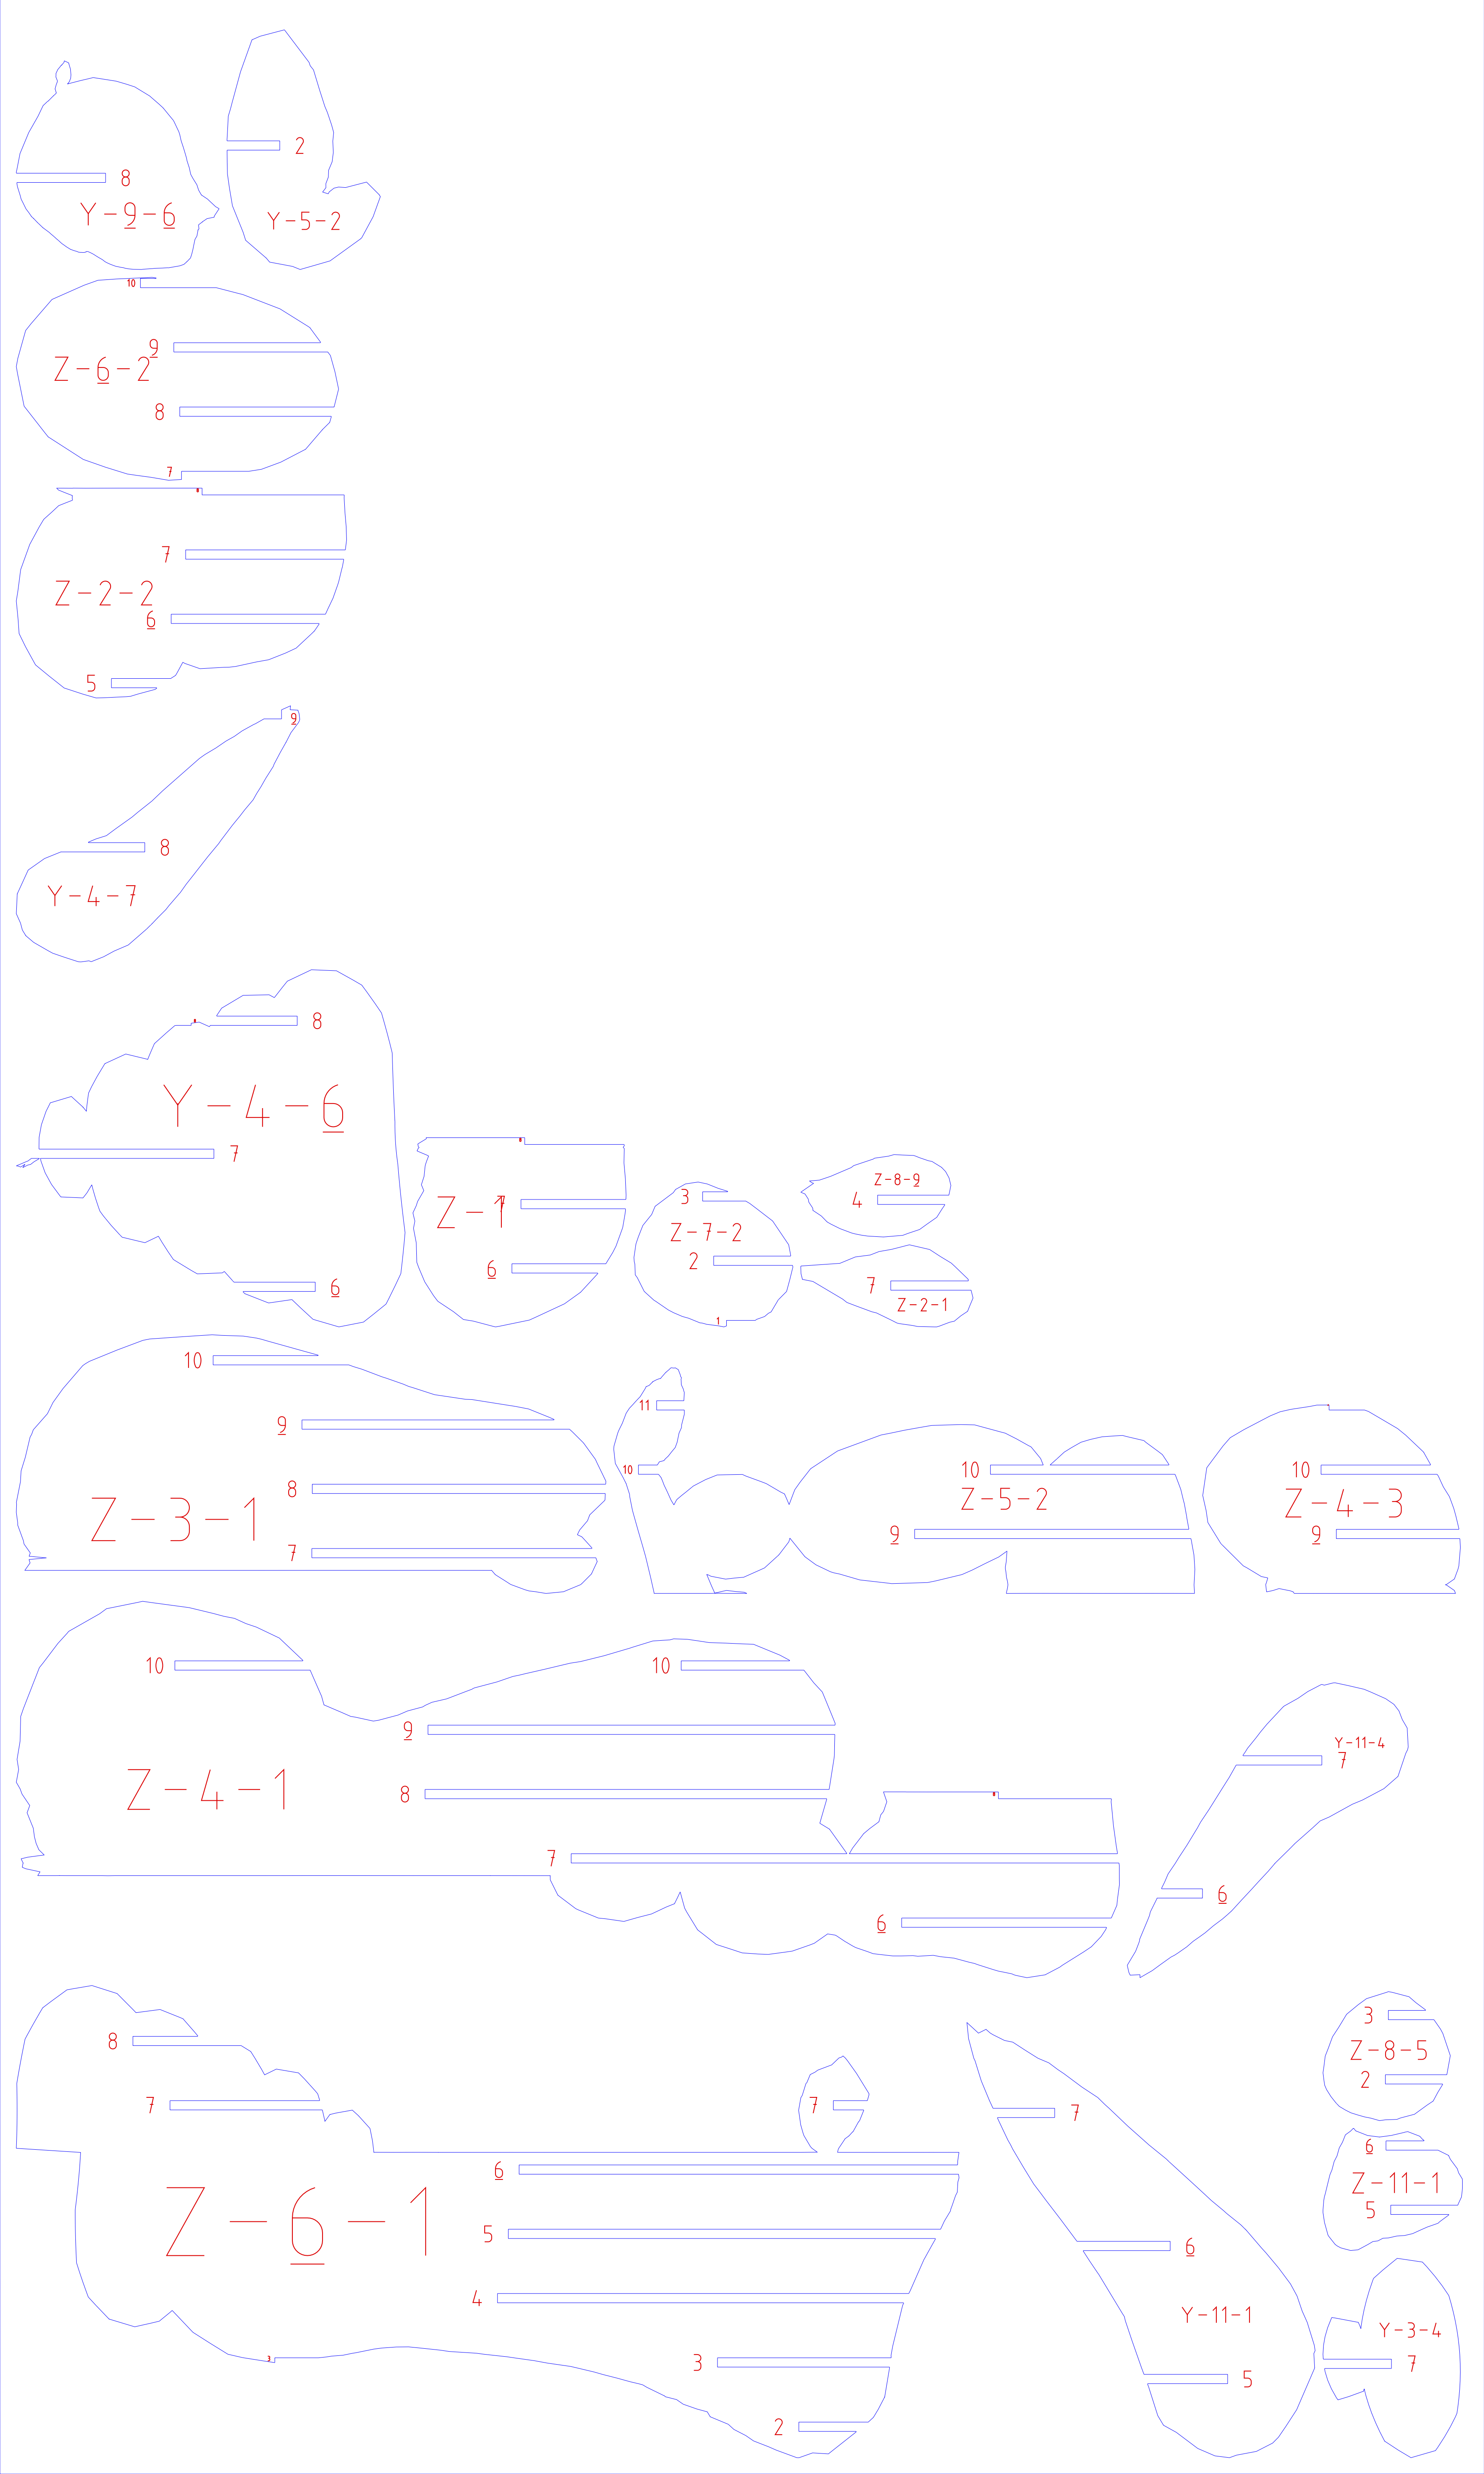
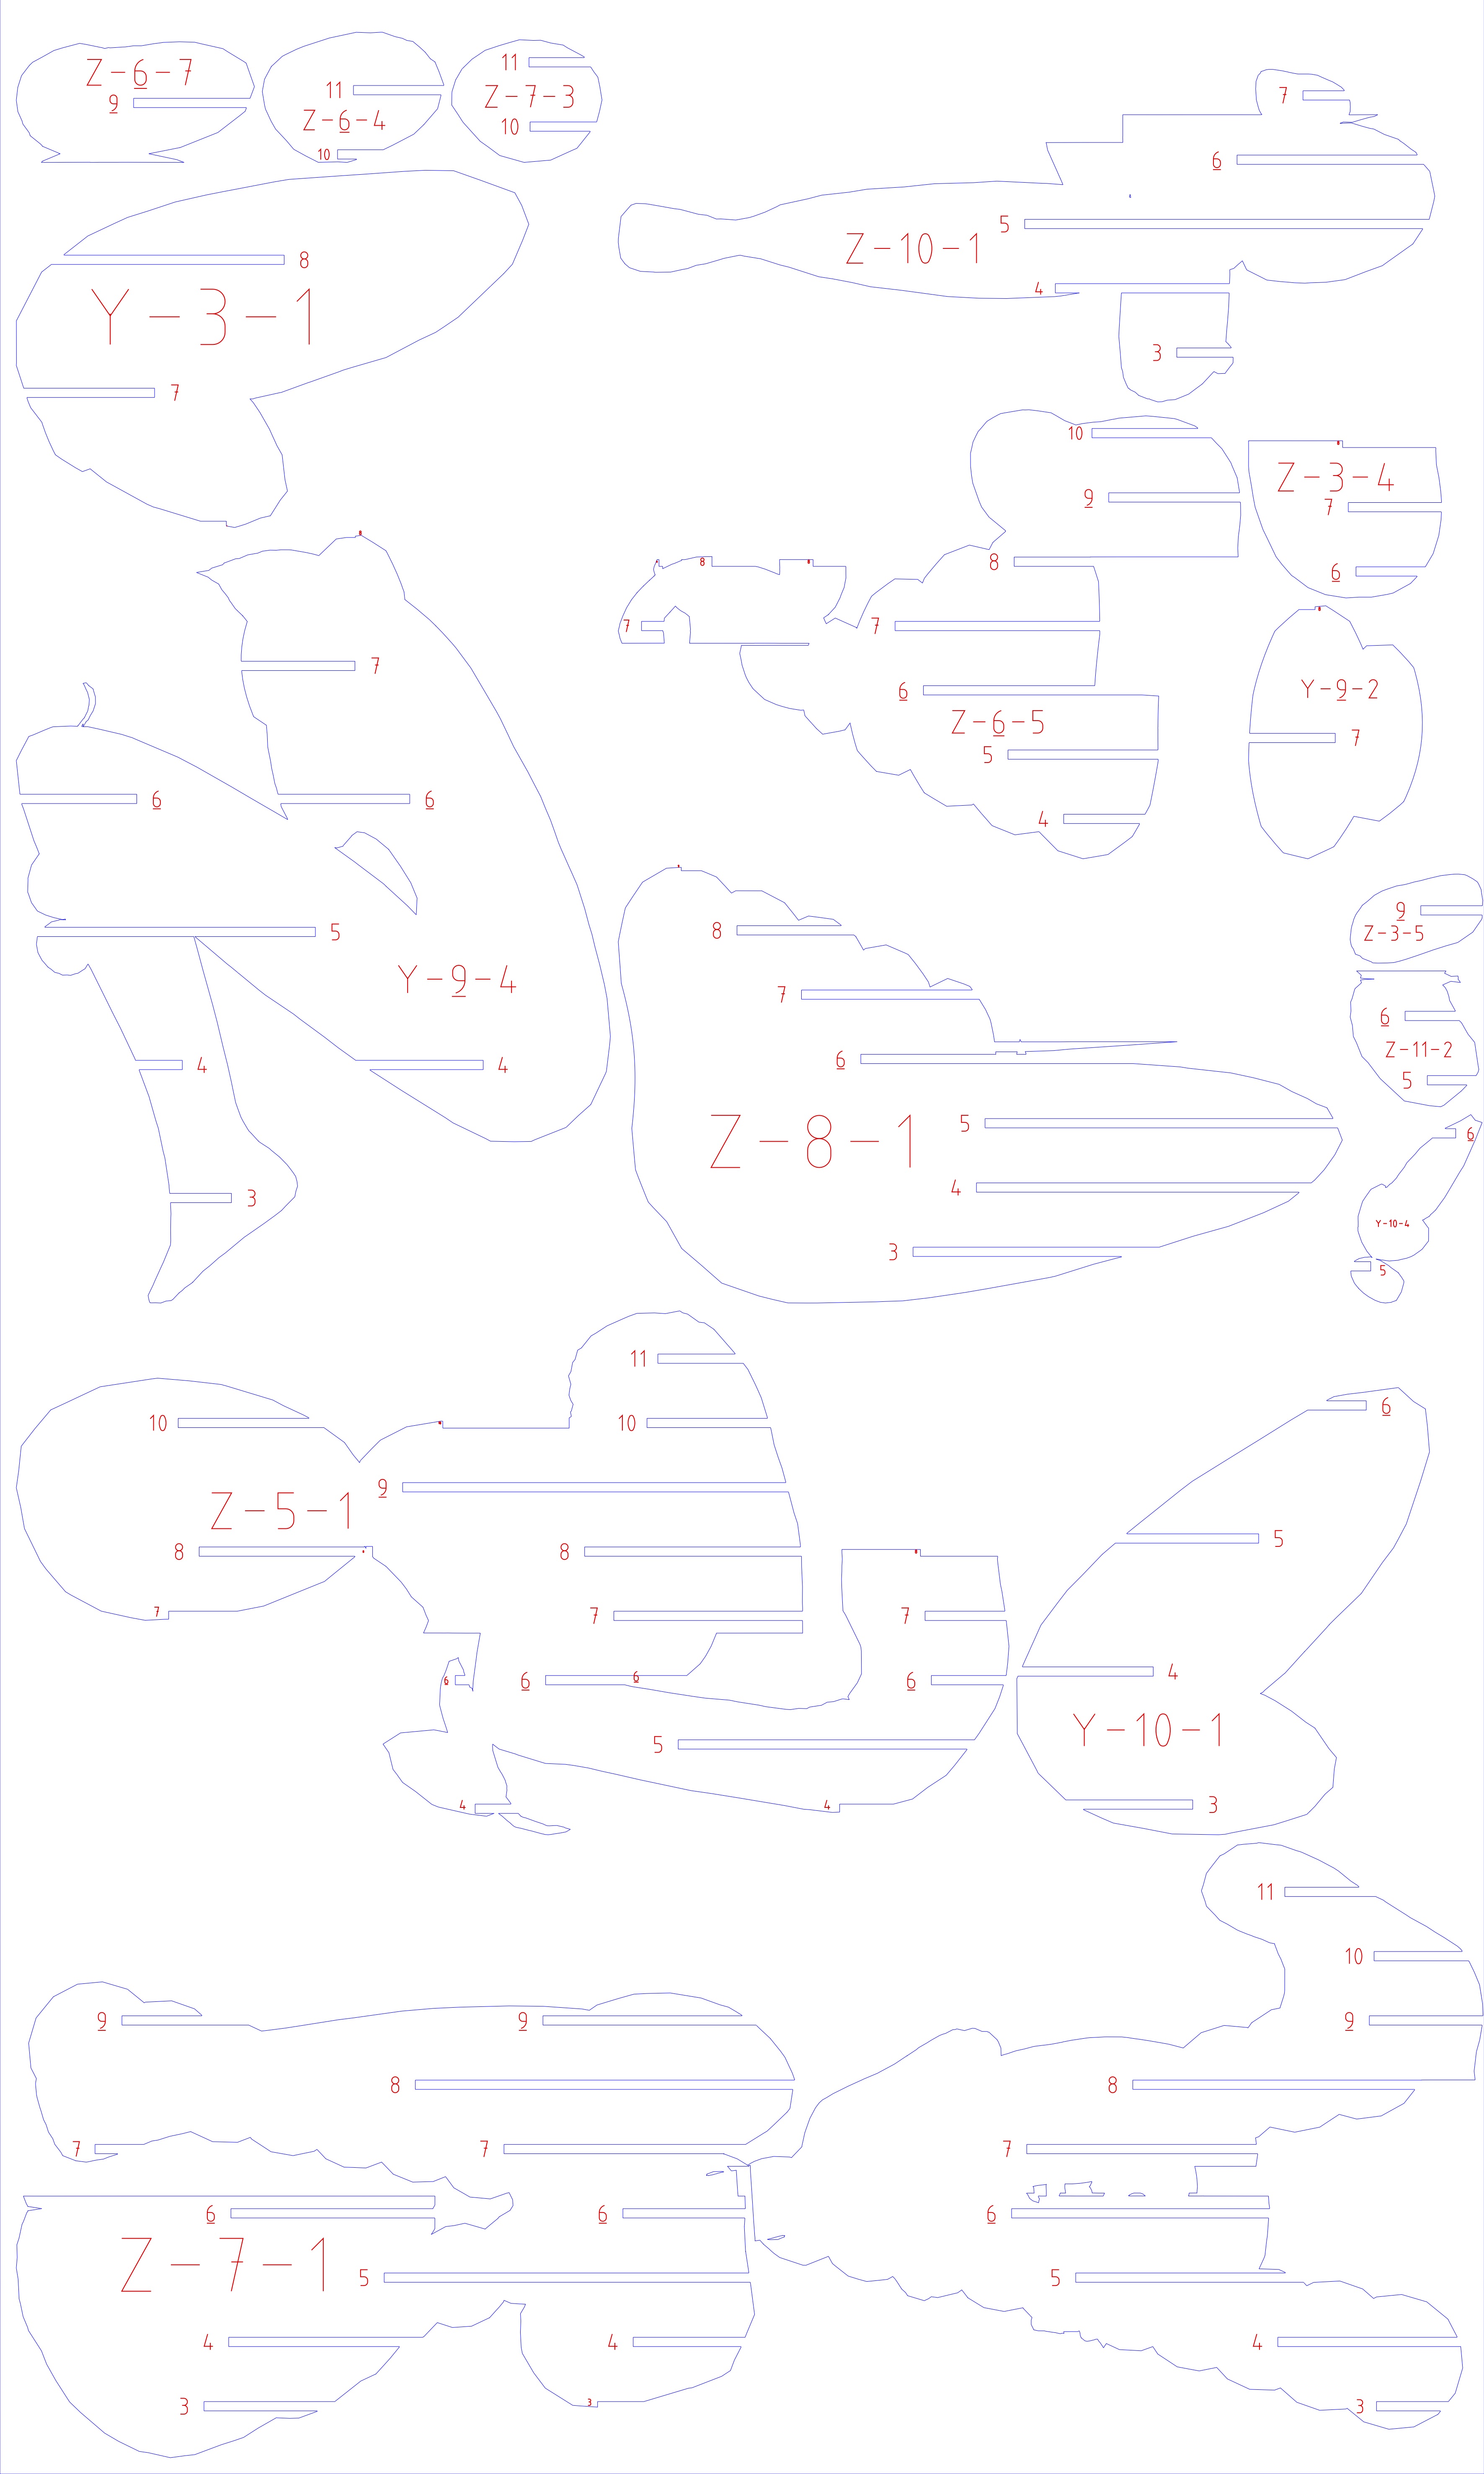
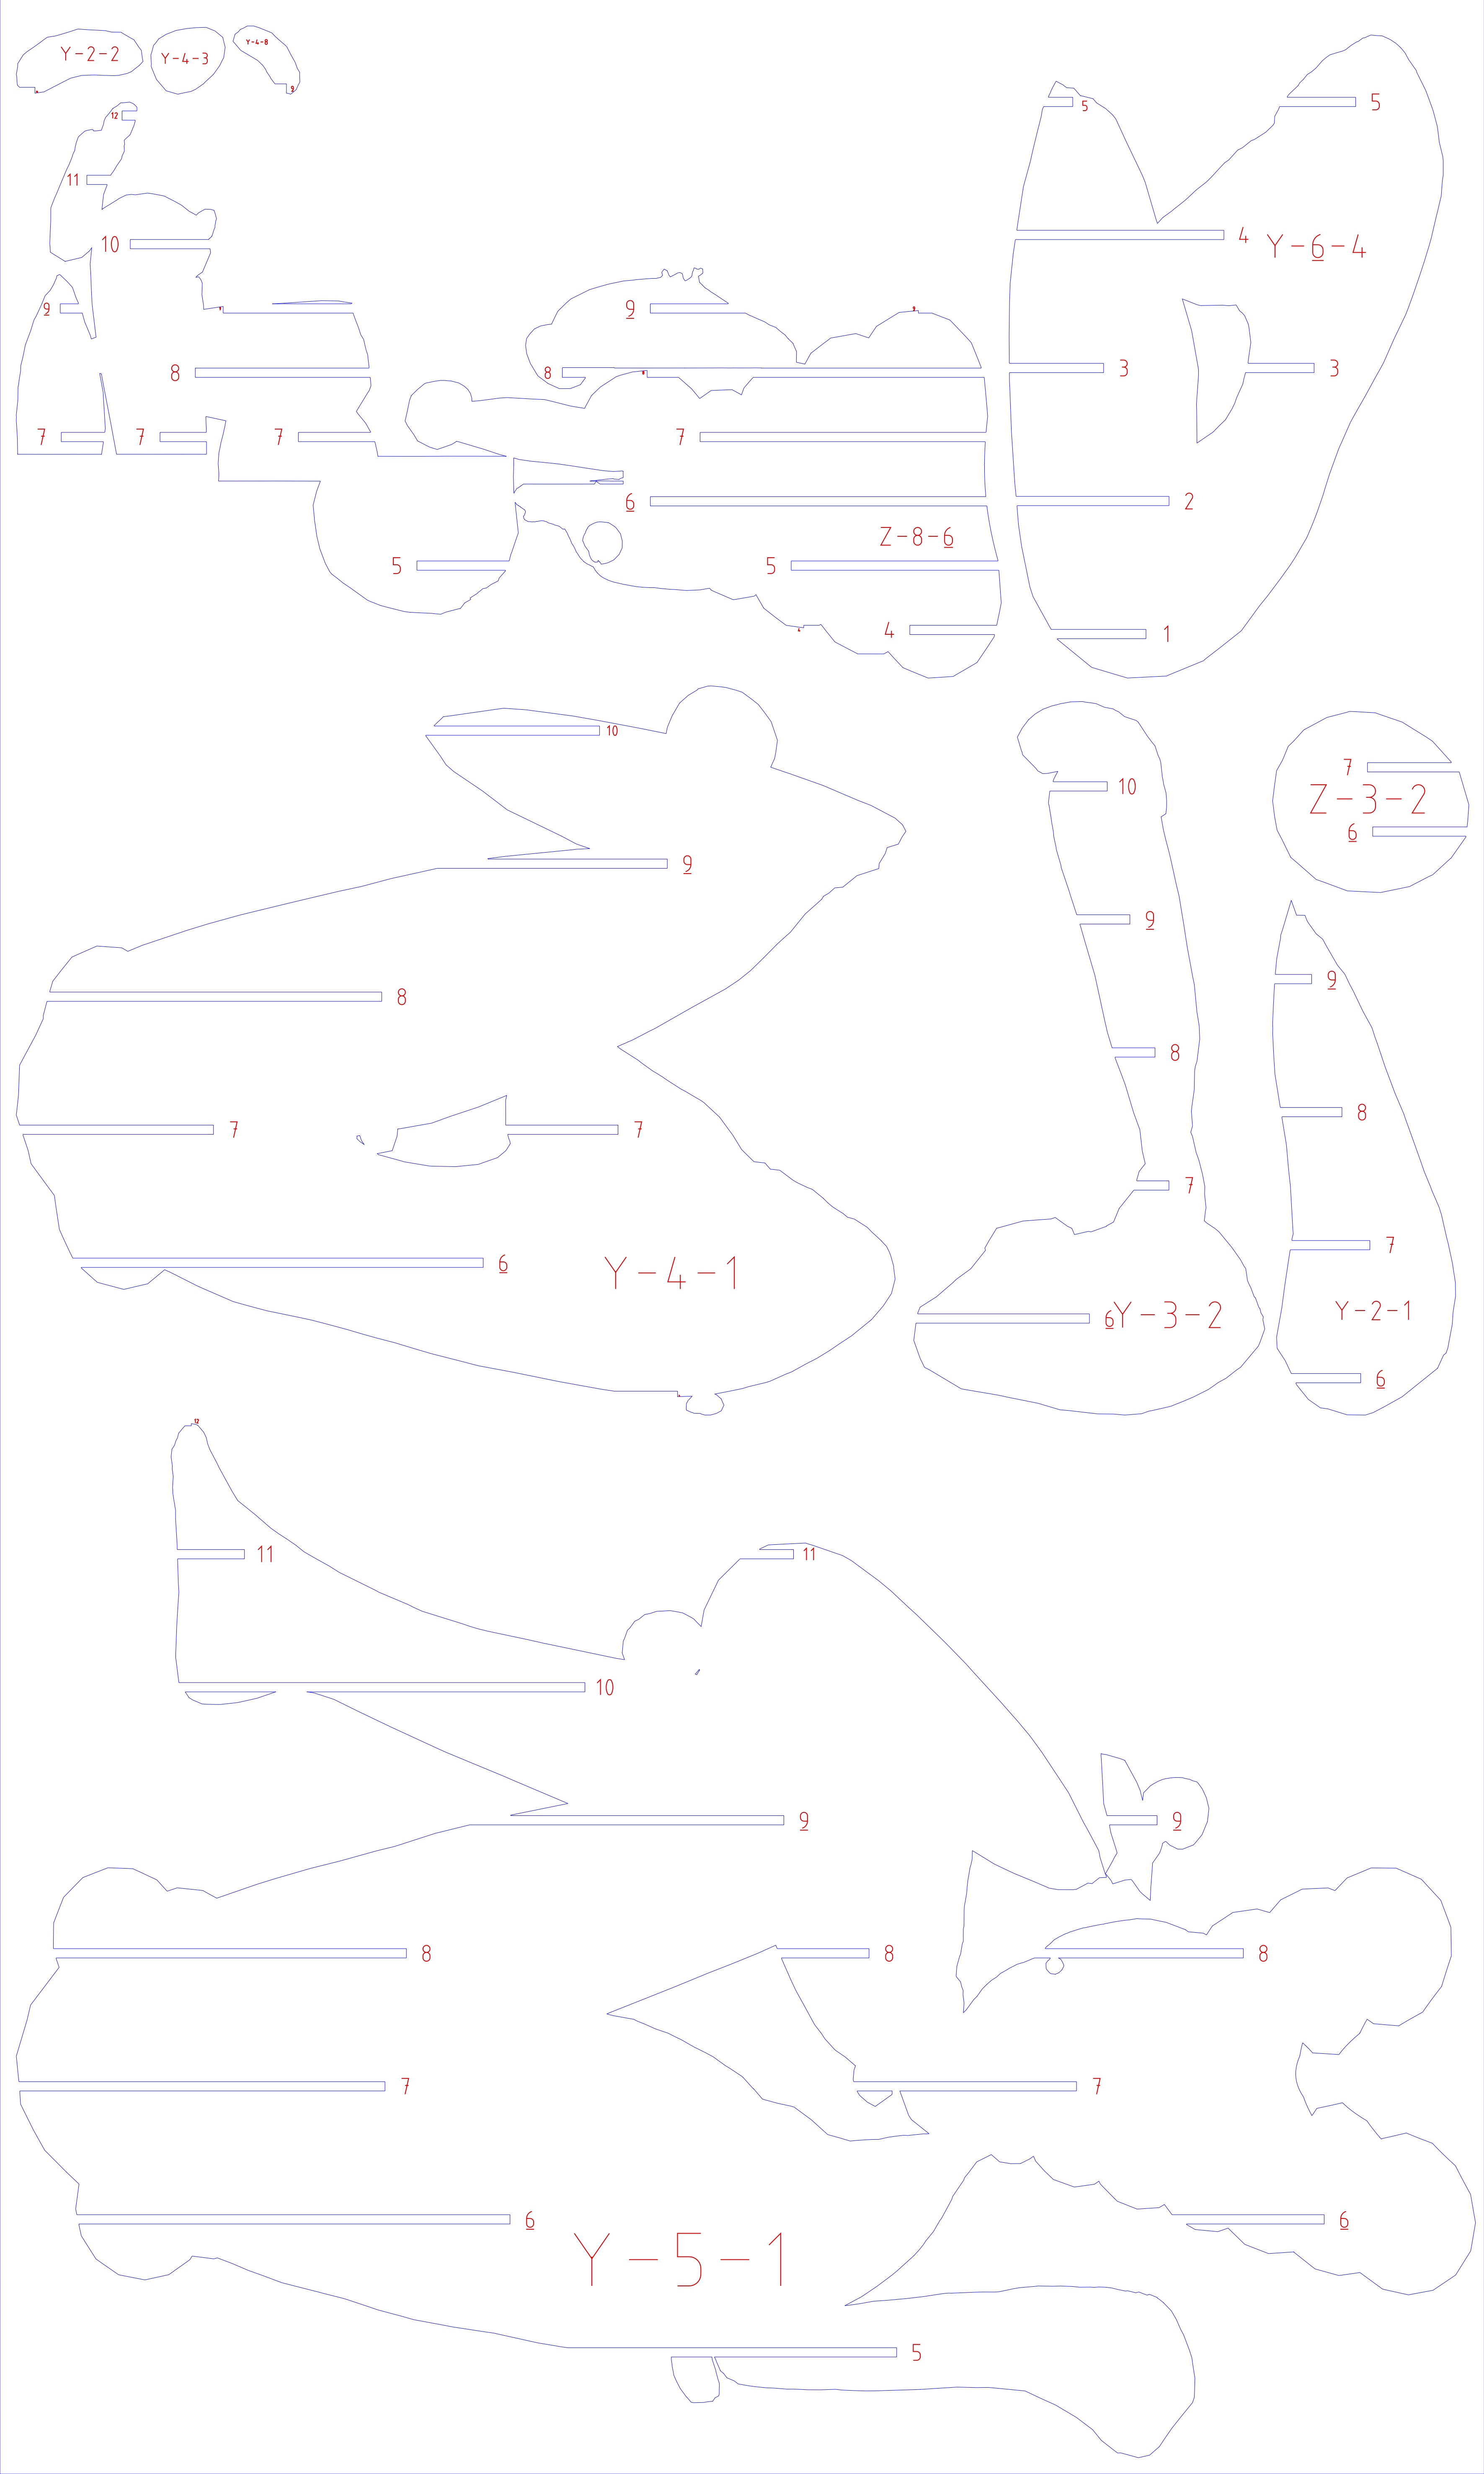
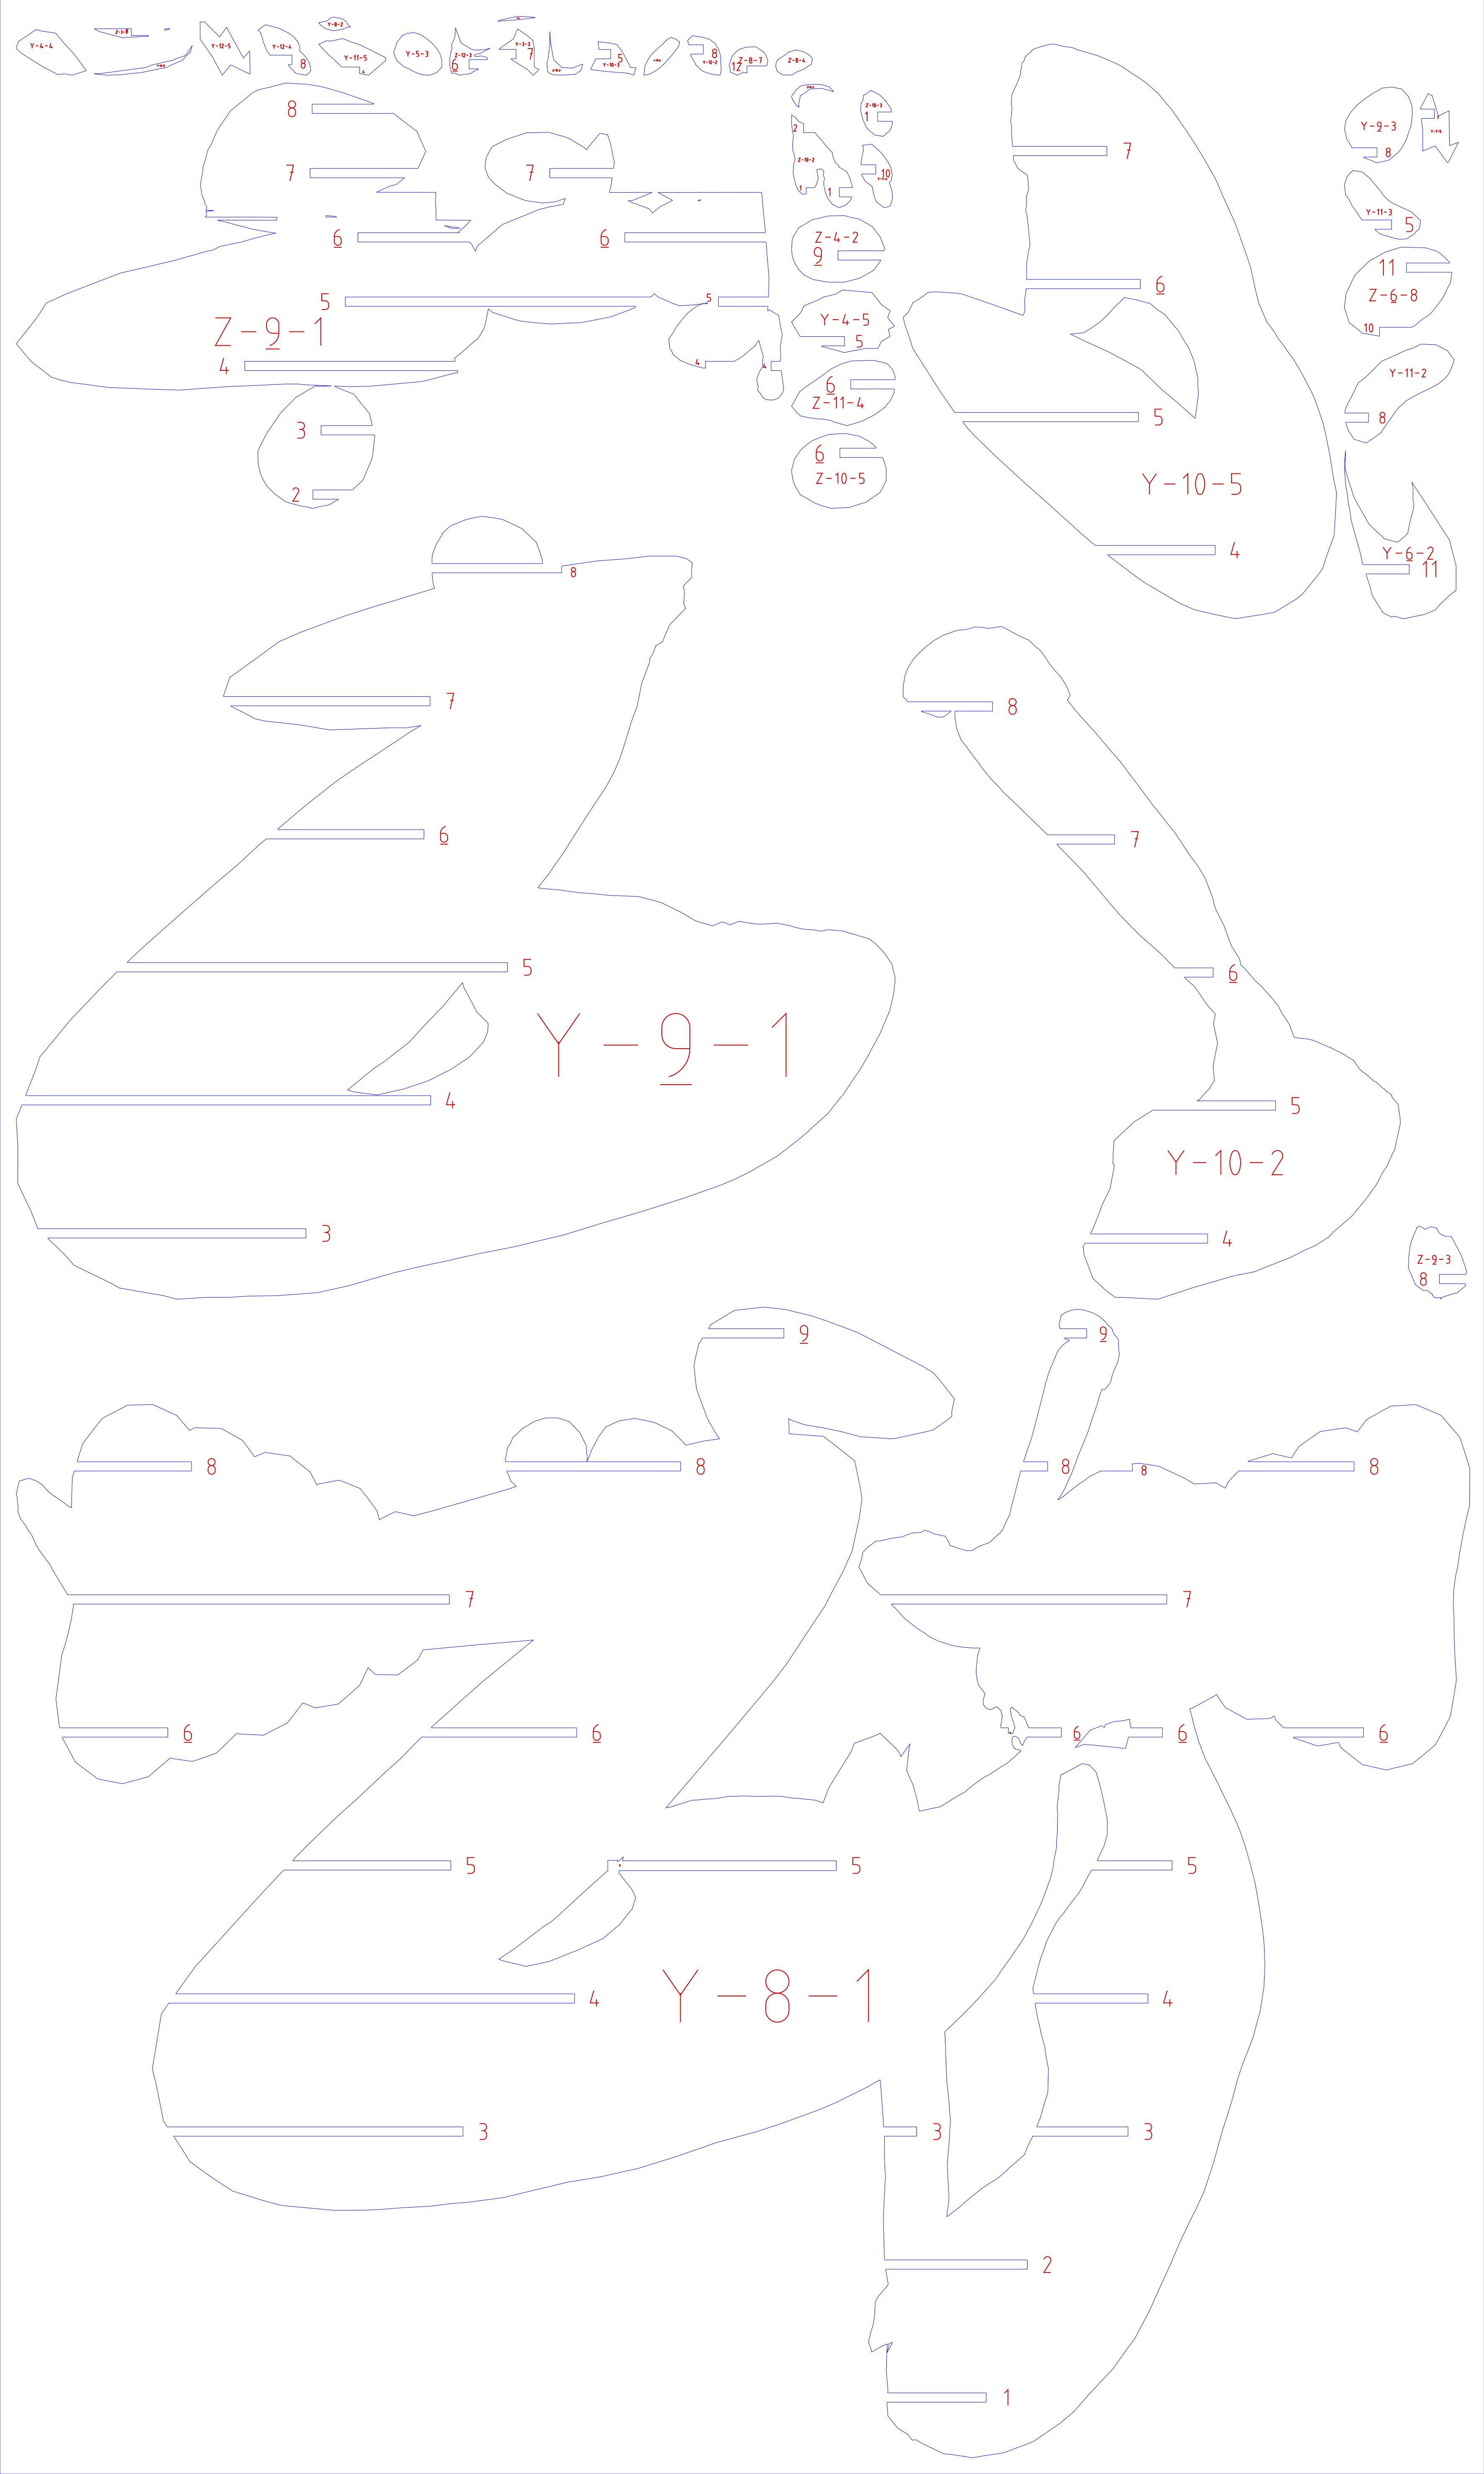
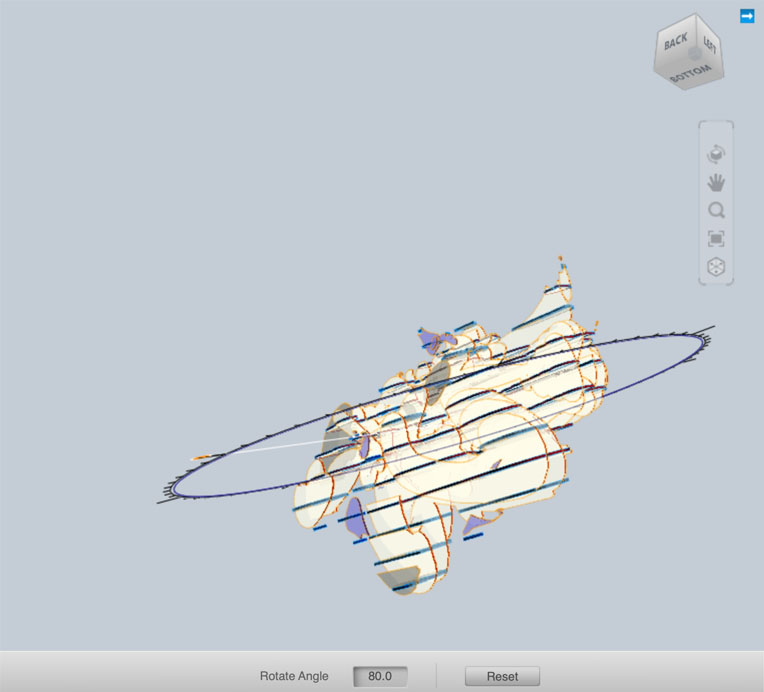
slicer
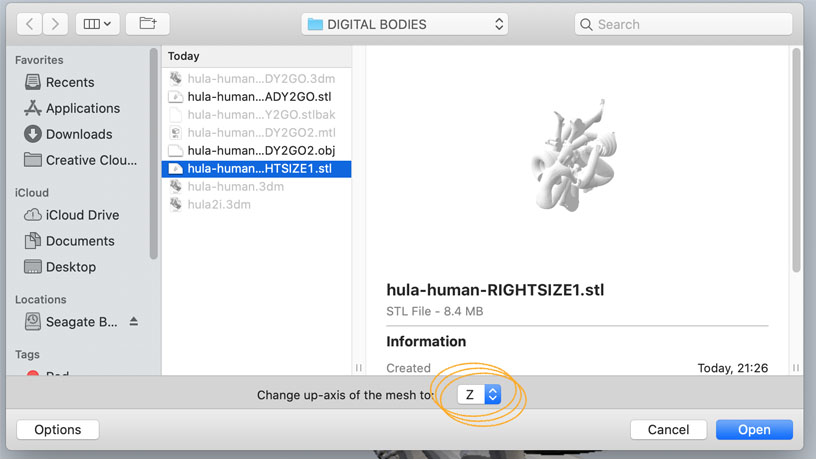
- Import file in the right axis for the model orientation
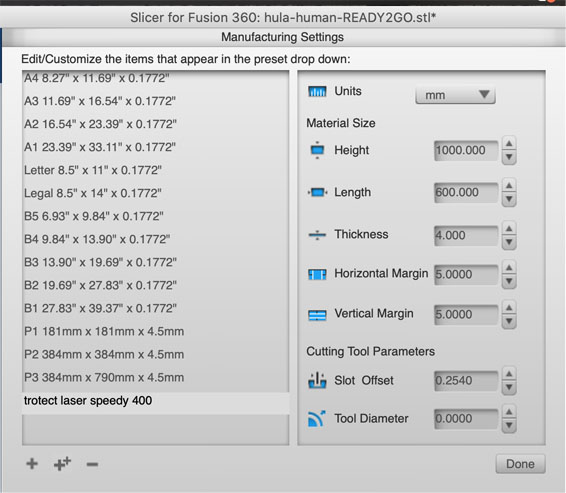
- Edit the manufacturing setttings for the size and dimensions of the printer/device which will lasercut the object
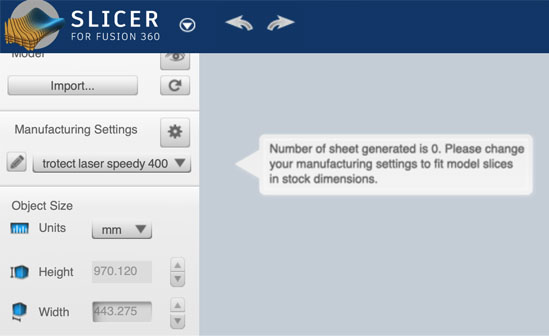
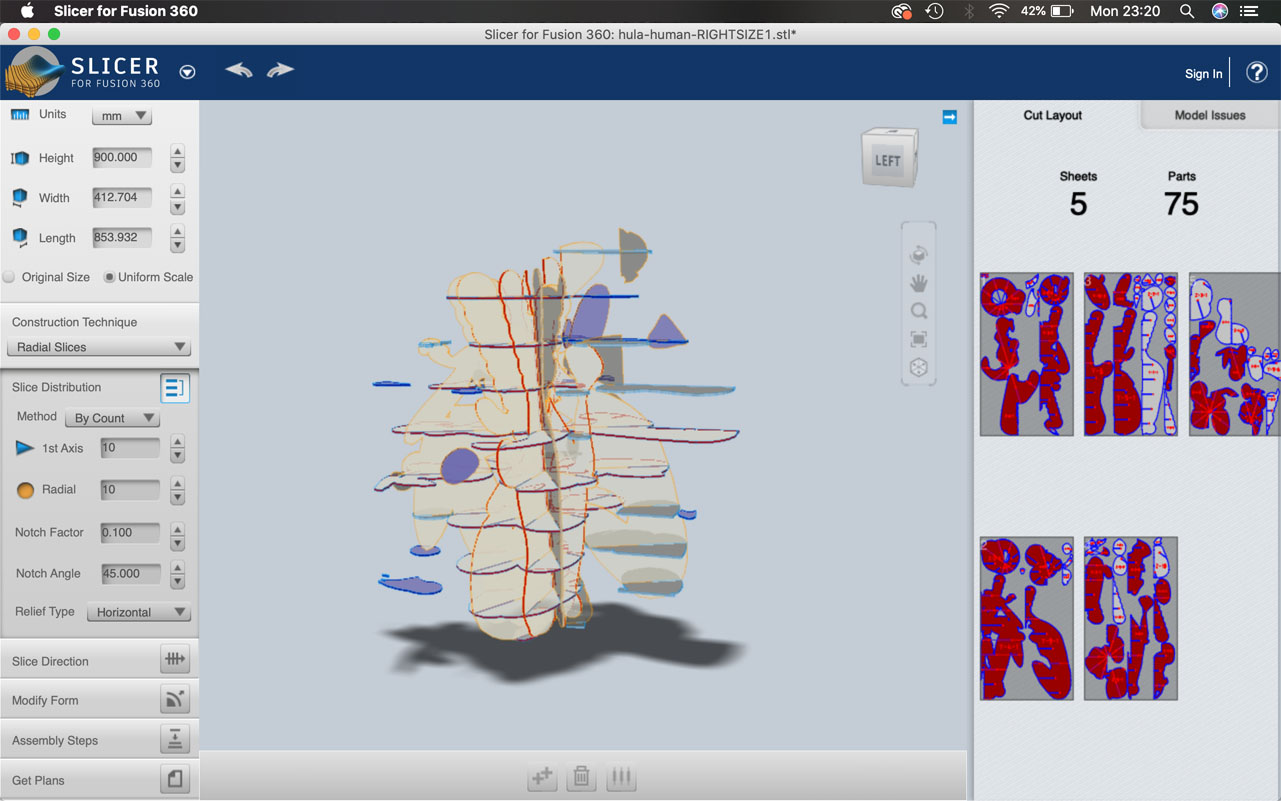
- This message popped up to remind me how big the design is - later on I have no choice but to change the dimensions, which works out better anyway.
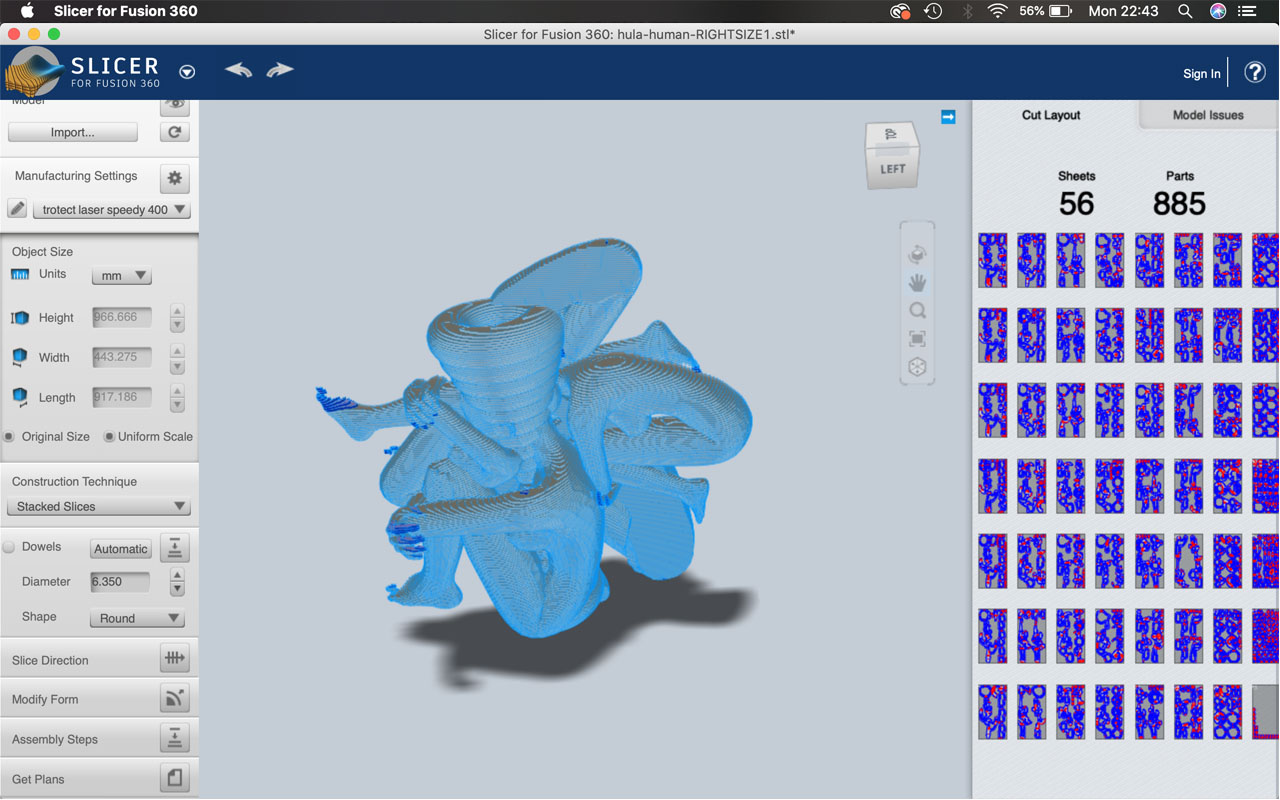
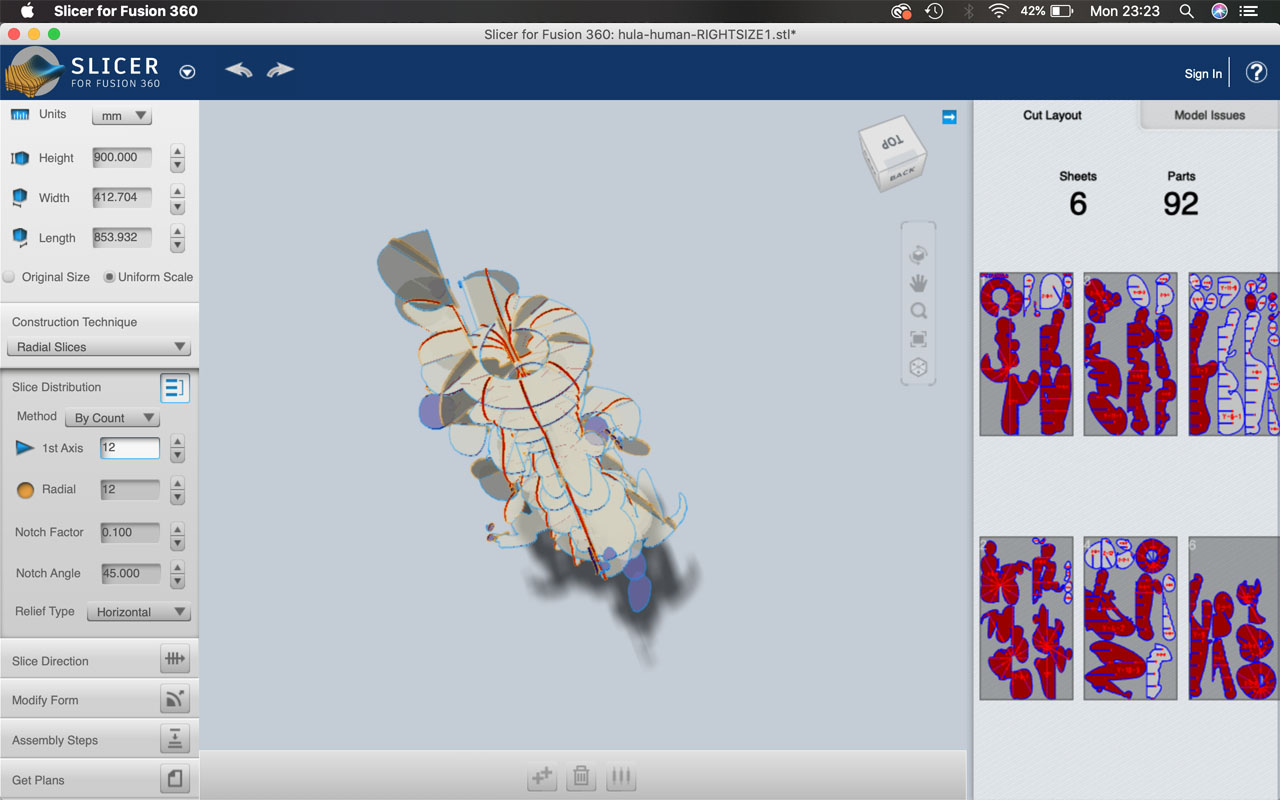
- The first import shows how many pages of pieces it would take to build which is over the allowance of Fabricademy so I need to change this and reduce my page to 6 or less. Stacked slices is a nice looking structure though.
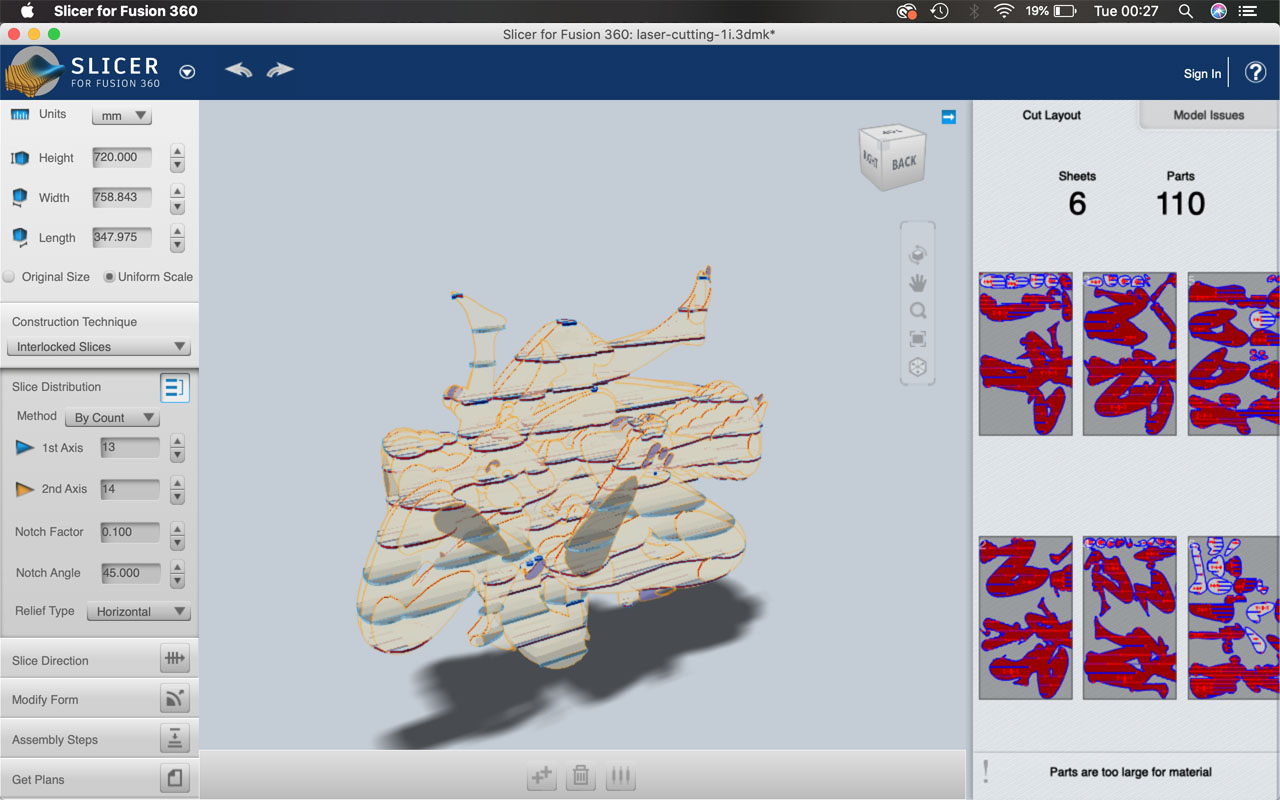
- Interlocked slices add more components to the whole structure so that it becomes almost like furniture - more geometric and cubist. Also I changed the construction technique to reduce the number of pages of pieces
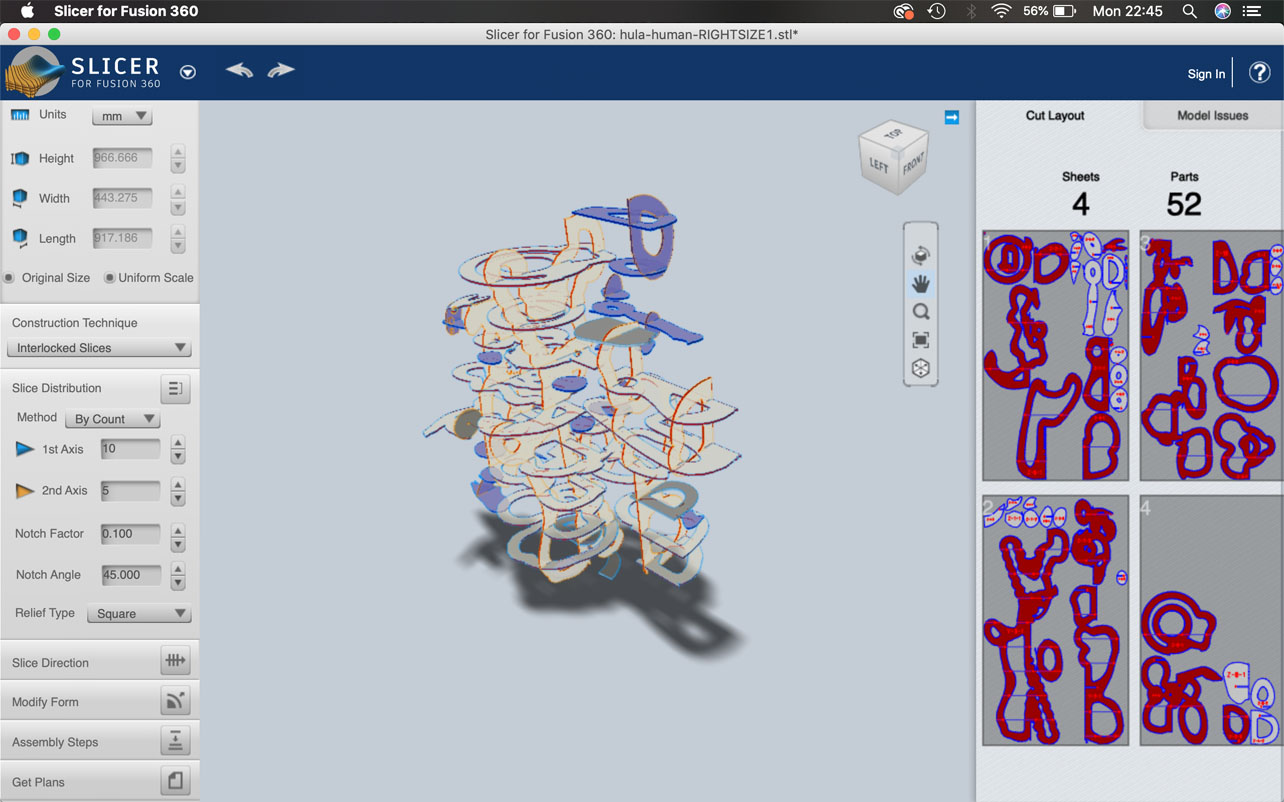

- The pieces are still too big to fit on the device to be printer properly to I need to change the dimensions to make them fit. I also changed the axis on these to balance the pieces going that will fit horrizontally and vertically.

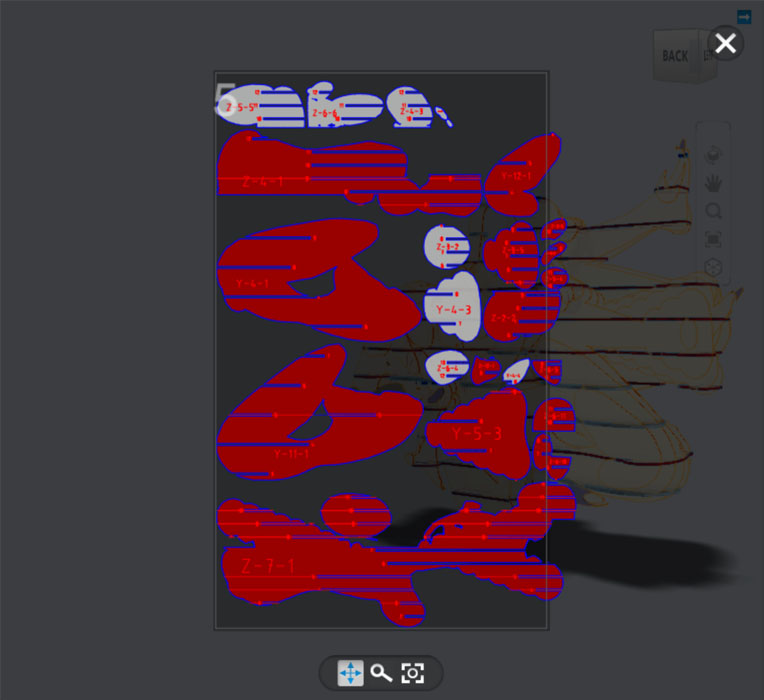
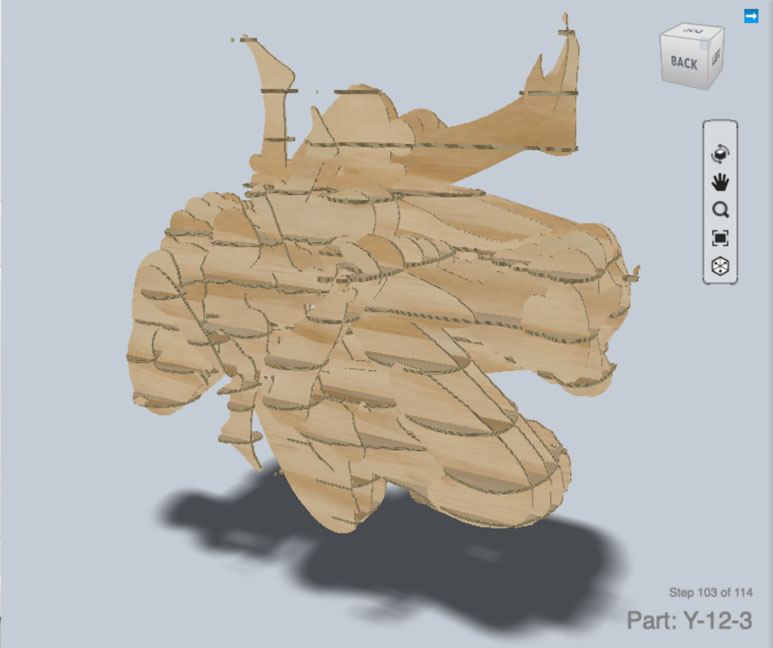
- Plywood preview model
- Cardboard preview model
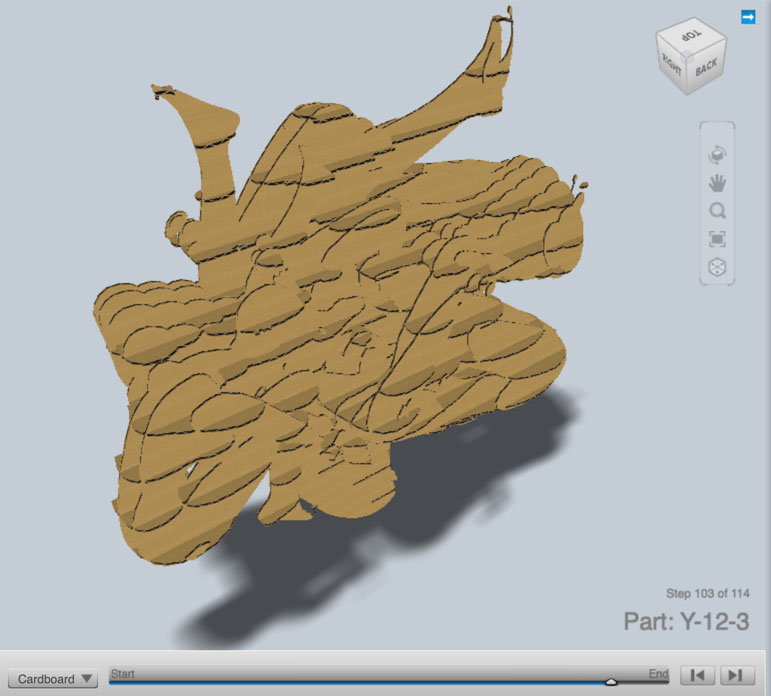
completed files