05 assembling and construction
development
survey
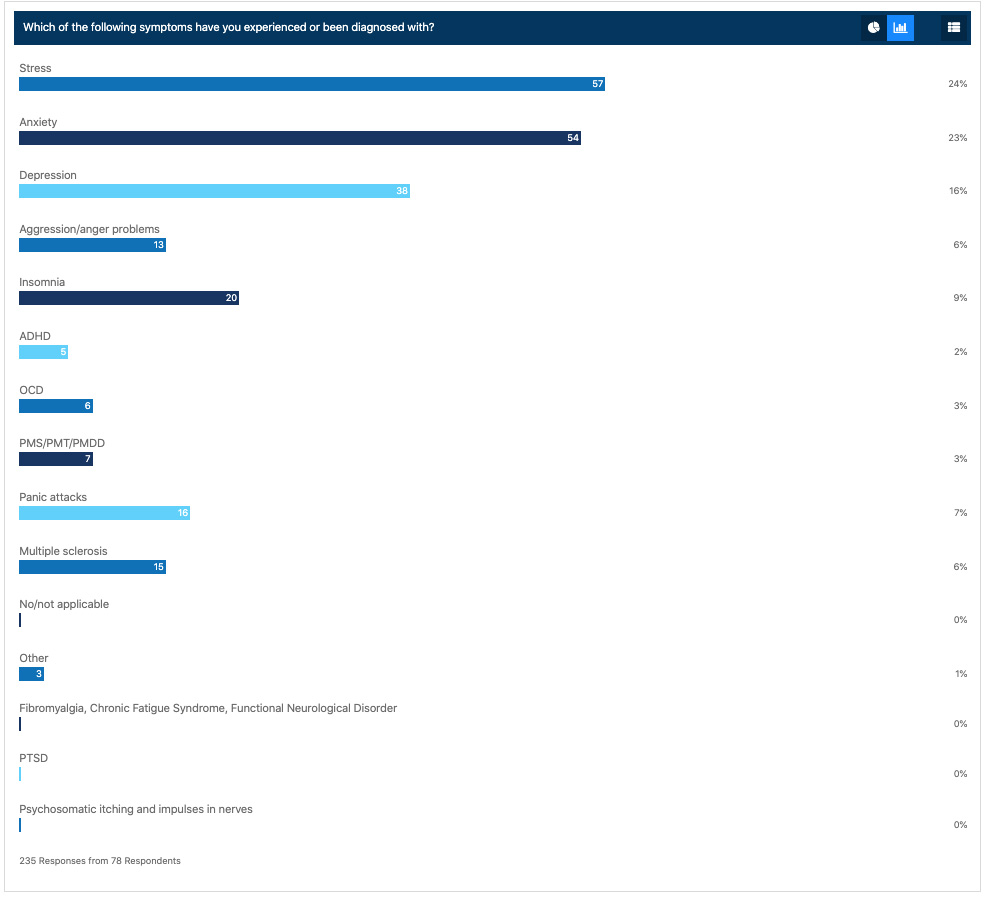
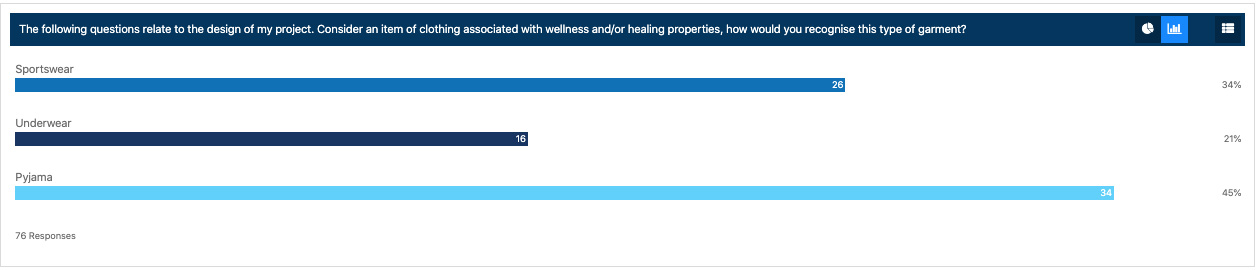
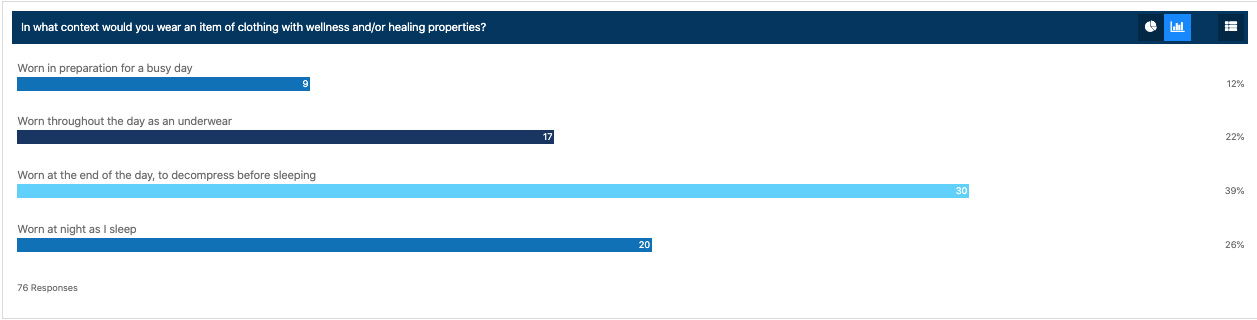
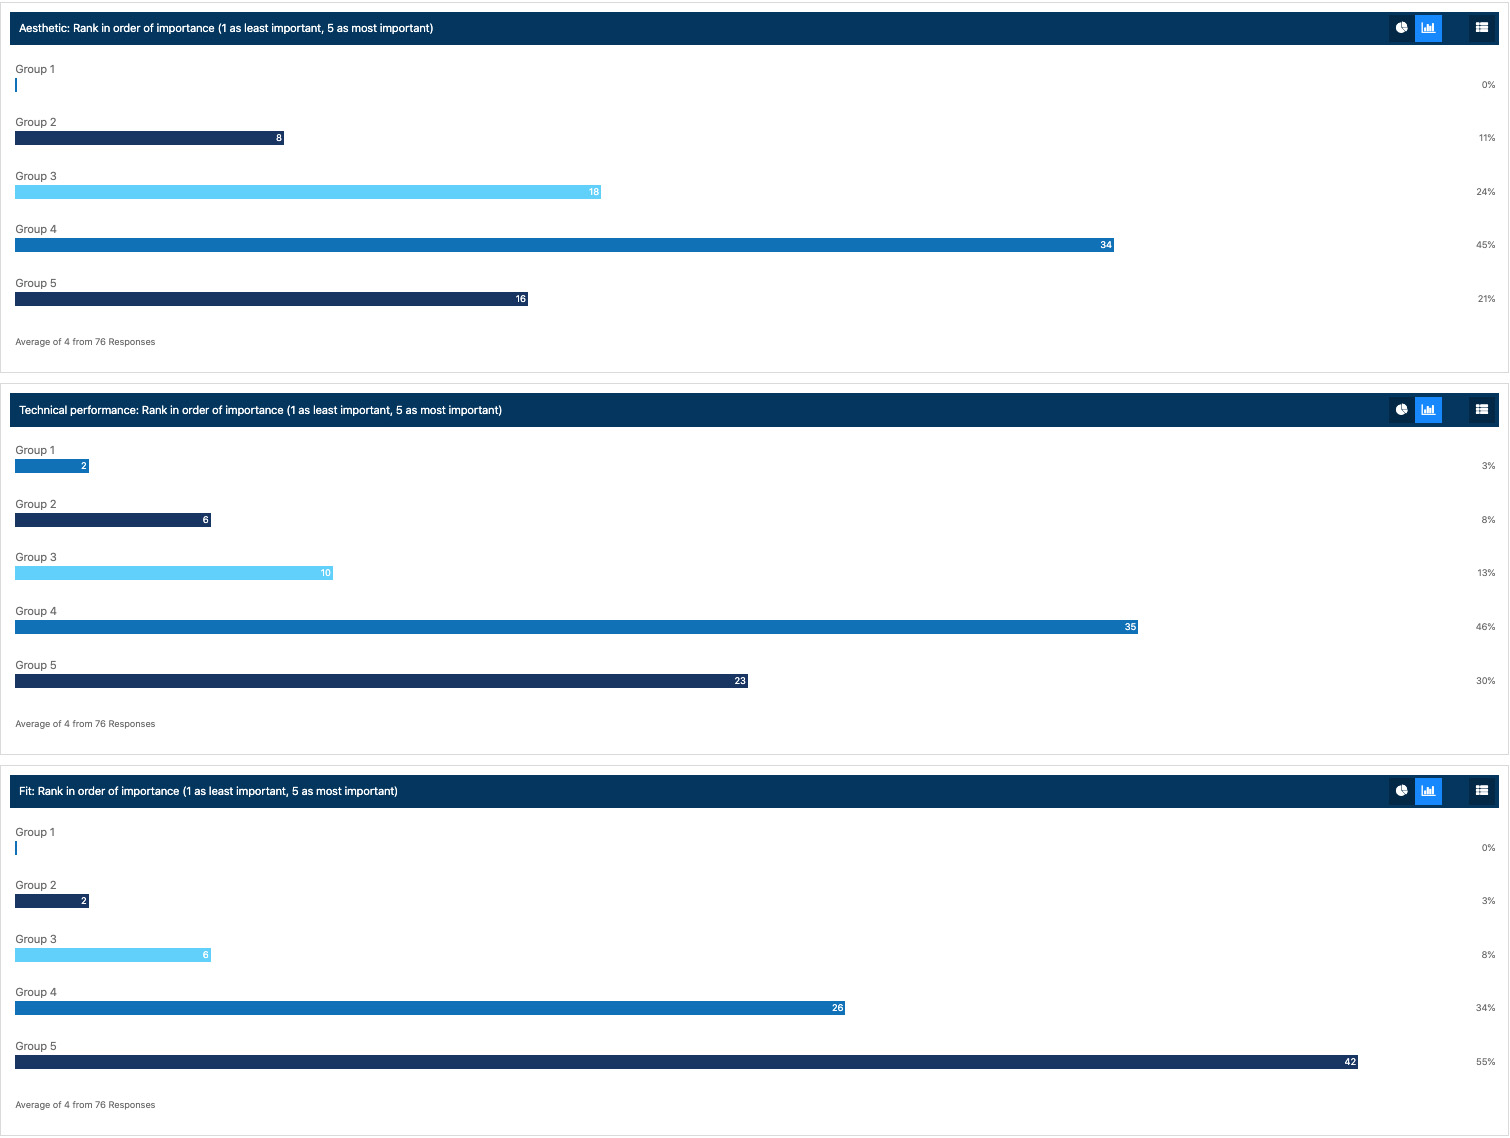
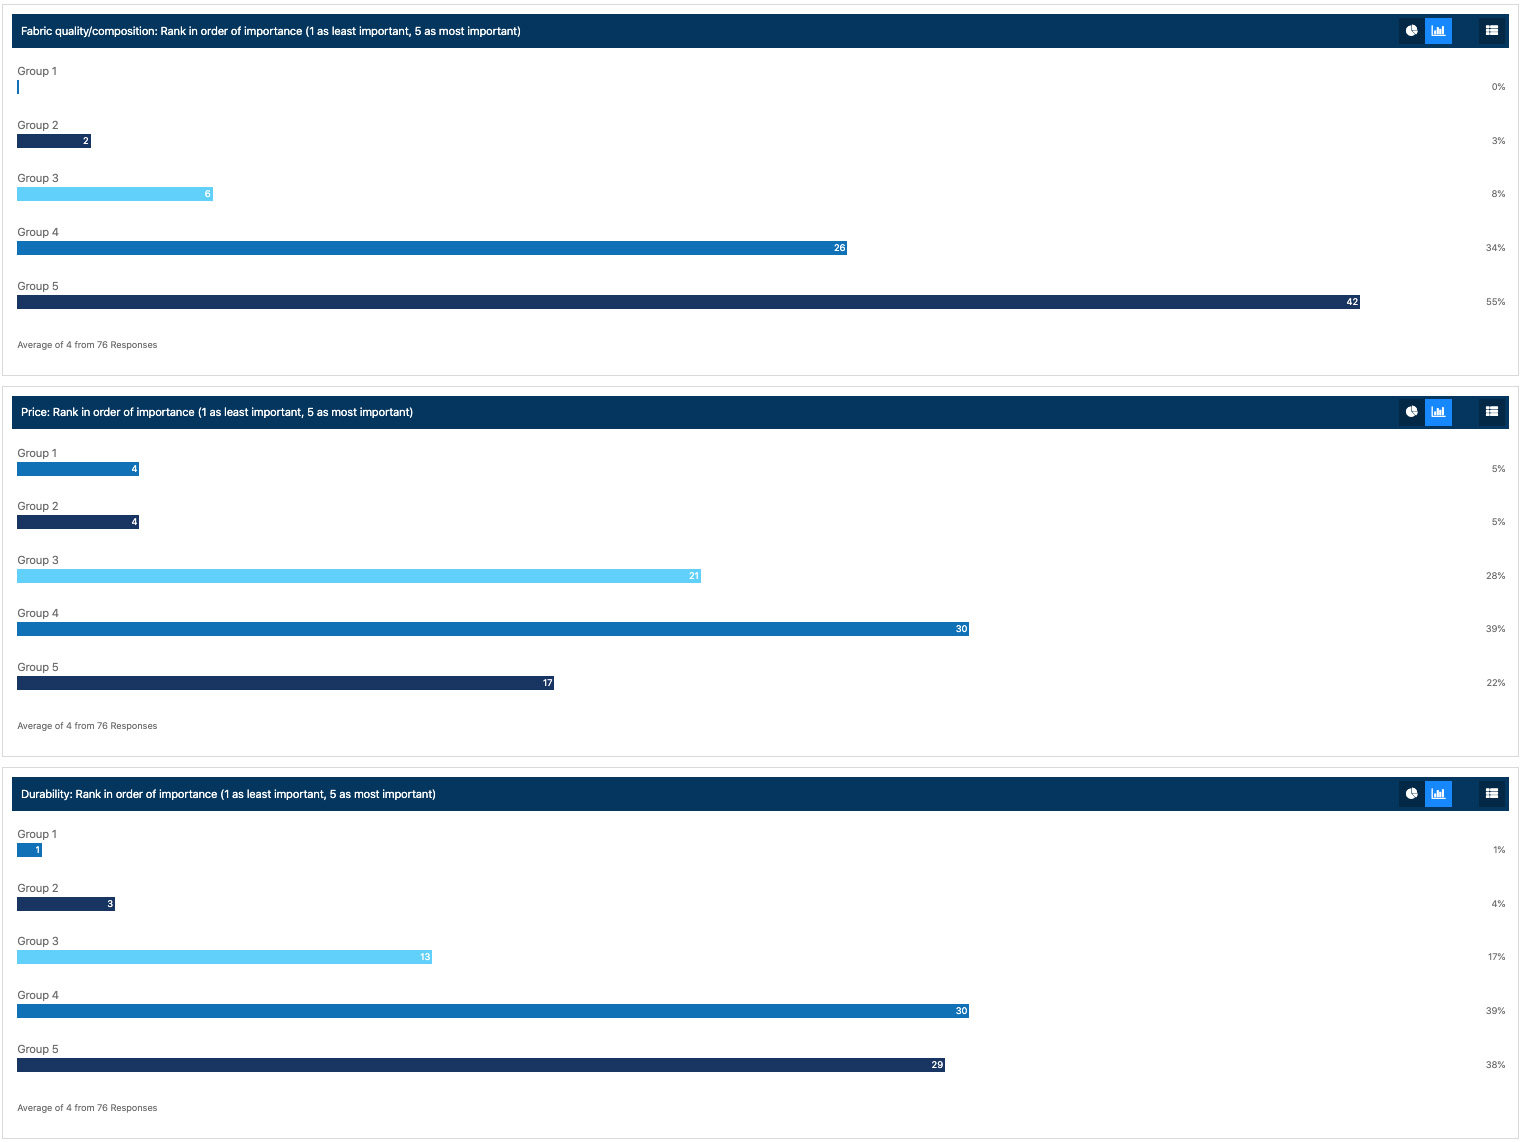
I made a survey to find out the validity of my project and the needs of the customers. For the first questions it was important to find out how widespread people are affected by symptoms of stress - as well as how this transpire's towards other symptoms such as depression and long term conditions.


All the data from the survey can be viewed here:
On reflection, the survey definitely highlighted the profound impact of stress on everybody who participated. This means my project has a big potential to help a huge market of people. It is very helpful to determine my customer through this. I would say the customer could be any one of these participants - a young professional, most likely a city dweller with a high pressure job. Though currently, "high pressure" is more widely spread due to societal cause and effects. It's difficult to crystalise an exact example of the individual customer because of the general consensus of societal disruption. In terms of the physical outcome of what I want to achieve though, the physical and aesthetical development makes a firmer determination for the exact individual. For sure, developing a lingerie piece is predominantly marketed for females, however this will be an exciting challenge to compromise in order to avoid this restriction.
market research
I looked at different sports/lingerie styles to develop my designs. It's useful to explore existing pieces in the market to consider where I would place my idea in the market. My ideas around a lingerie/sportswear hybrid embody wellness, comfort and healing aesthetics and functionality.
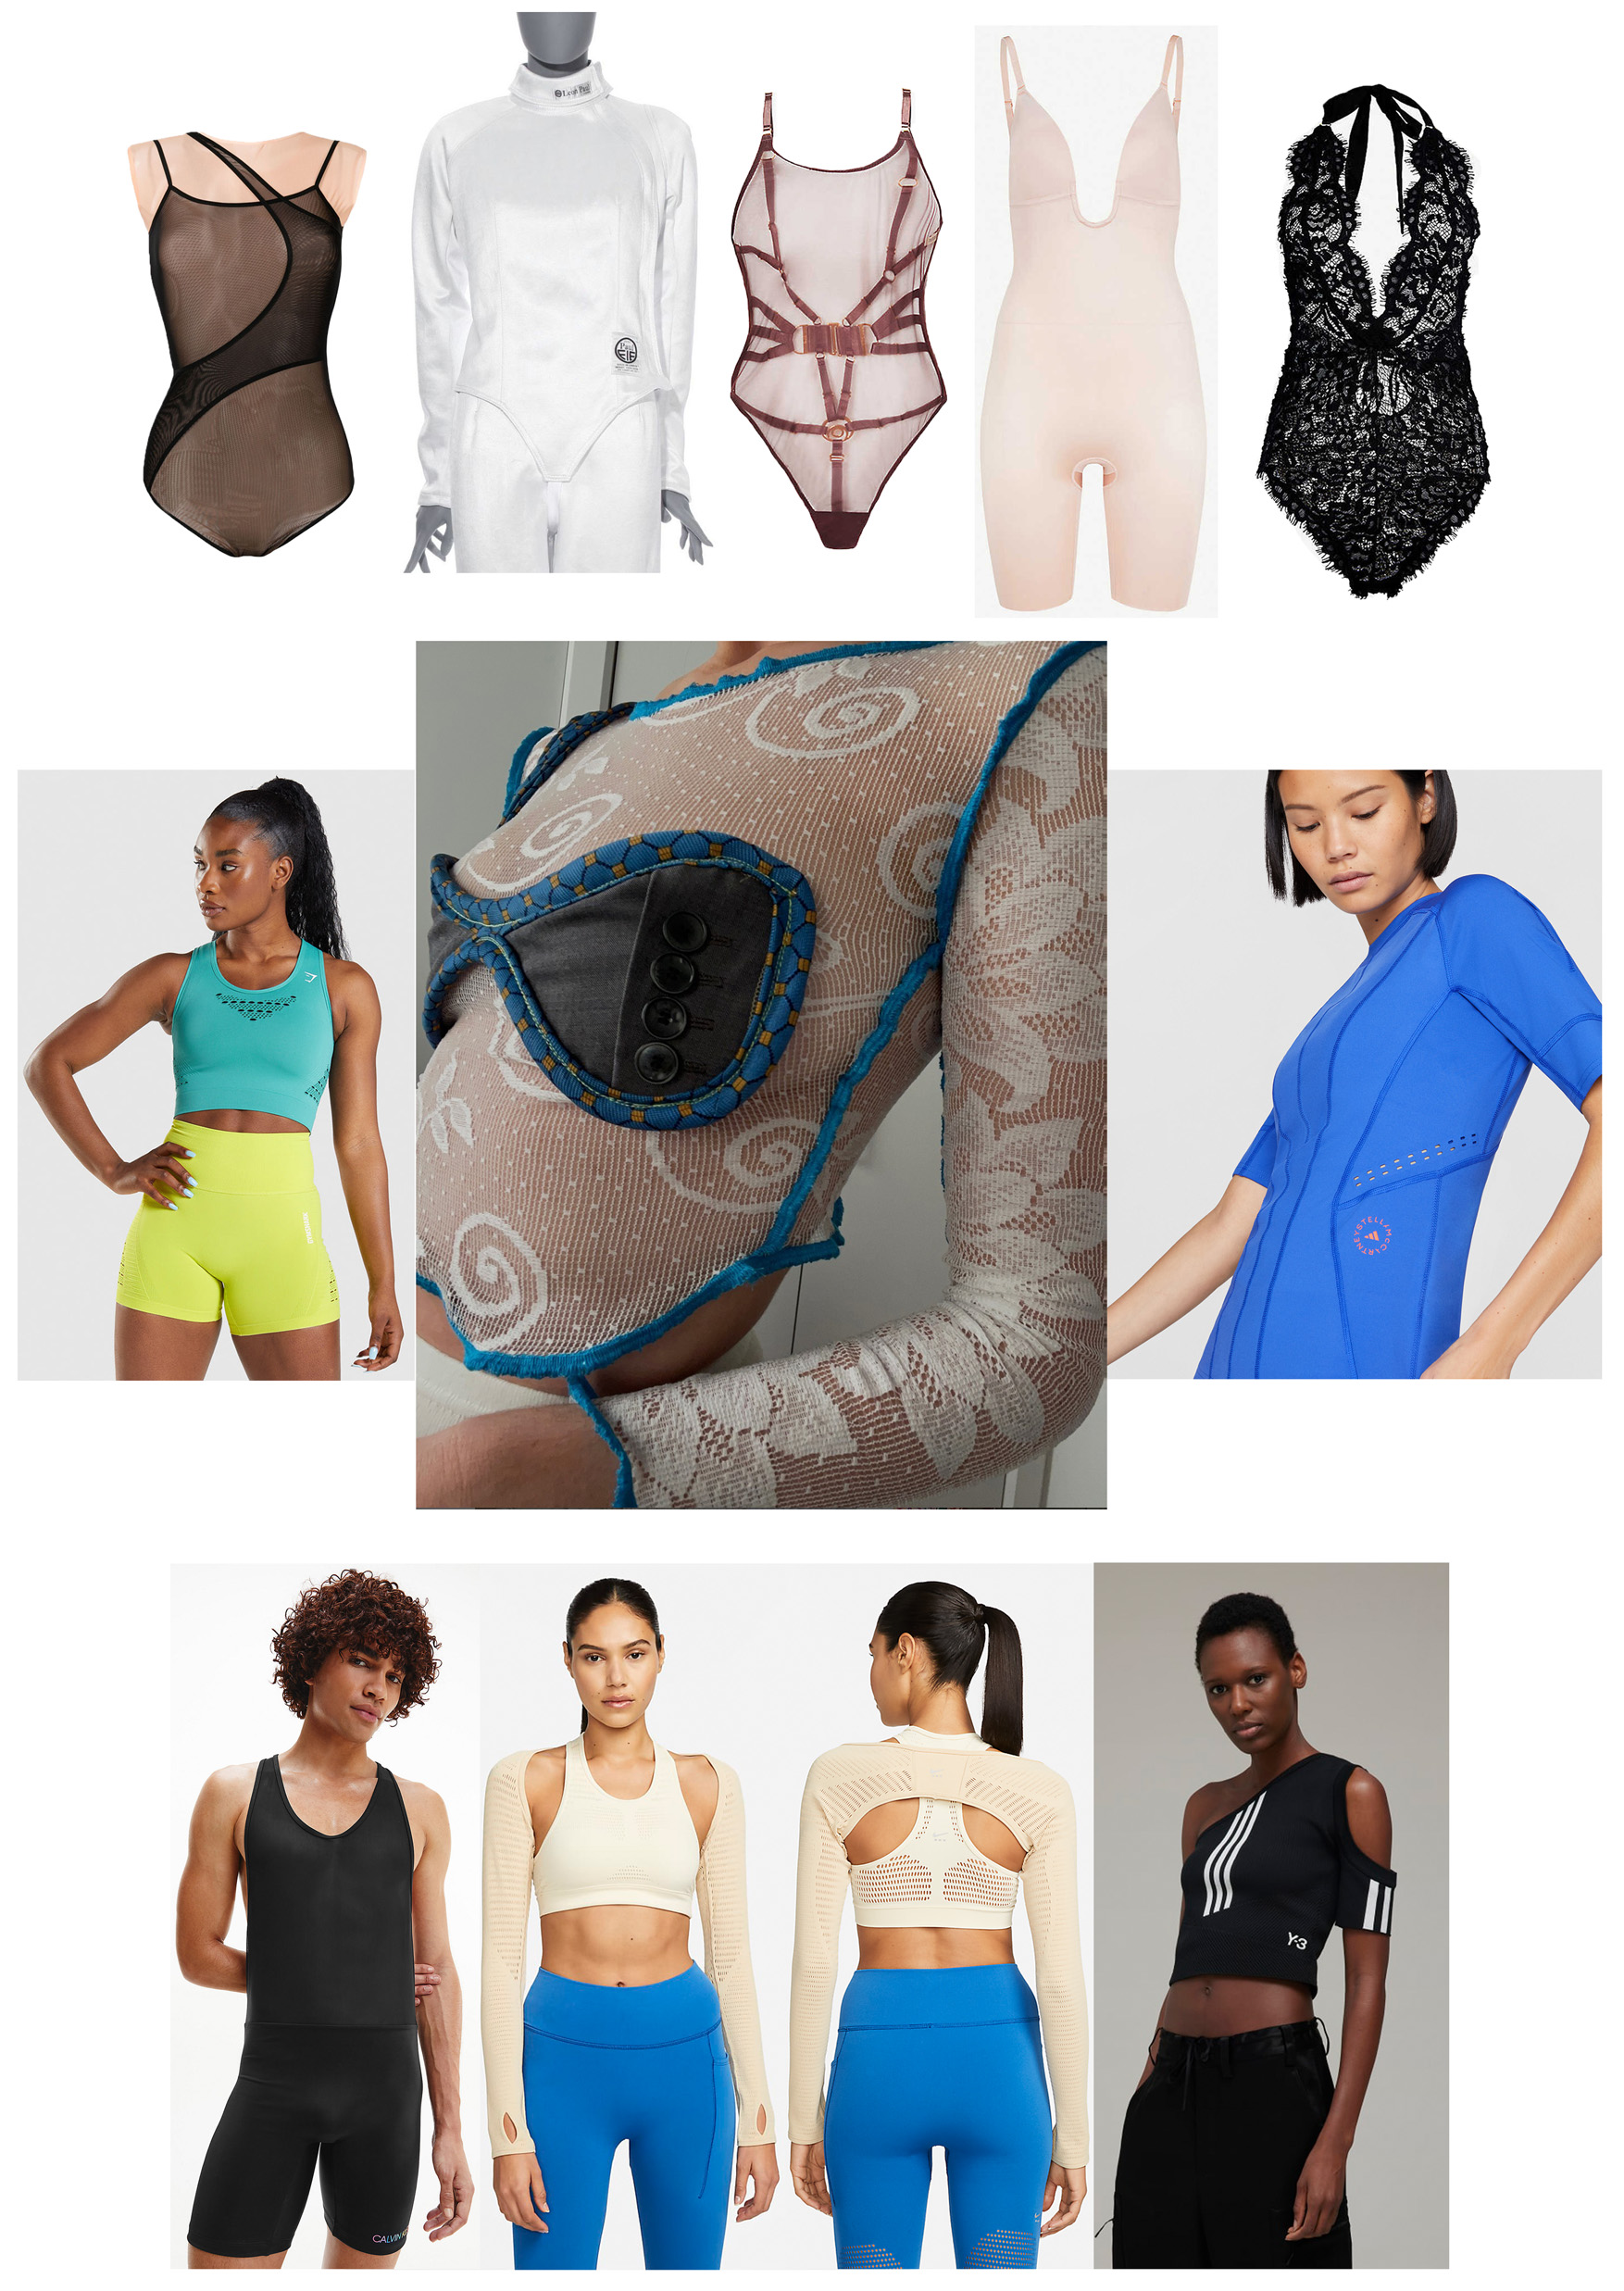
References: top-middle-bottom (left to right): Loulou; Leon Paul; Bordelle; SPANX; Bluebella; Gym Shark; Rua Carlotta; Stella McCartney; Calvin Klein; Nike x MMW; Y3
The research is a further example of the customer this project would be marketed towards - in terms of what they buy into already.
2d design
I wanted to push my design forward - keeping in mind the market research above as well as my previous sample which I show again here. I used Illustrator to work on this development:
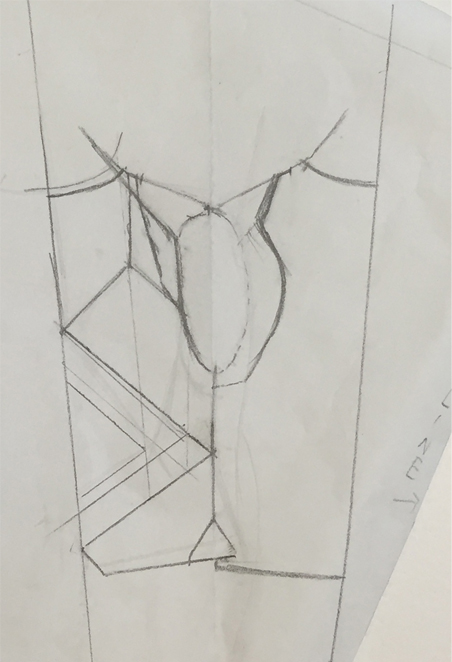
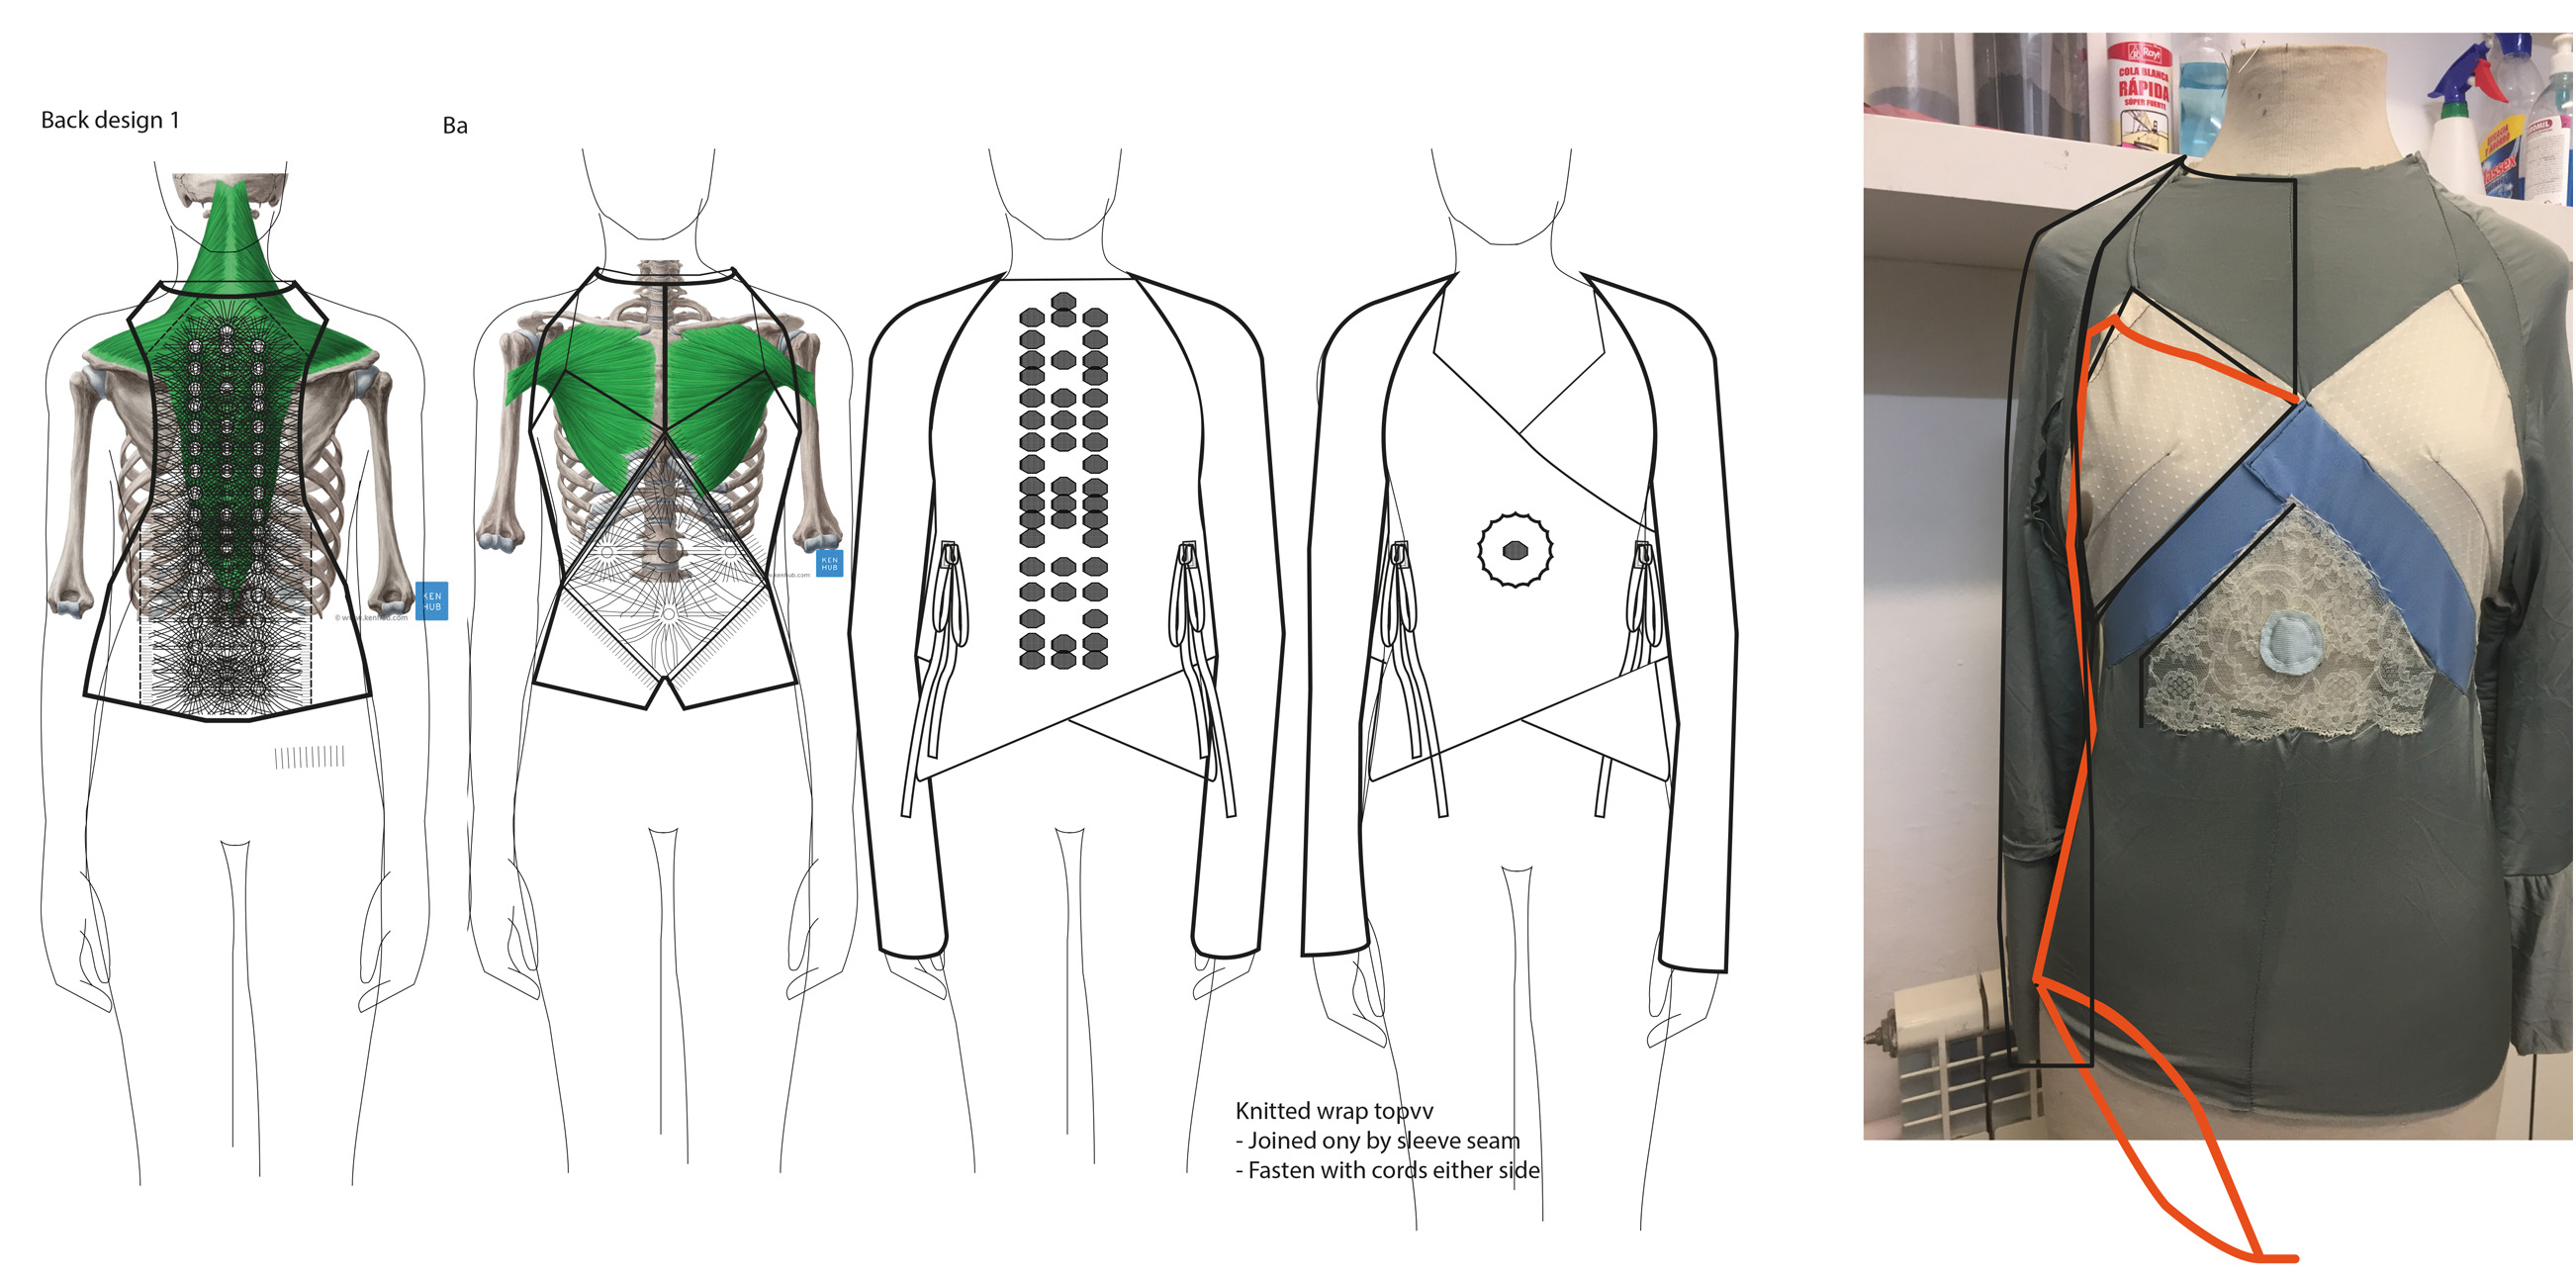
I was interested in designing specifically referencing the trapezius and pectorial muscles for a human anatomy and sports focus. These design sketches also include the potential knitwear which have the pockets where beads would be inserted to press on the pressure points of the lace. Therefore these designs are a 2 piece combined function.
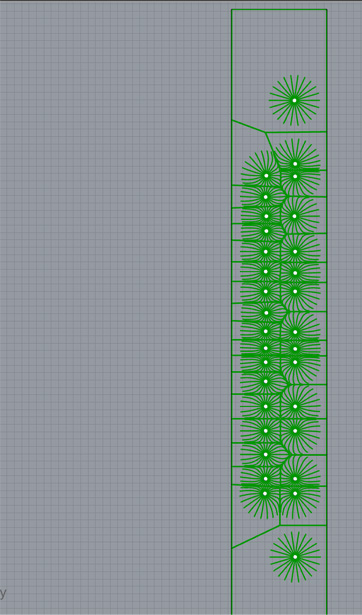
grasshopper definition
Moving on with the grasshopper definition:
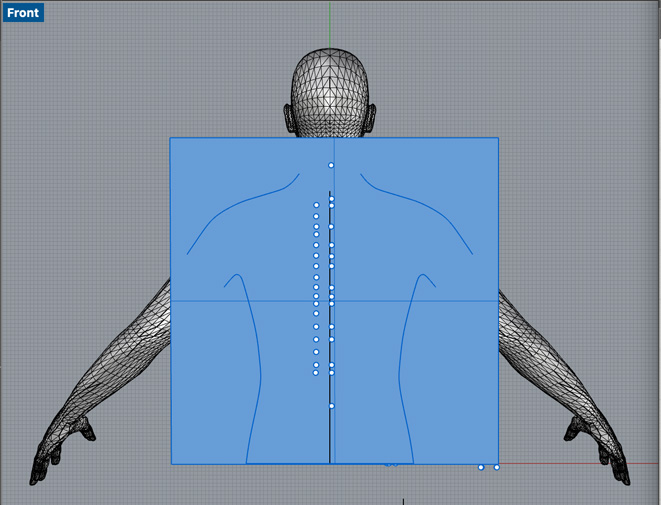
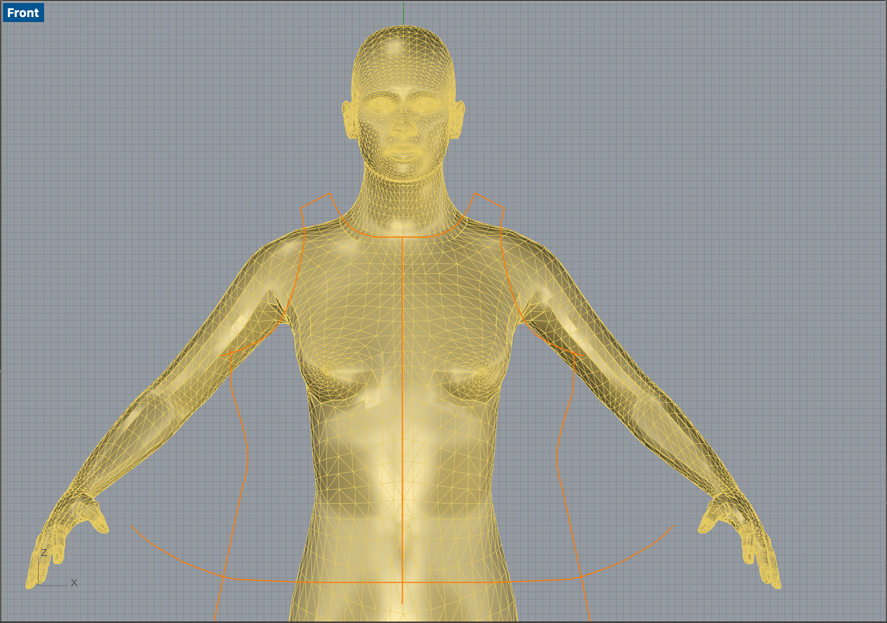
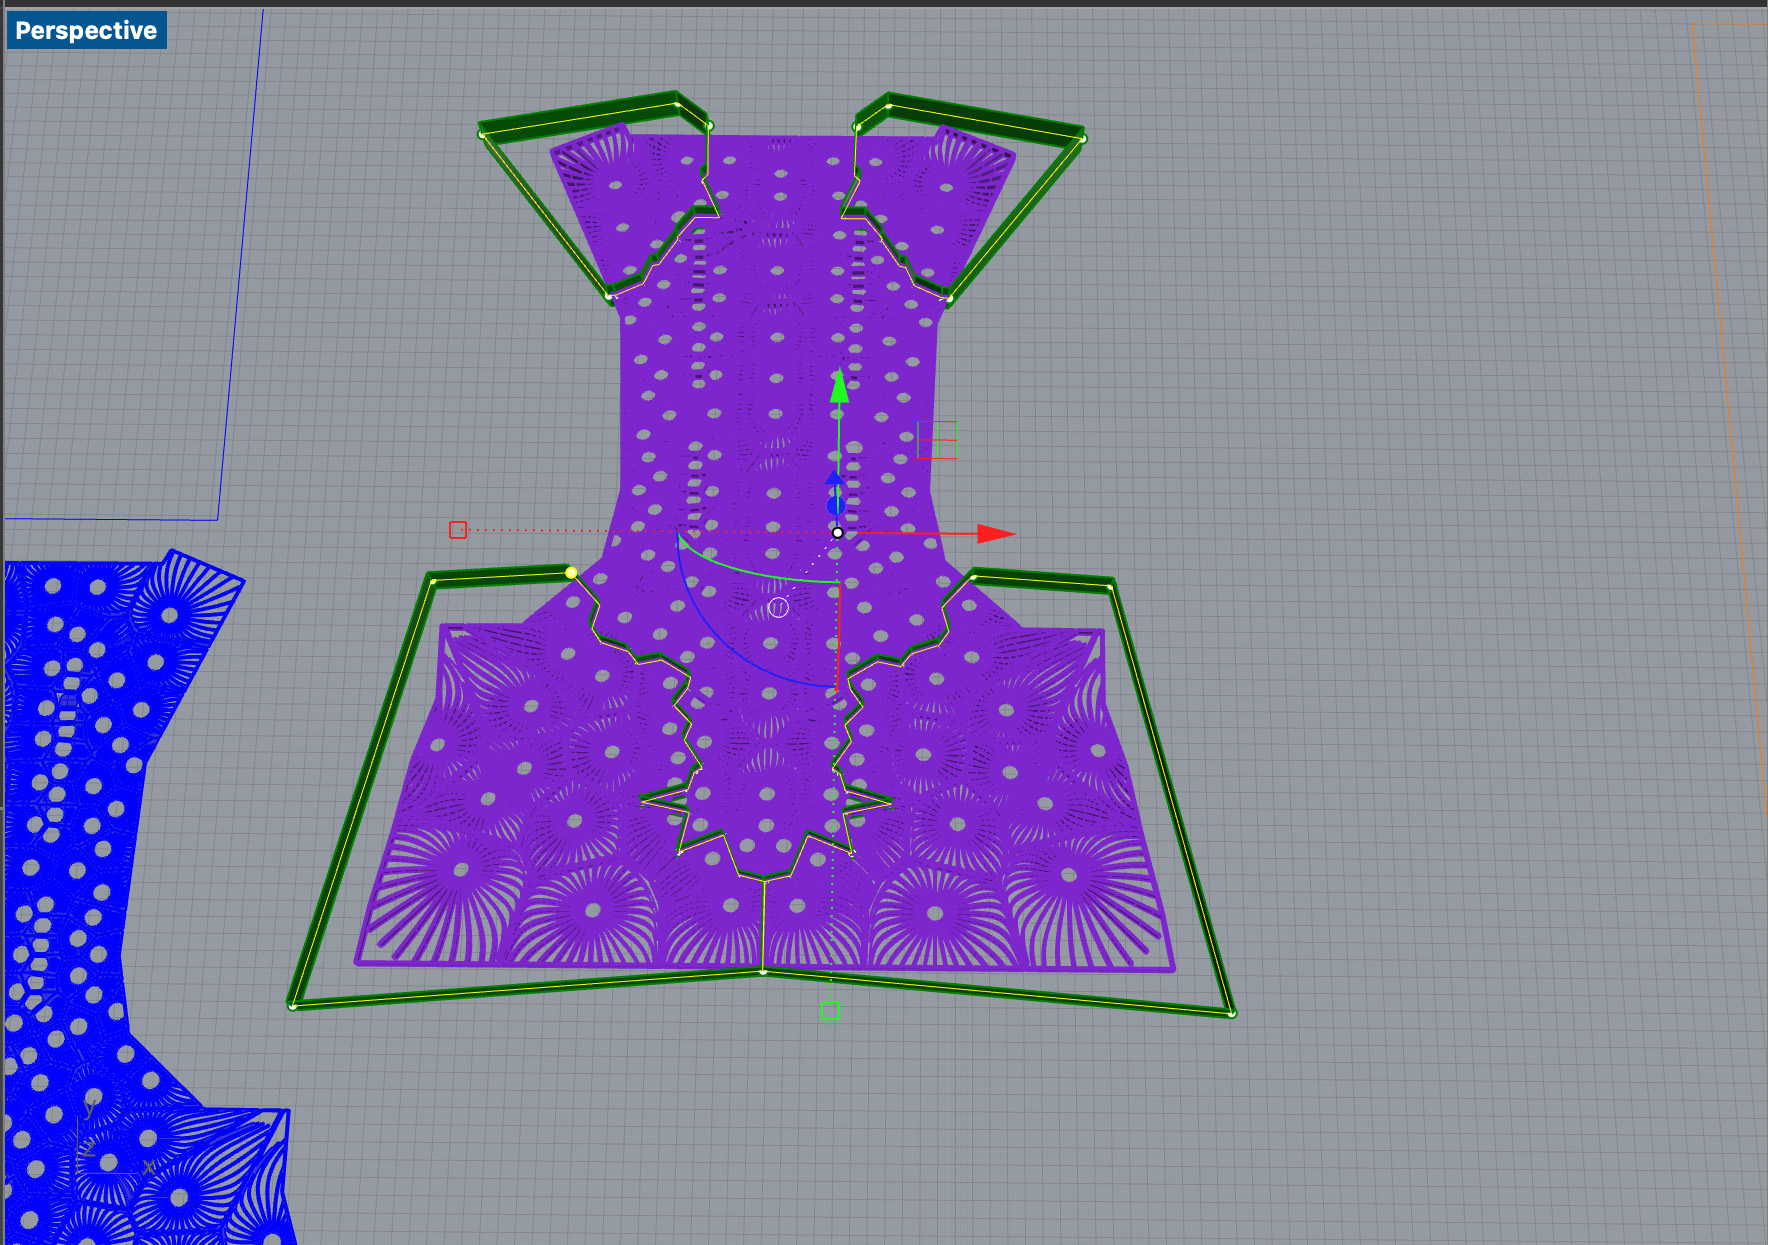
I needed to get on with 3d printing a template as a starting point for the parametric design. To do this I used Make Human to import a model with the measurements of Maud who will be my model for this piece.
template
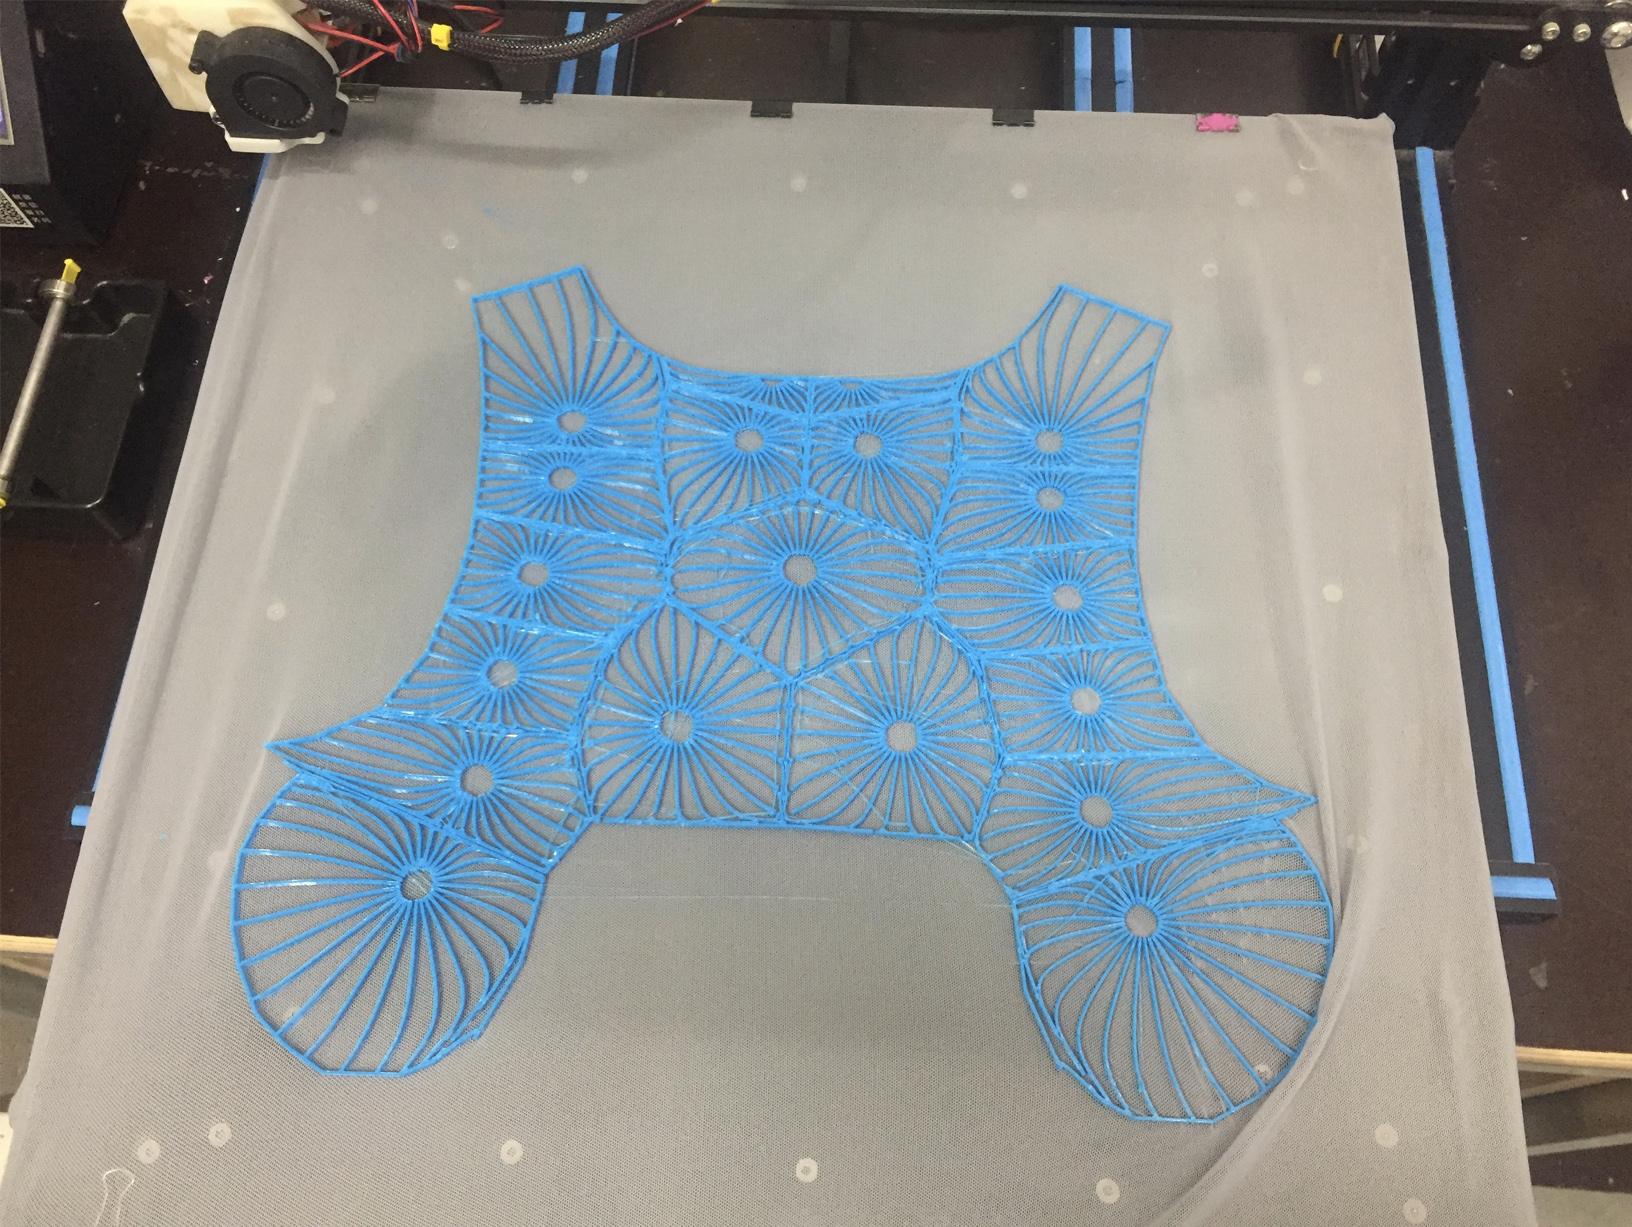
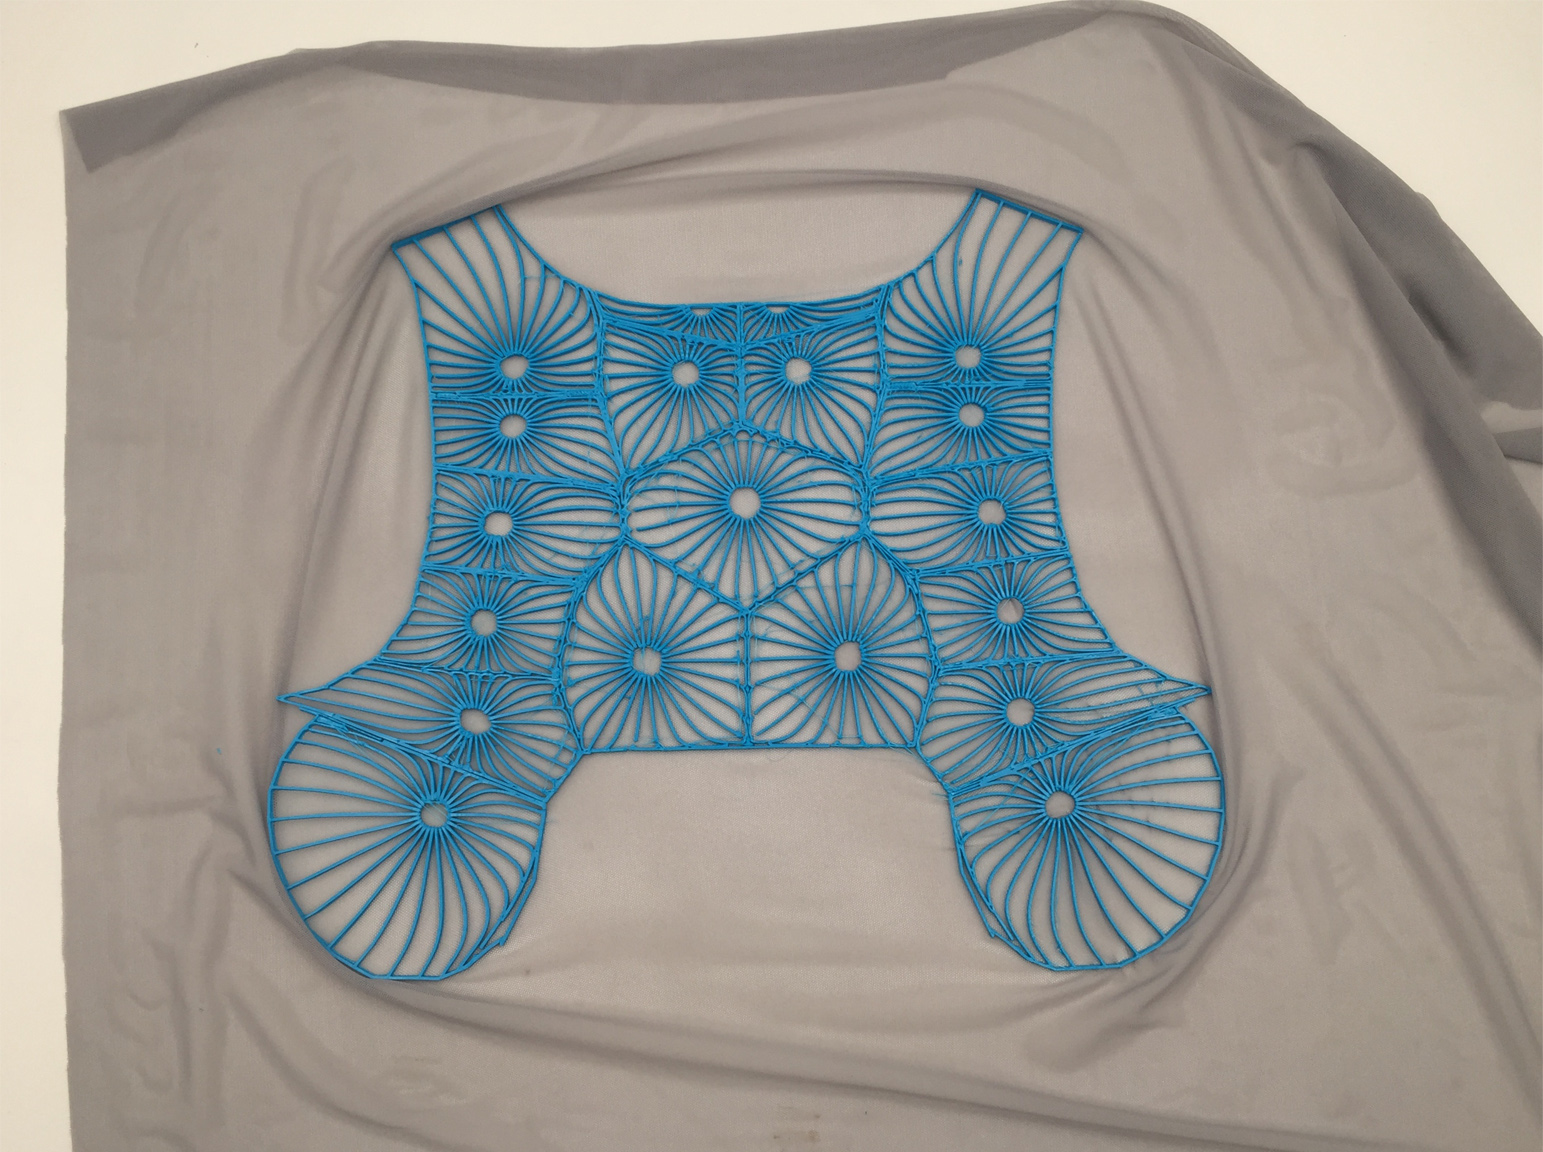
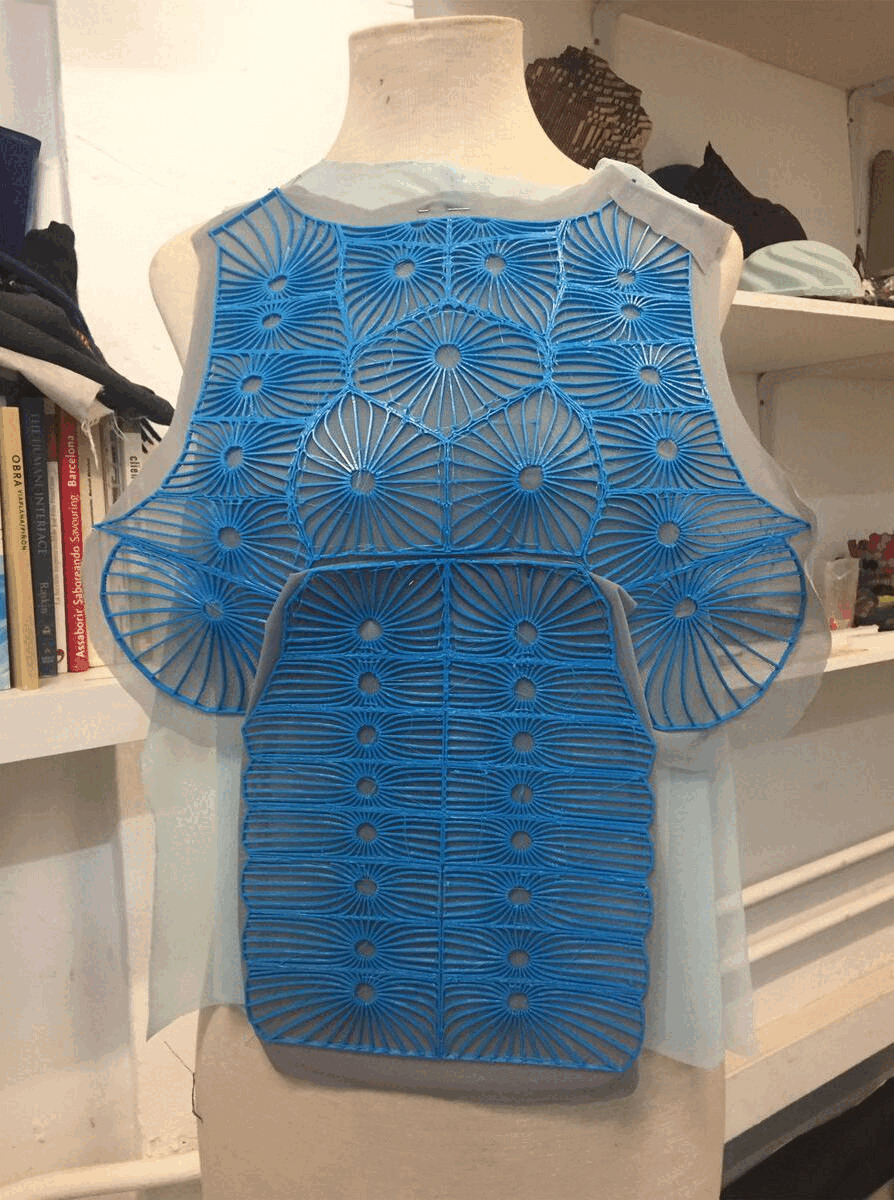
I have 3d printed this for a first template.
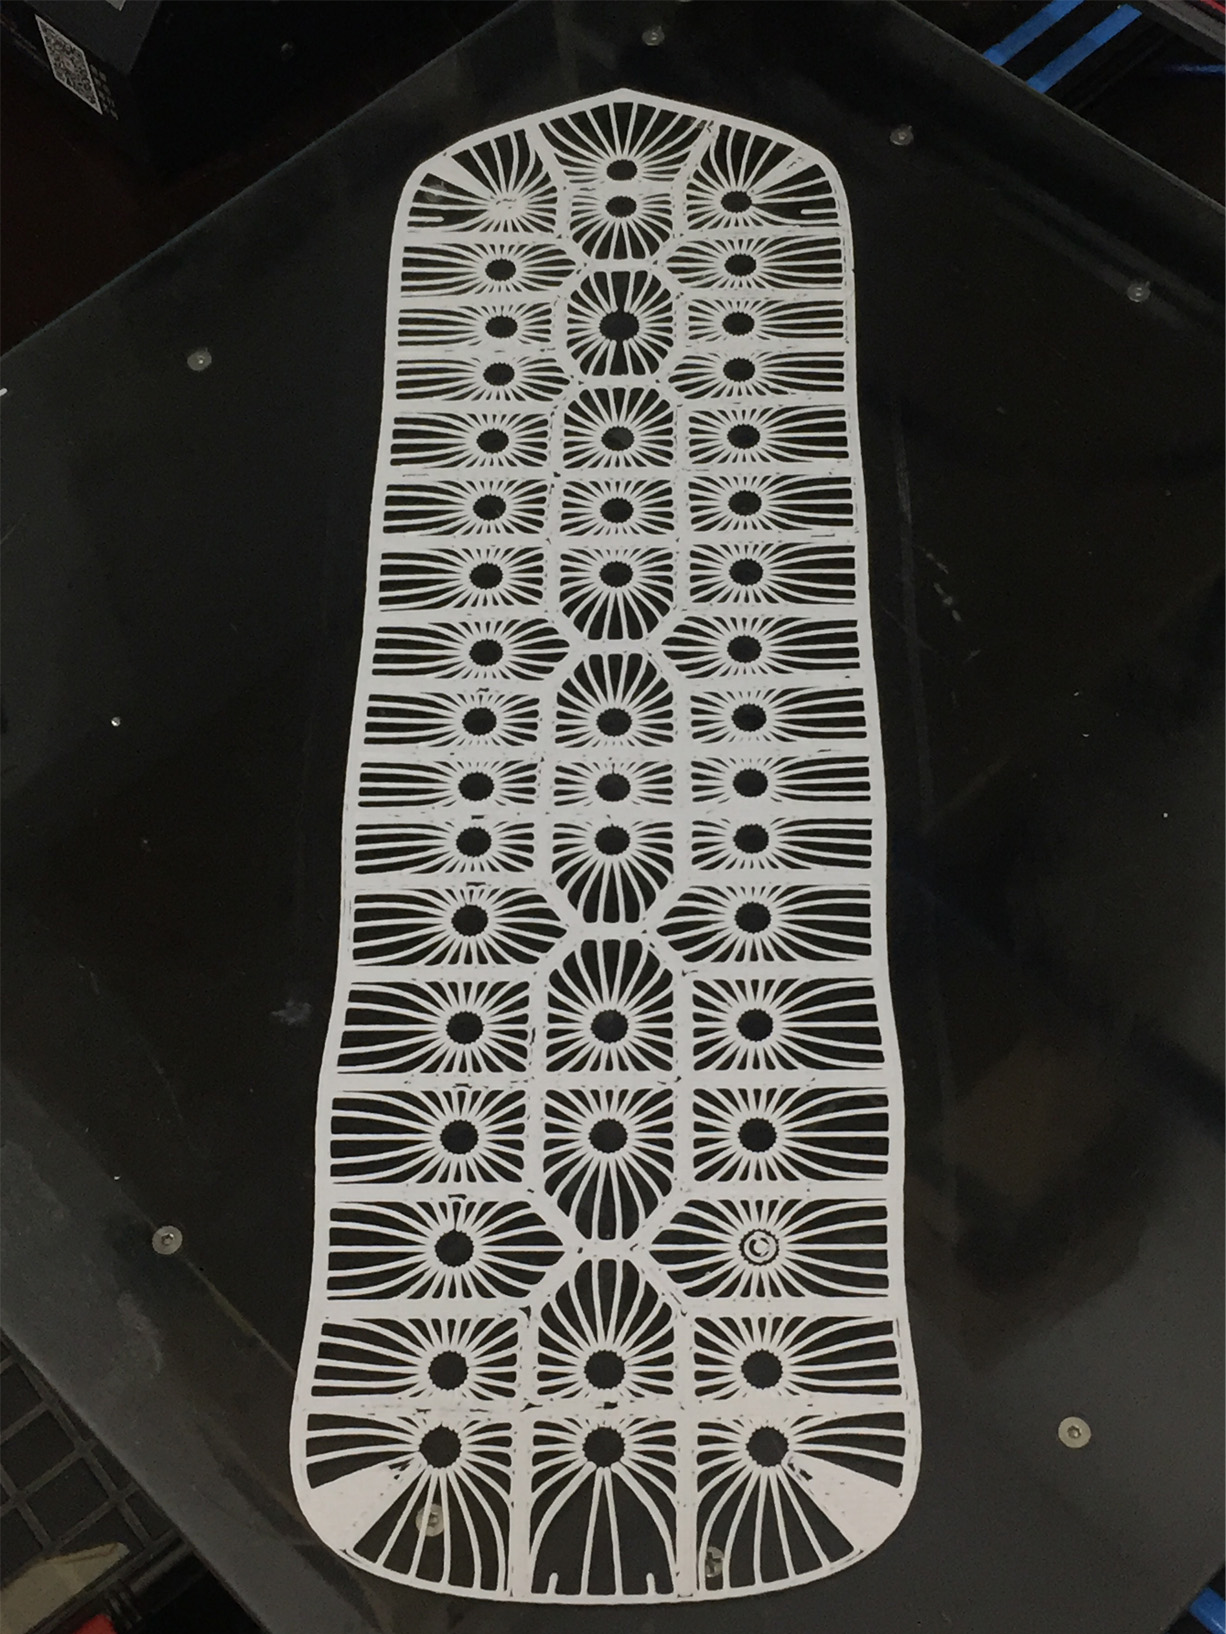
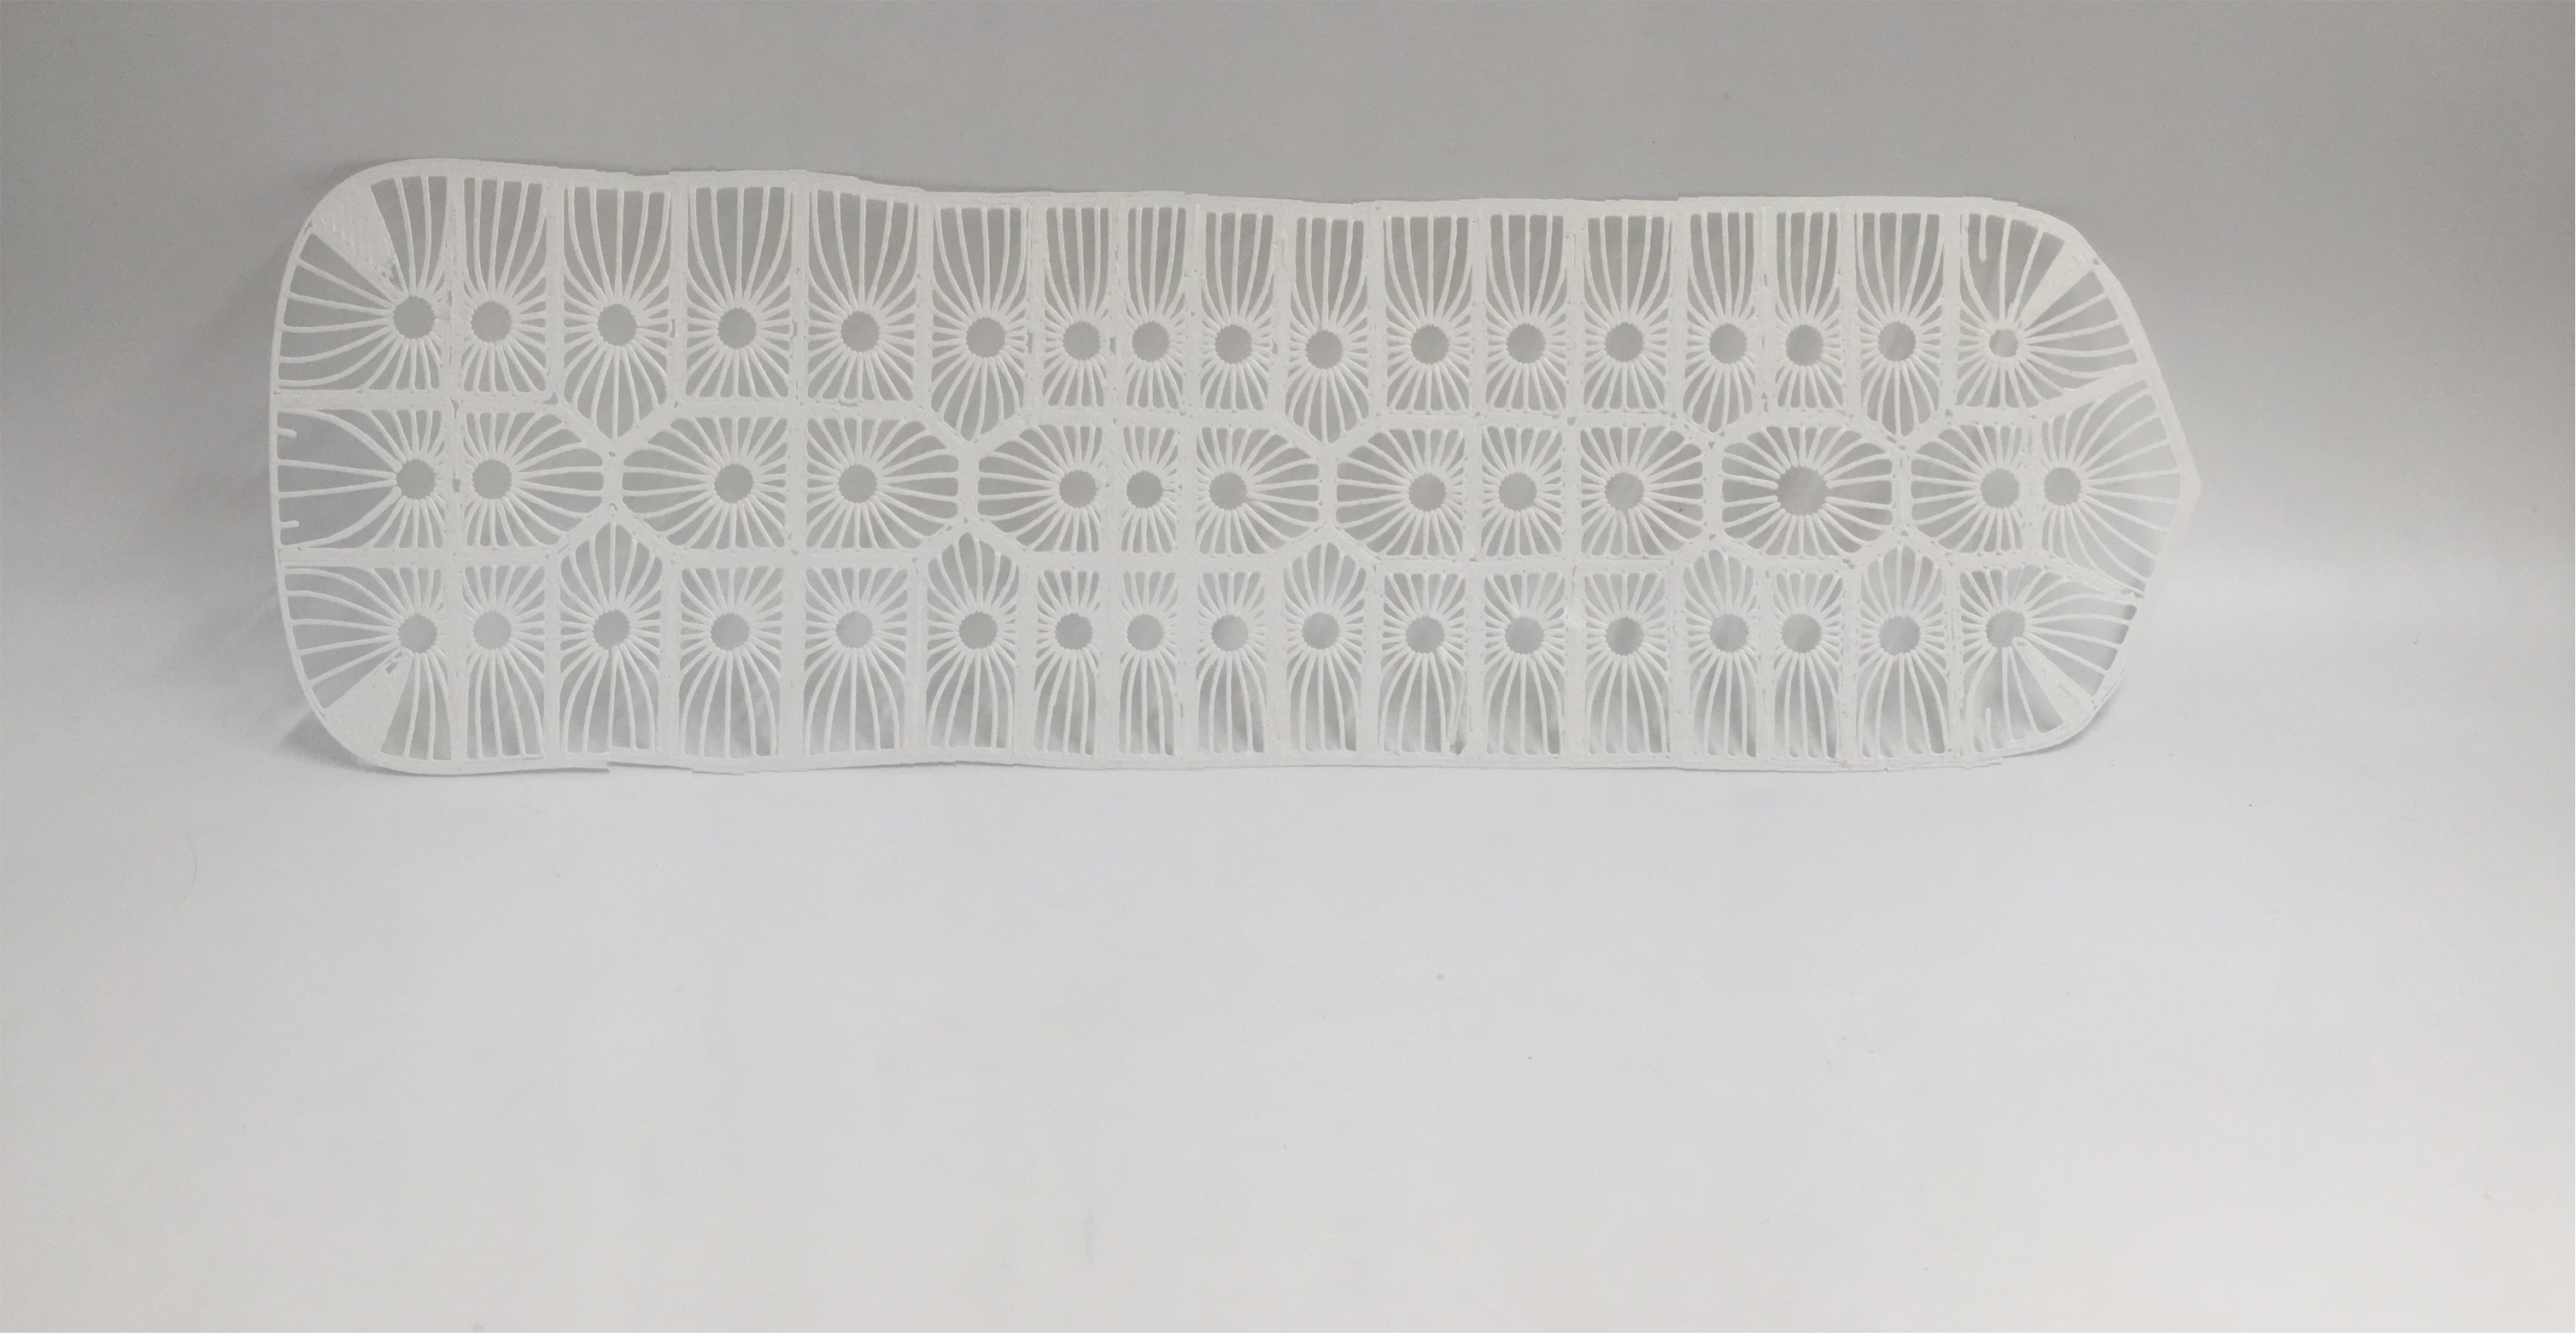
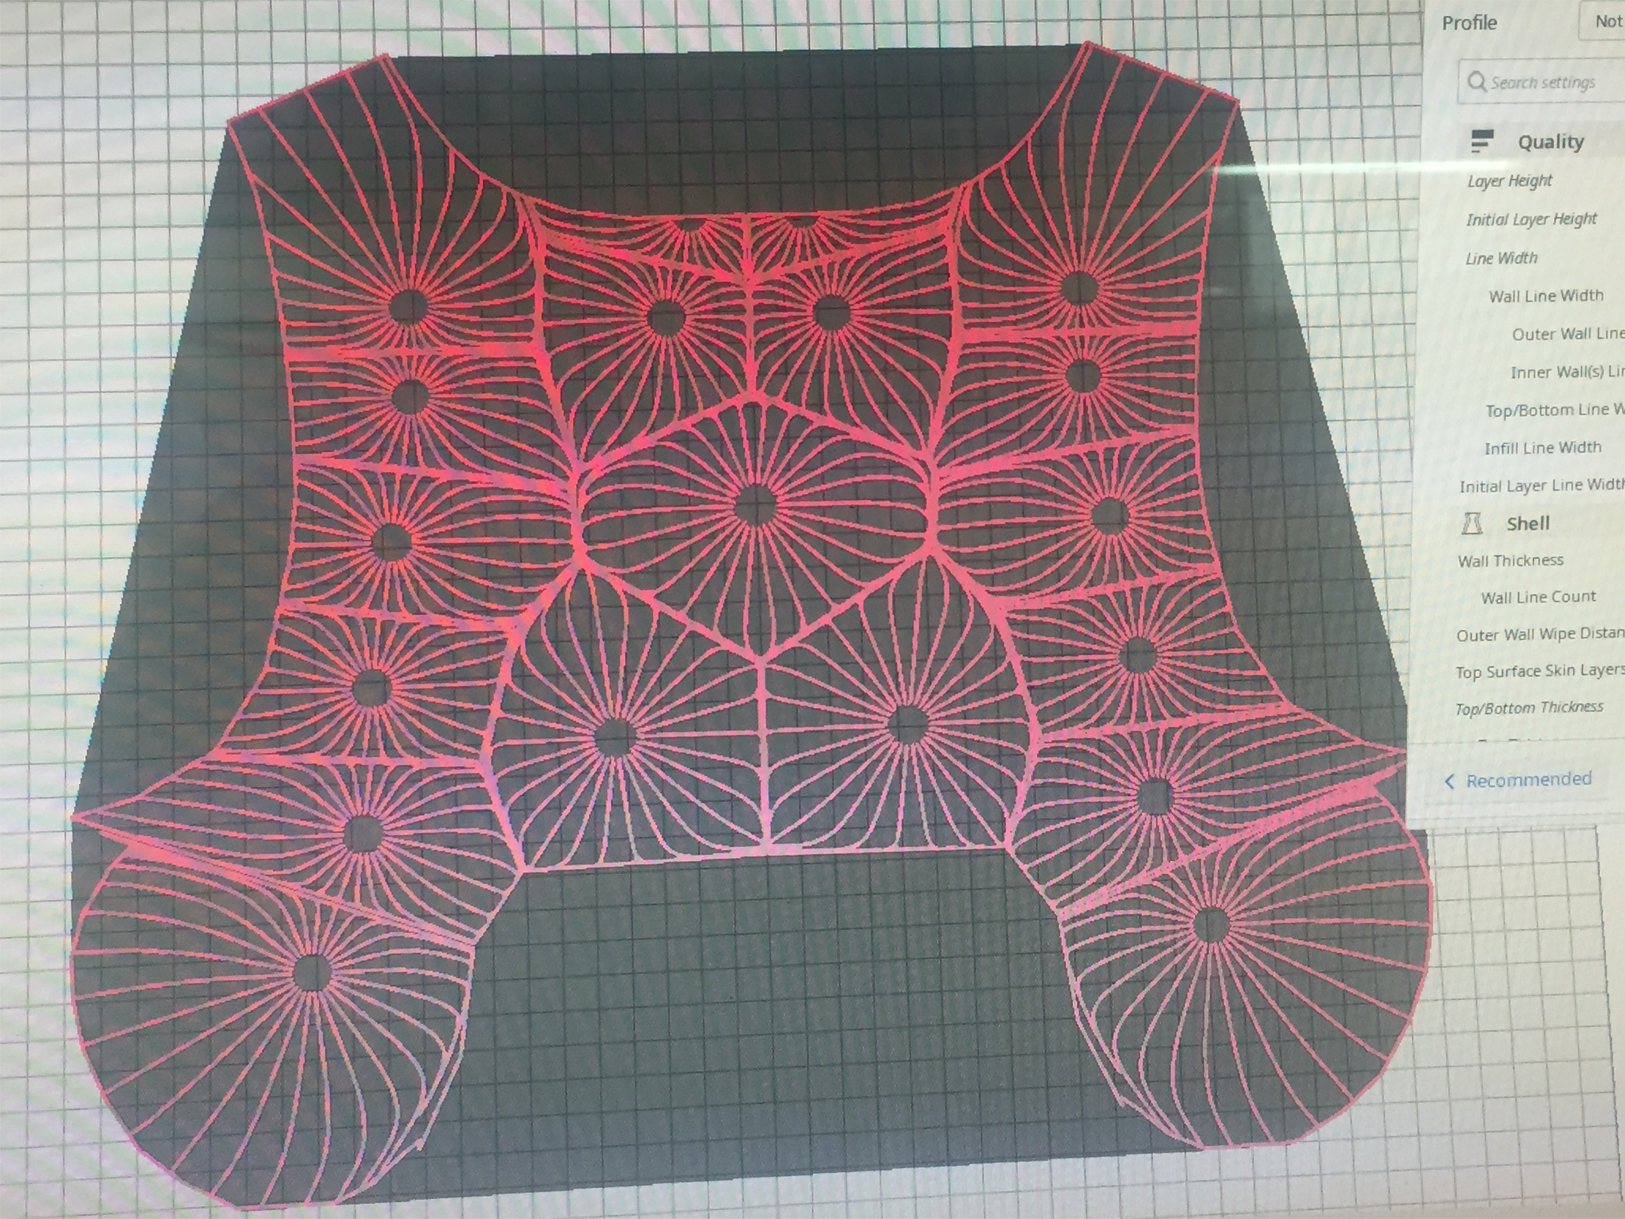
The outcome is really beautiful - though I may use a softer filament next time. The effect of the definition can easily be translate towards something lace and I'm excited to develop this further.
As you can see, the voronoi divisions around the points above don't stretch. So I will add more points to the back design so that there are more connections to the legs in the divisions. This adds to the psychedelic style because I don't want the back focus to be a panel - more an full back feature.
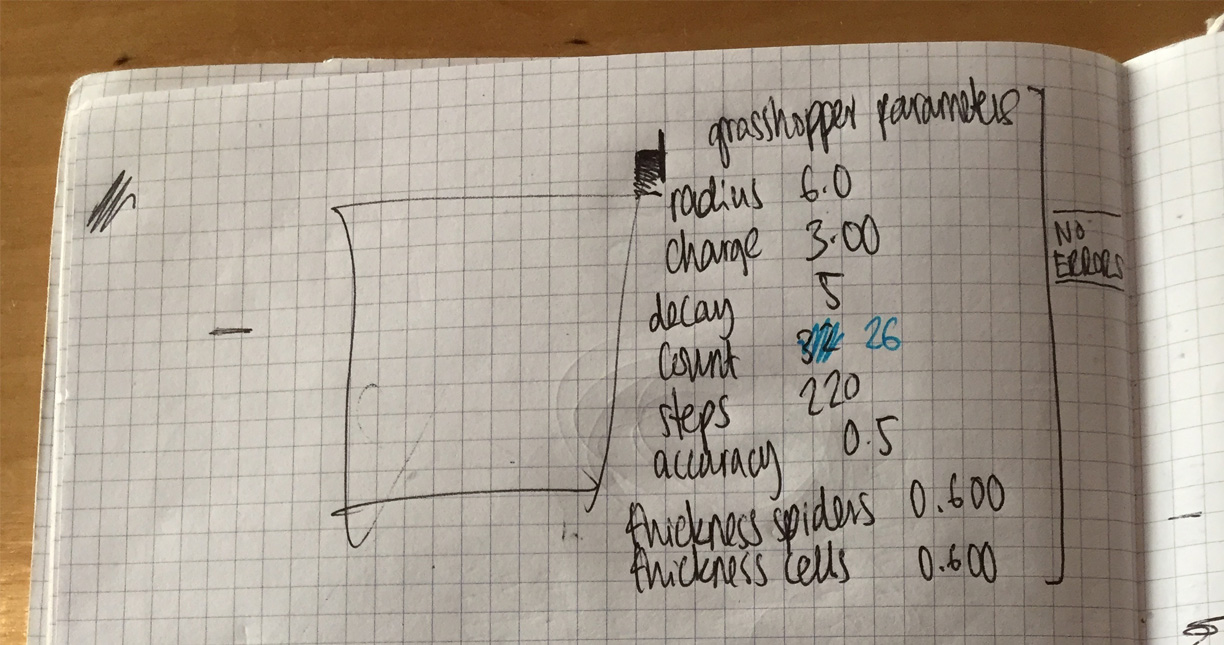
Finalising the elements of the definition is quite complex because all the components need to be considered in accordance with the others for the definition to work. For example, changing the field charge disrupts the whole definition so it cannot be baked and worked on further.
The key componenets:
- field line
- point charge (create the void or hole in the spiders)
- bb offest (bowerbird) thickens the offsets on either side
- boundary surface (uses the patterns of the garment to shape the definition within)
- voronoi process (using a square shape to divide the space into calculated points with measured distance ie. generates geometry around the points)
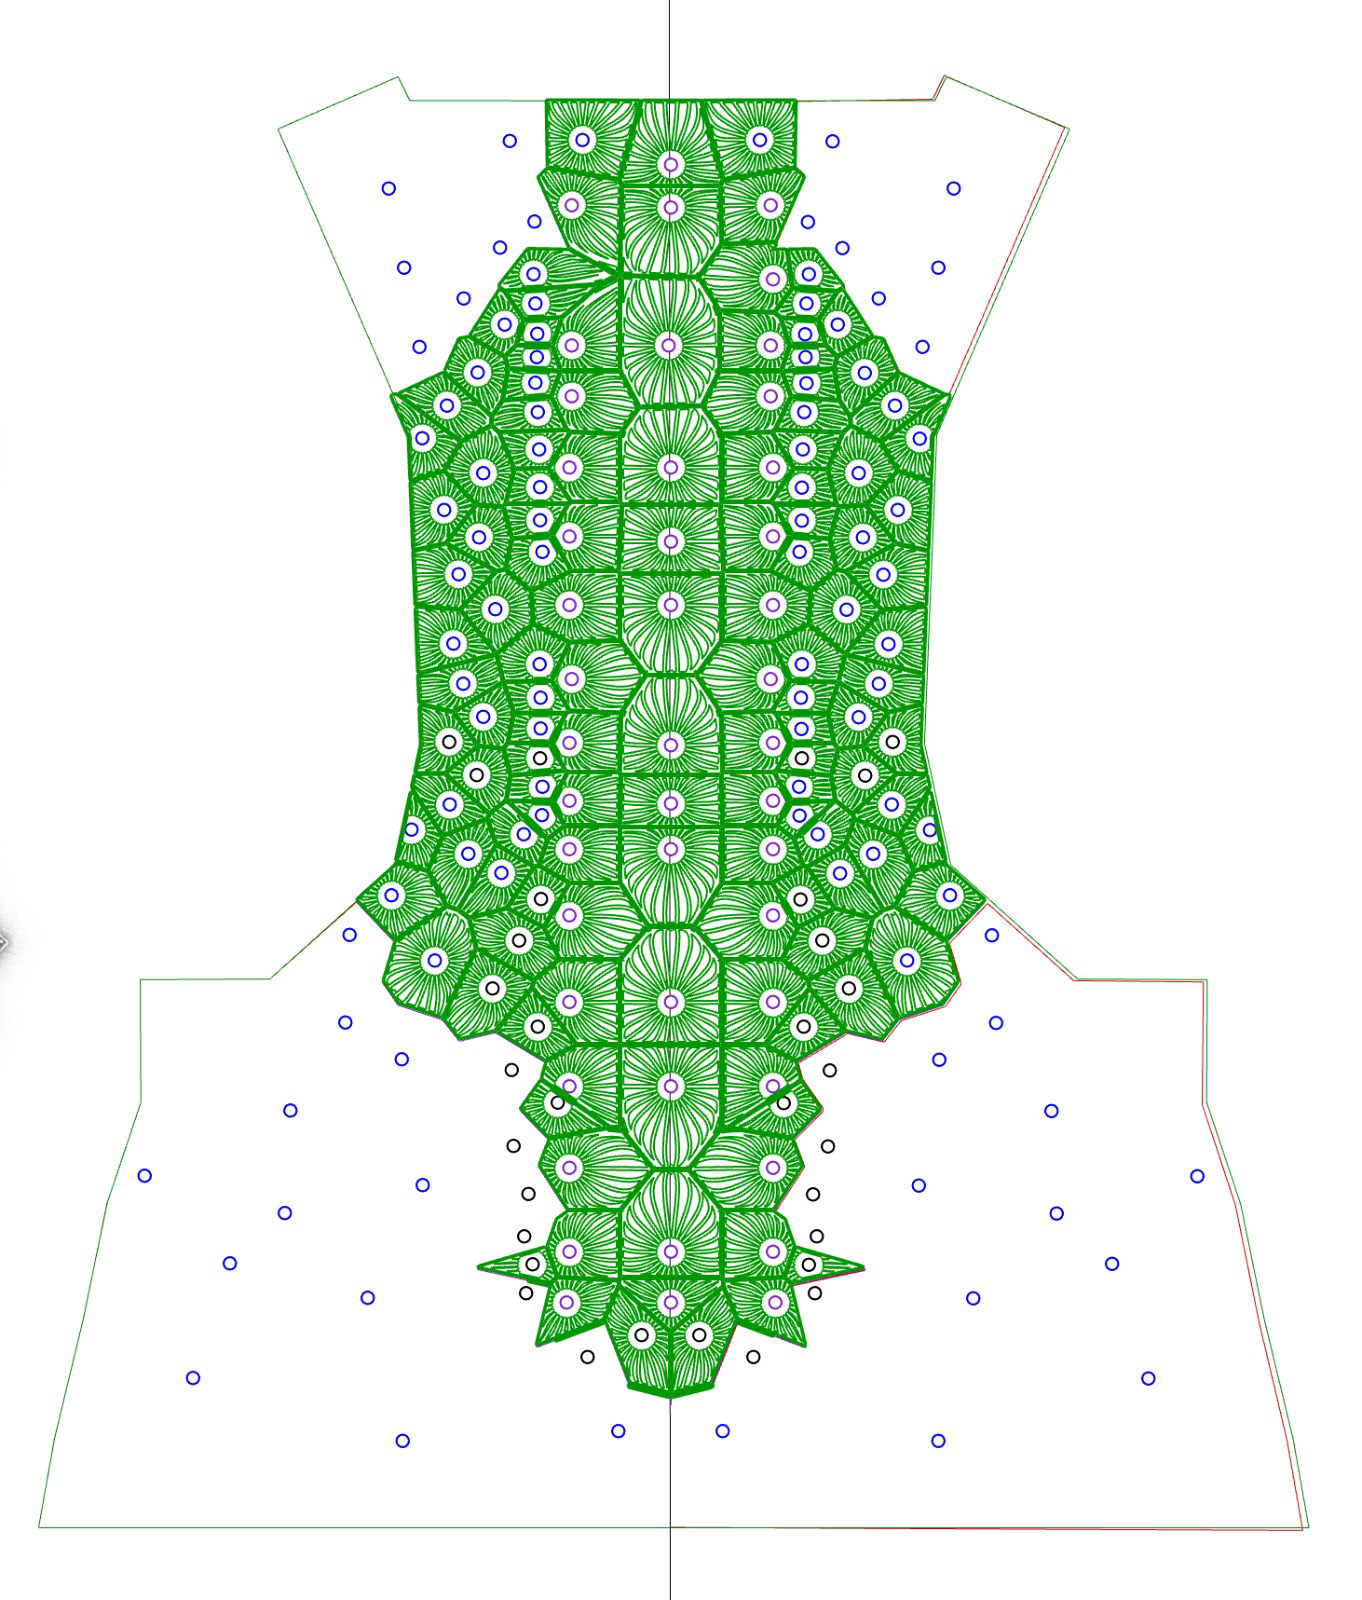
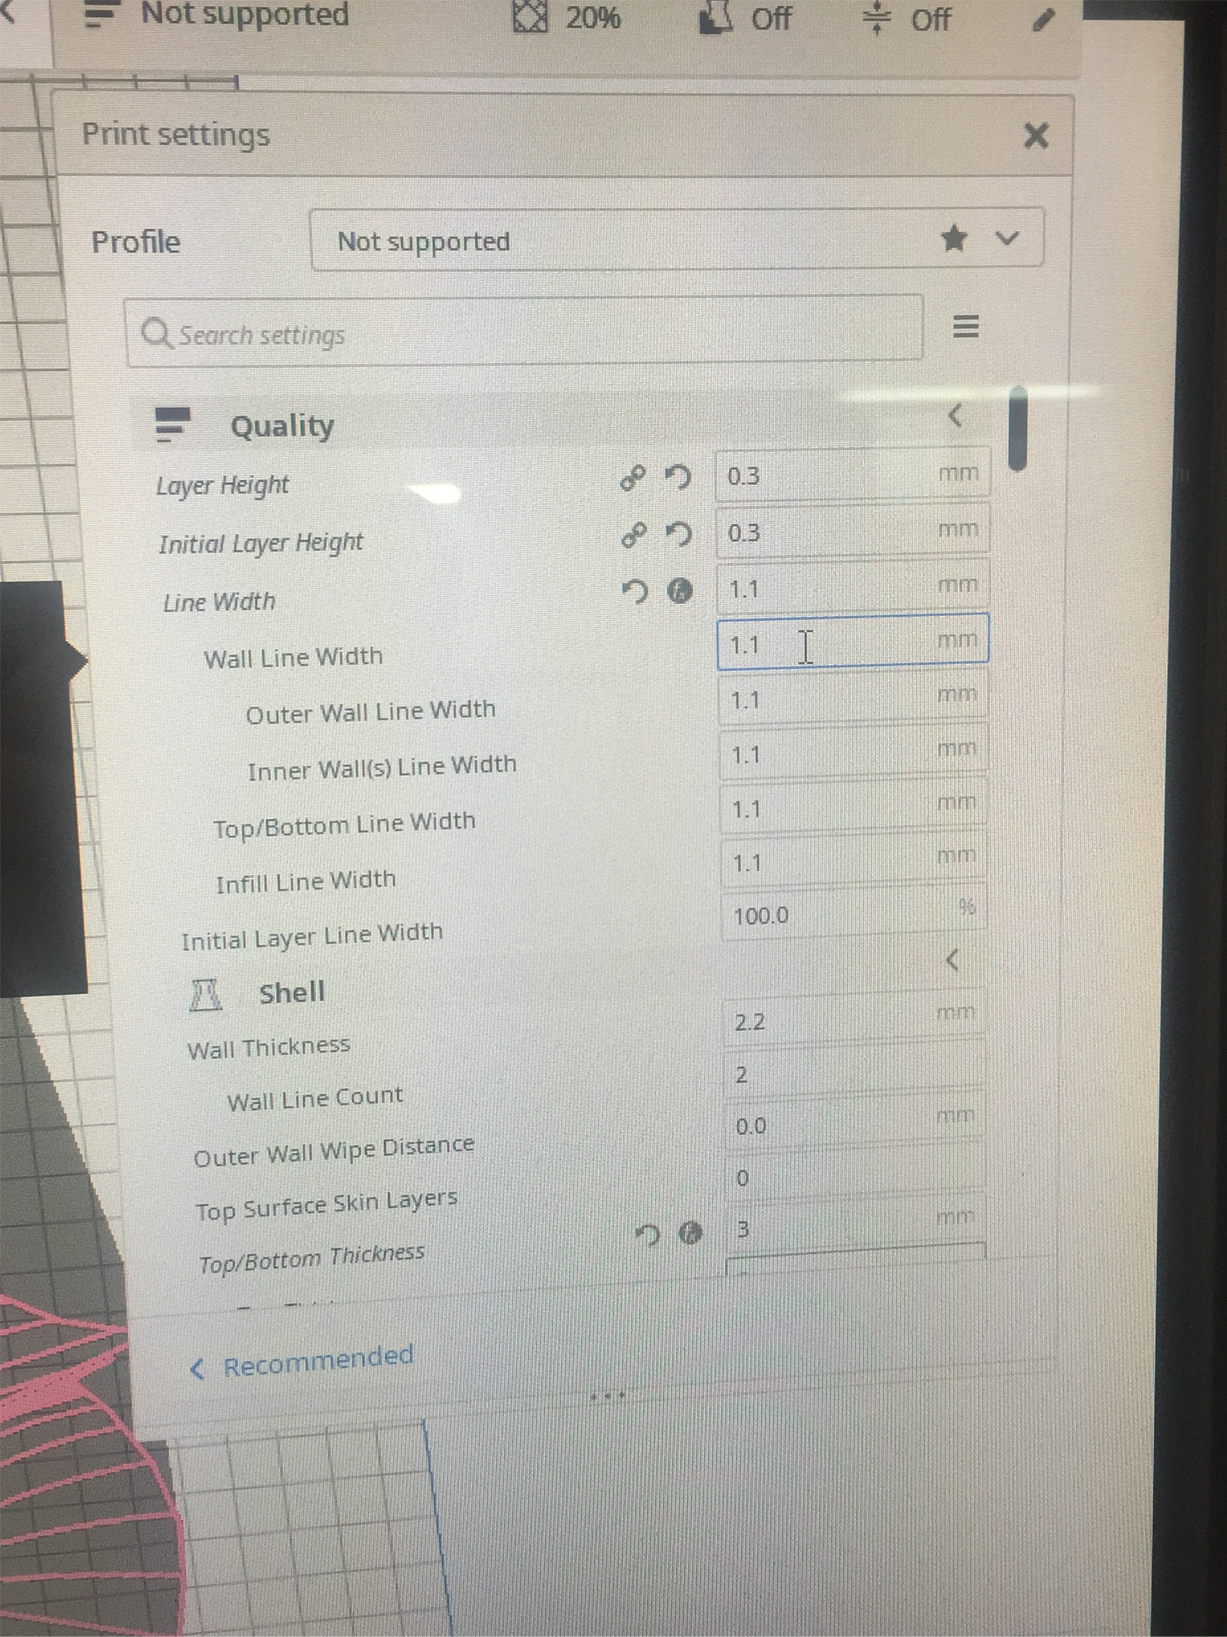
I did this small test of the design to check its compatible with the 3d printer - as you can see here it is too thick so should be changed.

Here is the finalise definition notes after realising their numbers should stay the same to prevent errors.
And the final definition:
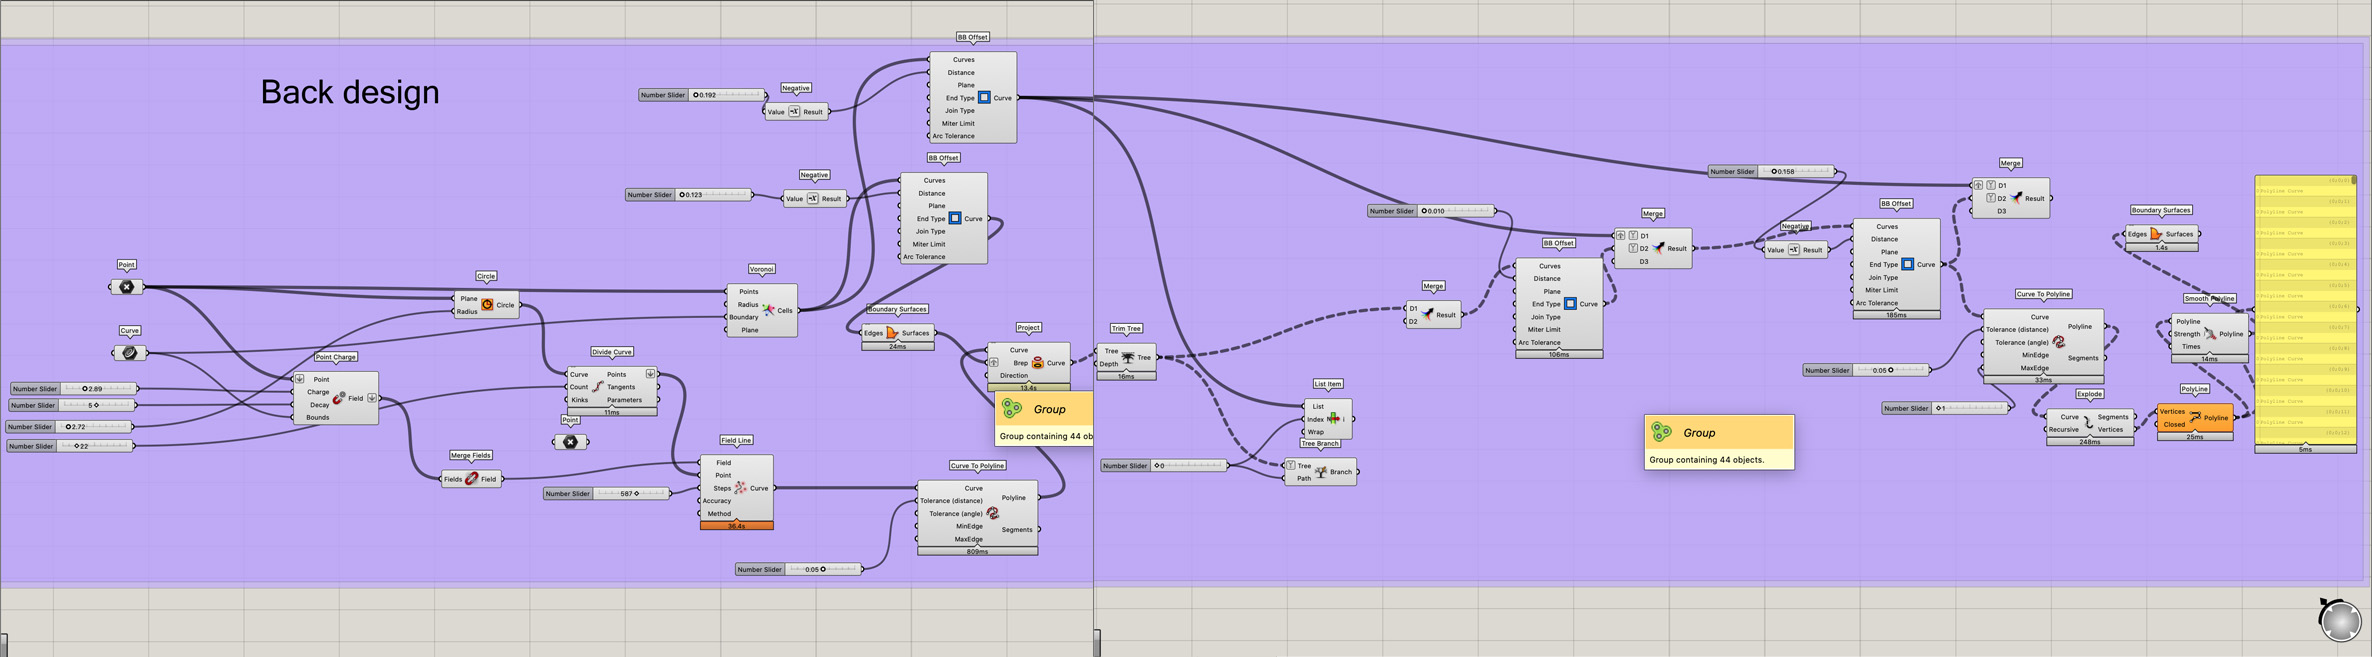
Adding more points means I will construct the back pieces together seperately.

troubleshooting
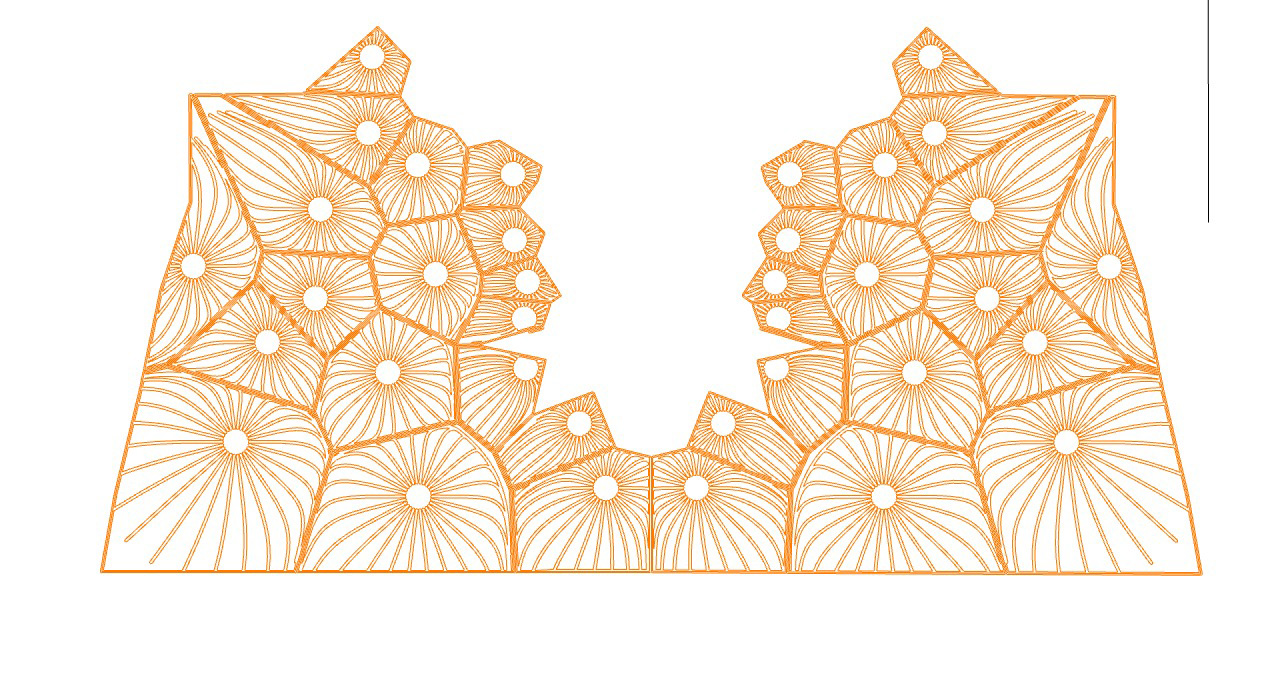
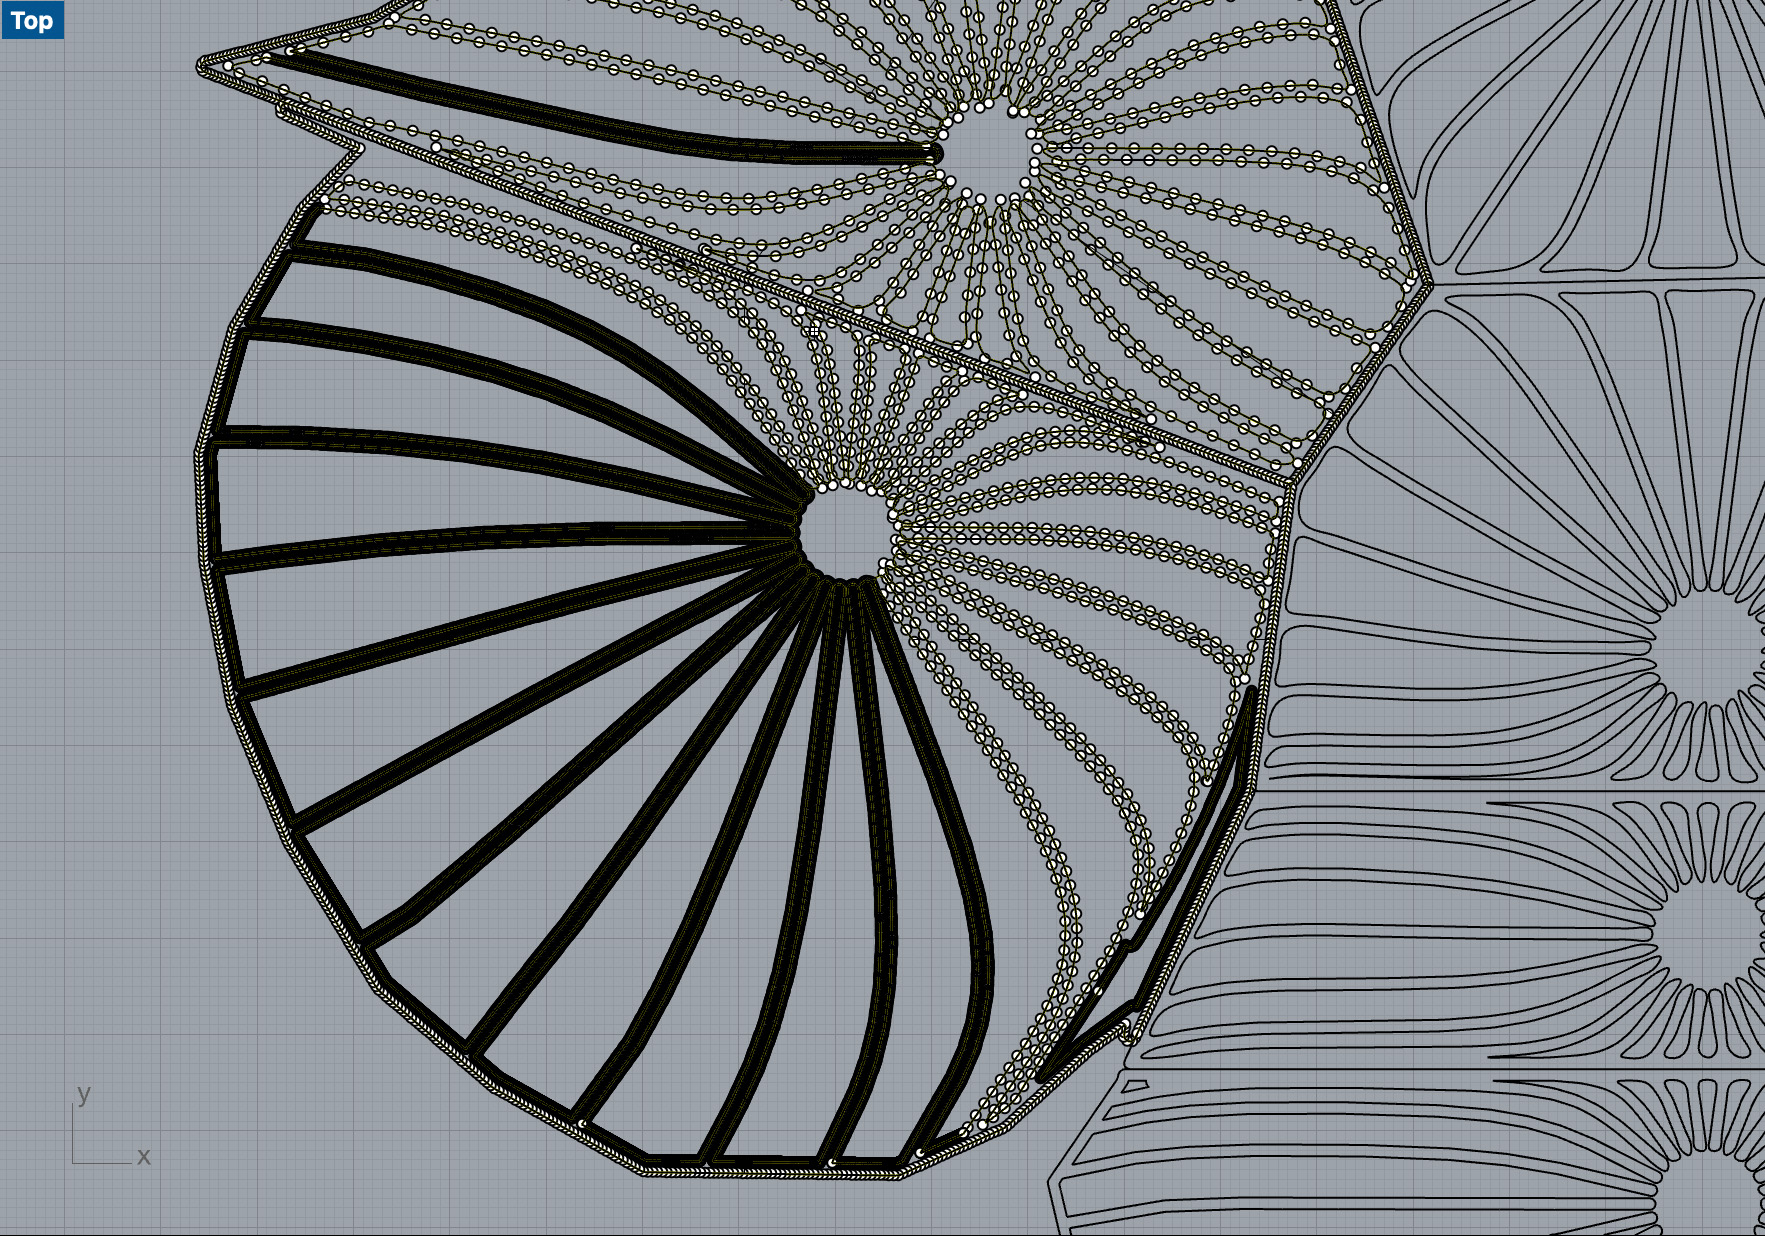
Apart from the definition in grasshopper, the design has to be prepared to be 3d printed. Also because the geometry doesn't always stretch far enough, I need to extend the specific legs manually.
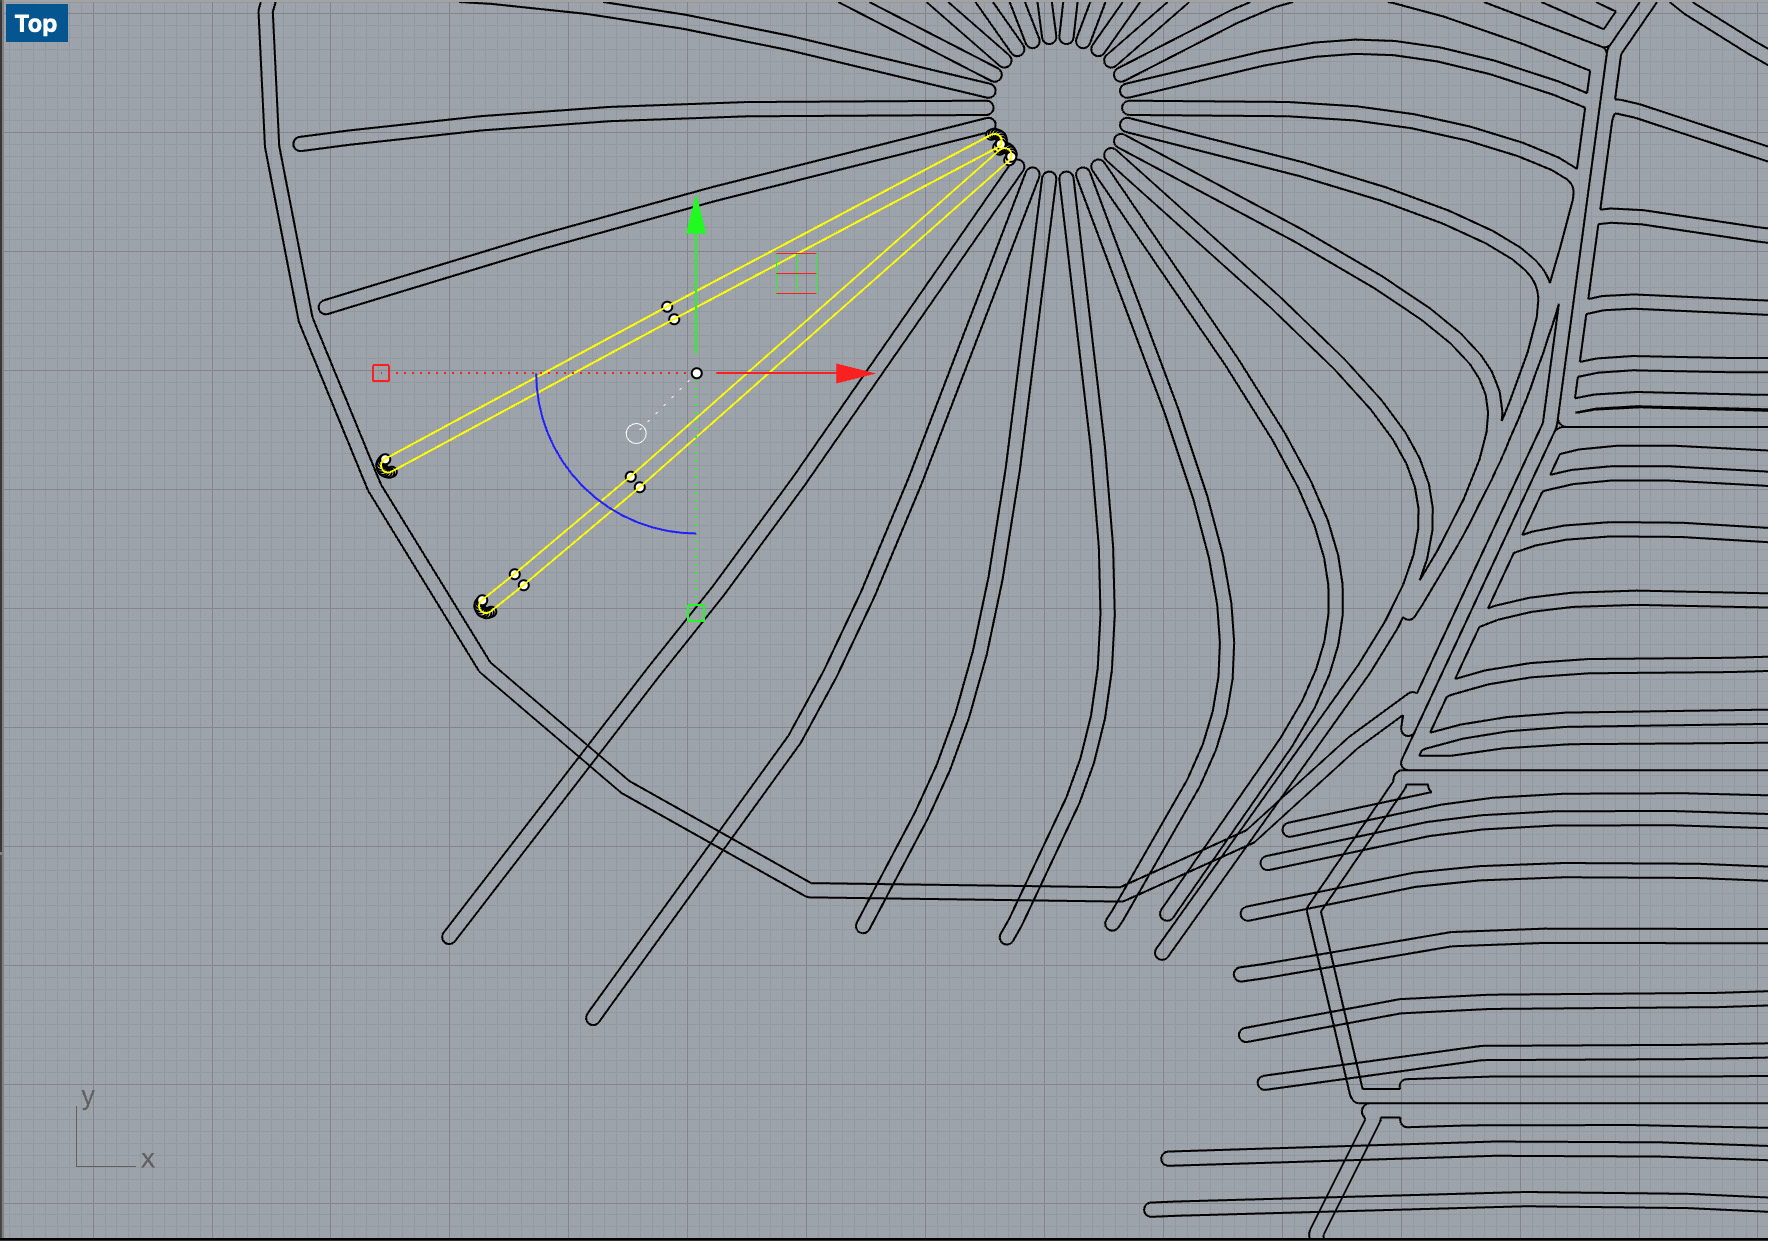
In some cases lines should be converted from a surface to a planar surface
The lines need to be rebuilt to be made a closed curve for the design to work. This means the points in the close shapes can be put to a fixed number of points - and highlights where the legs cross over or back on eachother.
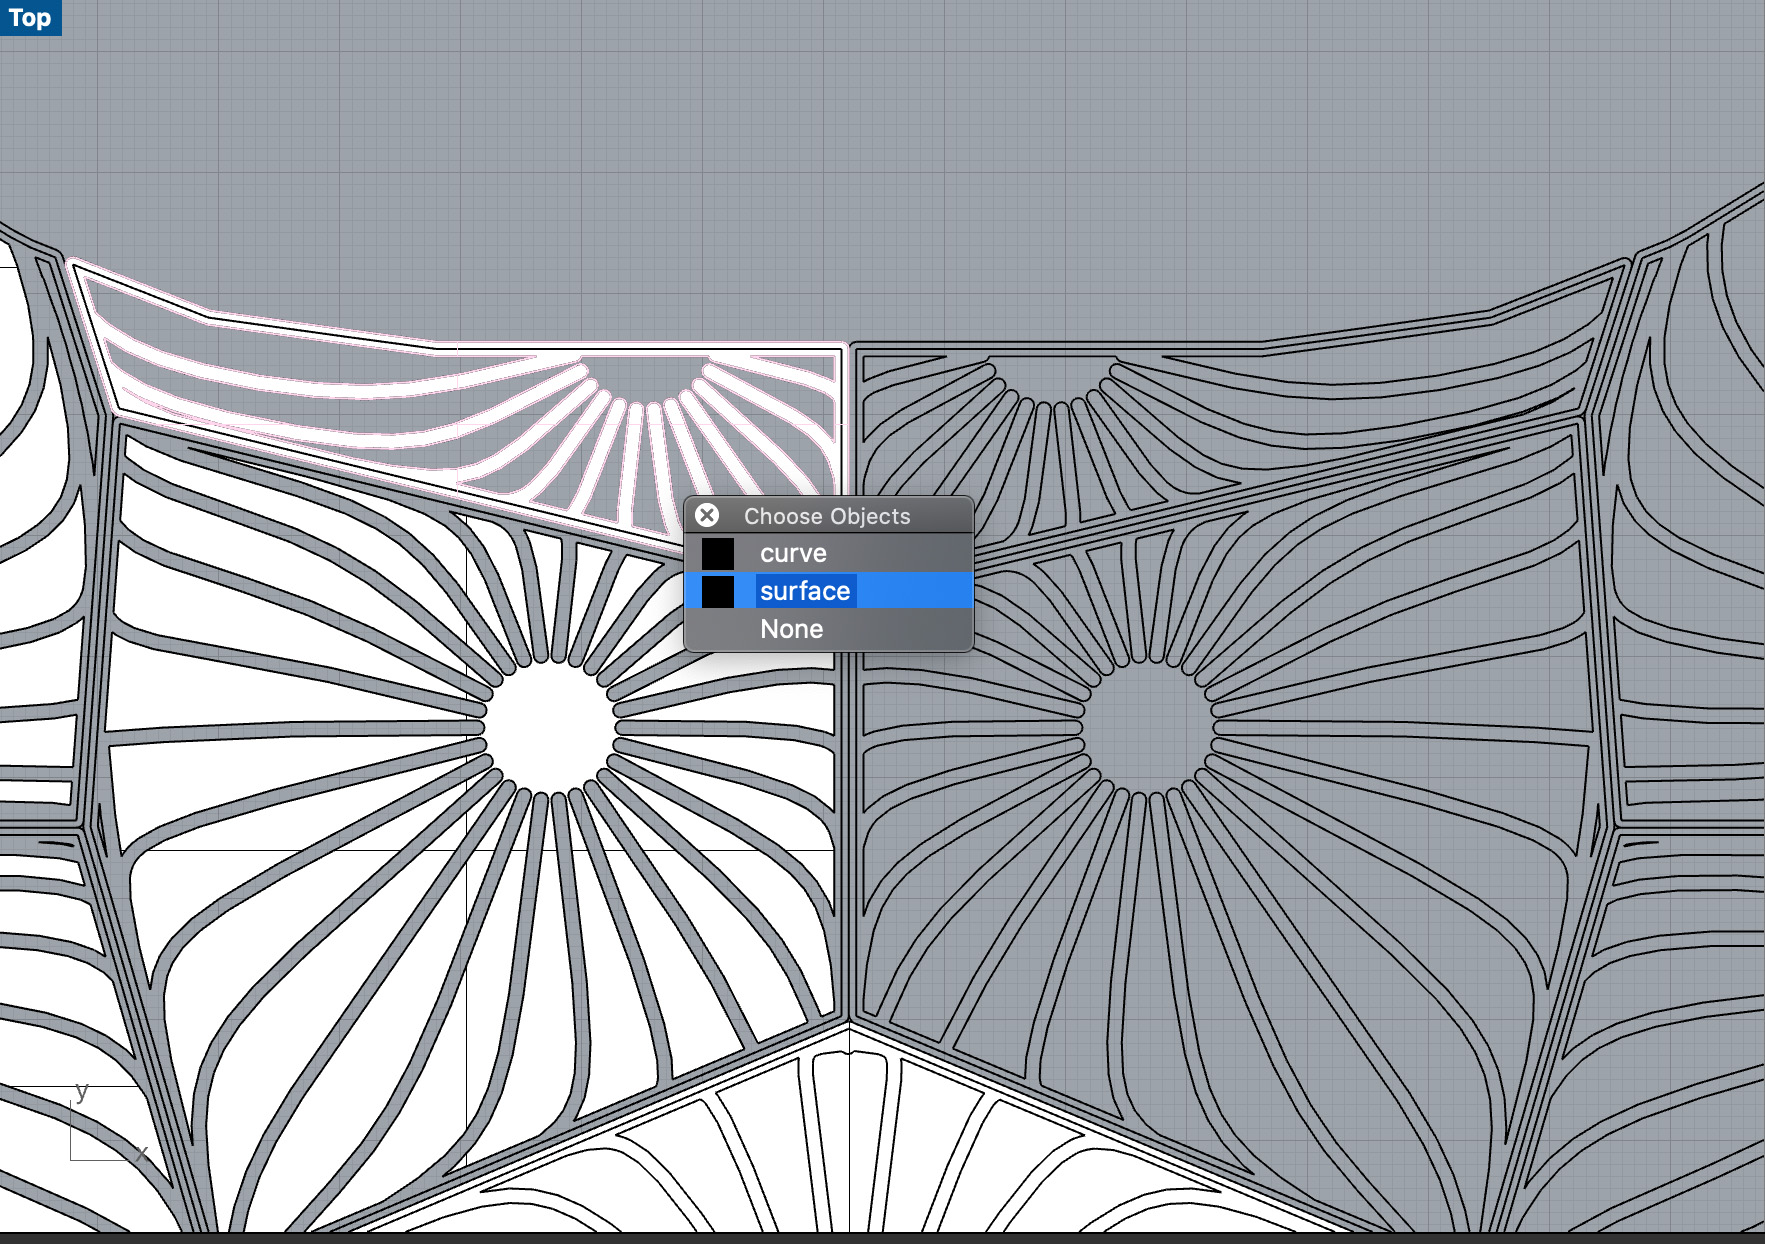
preparing for illustrator
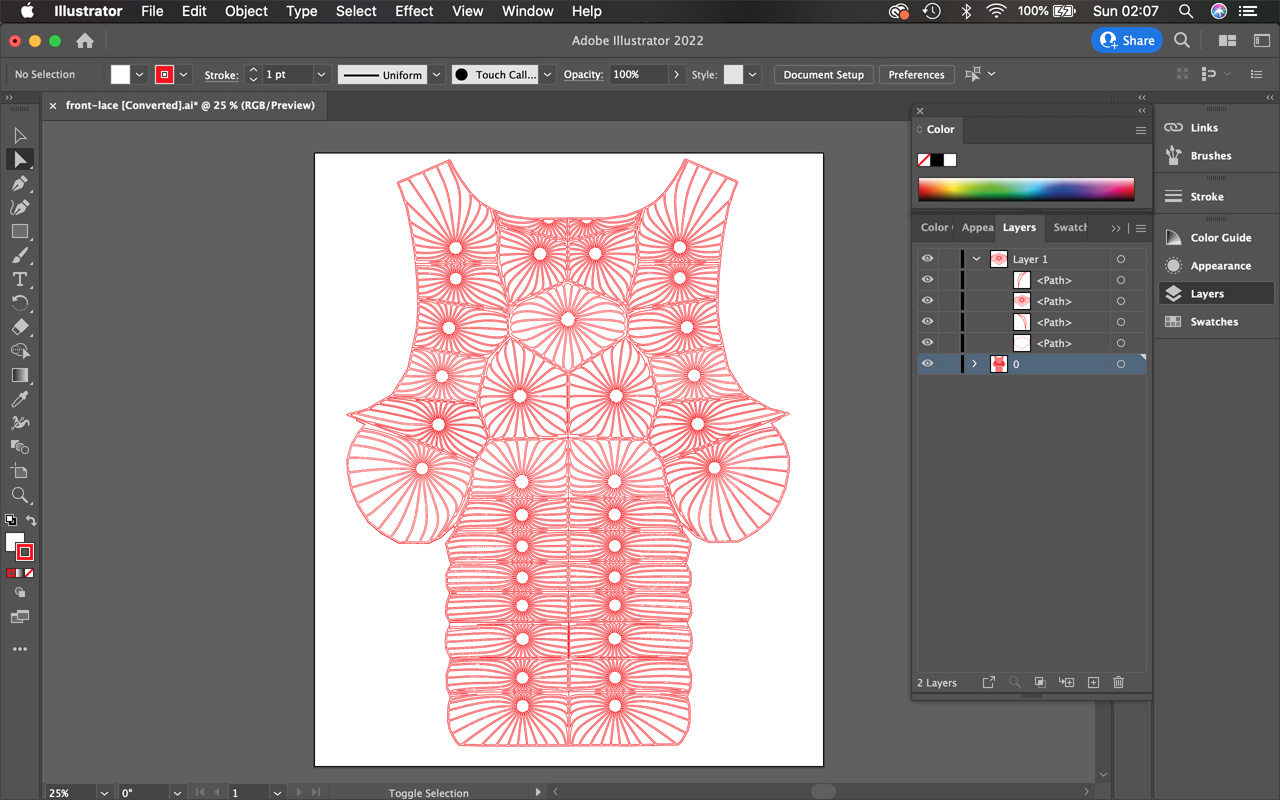
I will convert the files to an AI Illustrator file format for future digital embroidery. See my notes on how to do this below.
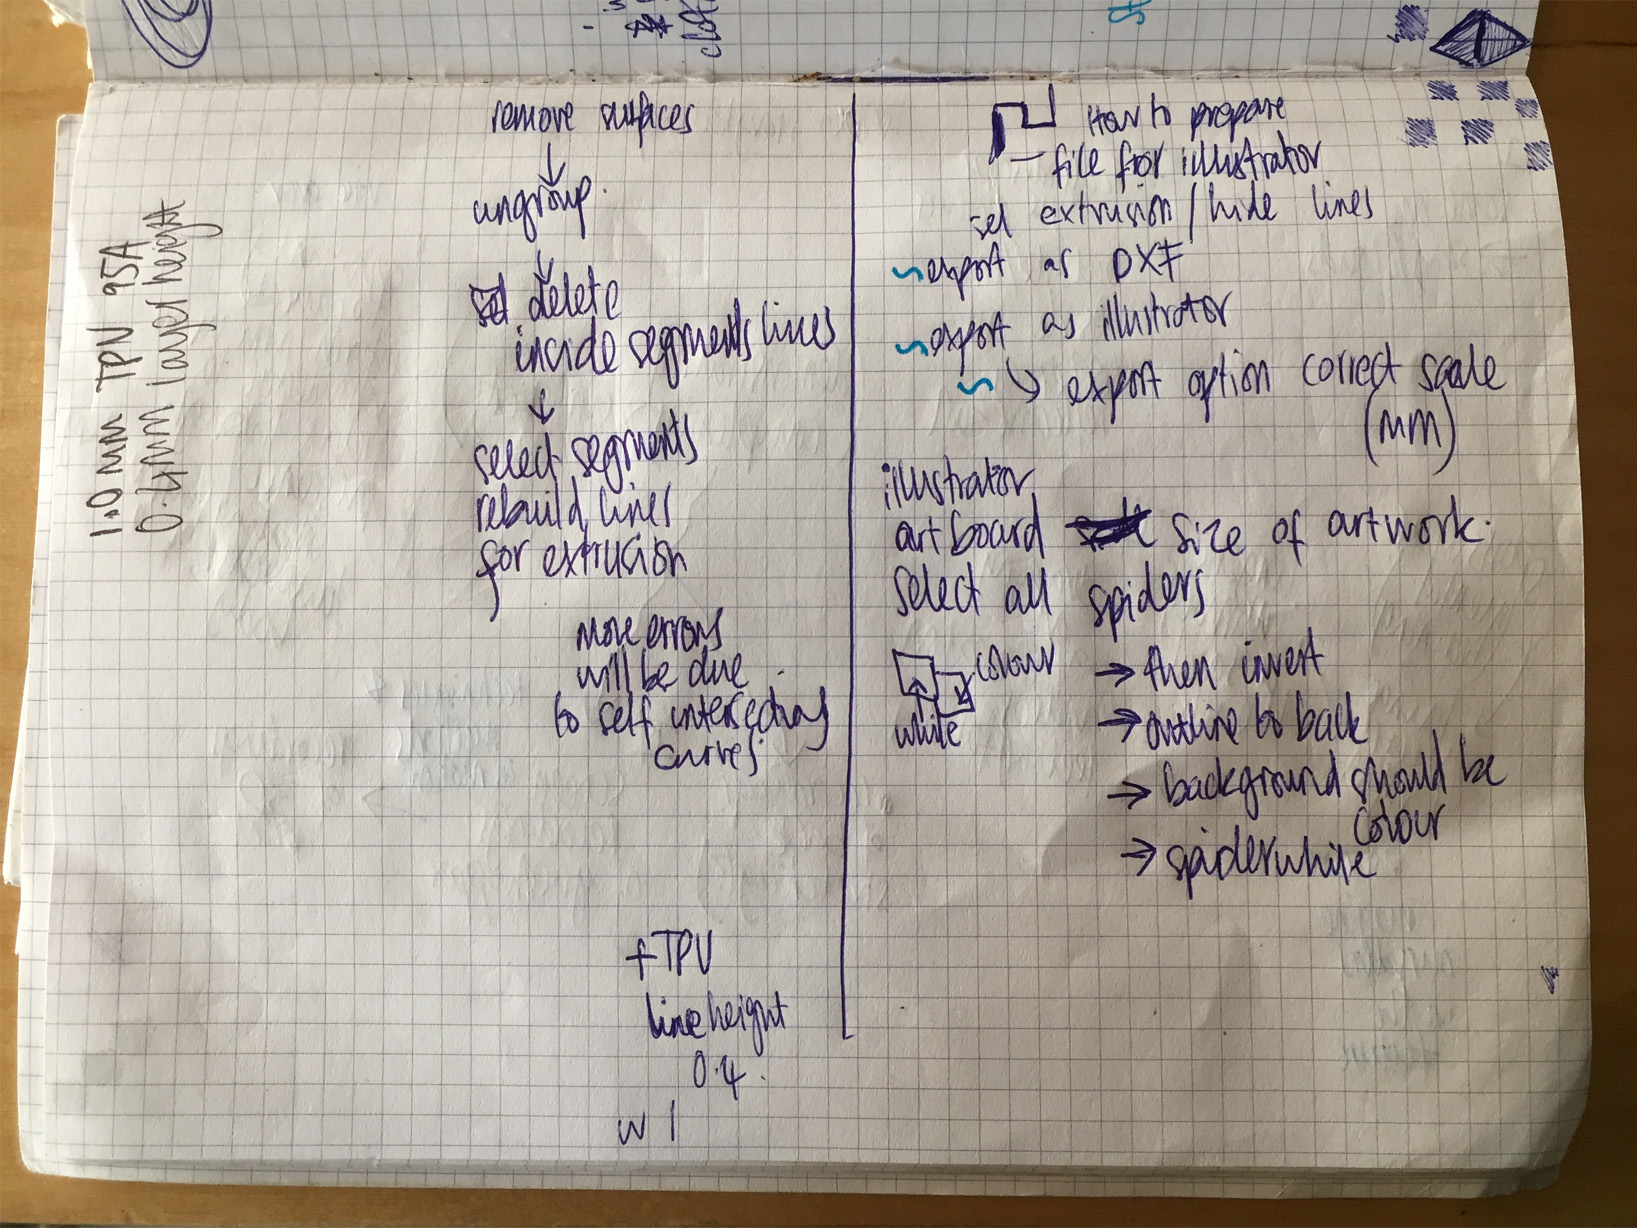
The important thing is the order of the stroke and fill colours for the embroidery to work.
I have not had the time to access the digital embroidery again given my available time left for this project, but I definitely intend on collaborating with an embroidery studio in the near future.
pattern cutting
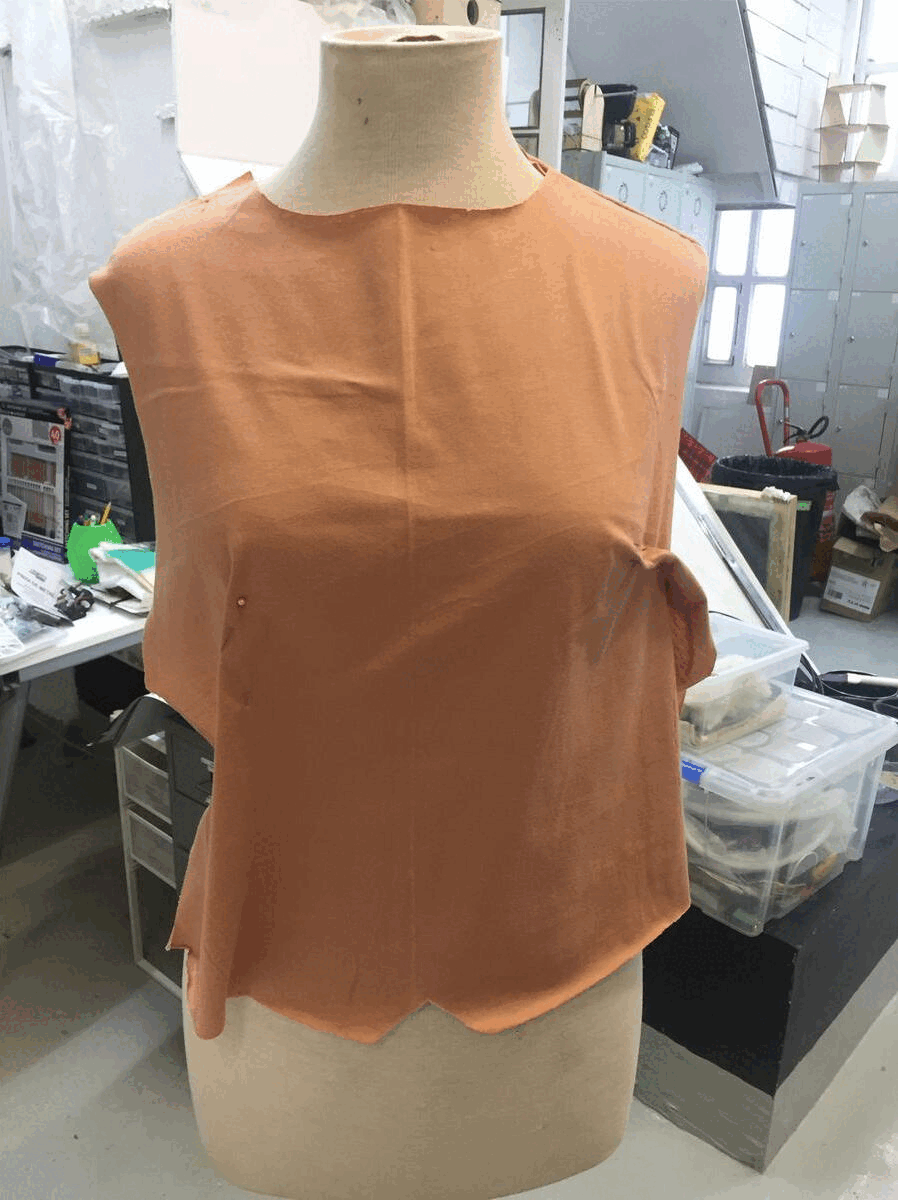
I did a basic drape on the mannequin of the shape of the top using the mannequin as a guide for the pattern.
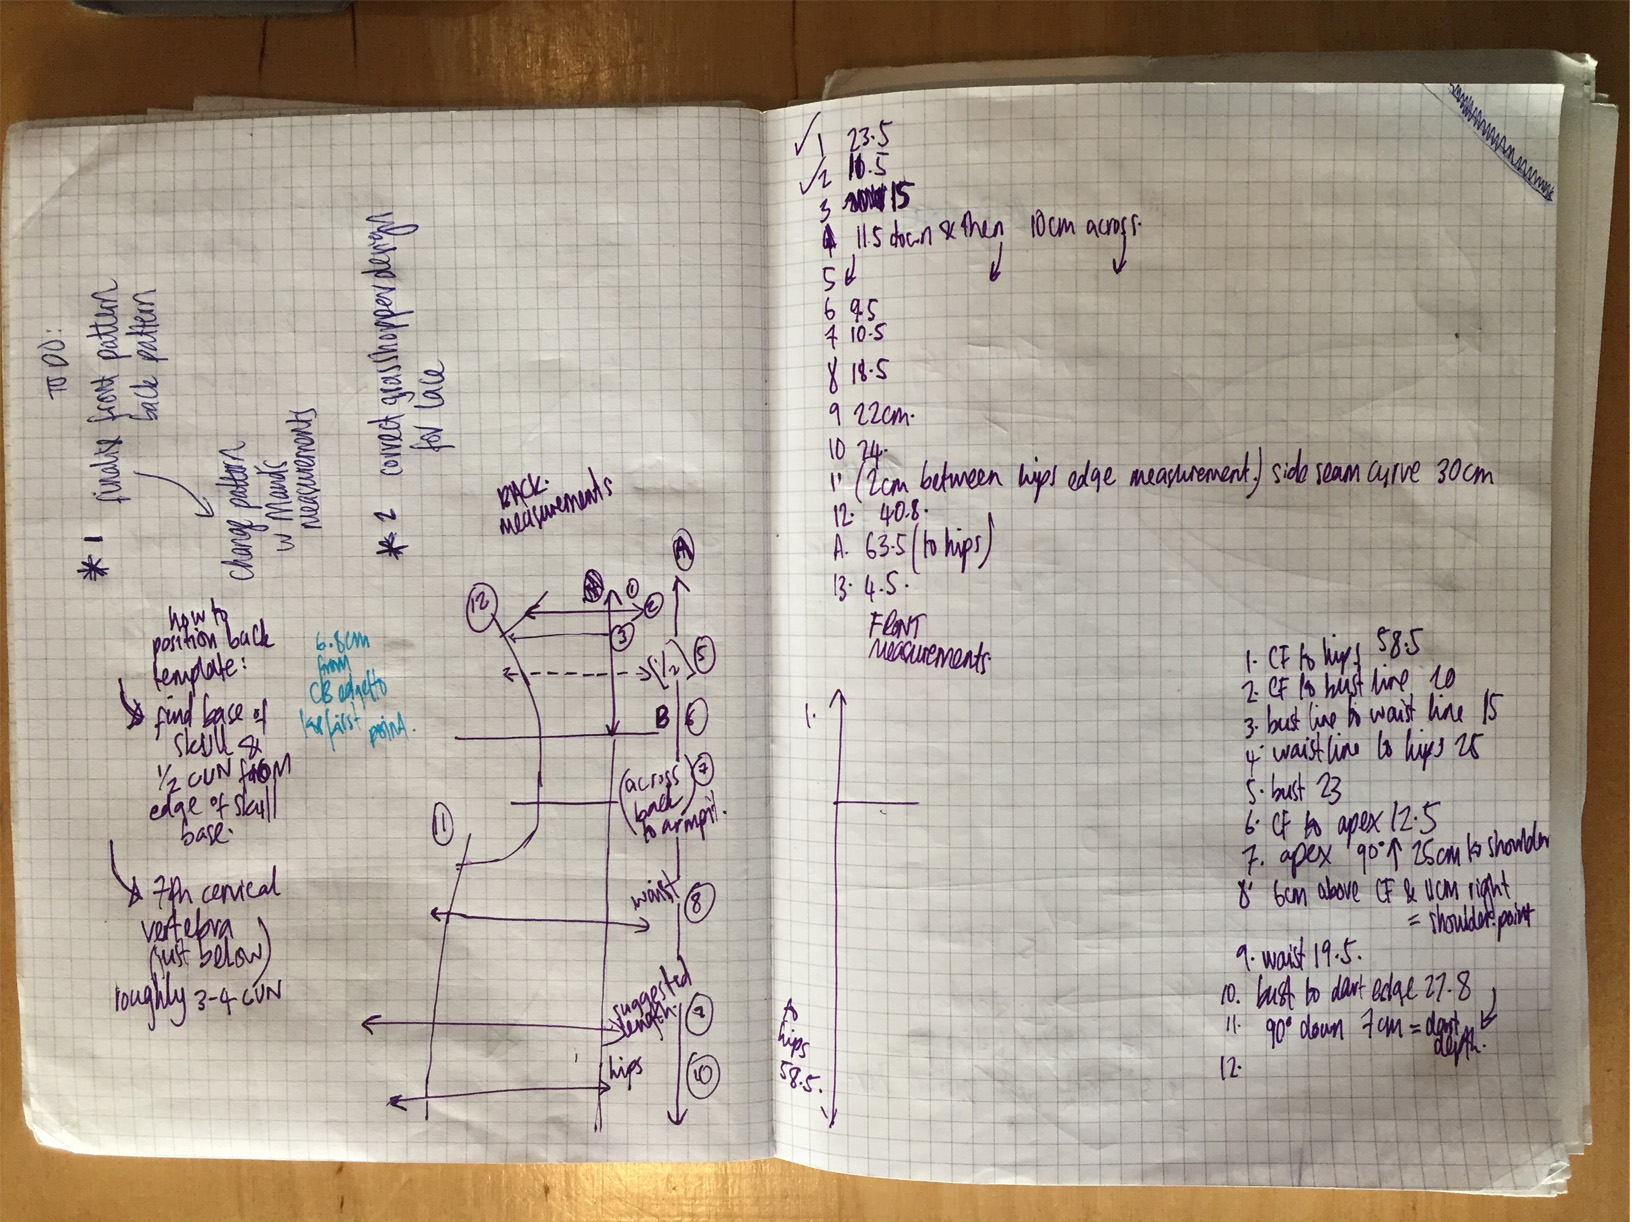
Some of my notes regarding the measurements:
fitting


alterations
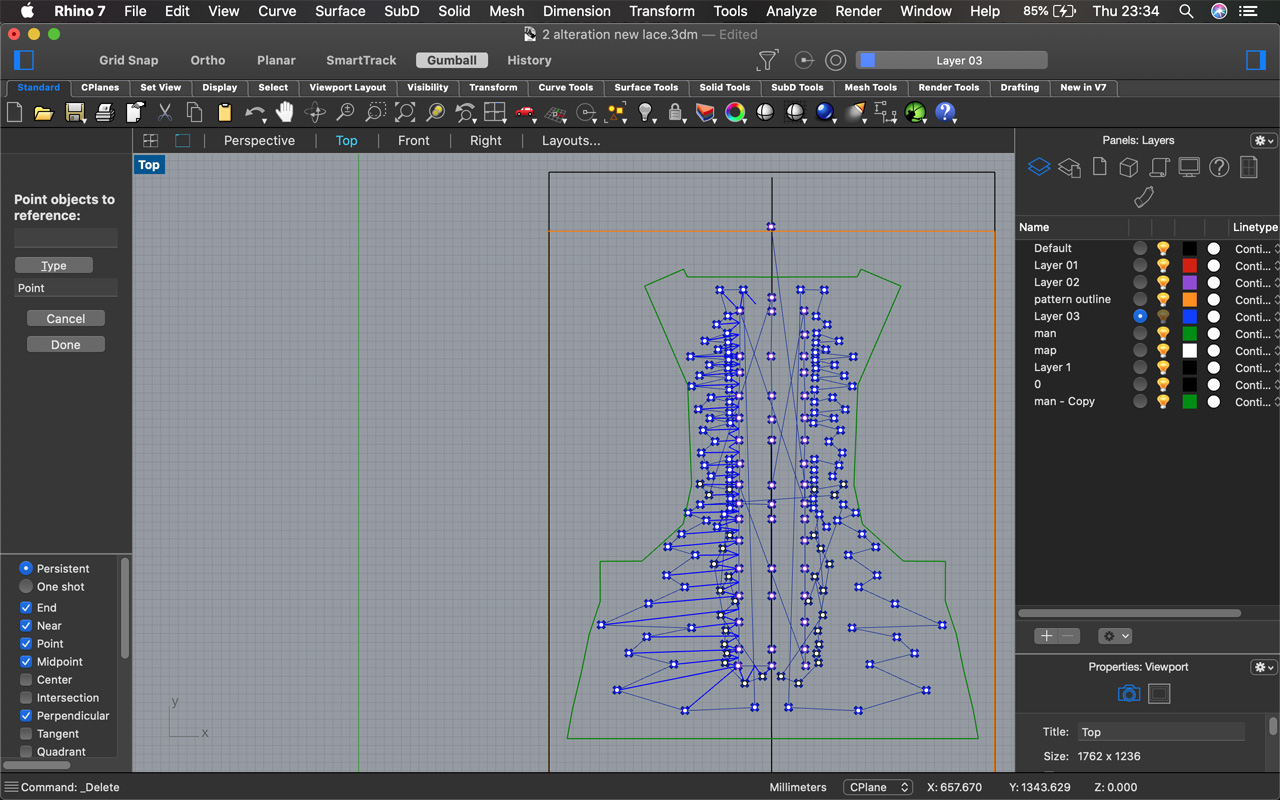
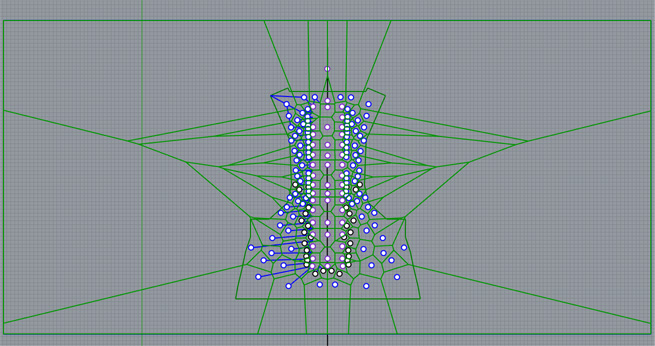
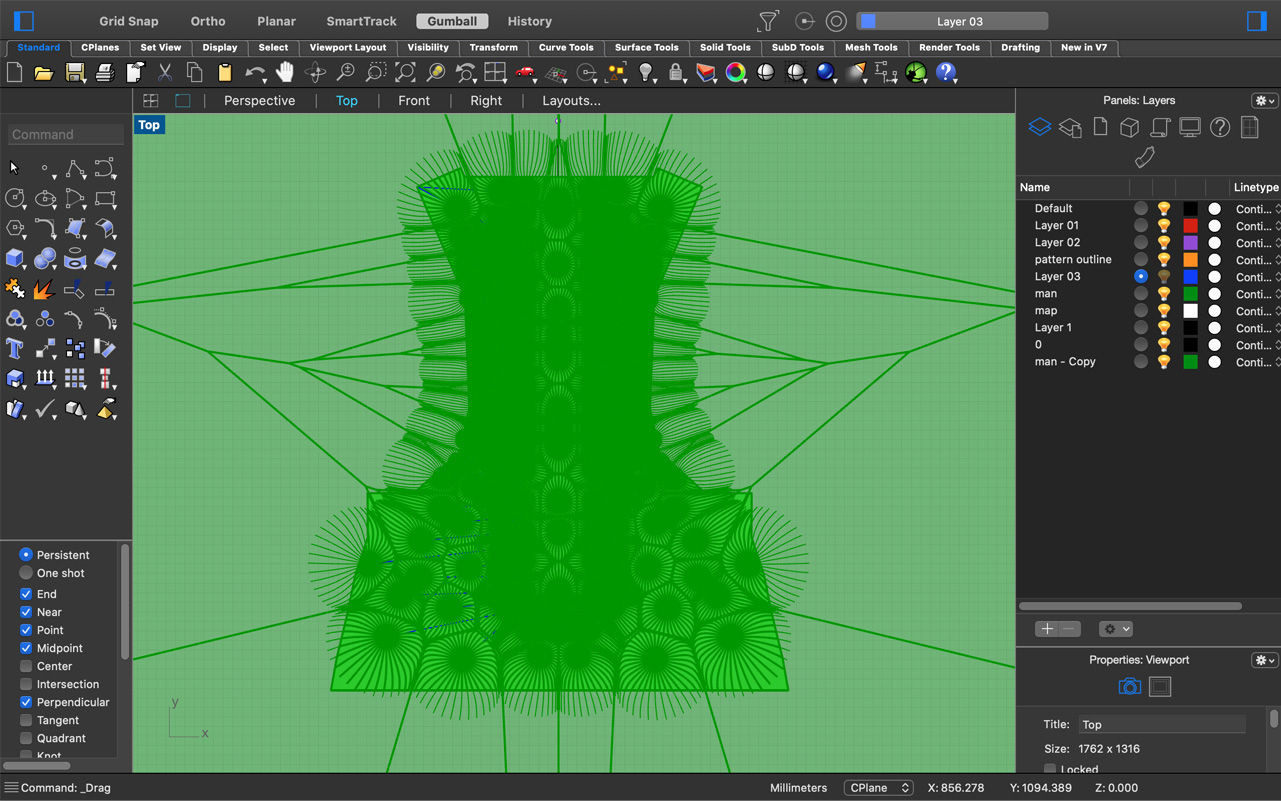
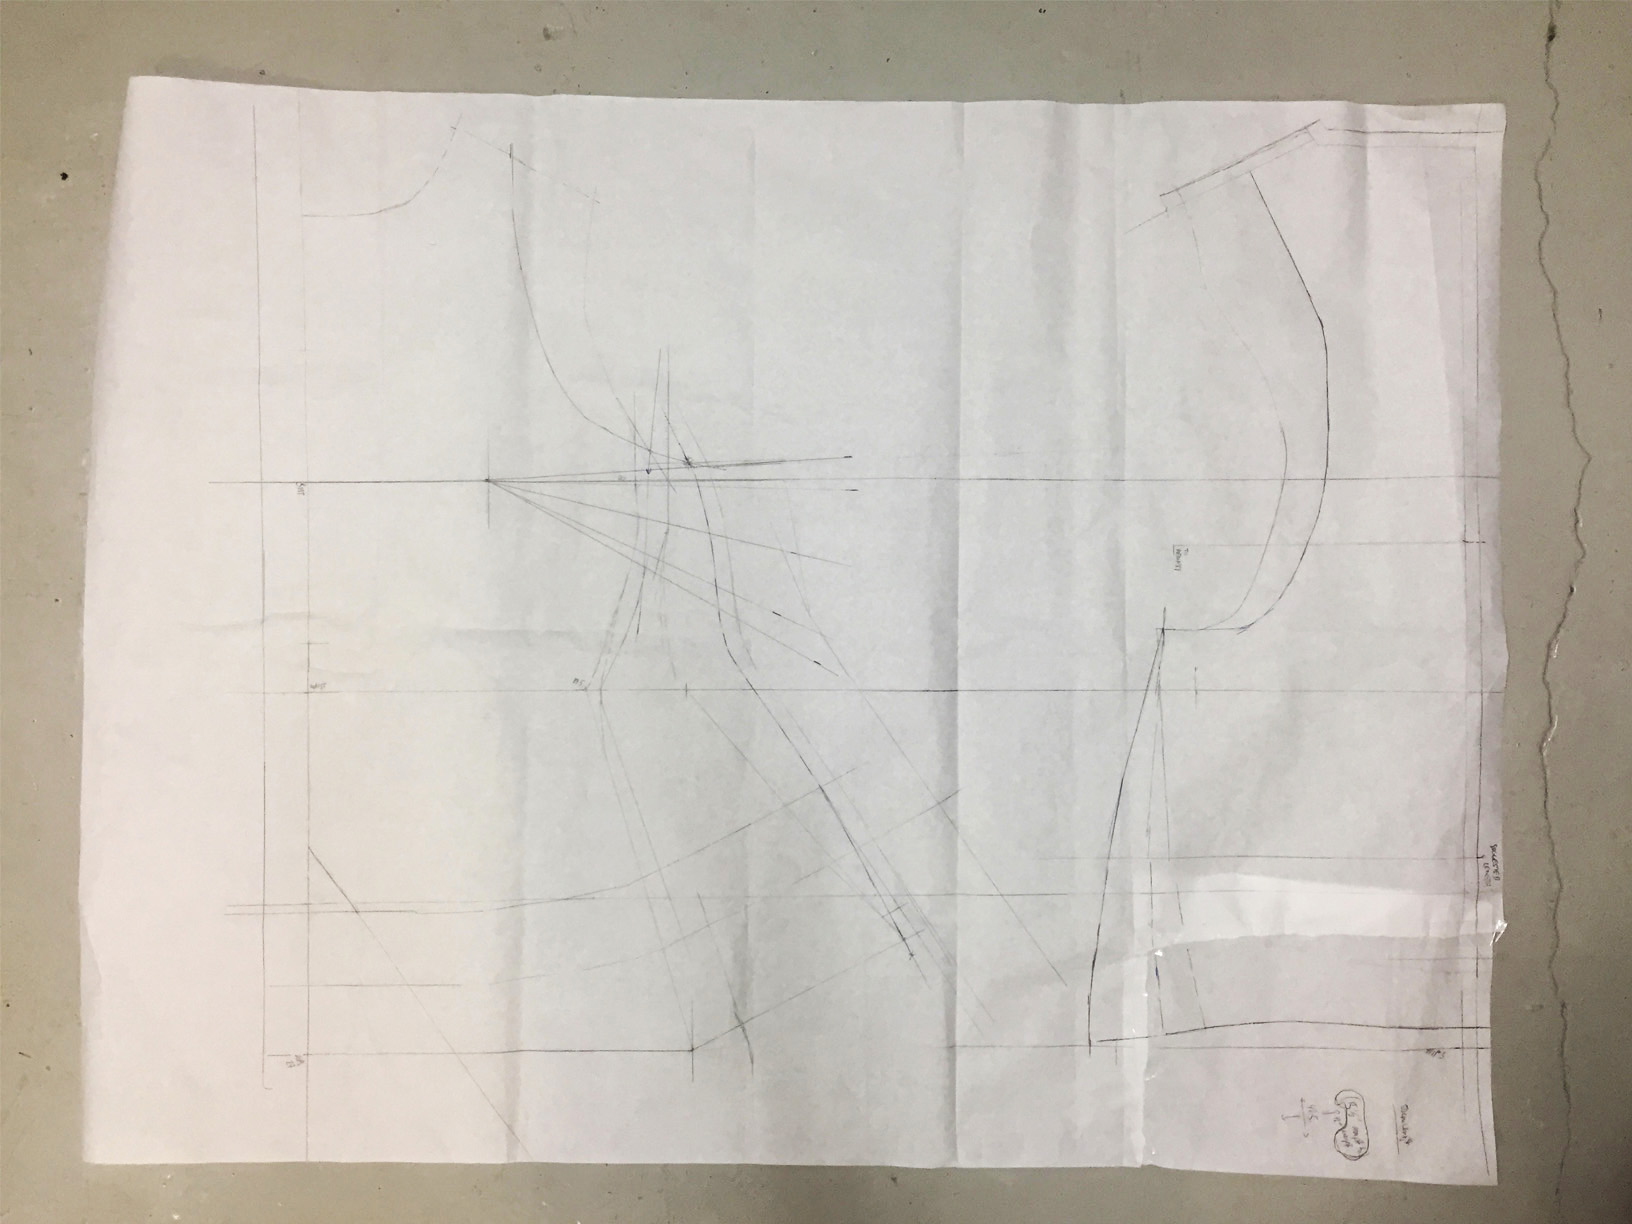
I found doing the pattern alterations more efficient on Rhino. To do the alterations, I took the measurements from the fittings and halved them and subtracted them from each side seam as you can see. Then reset the boundary surface in the Grasshopper definition so that it prints to the correct size.

3d printing
construction
gloves
To do the gloves I drew around my hand and scaled the image in Rhino. I added the hand pressure points and applied them to the Grasshopper definition. I offset the my hand by 10mm for the sewing seams, I also simplified the shape for the sewing so that the shape can be cut away and the seams won't be turned at jagged angles - it's already difficult to sew over a 3d print.
