09 textile scaffold
16th - 23rd November 2021
9. Textile Scaffold
textile as scaffold
I was really inspired to look at textiles from a different perspective: considering their composition; what can be created when combined with harder materials such as wood/concrete/ceramic; as well as using the them to bear the support of crystals; transforming them into a much harder surface in molding...
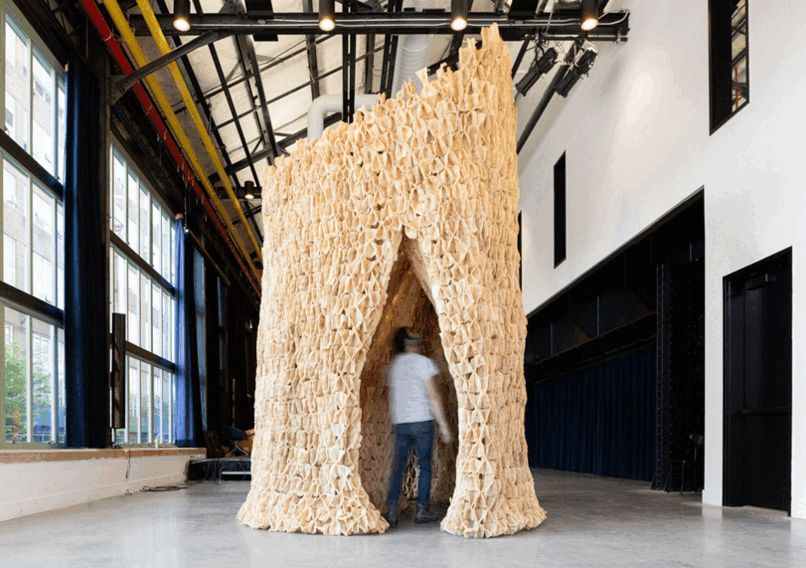
The Living studio used dried luffa fibres - a tropical vegetable - for this pavilion to demonstrate how organic materials with microbial properties could help create healthier environments for humans. In this work the living materials support microbes that promote the health of those who experience it: "Bio-receptive materials trap and host microorganisms in surfaces containing pockets with different temperatures, moisture levels, air flow and nutrients."
I like that they have decided to experiment agaist sterile cleanliness with their textile because these processes have problematic outcomes
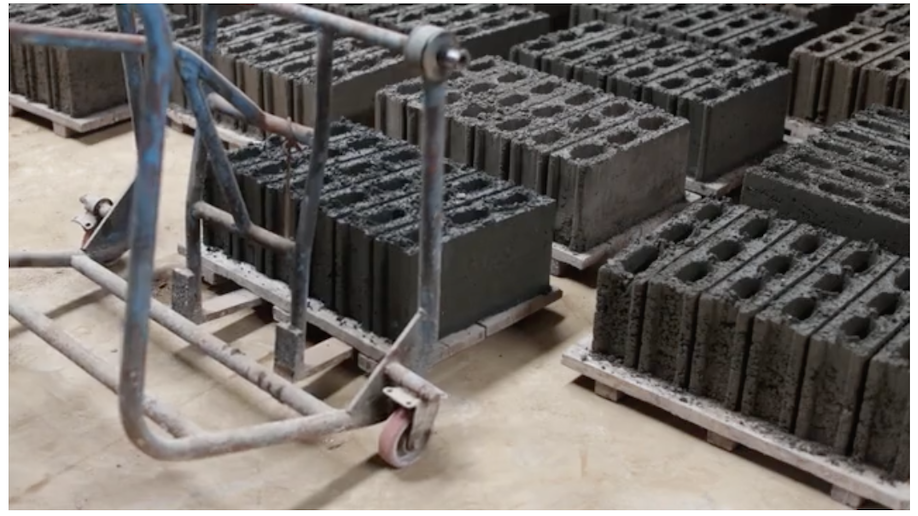
Toxic sludge byproducts from Saitex denim manufacturing is extracted and shipped to a brick factory. It is mixed with concrete so the toxins don't leak into the environment and are used to build affordable homes. This is a cool example of transforming harmful materials into beneficial properties.
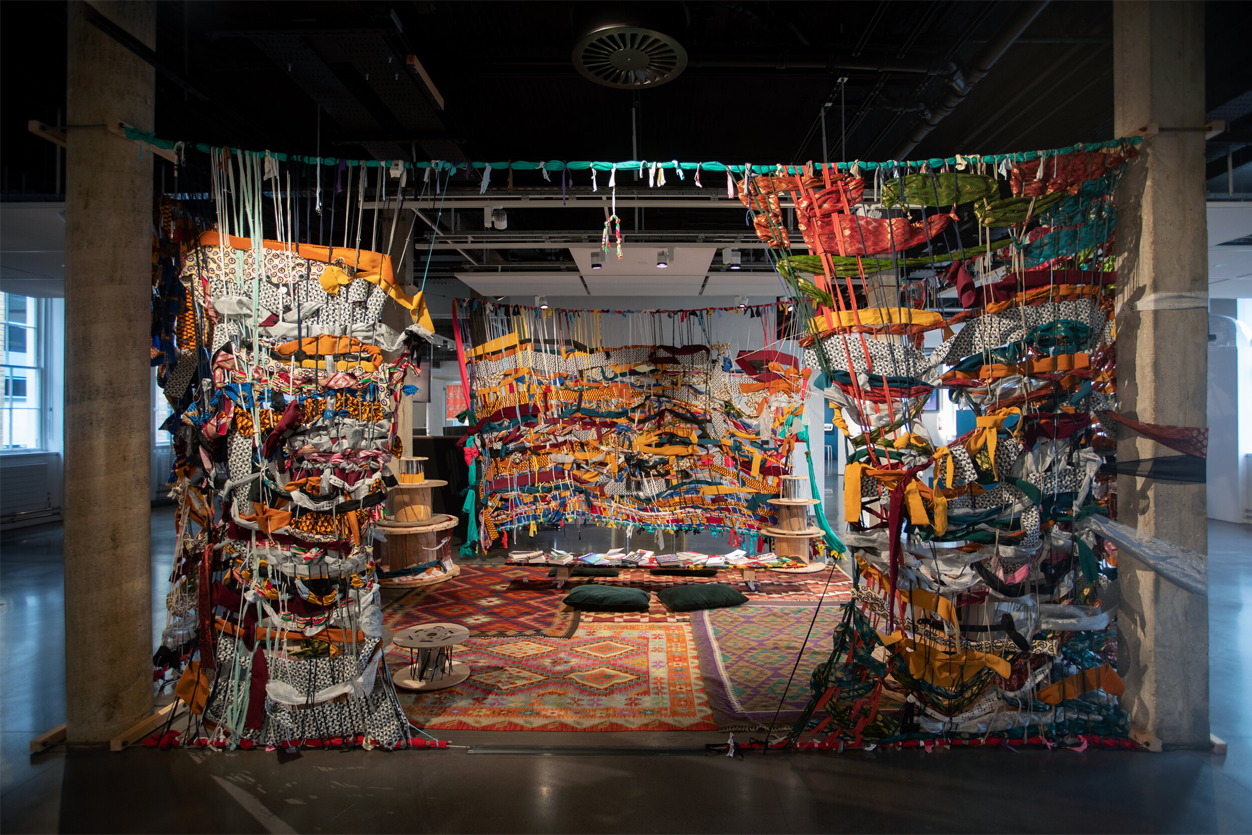
Also I remember seeing this installation by Resolve at this exhibition
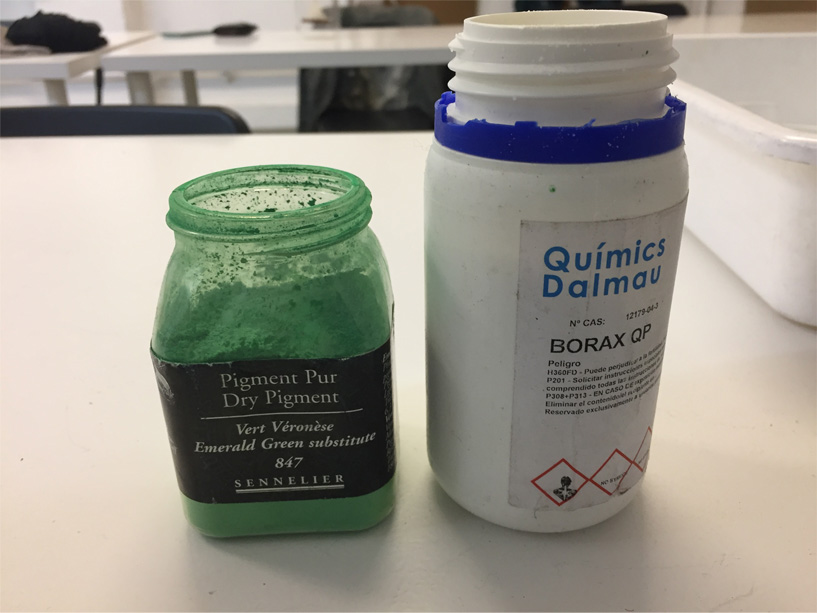
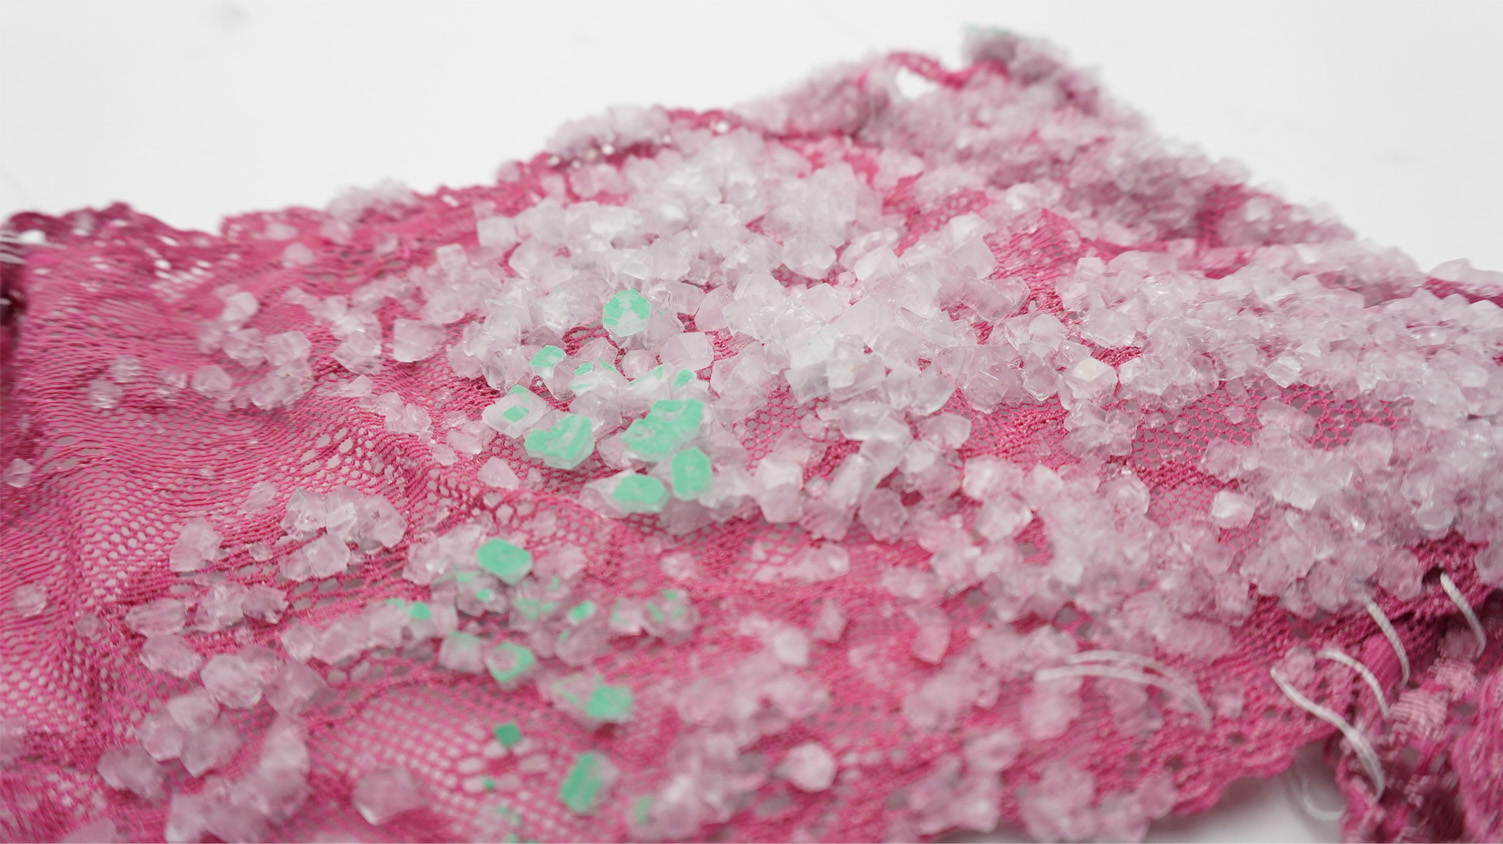
crystallisation
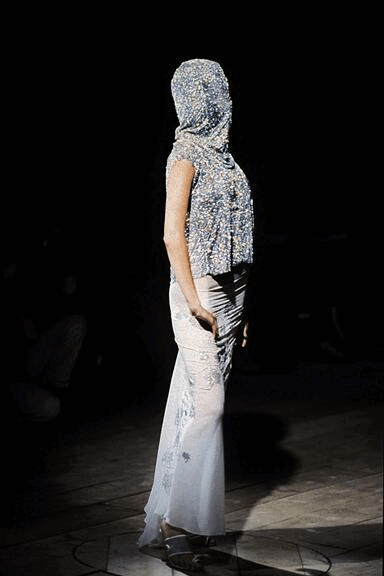
For the crystallising I worked with some lace fabric pieces because crystals and lace are a nice combination and the fabric can accommodate their growth in the gaps. I remembered that McQueen worked closesly with Swarovski in some of his early collections
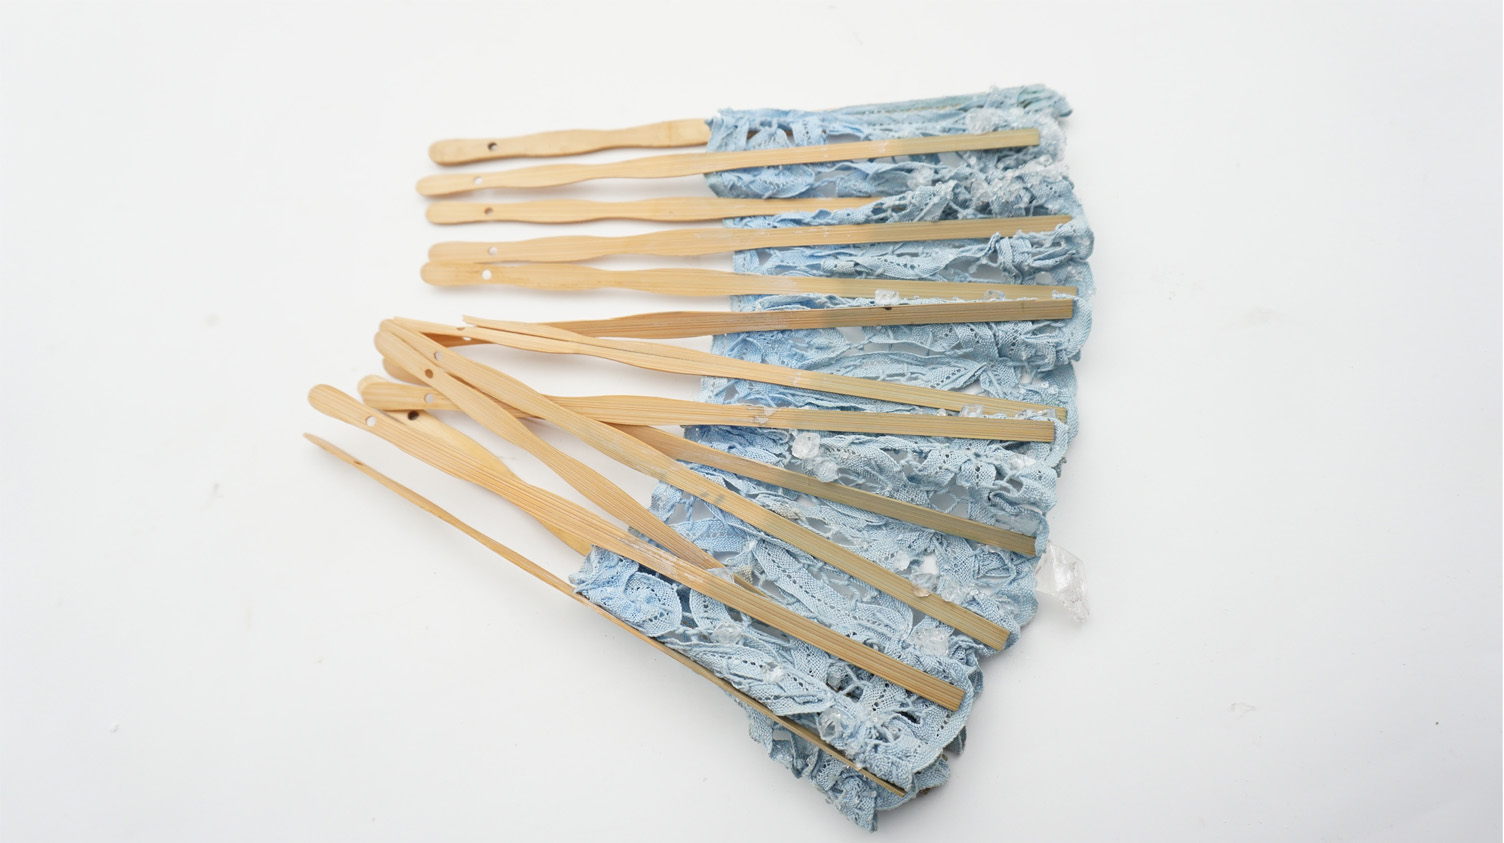
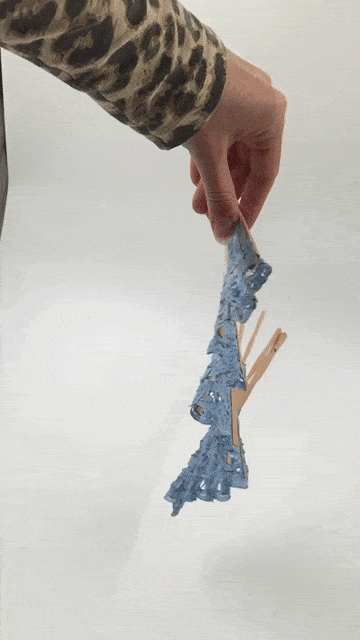
experiment i
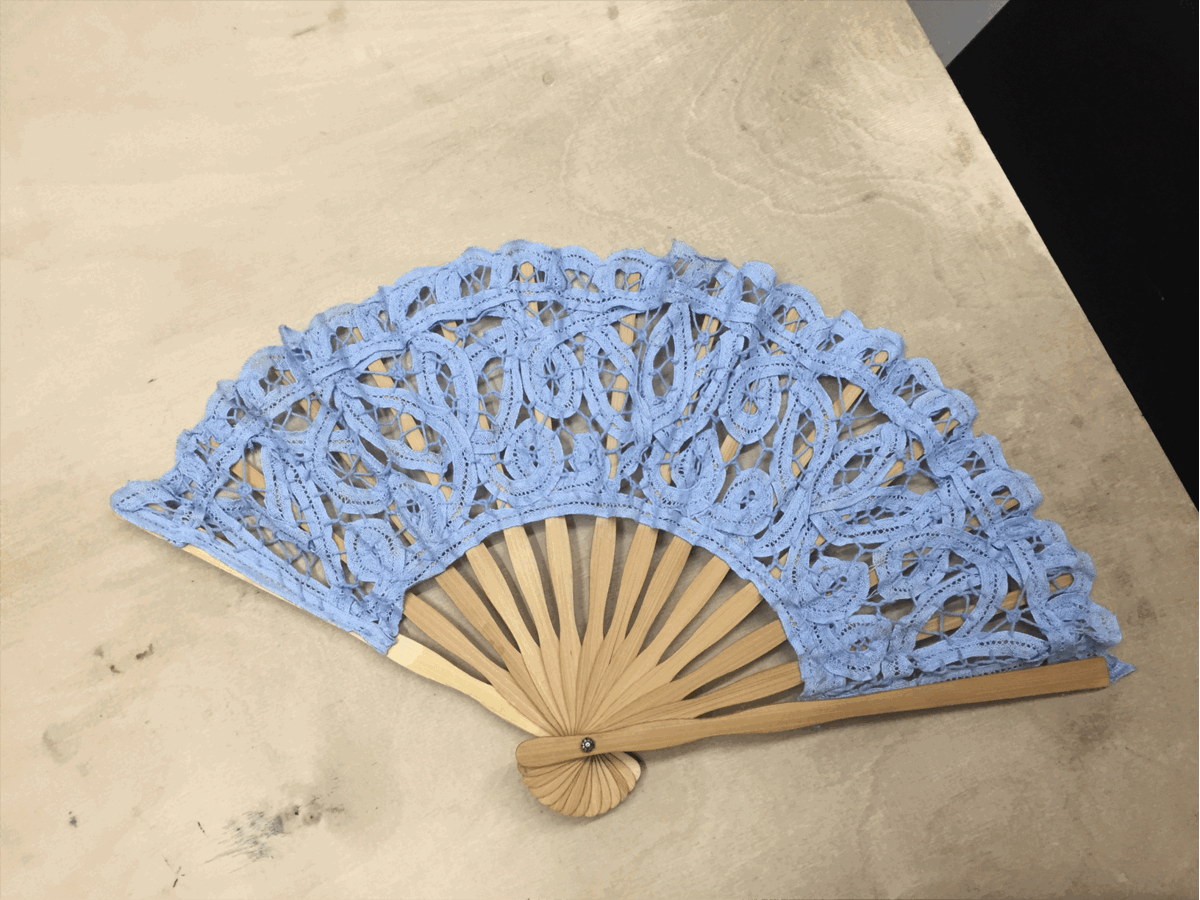
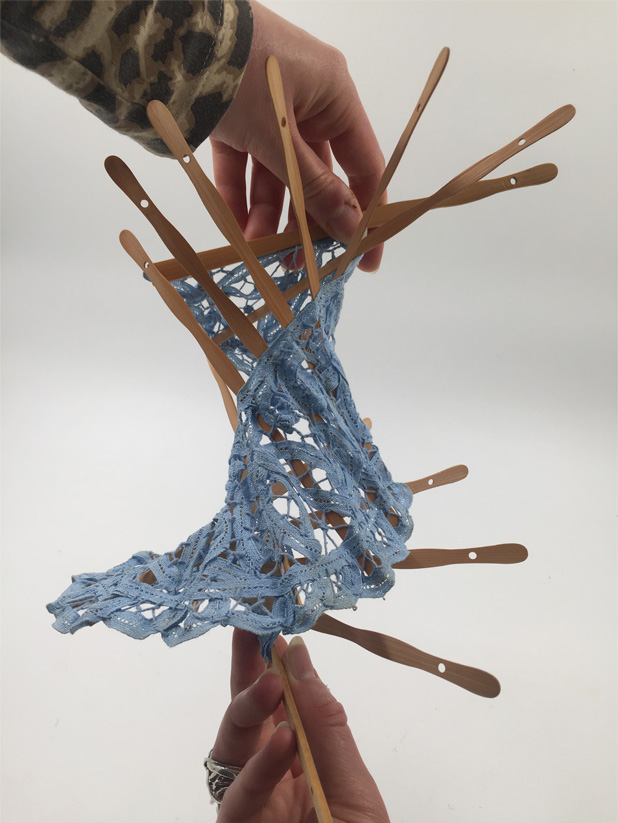
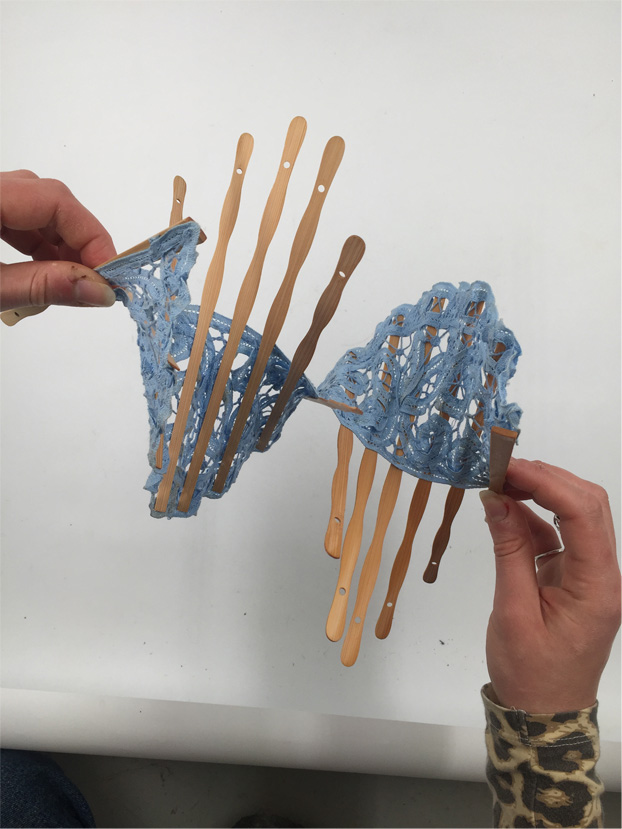
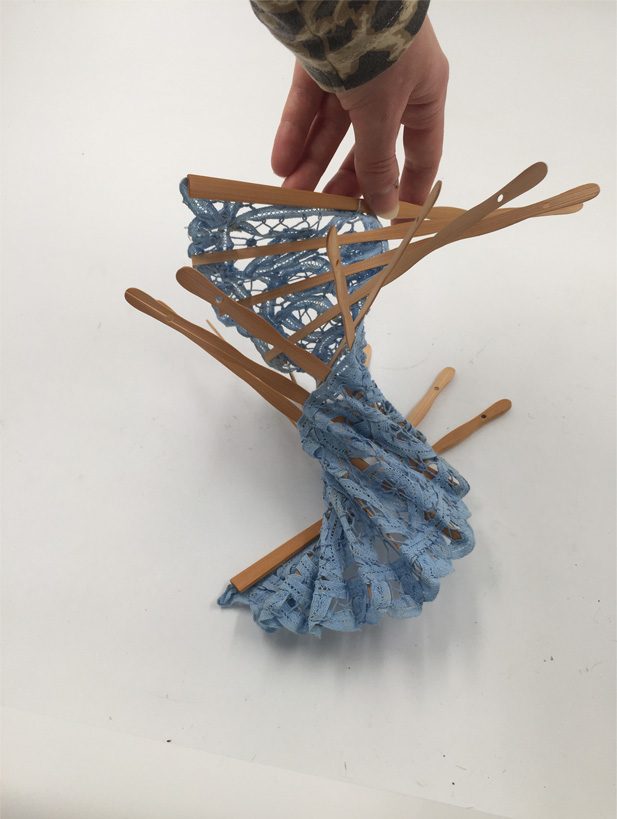
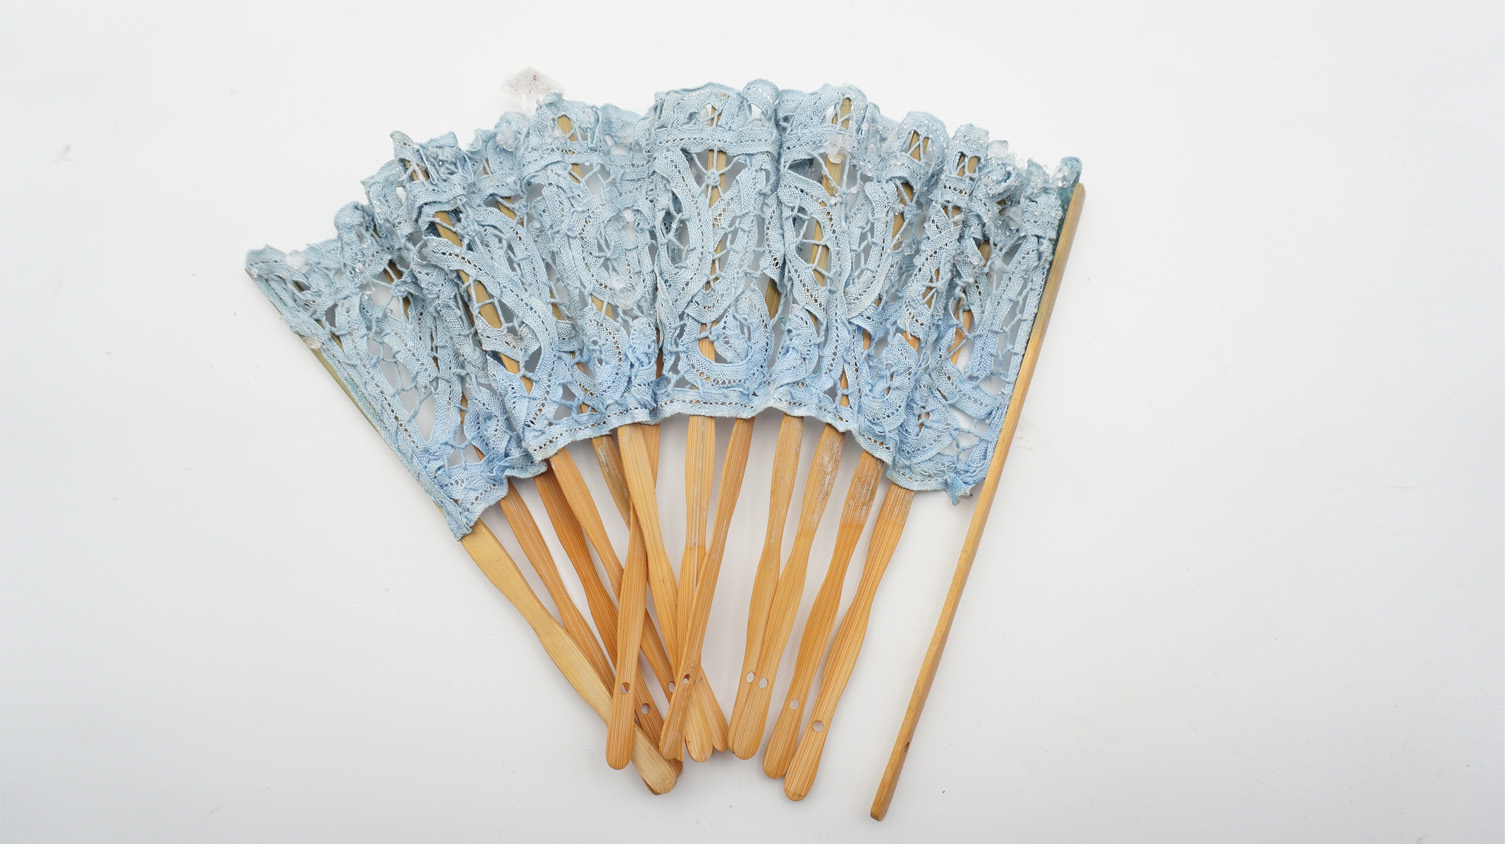
I have this lace fan which I thought might be cool to explore the process with. When I first deconstructed it, it makes this really nice helix shape.
For this experiment I am using this recipe:
| water | alum |
|---|---|
| 1l | 200g |
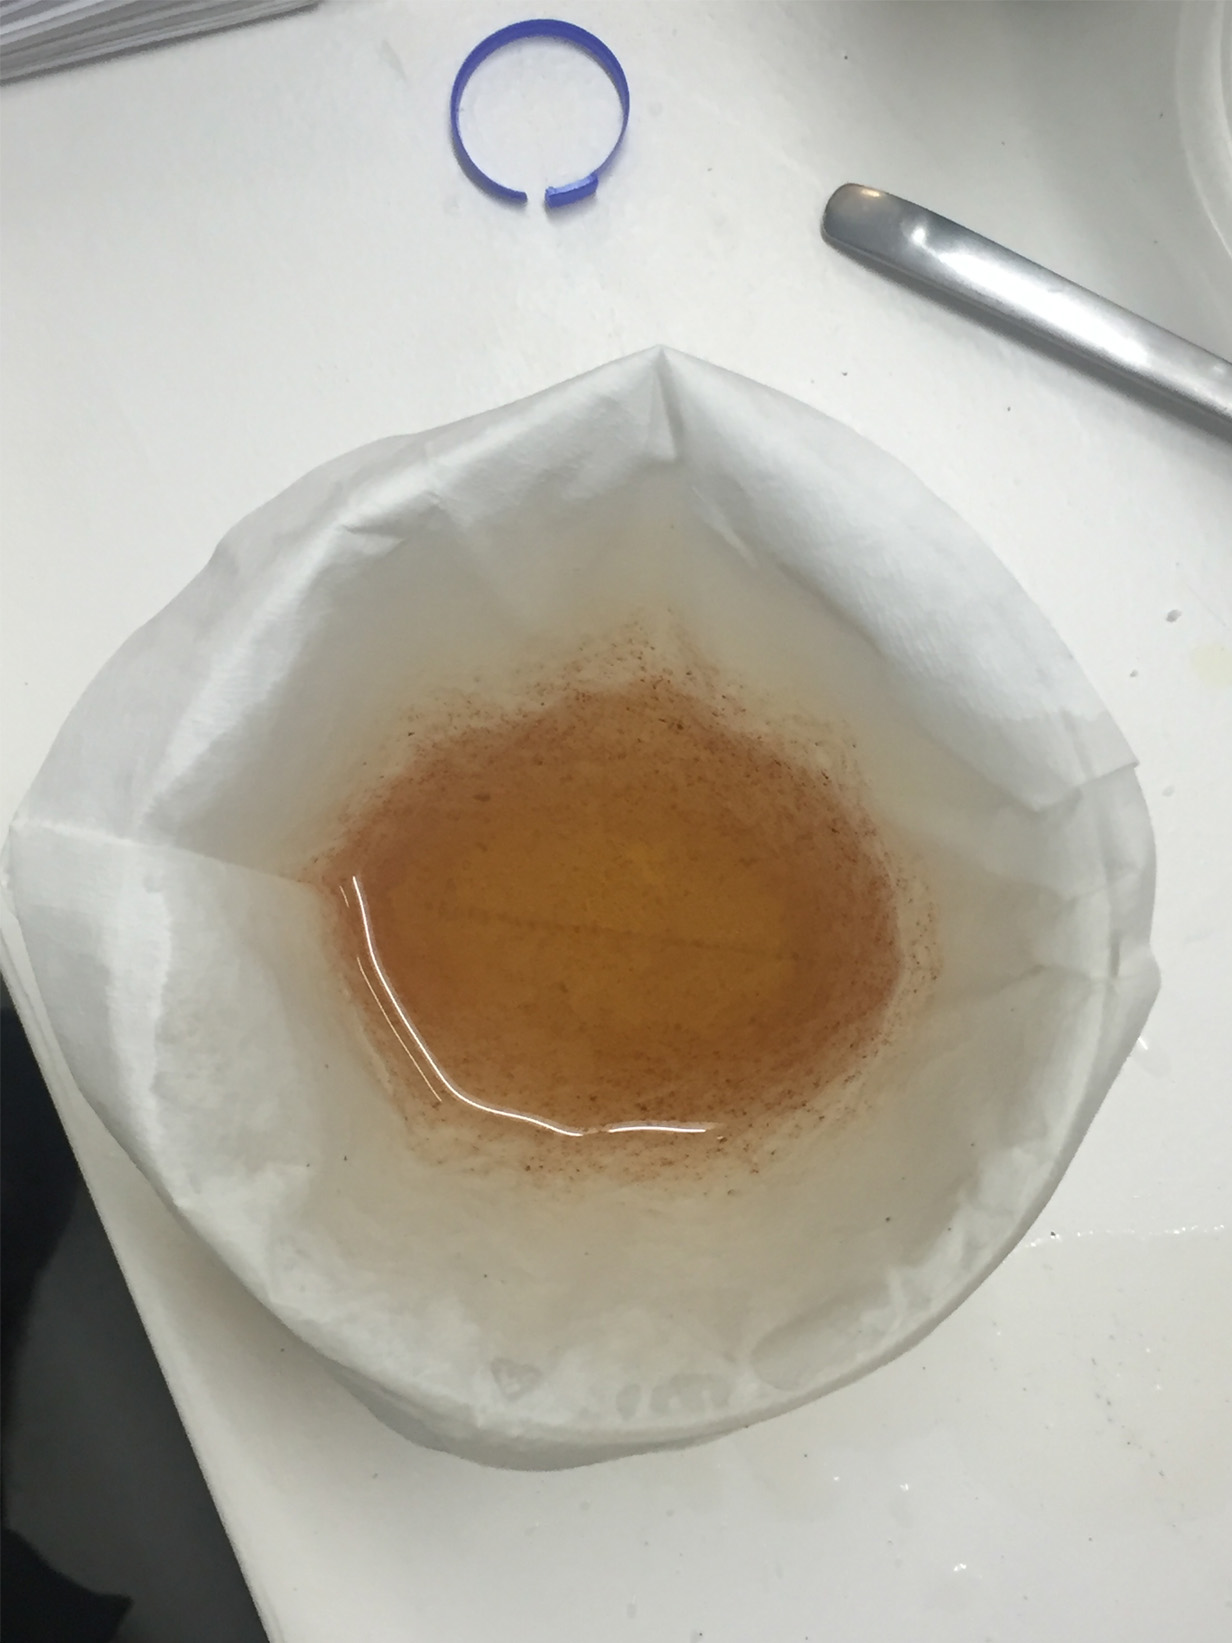
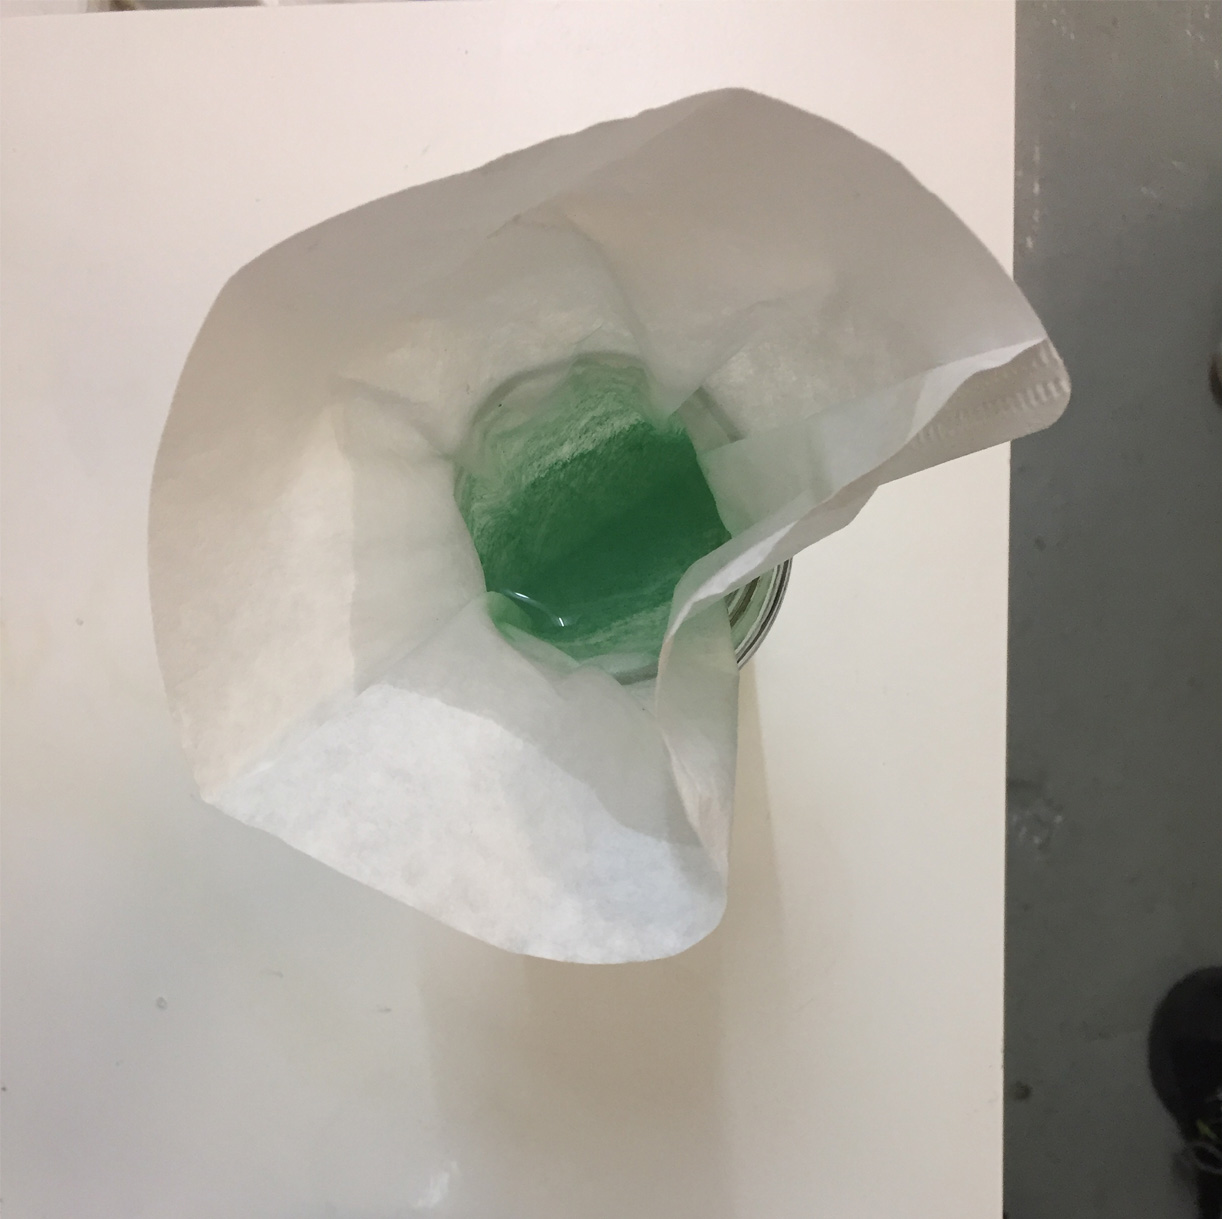
The method is just to add the alum to the boiled water to dissolve it and stir; then to filter it with a coffee filter

The fabrics need to be submerged in the crystallisation solution without touching the side or bottom of the containers - otherwise the crystals will grow directly on the surfaces. For this to work I need to make a lid with some slits to fit the wood segments of the fan so that it holds properly.

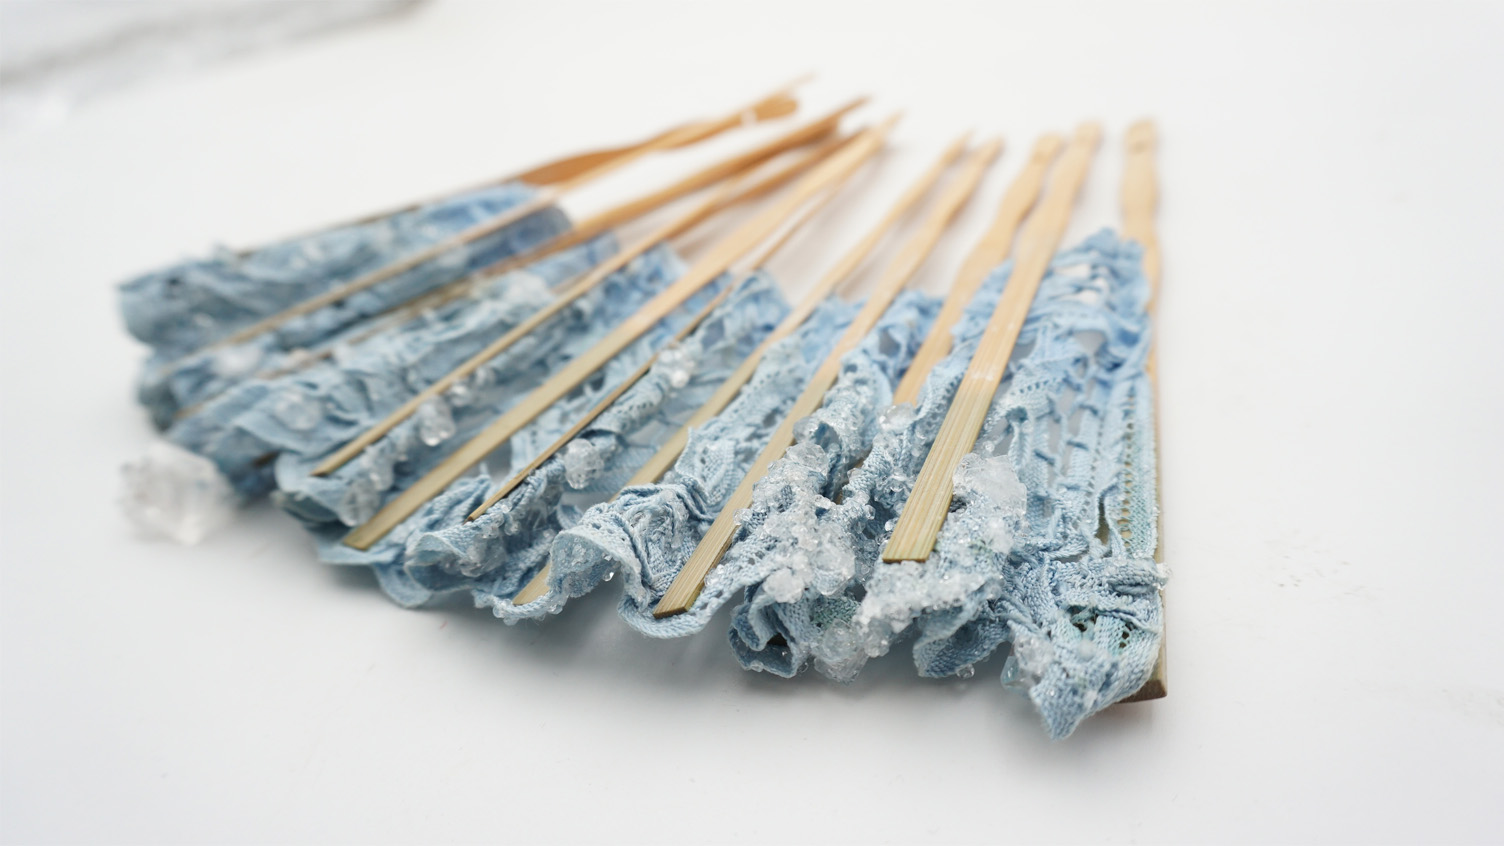
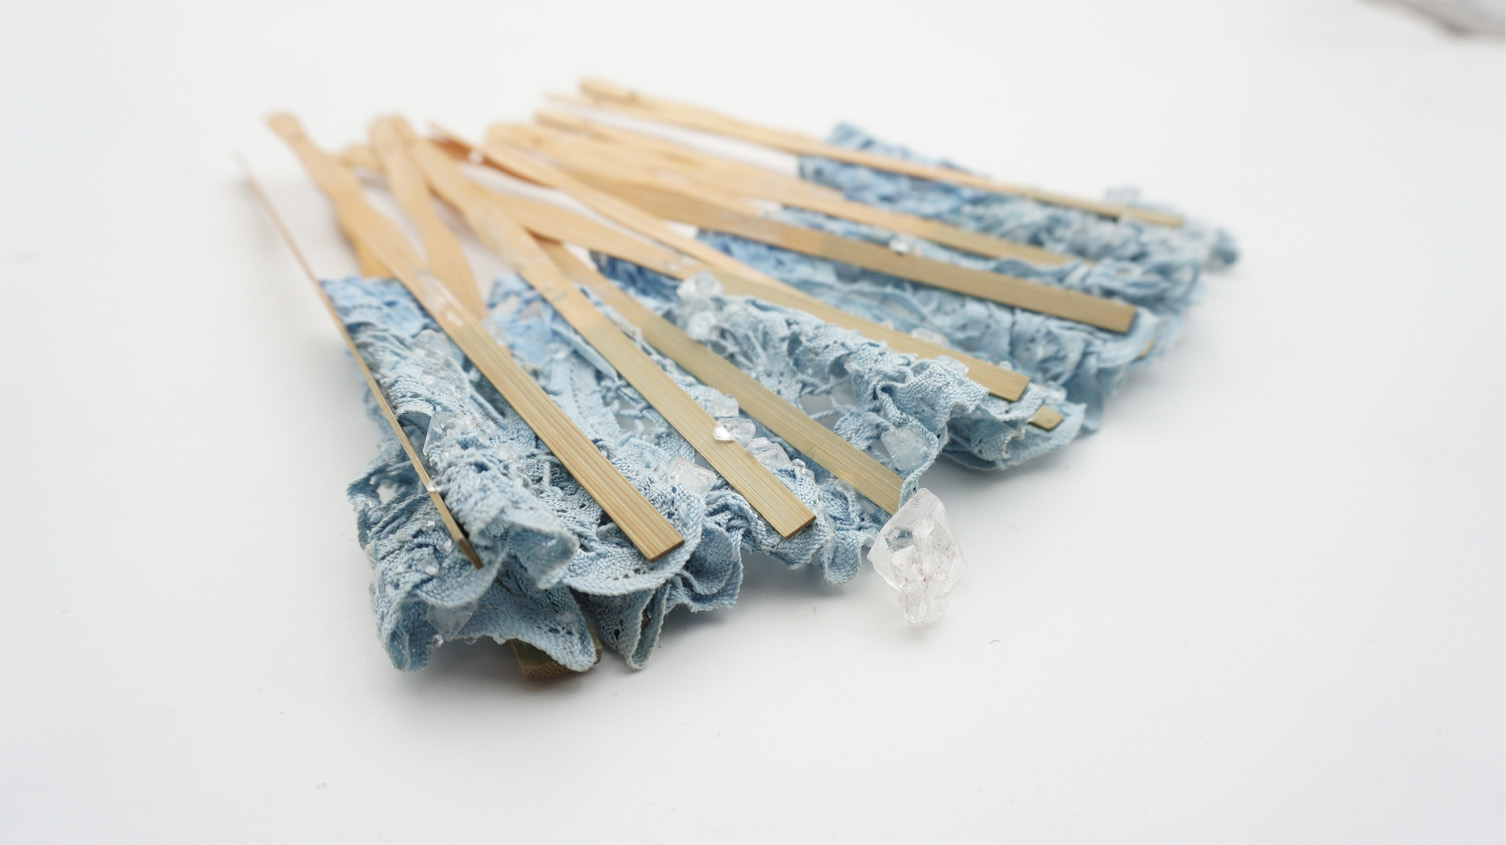
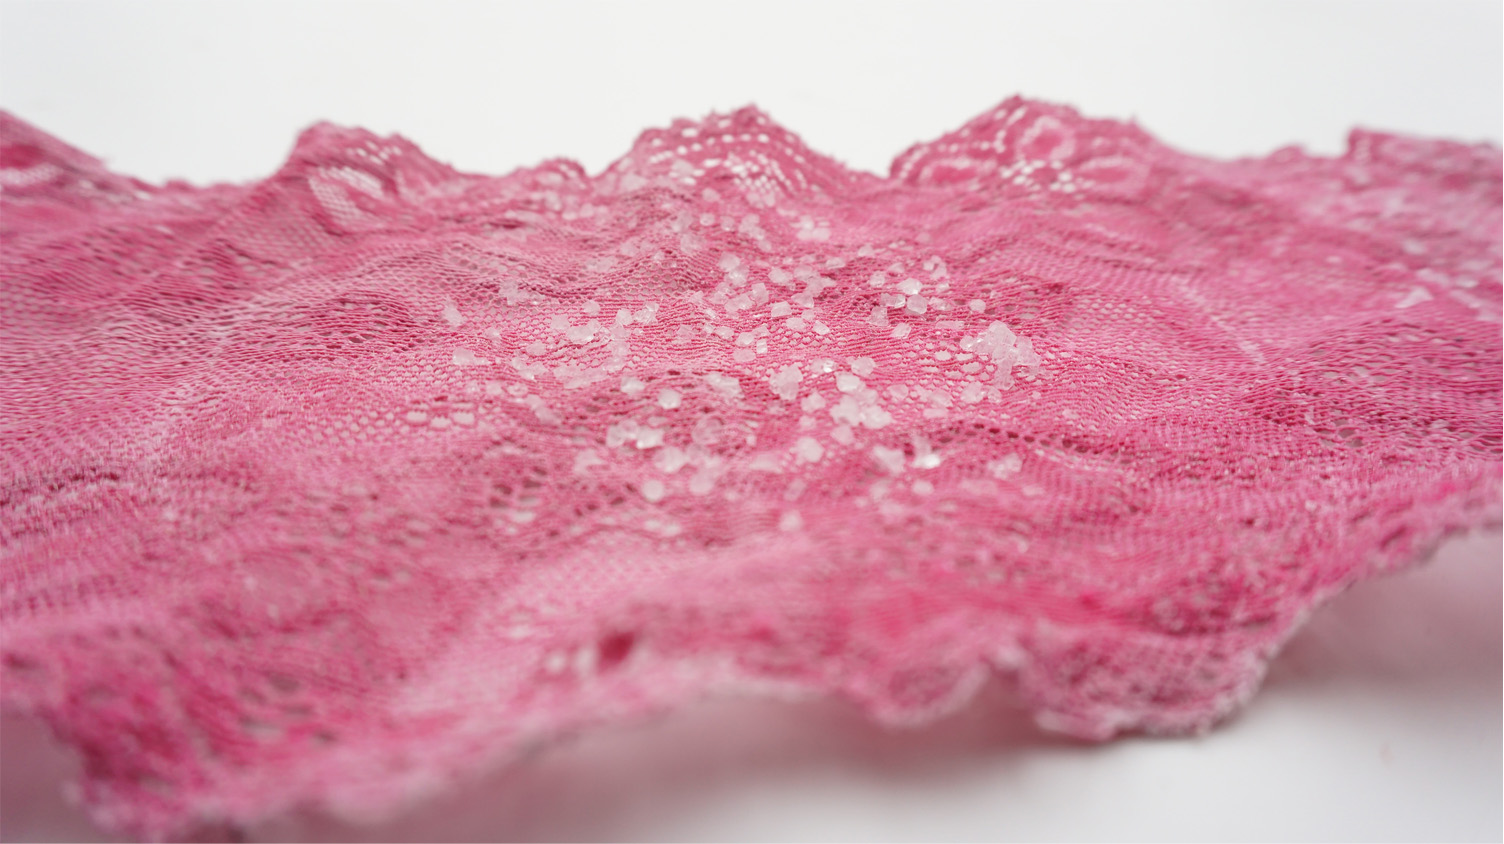
Here is the final outcome of the fan experiment:
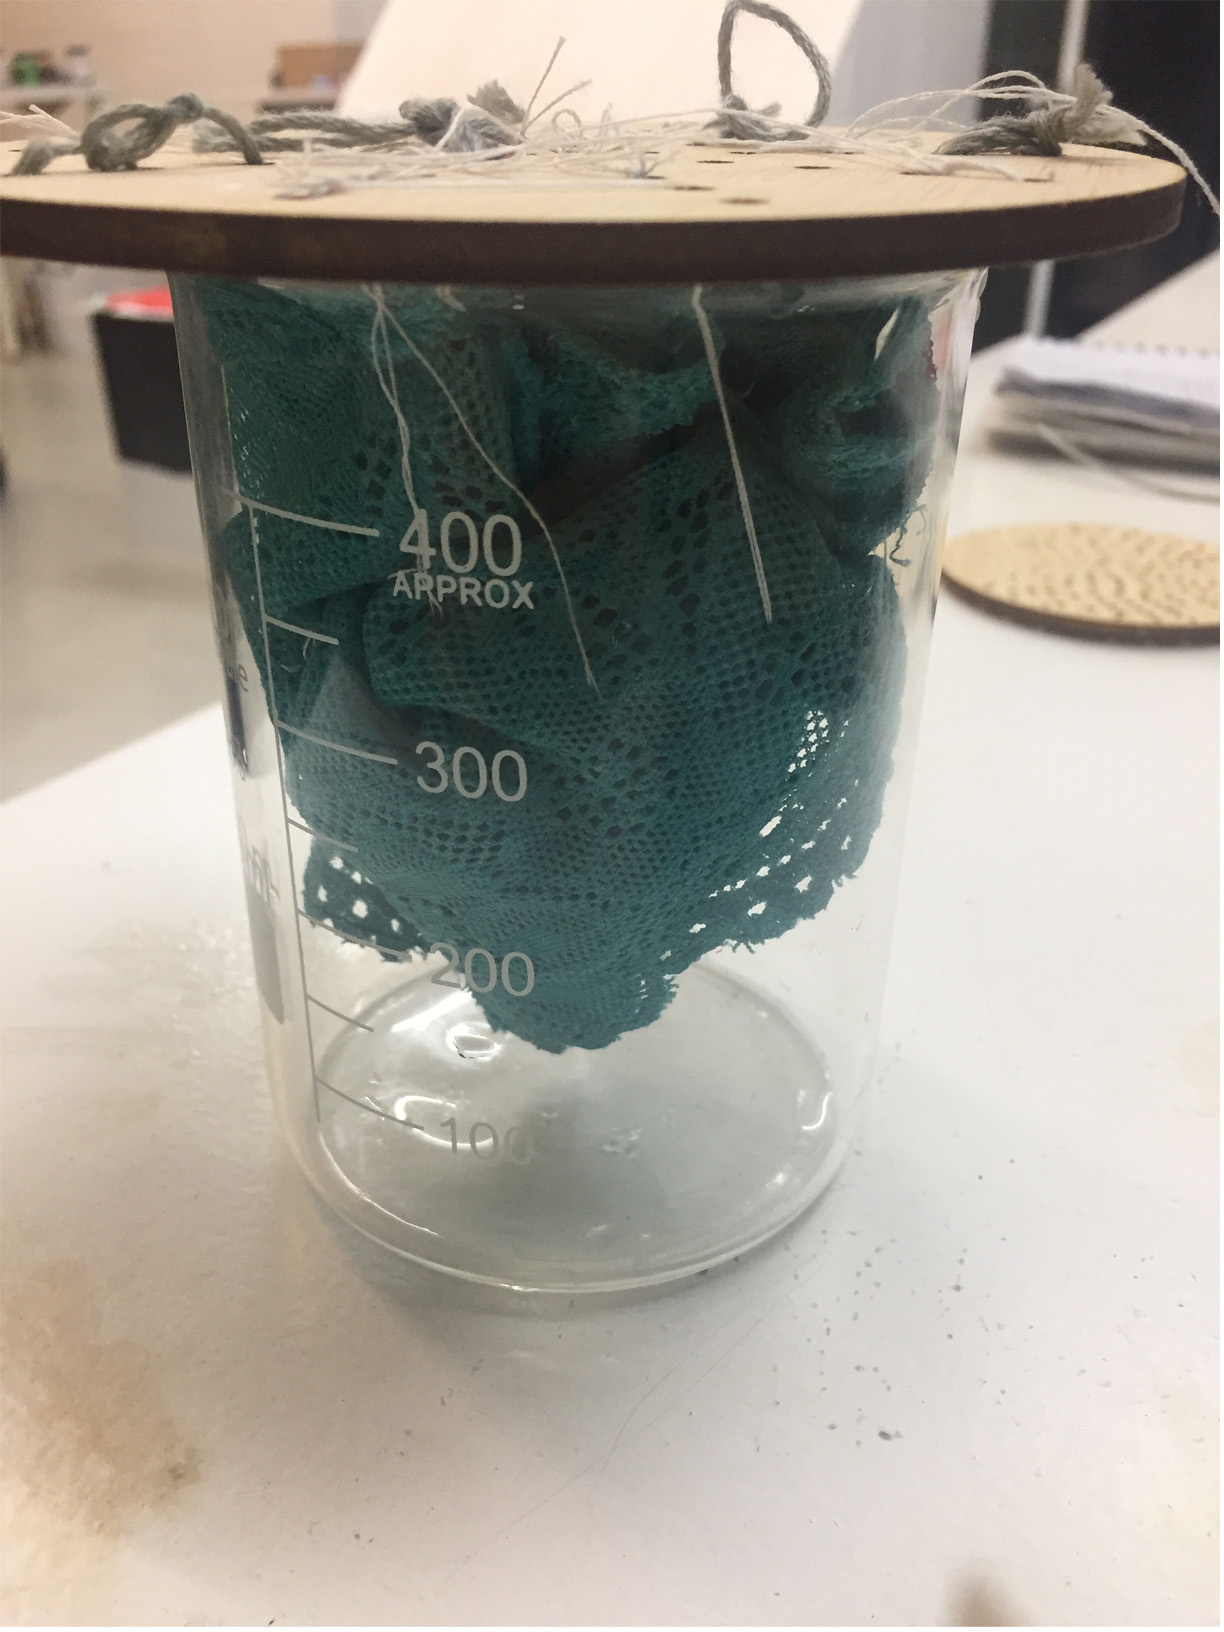
experiment ii
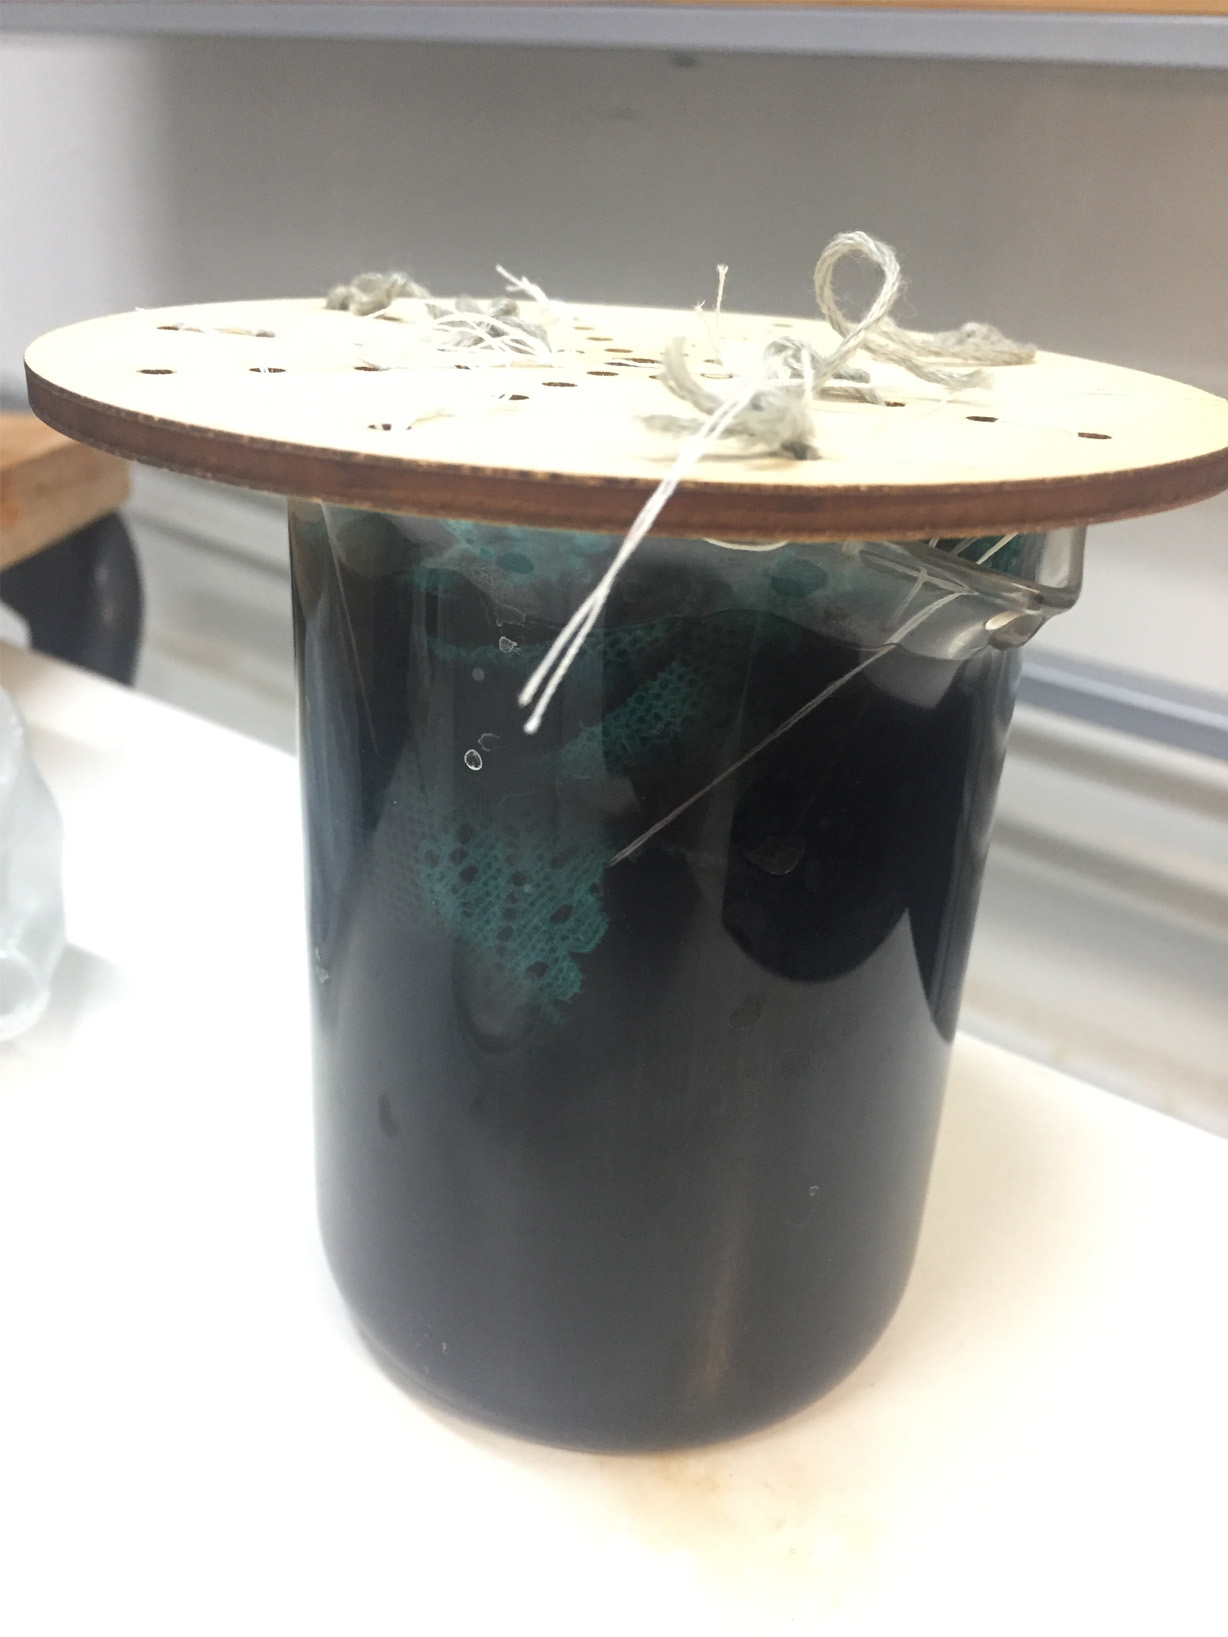
For the second experiment I want to try with a different lace fabric. I have to attach it to the wooden lid and sew it together so it doesn't touch the sides or the bottom of the glass.
I'll use the same recipe as the first experiment...
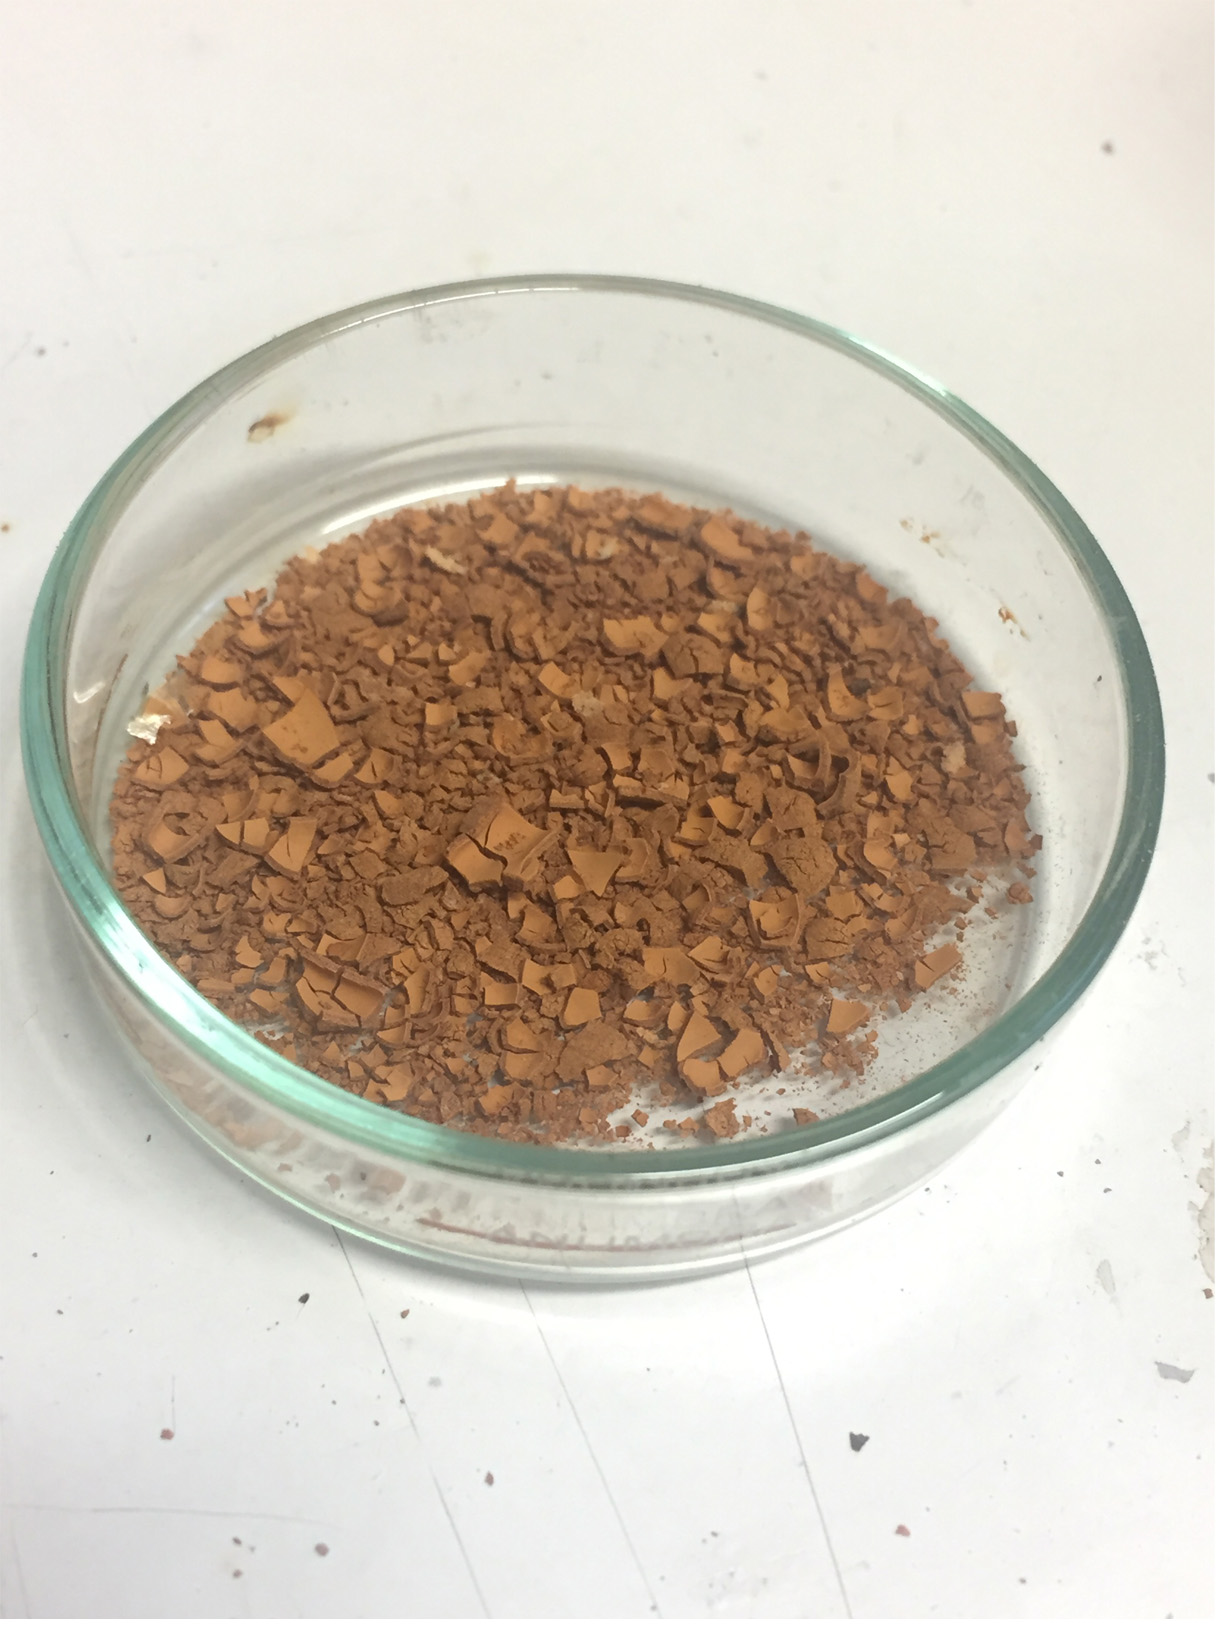 I'm also going to add my annatto pigments from the biochromes week to see if I can colour the crystals in a nice orange contrast to this turquoise lace.
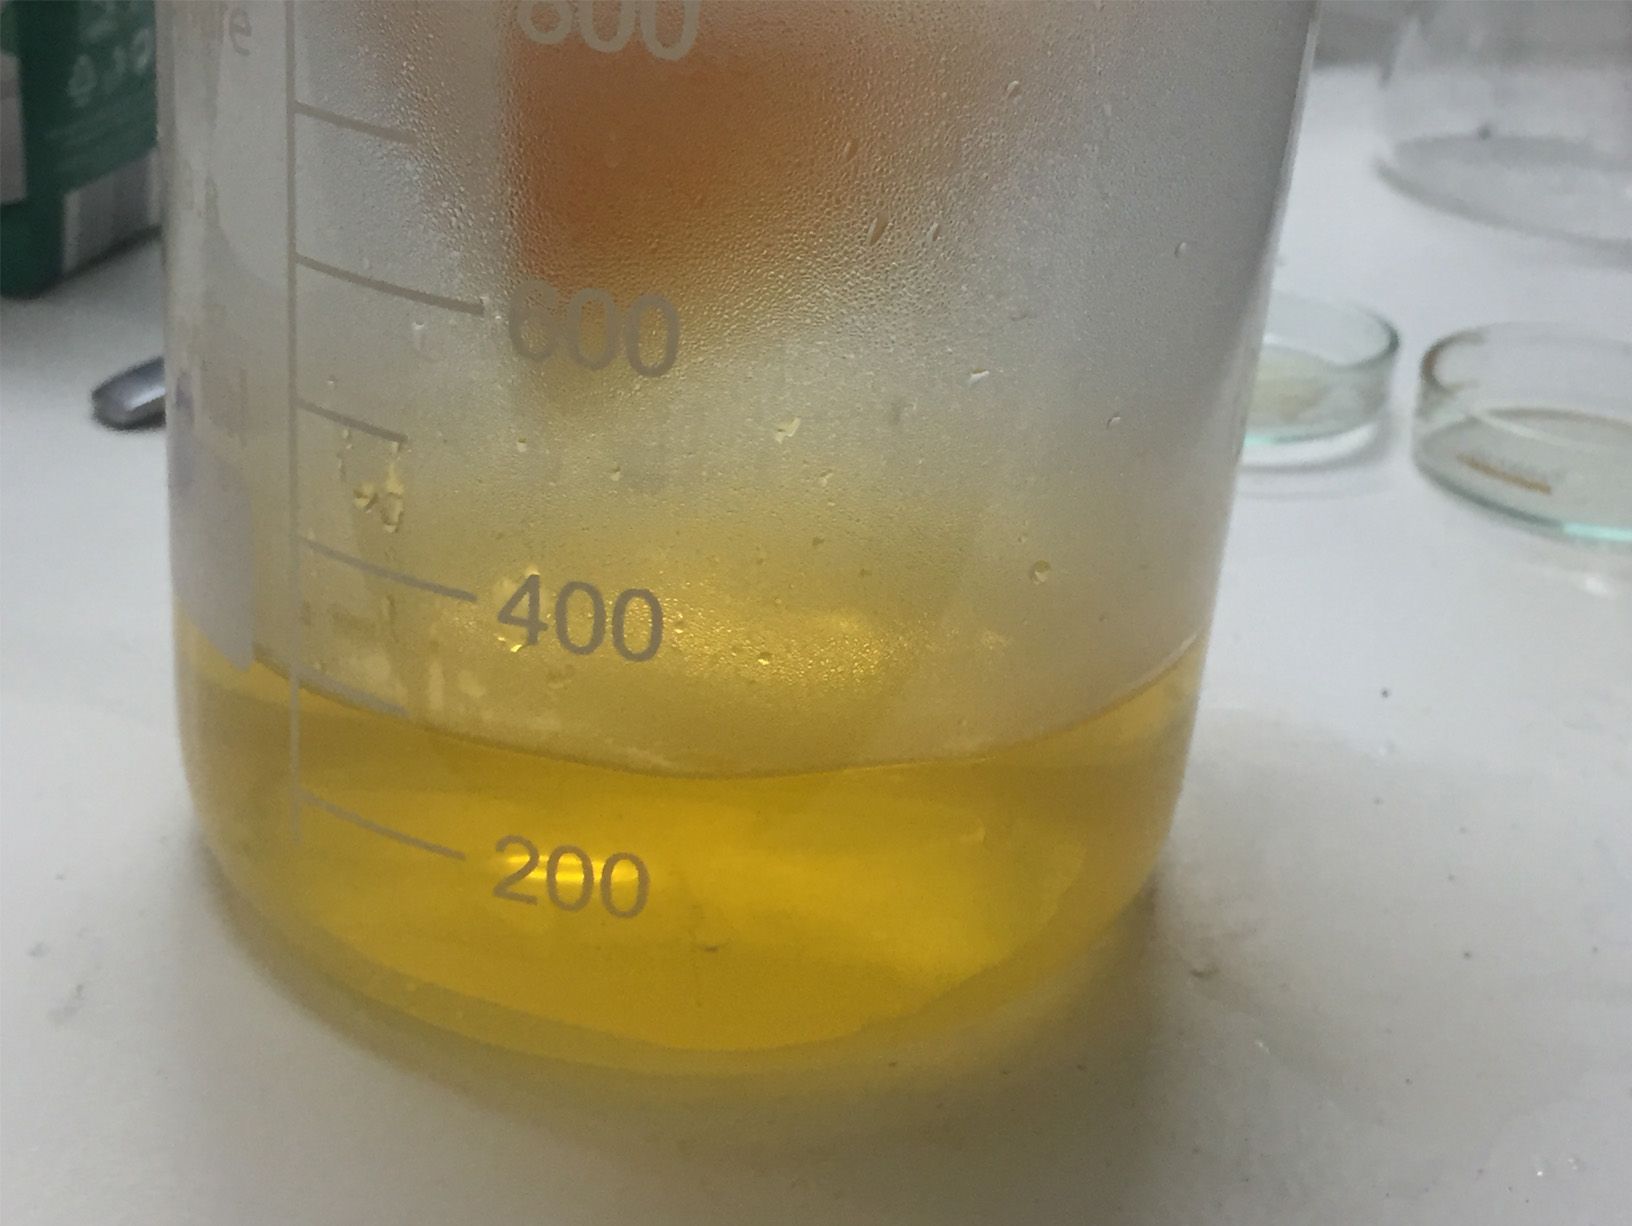
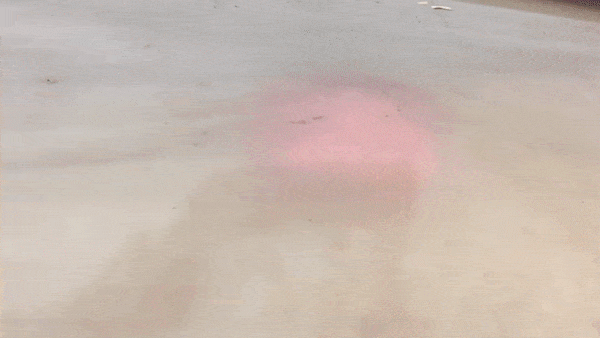
When I add the solution to the crystallisation mix it turns the liquid dark
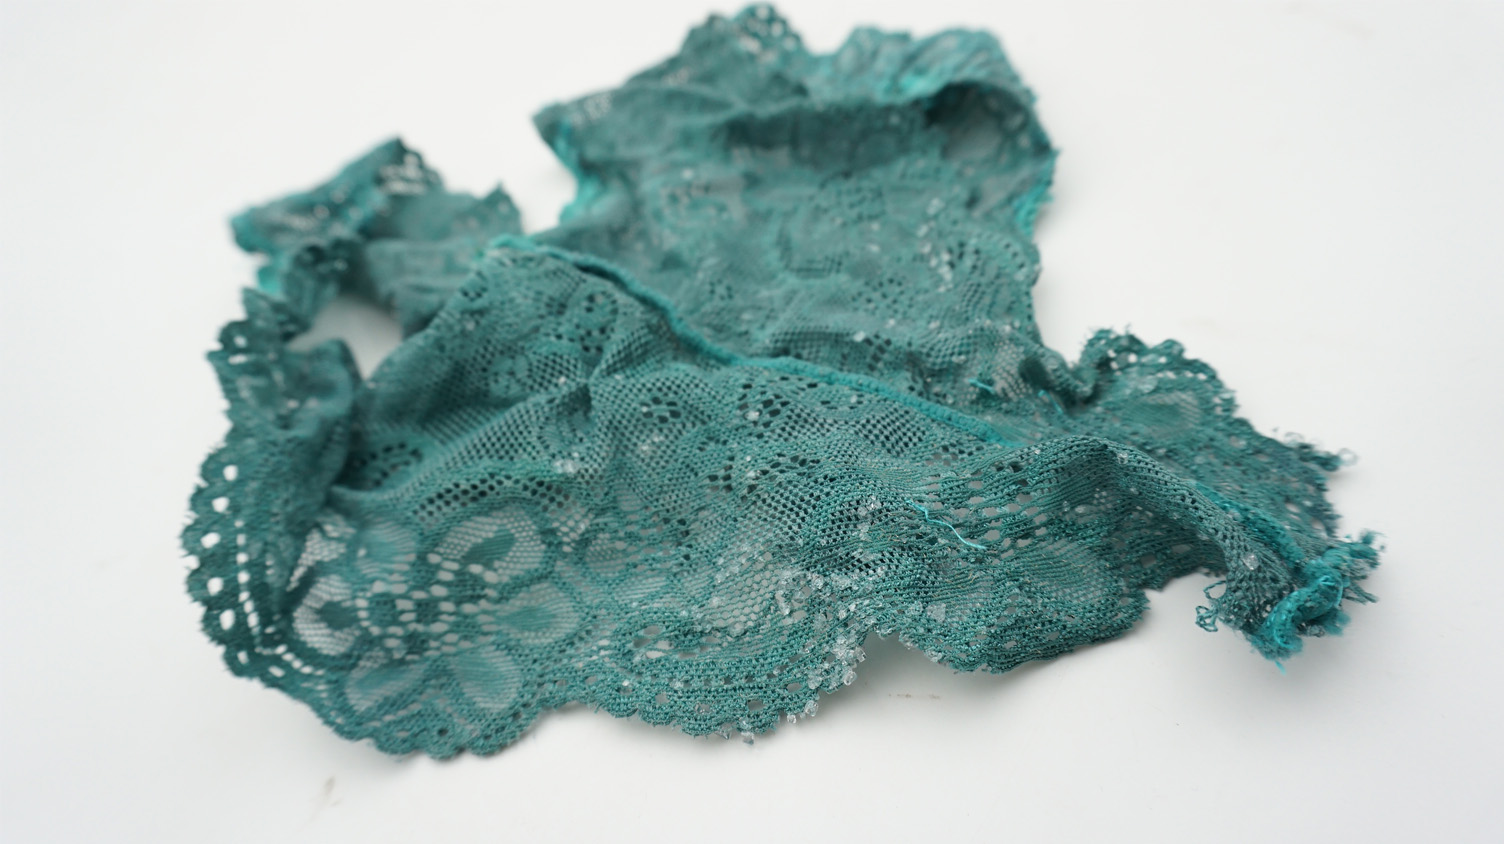
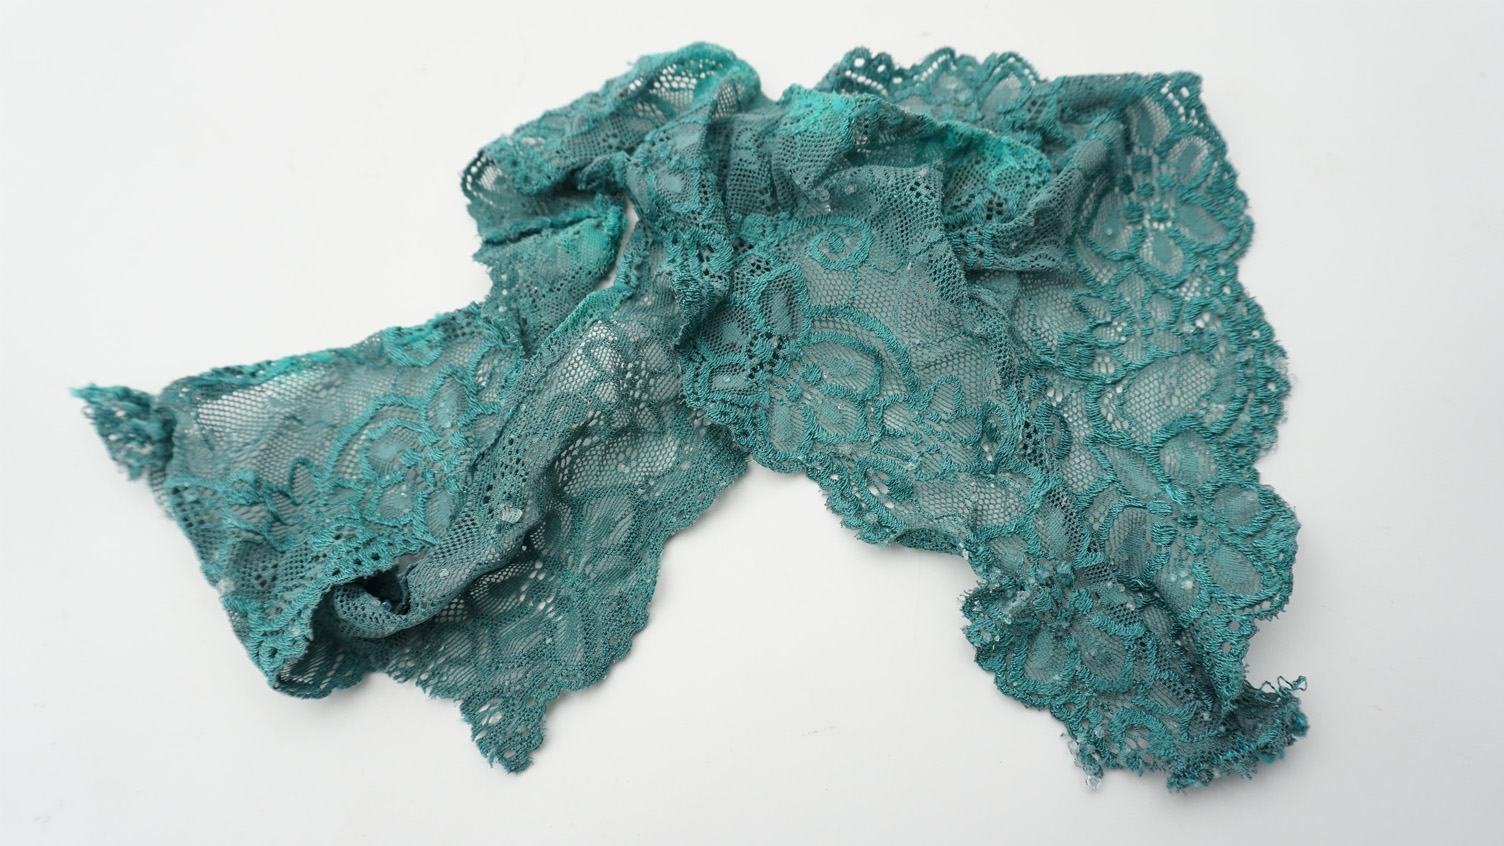
Here are some pictures of the final outcome... the pigment did not dye the crystals but the fabric came out slightly darker.
experiment iii
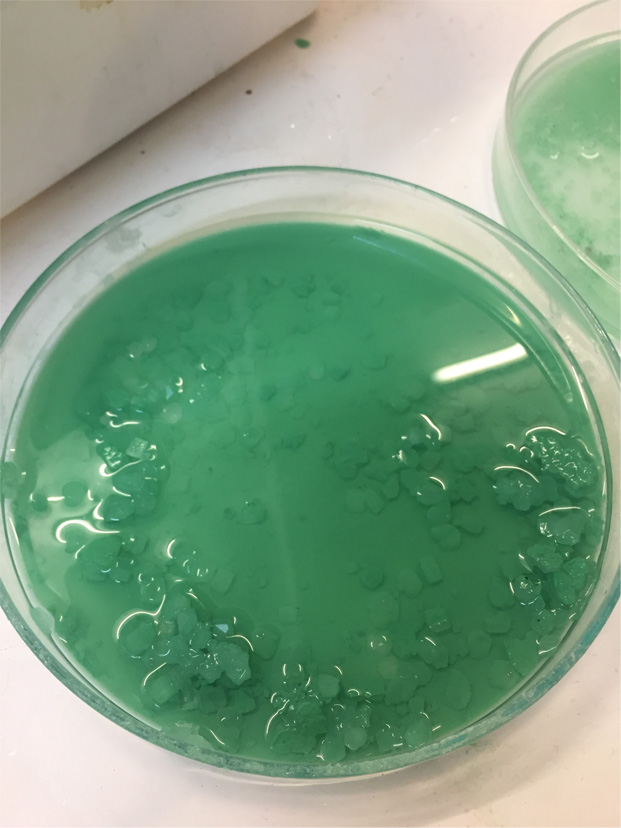
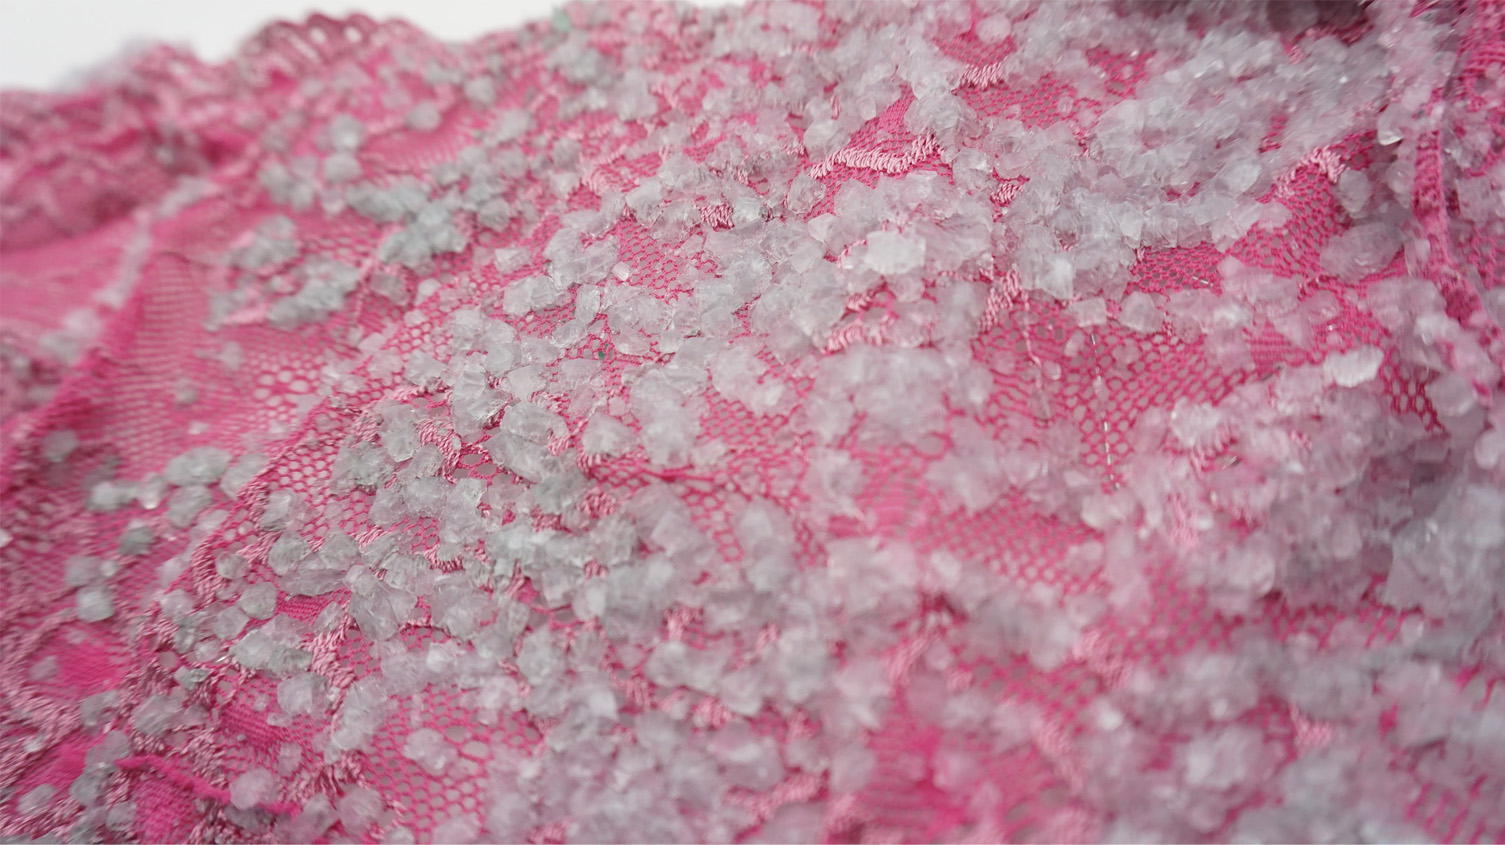
I did another experiment with pink lace. I wanted to try and create some colour contrast with the crystals so tried some green pigment in my recipe.
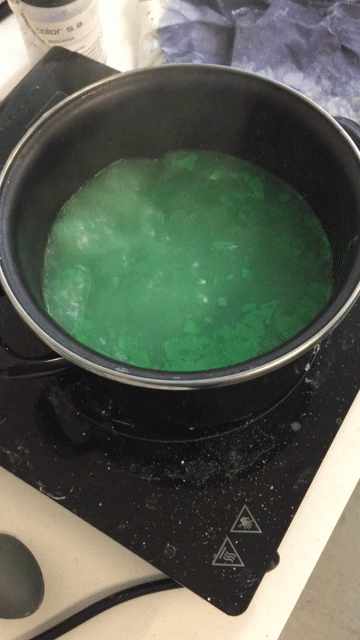
Here is the ratio for crystalising with borax
| water | borax | pigment |
|---|---|---|
| 2l | 9tbsp | pinch |
The method is easy: just boil water, add the borax and the pigment; stir to dissolve; filter with a coffee filter; pour into clean container
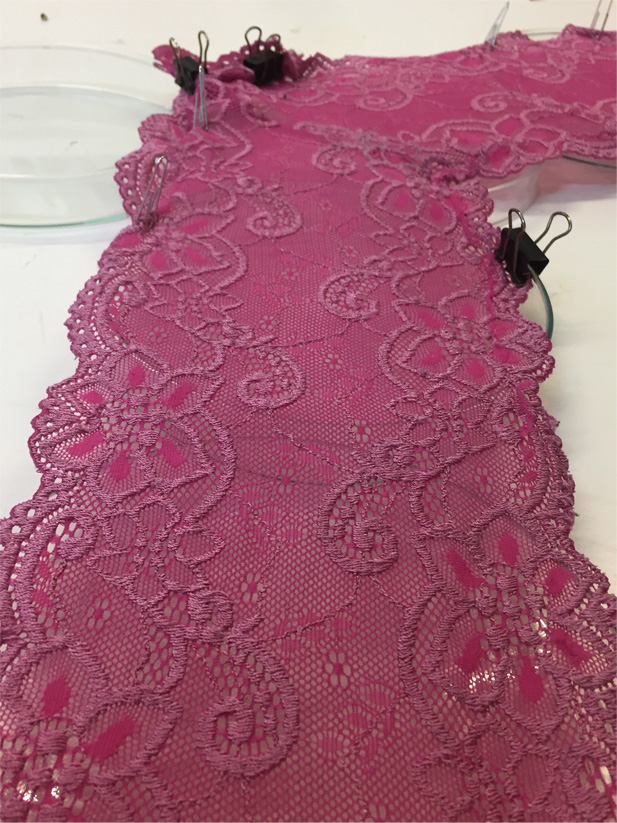
This lace too big for a glass beaker so will drape it over some petri dishes, clipping it to the sides. The liquid is absorbed by the fabric and will leak through the material hanging over the edges
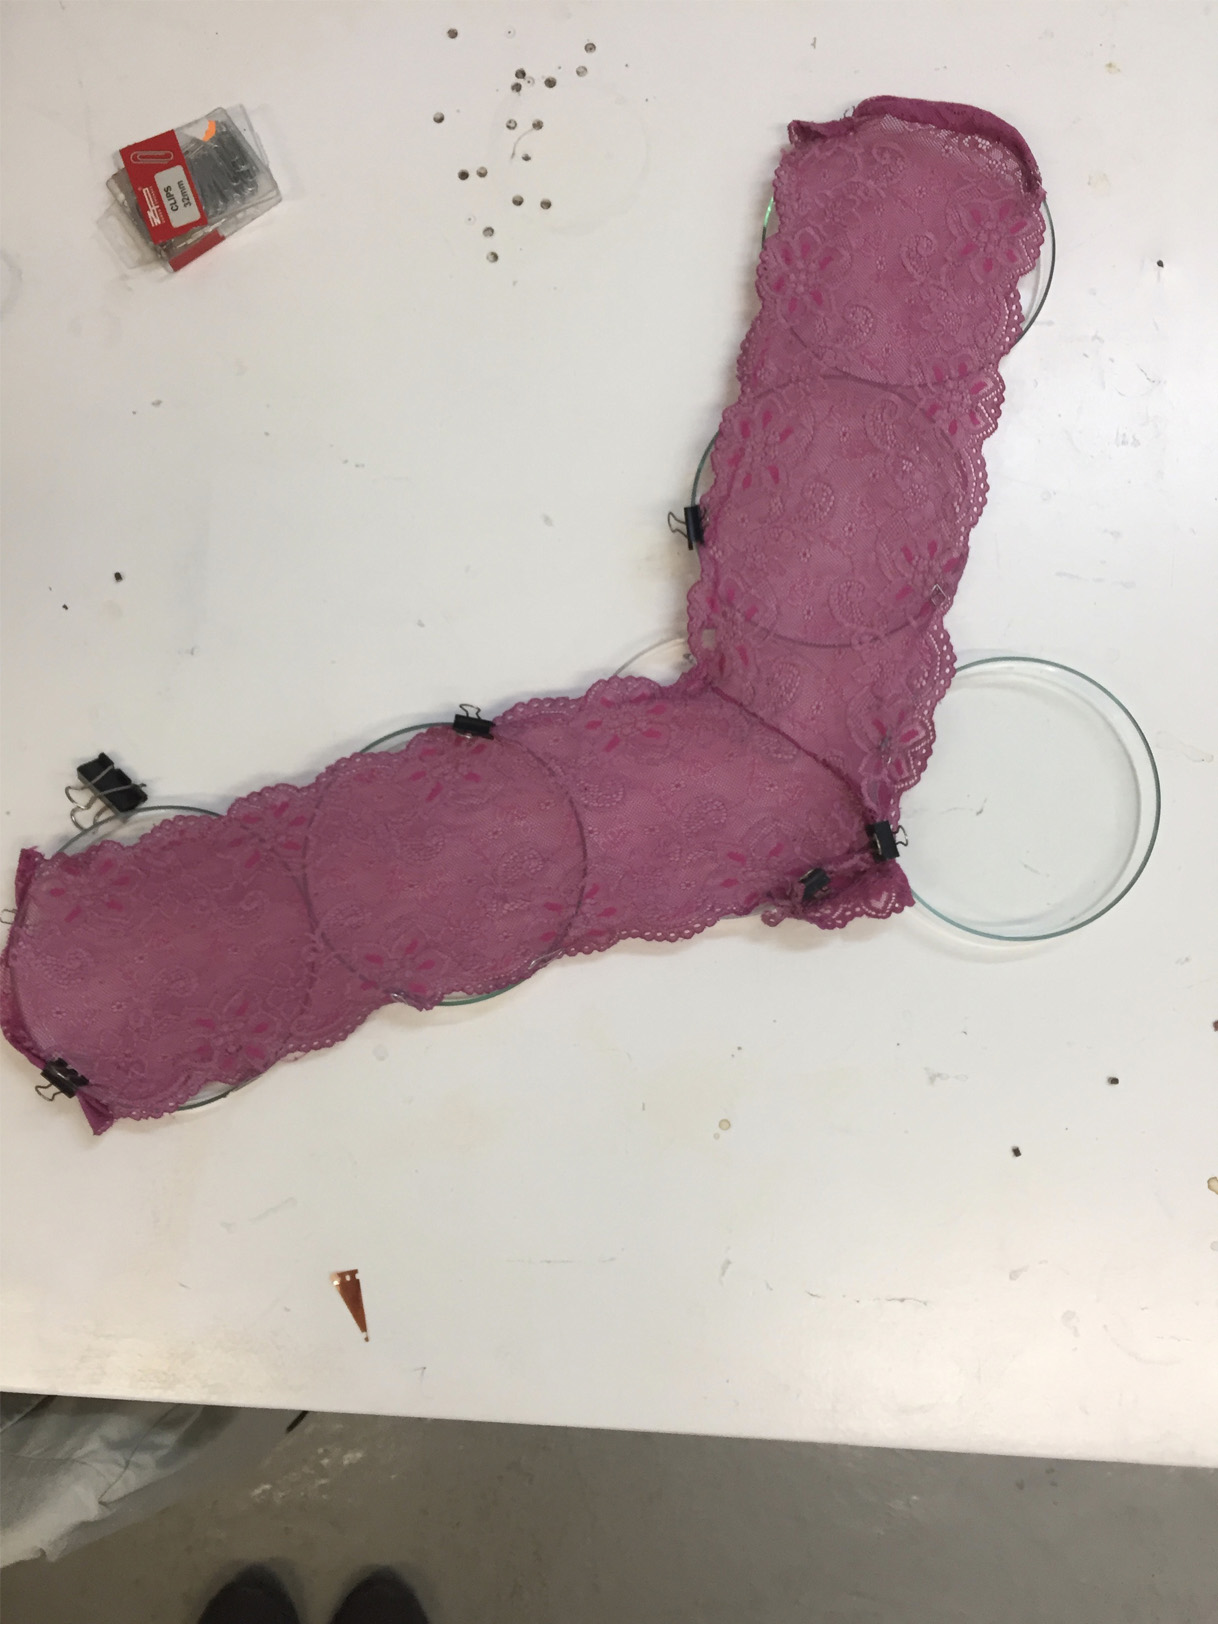
I reused the solution..
because the petri dishes were really shallow so the crystallisation process is more difficult to execute..
placed the lace into a bigger tray so it could float more easily and not leak so much. When I left it over the weeeknd, it came out with a lot more formations.
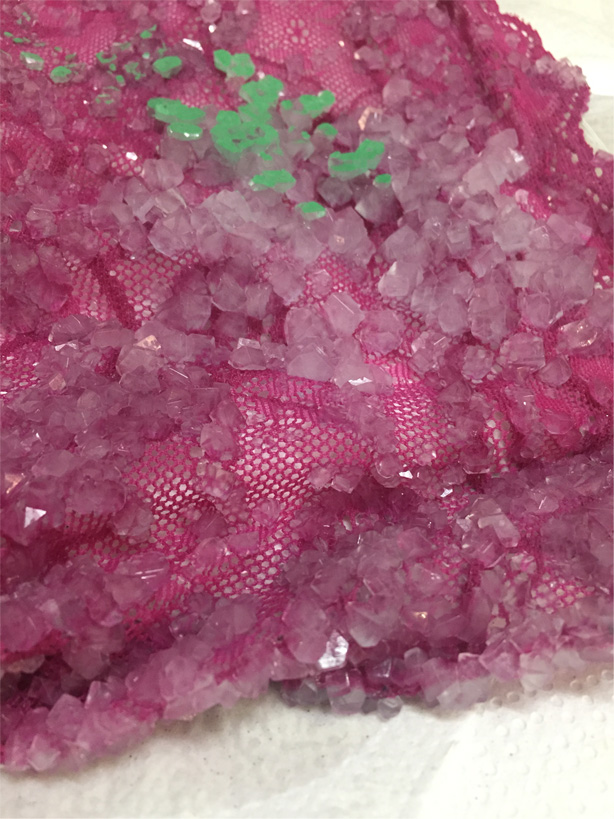
Here are my final pictures of this sample
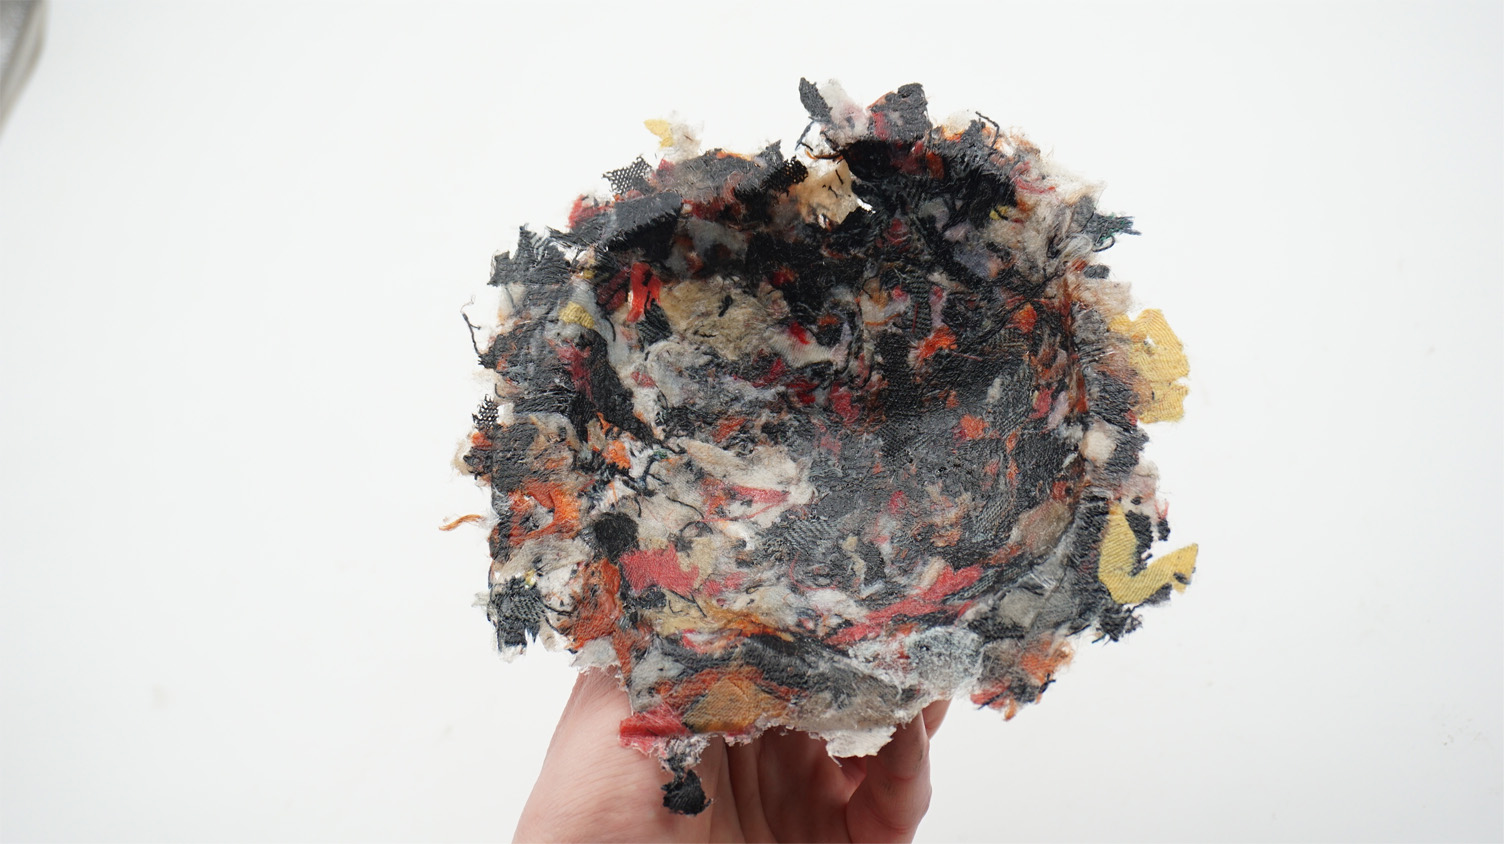
composite
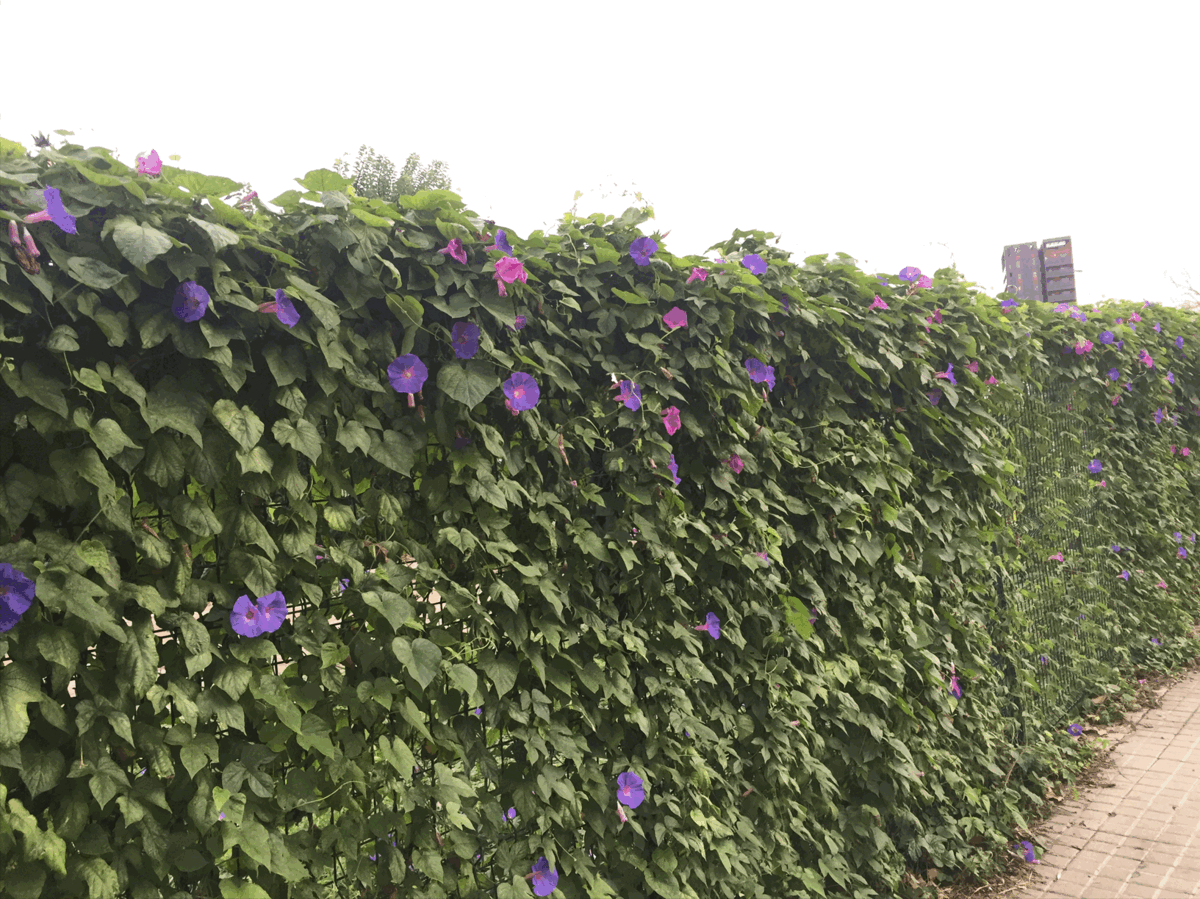
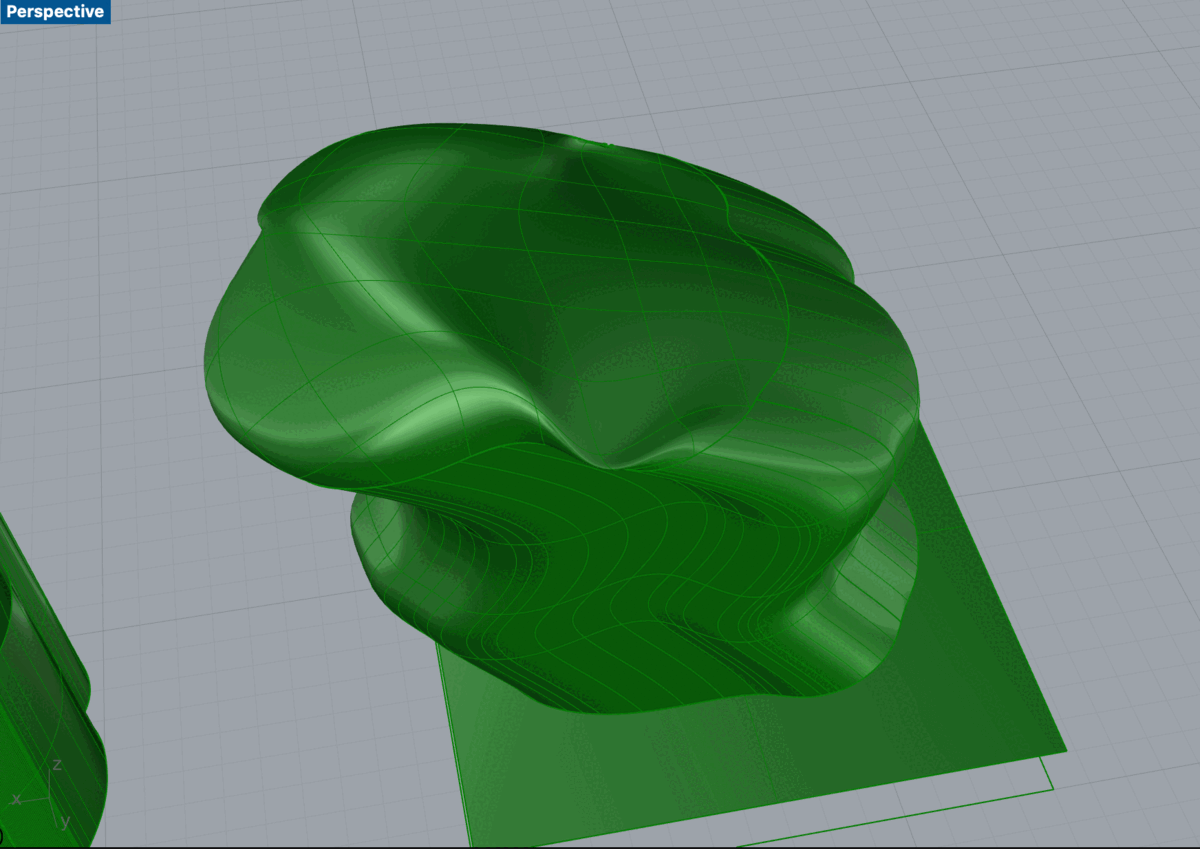
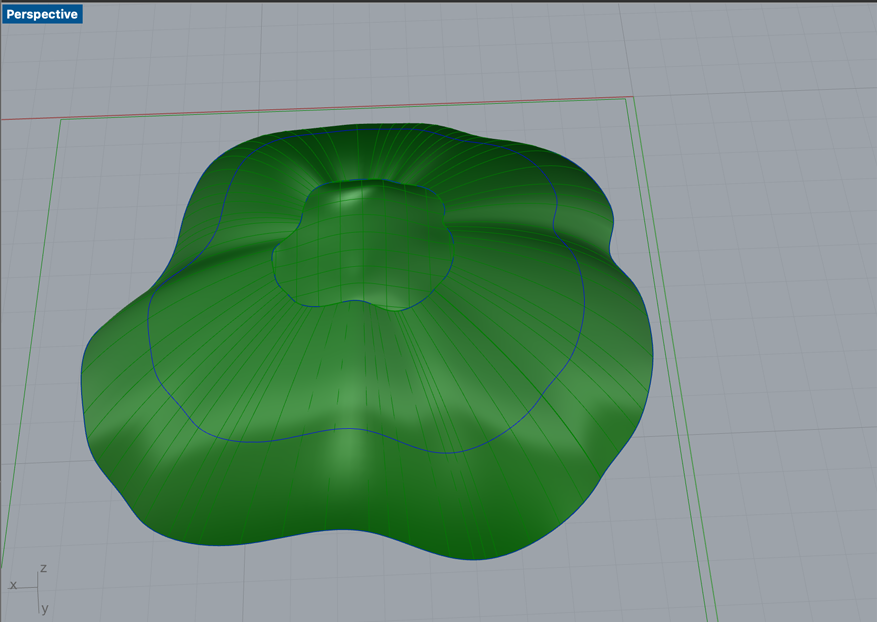
I took inspiration from these flowers I saw and thought to do a hat with the shape of the petals
I'm still learning different tricks and commands with Rhino..
This video really helped translate flower structures into Rhino
I am gradually becoming more agile with the program and used some new commands to try and achieve different hat shapes:
- cage edit: dividing shapes and manipulating points within them
- extrude along curve: use a curve in y axis to extrude from 2d
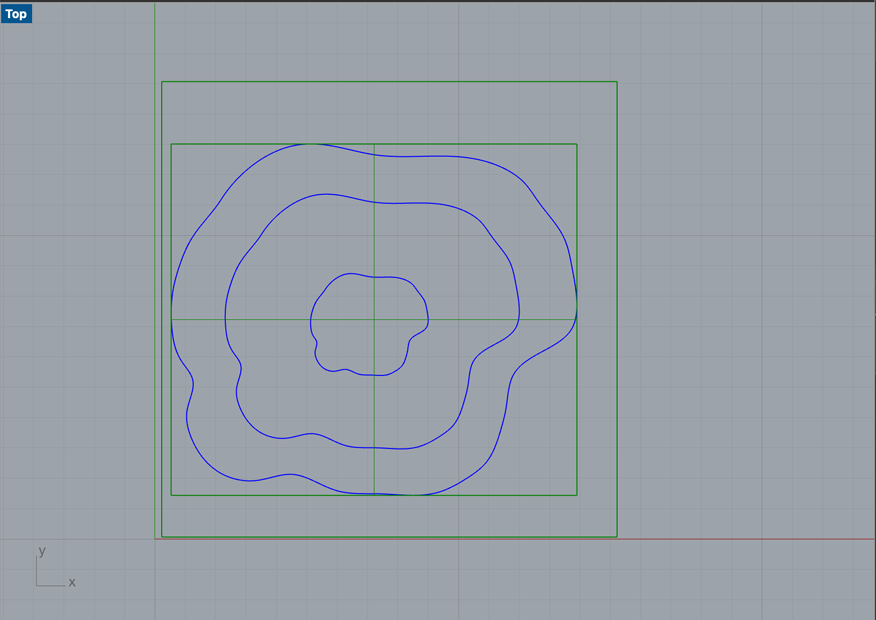
I realised some things about casting: that determining the surface to expose depends on the positive and negative space of the model...
My initial idea was to do a hat but this final piece will be a small bowl.
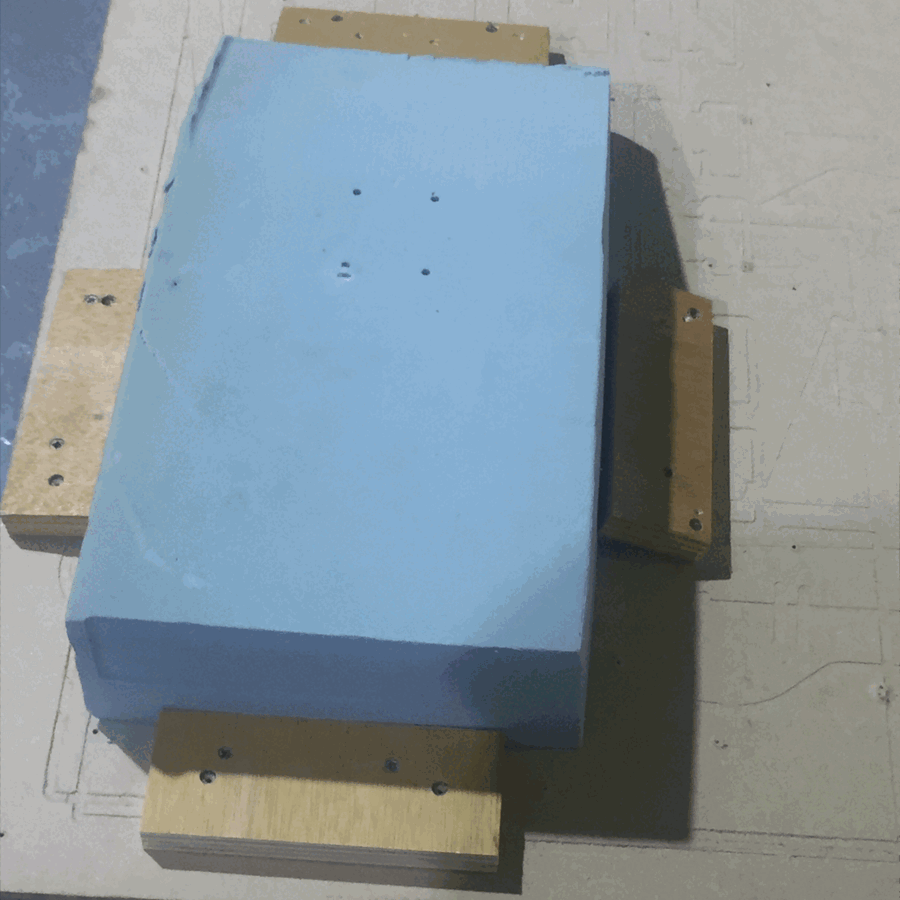
cnc
First I need to prepare my Rhino file for the CNC machine with Rhino Camp - a licensed plug in specifically for translating models into processes for these milling machines. The machine works with 3 axes, excavating and hollowing the material you use - so it means you have to work in reverse in terms of moulding positive or negative space..
- Setting a bounding box around the whole mold
- Moving the entire piece under the origin so it sits below the x axis
- Set the depth to 34mm for my design
- Place a square surface above the work
- Set the origin (starting point)
- 0,0 axis should be placed under starting point
- Define material: box stock; set positions of corners; **scale 3 axis adv = 3D modelling
the machine divides its processes into roughing and finishing: roughing via the x & y axes and finishing via the z (CNC MAP GIF))
- Tools: a flat edge tool is better for cutting/ball end tool is better for finishing
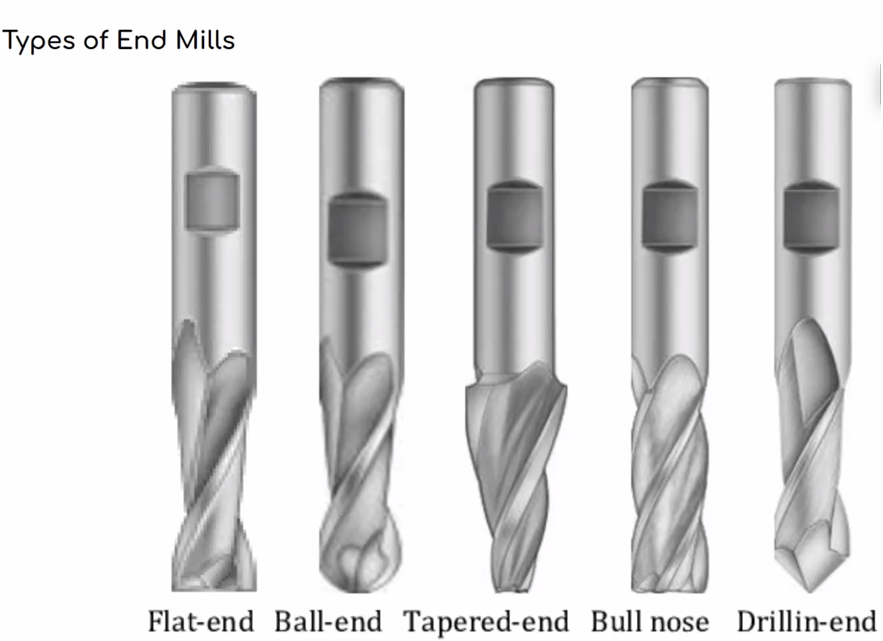
Upcuts are better for plastic materials (because cutting plastic down will compress the material more) downcuts are better for wood - this is to do with the direction of grains
- Editing tool dimensions depends on the model design and scale etc: in my case I will use 12mm diameter tool: l 90 / shoulder 60 / flute length 60 / 2 flutes
- Setting the cutting speed to 6500mm / approach 3500mm
- Feeds and speeds: load from tool - stock max (the measurement of the non-cutting space when the tool is lifted) = 10
- Stock offset = 0.6
- Cutting patterns: offset & mixed
- Step over distance = pause between cutting. In my case this is set to 25% of tool diameter
- Parallel finishing: select square; tool; ball mill : l 70 : shoulder 60 : flute 60
- Feed/speed = 6000 speed
This shows the route of the CNC machine as it excavates the mold.
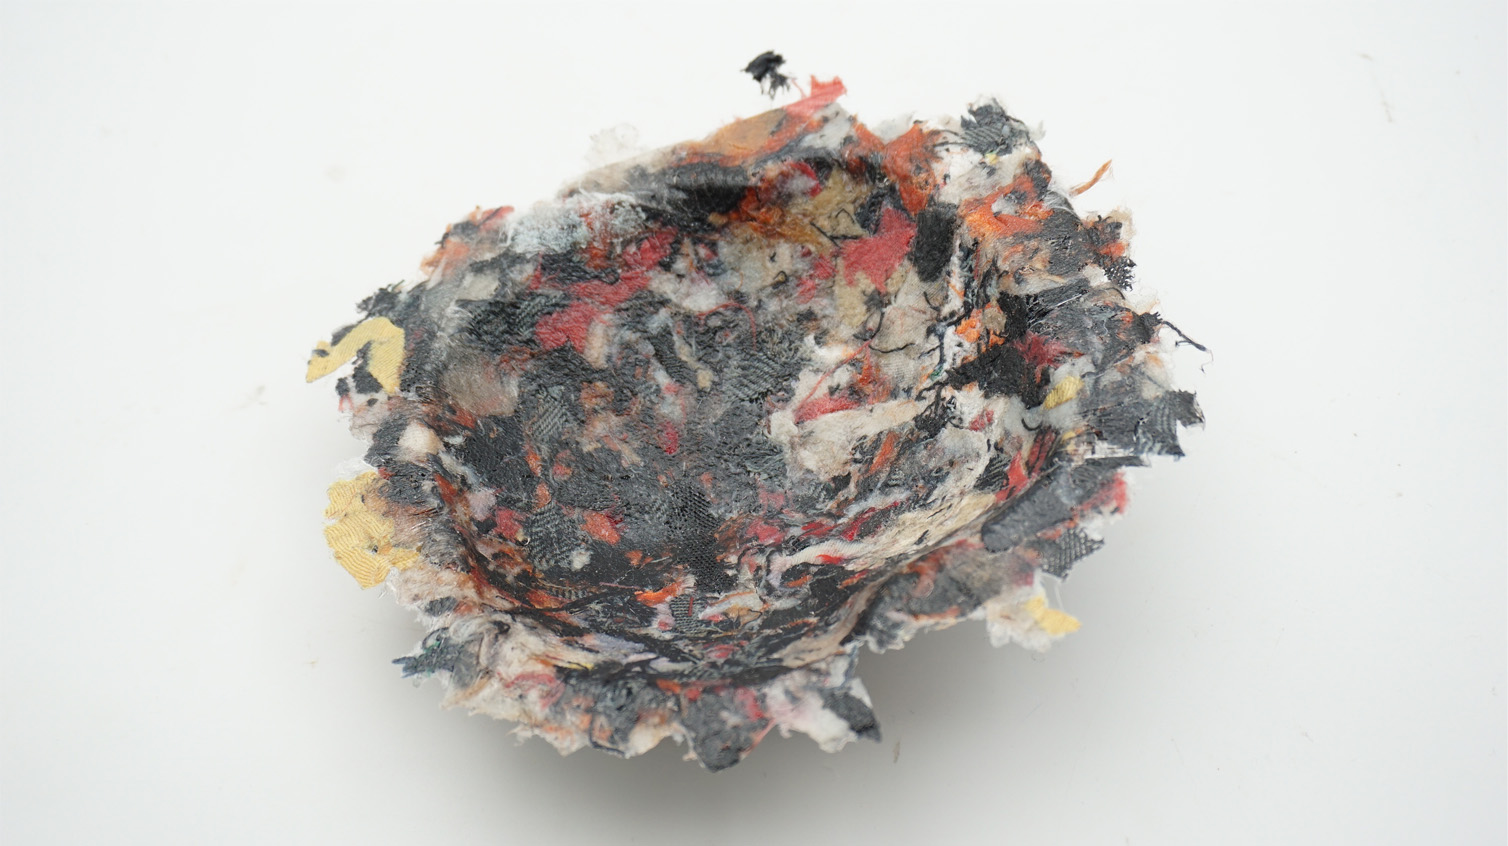
molding
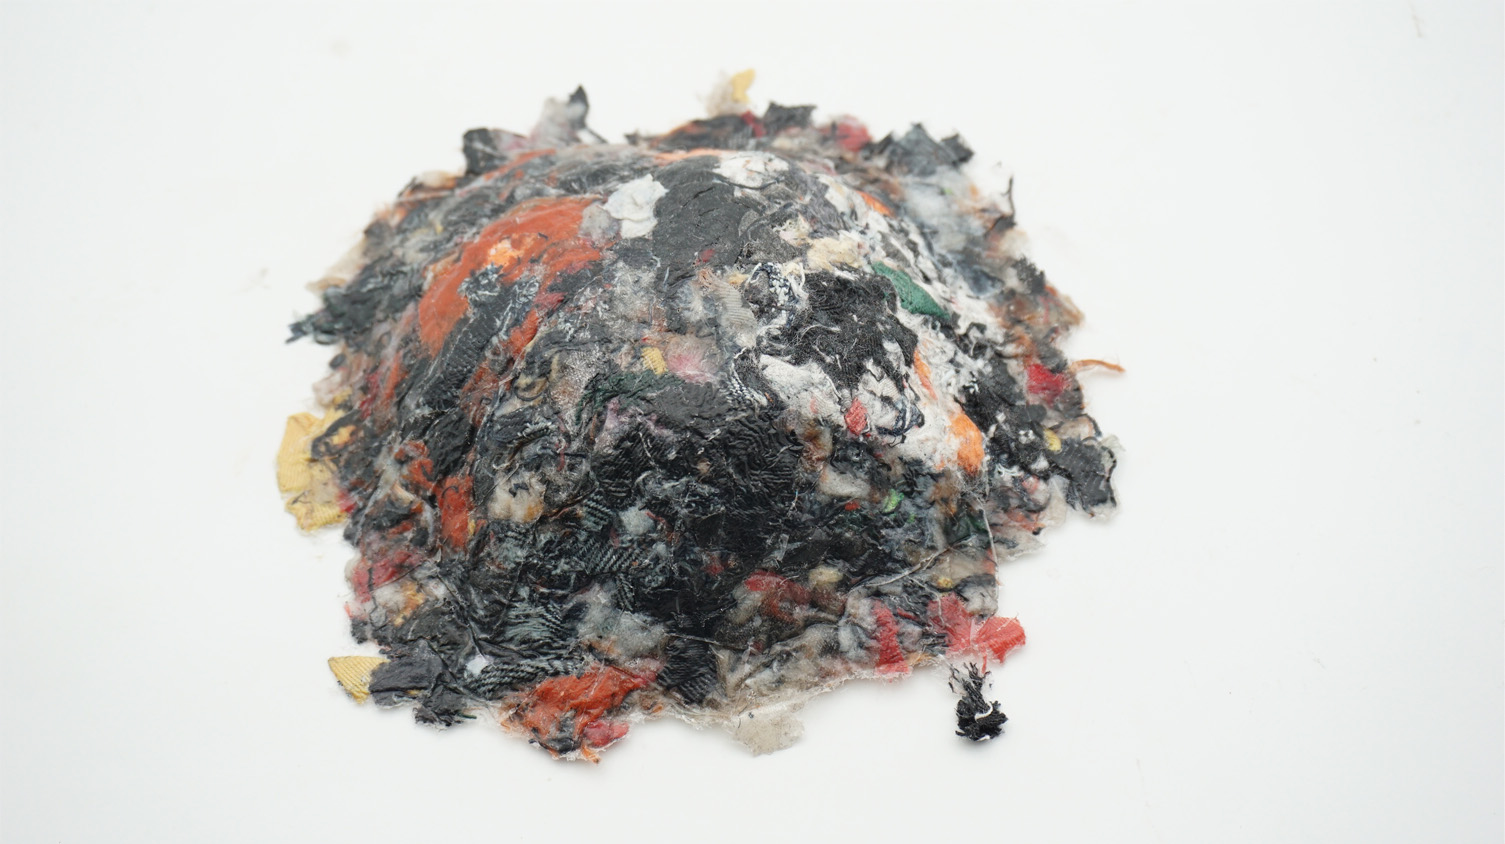
Here are some final outcome pictures
Here are pictures of the final outcome:
my initial design was inspired by the flowers and i wanted to do a hat but decided to downsize so this final outcome is more like a small dish or ashtray.
inspiration
I wanted to explore casting fabric with hard materials like concrete because it relates to the ideas I have for my final project: impregnating fabric with ceramic material that will insulate part of the body.
casting
This is another cool way to use textile as scaffold because in this case it behaves as the scaffold to hold concrete. My inspiration to do this experiment stems from my ideas on my final project: bioceramic materials. As a starting prototype, my design will be injected with concrete casting - in a similar format to the pressing therapeutic beads in weighted blankets; the liquid will dry and create and enclosed pocket. In this journal they experiment with impregnating textile. Listener is the design of a complex and multi-layered membrane.

design
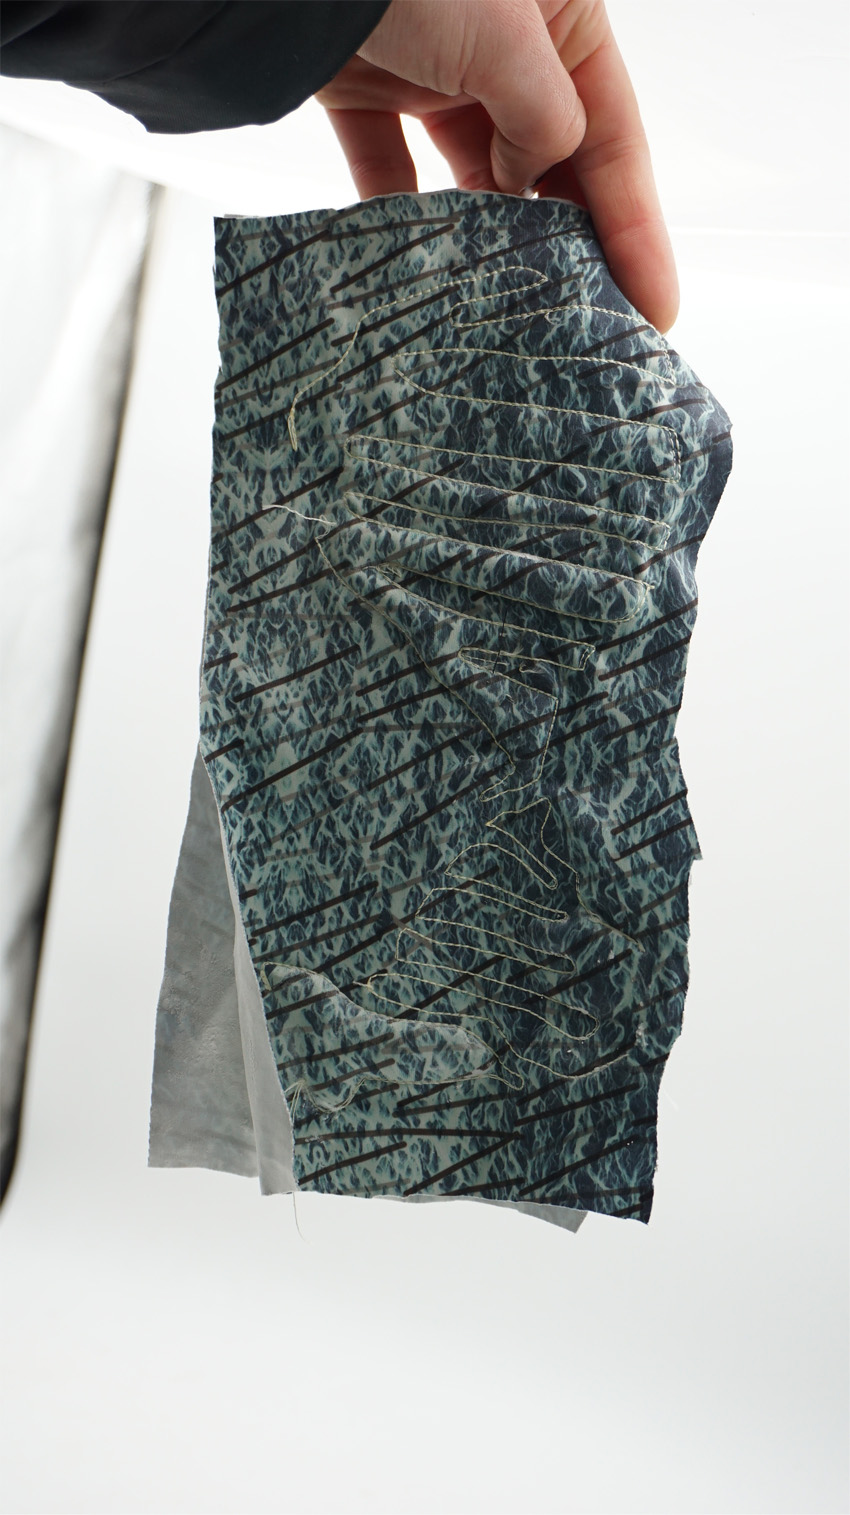
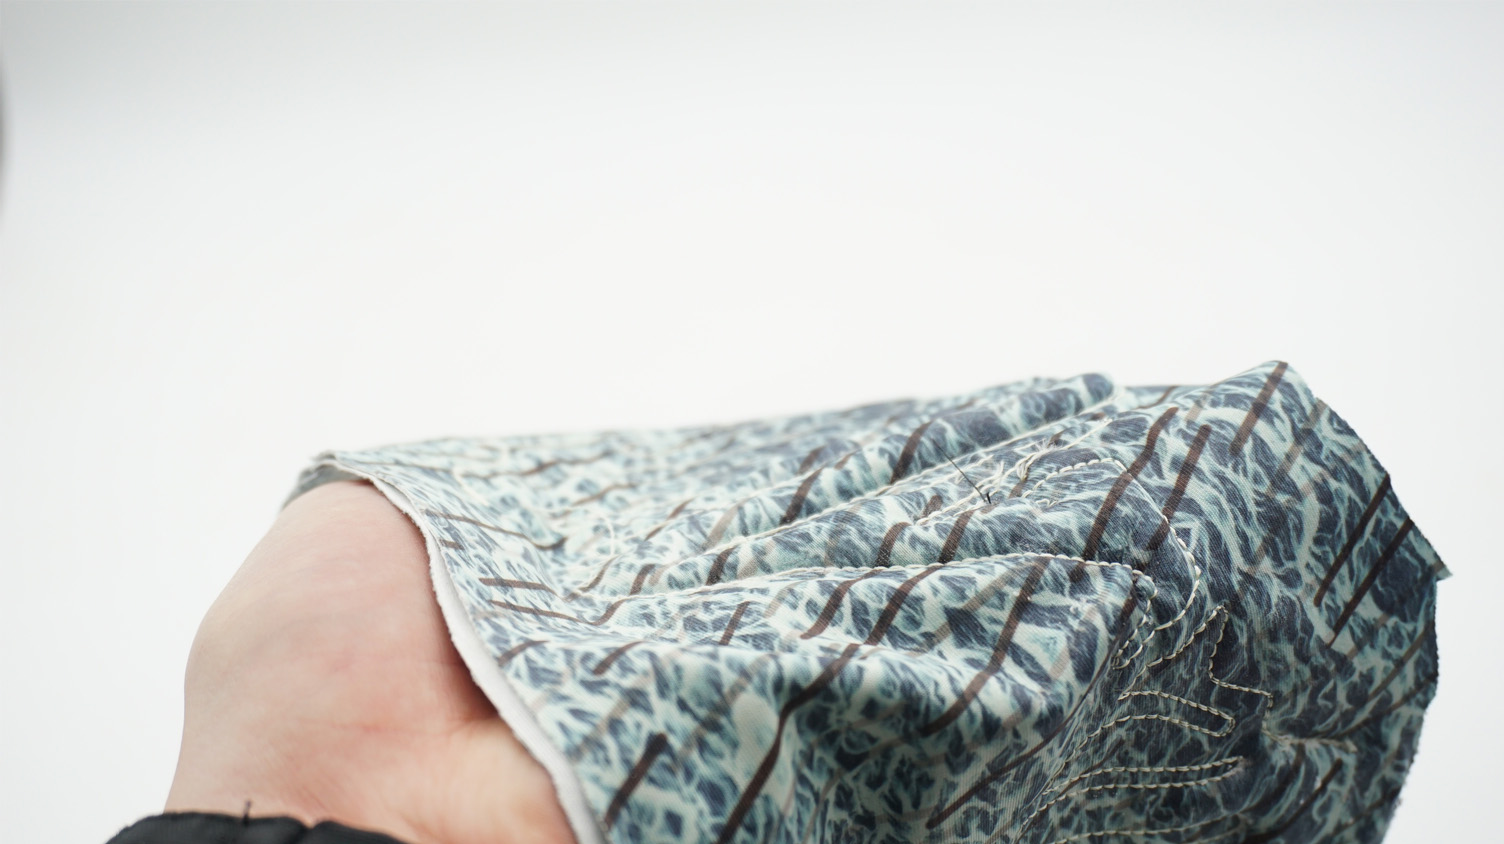
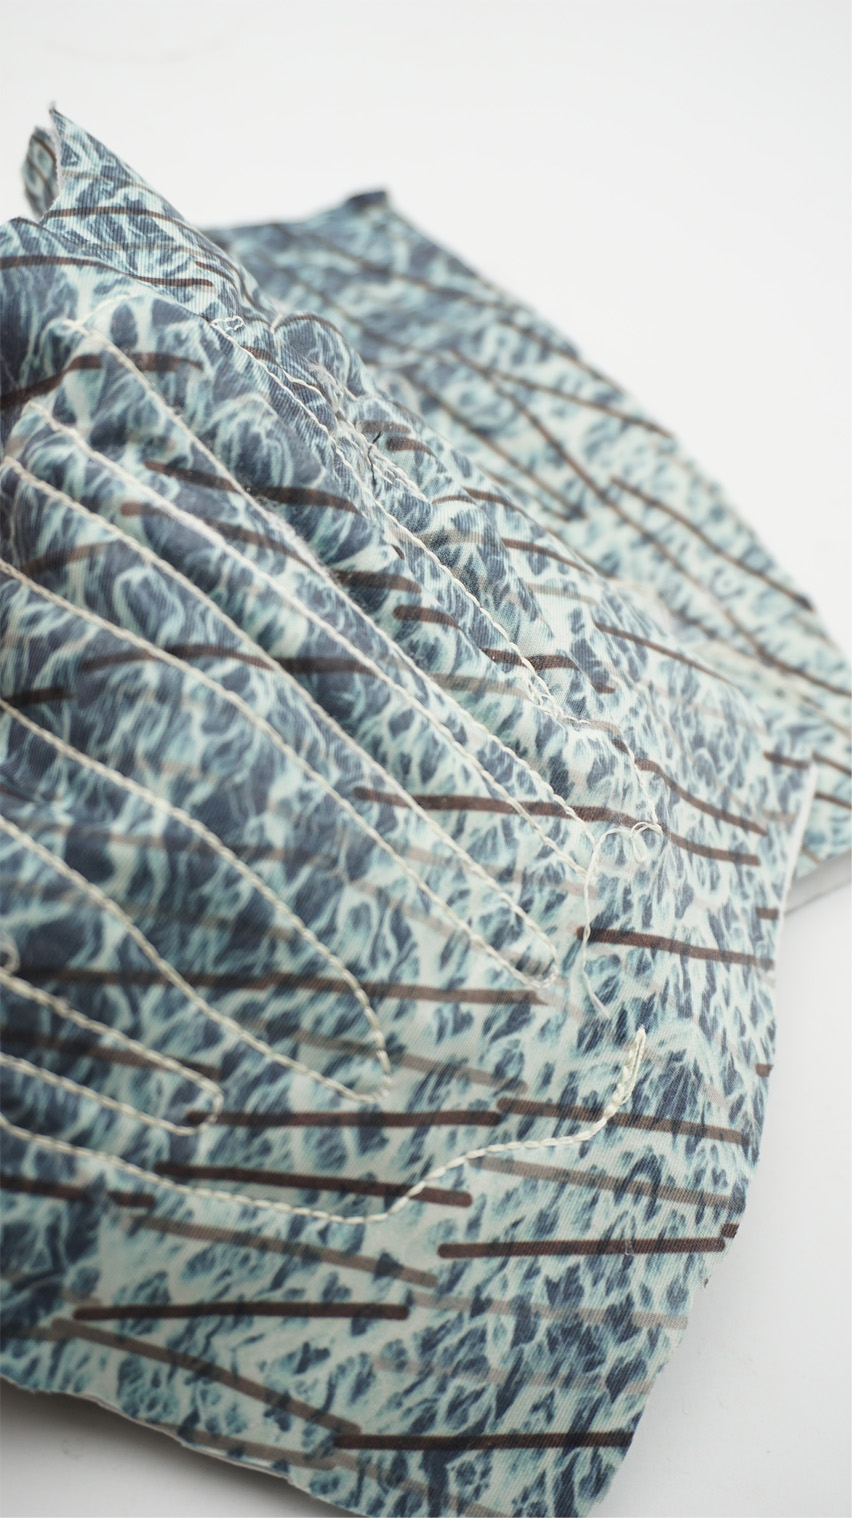
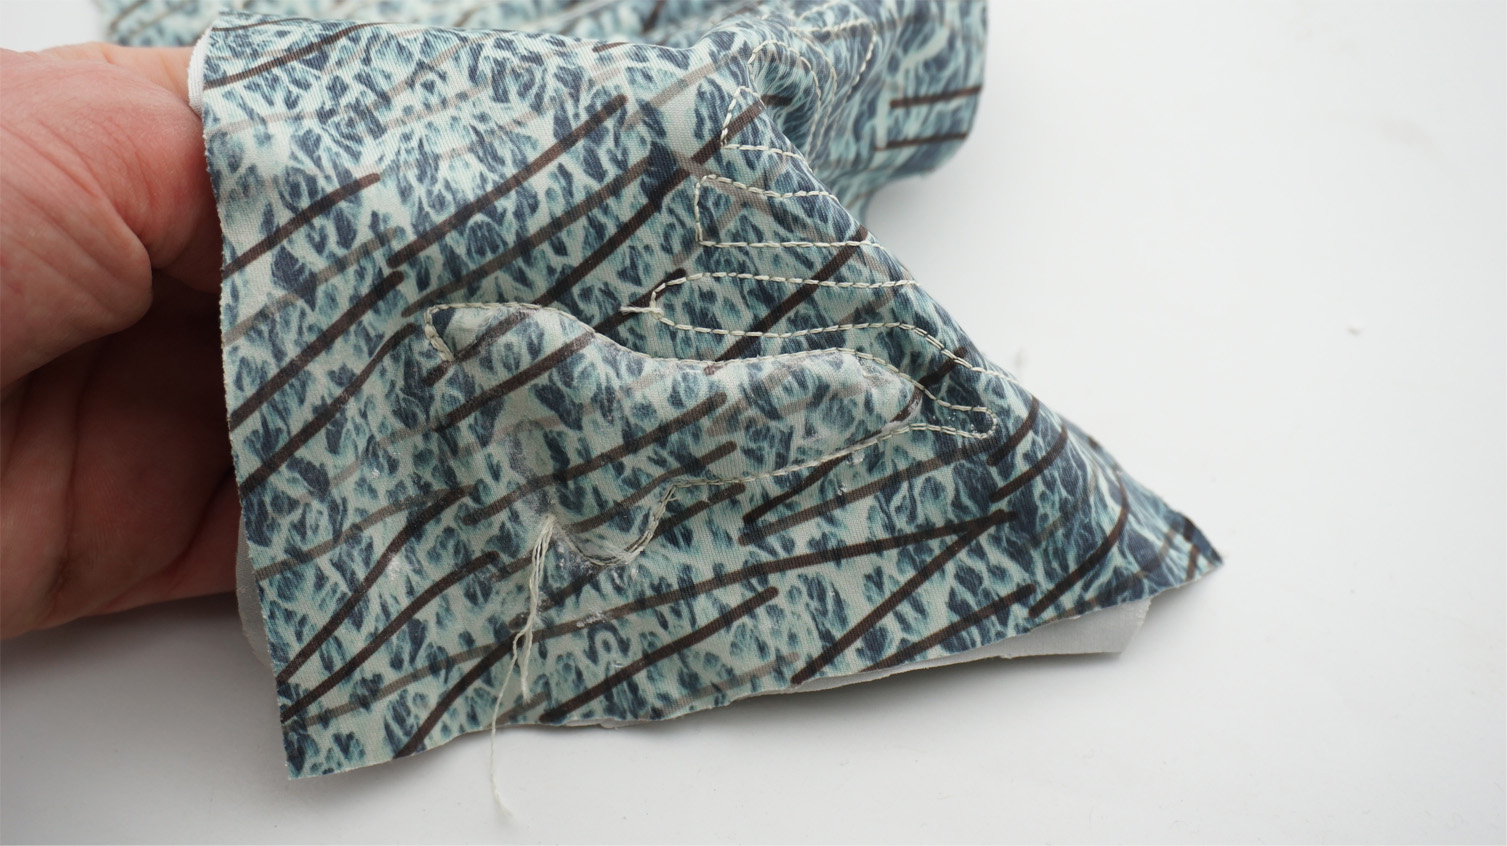
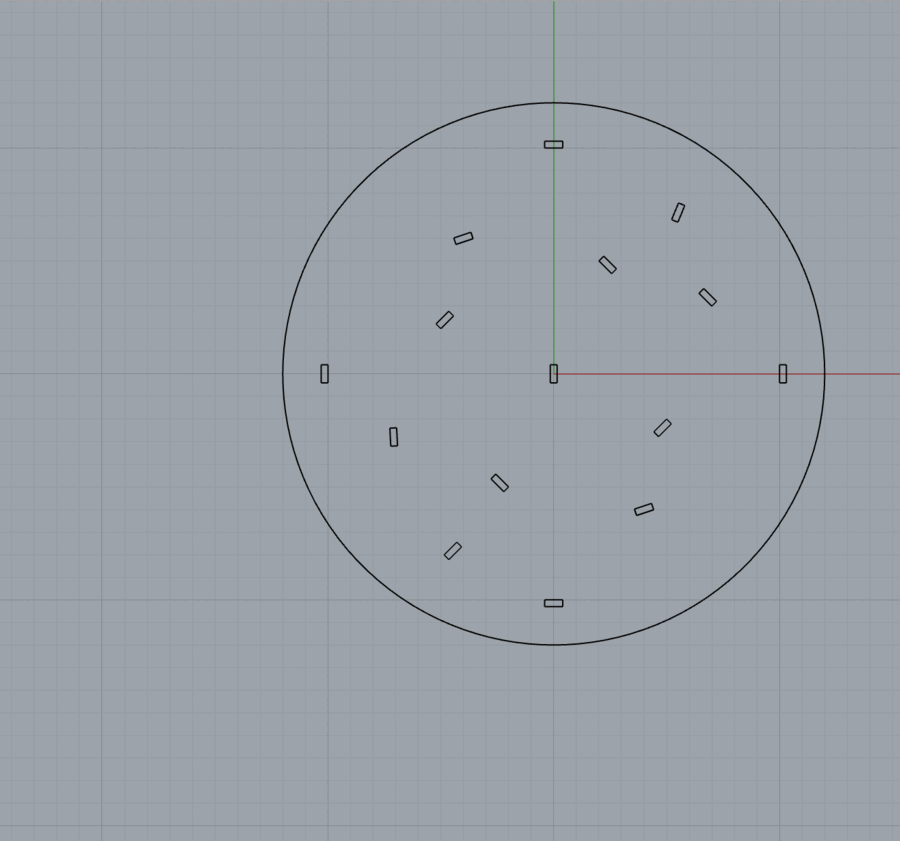
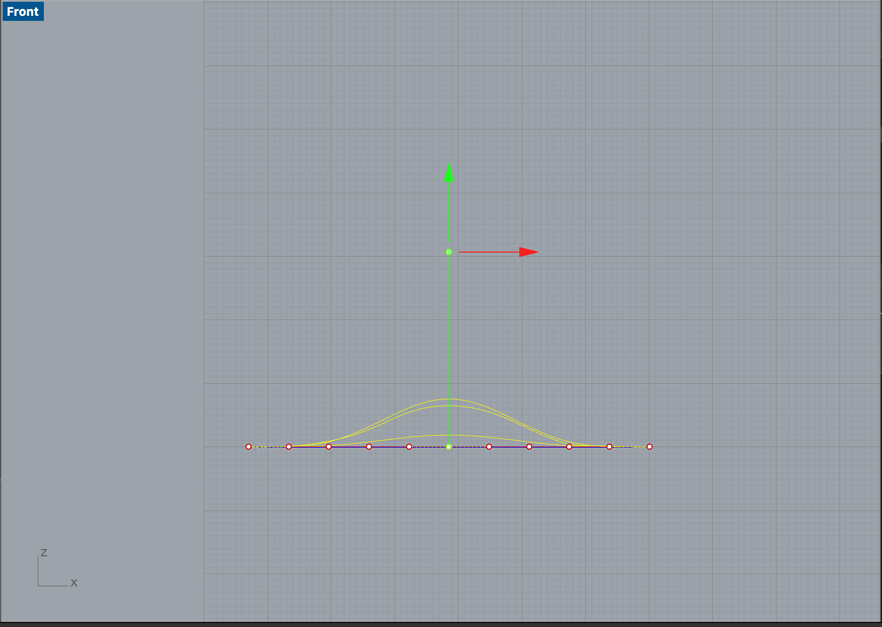
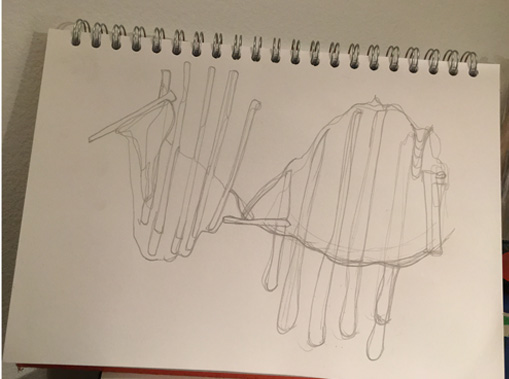
My design is based on the helix shapes from the deconstructed fan.
The shapes of the fan I used in crystallisation has inspired me to do some helix shapes.

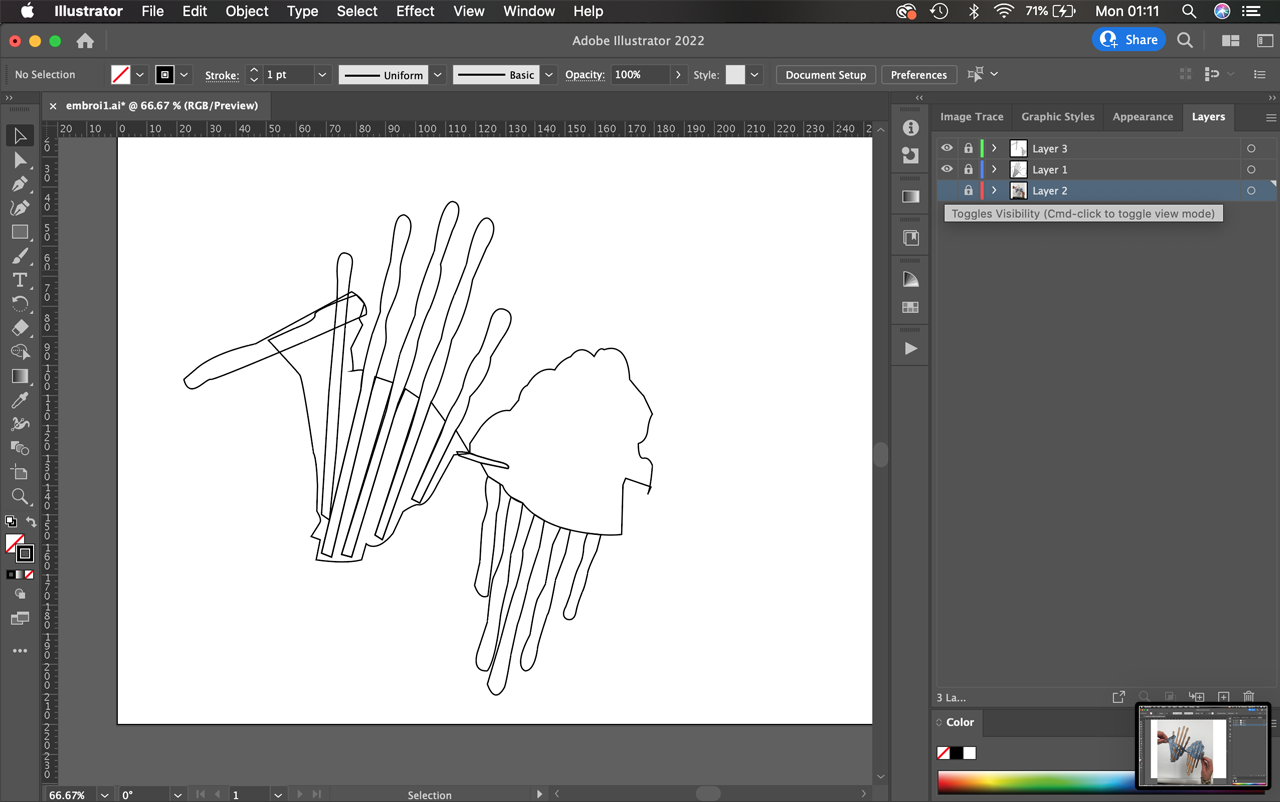
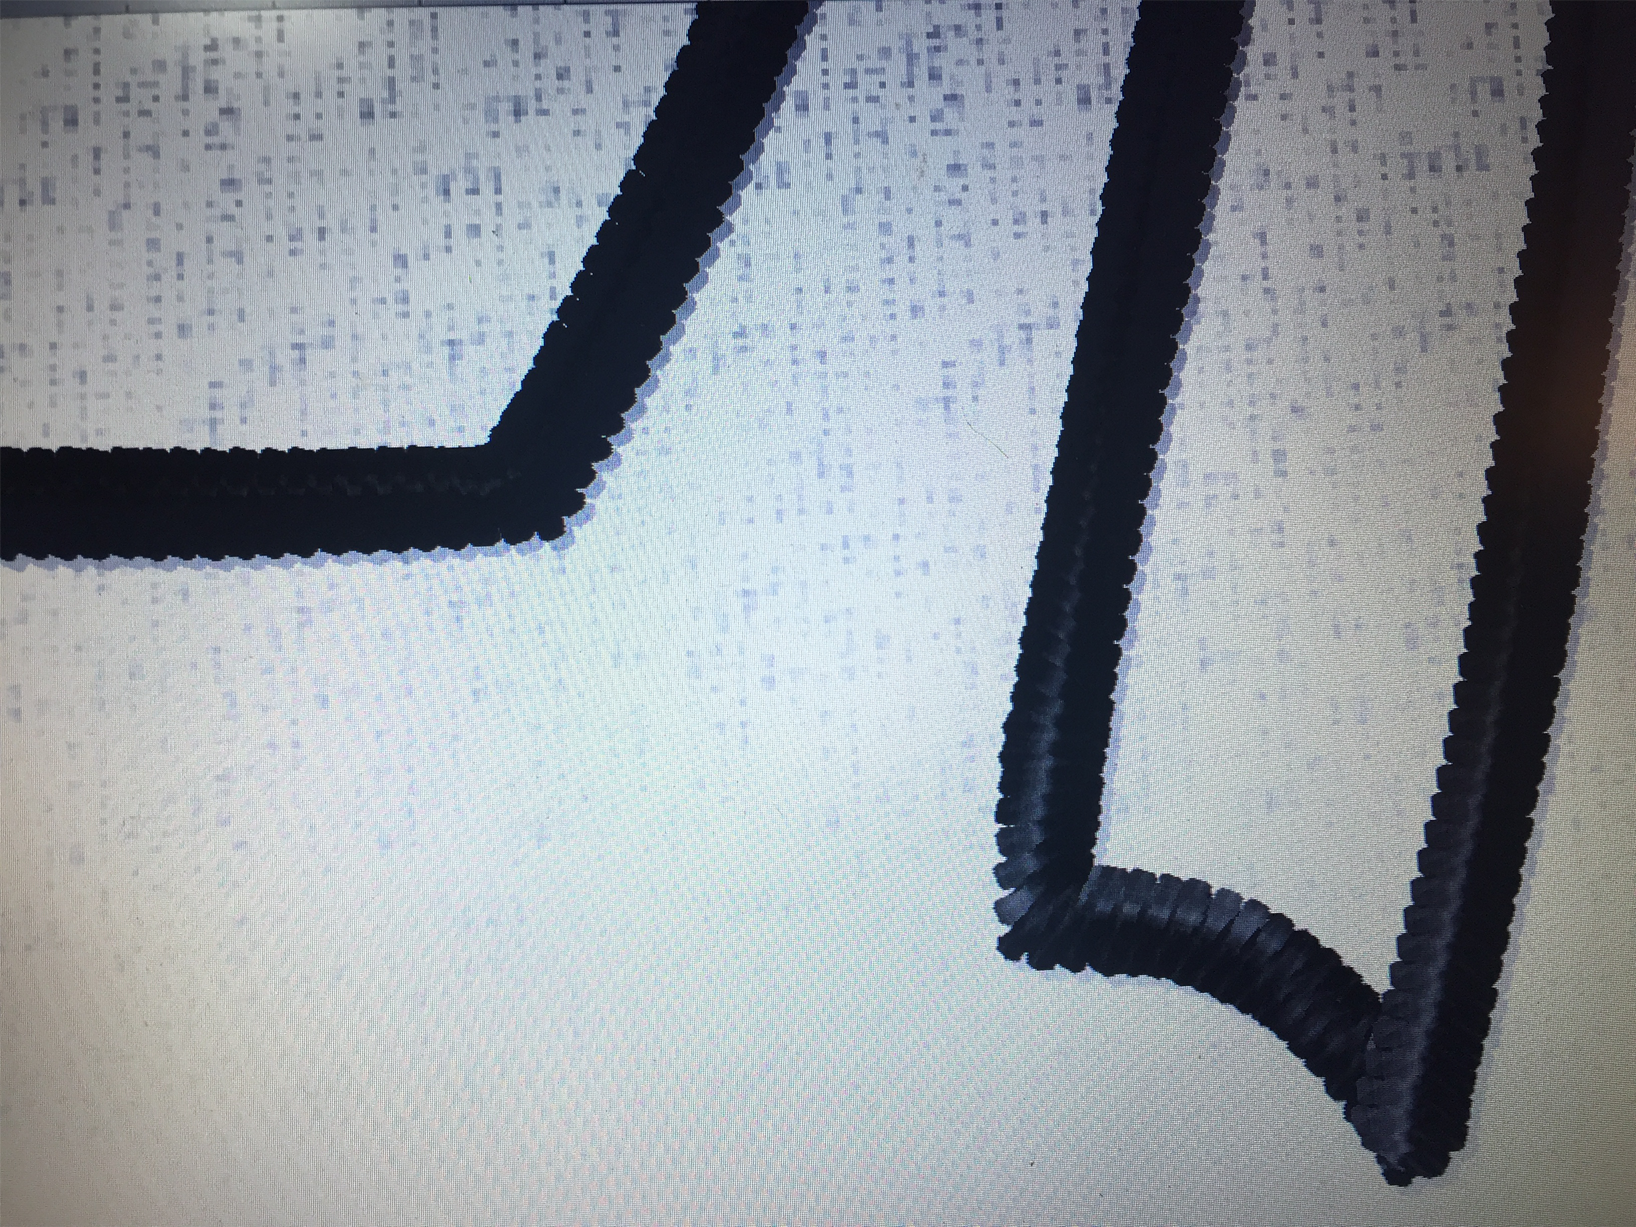
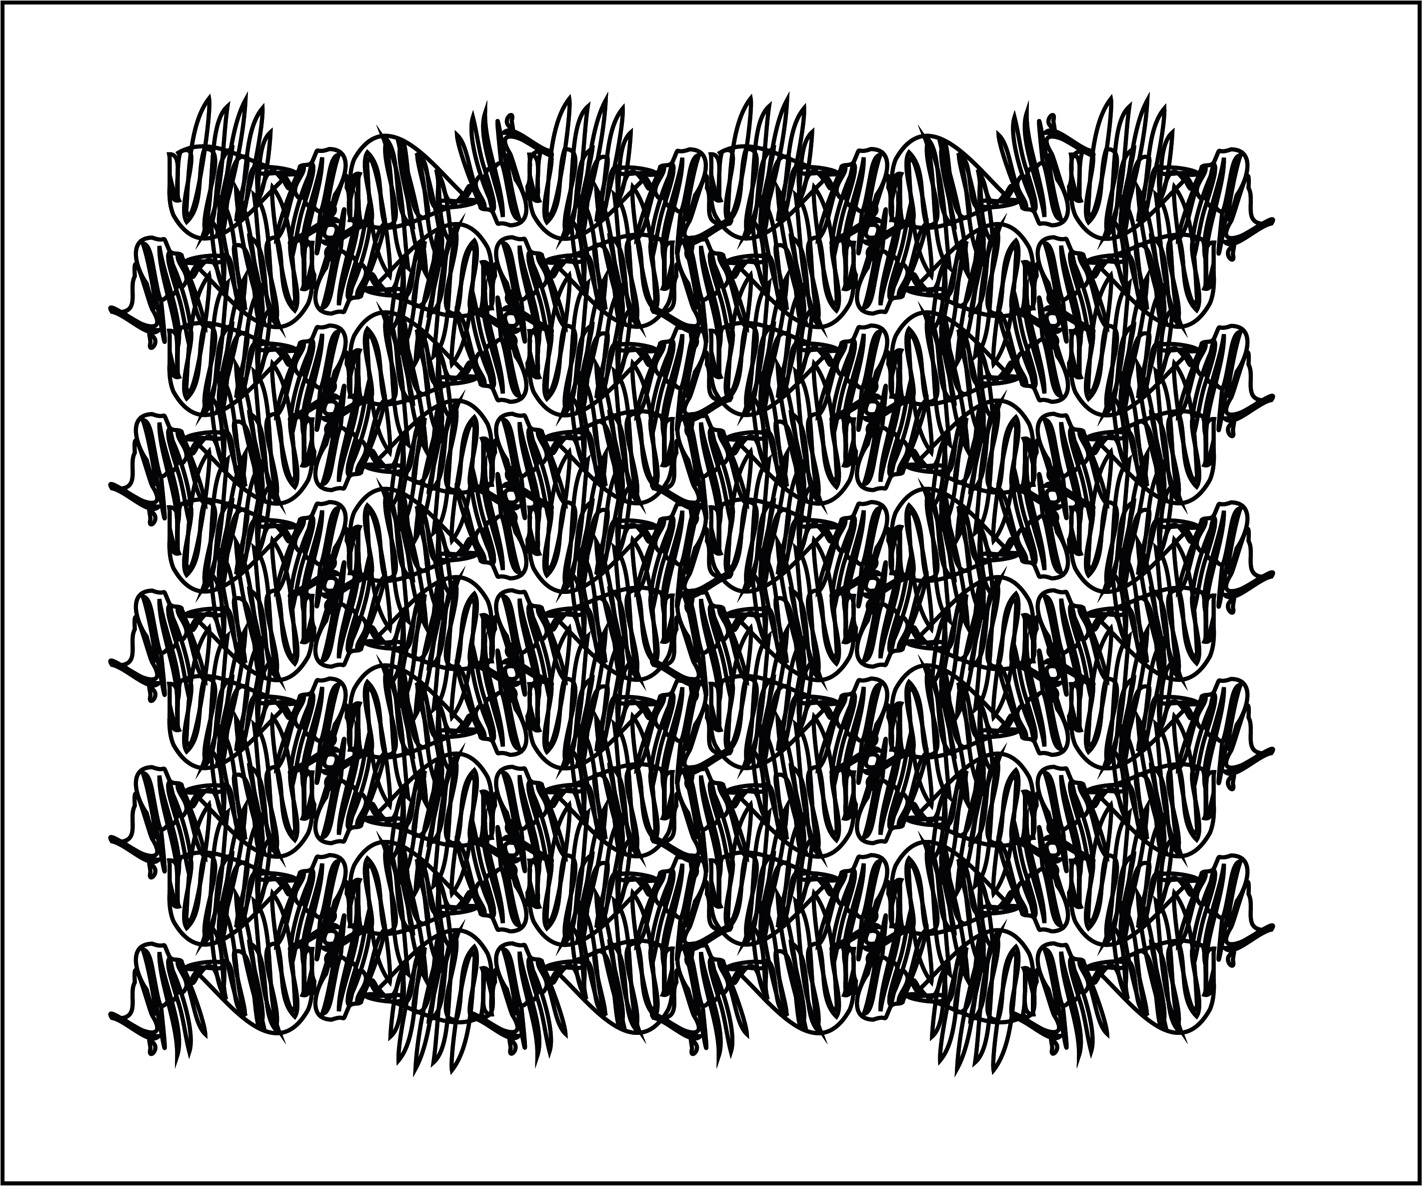
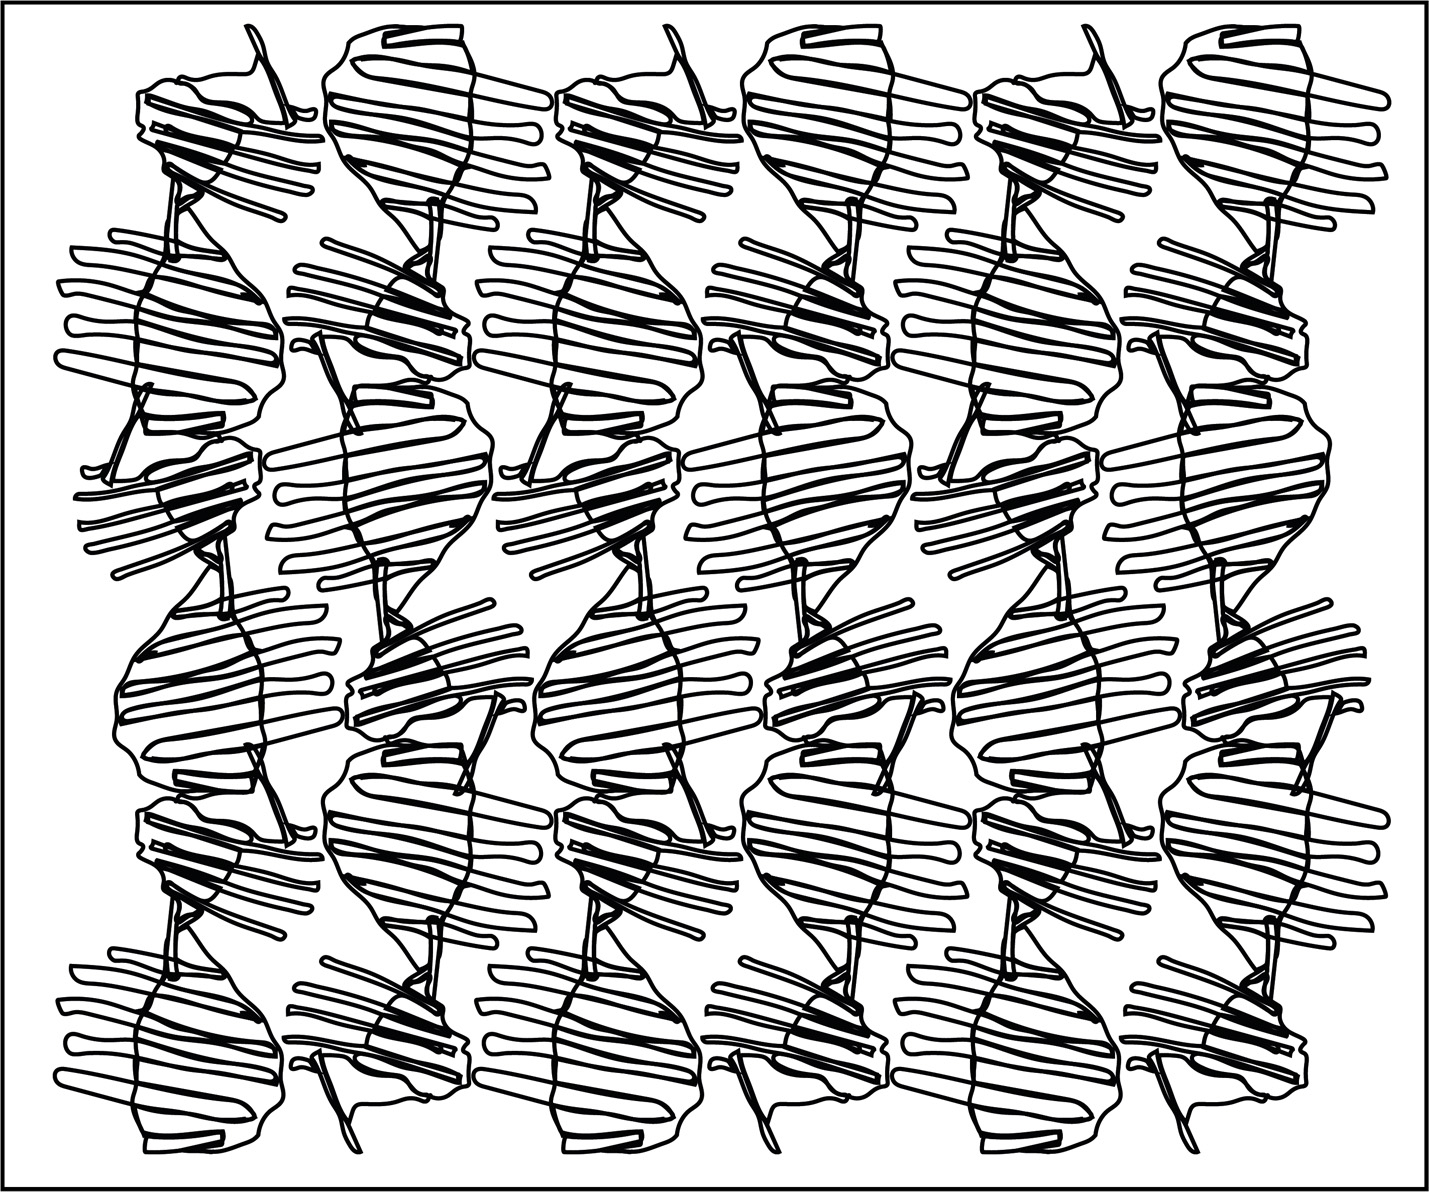
I did some emboidery sketches on Illustrator for the embroidery machine:
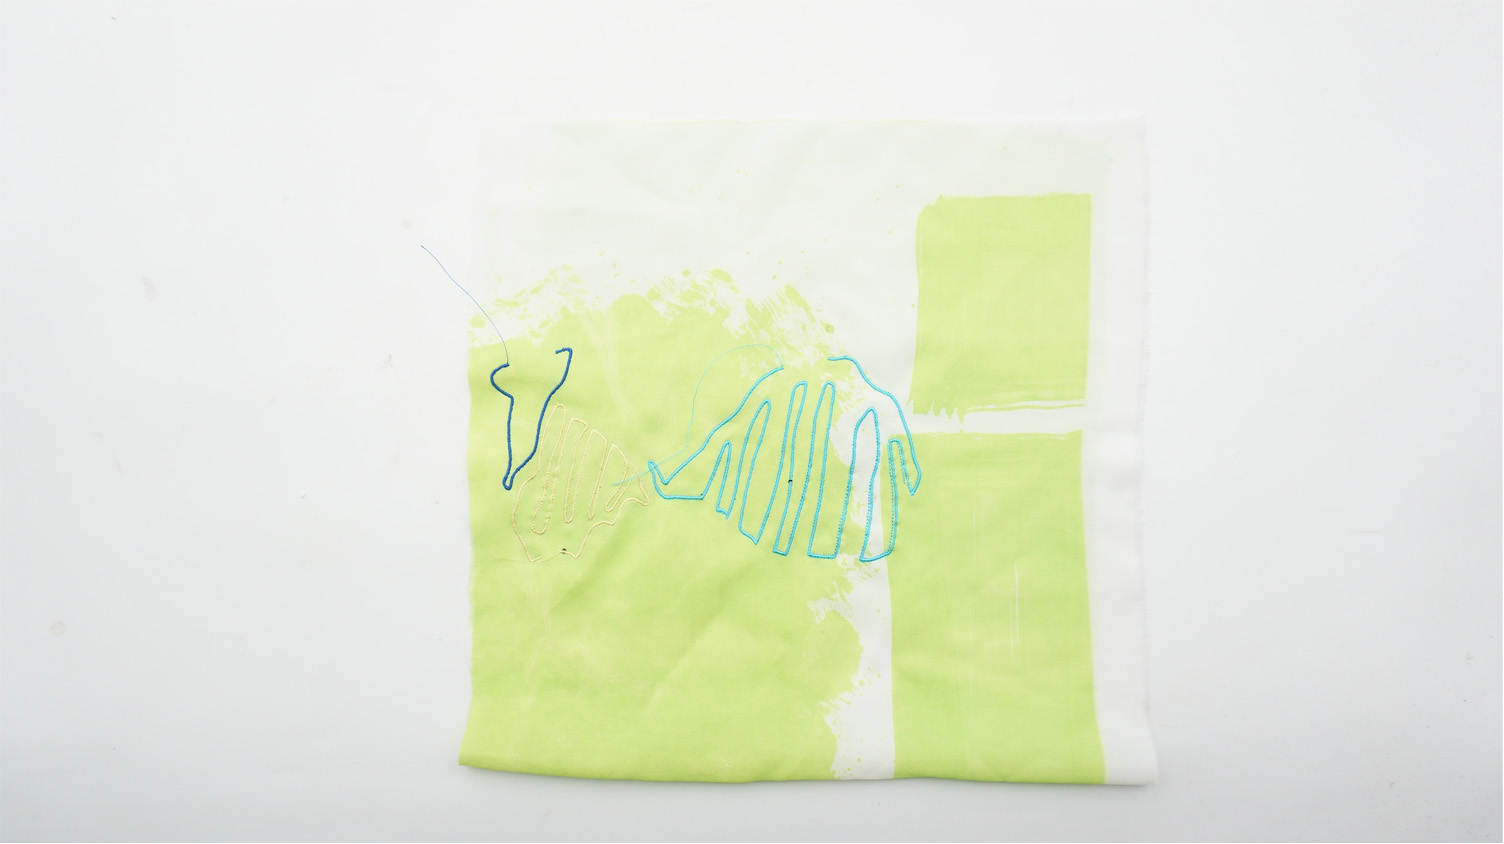
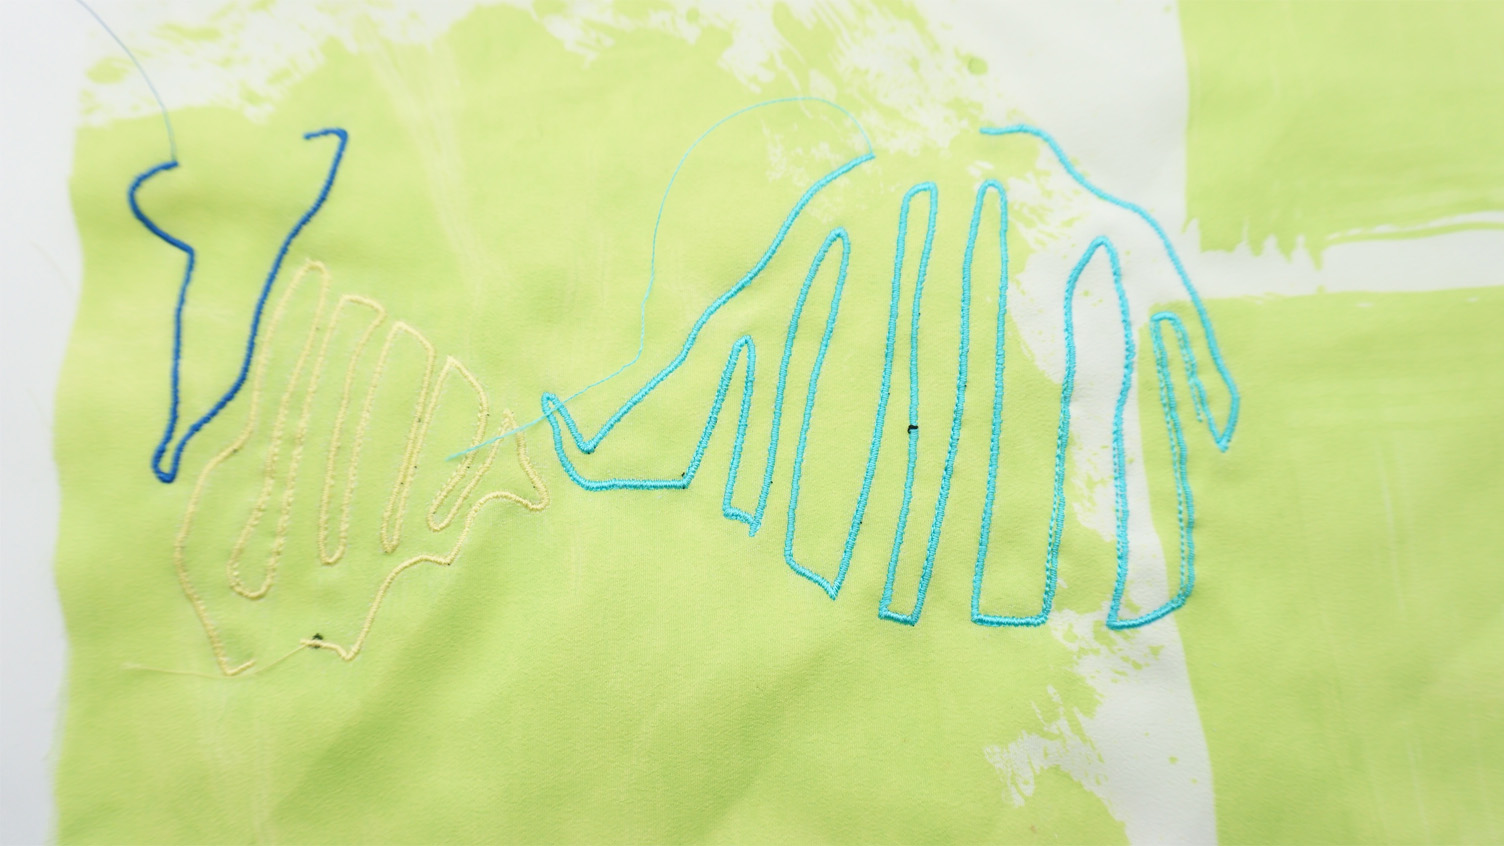
Here is an example of the embroidery on some fabric I have printed
embroidery machine
These are the steps for the embroidery machine:
- The machine uses Embird 2018 so first I need to open this software
- Launch the studio plugin
- Set the size of the hoop: in this case Janome 240x200mm
- Import image (PNG file): in this case it is the AI Illustrator file I have
- Reselect the hoop
- Convert lines to stitches with the magic wand tool
- Select the stitch style and generate stitches: in this case the stich is a running stitch
- Change the parameters - option to reorder or deselect parts
- Compile with the zigzag button
- Save file onto the VNO memory stick
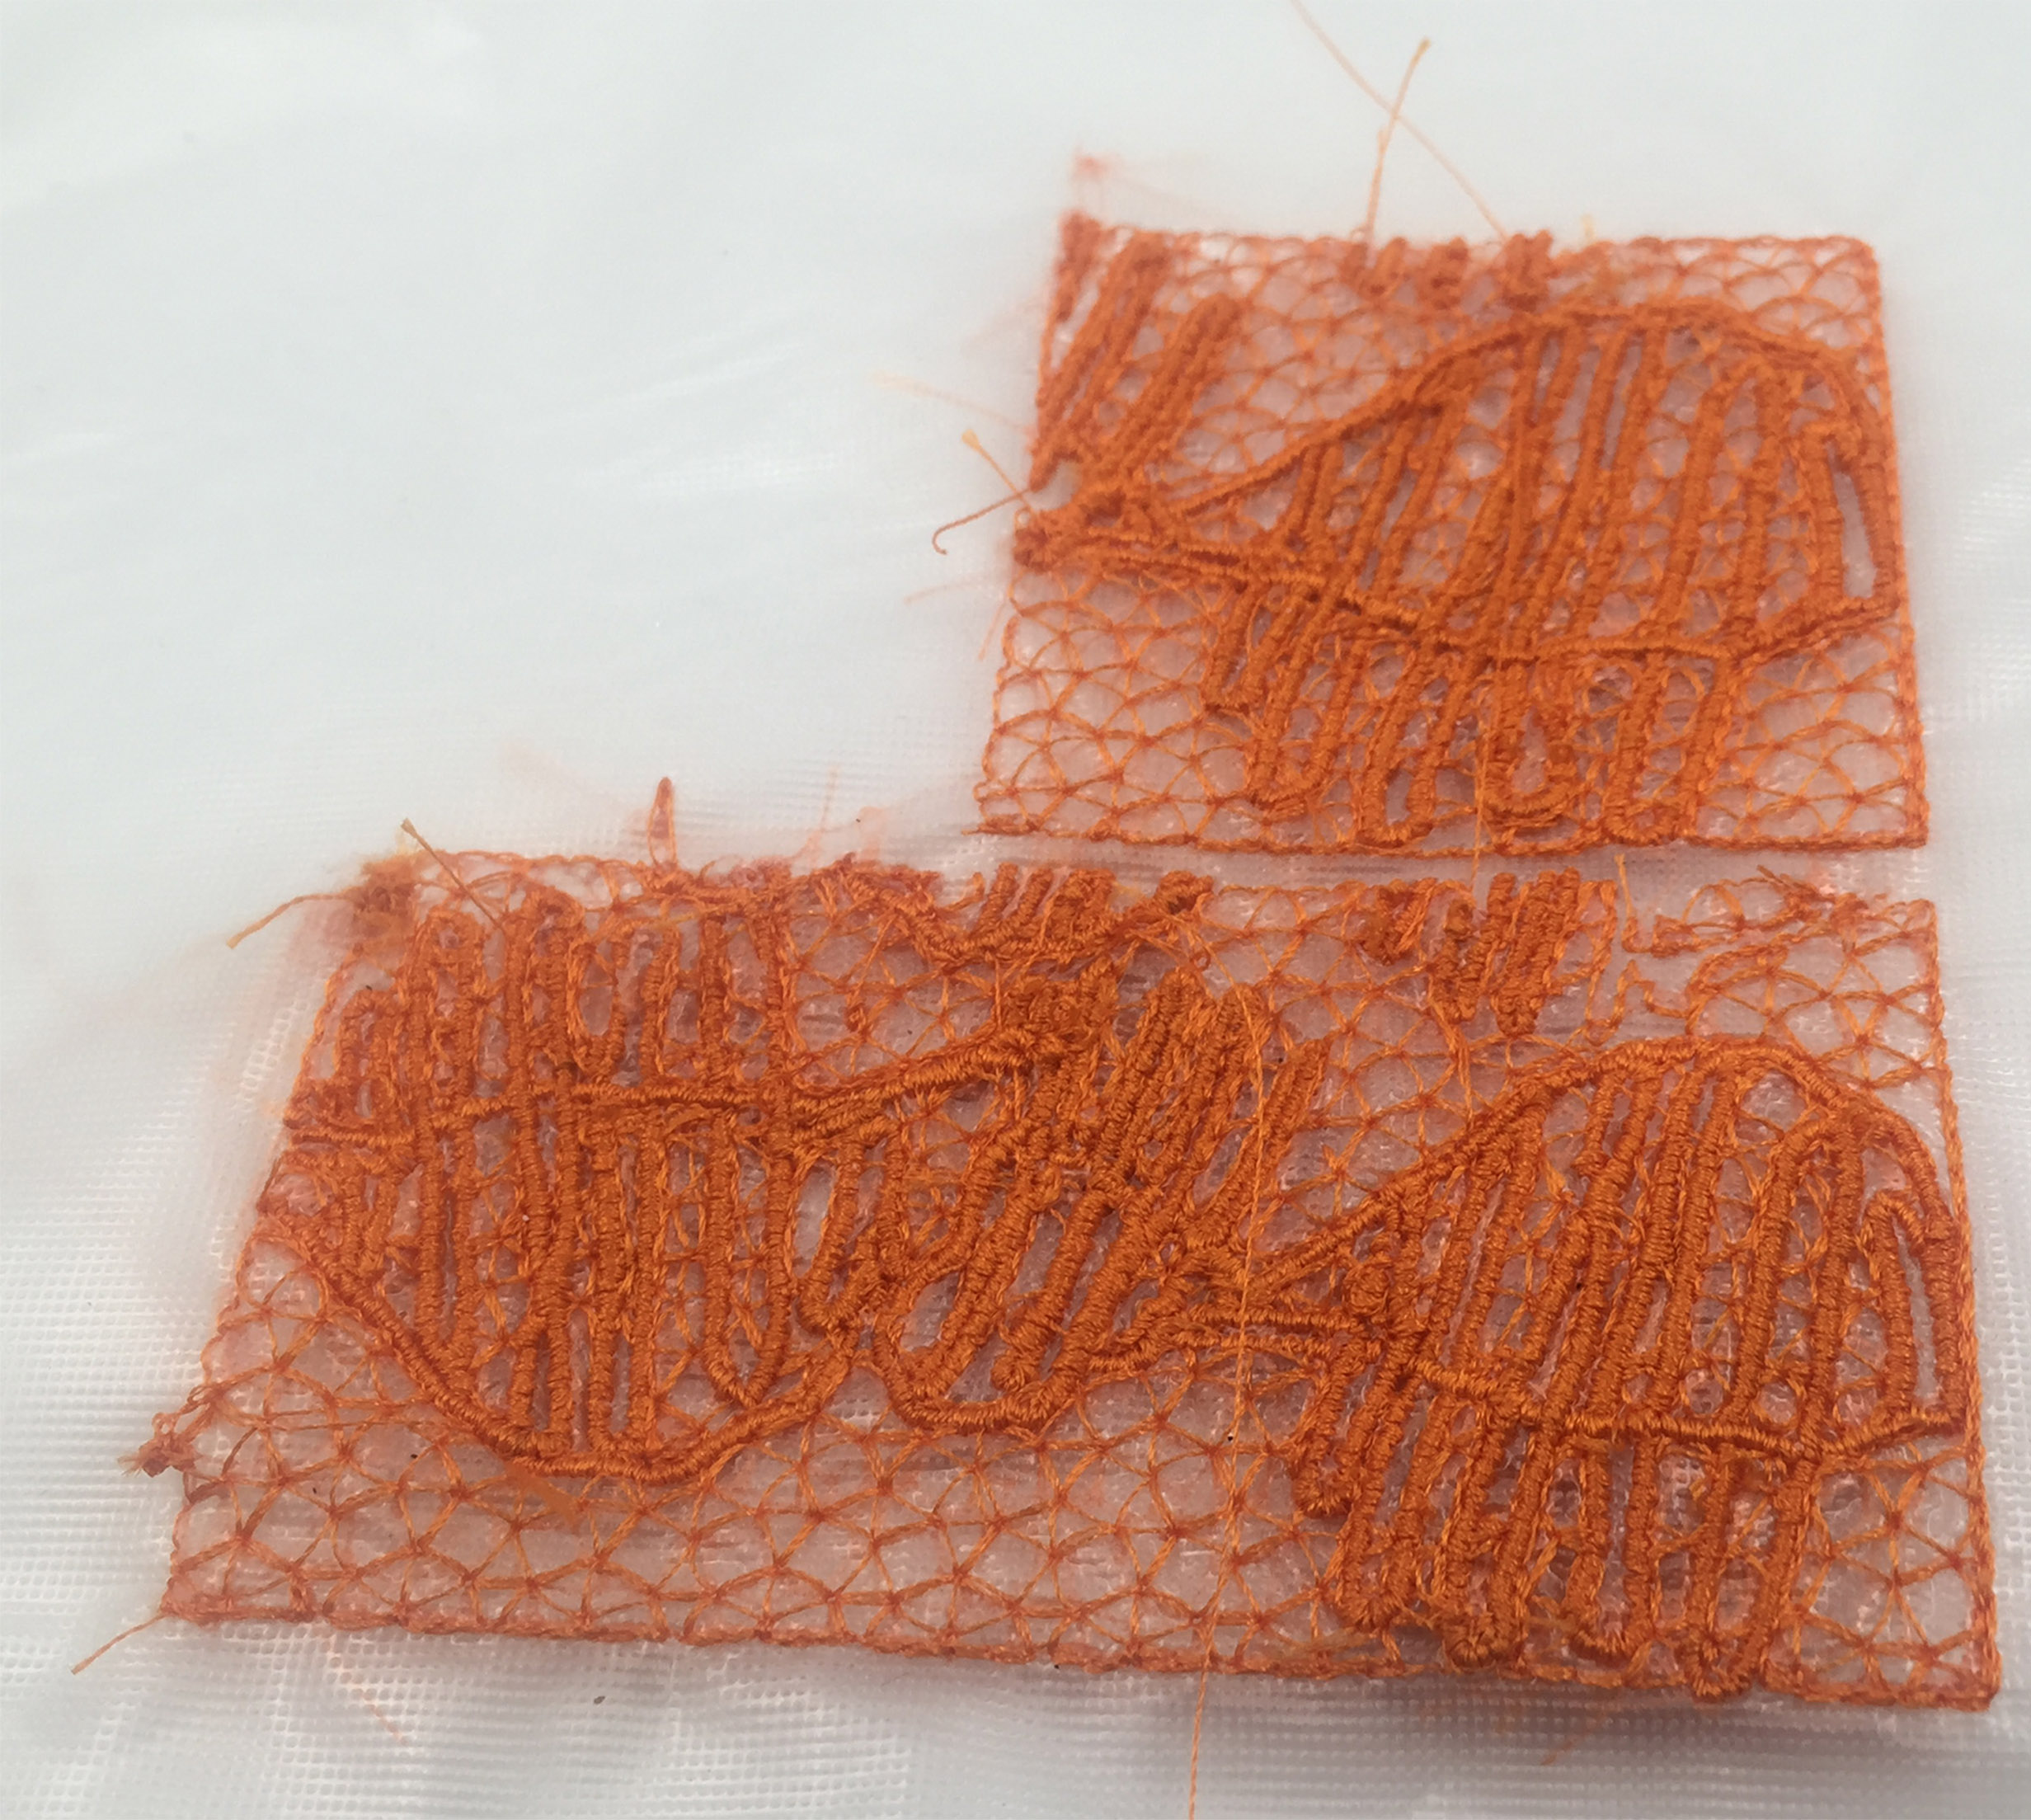
To cast inside fabric, I need to embroidery 2 layers of fabric together, creating a small opening to inject with the concrete in a liquid.
This is the path the embroidery machine will take:
Using an elasticated fabric is important for the tension of the embroidery to contain the casting..

digital lace embroidery
I also wanted to extend my helix designs for a digital lace design. This can be done with a soluable fabric so that when dissolved, you are left with the embroidery as a lace structure. I remember seeing this technique at this exhibition where it was defined as chemical lace embroidery.
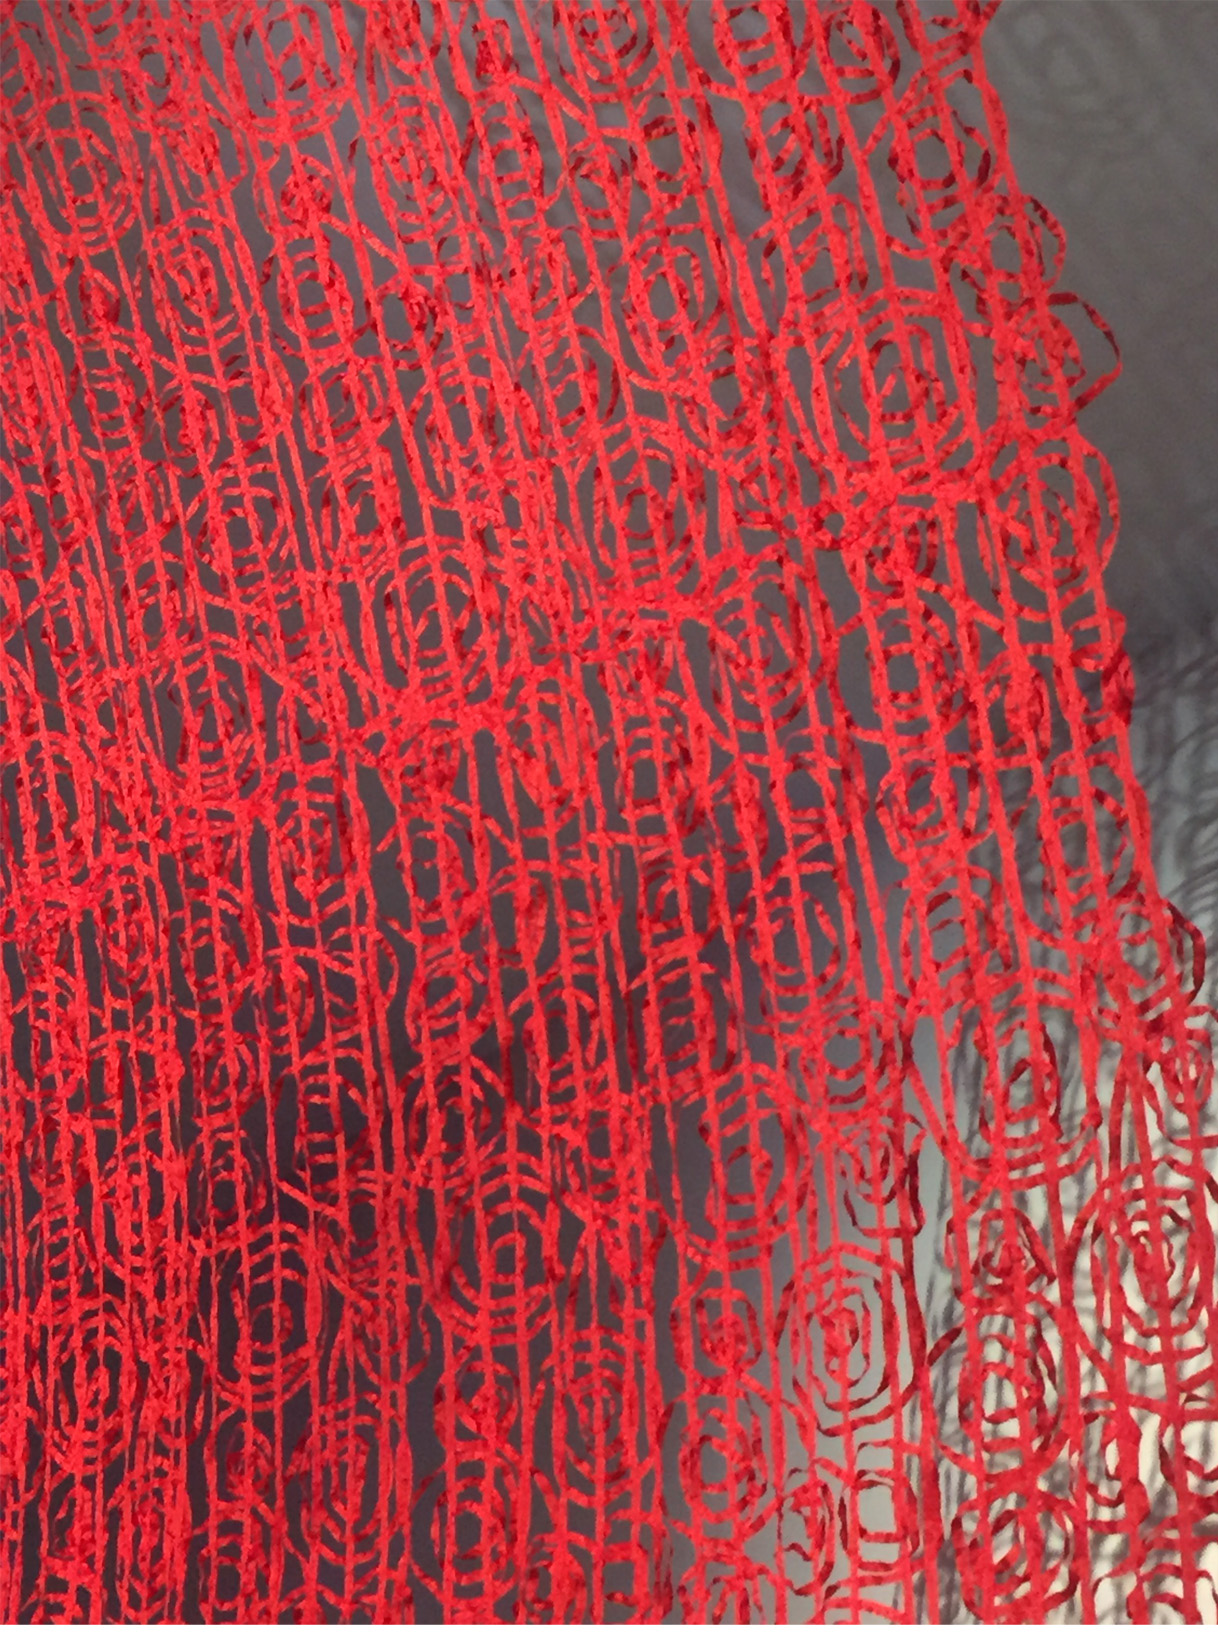

Here's the final sample of my embroidery lace technique:
process
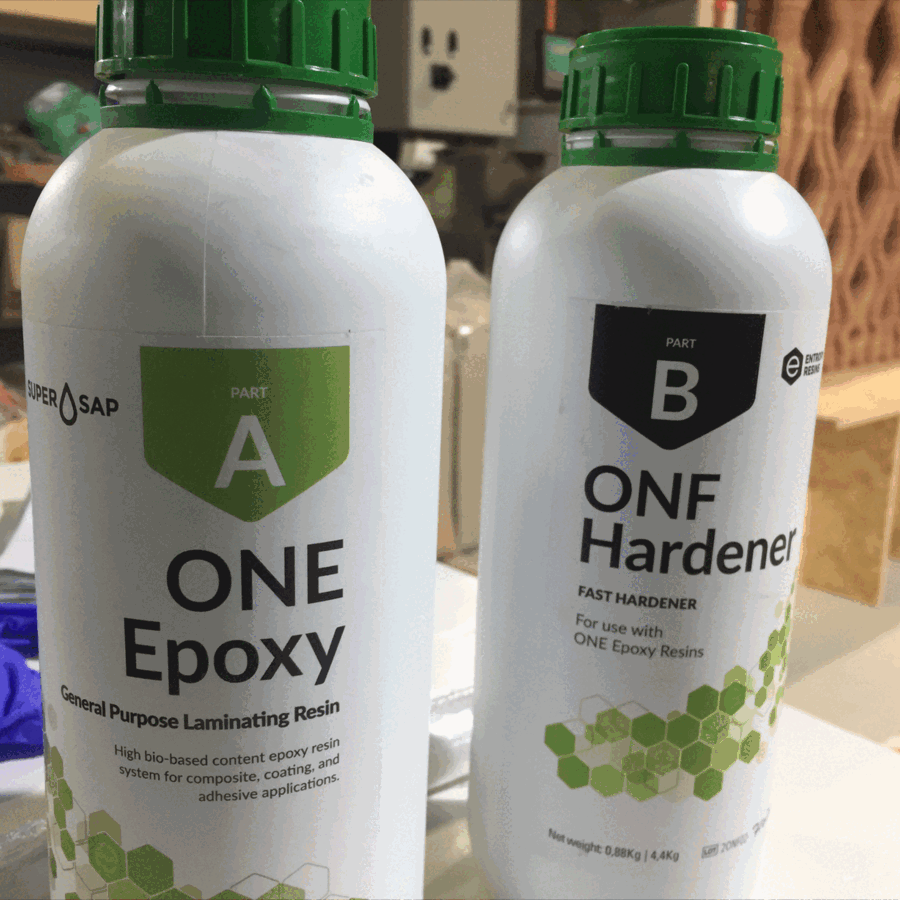
I am using the mable casting powder we have in the lab.
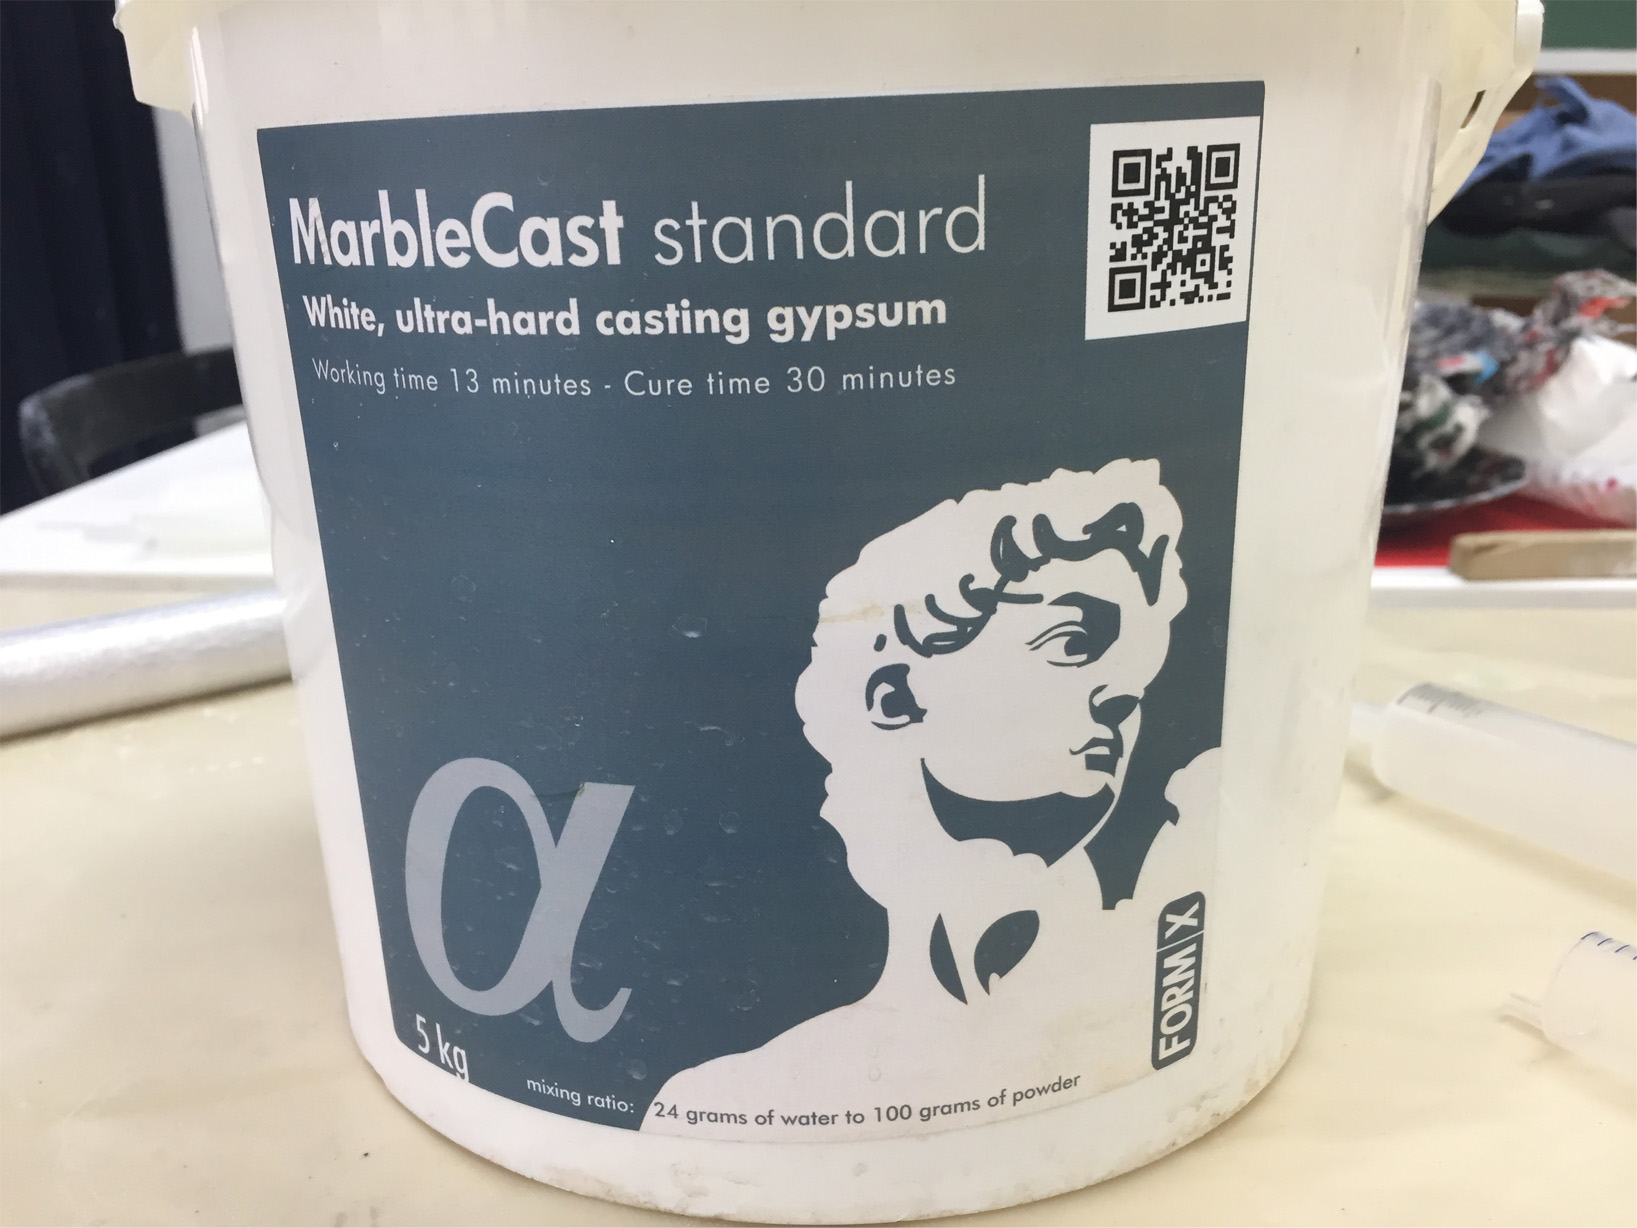
This is the recipe as shown on the tub:
| water | marble casting powder |
|---|---|
| 24ml | 100g |
so for 400ml:
| water | marble casting powder |
|---|---|
| 400ml | 1670g |
It's a lot of casting powder to add for 400ml.. I added the powder very gradually; halfing the amount and halfing it again.
The solution dries very quickly: the liquid should be taken in the syringe and injected into the sample opening quickly before it dries inside in the syringe.
final result
Here are some pictures of my casting sample outcomes: