08 wearables
9th - 16th November 2021
8. Wearables
Wearable technology offers the opportunity to adapt and respond from signals - environmental and generated; to react to changes quicker than we ourselves can; using and creating real hybrids to transcend our natural states.
intro
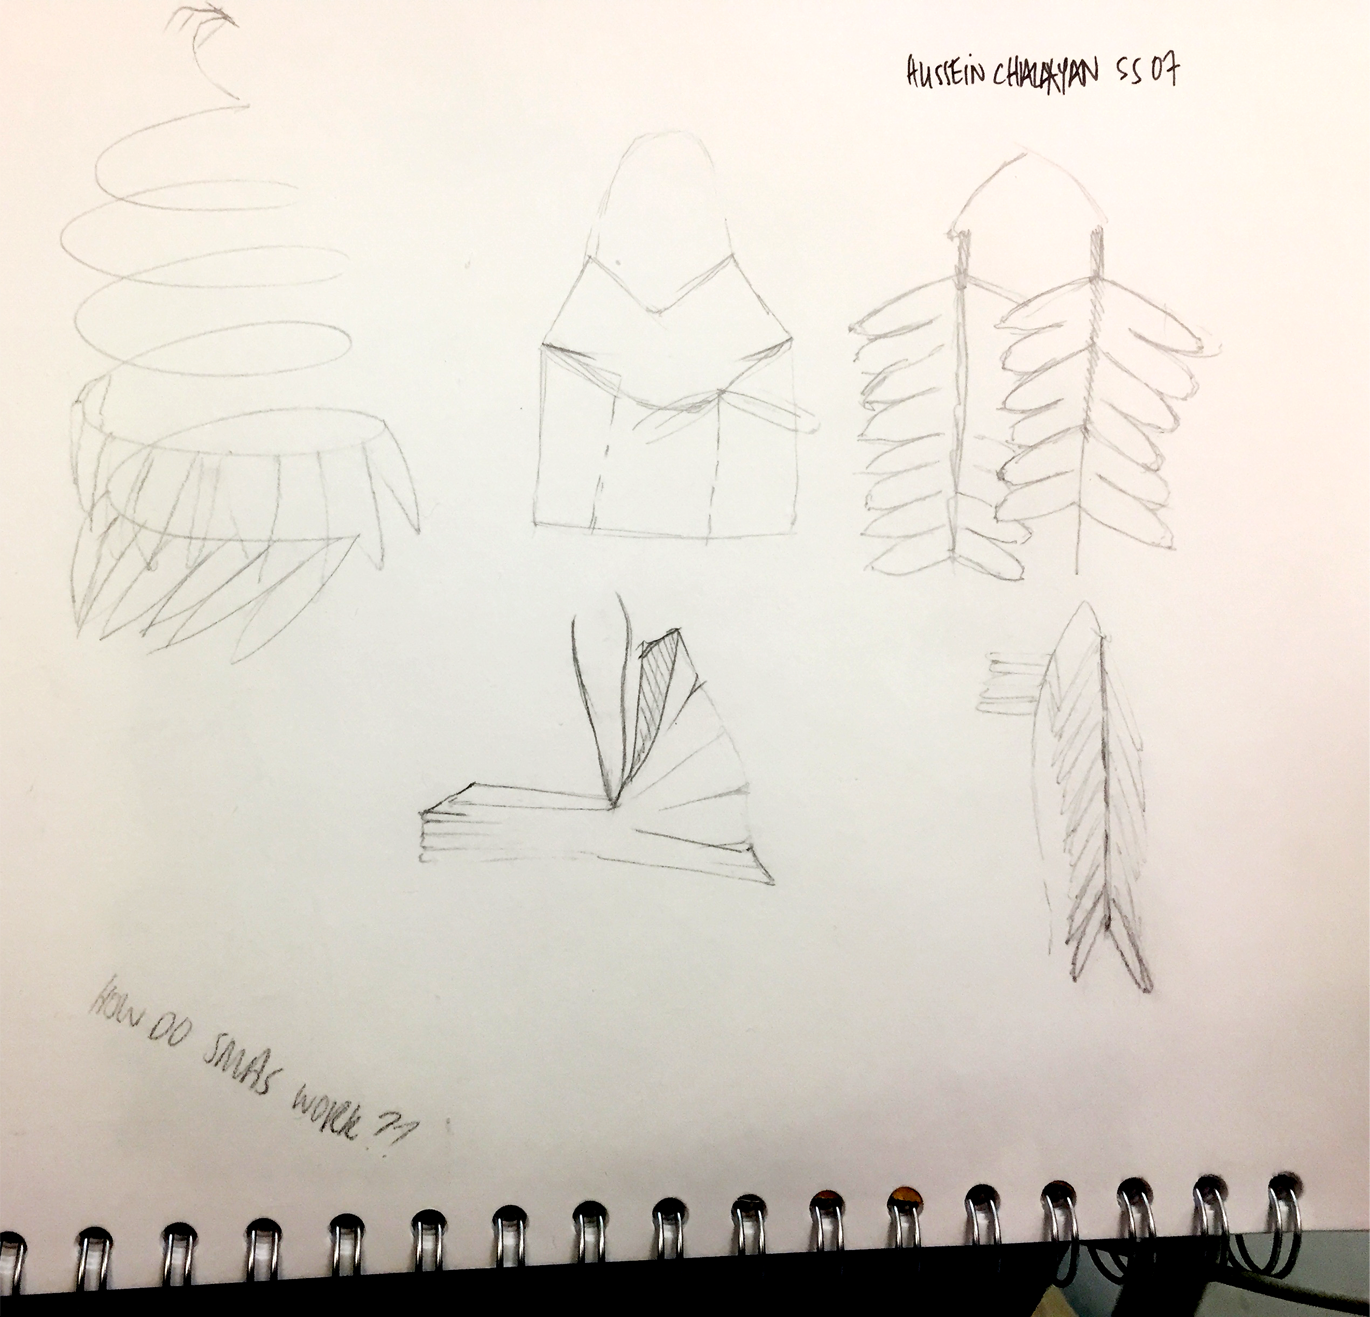
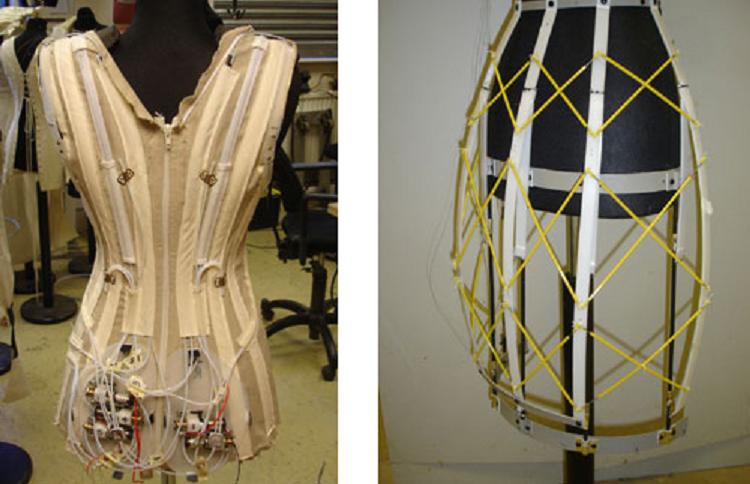
After our introduction to Wearables I was thinking about Hussein Chalayan's ss07 show:
He incorporated some much more complex engineering in this show with several motors remotely controlled on garments, transforming their shape

Image sourced here
I was also thinking about natural transformations around us and remembered seeing this plant...
Mimosa pudica (aka "shame plant") responds to movements and closes upon being heated. When the plant is exposed to predators and stimulation, it undergoes a series of biochemical and bioelectrical changes that allow it to bend inwards.
Here is a rough initial sketch of how an SMA might be incorportated into a halterneck top, for example, where the petals of the top can coil up like sensitive feathers or leaves.

interactive monster
This week we also did a small interactive monster exercise. We worked with some new items and some familiar items:
- RGB LED
- 3V battery
- conductive tape
- goma eva(50x80mm) (Ethylene-vinyl acetate: light foam fabric)
- velostat
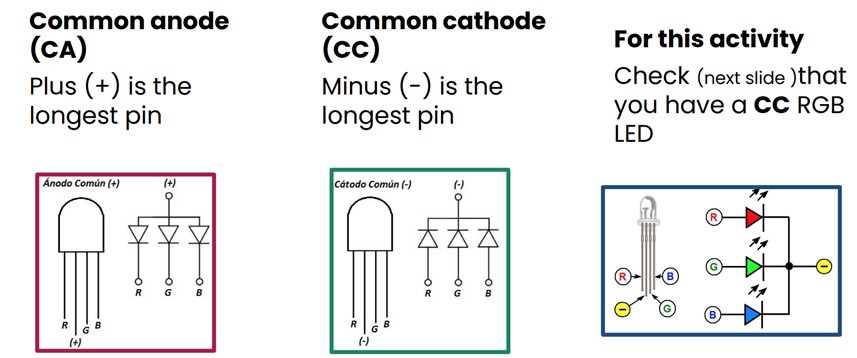
An RGB LED, has 4 legs. 1 of the legs may be longer than the others but this is not always the case. It's a good way to test how the light is set up to work though: pressing the longest leg on to the battery to see if it works with + or -. Depending on how the LED lights up also determines if it is:
- Common anode (CA) (plus (+) is the longest pin)
or
- Common cathode (CC) (minus (-) is the longest pin)
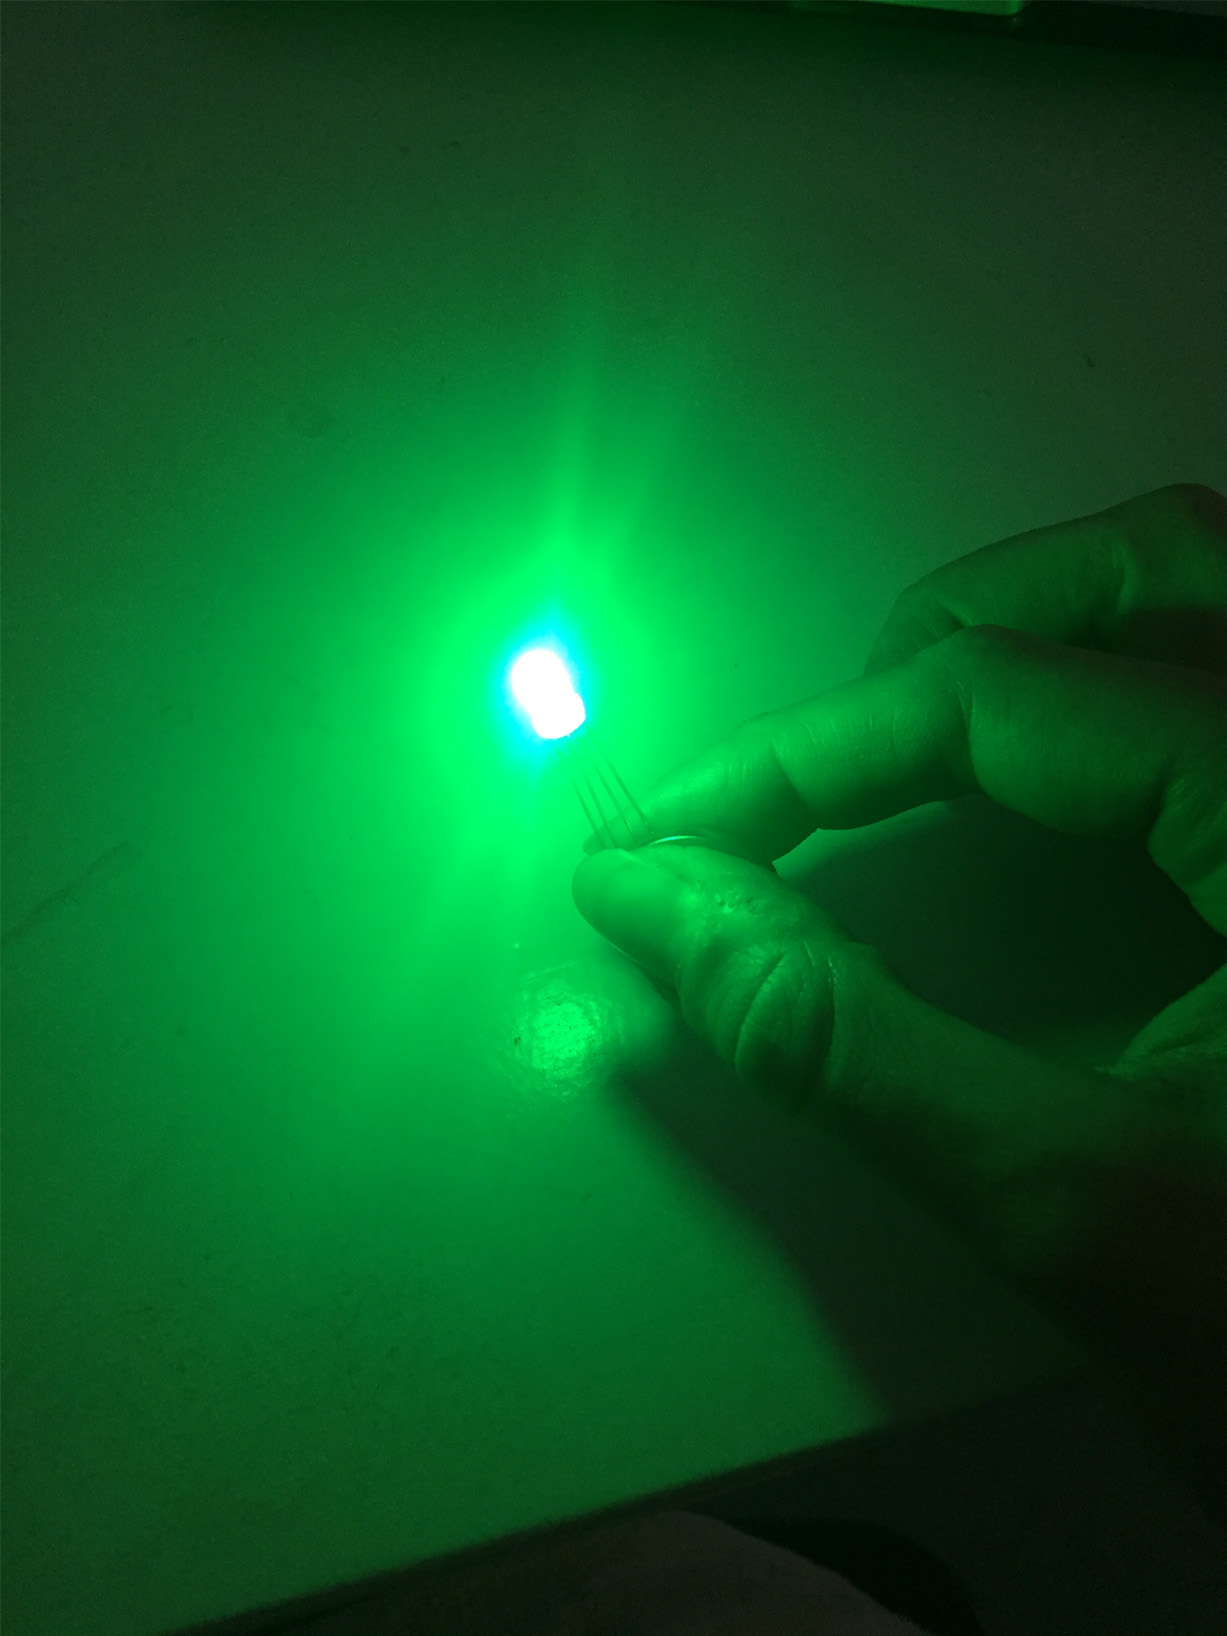
In this video I managed to make a turquoise colour with the LED by pressing the G and B legs together on the + and the longer leg on the - of the battery.
This is how the exercise begins:
- Pierce 4 horizontal holes (this is wherer each of the LED legs will thread through so the colours don't interfere with the circuit)
- Pierce another hole under the second hole (this is where the longest leg will thread through to reach the battery)
- Draw a circle for the space where the battery will sit, but so there is enough space for it to be covered with the foam folder over it from underneath
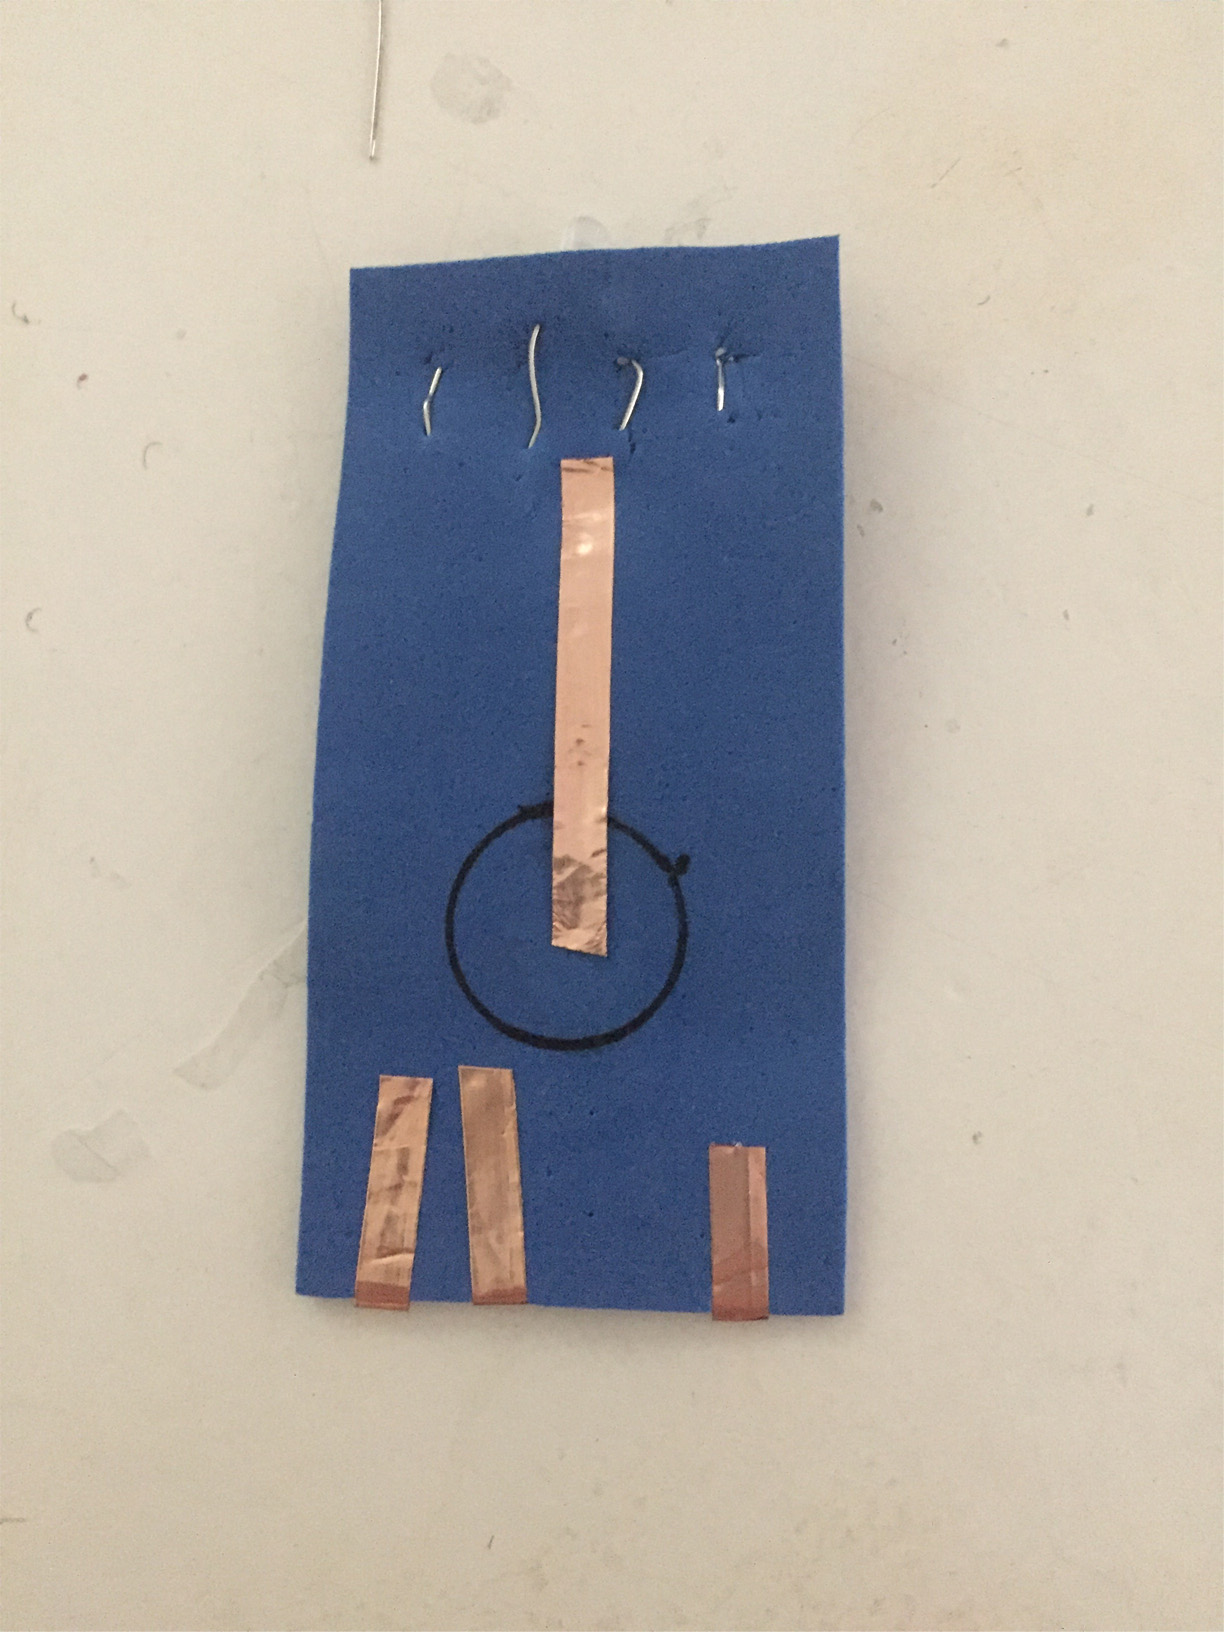
- Attach some copper tape that will connect the long LED leg to the battery position on the front.
- The battery should be stuck down with copper tape but with the + facing up - it will be pressed in a sandwich so that the current passes through the copper tape with no direct interaction
- The velostat should sit in between the battery and the copper tape strips
- On the back side stick the copper tape to the other 3 leg positions that will be folded up from the other side
- Folding up the bottom of the rectangle and pressing on the parts where the copper tape are shoud light up the LED
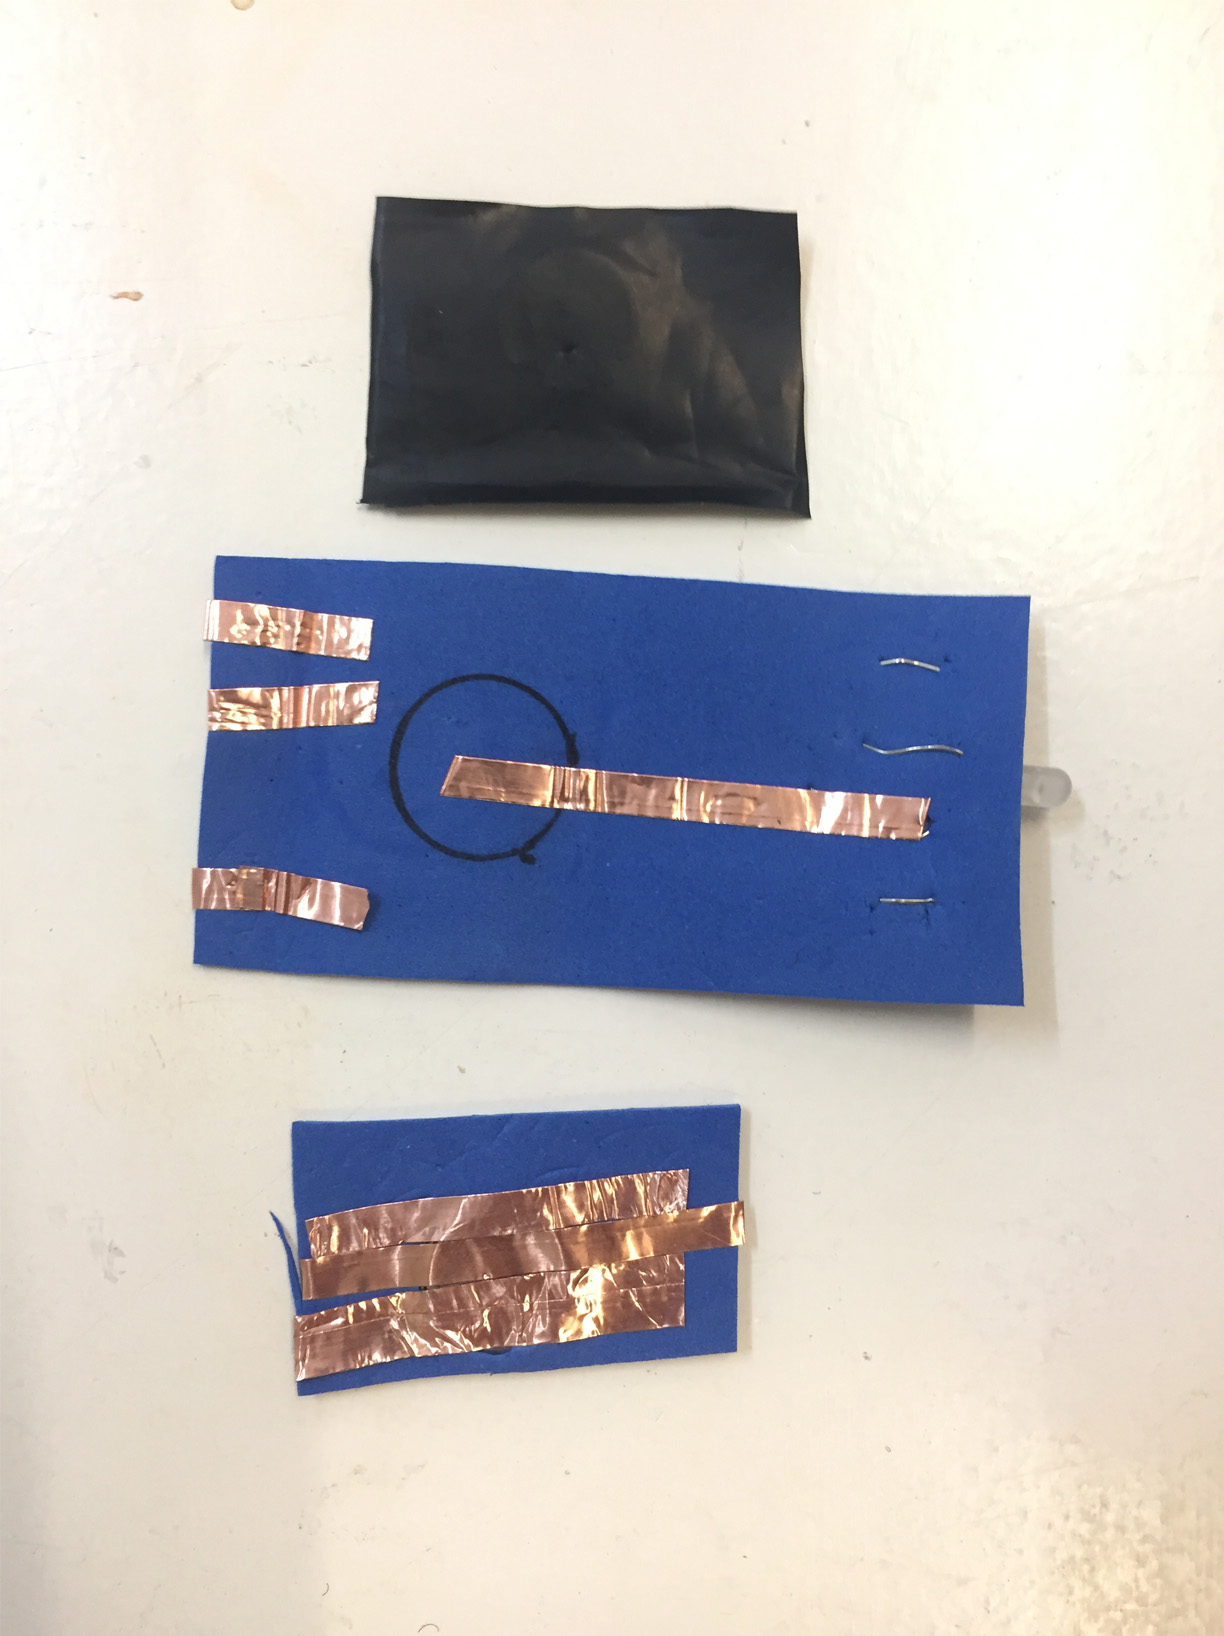
The sample works in the end!
actuator: SMAs
An actuator is a state changing component that moves or controls another part of a circuit based on input.
SMA (Shape memory alloy) are metals that change shapes when they're heated and return to their present state when they cool. I was inspired by the possibilities of this technology on a practical and aesthetical level.
This example is by Mika Satomi
This example is by Hiuman Luk
SMAs are also used for medical cases such as medical treatment therapy as an alternative minimally invasive therapy
In Liza's example above: the delay value changes the pulsing tension and affects how much the metal will return to its orginal state.
So after seeing the previous examples of SMAs - I realise they tend to be preshaped to relax when powered, or unshaped to create shape.
With the idea of the mimosa in mind, I curved the SMA wire and stitched it down to some fabric roughly. You can see the way it contourts when powerered below.
In this video, the SMA is only attached to the power source.
n channel mosfet transistor
![]()
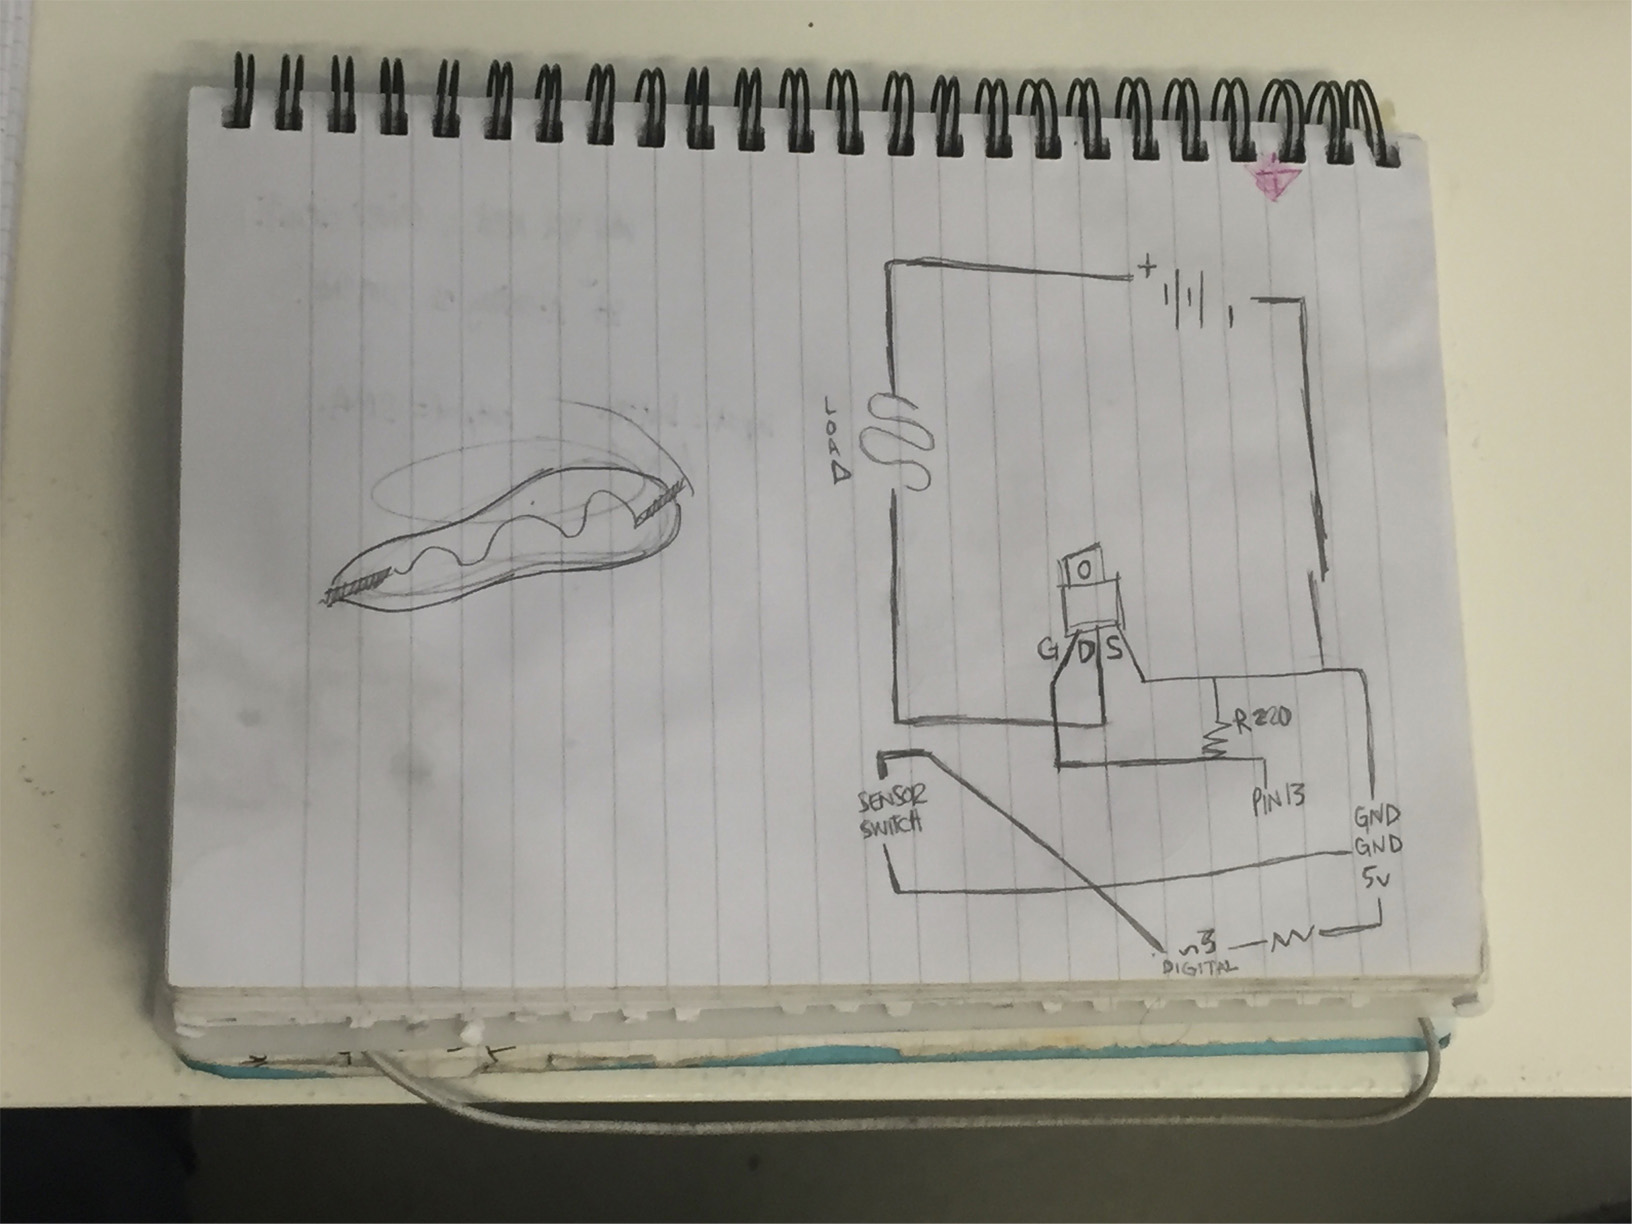
As well as looking at actuators, we are using an N CHANNEL MOSFET transistor this week. A transistor contains a switch inside the box that joins the 3 ports. We are using them because they are useful with heating elements such as SMAs: heating elements require a lot of power (more than Arduino can provide) and this transistor will accommodate a second power source. The channels are: gate; drain; source
Their names give an indication of their role in the circuit. The wires connecting should be programmed to control the switch inside the transistor because we can't access it.
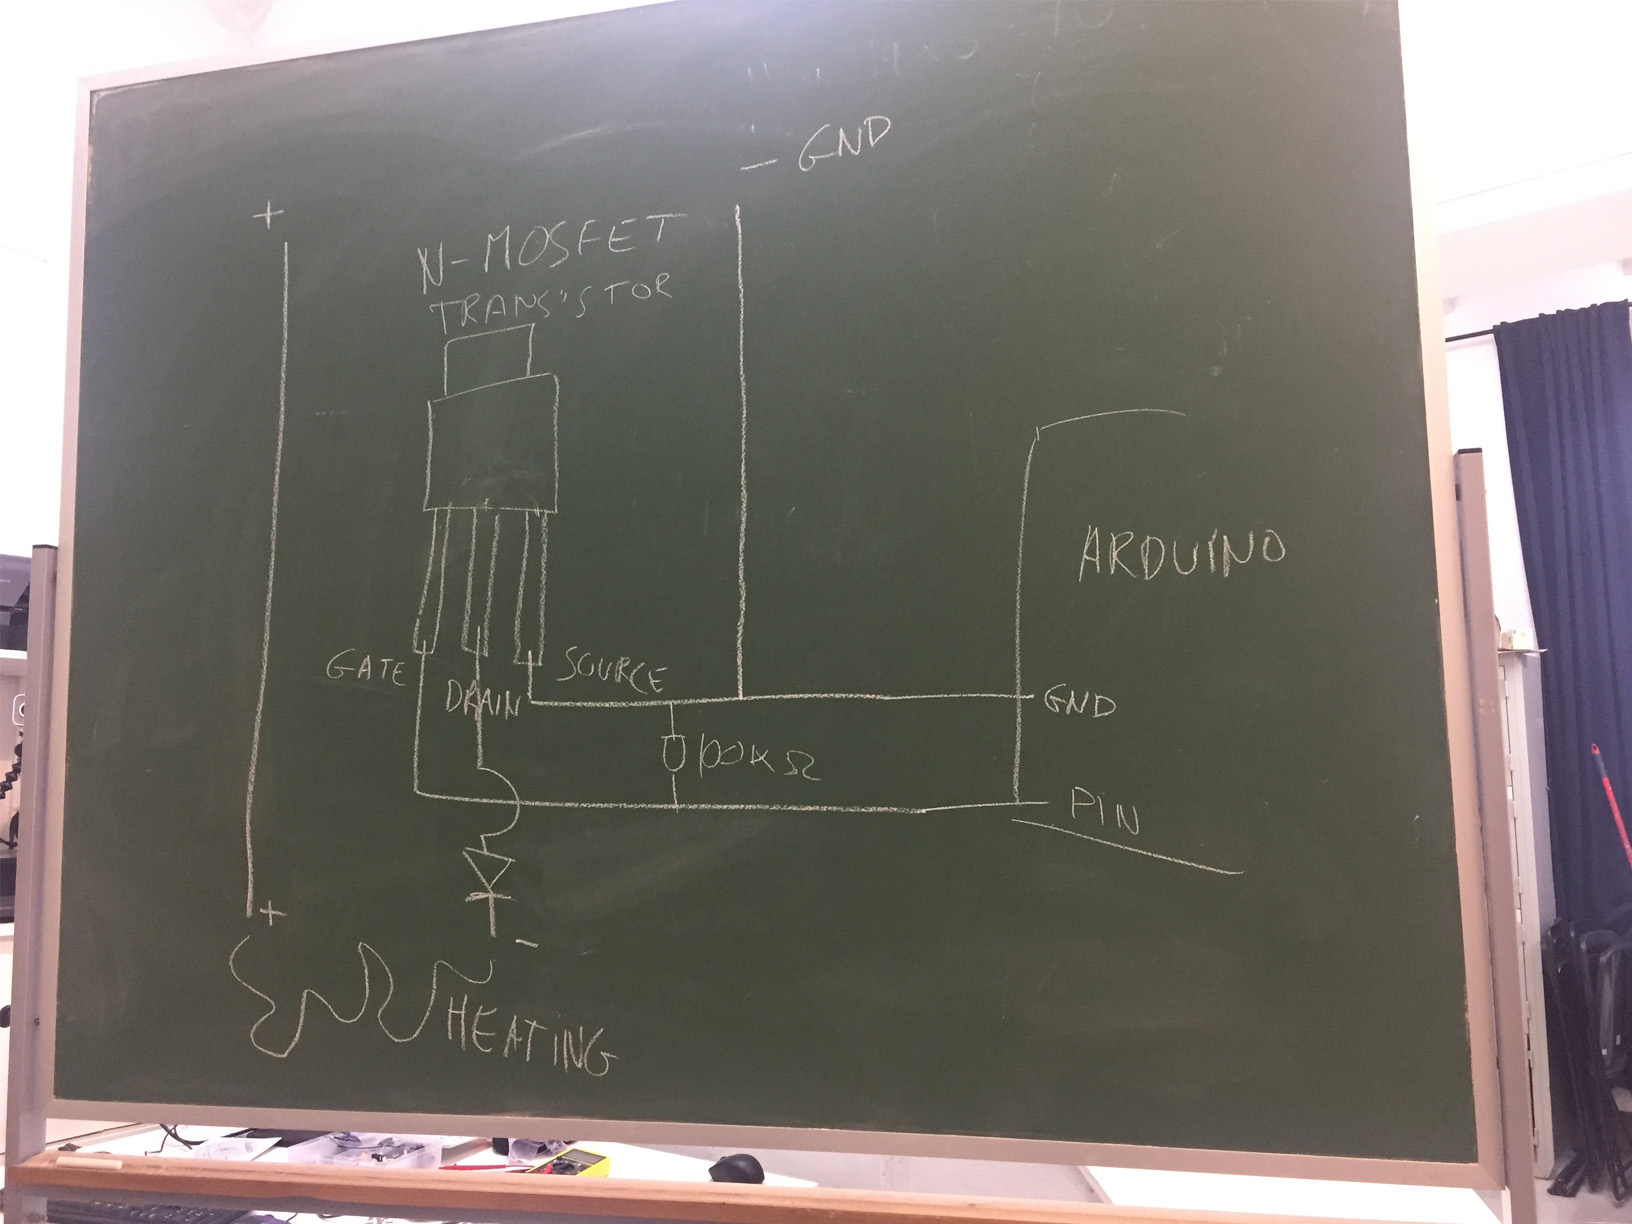

These picture show where the heating element should be added: to the drain It's also important to note that this circuit uses a diode in the drain channel which ensures the current only flows one way ie, only out of the drain path and back to the power source.
sma head piece

Rasa Vil makes these beautiful embellished, crocheted and jewelled head pieces. They inspired me to incorporate some electronics into a wearable design.
To start with, we need to incorporate the SMA with the transistor and an extra power source.
Here it is attached to the transistor
- https://makezine.com/2012/01/31/skill-builder-working-with-shape-memory-alloy/
- https://technology.nasa.gov/patent/LEW-TOPS-137
- https://www.christinedierk.com/hairio