3. Open Source Circular Fashion
This week started with the Recitation by Elizabeth Jayot and then the Lecture by Zoe Romano. We were asked to design a module to create a seamless textile.
Inspiration: Aurelie Tu & Sara Álvarez Vinagre
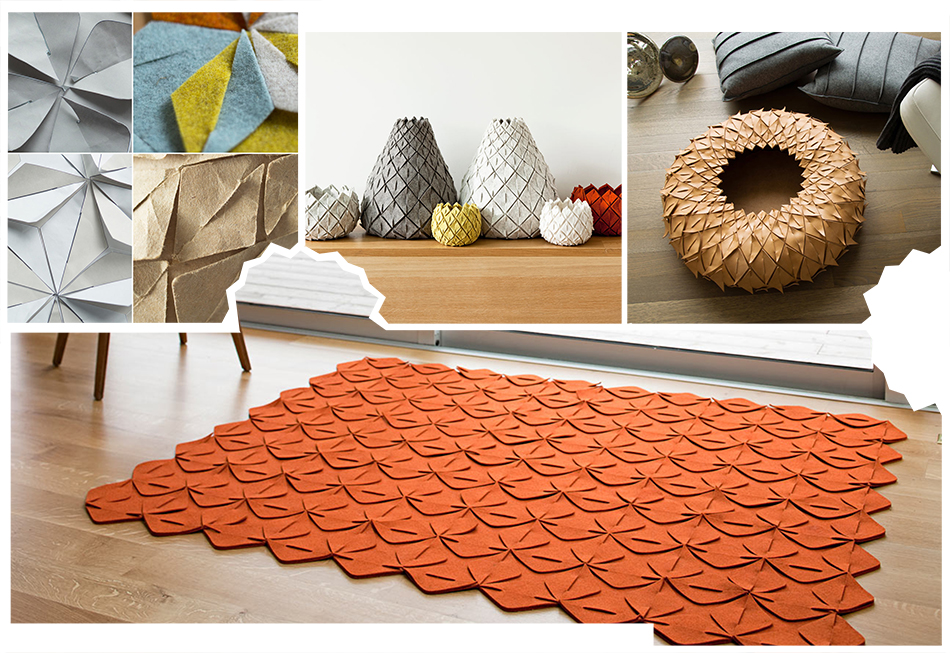
For this week's assignment, I started thinking about how I could find an inspiring shape that allows me to be interlocked. I felt super inspired by Aurelie Tu's amazing work and also by the hexagonal shape of a previous year's student who is called Sara Álvarez Vinagre. She made a kimono which really caught my attention, so I tried to find some kind of that shape for my own one.
This is Aurelie Tu's work and I took these images from this page which inspired me a lot.
If you want to check Sara's design you can do it here.
My Designing Process
· First Design Tries
I started designing the shape in Illustrator and I wanted to base the design on my Crane Template so that I started playing to find one interesting shape for me.
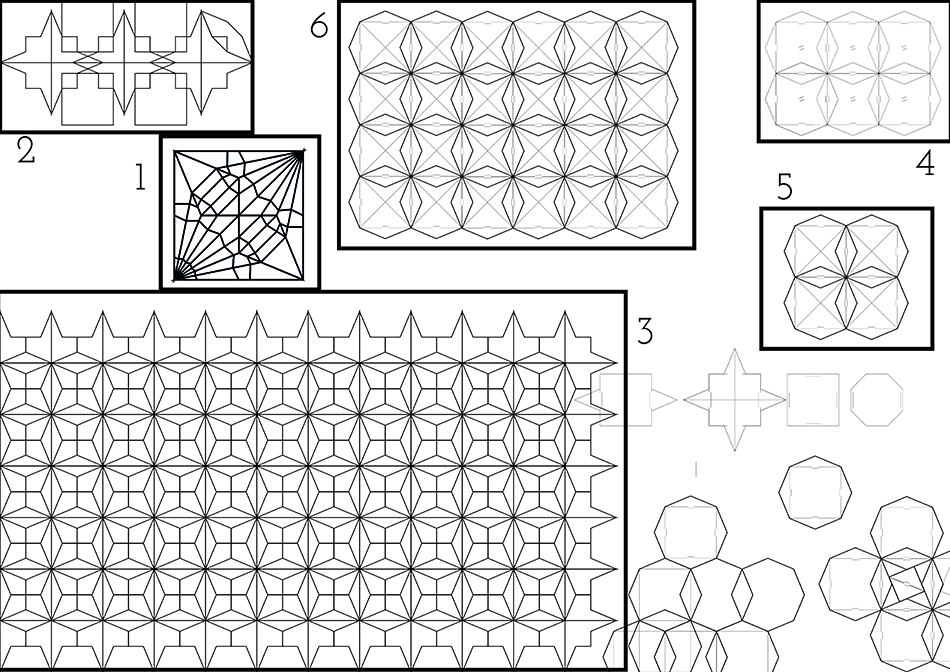
These are the steps which explain how the design developed:
- 1. This is my Crane Template, so I wanted to find an interesting module into it, that allowed me to be interlocked.
- 2. My first tries didn't really pleased me since I found them boring.
- 3. So I played until I made this, which is modular and really interesting for me, and made kind of an experimentation for trying to find the module which creates this visual appearance.
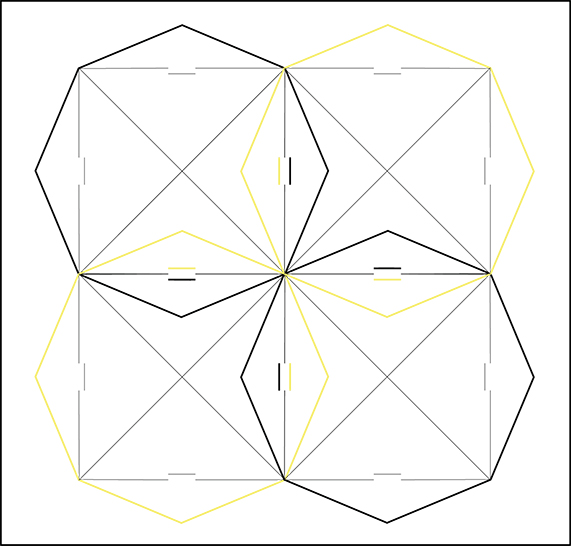
- 4. I finally arrived to this point, which is an octagonal shape, I thought about the interlocking arrows inspired by Sara's design.
- 5. I finally decided to design an engraving in the middle that could make the module more interesting for the chosen material.
- 6. This is how it would look like when assembling a bigger amount of modules together.
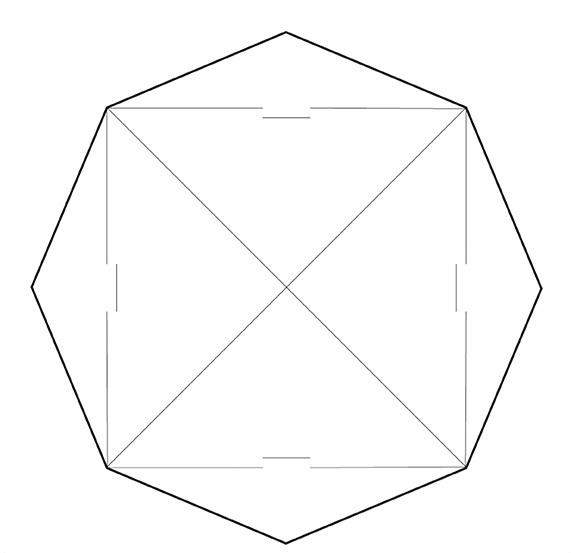
· The Module
This is the final module I created:
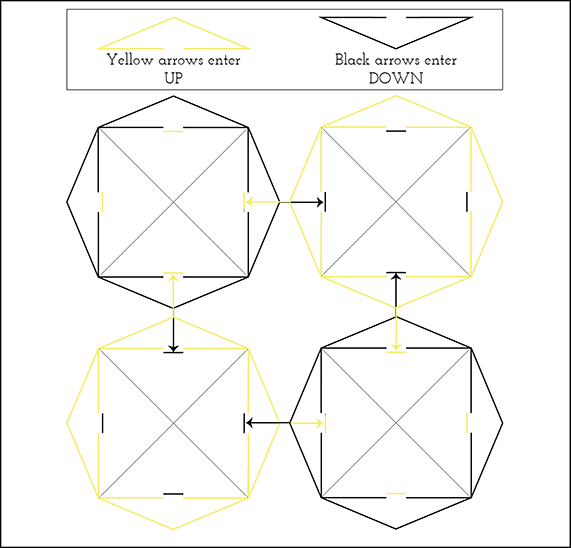
And here is how the pieces interlock:
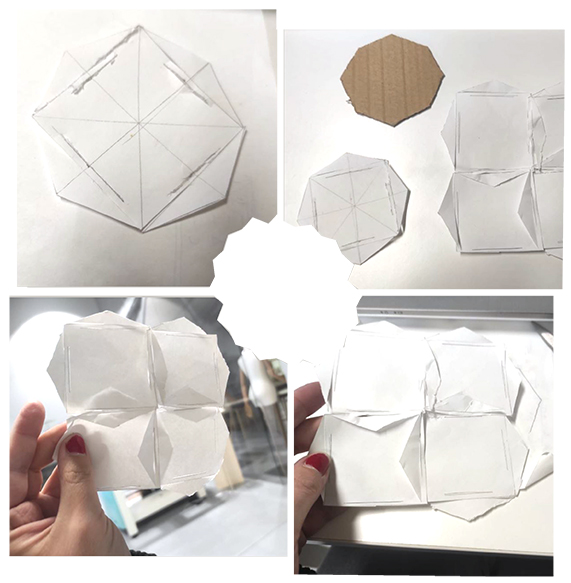
· Trying the Modules With Paper
This is the try I did with the modules with paper (I made them by hand and cut them with a cutter) for verifying that the interlocking worked in real:
· Exporting the Final Module From Illustrator
As I said, I designed my modules in Illustrator since I'm more used to design in that software. Once I saw that the interlocking worked, I saved one individual module as ".ai" file for manipulating it in Rhino and have a most accurate file for the laser cutter.
These are the steps I followed for doing so:
- 1. First, being on the file of the design, I selected one individual module.
- 2. Then, I copied the module.
- 3. Opened a new Illustrator file.
- 4. Pasted the module there.
- 5. Finally I saved the file as a ".ai" file.
This video shows how I saved the design from Illustrator for working with it in Rhino:
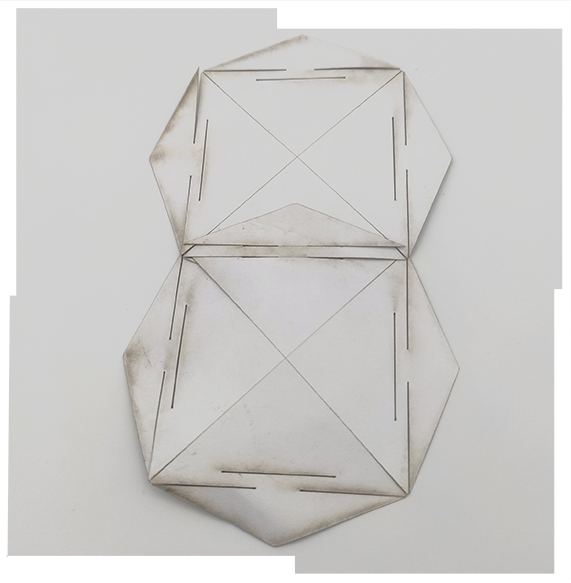
· Preparing the Cutting File in Rhinoceros
I prepared my file for the laser cutter in Rhino, first for trying the module with paper. I only tried two pieces just to see how they looked like out of the screen and how it worked when interlocking them.
These are the steps I followed for preparing my design from Illustrator to Rhino for the laser cutter:
- 1. First you need to open the individual module design in Rhino.
- 2. Then, you need to draw each line again in different new layers (Engrave, Inside, Outside).
- 3. Once you did that, then is time to copy and paste the design, in my case only one more time just to make a try on paper.
- 4. Select both modules and export them as a ".dxf" file.
- 5. Your design is ready to be laser cut!
This is the video that shows the process explained before:
Here you can see how the two pieces interlocked together:
· Preparing an Almost Zero-Waste Cutting File
Then, I prepared a file with more modules to cut once I saw that the interlocking worked. Unfortunately, it looked like there was a problem with the file cause the laser cutter couldn't cut it properly (as a solution I changed it and remade it with fewer lines, and tried to cut a less amount of modules, just in case).
I tried to put all the modules as close as possible for creating less amount of waste in the cutting process. For doing so, you need to put them so close, in some cases, the duplicate lines could be a problem when cutting your design. I'll explain the process I followed to solve this problem down below.
These are the steps I followed for preparing an almost zero-waste cutting file:
- 1. Open your individual design in Rhino.
- 2. Then, you need to draw each line again in different new layers (Engrave, Inside, Outside).
- 3. Once you did that, then it's time to copy and paste the design several times until you create as many modules as you wish.
- 4. This step is probably the most boring one: create a new layer and draw all the outside lines again (I know that it's boring, but as my Rhino skills were not so developed, this was the best way I found for avoiding the duplicate lines).
- 5. Once you finish, organize your layers and make sure that you have your design in 3 different layers: "Engrave", "Inside" & "Outside".
- 6. Select all of them and use the "Join" command, for trying to join as many lines as possible.
- 7. Check and make sure that your design doesn't have any duplicate lines, this is so important!!!.
- 8. You're ready now to export it, so select all the lines again and export them as ".dxf" file.
- 9. Your design is ready for being laser cut!
Here you have a video that shows this process:
· Laser Cutting the Modules
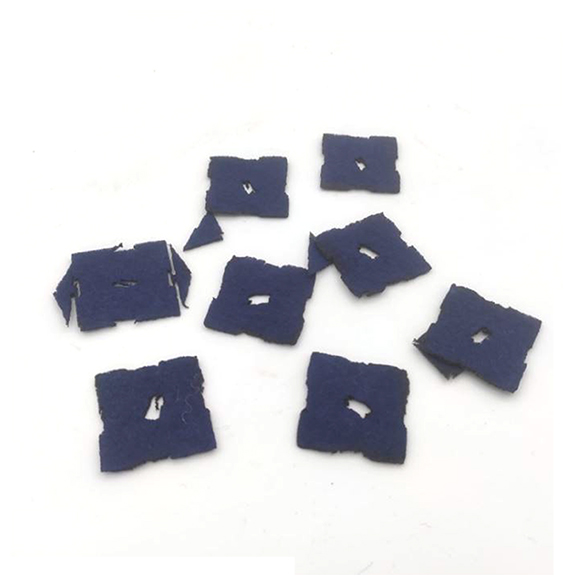
· Try With Felt
As it worked on paper, I wanted to cut them in felt, inspired by Aurelie Tu's designs. But the results were awful so finally, I thought about another kind of material.
These were the parameters I used for laser cutting the felt:
- Material: Type: Felt; Thickness: 1 mm
- Machine Settings: Cut: Speed: 20 / Power: 90-93;
And this is the result, which I didn't like at all:
· Try With Translucent Paper
So I finally decided that I wanted to change the felt for paper, something stronger than regular paper and maybe more translucent.
The material and the seetings for the laser cutter where these:
- Material: Type: Translucent Paper (160gr); Thickness: 0.5 mm
- Machine Settings: Cut: Speed: 75 / Power: 50-53; Engrave: Speed: 800 / Power: 25
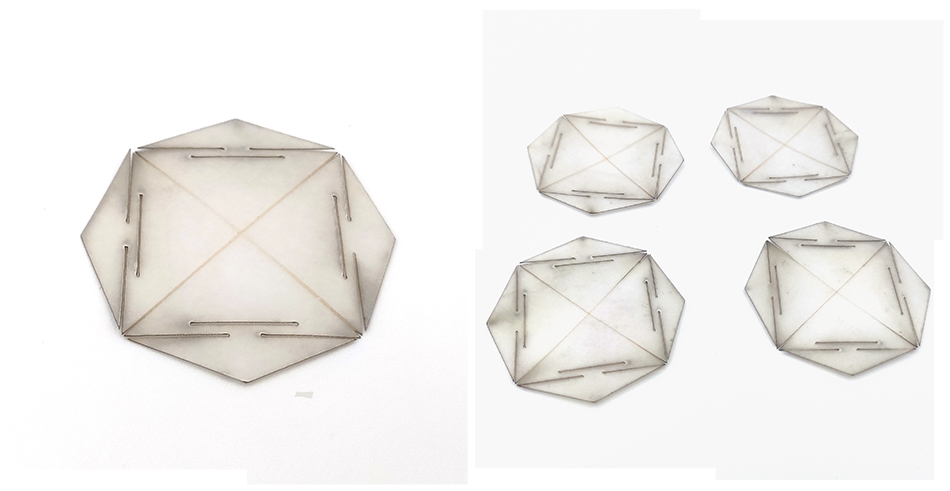
And this is the result:
From here you can download the cutting file.
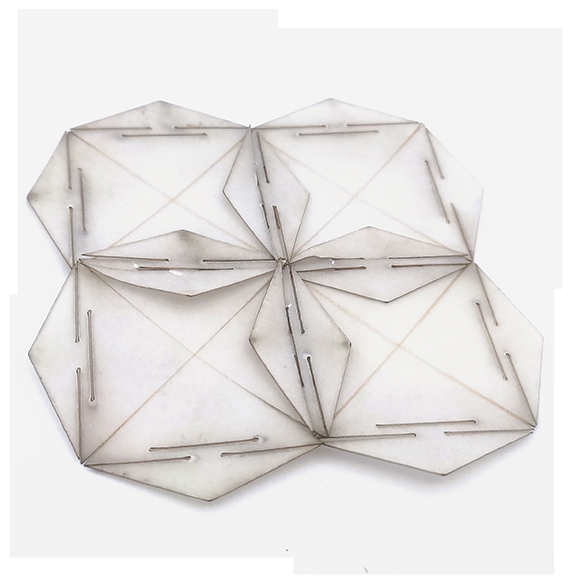
This is how finally one module looks like:
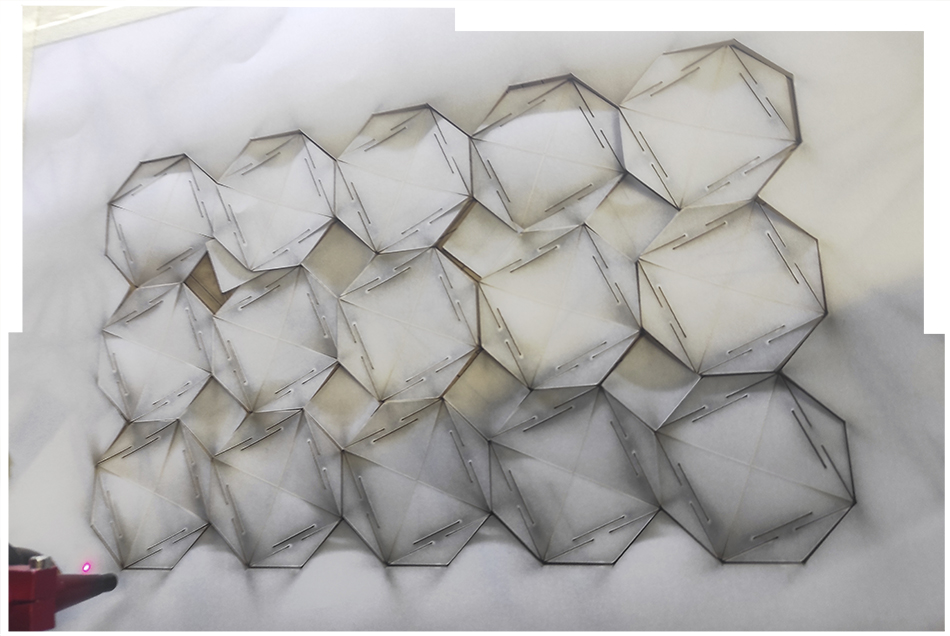
· Assembling Process & Final Results
Here you can see a video of the assembling process:
This is the final result of some interlocked pieces:
Downloadable Files
From here you can download the cutting file of the design.
References & Useful Links
These previous year's students inspired me:
Useful Links:
- Recitation by Elizabeth Jayot
- From Tech To Texture: Aurelie Tu of Craftedsystems
- Aurelie Tu: Crafting Positive Outlook