Circular fashion
Final work of this week
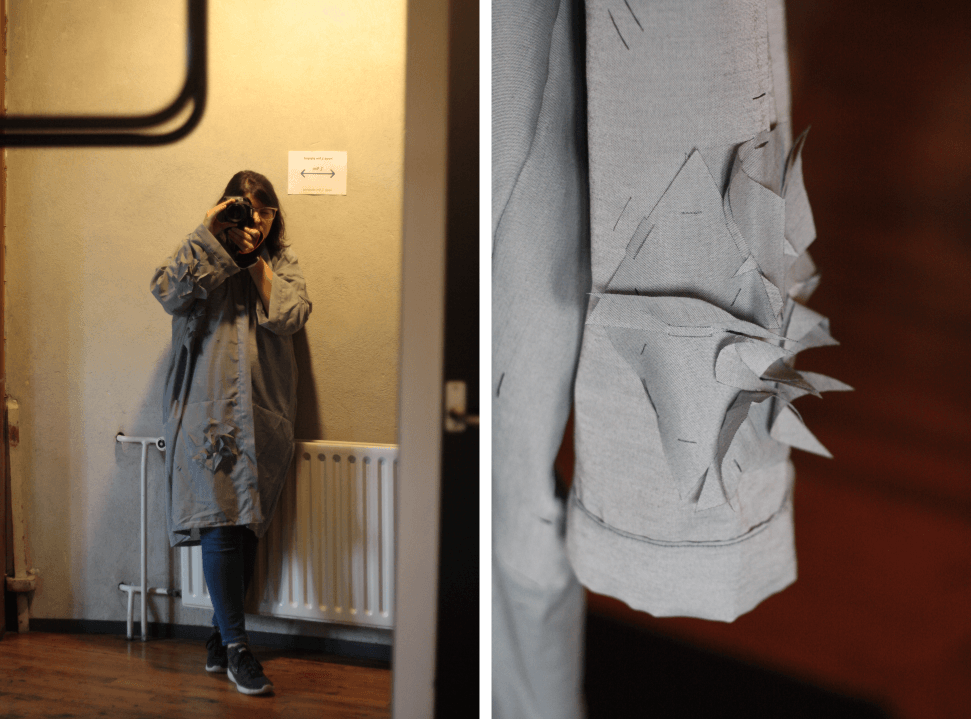
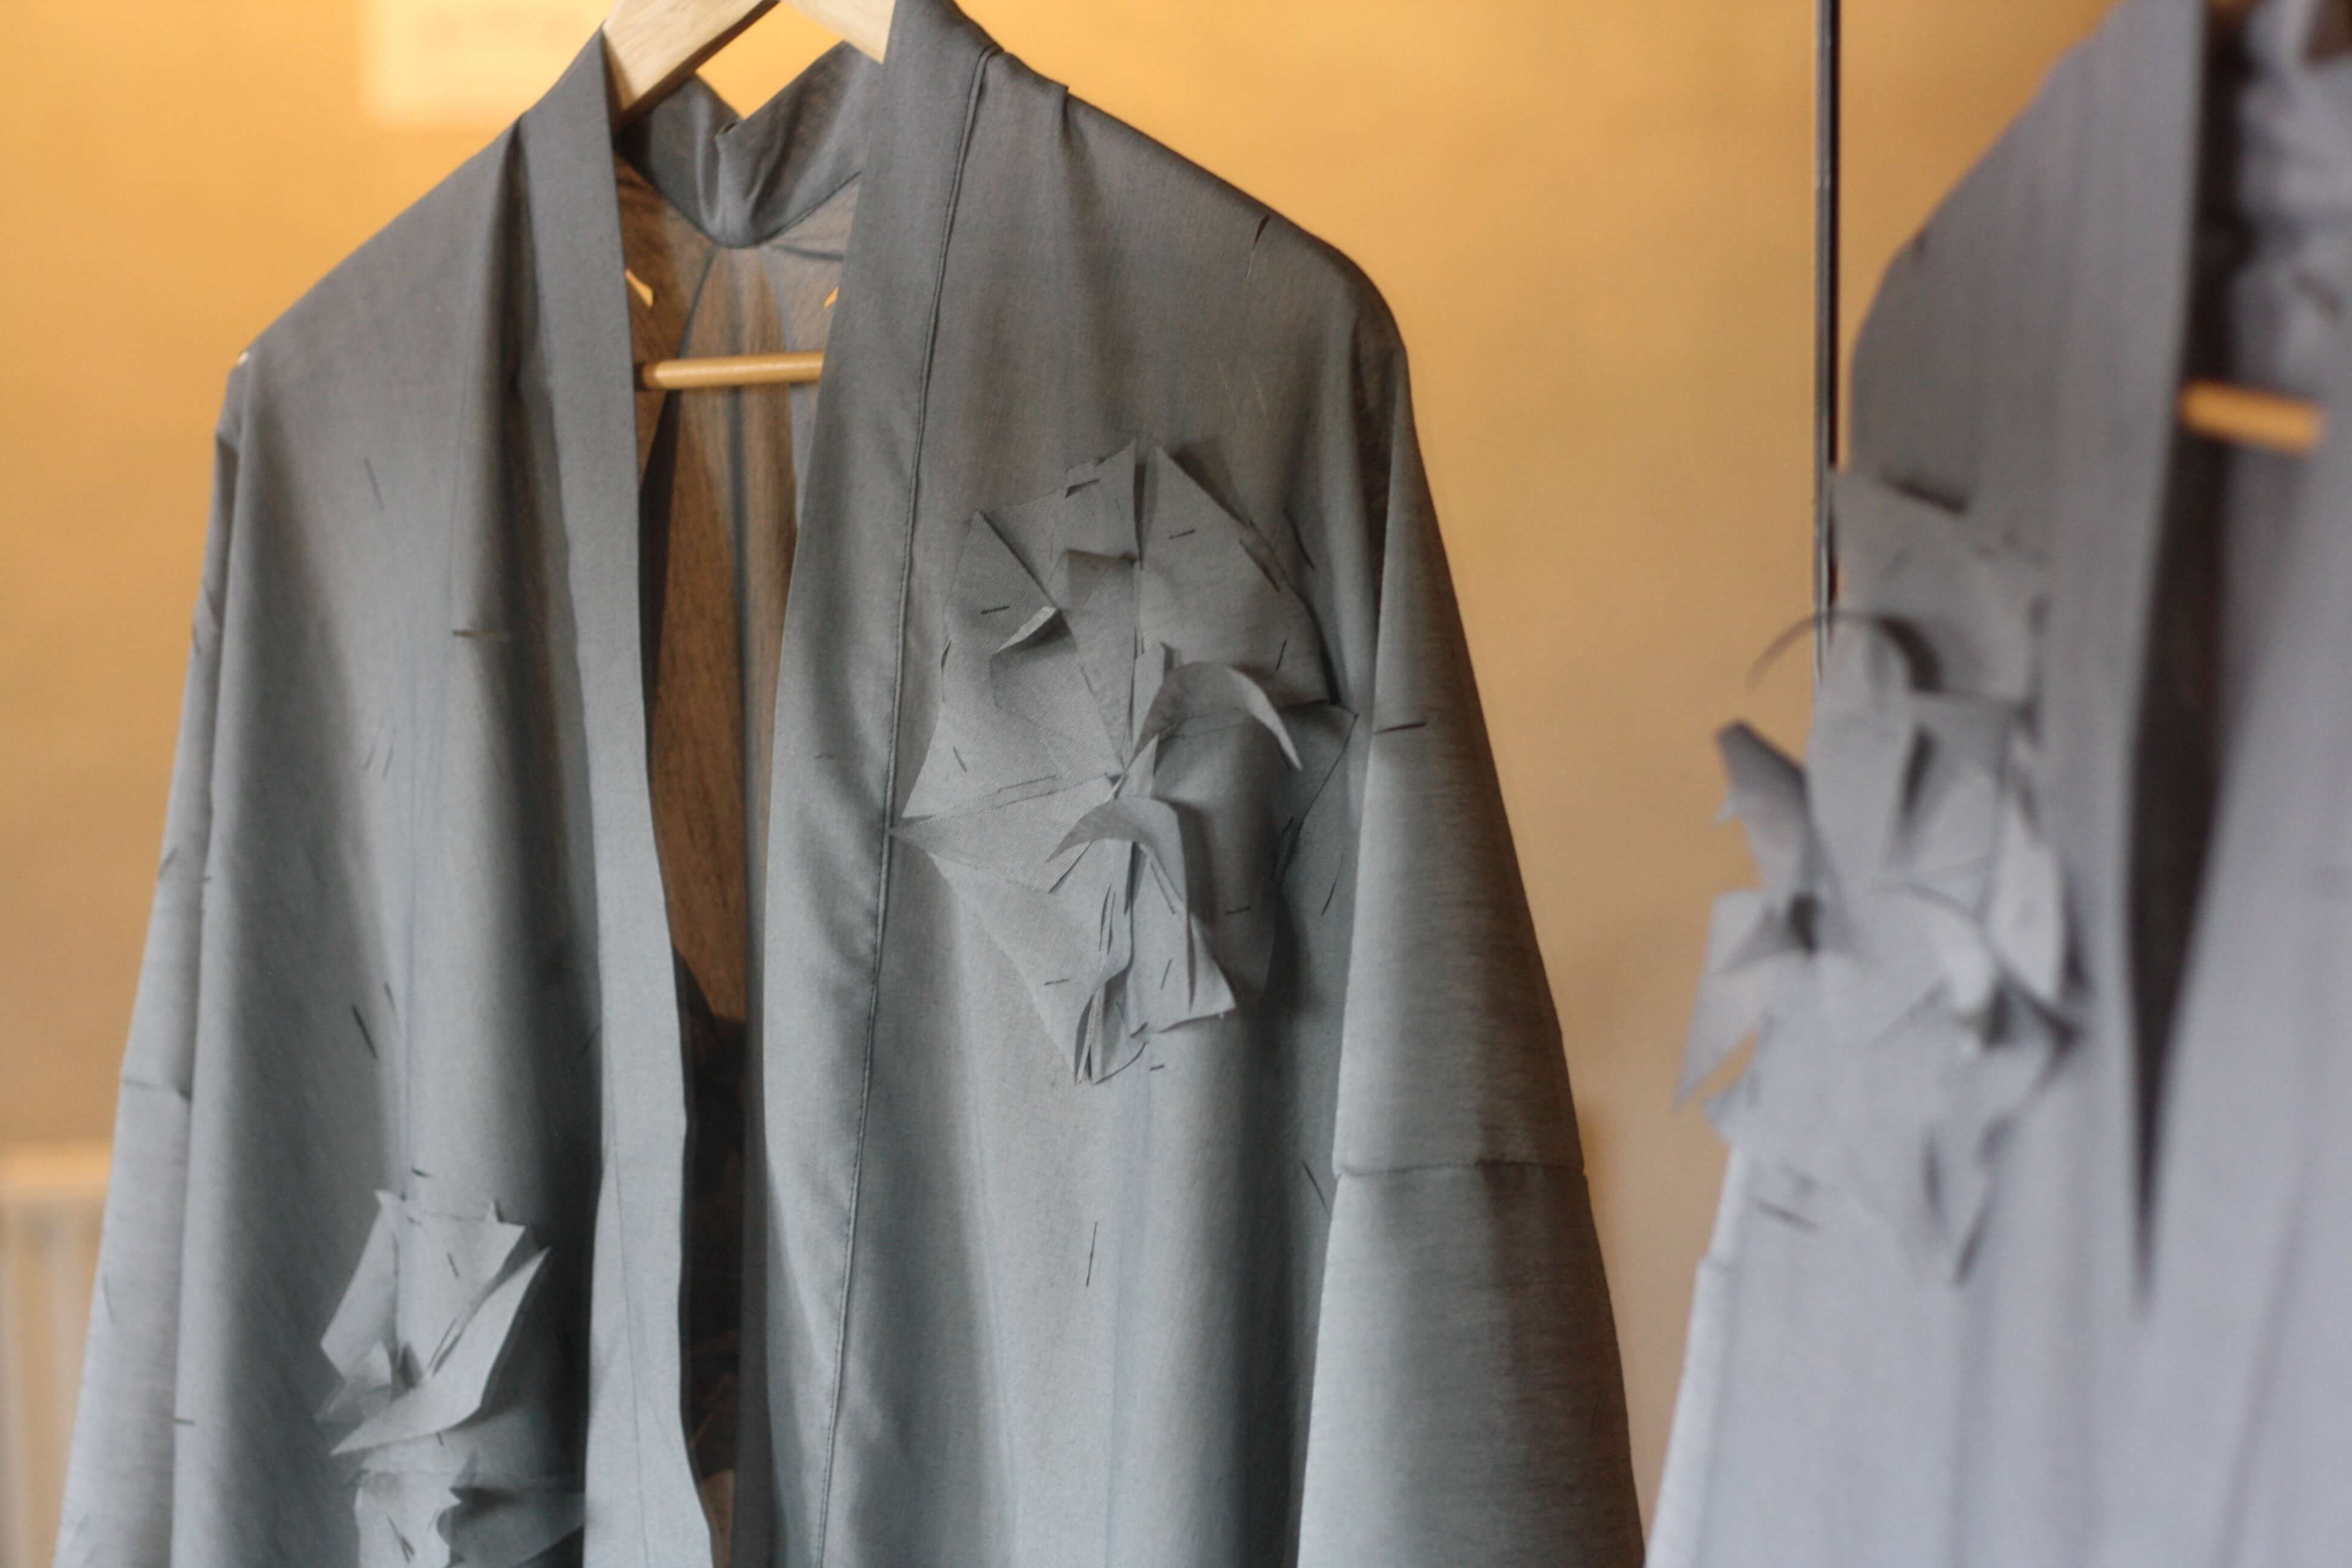
I present you a customizable (almost) zero waste kimono!
- It produces very little waste, as most fabric yardage is part of the final garment.
- It is customizable, since it can be adorned with fabric flowers without any tools! This also means it is easy to change placement and quantity of the embelishments for an ever evolving garment.
- The fabric flowers are (almost) zero waste and don't require tools or fastenings to be put together.
Rhino file
Follow this link to download the Rhino file containing the tile and kimono designs.

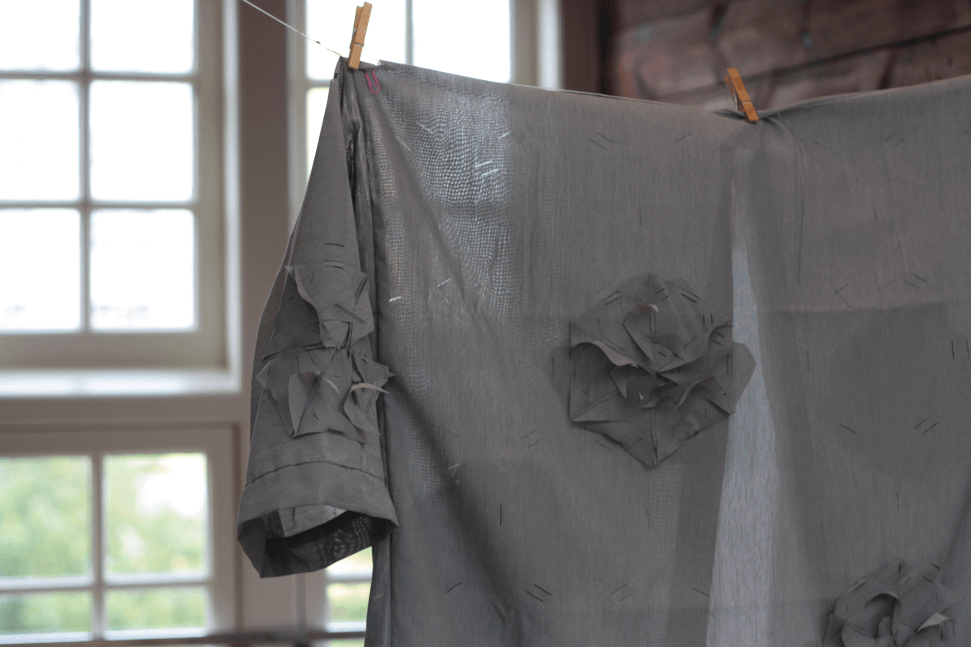
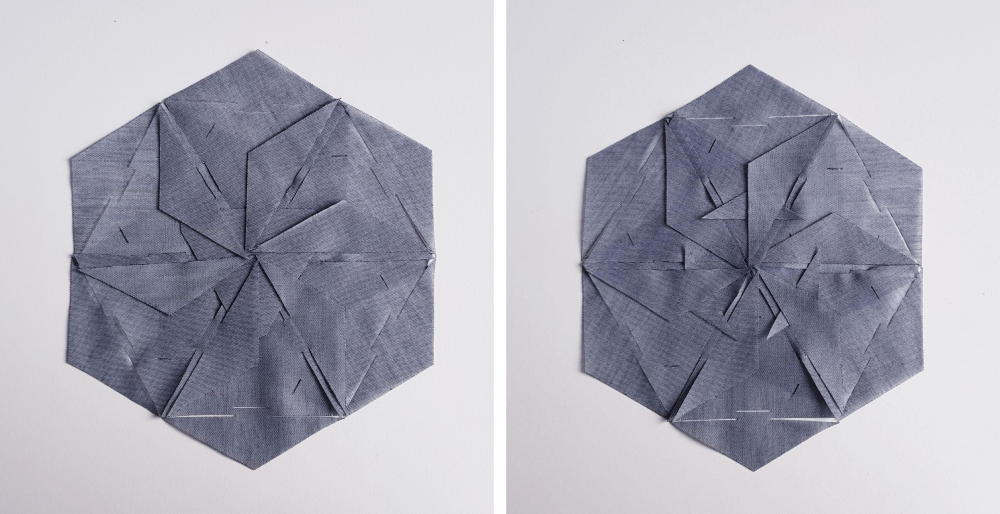
The jacket has a series of laser cut slits in which fabric flowers can be interlocked. The fabric flowers are constructed using the ideas from modular clothing, in which small tiles are linked together to form a bigger structure.
Concept development
Inspiration
At the beginning of the week I didn't know what shape the final garment would take. I was inspired by many things, but mainly by geometric forms and the relation of tiling patterns and mathematics.
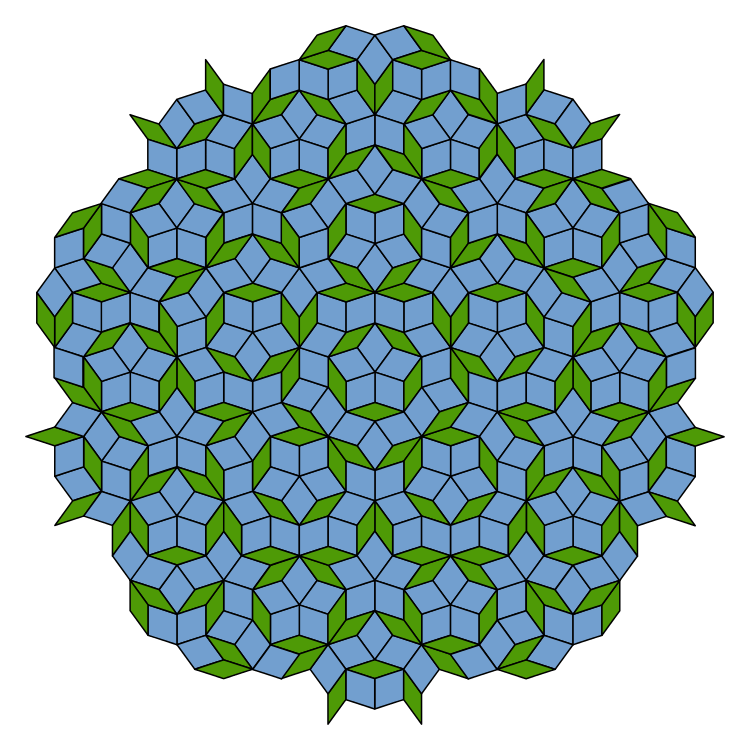
Mathematics in tiling
Geometry and mathematics are tied together. Math describes and decomposes patterns into formulas. When looking into tiling patterns, geometry and simmetry, I am transported to algebra lessons at uni. A specific case I find intestesting is Penrose tiling.
 Source
This is an aperiodic kind of tiling, which means there are infinite ways to arrange the tiles of the sequence, obtaining infinite different surfaces. Veritasium explains it wonderfully in his video:
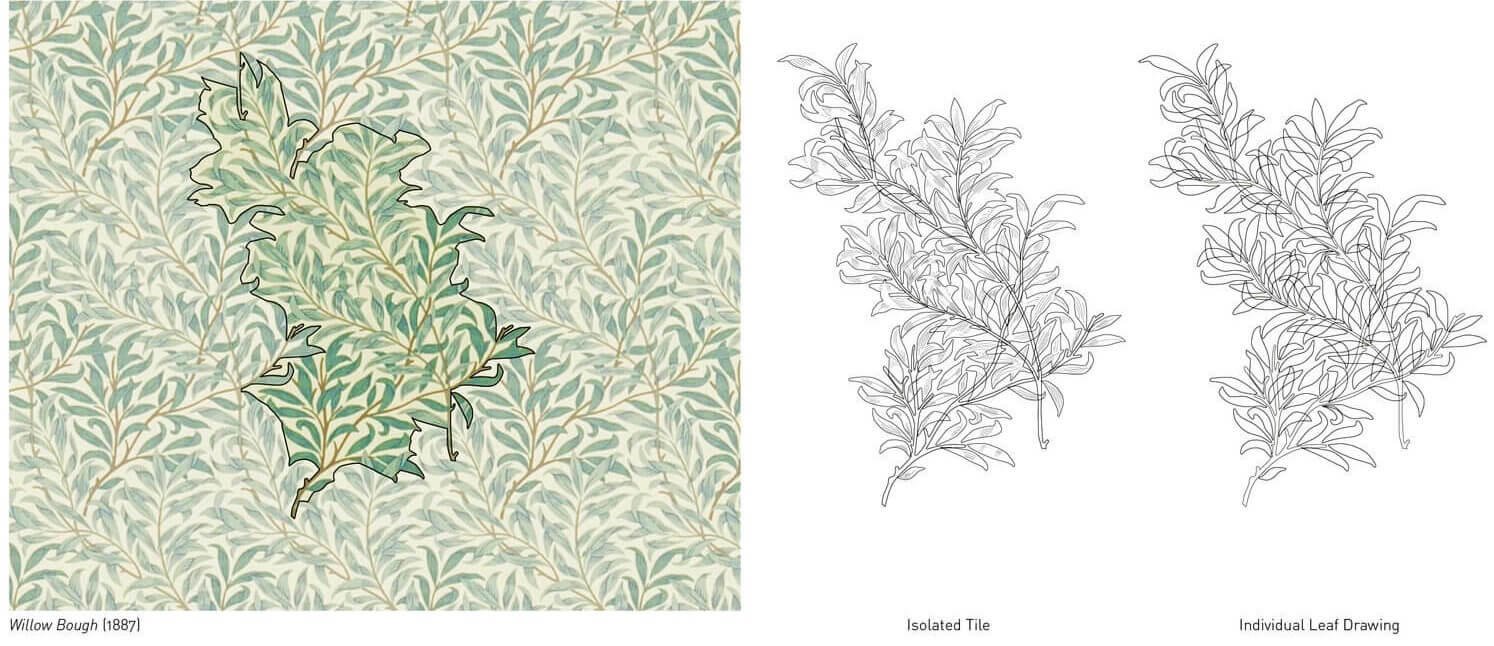
William Morris
While researching for inspiration for modular clothing, William Morris' wallpapers and fabrics came to mind. What I love about them is that it is hard to spot the repetition, making them look very organic and handcrafted, as opposed to surface patterns with a clear repeats. The way William Morris' surface patterns are built is explained in detail on this paper from Georgia Institute of Technology as well as this article.
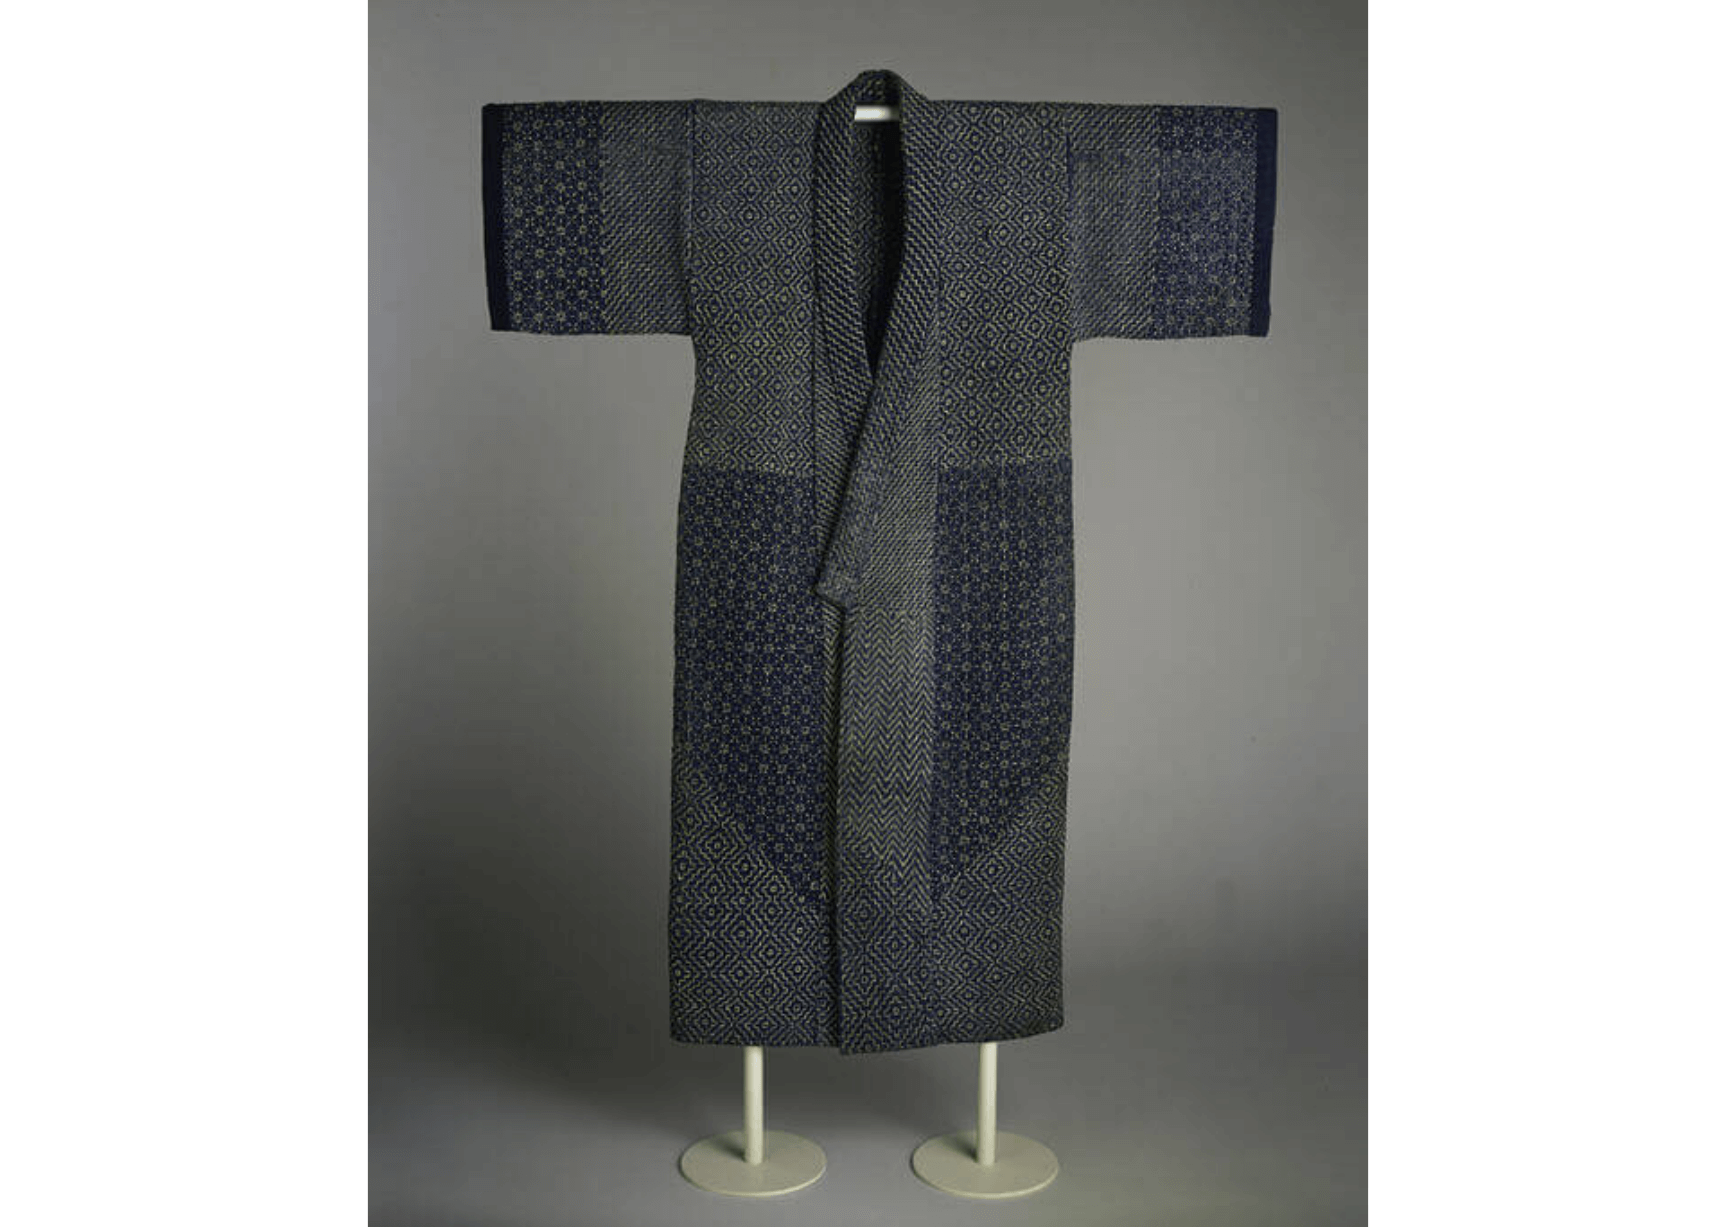
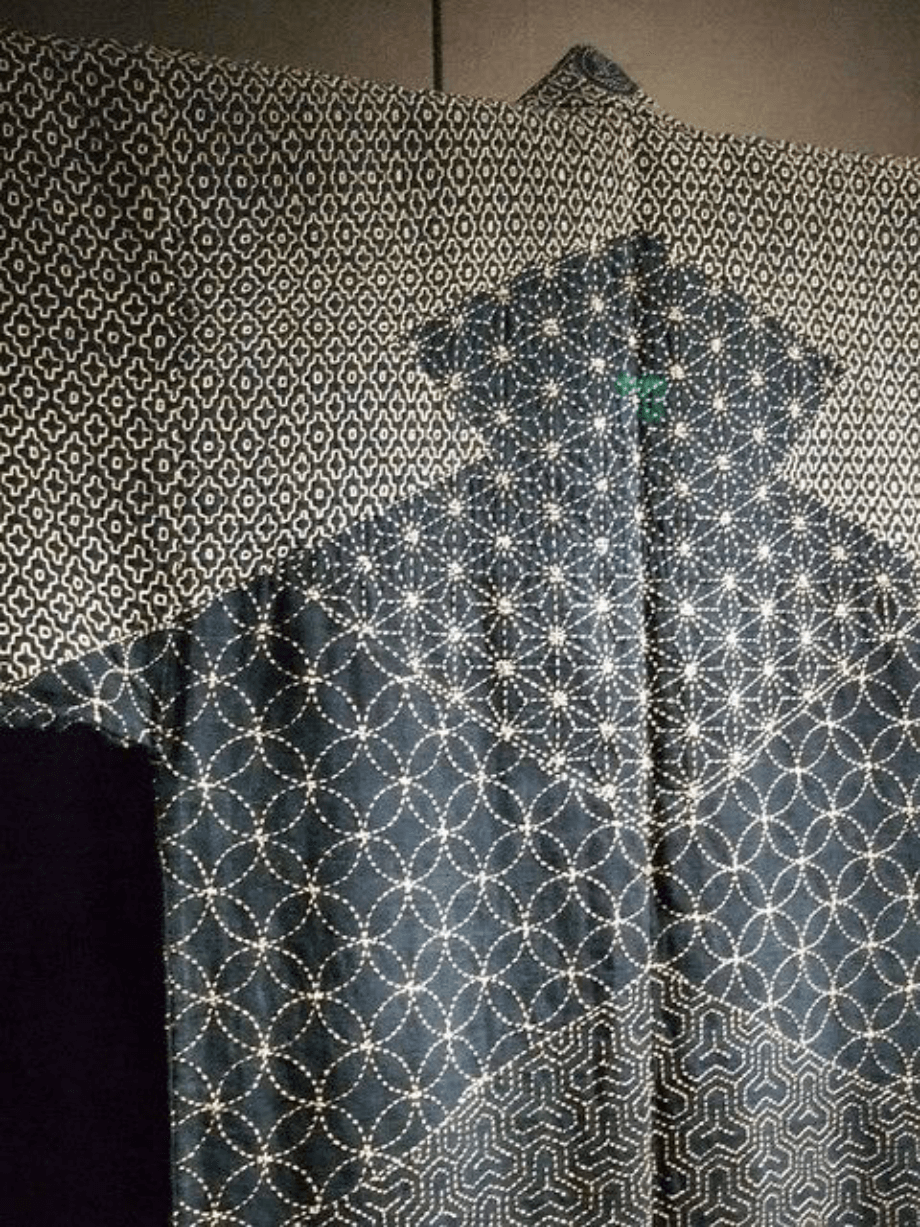
Shashiko embroidery
Shashiko is a technique that goes back to 17th century, used for mending worn or broken garments. It is as practical as it is pretty, and it often uses geometric motifs.
Paper tests
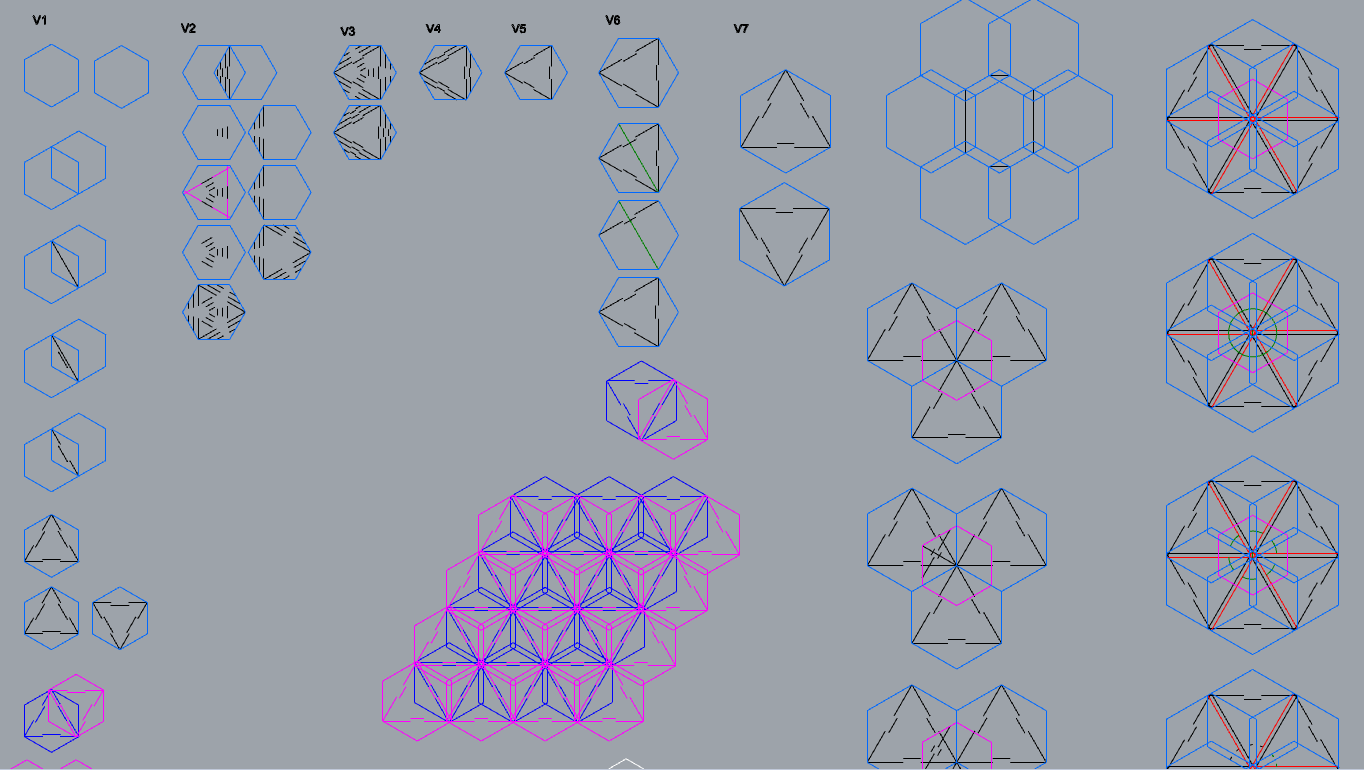
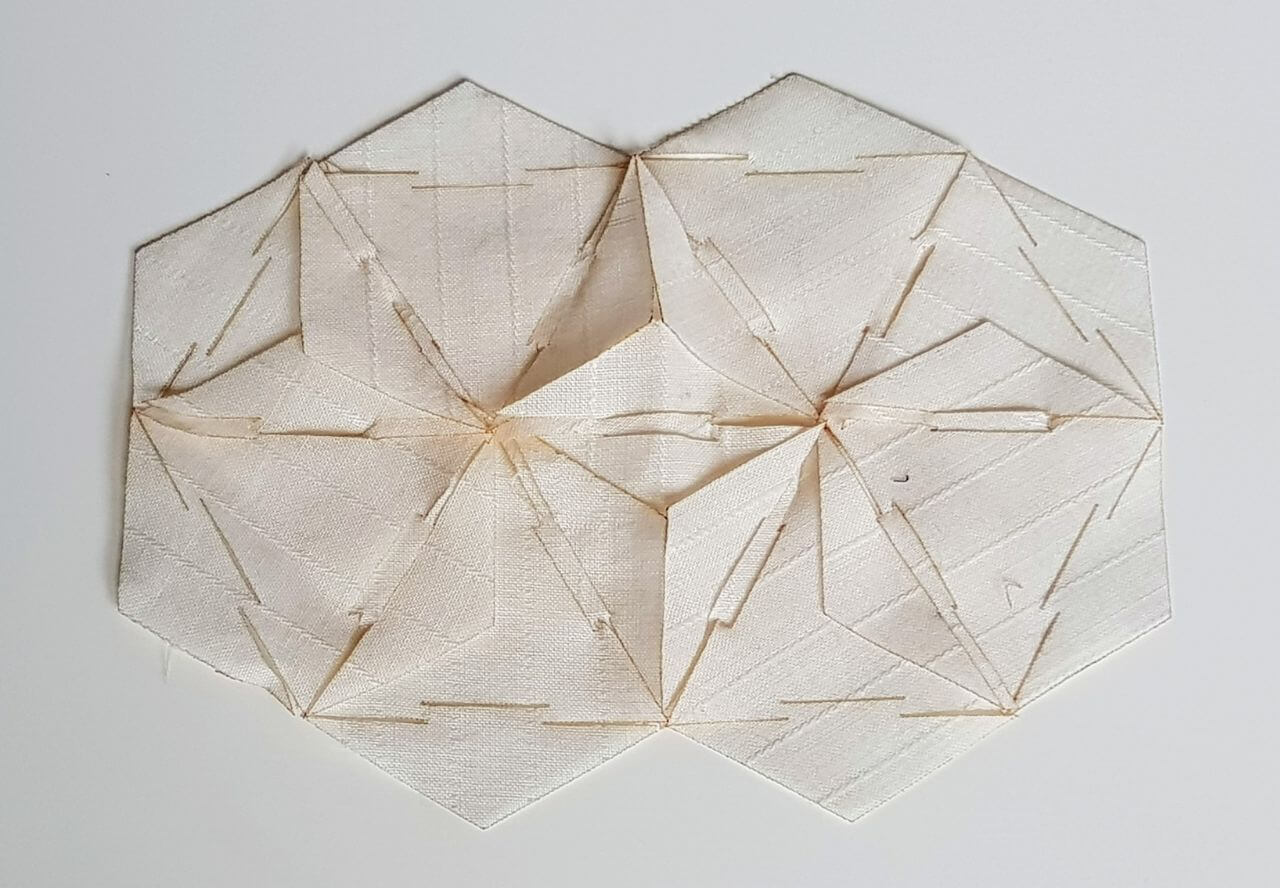
Initially I started cutting out geometric shapes in paper and playing with ways of interlocking them. This gave me a better understanding of how pieces can be locked together, how to create holes or have a continuous surface.
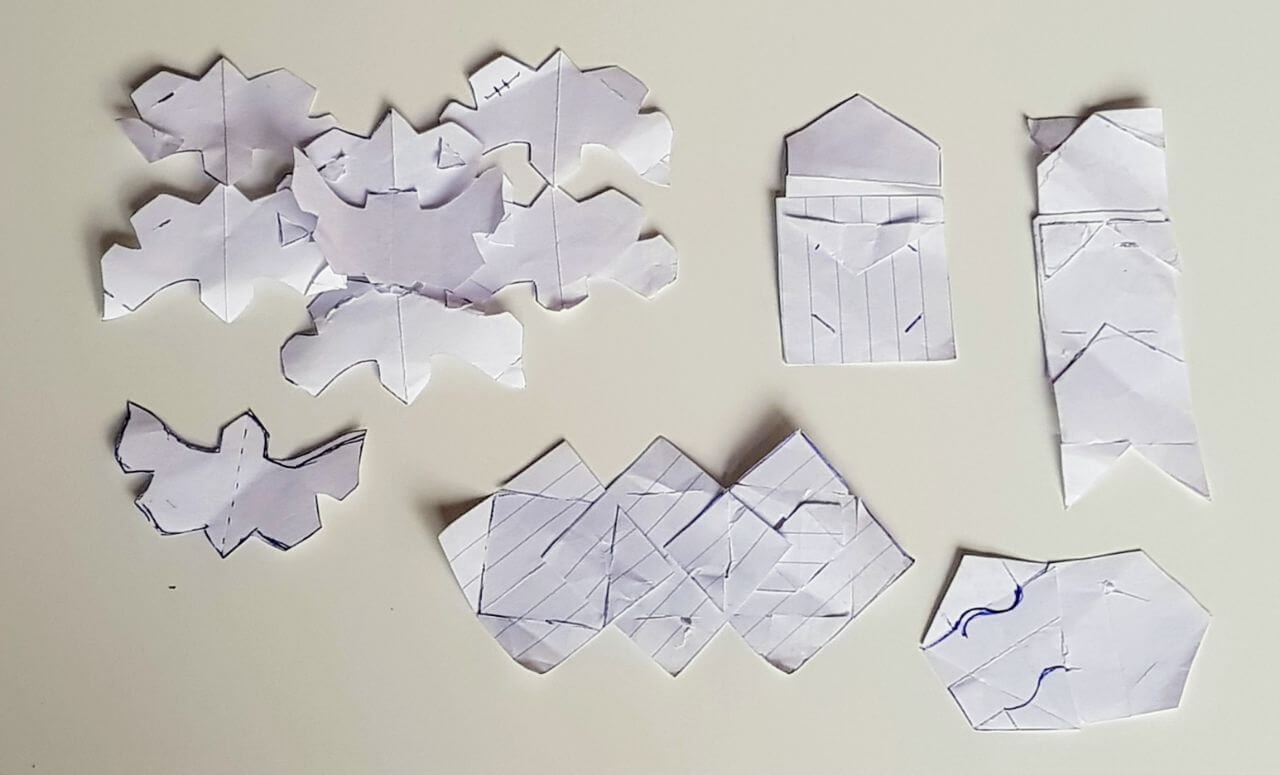
Soon I realized that I wanted to create a tile that didn't produce waste, which means that it should cover the whole surface of the fabric used. That limits the shapes quite a bit, so I kept it simple and worked with an hexagon as base shape. Adding cuts in different placements provided different final outcomes.
Design iterations with Rhino and laser cutter
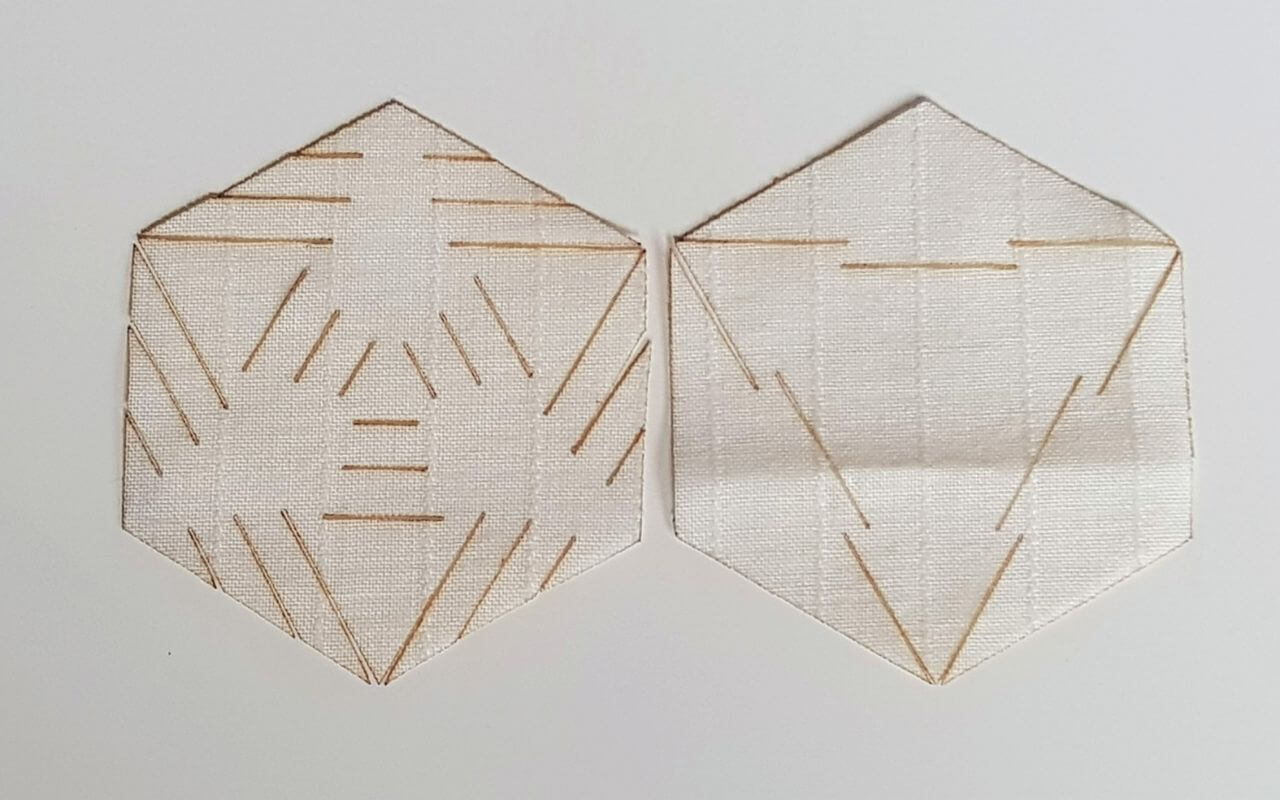
After deciding on the base shape of the tile, I thought of how to make the interlocking mechanism in a way that would create a sturdy connection between tiles. As you can see in the pictures below I went through quite a few iterations. I laser cut each iteration in fabric to see how it worked in real life and made adjustments until getting to the final shape.
Viewing items to scale in Rhino
To have a feeling of dimensions in real life before going to the laser cutter, I checked a way to present items to scale in the screen. The command is Zoom 1to1 Calibrate.
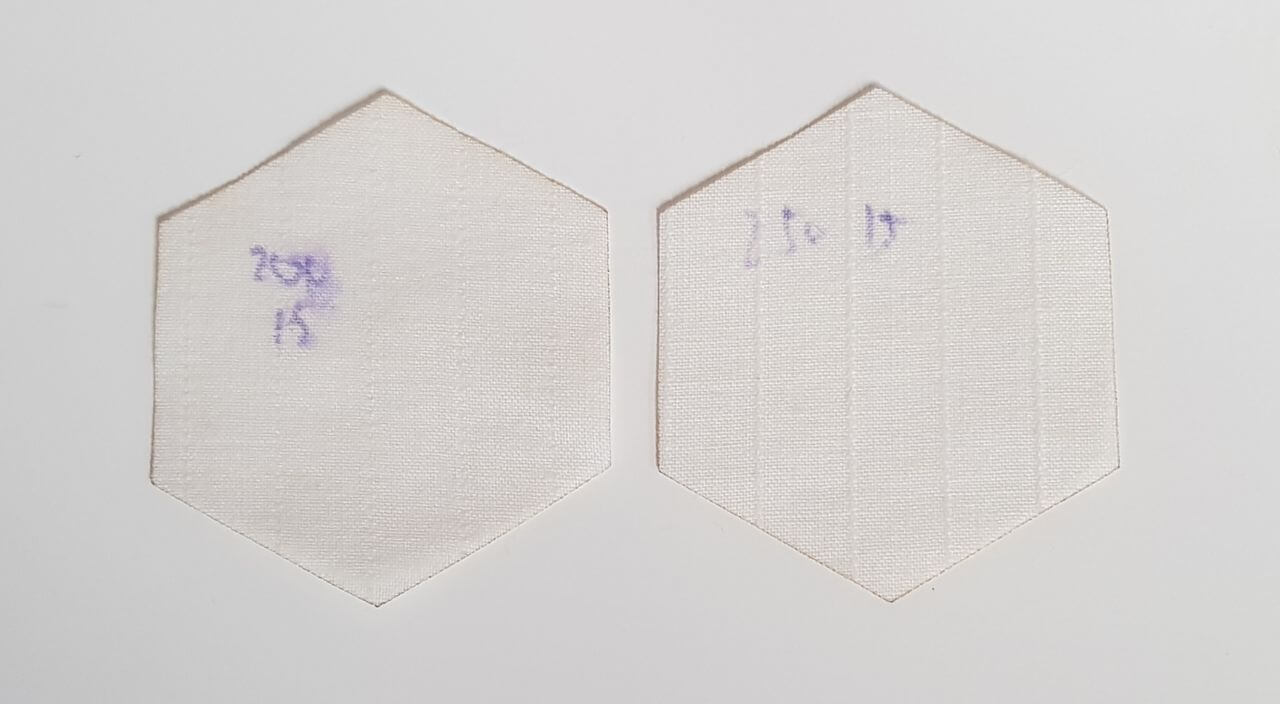
Fabric tests using the laser cutter
When testing with the laser cutter, you need to find the right settings depending on the fabric used. I had a piece of cotton/linen available at Waag, and that's the one I used for my tests.
After a few tests I concluded that the best settings for this fabric were:
- Speed: 200
- Power: 15
Digitizing pattern in Rhino
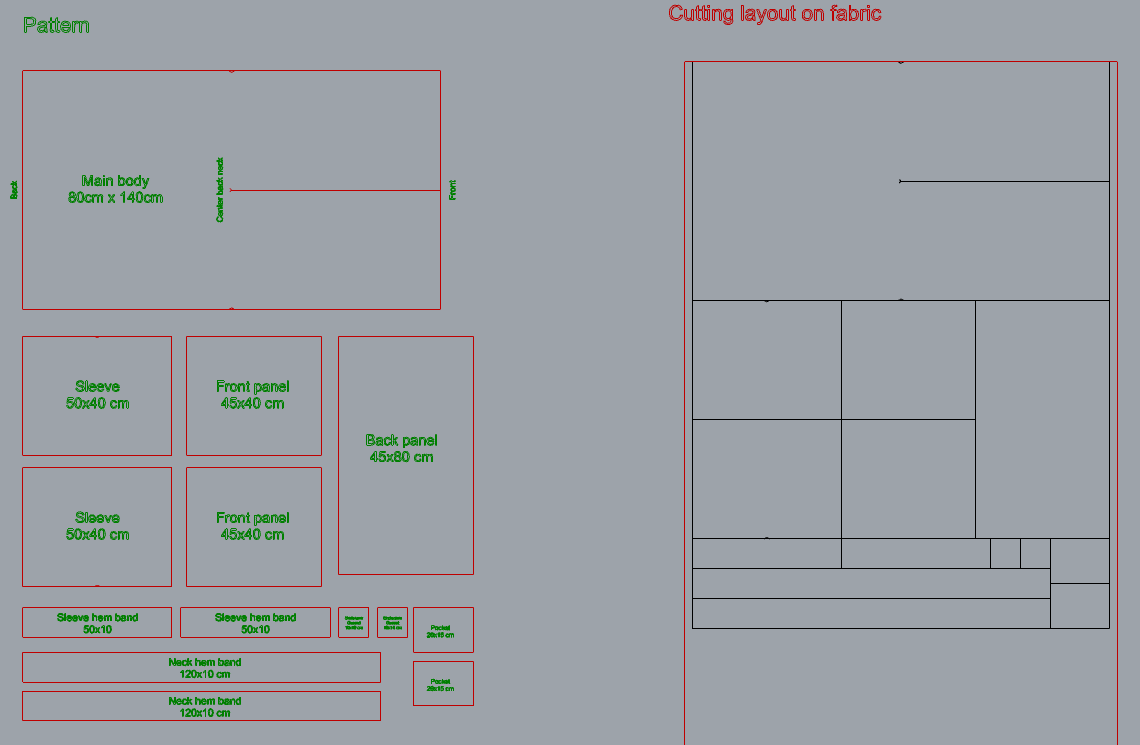
As for the kimono pattern, I looked for an existing zero waste pattern. I found a few, but this is the one I liked the most.
The website provides the pattern in form of a picture with measurements (since all pattern pieces are rectangles), so I drew it digitally in Rhino. That way I could laser cut it together with the modular tiles.
Final version
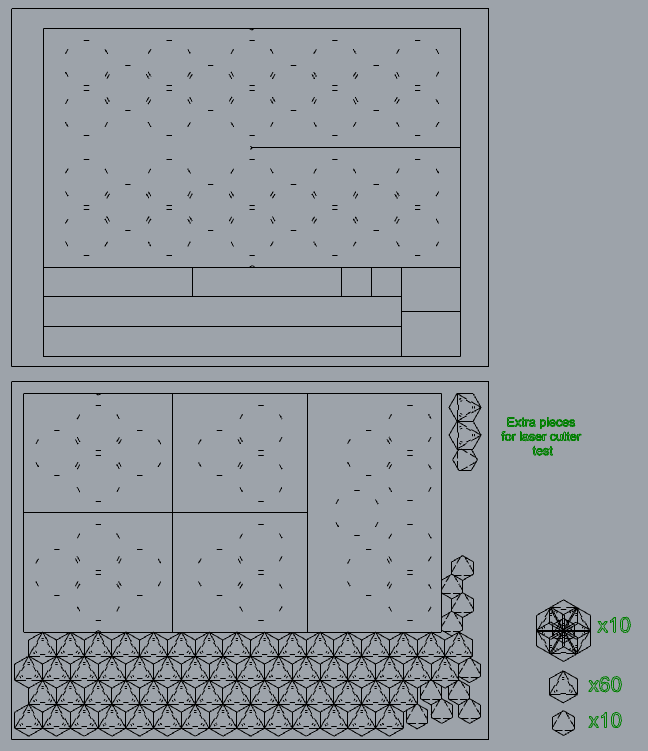
For the final version I checked the number of flower modules I wanted to have and layed the tiles needed together with the kimono pattern.
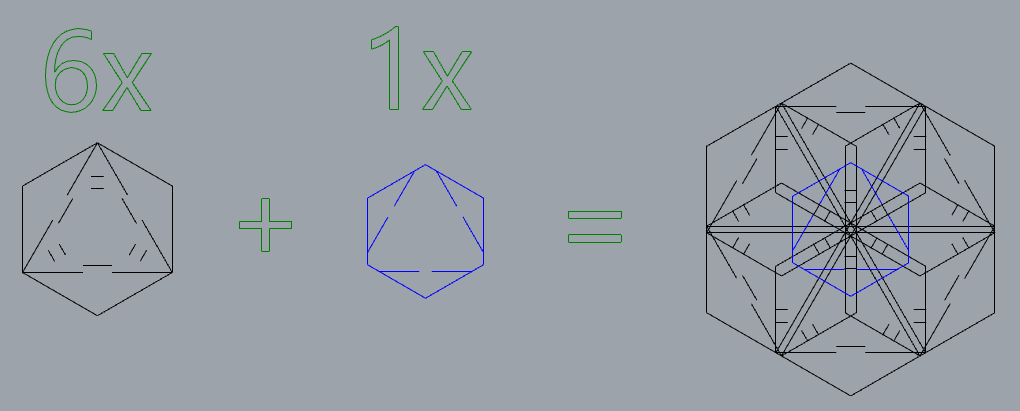
My goal was to minimize the amount of unused fabric, so I tried to squeeze everything together in the fabric layout taking into account the laser cutter measurements.
Making of the final piece
Finding fabric
I really liked the fabric I used for the tests, but I didn't have enough for the project. So I went on a mission to find a similar one in Amsterdam stores. I wanted a fabric with some amount of synthetic fibre, as that would make the laser cutting easier since the plastic fibers melt, sealing the edges. However, finding a fabric with this qualities that looked similar to the test fabric proved to be a really hard task in the time I had available, so I bought a polyester-cotton blend used for muslins. Unfortunately this fabric didn't work, because the weave was quite loose, which means the moment I laser cut it it frayed like crazy. So back to fabric shopping.
Luckily enough I had to go to Ikea to buy some stuff for my house. I stumbled upon a curtain set made of recycled polyester for really cheap, in an acceptable color. Still not my favorite fabric, but at this point time was running out and it seemed like safe bet for the laser cutter. And it was indeed!
Lasercutting
Having the fabric, I tried with the same laser cut settings that I used for the tests, and luckily for me they worked as well with the new fabric. However, my inital layout in Rhino had to be adjusted because the software of the laser cutter allowed for a smaller area to be laser cut than I had anticipated.
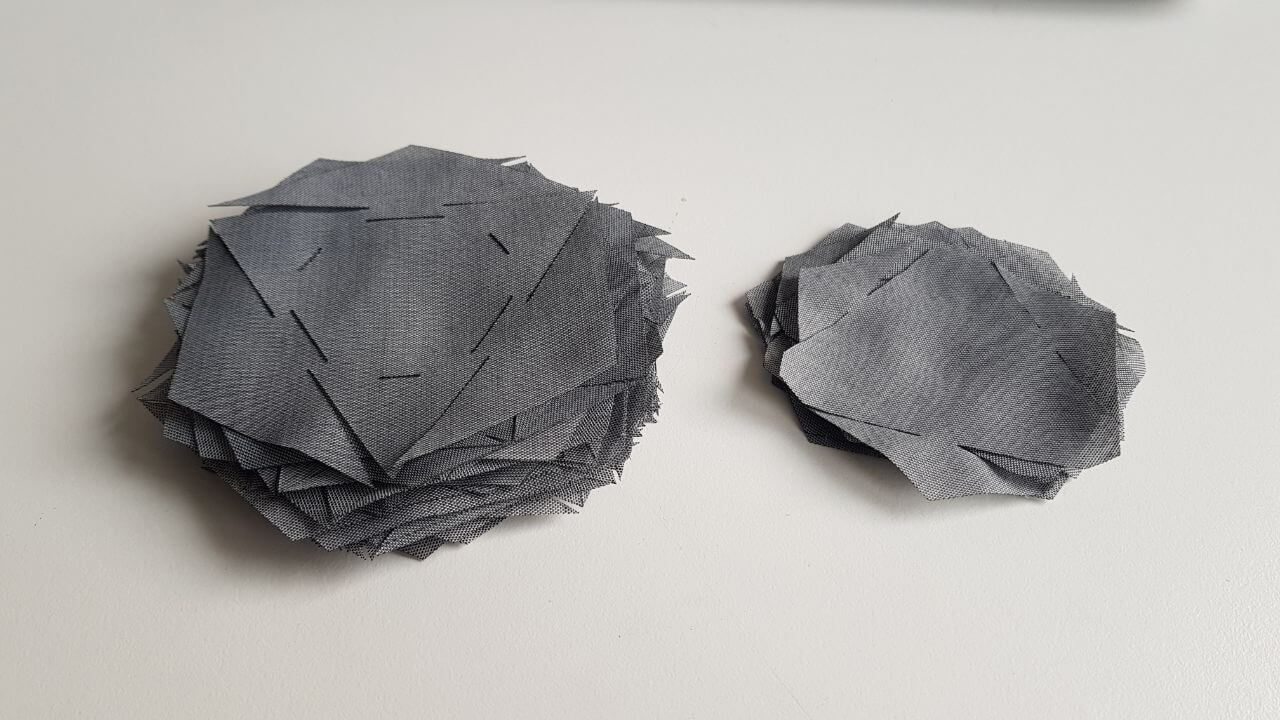
After laser cutting, I had a nice pile of tiles to put together and a set of kimono panels to attach.
Assembling the fabric flowers using modules
I figured this is easier explained in a video, so click play to see the flower making in action.
Sewing the kimono
This step was very straight forward. Since the fabric was lasercut, the edges were sealed, so I didn't need to finish the seams. Just a bunch of straight seams to put the panels together was all it took to make the kimono.
Sources
- Periodic and non periodic tiling
- Penrose tiling
- Tesselation and mathematics
- William Morris' tesselated designs
- Concealed repetition patterns from William Morris
- How to create a zero waste pattern
- Holly McQuillan's zero waste patterns
- Zero waste article in Seamwork magazine
- Making a zero waste pattern
- Kimono zero waste pattern
- Fashion brand Realm about their zero waste designs