5 E-textiles
Learning outcomes
--> Understand how we can produce soft circuits, sensors and actuators
--> Learn how to embed them in garments, soft objects or wearables
--> Study and learn soft-hard connections
--> Discover necessary materials, components, tools
--> Explore and replicate existing projects
Inspo
--> Refream talk


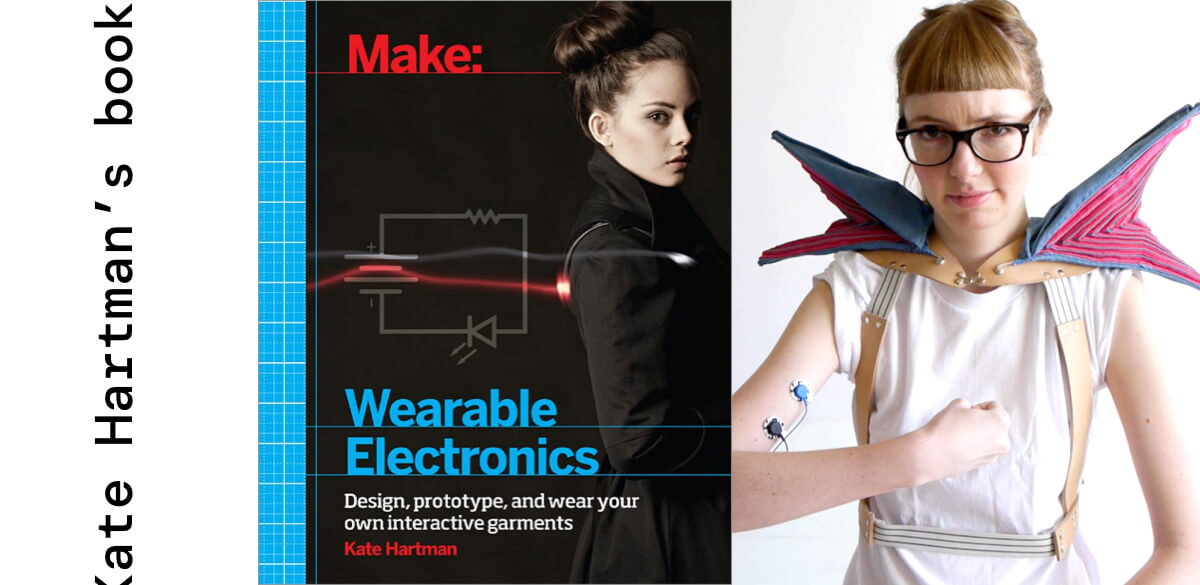
--> Wearable Electronics
Lecture takeaways by Liza Stark
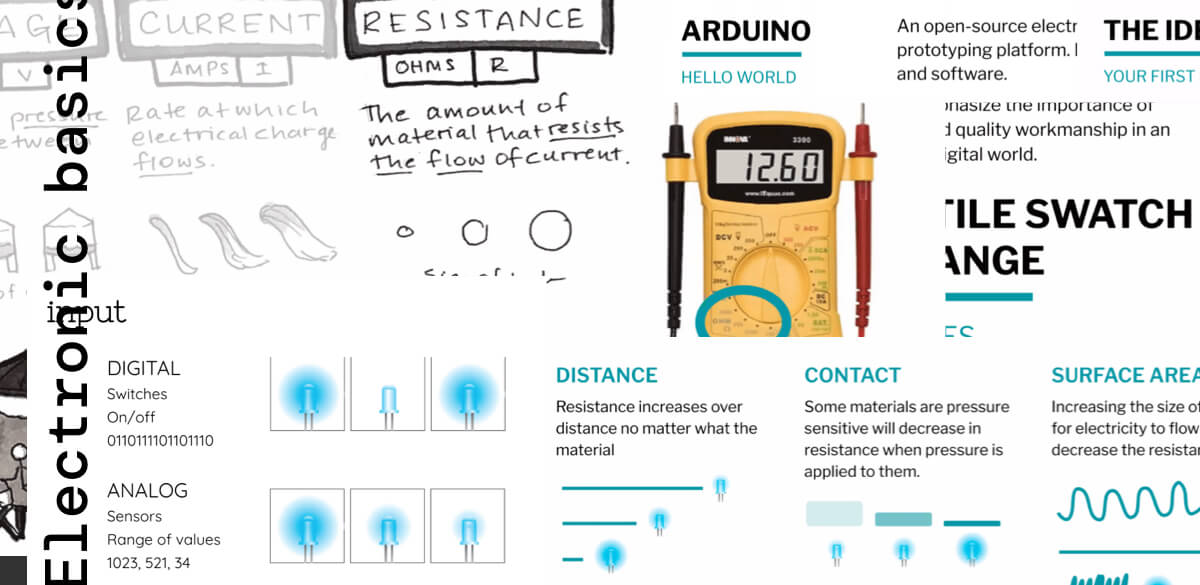
--> electricity , the 3 VIPS: voltage, current, resistance
--> we can change resistance in 3 ways: distance, surface, contact
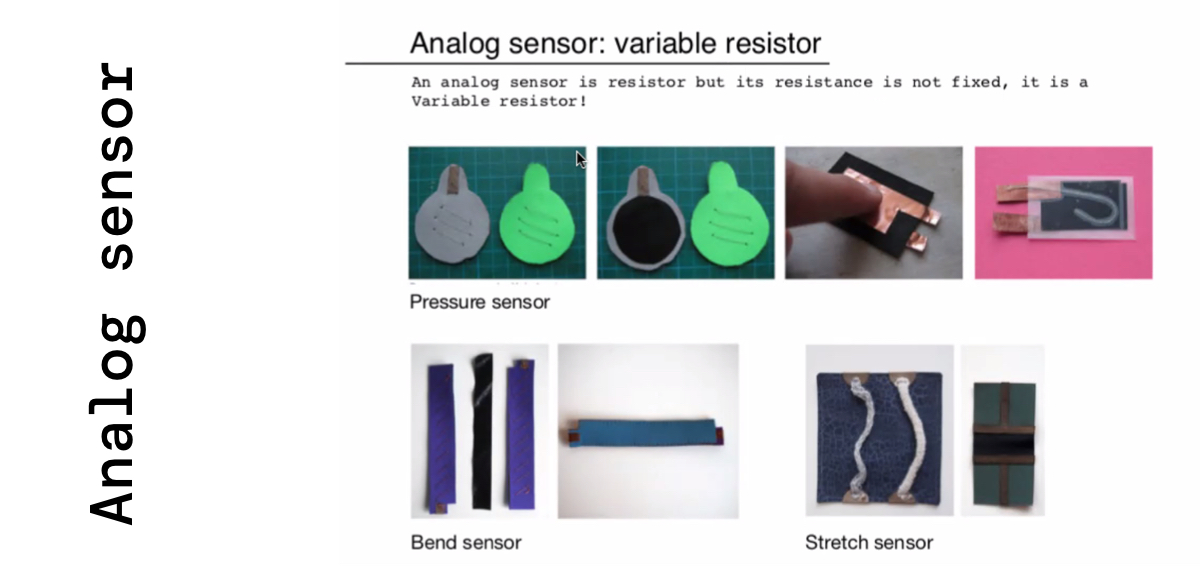
--> difference between digital sensors = on/off 1010101 AND analog sensors (variable resistors offering a range of values)
--> physical swatch exchange
--> intro to Arduino: the IDE, the different boards, code functions
Electronic basics
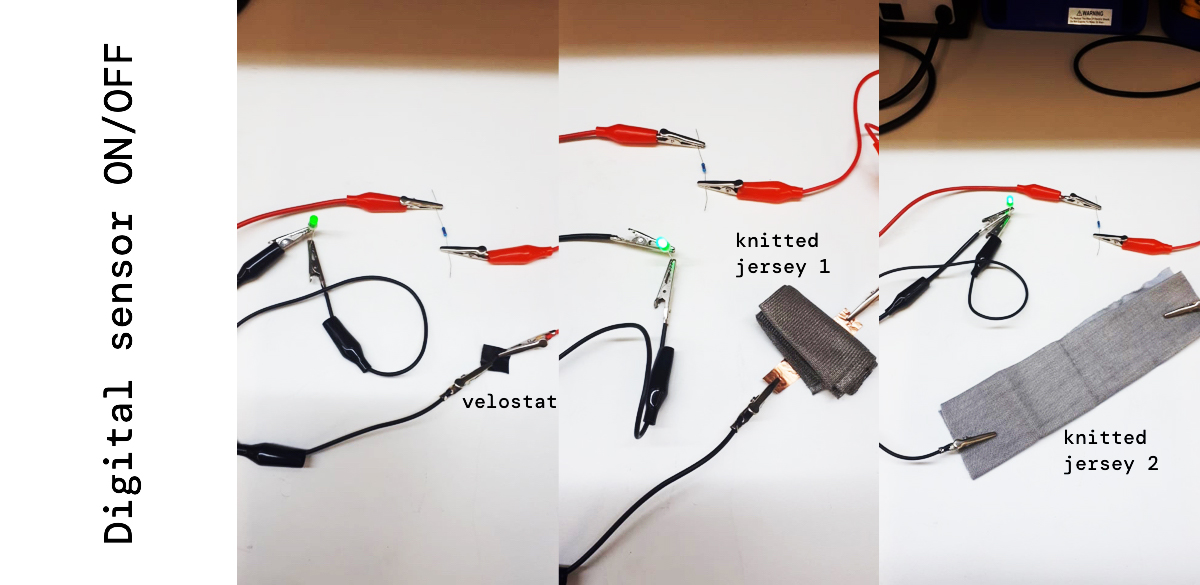
--> Experimenting with digital and analog sensors, I tried the quick and dirty sensors for both:
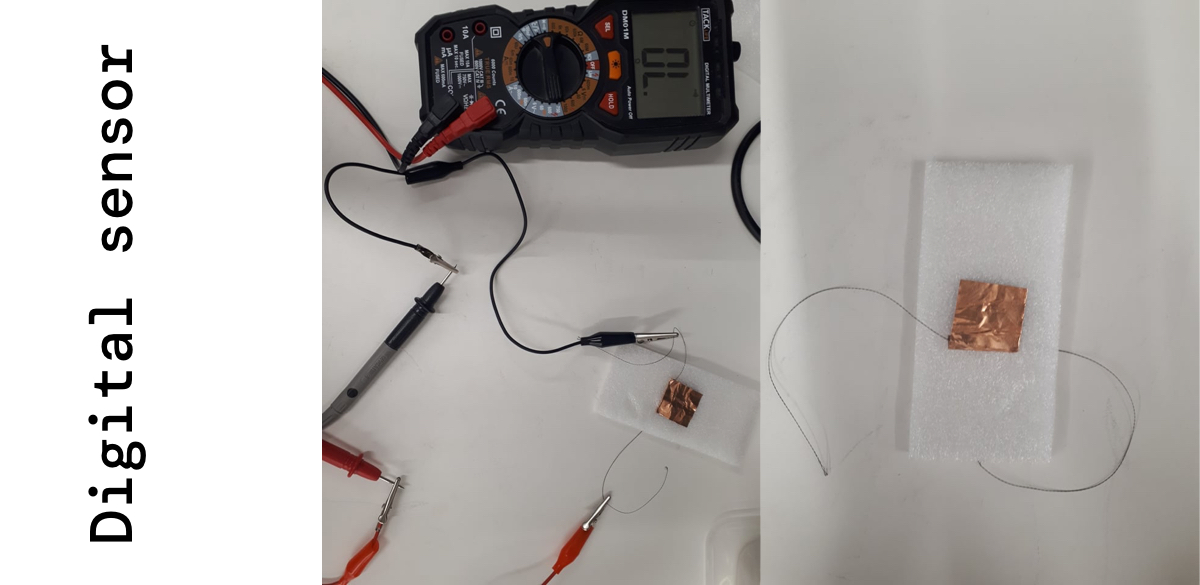 This ON/OFF digital sensor is made out of copper and a non-conductive piece of foam. When you press on the copper and it touches, the multimeter hows the current flowing.
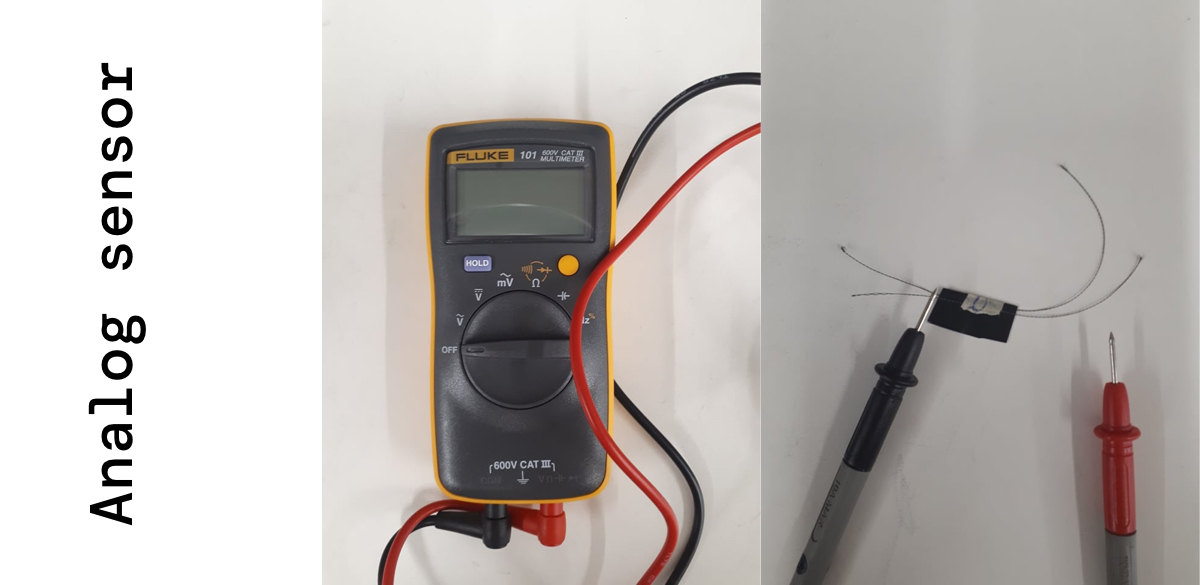 This analog sensor is made out of velostat, I used a multimeter to show the readings.
--> Experimented with circuit
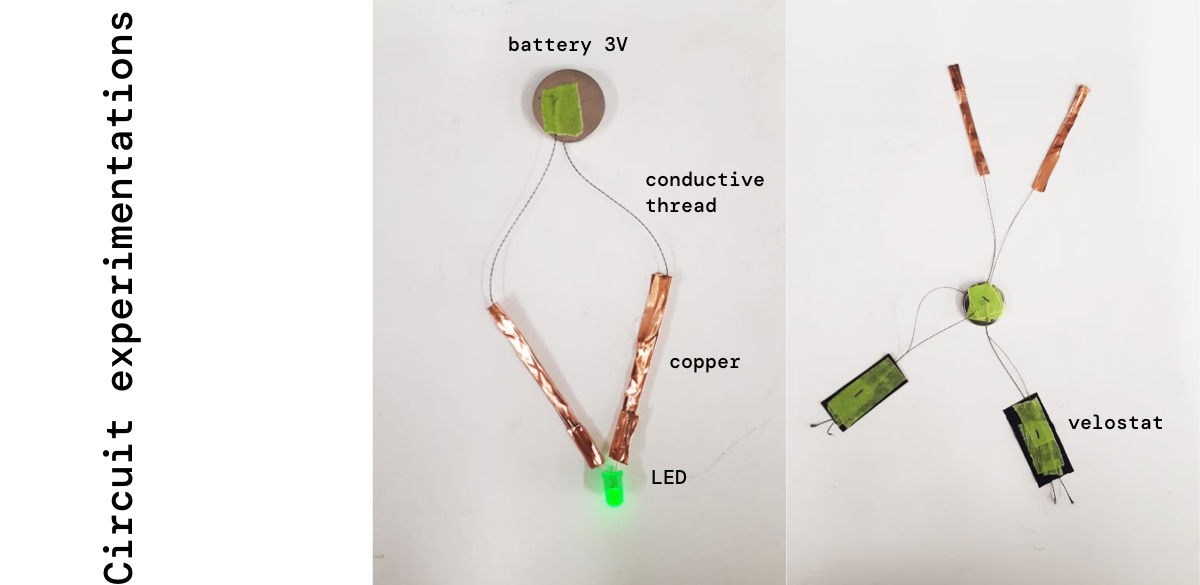 The circuit on the left is made out of: a 3V battery, a conductive thread, copper and the LED lights up. I was testing the thread and aiming to make a wearable necklace.
The circuit on the right is made out of: a 3V battery, conductive threads, copper and velostat.
--> Experimented with digital sensors
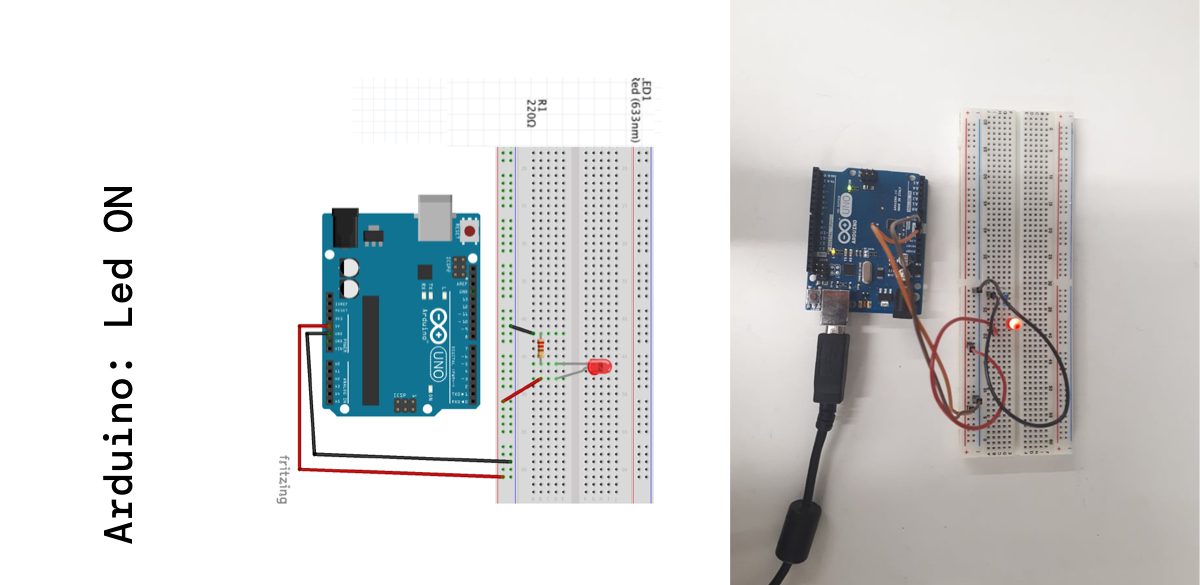
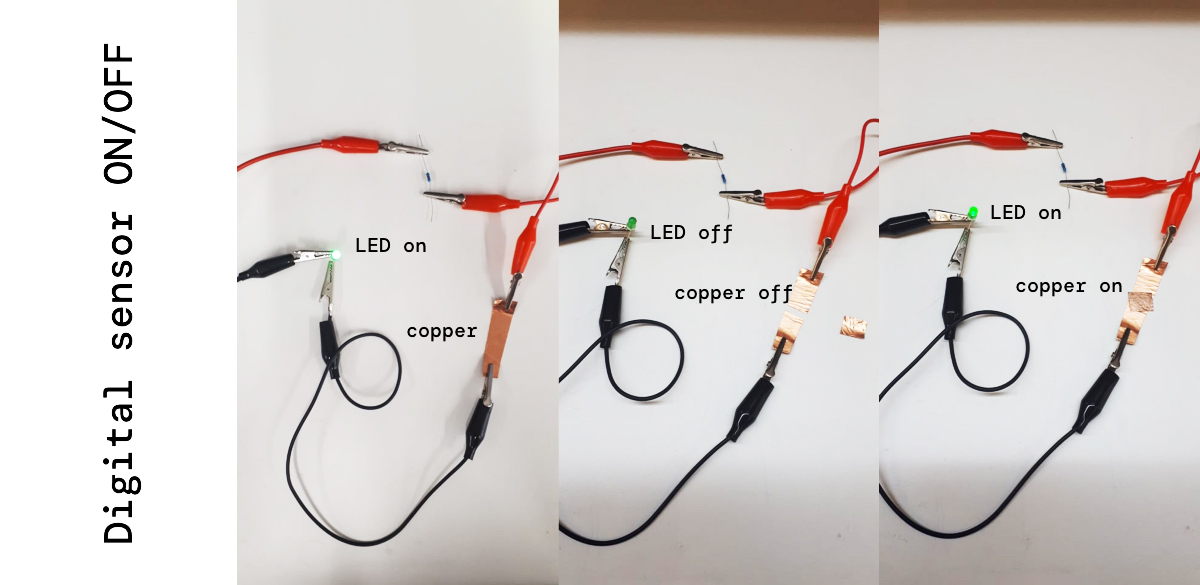 This is a switch with copper, the resistance is a 220ohm and the battery a 3V. When copper is off the lights turns off, and copper is on the lights turns on.
--> Experimented with different conductive fabrics
Experimenting with Arduino
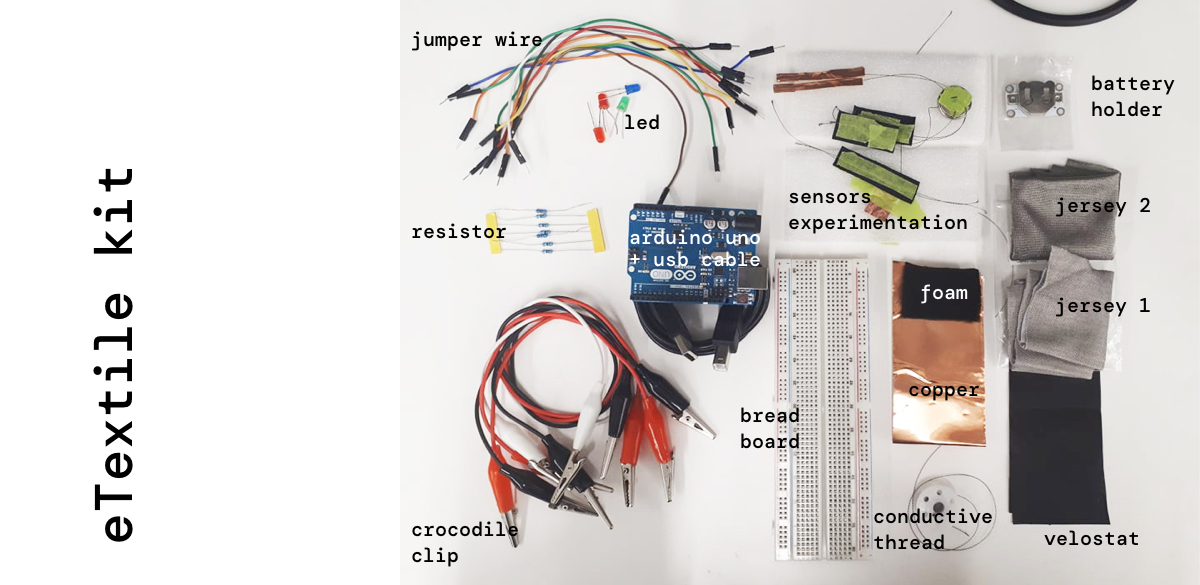
--> eTextile kit
--> turn a led on
--> make a led blink
--> make a led fade
--> make a button (digital switch)
The video shows on the left the digital switch made of copper and foam. On the right it's the serial monitor reading of the Arduino software. When pressed the readings shows a 1, when off 0.
--> measure an analog sensor with arduino serial monitor
On the left there's the analog sensor made out of velostat, on the right the serial monitor showing different readings of the current flowing.
--> followed the workflow tips to test an analog sensor

--> measure the analog sensor with a multimeter
--> measure the analog sensor with arduino analogRead.sketch
On the left there's the analog sensor made out of velostat, on the right the serial monitor showing different readings of the current flowing. An analog sensor when touched or triggered lets a different amount of current flowing, so the readings have a wide range of numbers.

Test & fail
--> I was not able to make the analog sensor + led work, because I didn't have 10kOhm resistor in my kit. It took me 2 hours to understand what wasn't working in my circuit. Good lesson here, don't UNDERESTIMATE THE RESISTORS.
--> I also tried making 2 LEDS light up using one breadboard, but did not figure that out. I will experiment more on that. Probably linked to the resistors I'm using.
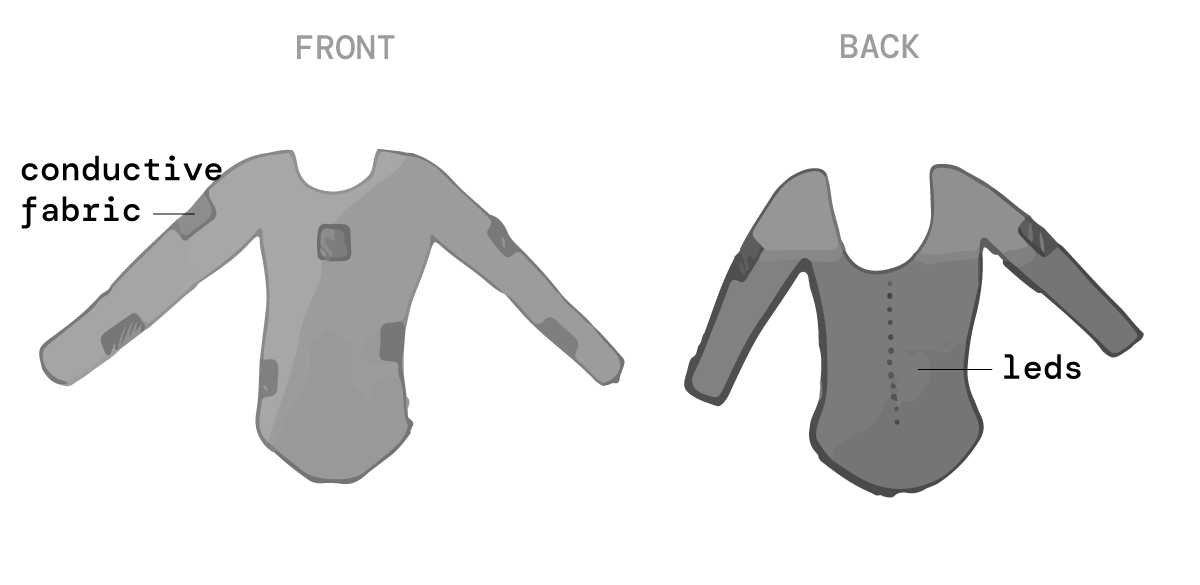
Wearable project
--> Inspired by the "Embrace Me" hoodie by Studio 5050, conductive fabric on the chest of the hoodie closes a circuit when two wearers hug, causing a pattern on the back of the hoodie to light. I'm thinking of the same idea of a closed circuit, on a dancer's bodysuit, with parts of conductive fabrics randomly embedded on the suit, and when dances touch it lights up leds in the back. Dance is about movement individually, and how you can balance your body with other bodies. Touch and weight in contemporary dance are central. The lights would enhance the tension created when 2 bodies touch.

Useful resources
--> Liza Stark website
--> Pea in the pod cute digital switch
--> Basic electronics tutorial by Emma Pareschi
--> Basic sensors tutorial by Emma Pareschi
--> Basic arduino by Emma Pareschi
--> Design of textile knitted stretch sensors for dancers PDF
--> Eduardo Loreto
--> Batoul Rashdan
--> Arduino Sketches