02 Digital bodies
Inspiration

"That building looks postapocalyptic!" A friend said as we walked past a building covered with climbing plants. My mind wandered to that day when I started thinking about my project for week 02. I wanted to make a human body submerged in nature. I thought about how difficult it is to live in harmony with nature today although, we need nature. Looking back at my inspirations from week 01 and one of my favorite shows, Where the Wild Men Are, I started visualizing the relationship between a human hand and mother nature.
A picture I took of a house in Amman.
The sculpture Exposure by Antony Gormley fascinated me, how the light passes through steel, how nature and manmade come together, and how ephemeral our existence is. I was also inspired by Sun-Hyuk Kim's sculptures, and I find the proportions of Mano del Desierto peculiar!
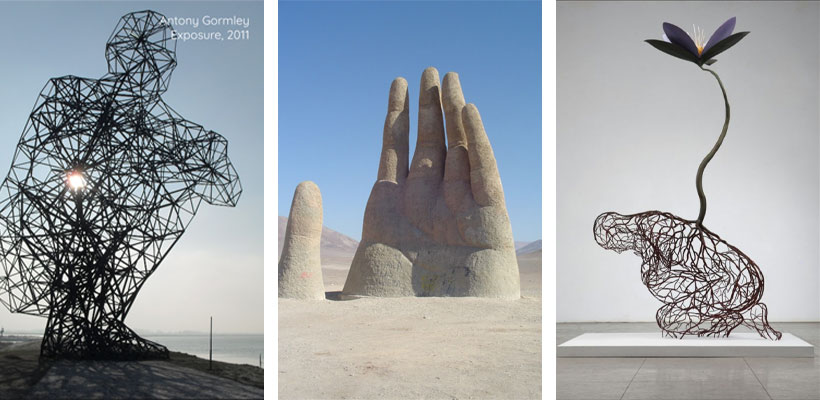
images from Fabricademy presentation, and All City Canvas website.
Process and Workflow
Ideation
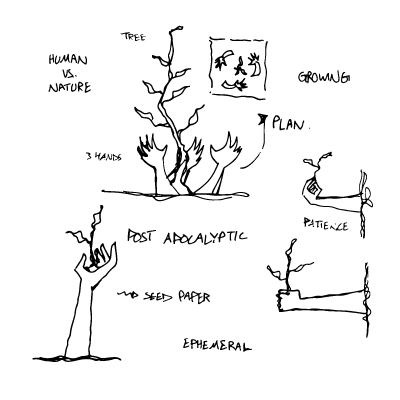
I started sketching out the relationship between a human hand and nature, with some keywords that wandered into my mind. Should I show humankind protecting nature, three hands around a growing tree? Holding a branch? I wondered what the feeling I am trying to convey through my form is. I sketched down these ideas.
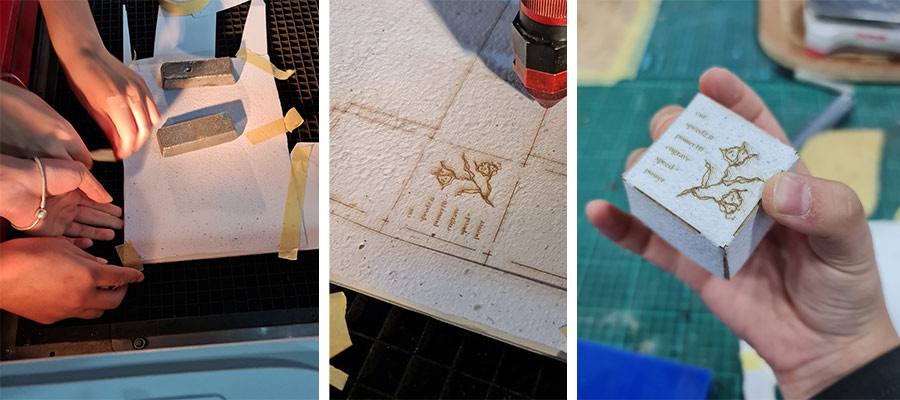
I thought about the material I am going to use while thinking about the form. And decided to try the seed paper I make. I had to alter the recipe to make it stronger in order to support itself so I added some rice glue to the mix. We had to make some tests of the material on the laser cutter before cutting the model of course. And I needed to make sure it is strong enough to turn into a 3D object. So I made this test cube. Everybody joined in as we tried to tape down the wavy paper (it didn't dry well this time, but for the final model it was straight). We put a piece of foam beneath so the paper wont get dirty from the laser (that was a nice trick I learned from Claudia).
At Last I decided on a hand reaching out for nature made out of seed paper. Claudia said it is ephemeral. I loved this word. The idea is that this hand can be watered and the little seeds in the paper would grow. After a while, the paper itself would biodegrade. The human hand will be a part of the bio-sphere once again.
Prototyping
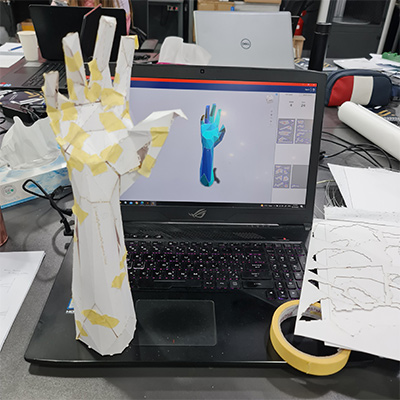
I wanted to make a 3D scan of my hand for this project, but I also wanted to try the MakeHuman software. I chose to start with the easier, MakeHuman. I plan on making it again using the 3D scanner at the lab. I started with MakeHuman and edited the hand and arm as I liked. Next, I wanted to change the pose of the hand so I looked between the poses already in the software and poses on the MakeHuman website but I couldn't find any hands that worked with me. I searched online and read that I can export the model with rigs from MakeHuman to Blender and then edit the pose there. I found this website very helpful.

Exporting from MakeHuman to Blender
- I chose the Default No Toes rig as it had more details in the hands
- I had to download the MHX2 Plugin for Blender and then export from MakeHuman in MHX2 format
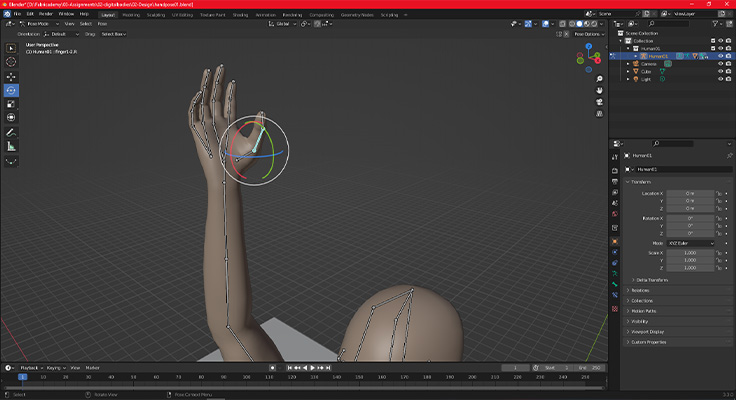
I thought moving the rigs in blender would be easier but it was a bit challenging since you can move any rig any way you want, even if it produces unnatural positions. Make sure you select pose mode from the top left corner and have some patience and a reference like your own hand or an image.
Then I exported the model from Blender as .obj and imported it to Rhino to subtract the body and get the arm alone. I tried editing the mesh on Rhino to get some control over the polygons before I export to Slicer for Fusion360. I'm not sure it actually helped but I learned how to simplify the mesh to make the model more polygonal.
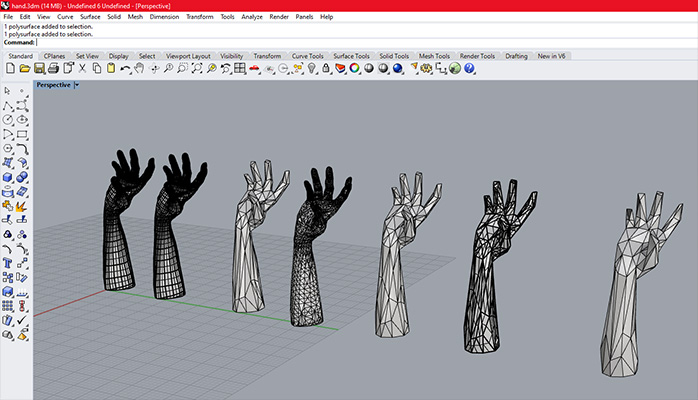
Rhino commands I used
- MeshBooleanDifference to subtract the body and keep the arm
- ReduceMesh to simplify the mesh
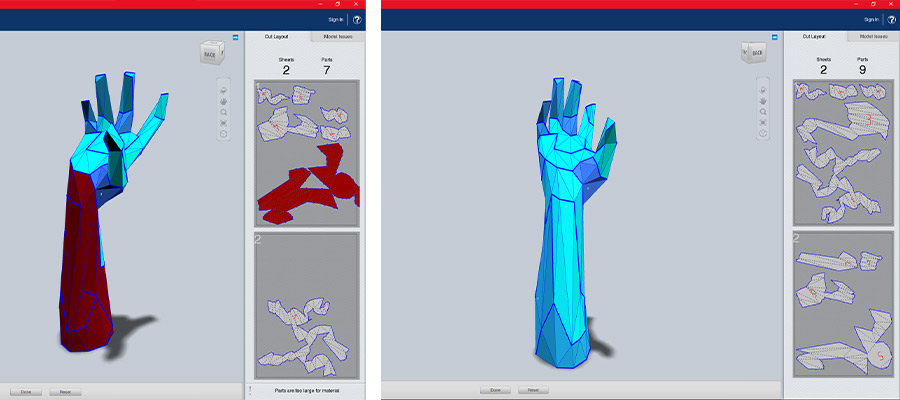
Finally, I exported the model as .obj from Rhino to the slicer. I chose the polygons mode and played a little with the settings. I kept getting these red areas and didn't know what's wrong. I realized it was because the piece was bigger than the sheet. I sliced the piece into smaller parts and everything went blue and well.
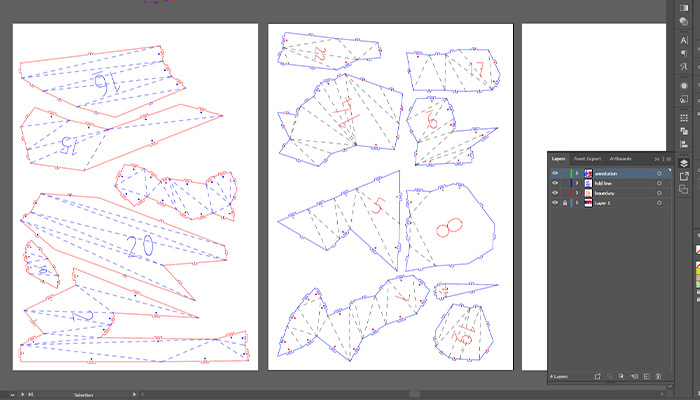
Another probelm I faced was when exporting the plans in .dxf format they rendered as surfaces in Rhino, which made it very difficult to edit and resulted in double lines when laser cutting. The solution was exporting in .pdf format. I edited the files in Illustrator to change the colors and delete the bign numbers so they won't show on the model. I also added one of my favorite quotes. I realized the importance of layers in making this process much easier. I have been working with Illustrator for almost 5 years and never actually used layers until this time.
I cut the pieces on white cardstock to test the size of the model and try to put the pieces together. I noticed that the size exported from MakeHuman is the actual size, so cool! But make sure the unit is the same in all the programs. Although I couldn't figur out the thumb, I love how this preliminary model turned out!
Laser Cutting
I made a little test on the handmade paper, expecially for the engraving, adjusted the settings, then cut the parts. We put a white cardstock sheet below the papers when cutting so they won't get black from the back. This trick was really useful!

Laser Settings for thick seed paper
Engrave: Power 60 / Speed 70 / 500PPI
Cut (score): Power 50 / Speed 10 / 1000Hz
Cut: Power 70 / Speed 4 / 1000Hz
Final Result
I cut the pieces with the laser cutter from the seed papers and glued them together. I wanted to use the rice glue I make so it would be ecofriendly but it takes longer to dry, making the process harder. I will probably use it next time as I plan to remake the model so I can water it and make a GIF of it growing. I don't want to destroy my first model! I found it very helpful to open the model on the slicer while gluing the pieces. The quote I chose to engrave is below the pictures.
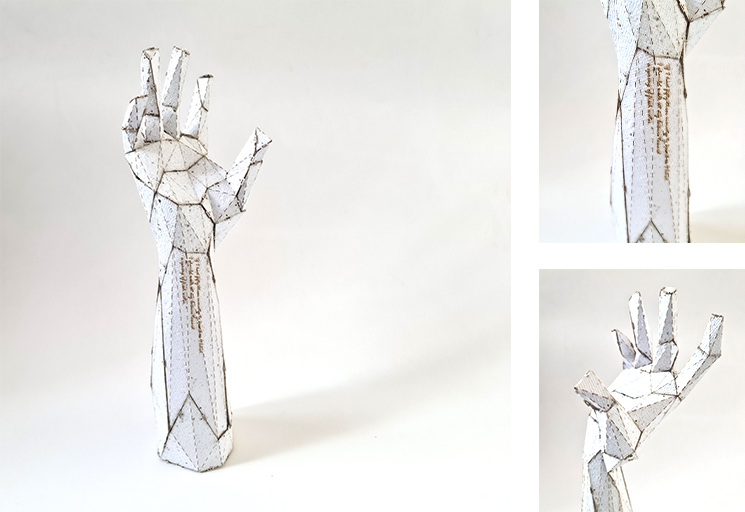
"If I had fifty-three minutes to spend as I liked, I should walk at my leisure towards a spring of fresh water" from The Little Prince, by Antoine de Saint-Exupery
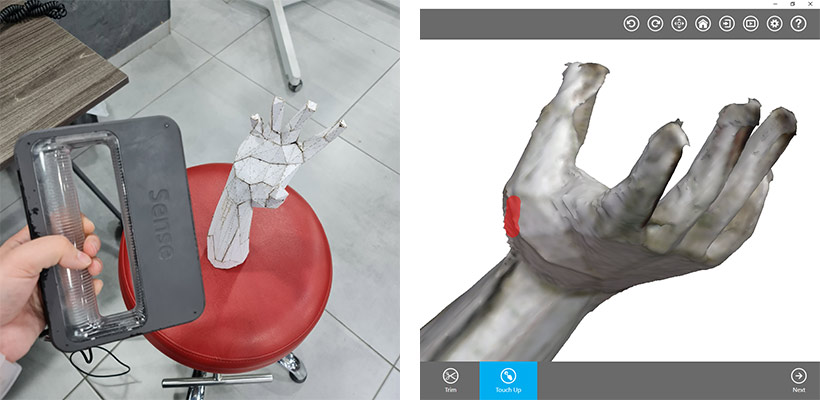
3D Scanning
I finally tried out the 3D scanner! I used the Sense 3D scanner we have at Techworks to scan the hand model I assembled. And here is the result:
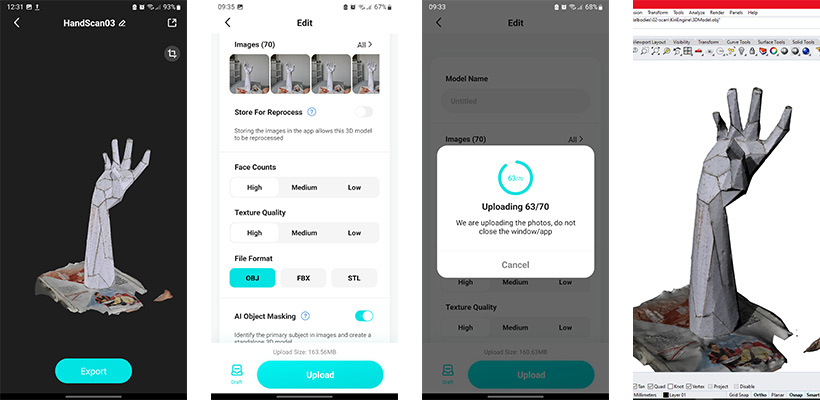
I also tried to scan using my cell phone. I used Kiri Engine app. The resuls are FASCINATING! Much better than the Sense scanner! Zoom in to see the beautiful textures.
I scanned the hand with my phone, then waited for the model to be constructed over cloud. When it was done, I sent it t omy email and edited it using Rhino. I had trouble exporting the materials from Rhino, and uploading the model with materials to Sketchfab. I was exporting it as .obj so I search the web a little and decided to try exporting as different formats. At last, the .fbx extension worked! So if you want to edit your model using Rhino and upload it to Sketchfab with original materials, make sure you export it as .fbx.
Tools
Fabrication files
-
File: Folded panels ↩