04 BioChromes
Coming up: answers to many questions, an end to long struggles, and a doorway to wonderful experiments! This week we played with biochromes to produce 3 things: dyes, pigments, and inks. It was a week full of serendepities and magic!
Inspirations
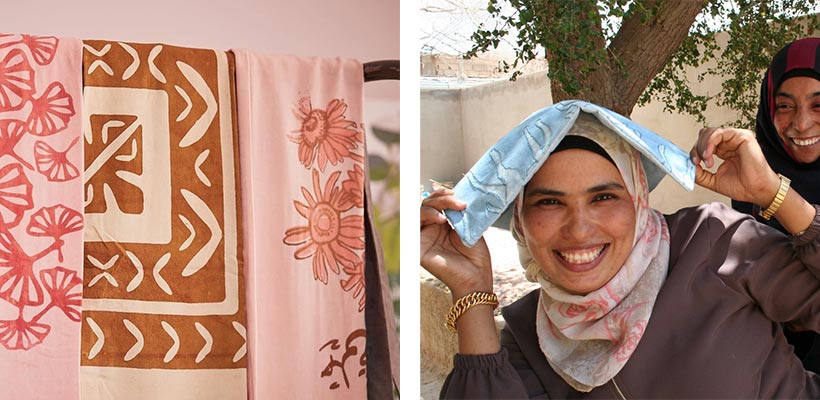
One of the most inspiring small businesses in Jordan for me is Safi Crafts. They are a group of women in Ghour Al Safi, which is one of the lowest places on Earth, close to the dead sea, and thus a very very hot area. They dye natural cotton to make clothes, bags, cushion covers, and more. The dyes they use are all natural coming from madder root, tea, tumeric, and other ingredients. They are especially famous for the indigo dye they extract from Nila plant that grows there. The women also mastered the technique of silkscreen printing using biochrome dyes and produce lovely intricate patterns! I once bought a light jacket dyed with tea and modified with iron to give a light grey color. I showed the jacket in the workshop this week because the color faded a bit after I washed it in warm water by mistake. The Safi women told me it should be washed with cold water. And Anastasia said it could be post mordanted with alum to preserve the colors.
Dyes
It's all about mordanting.
In this first part, we learned how to dye different fibers and extract dyes form the biosphere.
Weighing & Sorting
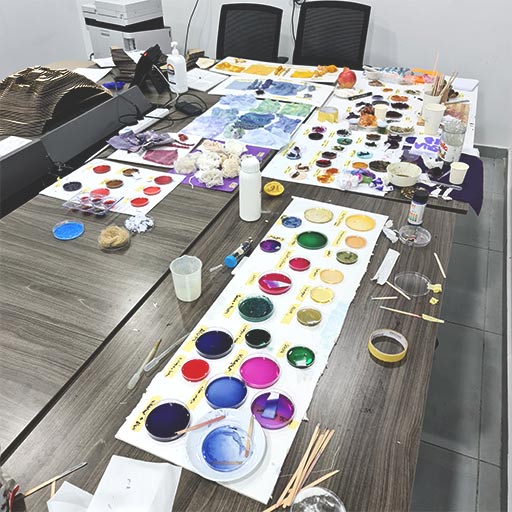
In this step, I finally knew the meaning of (WoF). We started the week by sorting the ingredients and fibers we had. We spent a fairly long time doing this, but we soon realized the importance of this step. The process of dying needs a lot of time and effort and it could easily get very messy, and getting things sorted and organized from the beginning will make things easier.
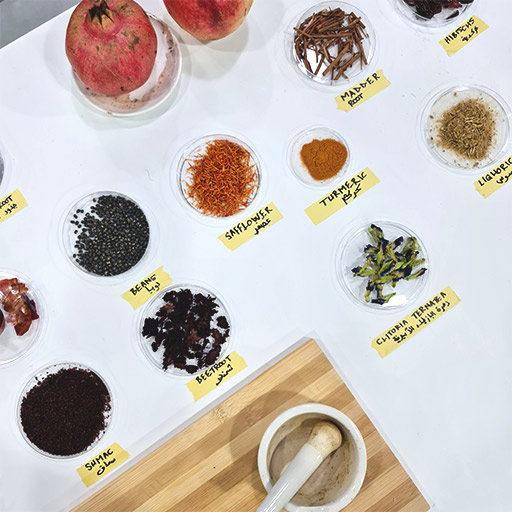
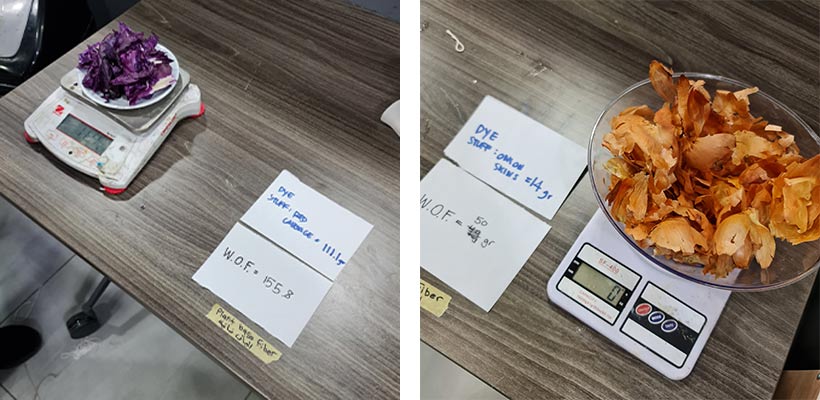
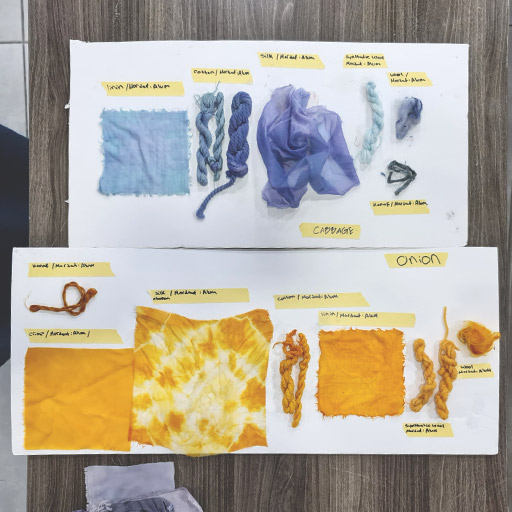
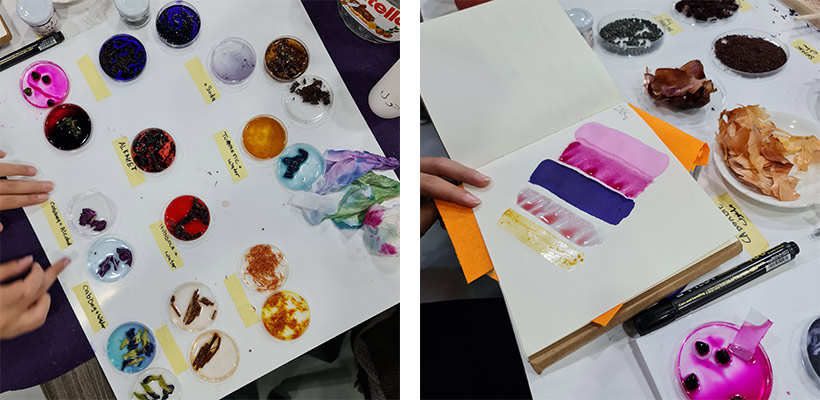
Some of the awesome dye ingredients we had: - Madder root - Onion peels - Safflower - Turmeric - Beans - Hibiscus - Pomegranate - Purple and pink Qurmuz
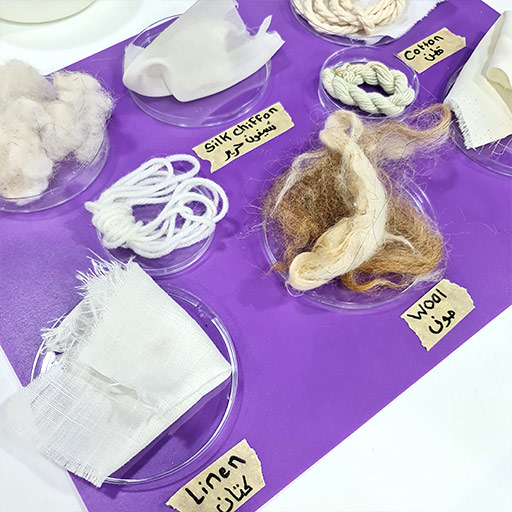
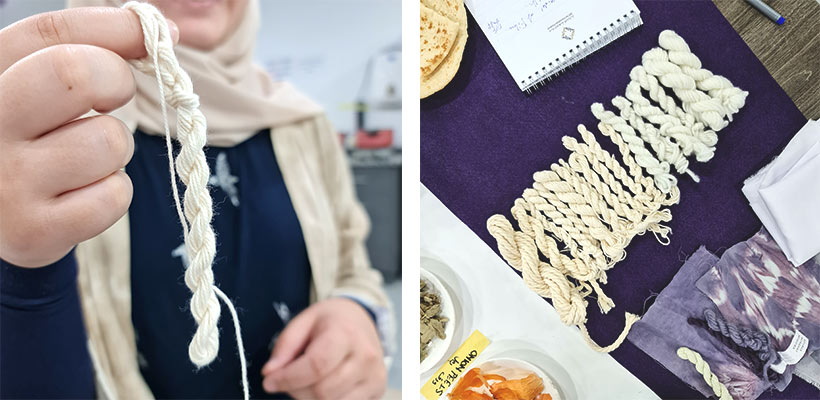
We categorized the fibers we had into animal based and plant based.This is a very critical step as dealing with each type of fibers has its own rules. We prepared the threads we had by twisting them together to make it easier to dye. And at last, we picked the pieces we wanted to dye and weighed them. We had 50 grams of animal fibers and 155.8 grams of plant fibers.
Scouring
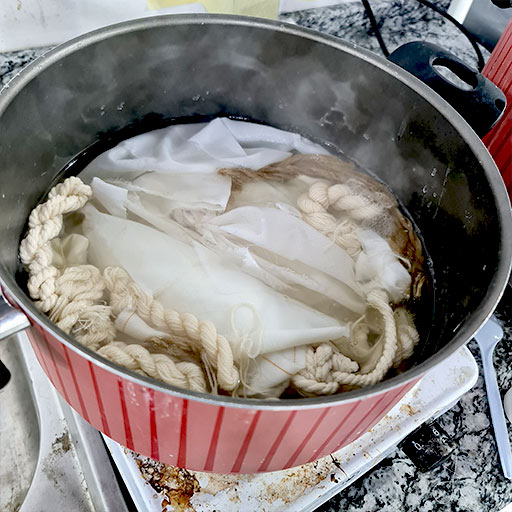
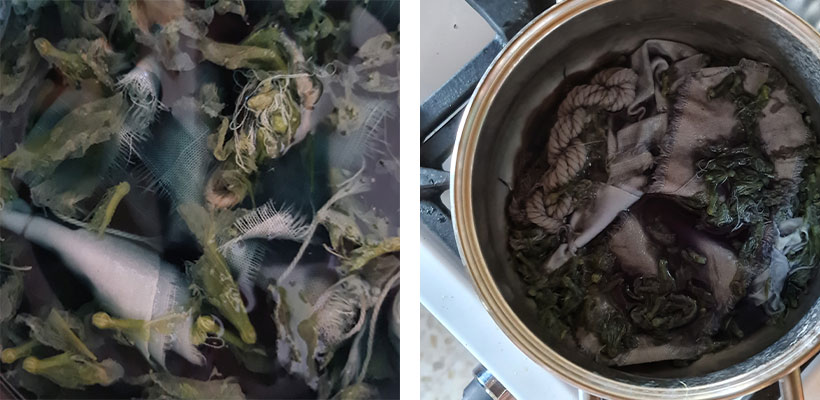
Starting with the very long dying process. At first we scoured the fibers, which is a fancy way of saying we washed them. We put the animal fibers in a pot and the plant fibers in the other. We should always keep them seperated. Cover the fibers with water and add 2 spoon of washing soda (Sodium bicarbonate) for each litre. Keep the pots on the stove for 30-45 minutes.
Always keep the animal fibers and the plant fibers seperated!
Plant fibers can boil and can be rinsed with cold or lukewarm water after the scouring finishes
Animal fibers can NEVER boil and MUST be rinsed with lukewarm water. You should be careful not to shock the fibers.
Mordanting
Remeber I said the dying process is all about mordanting? No mordanting = no color. I tried dying my handmade paper with natural dyes several times to no avail; the colors never stuck and I always ended up with gray. Because I skipped the mordanting step. Mordanting means opening up the fibers to embrace color. To mordant the fibers we heat water and dissolve 10-15% WoF (Weight of Fibers) Alum in it. The animal and plant fibers are still seperated. When the Alum dissolves add the rinsed fibers to the pot and keep it on the stove for another 30-45 minutes. When done, rinse the fibers and save the solution to use for mordanting again (assume the solution has 50% of the required alum amount when reusing).

Tannin
Tannin is used to strengthen the bond between the fibers and the dye and make the colors more vibrant. It is optional to use it and honestly, the internet has very different says on whether and when to use it. I read it should be used with animal fibers only, and somewhere else with plant fibers only, some say it should not be used with animal fibers. The opinions are divided about it. I guess it depends on the dye and fiber type and a lot of experimentation.
When we dyed using onion peels the color turned out surprisingly vibrant because onion peels already have tannin in them. We didn't add tannin for either fibers for other colors.
Dye Bath
Now we finally get to the colors! We chose our dye stuff, covered them in a good amount of water, and left them to boil for another 30 minutes or so. The time depends on the dye stuff and how deep we want the color to be. We didn't really calculate the weight of the dye stuff to the WoF but we weighed the dye stuff anyway. In the lab we experimented with onion skins and red cabbage. We didn't want to choose the onion skins and were all very skeptical about it but Claudia said they give a surprising golden color. We looked at each other like ok we'll see.
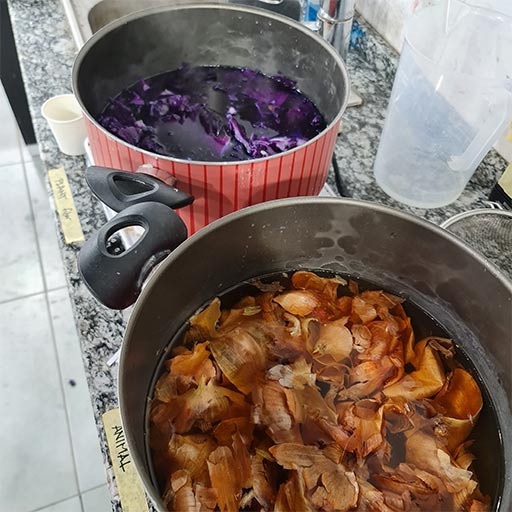
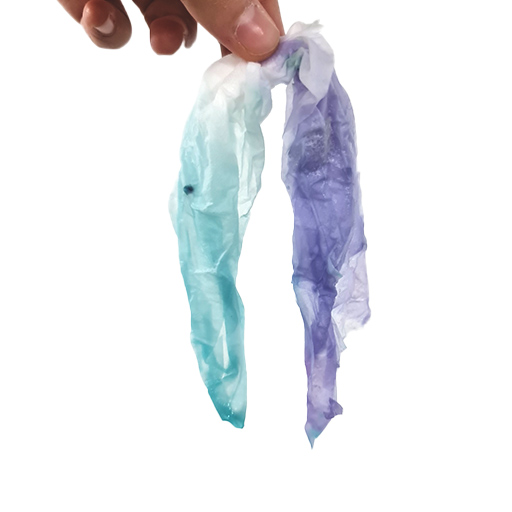
We dipped some tissue papers in the pot at various times to see how the dye changes it colors. The cabbage turned from light blue to purple. It was magical to see. This shows that the final dye color is affected by the duration of boiling and simmering and the percentage to the weight of fibers.
At last, we put the fibers in the dye bath and left them to simmer. Sometimes you only have to leave them for a couple of minutes and sometimes for an hour or more. I absolutely love how the onion skin dye turned out!
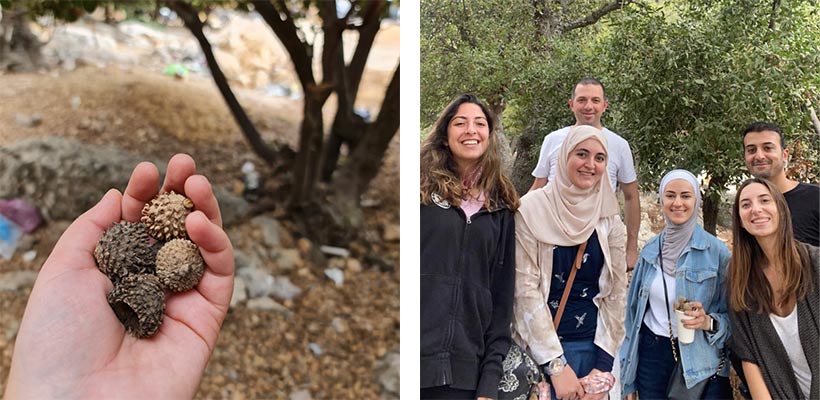
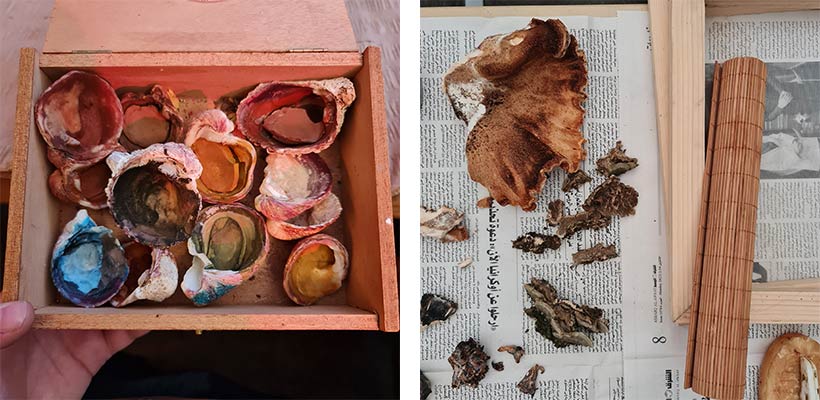
We also went to hunt for acorns which Shahd experimented with. We all squeezed into Murad's car during the lunch break and followed Suhaib's instructions to a not-very-nearby patch of greenery in Amman. We weren't sure we are going to find any acorns but Suhaib kept asking us to trust him. And he was right! We collected some, had an argument about where to eat that ended up with picking Shawerma of course, and headed back to the lab just in time for the tutorial and labwork.
Modifying the colors
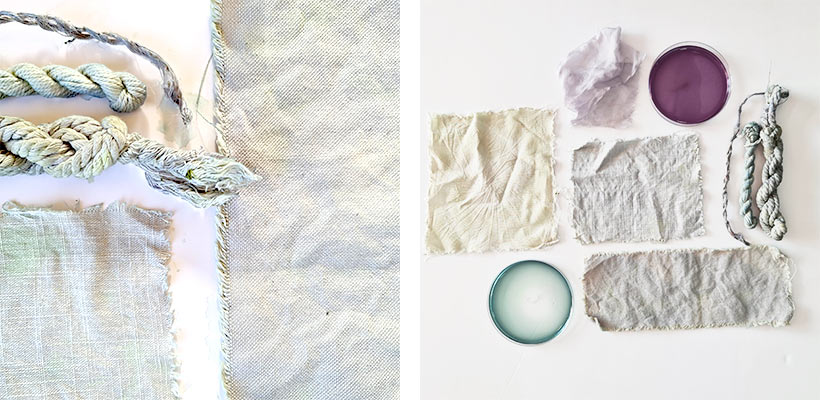
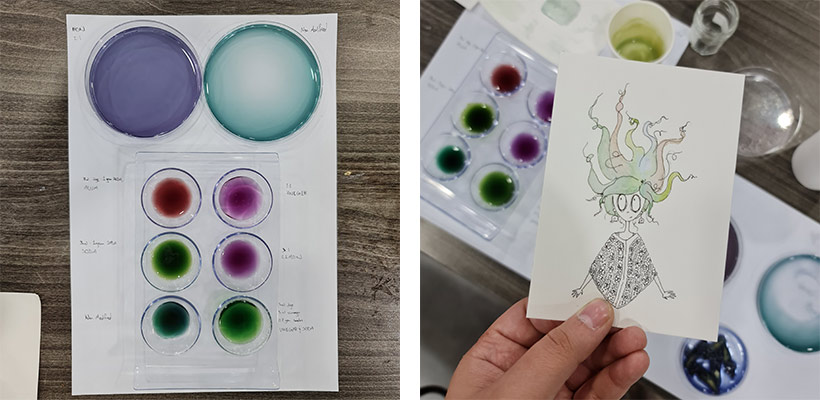
An awesome thing about biochromes is that they can be modified using acidic or alkaline compounds. We used lemon, white vinegar, soda ash, and alum. The onion dye did not react to the modifiers but the red cabbage gave us very different colors.

Dyes Summary
- Sort and weigh the animal and plant fibers
- Animal fibers are sensitive
- Scour the fibers
- Mordant
- Prepare the dye bath
- Modify the color
- Dye the fibers in the dye bath
Pigments
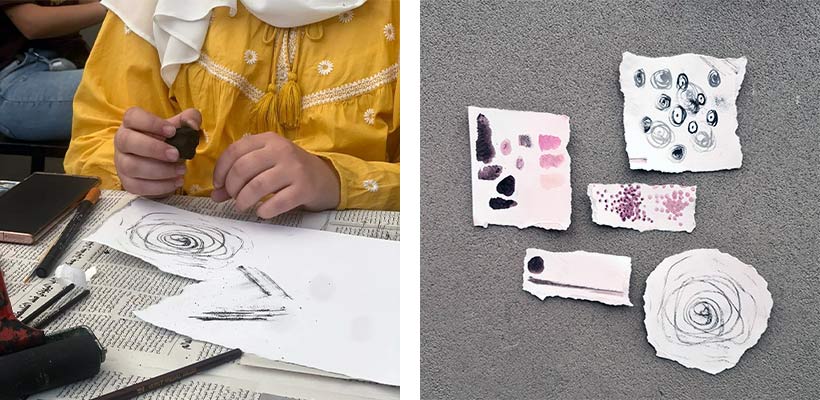
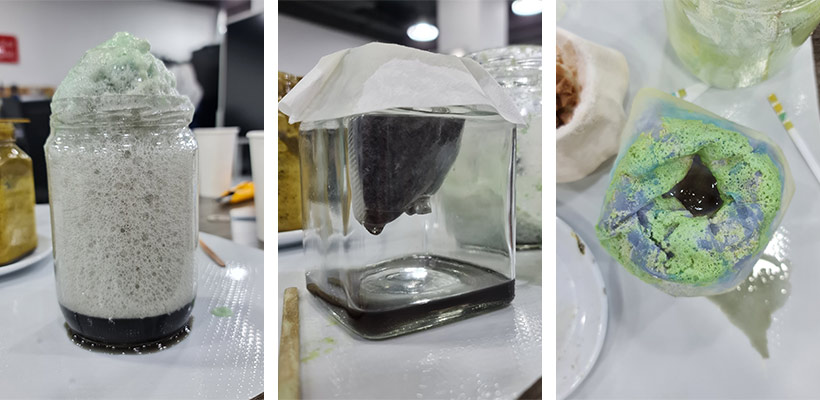
To preserve the dye bath for a longer time and also turn it into ink, we make pigments out of dye baths. Pigments are the dry powder form of liquid dyes. This process is a bit tricky, but simply put, we make a chemical reaction using 2:1 alum and soda. The mix is then poured into a filter and we wait a couple of hours until we get the powder. If the filtered liquid still has a strong color, add more alum or do the whole process a second time. We can use any leftover alum to water plants that love acidic soils. Check the pigment I made at the end of this documentation. Here is the process put simply:
Making Pigments
- simmer the dye bath (unless it's madder)
- for 1 litre of dye bath use 15g alum and 7.5g soda
- dissolve alum and soda in 100ml hot water seperately
- add alum into dye bath first
- add soda little by little while stirring
- don't panic when you see the rising foam!
- meausure ph and add soda if it's acidic
- pour in a filter
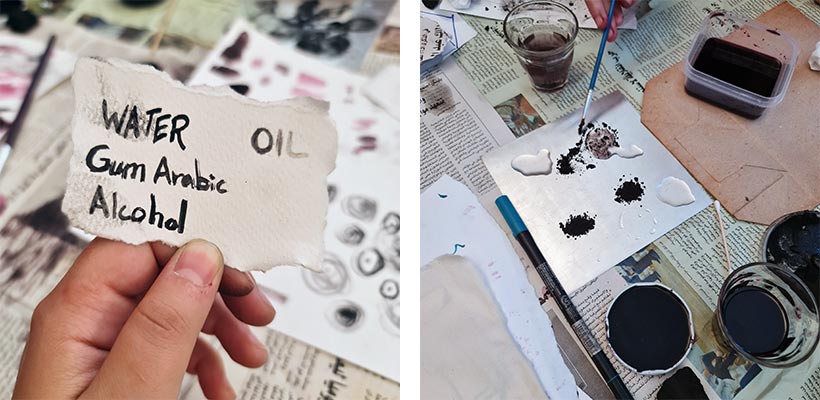
Inks
There are several ways to make natural inks and choosing one depends mainly on the viscosity you want. At the lab, we added warm water or alcohol to dye stuff to produce inks. Some dye stuff produce colors with water, some with alcohol, and some with both.
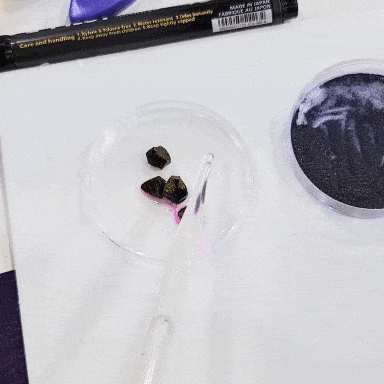
We had these magical greenish soft rocks labelled: "Qurmuz" which Claudia got from a spices shop. Claudia tried asking Anastasia about what could they be, and we tried searching online, but we didn't find definitive answers. The closest thing to information I reached was that they are a matter produced by small insects and used to dye hair. They produce green, red, pink, and purple colors. We didn't use them as we thought they were sketchy, but I ground some and they gave a beautiful purple color. It looks magical with the green. We also made some inks from them. They react to both water and alcohol.
Beirut Workshop
It happened that I had to go to Beirut for 3 days a week later to exhibit my paper clay lampshades. And I took two ink workshops there:
Earth Pigments: We made pigments from stones using the levigation method.
Wild Inks: We experimented with inks from coal, berries, and mushrooms.
I learned this simple guide to make inks:

More details on the processes of making inks
Types of oil to use: linseed, flaxseed, walnut oil
Gum arabic: any tree resin works as a binder but acasia resin (gum arabic) is the best. Use water to gum in ratio 2:1. Stir it on stove but do not let it boil! Add pigments when it is lukewarm
When making watercolors, the pigments should be fine (made using levigation method). You can add glyserine or honey to give more range and volume, and add essential oil to prevent molding. You can mix all these things on stove then store in fridge; this is your binder mix to add to pigments later. To make a watercolor palette, add 2 parts pigment: 1 binder mix, cover with water and leave to dry.
Egg yolk: seperate the yolk with your hands and keep moving it from hand to hand until it is dry. Pierce the sack and mix it right away with pigment. Add essential oil to prevent mold
Fun fact: Saliva is also used as a binder!
Levigation Method
used to extract pigments from stones. You can skip this step and add the crushed stones to chosen binder directly to get a rough texture.
- Crush the stone and add 3 times water
- Leave for 30 minutes at least to let the pigment float and powdered stone sink
- Pour the mix in a jar and leave it in sun for some days to eveporate (you can remove some water carefully to make the process quicker)
- You got the pigment! Store it, then mix it with a binder to use it.
Our instructor had a beautiful color palette she made from natural dyes and using sea shells and an old wooden box she had.
Explorations
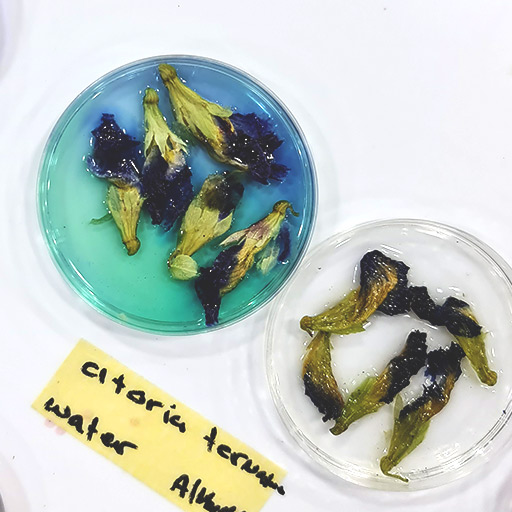
Clitoria ternatea
A few months ago, I met a lady at a bazaar selling Moringa tea. I am fond of different and flavored teas. But what I was more interested in was the small package of blue flowers she was displaying. At the time, I was trting to dye my handmade paper and keeping an eye out for natural dyes I can try. She told me these flowers are used to make the tea blue so I bought 5 grams. They were not cheap so I didn't want to use them before I succeed in dying the paper pulp.
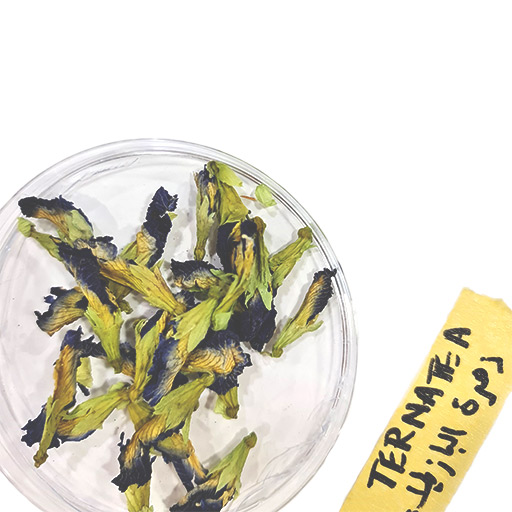
Fast forward to today. We were looking for uncommon materials to dye with and I remembered the blue flowers I am keeping next to my bed. The time has come! I showed them to Claudia and we did some online research about them to know what they are exactly and if they can produce dye. They are called Clitoria ternatea and are not commonly used in dyeing (probably because they are expensive). I wanted to try them but 5 grams are not enough. I had the lady's number on the packaging and called her to ask about getting a larger quantity. She was so lovely and offered me a discount to encourage my research and experimentations. And I was excited that their place is only 4 minutes away by car from my home, which is a miracle considering I live in Na'ur very far from everything. I went to pick up the flowers and bought some moringa tea and honey.
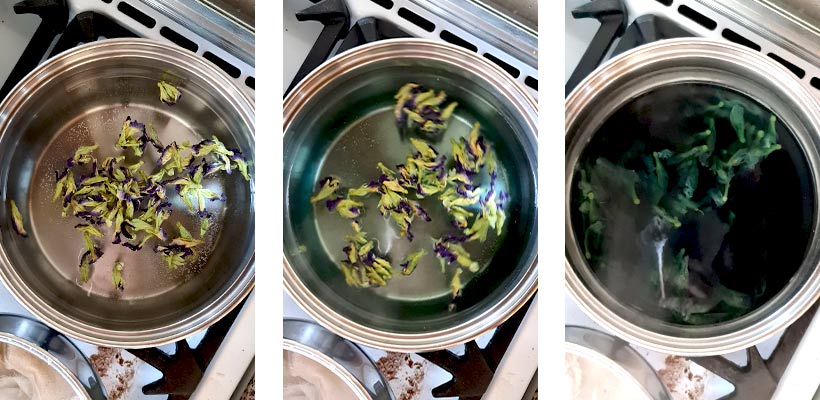
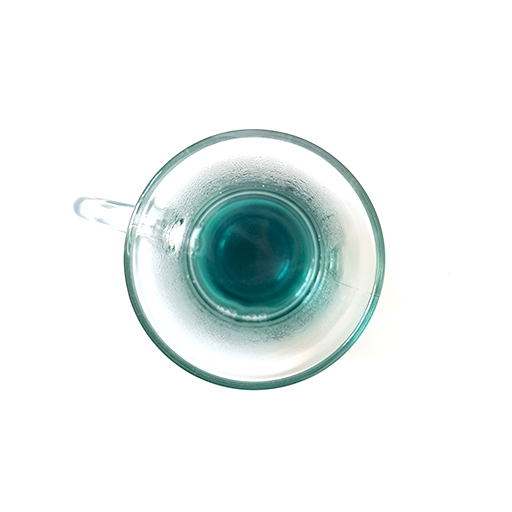
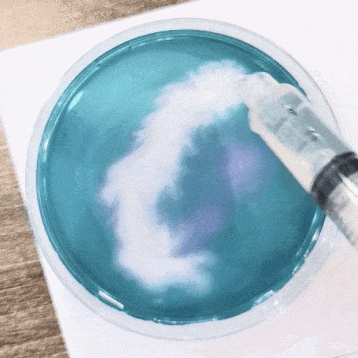
I was expecting something bluish but got a light turquoise color, even though I left the scoured and mordanted plant fibers to boil with the flowers in the dye bath until there were barely any water left. Nevertheless, I think it's nice. The crimp fabric did not catch any color. You can see a cotton piece dyed with shibori (tie-dye). The modified color was used to dye a silk piece.
I then made a pigment and a colorful color palette using the dye bath.
Here is some modifying magic..
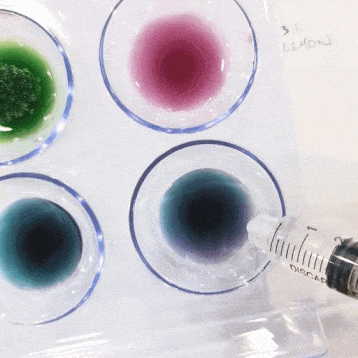
Modifiers used
from left to right:
- iron 2:1
- non modified
- alum 1:3
- vinegar 1:1
- soda 1:3
- lemon 1:3
- non modified
- 3ml dye: 3ml vinegar: 0.7g soda
And this concludes this beautiful week.