05 E-textiles

Inspiration
I am not someone who is enthusiastic about technology and electronics. I am more an advocate of the biosphere who absolutely hates batteries! But for some unknown reason, I find myself fascinated by the concept of e-textiles. There is a certain type of magic to it. I am especially fond of Liza Stark's works. What a cool coincidence that her name is Stark (like Stark industries).
Explorations
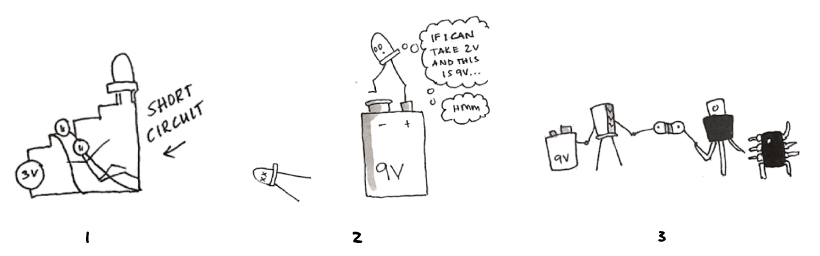
A circuit is a closed path for electricity to flow. When working with circuits we should keep in mind some important rules: 1. Electrons are lazy and will always take the easiest path. 2. All energy in a circuit must be used. 3. Different components play different roles.
When designing circuits for textiles we use certain components to make the circuit more "soft", like conductive threads, special fabrics, and microcontrollers and LEDs that have little holes to connect them and sew them to fabrics.
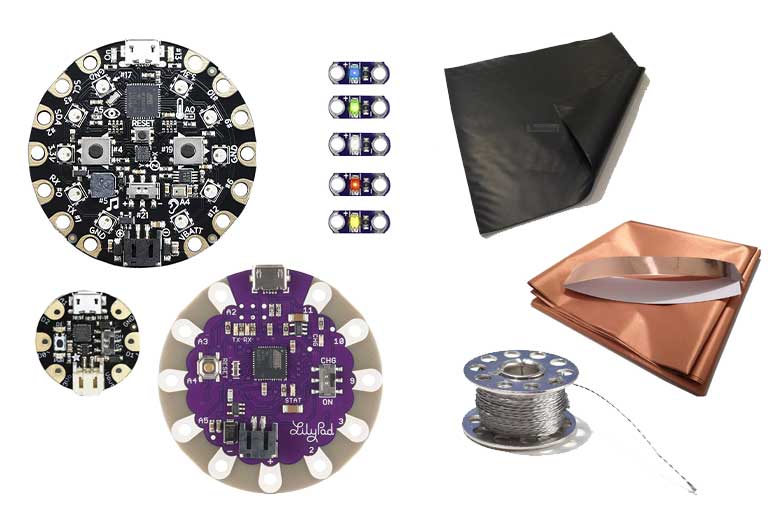
circuit parts in the picture
microcontrollers: Arduino Playground, Adafruit Gemma M0, Lilypad
LEDS: lilypad
copper fabric and tape
velostat resistive fabric which is pressure sensitive
conductive thread
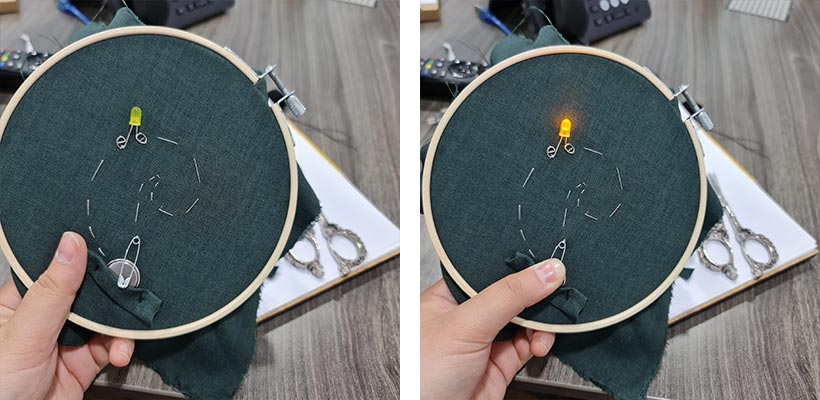
We started off the week with a simple electric circuit made using the conductive thread. I think this conductive thread is what fascinates me the most about e-textiles.
Then we worte a simple blinking light code on Arduino IDE to get to know the arduino more. Arduino is an open source software and hardware company. It produces several microcontrollers such as the Arduino UNO board which we used. They also develop the Arduino IDE, an open source software that allows users to program and control the microcotrollers.
This is the code:
int yellow = 4;
int blue = 6;

void setup() {
  pinMode (yellow, OUTPUT);
  pinMode (blue, OUTPUT);
}

void loop() {
  digitalWrite(yellow, HIGH);
  digitalWrite(blue, LOW);
  delay(1000);
  digitalWrite(yellow, LOW);
  digitalWrite(blue, HIGH);
  delay(1000);
}
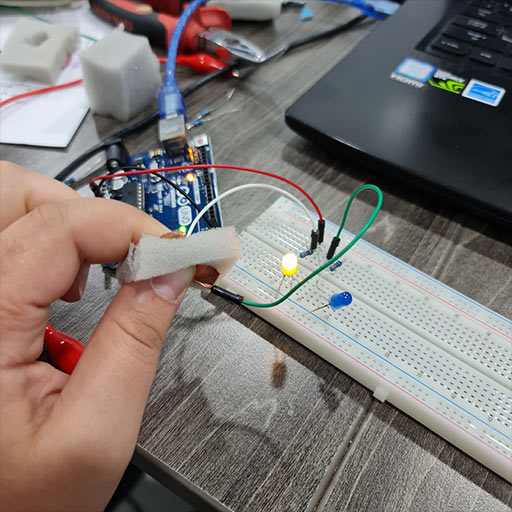
I tried to add a soft momentary switch to the same circuit. The easiest way is to turn the jumper wire that comes from the GND (ground) pin into two wires with the switch in the middle. I made the switch by cutting a hole in the middle of a little sponge, and attaching a piece of copper tape to the end of each jumper wire. If I press the sponge, the copper tape pieces will touch each other through the hole closing the circuit.
For this week we have to make a digital switch and an analog switch. Here we go.
Digital Switch
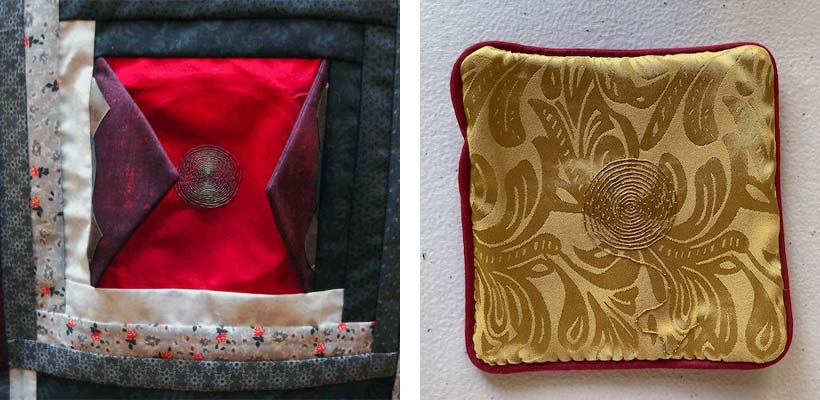
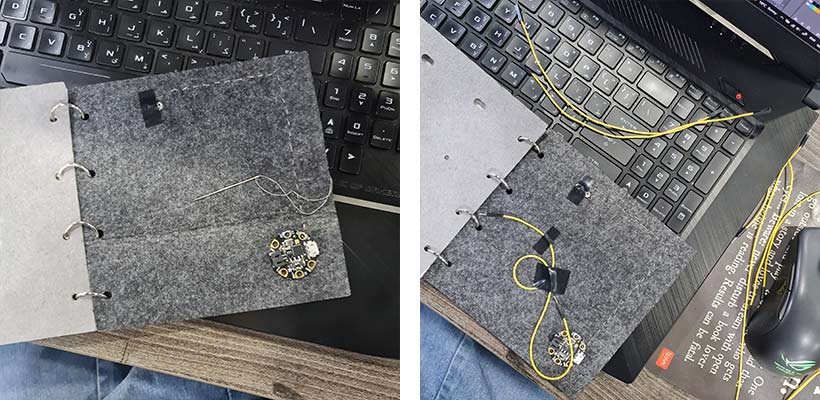
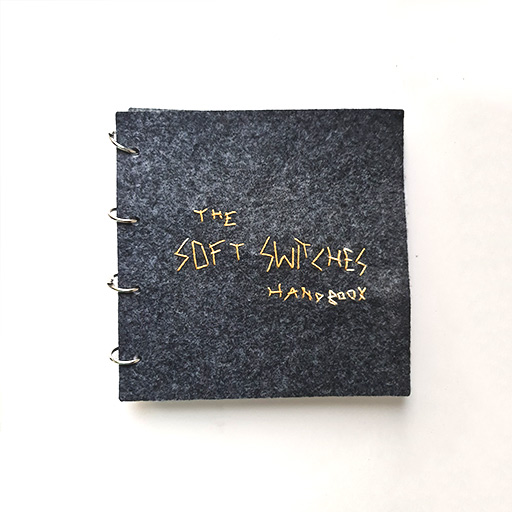
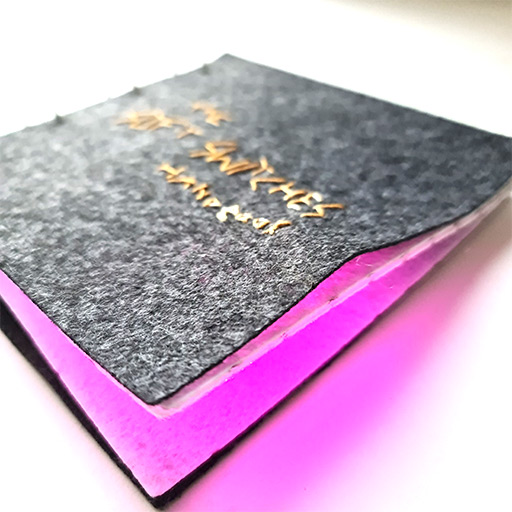
I had this idea to make a felt handbook that will have four types of soft digital switches: toggle, momentary, stroke, tilt. I started by making some sketches and then preparing an illustrator file to be laser cut on felt1.

laser cut settings for felt
Laser engraver: Trotec speedy 400
Power: 30 / Speed: 2
I handstitched the letters to make the handbook's title using a cotton thread dyed with onion skin.

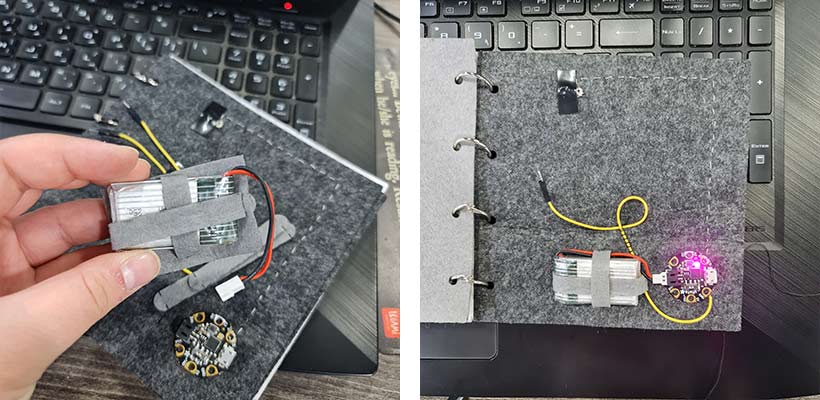
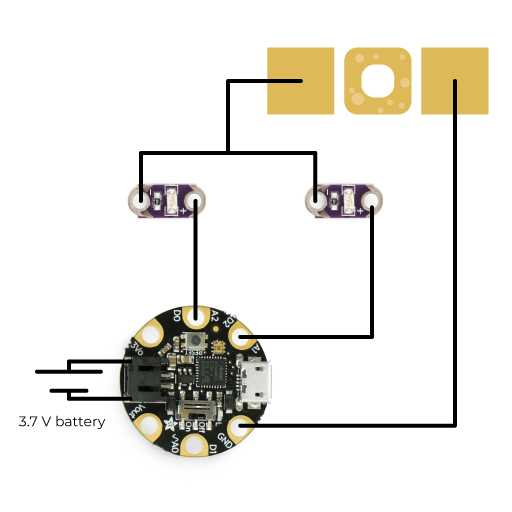
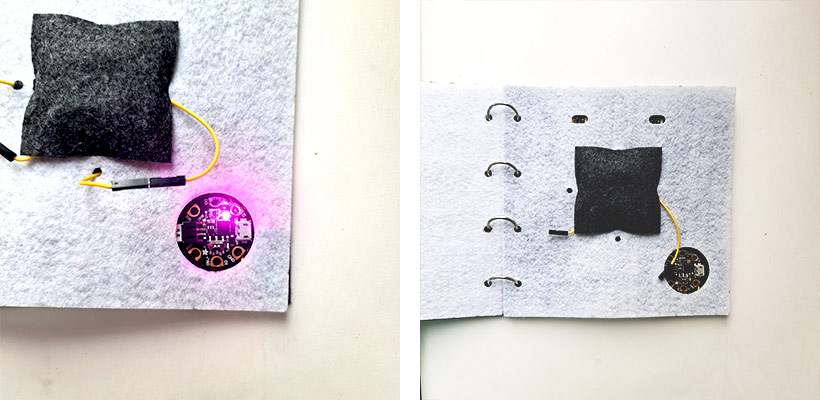
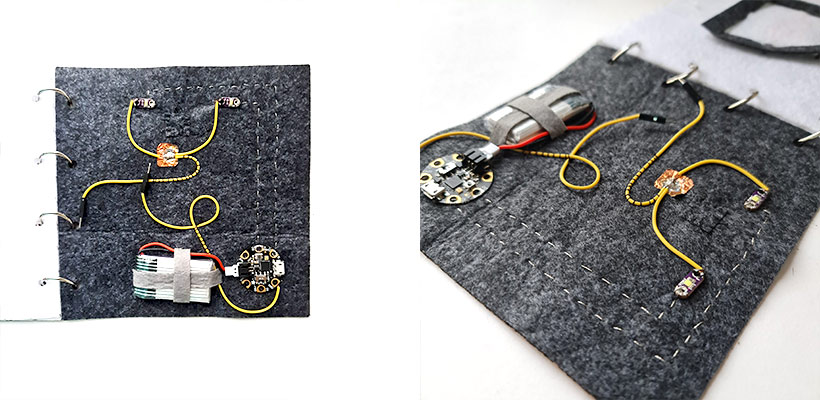
I attached a circuit on the inside of the back cover that has two lilypad LEDs and an Adafruit Gemma M0 microcontroller. I used the conductive thread and yellow wires to connect pieces. I left a gap in the circuit for the switch and put two jumper wires with the male end there. This way I can pull these wires through the holes on all pages to connect them to the female ends of the switches. So I only have one circuit at the back and I can connect it with four different switches.
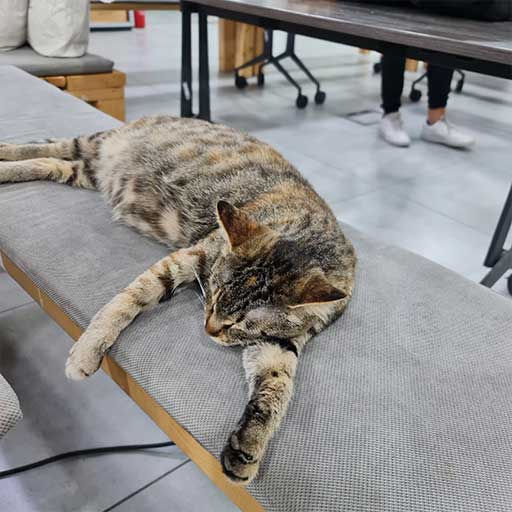
The lab's cat (or Lina's cat) layed against my back the whole time I was stitching this handbook. She is pregnant. She always is.
Because I used the Gemma m0 microcontroller, I had to install its libraries in Arduino IDE. It's very simple, just search for Adafruit SAMD in the arduino IDE library manager and install the libraries. I found this tutorial very helpful and clear. In the screenshot below you can see where to find the libraries but not the SAMD library because I already installed it.
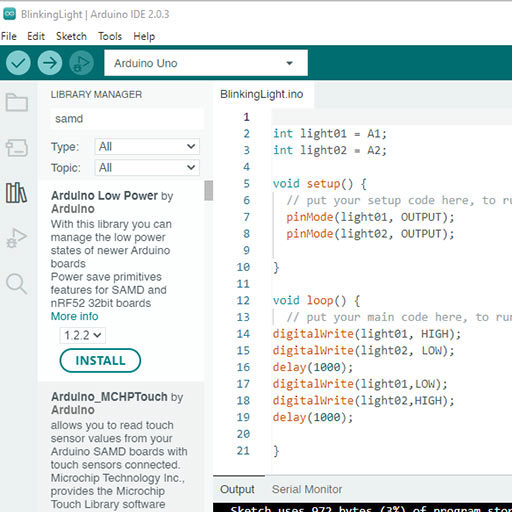
This is the diagram for the circuit.
And this is the code I used.
int led1 = A1;
int led2 = A2;

void setup() {
  pinMode (led1, OUTPUT);
  pinMode (led2, OUTPUT);
}

void loop() {
  digitalWrite(led1, HIGH);
  digitalWrite(led2, LOW);
  delay(1000);
  digitalWrite(led1, LOW);
  digitalWrite(led2, HIGH);
  delay(1000);
}
And Here is the handbook with one switch for now.
Analog Switch
The concept of analog switches is cool. But the application is tricky. I tried a couple of things but they weren't working properly, and at last decided to follow Haneen's documentation to make a potentiometer.
I assembled the following circuit. The grey rectangle is a velostat fabric. I used 2K ohm resistors, LEDs, Arduino board, breadboard, and jumper wires.
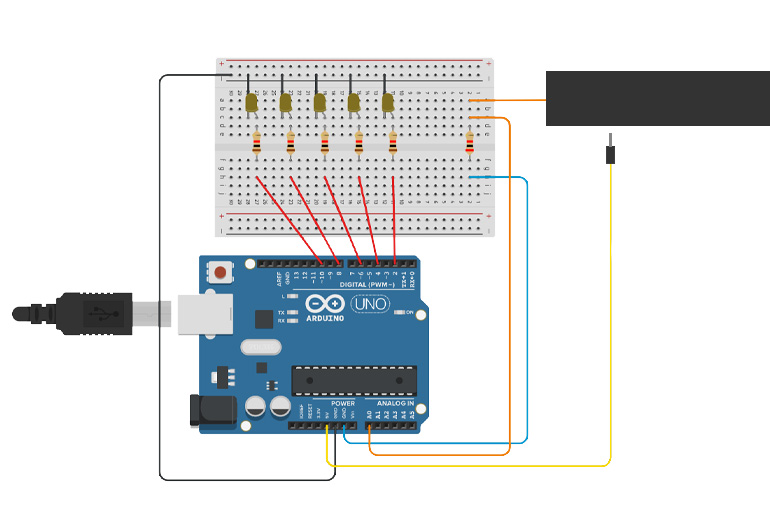
I started by measuring the values of the sensor to know the range I should input into the potentiometer code using the following code
int analog_sensor_pin = A0;   //change the pin, where the sensor is connected?
int analog_sensor_value = 0;

void setup() {
  // put your setup code here, to run once:
  pinMode(analog_sensor_pin, INPUT);
  Serial.begin(9600);

}

void loop() {
  // put your main code here, to run repeatedly:
  analog_sensor_value = analogRead(analog_sensor_pin); //read the Voltage of the pin sensor

  Serial.println(analog_sensor_value); // print the value on the Serial monitor
  delay(100);

}
I noticed the values range between 10 and 150. It was a lot less than what Haneen got, I think because she was using a 10K ohm resistor while I used a 2K ohm. Also very strangely, the values where getting lower as I went further down the velostat fabric. I think it has to do with the pressure I was applying maybe. Anyway, I adjusted the numbers in Haneen's code to match what I was getting.
int resist = A0;
int light_1 = 2;
int light_2 = 4;
int light_3 = 6;
int light_4 = 8;
int light_5 = 10;


void setup() {
  // put your setup code here, to run once:
  Serial.begin(9600);
  pinMode(light_1, OUTPUT);
  pinMode(light_2, OUTPUT);
  pinMode(light_3, OUTPUT);
  pinMode(light_4, OUTPUT);
  pinMode(light_5, OUTPUT);
}

void loop() {
  // put your main code here, to run repeatedly:

  int r = analogRead(resist);
  delay(500);
  Serial.println(r); //0-1000 R
  if ((r < 1020) && (r >= 10)) {

    if ((90 < r)&&(r <= 150)){
      digitalWrite(light_1, HIGH);
      digitalWrite(light_2, LOW);
      digitalWrite(light_3, LOW);
      digitalWrite(light_4, LOW);
      digitalWrite(light_5, LOW);
    }

    if ((70 < r) && (r <= 90)){
      digitalWrite(light_1, HIGH);
      digitalWrite(light_2, HIGH);
      digitalWrite(light_3, LOW);
      digitalWrite(light_4, LOW);
      digitalWrite(light_5, LOW);
    }

     if ((50 < r)&&(r <= 70)){
      digitalWrite(light_1, HIGH);
      digitalWrite(light_2, HIGH);
      digitalWrite(light_3, HIGH);
      digitalWrite(light_4, LOW);
      digitalWrite(light_5, LOW);
    }
        if ((30 < r) && (r <= 50)){
      digitalWrite(light_1, HIGH);
      digitalWrite(light_2, HIGH);
      digitalWrite(light_3, HIGH);
      digitalWrite(light_4, HIGH);
      digitalWrite(light_5, LOW);
    }
        if ((10 < r ) && (r <= 30)){
      digitalWrite(light_1, HIGH);
      digitalWrite(light_2, HIGH);
      digitalWrite(light_3, HIGH);
      digitalWrite(light_4, HIGH);
      digitalWrite(light_5, HIGH);
    }
    }

   else{
   digitalWrite(light_1, LOW);
   digitalWrite(light_2, LOW);
   digitalWrite(light_3, LOW);
   digitalWrite(light_4, LOW);
   digitalWrite(light_5, LOW);
  }

}
And here is the sensor in action
E-Textiles Studio
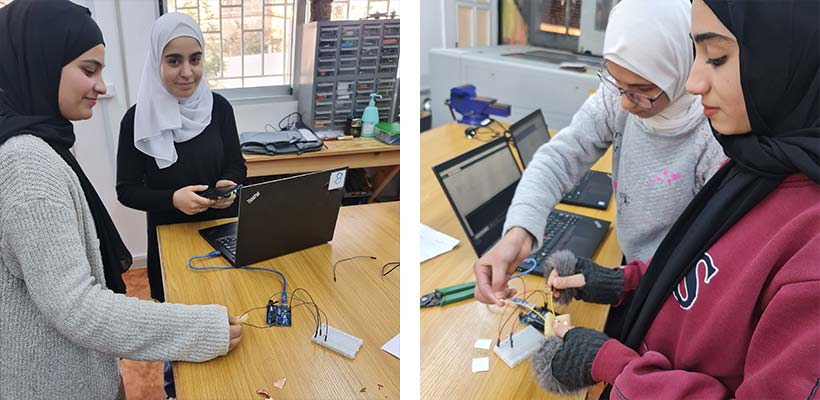
Some time later, I started planning an e-textiles studio at Ruwwad. Adolescents discovered the world of e-textiles and I gave them a class on soft switches. They made a momentary switch in pairs.
I searched for the materials we need online, after I asked around Amman to no avail. I was very nervous about choosing the conductive thread as the prices varied greatly. At last, I chose this spool which was priced 18 dollars (40 dollar with taxes and delivery to Jordan). When I compared it to the one we are using at TechWorks it was less conductive but working good enough. I was amazed by how conductive the thread we have is! I searched more until I found it and it costs 700 dollars! I discovered it is made of silver. This reminded me of a project named Electricity Has Expensive Taste by Plusea.
Here are my students trying their momentary switches.
And here we made a dirty prototype of a bracelet that lights up when worn using a toggle switch.