12 Soft robotics
Exploration
Seeing the silicone robots moving and crawling feels like seeing aliens!
This week I experimented with thermal adhesive vinyl and silicone rubber to make soft robots. I started by looking into previous documentations and found Saskia's final poject very useful. Other documentations that helped were Beatriz's, Vicky's, and Rebecca's. Also, this documentation from Fabacademy has an awesome robotic hand working.
Thermal Adhesive Vinyl
Claudia said that the Circassian patterns I was working with in week 07 are almost ready to be turned into soft robotics; they have "chambers" and "connecting paths". So this is what I decided to do to start this week. This method of making soft robotics is relatively simple and easy.
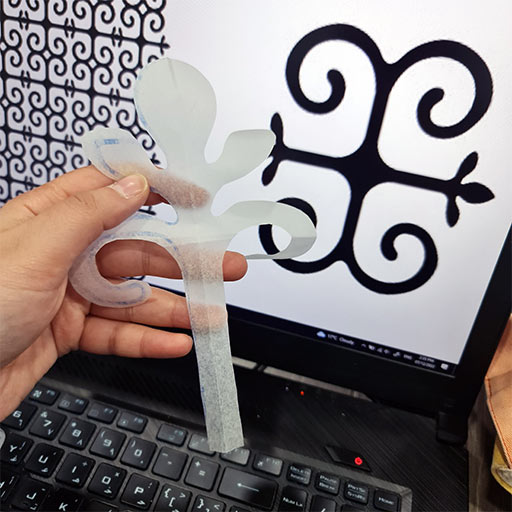
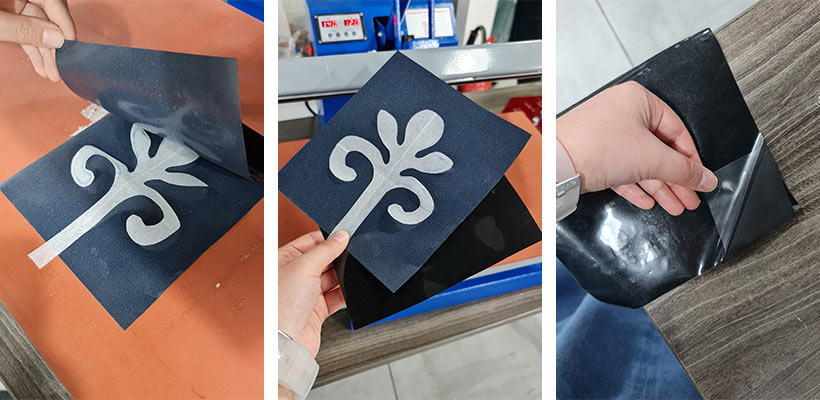
First, I drew and cut the pattern from butter paper. Next, we make a sandwich by putting this butter paper pattern between 2 thermal adhesive vinyl pieces. This vinyl sticks together with heat, so the butter paper is put where we don't want the vinyl to stick in order to create a chamber for air. Make sure you leave around half a centimeter of butter paper coming out one edge of the sandwich to have a path to pump air. Thermal vinyl usually has two sides, the one covered with a protective film (the shiny side) should be on the outside.
After that, we put the sandwich in a heat press. The settings depend on the vinyl's type. We set ours at 140 degrees for 60 seconds. After you take it out, peel the protective filament. You can cut around the shape.
At last, I connected the robot to a pipe and pumped some air inside. I think it could be made better, but I like this first trial.
Gripper
Ooooooh the aliens part!
I followed Jun's documentation and this Instructables project to make a soft robotics gripper. I took the dimensions for one arm from Instructables and decided to go for five arms. I made the mold using Rhino, make sure you do one arm and set it aside then use the polar array to make your gripper with as much arms as you like. Always make a copy of the shape before any major changes in case you need to edit anything.
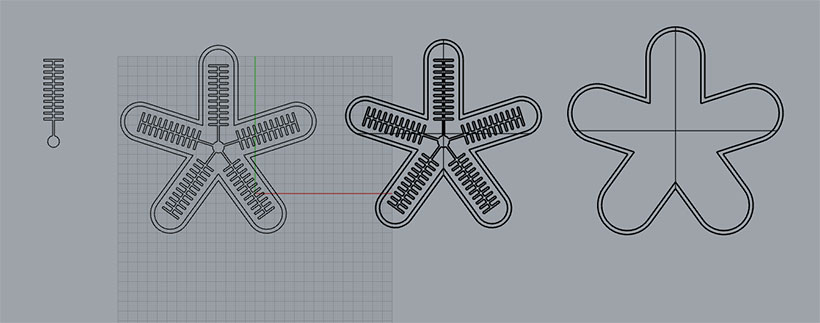
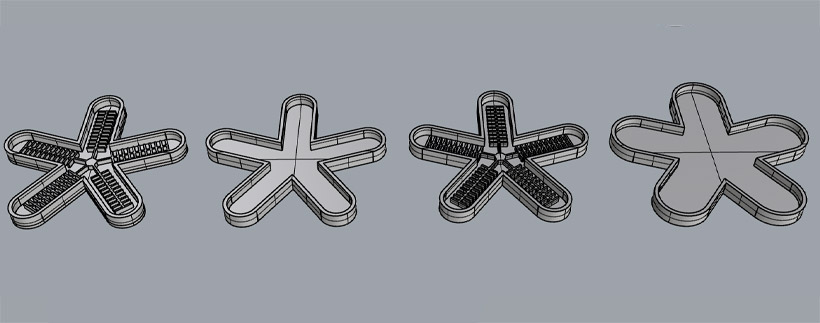
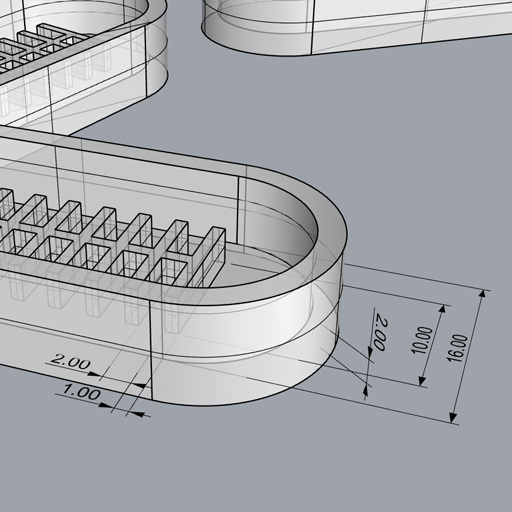
This screenshot shows the dimensions of the mold. And you can find the 3D model uploaded 1.
I exported the 3D model as .stl and imported it into Cura slicer to prepare it for 3D printing. The print took 6 hours to be done so I left it overnight at the lab crossing my fingers. I actually stayed at the lab with Claudia, Suhaib, Murad, and Ahmad Fares till 9 pm until I finished the mold and struggled with the 3D printers a bit. The latest I've satyed at the lab!
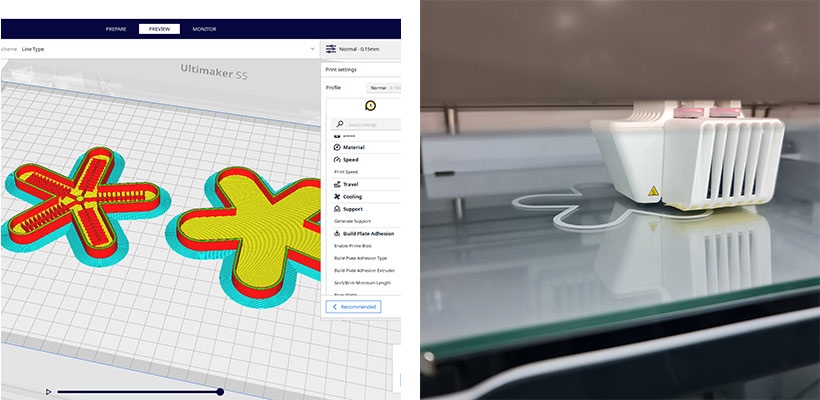
3D printer settings
printer: Ultimaker s5
material: PLA
profile: 0.15 mm
fill: 20%
speed: 70 mm/s
plate adhexion: brim
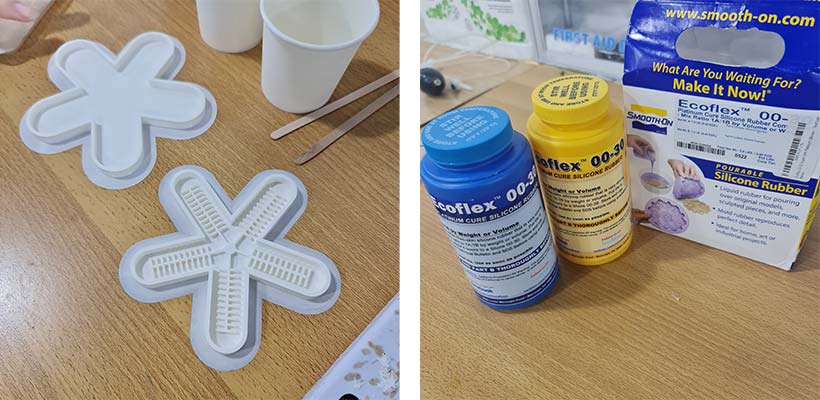
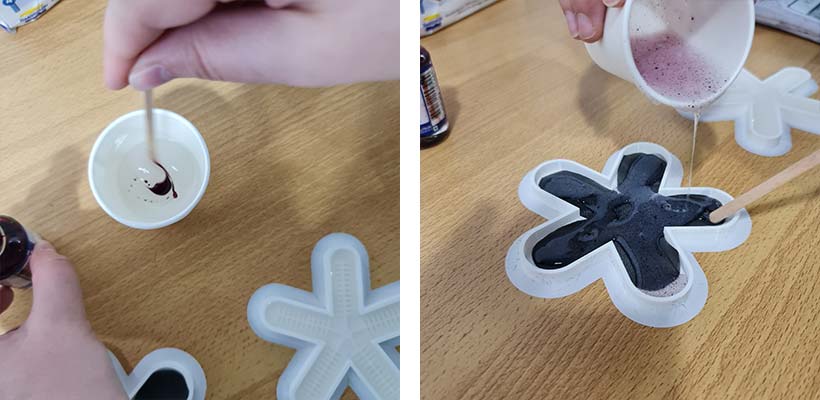
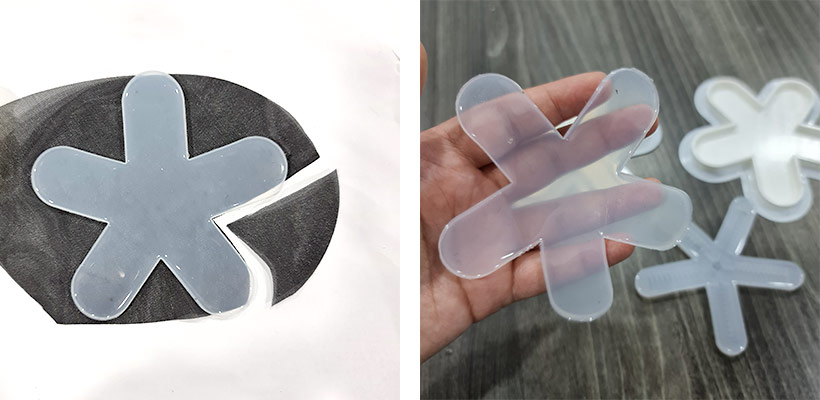
The next morning, the print was done and it was time to mix and pour the silicone rubber. The brand I used requires mixing a 1:1 of two parts. I tried to estimate how much I will need and ended up with just a little bit extra, which means I needded around 15 grams of each part to make the molds.
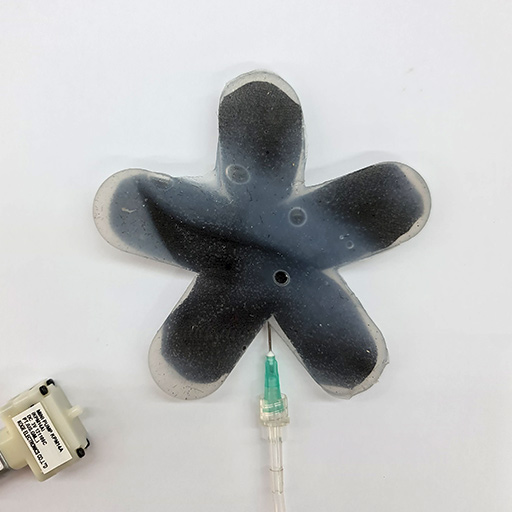
I put a fabric cutout in the second mold to reinforce it. I saw this tip in Jun's documentation. I tried to add food coloring with the remaining silicone for the second mold but it didn't mix well. I think it turned out cool though.
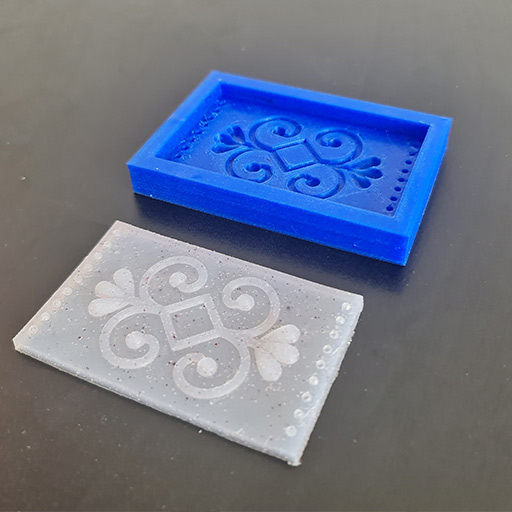
I poured the extra silicone rubber in a TPU mold I printed some days ago to try with bioplastics.

Four hours later, It was time for the incredibly satisfying demolding process.
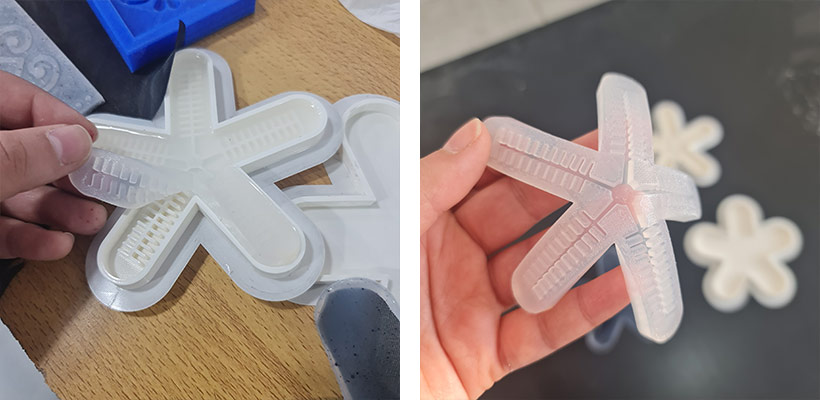
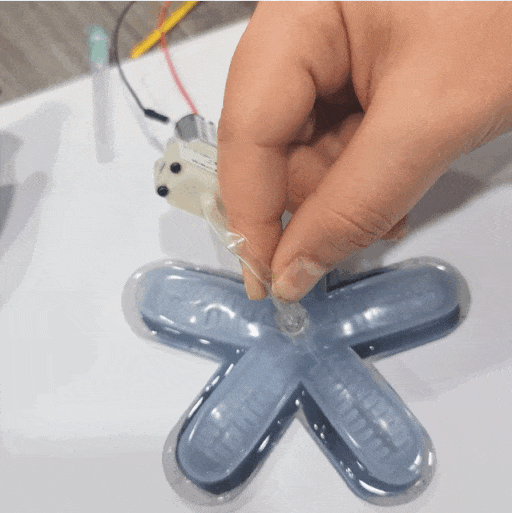
I mixed 6 grams (1:1) of the silicone rubber to adhere the two parts together. There are two methods to do this; spread a fine layer on the bottom layer or try to spread it on the top layer very carefully without getting into the air chambers. I went for the harder method becasue I was a little nervous about the first one. I put more silicone on the seams.
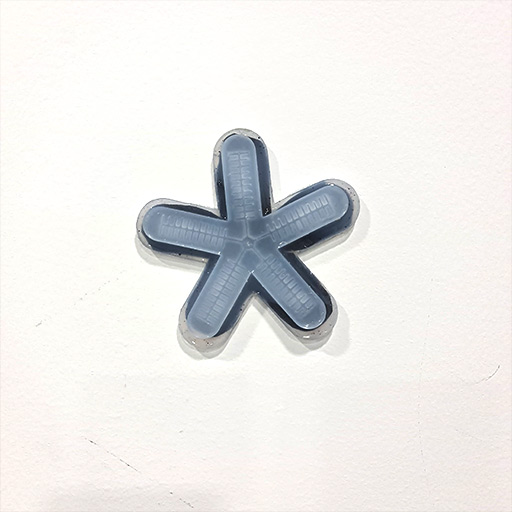
I had a serious problem when I tried to inflate it as only one leg was inflating.
I discovered this was due to the air bubbles that formed in the lower piece because I poured the silicone on top of the fabric and it was a bit tricky to distribute it evenly. One of the bubbles was right at the joint of the inflating leg. It made the base there thinner so the resistance less. That's why it was the easiest to inflate. I poured another robot at the evening before I left to try again tomorrow.
I used a little less silicone for the second robot so I ended up with a thinner base which made two legs inflate more. I tried sticking the fabric with silicone after the mold dried this time but it didn't seem to work well.
All in all, I felt the first robot had more hope. I made a quick silly attempt at a fix and it worked good enough.
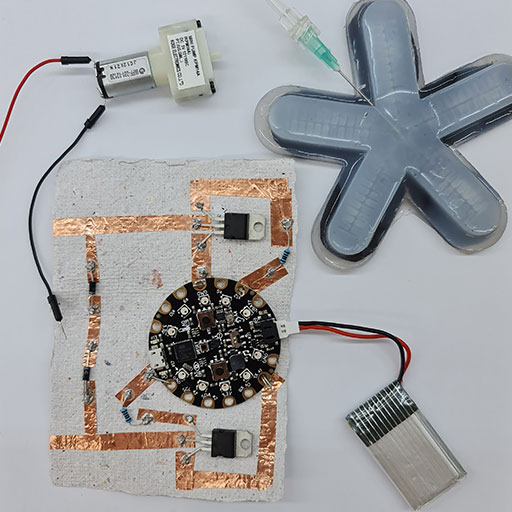
I made some two attempts to use the Playground and Arduino to control the DC pump, but I gave up on this path. I had a lot to do this week, between this assignment and my project's presentation and my master's thesis proposal deadline and next year's workshops plan I have to submit in my part time job. It just seemed everything squeezed itself in this week. So I decided to take the easy way out on this step and make a simple circuit.
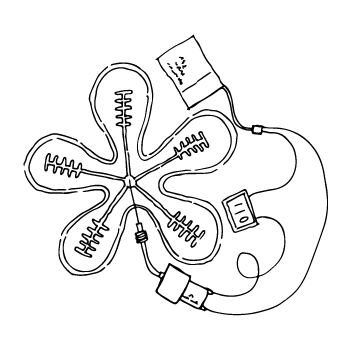
Alien Robot
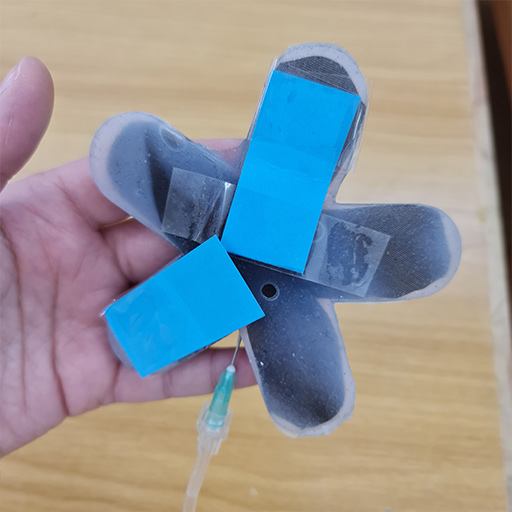
It's so fun seeing the robot inflate! All this hard work and struggling was worth it. Here are some pictures of the cute soft robot and a video of it inflating and holding a paper cup at the end! SO COOL!
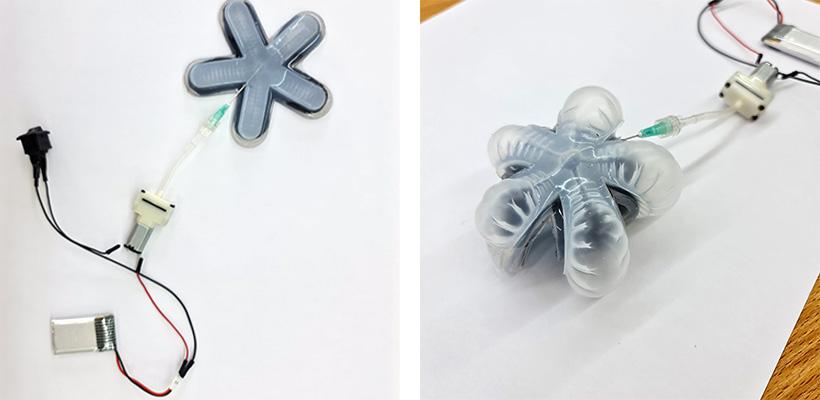
You can see the tape I put at two legs to reinforce them and limit some air as they were inflating much more and much quicker than the rest.
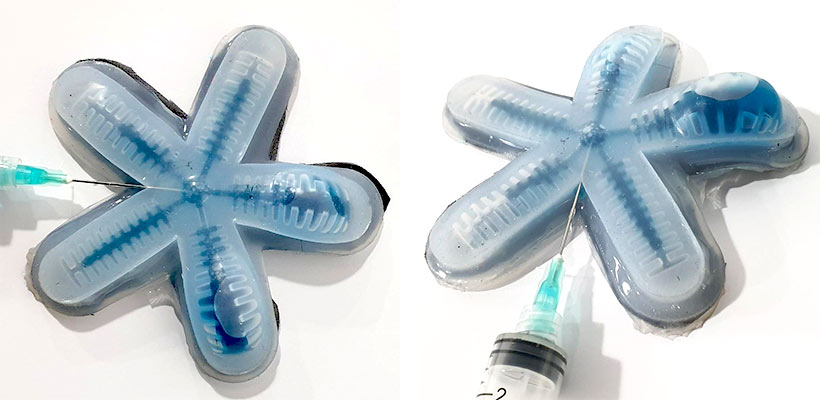
And I tried to fill the gripper with water and food coloring. It doesn't work but It is satisfying to watch.
Bill of Materials
| Qty | Description |
|---|---|
| 15 grams | part A silicone |
| 15 grams | part B silicone |
| 43 grams | PLA filament |
| 1 | 3V vacuum pump |
| 10 cm | medical silicone tube with syringe head |
| 1 | 3.7V battery |
| - | wires |
Resources
Fabrication files
-
File: 5 arms gripper ↩