09 Textile Scaffold
Inspiration & Ideation
This was a very intense week. It was filled with fun experiments. And I got to give my first masterclass!
At some point in the week, I lost track of what we are doing. We did a lot of very different experiments. But when I took a moment to notice the big picture it all made sense. We are using textiles as scaffolds, to facilitate the making of other things if you may. It's all in the title! A project that I really love uses textile as a planting medium, Be Grounded by Lara Campos. Textiles, or threads in this case, could be used to grow chrystals as in Tokujin Yoshioka's Spider's Thread chair. Textiles can also be used to make handmade paper, like the Japanese washi papers. This process is satisfying to see and the Awagami factory has these awesome big molds and deckles that I aspire to make and use.

In this week, we used textile scaffolds to make chrytals, handmade paper, and composites (reinforce biomaterials).
Chrystalization
When we raise the temperature of water, it gains the ability to dissolve more molecules. So when it cools those molecules escape again and chrystalize. And if you put something into the cooling solution, it will attract the escaping molecules, and chrytals will grow on it. That is how chrystalization works, simply put. I tried making chrystals using alum and salt.
Alum
The recipe stated 400 grams of alum to be used with 1 litre of water. My solution had other plans.
But let's go back a little.
First we prepare our scaffolds. The chrystalization process could happen fast, especially with alum, so it is wise to have the scaffolds ready before you start making the solution.
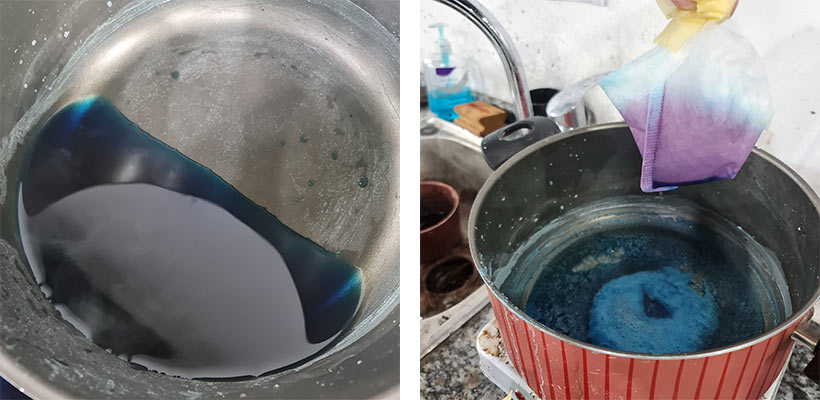
We put 1 litre of water on the stove to heat it up. When it is about to boil, we add 400 grams of alum little by little while stirring. We aim to have a super saturated solution. When you see particles at the bottom of the pot that are not dissolving, it means you now have a super saturated solution and you can proceed to the next step. When I finished adding the 400 grams, I still did not see any particles not dissolving in my pot and decided to add another 50. They all dissolved. I added more and the solution still took more. I ended up adding an additional 150 grams and still did not see any particles not dissolving! But I decided to stop adding.
A saturated solution is the solution obtained by dissolving the maximum amount of solute at a given temperature.
A supersaturated solution contains more amount of solute than required to saturate.
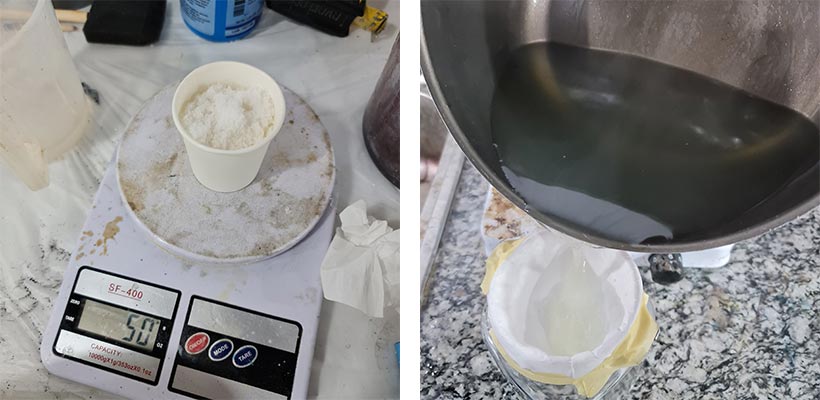
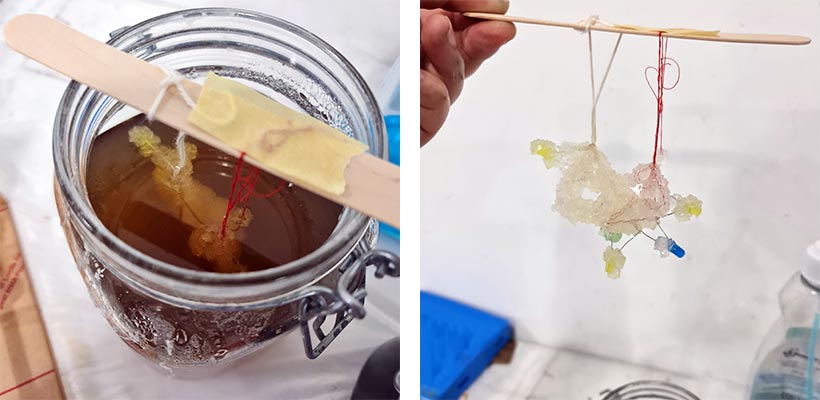
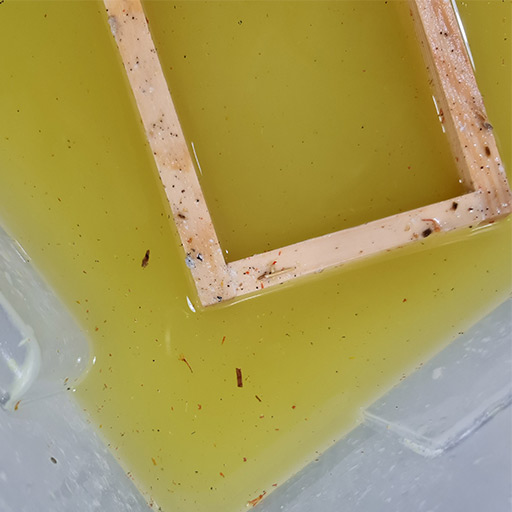
I poured the solution into jars using a coffee filter to make sure there are no impurities that could serve as mini chrystalization nodes. Then I added my scaffolds. The solution was extra-super-saturated and the chrytals were forming as I were pouring the solution. On the coffee filter! Claudia was helping me and we were racing against chrystalization time! Chrystals were popping out from everything!
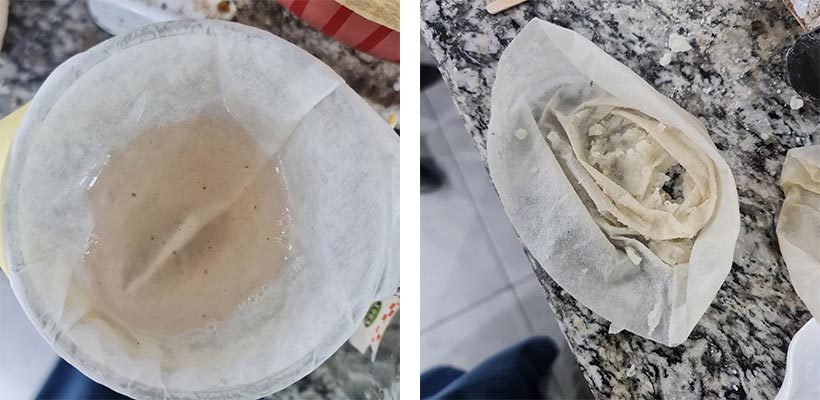
I actually added some of my leftover hibiscus dye bath to the solution at the end. That is why the solution looks a little brownish in the photo. But the chrystals did not take much color because the quantity was too little.
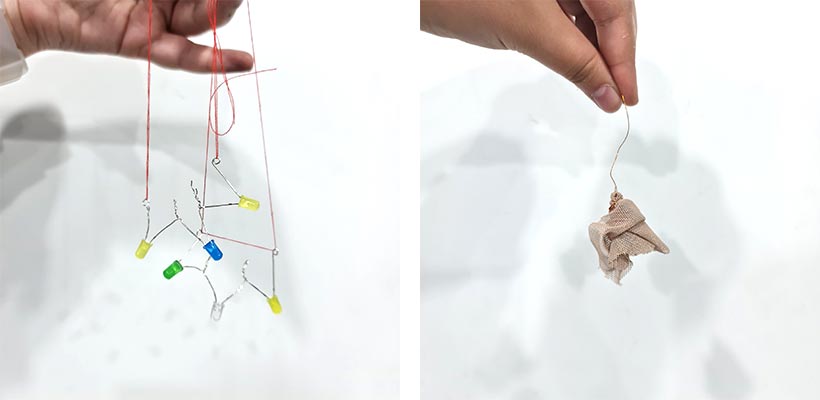
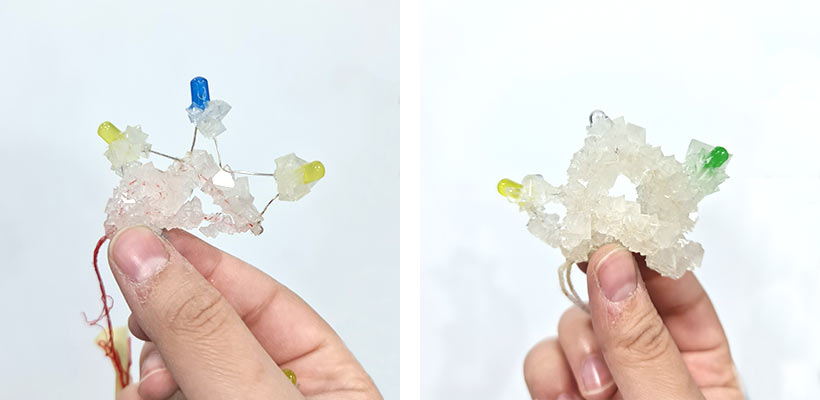
After an hour my chrystals on the LEDs had grown (which was really fast!) so I took them out. Claudia had suggested we paint them with nail polish to protect them from water but I dropped one in a cup of water for 5 minutes them tried it and it worked. I hope these still work, too.
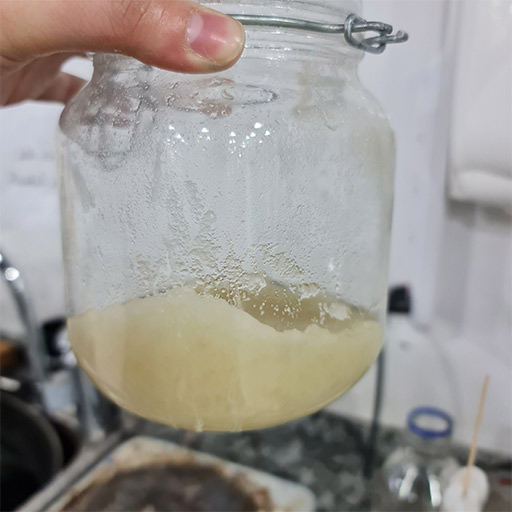
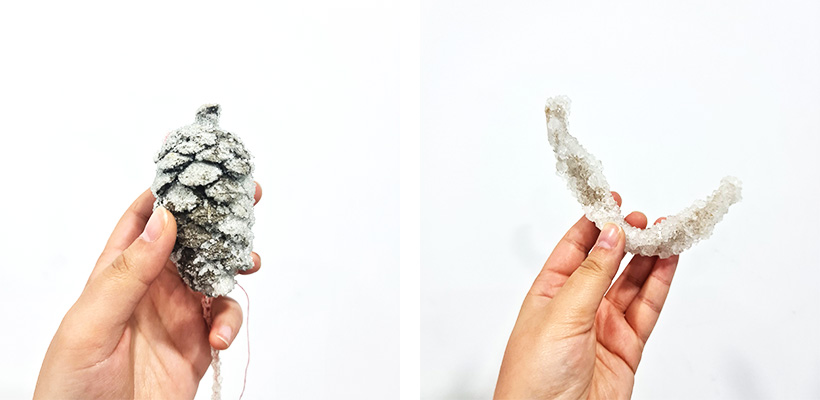
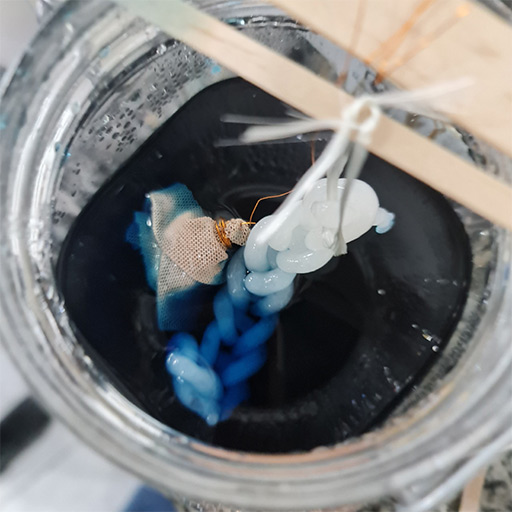
We had a LOT of leftover alum in the jar. I filled the jar with water and heated it and used the solution again. I was inspired by seeing the chrystalized filter and decided to use the filter as a scaffold for the next chrystalization jar. I also added a couple of objects I found around like a pine cone and a piece of jute.
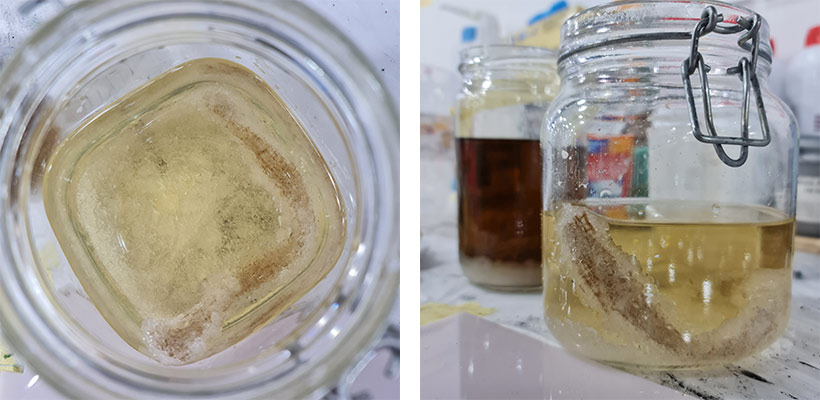
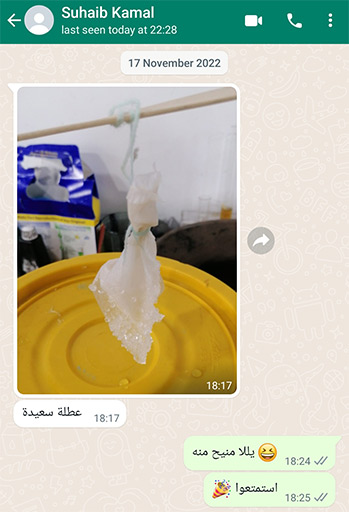
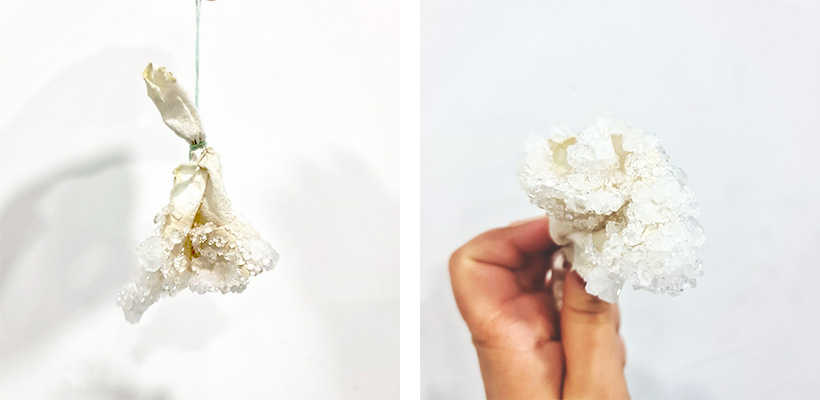
My LEDs got chrystalized so fast that when I checked on the coffee filter after an hour and saw nothing I decided to give up on it and give the jar to Suhaib. We were having a little glass jar crisis. I gave the jar with the filter hanging inside to Suhaib, gathered my stuff, and headed out to the car. As soon as I got in, Suhaib sent me this photo showing some chrystals starting to form. He and Claudia decided to keep it in the solution more for me and good thing they did. It turned out to be one of the most beautiful pieces.
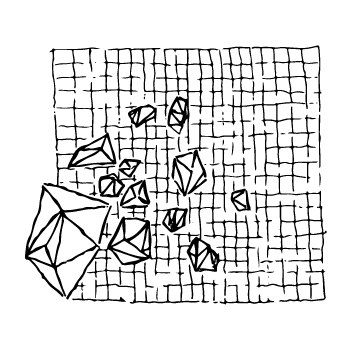
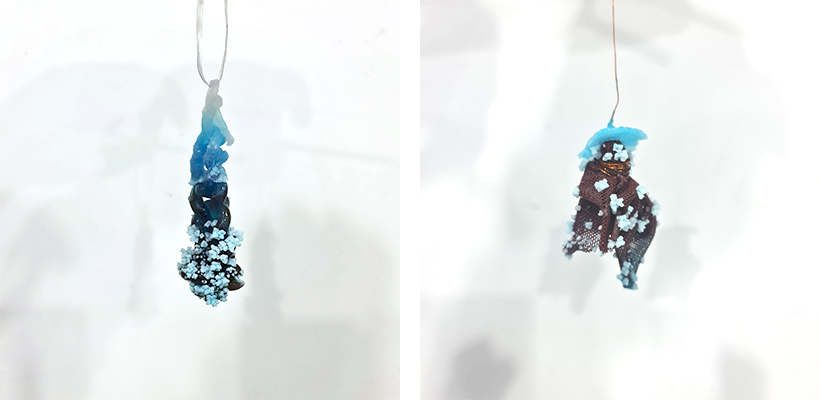
And here are my alum chrystals.
Salt
Claudia said the salt chrystals are perfect cubes. That would be awesome to see. And salt chrystals are harder to get.
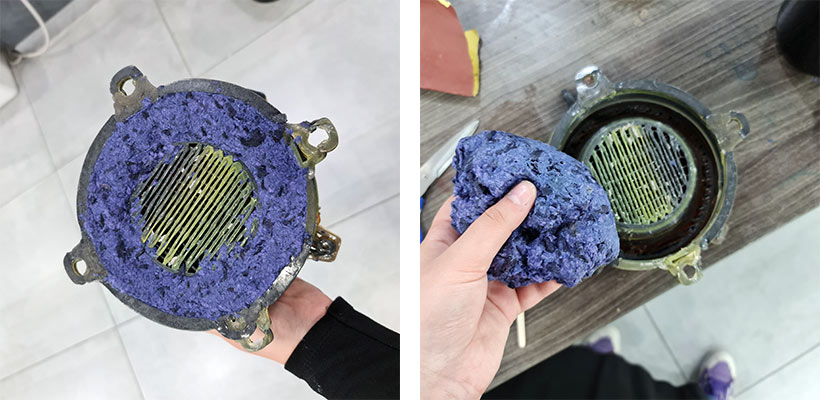
I put 300 grams of salt to 1 litre of water and stirred them on the stove. This time I tried adding blue food coloring to the solution. The color was cool. But the filter! Wow. The gradient on the filter was magical. I regret not using it as a scaffold as well.

I put a little mesh ghost and an alginate braid that was not dry yet. I was not sure it would attract any chrystals but it did.
And the results. The alginate got dyed. The little cubes look cool.
Lessons learned
- Do not add more than 400 grams/litre alum even if you see the solution could take more
- Add a big quantity of dye bath if you want the color to appear (maybe use it instead of water?) and remeber that alum modifies the color
- Food coloring gives a strong color. Just make sure to add it at the end so you can see the particles dissolving in the pot
Composites
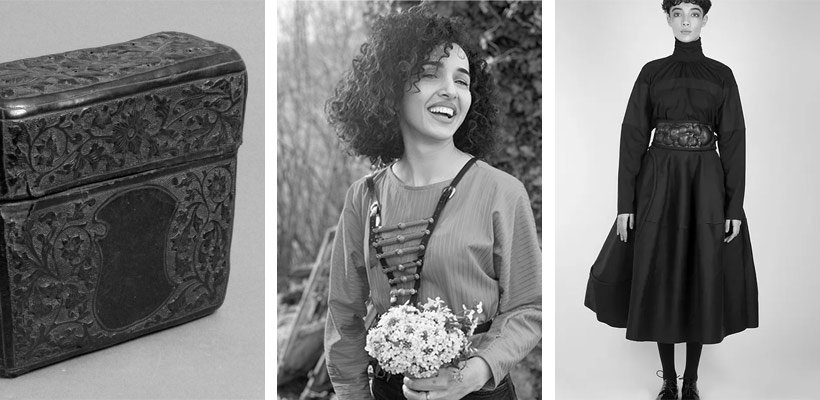
I have this idea about making a Circassian belt from composite biomaterials (bioleather or bioplatic). My father bought this beautiful belt from Georgia some years ago. It is my sister's and it is way too small for me. I brought it to the lab and everyone was shocked how could it fit someone! Heba is so thin.
I started looking at leather molding like this 15th century bookcase, and this leather belt by Esther Perbandt who calls her project "Esther hates PVC", how cool and relatable! I also remembered Mila ardan, a Georgian designer who visited Jordan a couple of years ago and is working on reproducing Circassian fashion to be worn today.
First, I have to make my materials.
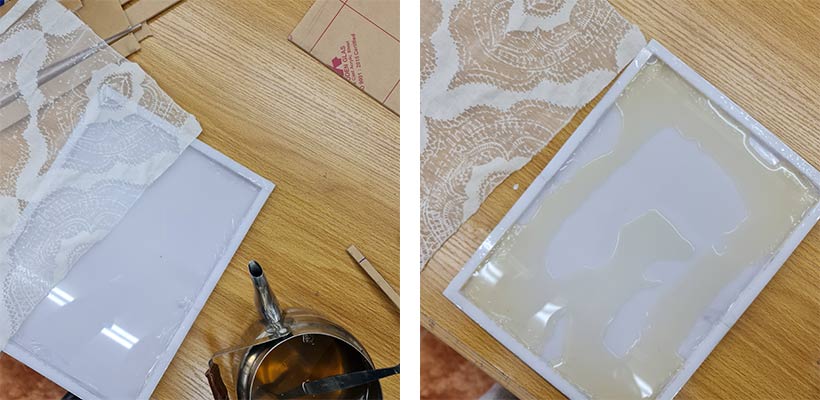
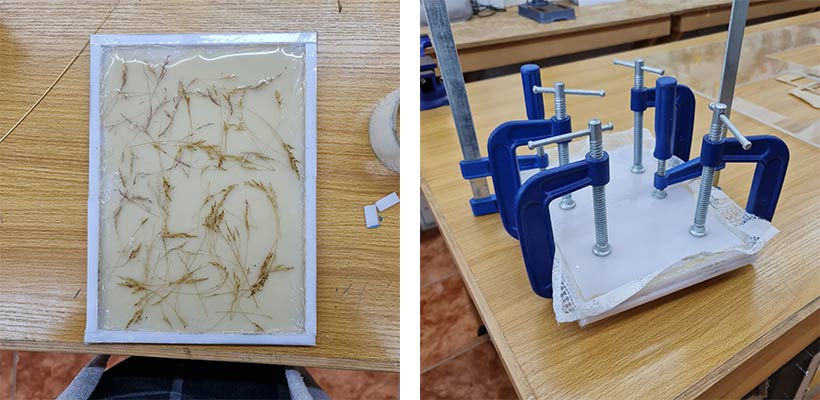
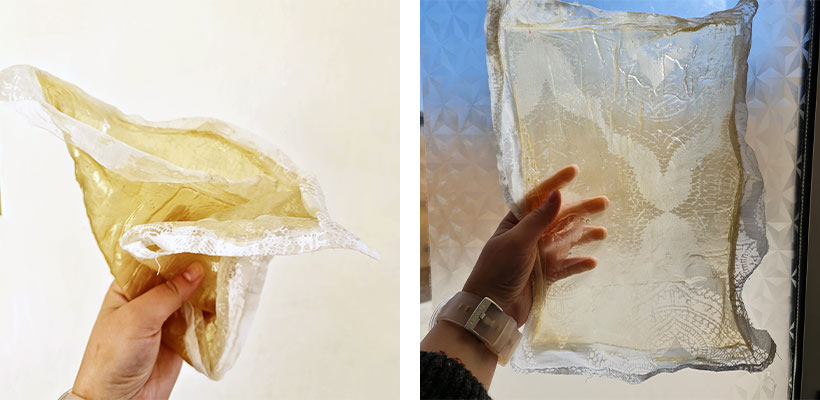
I started by collecting some dry weeds that grow by our house. They look so delicate. I wanted to use them to reinforce the bioplastics. I also have an old curtain that has been hit by the sunset for too long and now is a bit fragile. I think when I put it with bioplastics they will help each other out (the bioplastics and the curtain). I made some molds using white acrylic boards and a laser cutter.
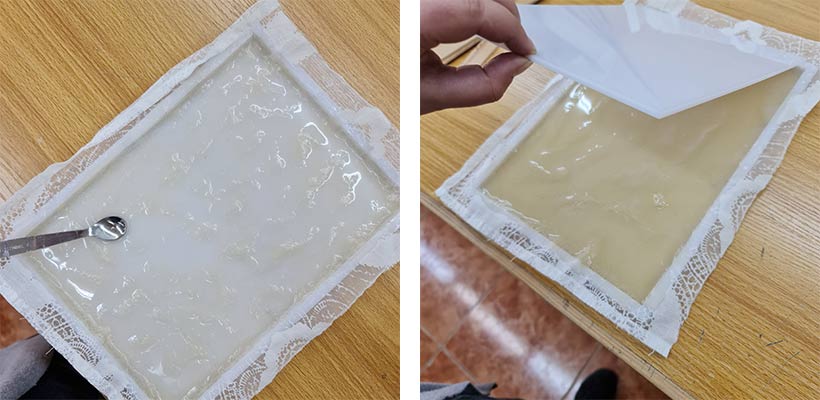
They took forever to dry; around 3 weeks! Part of it was because they were so thick, and the weather was a bit cold. Whenever I put them outside to get some sun they will get moist again. They turned out super flexible because of the glycerine. I added extra to make it flexible to be worn easy as a belt but I didn't think it would turn out this flexible.
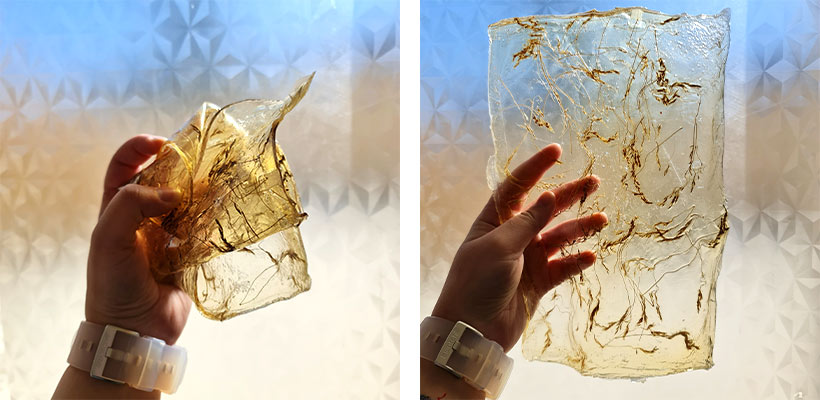
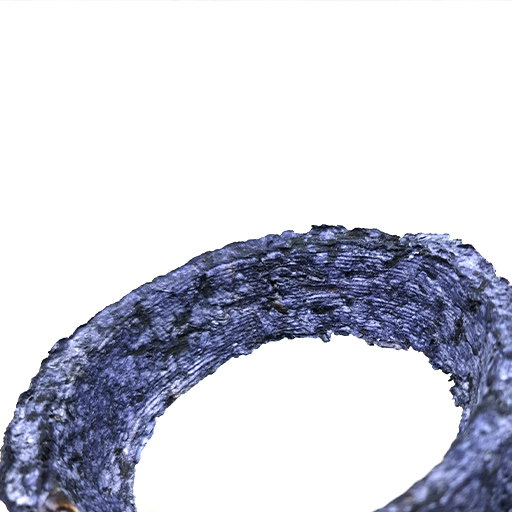
So I made another try. This time I used a hibiscus dye bath to give it a purplish color. I also made a wooden frame to let the plastic stick to it and remove it from the acrylic base when it's half dried to let it dry from both sides. I thought this would make the drying process faster and the piece would dry perfectly flat.
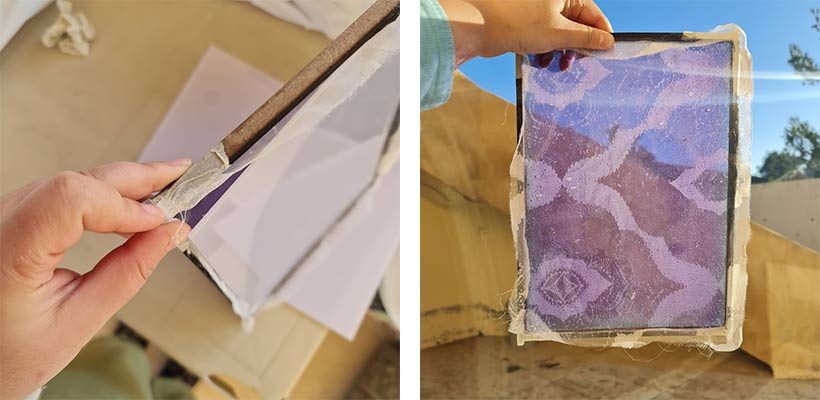
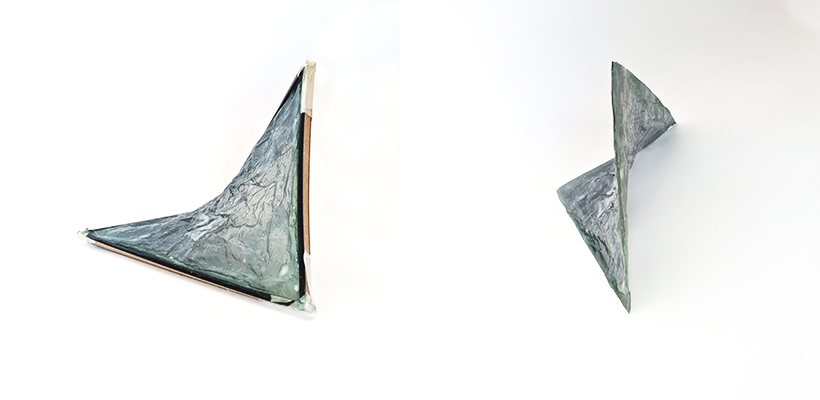
I was right about it drying faster (it took 3 days to dry). But it did not dry flat! Because the frame was loose, the plastic dried forming a tensile structure. I can't use this in the laser cutter now to make the belt pieces but I think it's pretty cool. Imagine if I had many small versions of it to tie them together and make a curtain maybe. Or form some kind of a 3D structure with this. I like the idea and I'll probably explore more. The color turned greener and darker probably because the gelatine modified the dye. A point to keep in mind next time.
Bioplastic Recipes
First Recipe (gelatine bio silicone): 240 ml water, 48 gr gelatine, 40 gr glycerine
Second Recipe (gelatine bioplastic): 240 ml hibiscus dye bath, 48 gr gelatine, 12 glycerine, 4 gr alum
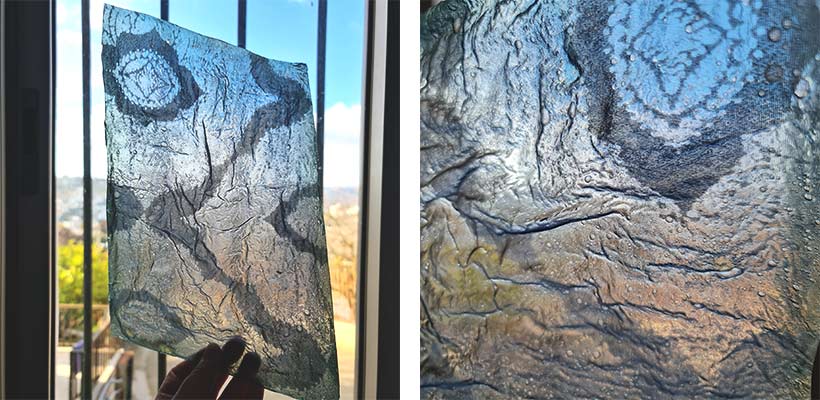
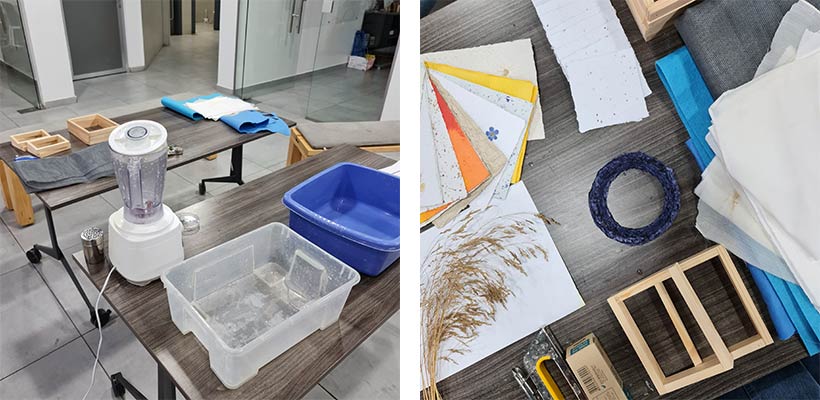
Handmade Paper
The first masterclass I give!
I have been making paper by hand for about two years now in my own micro business called Nafin. And this week Claudia suggested I give a papermaking masterclass! I was so excited!
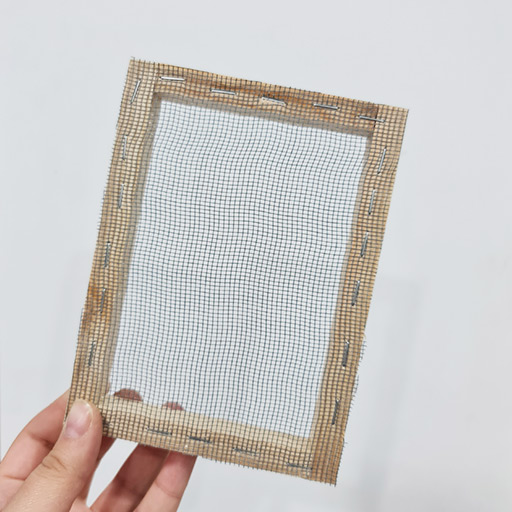
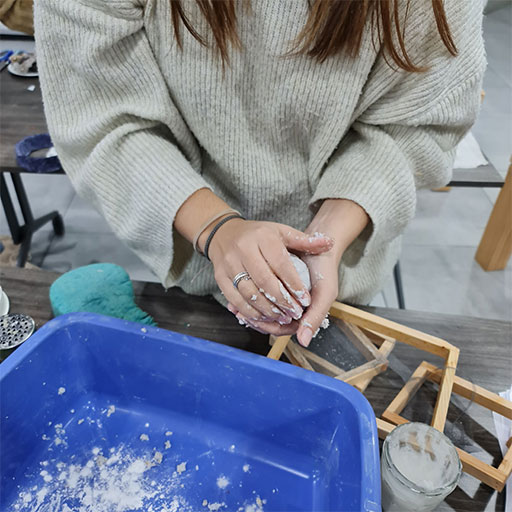
First we had to prepare our moulds and deckles. The deckle is made by stretching a piece of plastic net very very tight on a wooden frame. And the mould is an identical frame without the net. The mould can be a different shape than the deckle to give the paper a certain shape, as the mould controls the shape of the paper, while the deckle affects the texture. Another thing that affects the texture is the drying technique used.
We put the mould on top of the deckle (making sure the net side is up) in a vat, then we fill it with water up to about 1 cm above the deckle's net. We blend some old papers in a kitchen blender (preferably at least 600 watts). I usually dry my papers on a large frame with an aluminum net, but since I can't bring it to the lab, I thought we'll try to dry our paper on felt. I've been wanting to try this for some time.
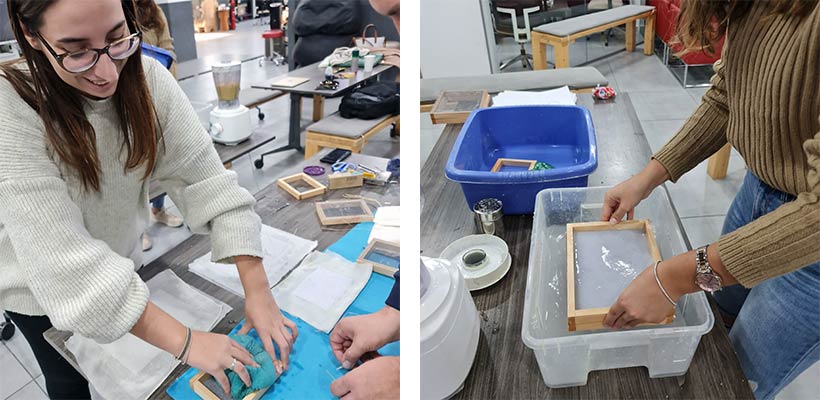
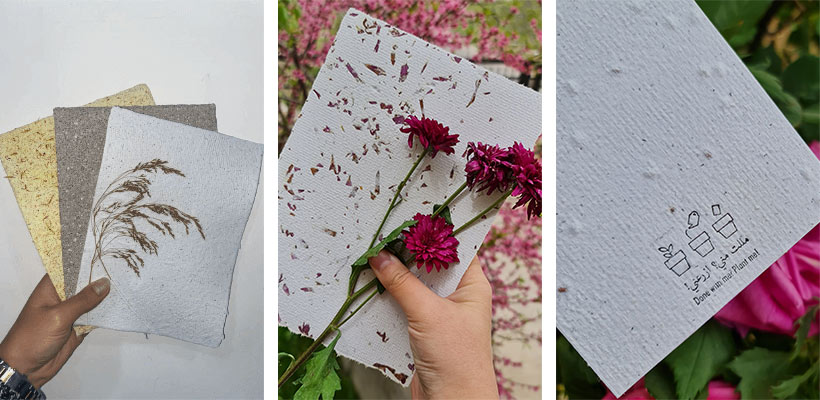
And here are some of the results. I took the leftmost photo from my student for this workshop Sirar. I love how she embedded this wild plant. It will probably fall off, this always happens with me, but it will leave a beautiful impression. I also added two photos from my previous works. I noticed that when I blend the flowers with the paper they stick better and rarely fall off. And the paper in the last picture has some seeds in it so you can plant it when done. I used to have trouble printing on them so I used stamps like the card in the photo. Now I managed to make them go into a home printer and opened a world of design possibilities!
Paperclay
We also tried making some paperclay. I was doing some experiments on the recipe for the past few months to make it as ecofriendly as possible. My recipe now has recycled paper pulp, rice glue, and some flour (or cornstarch if not available). To make the rice glue, I put half a cup of rice and a cup of water in a pot and cook for 20 minutes. When the rice becomes sticky and a bit mushy I blend it and sieve it and that's it! Blend the paper and squeeze as much water out as possible using a cotton cloth. I usually make the paperclay 2:1 paper pulp to rice glue and add flour to reduce the stickiness.
I had some extra paperclay I tried dying with hibiscus some days ago and brought it to try putting it in a mould. To make this, I simmered the paper pulp in a hibiscus dye bath for some minutes then squeezed ut and added rice glue and flower. The colour turned very purple probably because the pulp itself is alkaline. I kept some hibiscus flowers in it.
CNC Milling
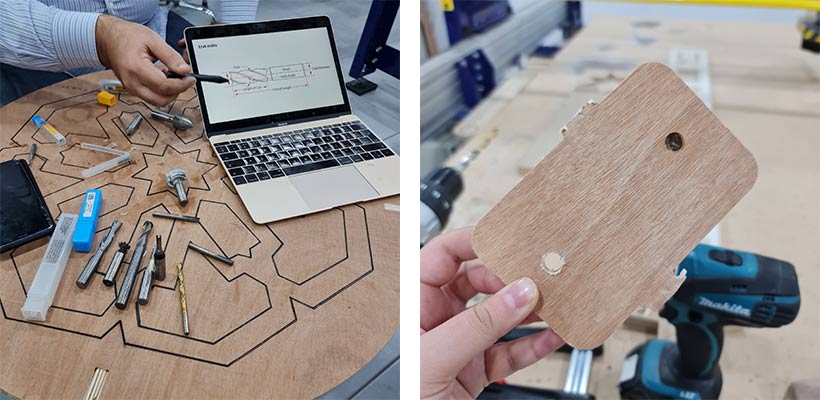
We had a "little" tutorial on CNC milling in case we wanted to use it this week to make molds or mill composites. I did not use it but I'll add what I learned here, nonetheless.
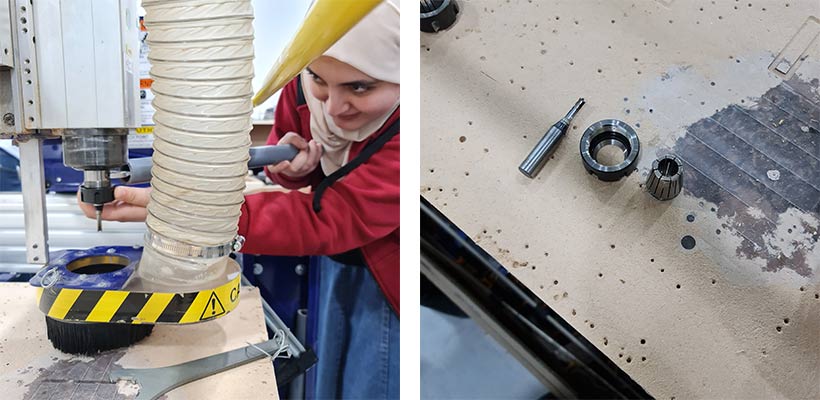
In TechWorks, Big Ismaile, as Claudia calls him, is the godfather of the cnc milling machine. He treats her like his daughter. And he almost never lets anyone touch it. His reasons are reasonable as the machine and its parts are quite expensive. I took a tutorial with him 2 times before, and in both times we never got to the part when he teaches us to actually operate the machine. We take introductions on tools and end mills and applications and then the time is up. Big Ismaile can give 4-hour introductions. This time we made it to calliberating which was huge for me as I got to control the machine for the first time. This "little" tutrial lasted 5 hours.
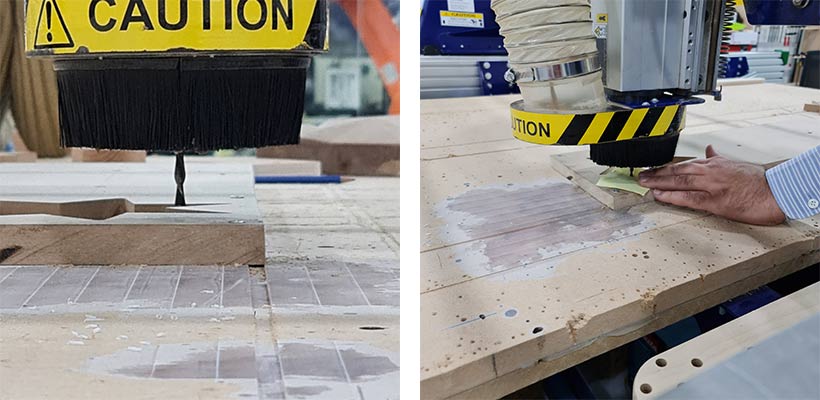
We started by learning about different drill bits and end mills; what they are made of and for what they are used. We differentiated between a drill bit and an end mill. A drill bit is used to drill down while end mills are designed to cut sideways. You can see in the picture below how using an end mill to drill a hole results in a burnt circle.
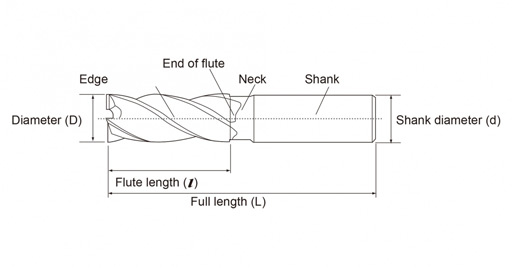
This is the anatomy of an end mill. The neck's diameter is smaller than the flute's as to not cause friction with the work piece.
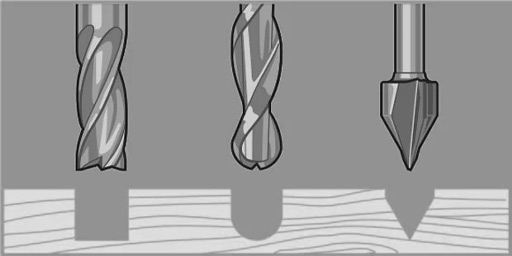
There are a lot of end mill types and shapes. Here they are categorized into 6 types, the most common 3 (the ones we have at Techworks) are end mill cutters, face milling tools, and T-slot cutters. The end mill cutter have diffrernt tips, of which these are the most common 3 (image taken from Gloiath cnc website):
Up-cut and Down-cut
End mills cut in two ways; down-cut and up-cut.
Up-cut: Drill bits are always up-cut. These bit leave a rough and messy finishing on the work face but a neat finishing on bottom.
Down-cut: They leave a neat top and a messy bottom finishing. Never used with plastics as they melt. Used with foam and compact materials such as mdf as the chips come from the side not from up.
Straight-cut: are the best of the two worlds as they leave a neat finishing on top and bottom.
And finally, we got to change milling bits and caliberate the machine. The machine we have at TechWorks is a ShopBot. Here are some photos of me changing the bit and Big Ismaile showing us how to caliberate. And that is all I'm going to share about the cnc I promise I won't bore you more. As there are lots of bits and machines are different you should check the specifications of the machine and bits at your makerspace.
If I learnt something from all the caliberations I did at the lab for laser cutters, 3D printers, and cnc milling machines, is that manual caliberation with a piece of paper always works best!
Bill of Materials
Chrystals
- textile scaffold: mesh fabric, used coffee filter, jute, or anything else really!
- solution: water (1 litre) and alum (400 grams) or salt (300 grams)
Composites
- gelatine, glycerine, and water to make a bioplastic recipe
- textile scaffold, I used an old curtain
Handmade Recycled paper
- waste paper to recycle
- mold and deckle (wooden frames with plastic net)
- medium water container that can easily fit the mold and deckle
- kitchen blender (preferably 700 watts and not to be used for food afterwards)
- piece of fabric to dry the paper on
- sponge
Paperclay
- waste paper to recycle
- sticky rice to make glue, or rice flour is easier