08 Wearables
Inspiration
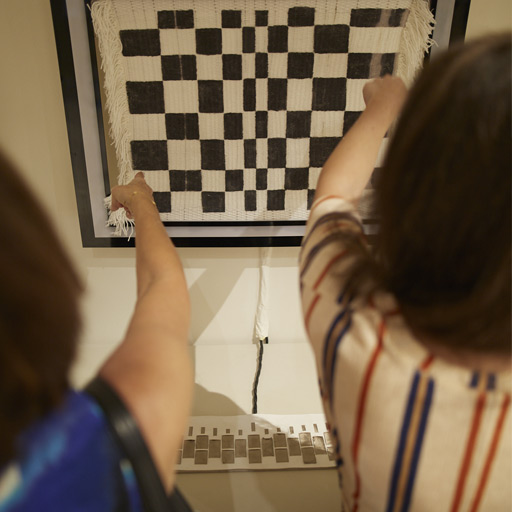
In 2019 during Amman Design Week, Al Zahra’a Al Omari was exhibiting a tapestry that changed colors when spectators pressed on some buttons. I learned that parts of the tapestry were dyed with a thermochromic dye. I was exited to play with these dyes this week. I was also excited to try the soft speakers, the ultimate e-textiles magic.
Explorations
They said "a multimeter is your best friend." I wasn't convinced at first but oh how much I used the mulitmeter. The one we had at the lab beeps to indicate connectivity, the lab was filled with beeps. This beep was the best sound you can hear this week! It meant that things are going good. I also did some soldering this week.
The Multimeter
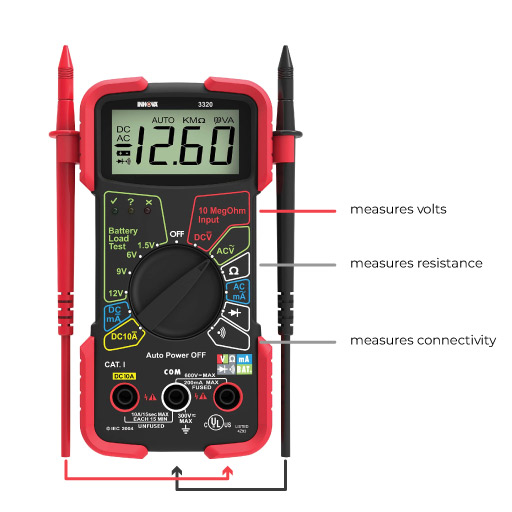
We have several multimeters at the lab but my favorite is this Innova 3320 because it is simple and beginner friendly. It has an auto ranging feature which means it will adjust the units automatically (giving the readings in milliampere or Ampere, for example). It is also color coded to make it simpler to use. I always look for this one when I want a multimeter.
So how is a multimeter useful? First, make sure to use the black wire on the negative side and the red wire on the positive. We used it to measure three main things:
-
Voltage. When measuring voltage keep in mind there are two types of current: AC and DC. Almost all electricity we have around us is DC. AC is used to transfer electricity to our houses and offices. When we want to aee if the battery is empty, or measure the voltage going through a circuit, we turn the dial to DCV.
-
Resistance. We use this to know the value of resistance components when we are not sure about it. We also need to measure the resistance to determine how much voltage wee need using the rule: V = I * R
-
Connectivity. The beeper! This device beeps when there is connectivity between different parts or components in a circuit. Sometimes it doesn't beep although there is a week connection. Some LEDs still light with this week connectivity (this happened with me). This function is particularly useful when working with copper tape because when we stick two pieces on top of each other most of the times they don't connect properly. We measure the connectivity using the multimeter then rub the top piece with the scissors or something solid to try and fuse the two pieces as much as possible.
We explored flip dots, soft speakers, and thermochromic dyes.
Flip Dots
We started with the simplest, flip dots. It is made by putting a magnet in the middle of a wire wrapped in a coil. The current that passes through the wire creates an electromagnetic field which then interacts with the magnet in the middle causing it to flip. When we reverse the current, the magent flips again.
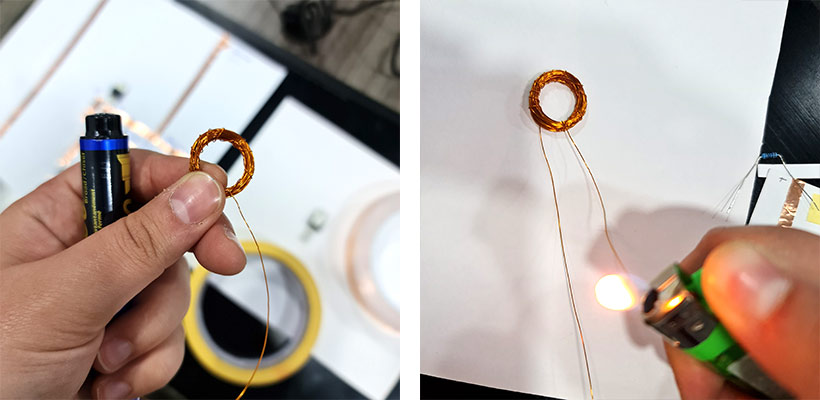
I wrapped a wire around a marker 60 rounds, leaving around 7cm at the beginning and end. The wire I used had to be burnt in order to get rid of the non-conductive filament that covered it. I made a little cushion around the magnet to tell the sides apart and know when it flips. I like how it looks like a little eye. Wicked.
Soft Speakers - Trials
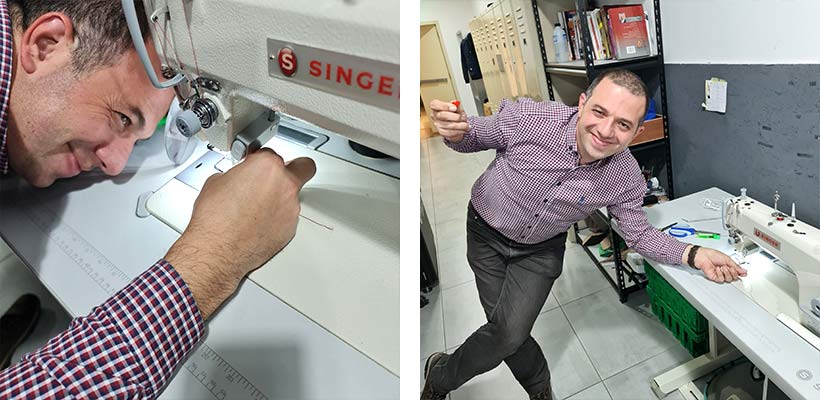
Suhaib and I tried to make a soft speaker but we weren't very successful. The voice was very low and unclear, probably becuase we had to add more laps of the conductive thread and make them closer to each other. Anyway, I'm going to document the day we got the sewing machine running here.
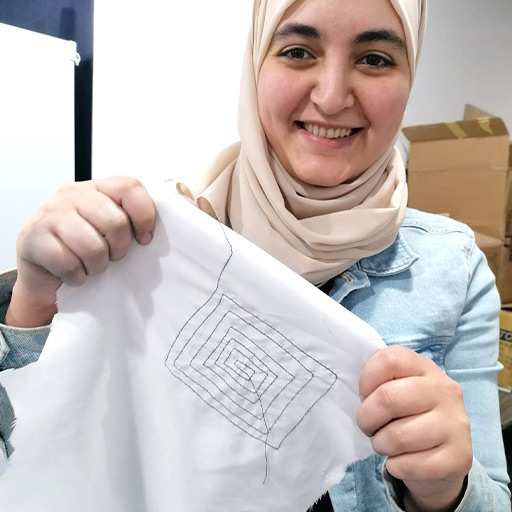
We have several sewing machines at TechWorks and I've never seen anyone work on them. They told me nobody knew how to operate them. I decided to get one running this week. I opened a Youtube video to learn how to set up the machine and load the thread. Suhaib was trying to help out. We got one running and I managed to sew a loop of conductive thread (spoiler alert: this will come in handy in the next section).
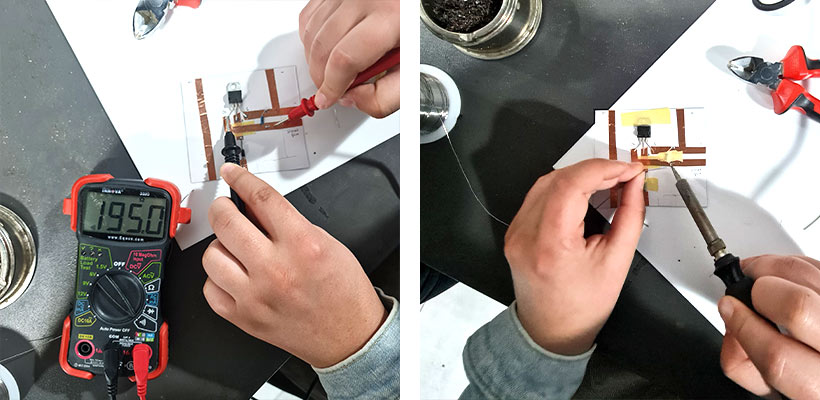
We made this circuit to control the sound using a microcontroller (Arduino UNO). Heating or producing sound takes a lot of energy (or current) which an Arduino pin cannot supply. This is why we use a transistor to amplify the current by connecting a secondary power source. We made the following circuit with a transistor for the soft speakers.
![]()
![]()
I joined Suhaib to test our speakers. We connected the soft speakers to this circuit we made and an Arduino board. Suhaib used the following code to play music.
#include "pitches.h"

int melody[] = {

  NOTE_C4, NOTE_G3, NOTE_G3, NOTE_A3, NOTE_G3, 0, NOTE_B3, NOTE_C4
};

// note durations: 4 = quarter note, 8 = eighth note, etc.:
int noteDurations[] = {

  4, 8, 8, 4, 4, 4, 4, 4
};

void setup() {

  // iterate over the notes of the melody:

  for (int thisNote = 0; thisNote < 8; thisNote++) {

    // to calculate the note duration, take one second divided by the note type.
    //e.g. quarter note = 1000 / 4, eighth note = 1000/8, etc.

    int noteDuration = 4000 / noteDurations[thisNote];
    tone(8, melody[thisNote], noteDuration);
    int pauseBetweenNotes = noteDuration * 1.30;
    delay(pauseBetweenNotes);
    noTone(8); // stop the tone playing
  }
}

void loop() {
  // no need to repeat the melody.
}
Thermochromic Dyes
Claudia and I started this experiment with the curse of "butter fingers". Claudia suggested we mix a green thermochromic dye with a hibiscus dye bath we still had in the fridge and maybe we'll get something interesting. Claudia picked up the big jar of hibiscus dye bath to pour some in the cups and it slipped making a big mess in the little kitchen. But we got these awesome designs on the paper cups!
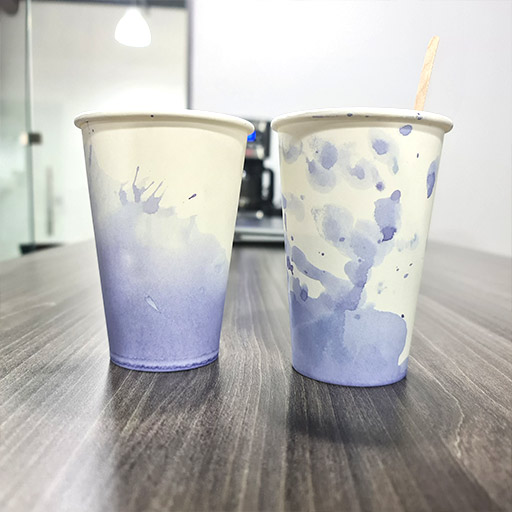
Long story short, this idea didn't work.
Meanwhile, I started playing this awesome video game when I want to escape at night. It became my inspiration for the week. That is why I always encourage others to play video games. The game is Portal, which follows a woman trying to solve puzzles to escape rooms while a robot promises her to have cake when she finishes all the levels. At the end of the game, the robot sings a line: "you just keep on trying till you run out of cake." And this was the spark that led to this week's design.
I heated some water and dissolved this thermochromic dye we have.
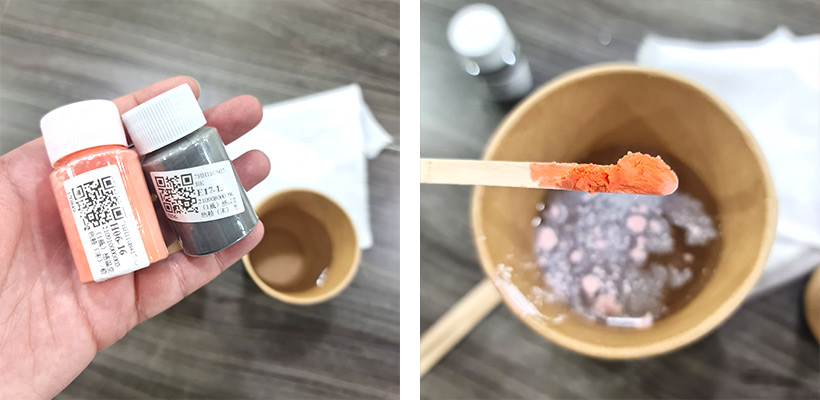
It becomes white with heat and regains color in room temperature.
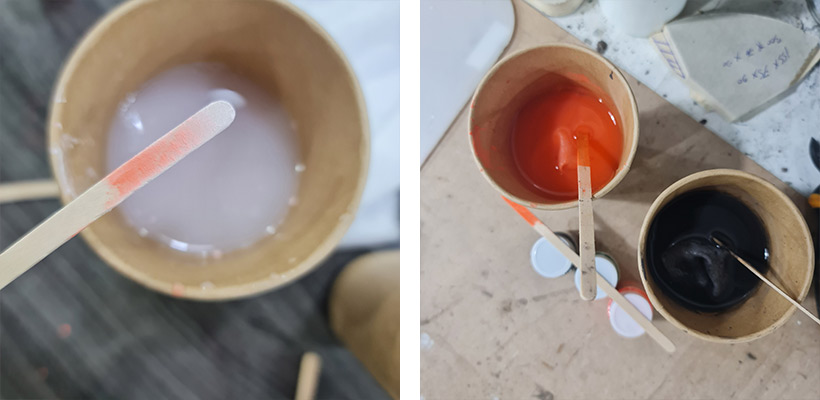
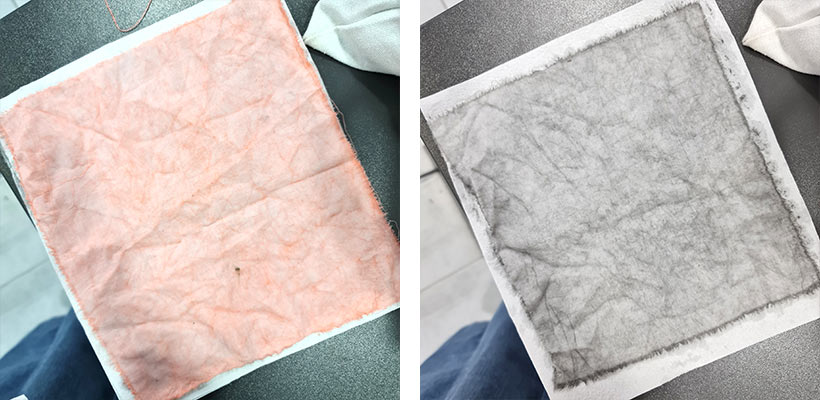
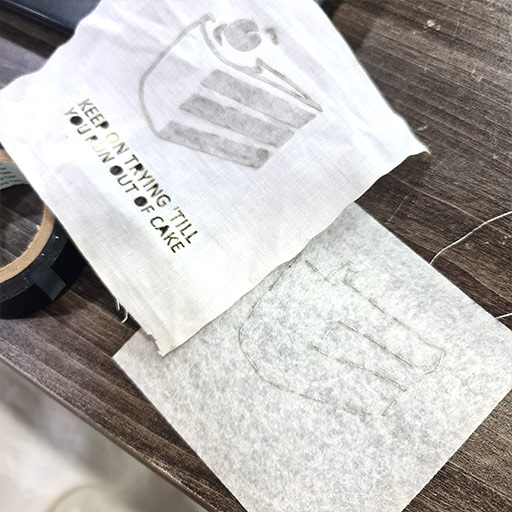
I dyed a piece of cotton with orange and another with grey.
I drew the infamous cake on Adobe Illustrator and cut it with the laser cutter. Then I used this fabric glue to stick the grey cake pieces on a white background piece engraved with the song line.
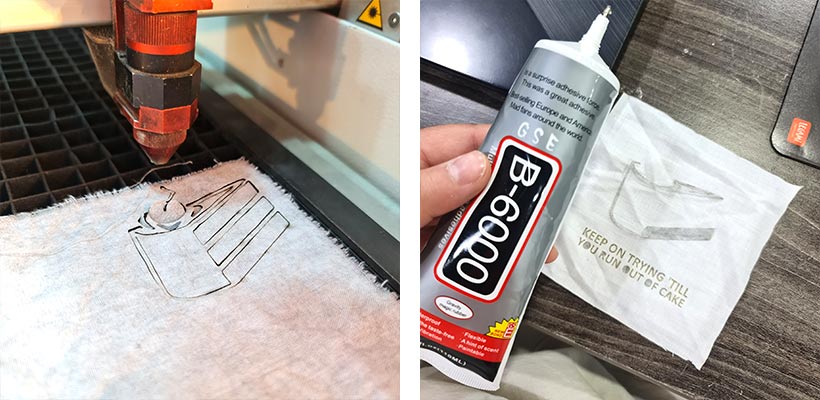
laser settings for cotton
Trotec speedy 400 laser cutter
cut - power: 20 / speed: 5
engrave - power: 30 / speed: 80
Then came the tricky part: using electric current to produce heat. I used a conductive thread to trace the line of the cake on a piece of felt. I tried it over and over with different volts but with no use. It wasn't getting any current. Maybe the resistance is too high? I tried adding copper tape but it didn't work either.
Then I decided to use the sewing machine to sew a loop of conductive thread. I figured maybe the resistance will decrease because the sewing machine uses two threads, one from above and one from below. And indeed it worked! I used 8.8 volts and it generated 0.13 amps.
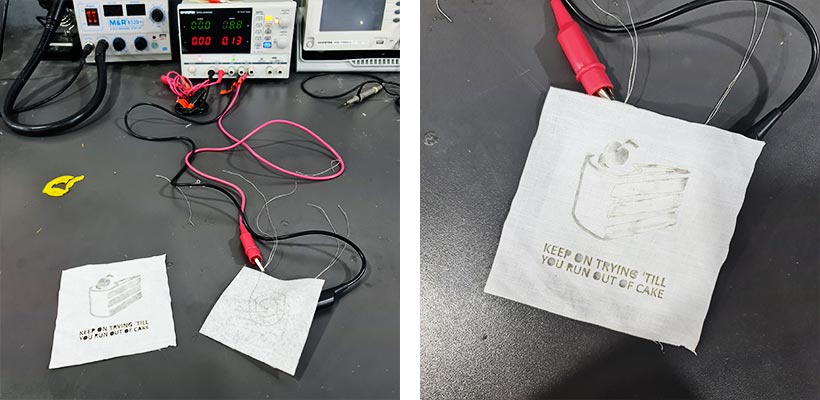
Here are some cool gifs of the color changing.
This one is done using a heat gun.