06 BioFabricating Materials
The first ever masterclass I took in our fab lab, TechWorks, was about biomaterials. Our instructor's name was Montserrat. I remember that because one of the participants was a graphic designer, he took one look at the recipe template she handed out and exclaimed that she was using the Montserrat font! I got to meet some local designers at this masterclass, too, like Farah Hourani and Petra Orfali. Farah managed to design a top piece and we laser cut it on a big pink bioplastic sheet and tied it with glittery threads. Those three days were eye-opening for me and one of the many little pieces that led me to Fabricademy.
Inspiration
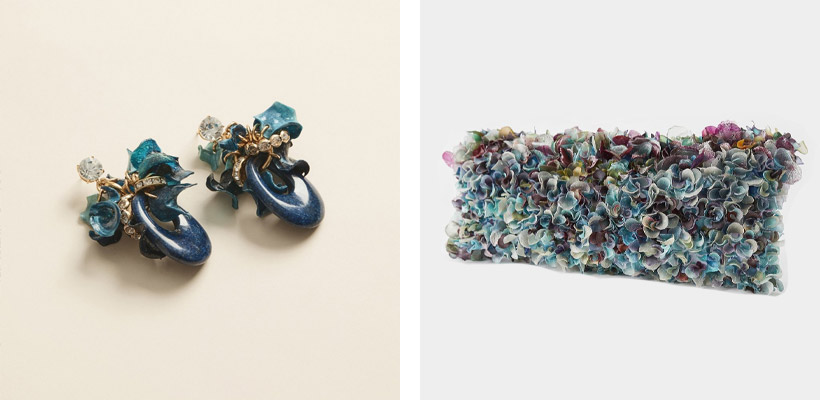
Biomaterials are usually associated with solving the plastic packaging problem or the fashion industry problem. But Sometimes they just add to the beauty and conceptual exploration of the world. Such is the works of Alice Potts, known for her "sweat chrystals" on ballet shoes. Alice has some pretty interesting explorations of bioplastics.
Biomaterials are either crafted or grown. This week, I tried different biomaterials recipes, struggled with Kombucha, and gave a bioplastics workshop to a group of adolescents at Ruwwad Innovation Space.
Crafted Biomaterials
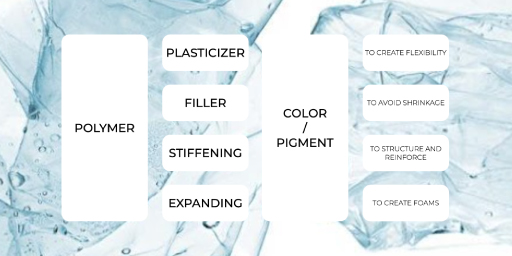
The following general recipe is the base for making different Bioplastics (bio-resin /-plastic /-silicon /-foil /-foam). Once you understand it, You can adjust and explore different ingredients and how they affect a material's characteristics.
I experimented with different polymers: gelatine, Agar Agar, alginate, and guar gum.
| material picture | material name | solvent | polymer | plastisizer | additions |
|---|---|---|---|---|---|
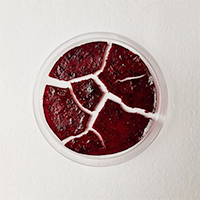 |
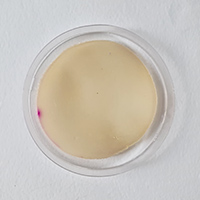
hibiscus bioplastic | water 40 ml | Agar Agar 1.6 gr | glycerine 5.4 gr | 2 gr hibiscus |
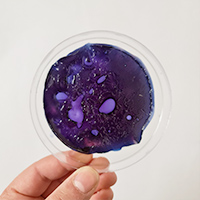 |
bio-galaxy | hibiscus dye bath 40 ml | gelatine 8 gr | glycerine 6 gr | drops of alum solution |
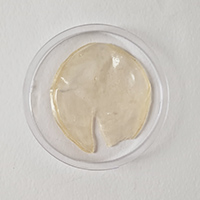 |
Agar foil | water 40 ml | Agar Agar 1.6 gr | glycerine 1.4 gr | - |
 |
Agar silicon | water 40 ml | Agar Agar 1.6 gr | glycerine 5.4 gr | - |
 |
Agar plastic | water 60 ml | Agar Agar 2.4 gr | glycerine 2.6 gr | - |
In all the recipes I started by adding the plasticizer (glycerine) directly into the pot on the scale. I thought this might save me the trouble of measuring it into a cup then struggling to get it out into the pot. I then added water and heated the solution on the stove. I stirred for 2 minutes to make sure it is well dissolved. Then added the polymer while stirring. I cooked them for 10 minutes then casted them in petri dishes.

Hibiscus bioplastic
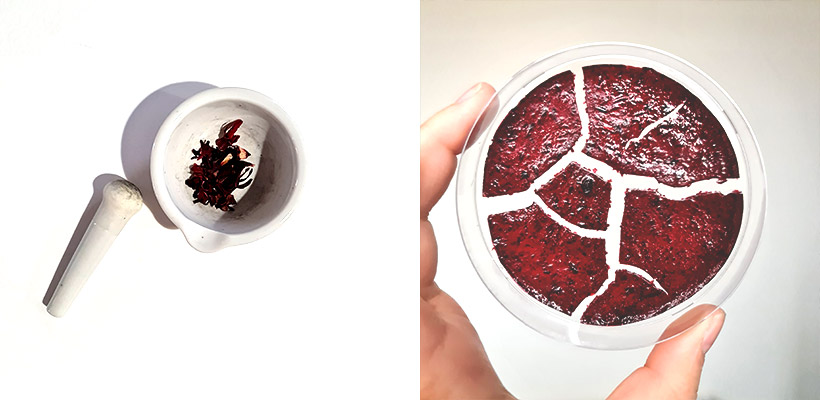
The Agar Agar bioplastics shrink a lot when they dry. I thought adding some fibers to the material will make it shrink less and stronger. But the material cracked and shattered to pieces.
Bio-galaxy
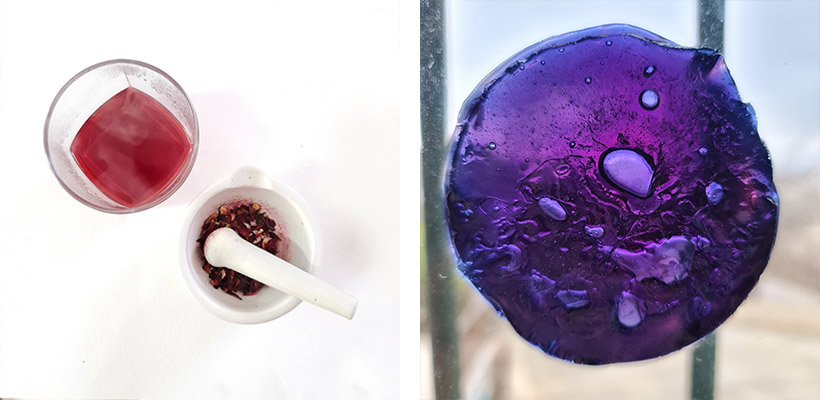
I started by preparing a small quantity of hibiscuc dye. I was trying to make a galaxy color with the gelatine bioplastic by using hibiscus dye bath to make the material and adding drops of alum solution to modify the color. I wanted to get a mix of pinks and purples. But adding the alum solution made some "holes" or thinner parts in the material. I think next time I should have two mixes with two different colors and pour them together? I probably should ask someone to make the second mix with me so we can pour them simultaneously. I had some trouble with the gelatine when adding it to the solution of hot water and glycerine as it made some clumps that got hard to dissolve.
Agar foil/ silicon/ plastic
More glycerine means more flexibility, but in such small materials the difference in flexibility was not perceptible. These materials shrank a lot and took about two weeks to dry. They kept "sweating" for some days more then dried completely. The agar foil cracked when it dried, maybe I should cast a thicker layer?
Polymers
Below are some notes on the different polymers I used for this week.
Gelatine
is derived from collagen in animal parts. It is used to make jelly and sweets (my aunts asked if I could get them some from the chemicals store I go to). it is the cheapest (in Jordan) and easiest to work with polymer.
Agar Agar
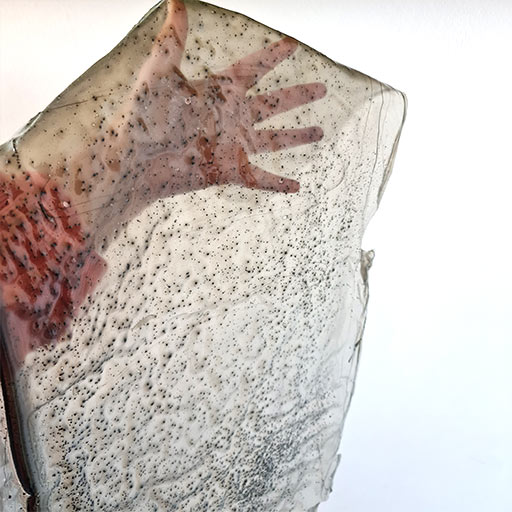
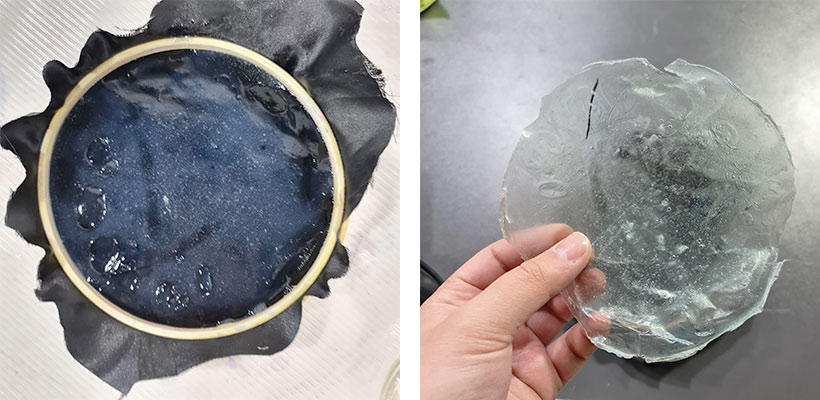
is obtained from red algae. When using it in biomaterials, it shrinks a lot when it dries as it loses a lot of water. This means you have to cook it for longer to try and evaporate as much water as possible. In the small materials I made I didn't cook them for a lot longer but I noticed they remained slimey for 2 weeks after they dried.
In the bigger piece I made (with 750 ml water) I dissolved the agar before the glycerine and cooked it for one hour and still when it dried it shrank around 20% and still has a slimey texture a month later.
Sodium Alginate
is the sodium salt form of alginic acid and gum mainly extracted from the cell walls of brown algae. This polymer is different as it doesn't require cooking and is cured with calcium chloride.
Guar Gum
also called guaran, is extracted from guar beans and used as a thickening agent in food.
Gelatine
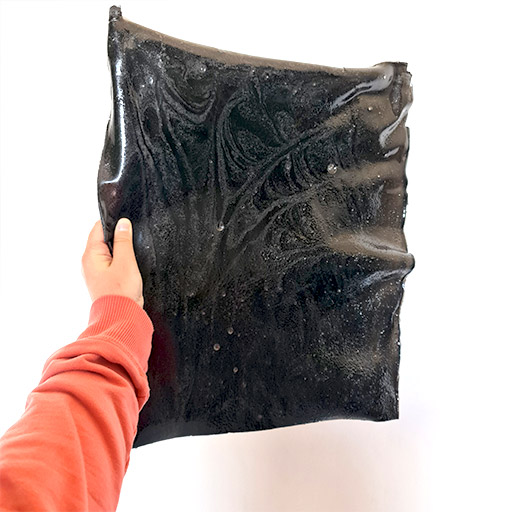
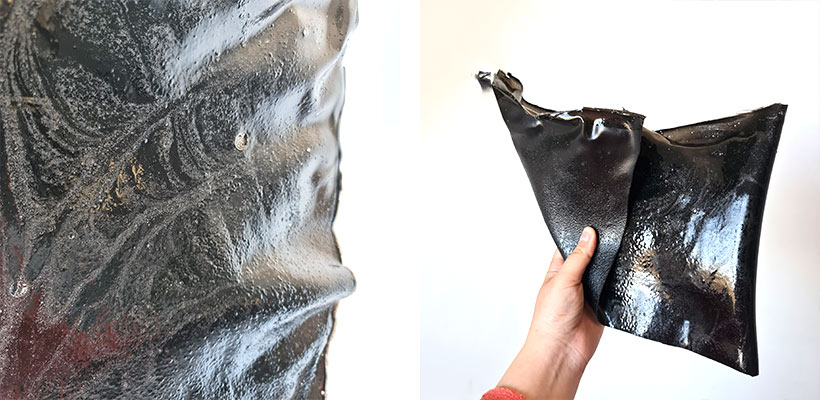
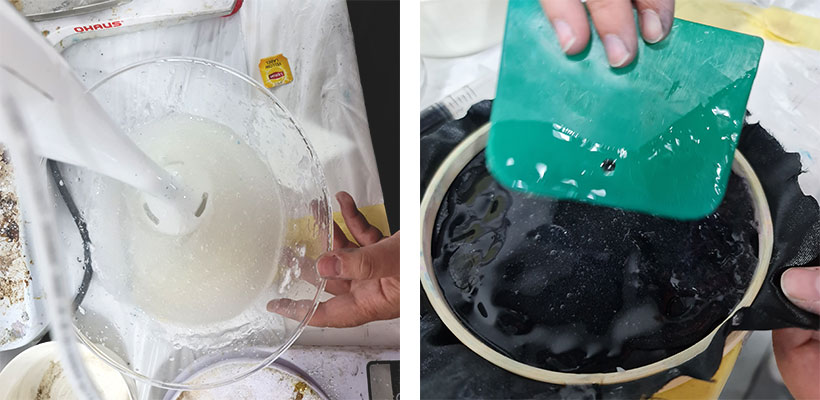
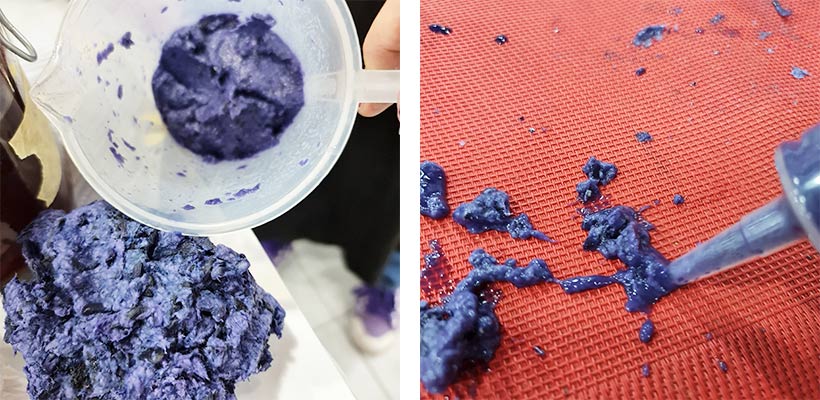
I wanted to try and cast a big bioplastic piece so I made a mold from hdf wood and covered it with contact paper. The size is 45*75 cm! I used 200 grams of gelatine for the recipe, which is A LOT! And I had a problem with dissolving the gelatine as it kept lumping and making sticky lumps. So I had this idea to dissolve the gelatine in cold water then heat the mix and add the glycerine. And that is what I did.
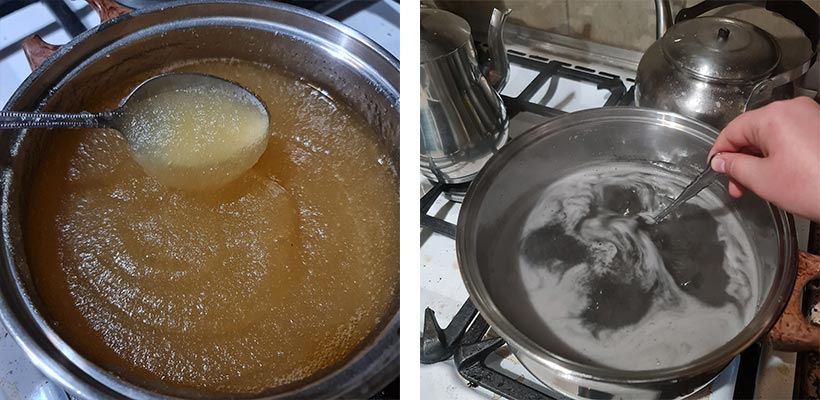
I added carbon to get this awesome black color and tried two different recipes. I cooked them for around 50 minutes and they took one day to dry outside in a sunny weather. When I put them in a dry cold storage room both recipes lost elasticity and became brittle, but they became elastic again when I moved them to the stairway which has a moderate to cool temperature.
recipe 1
water: 1 liter
gelatine: 200 grams
glycerine: 60 grams
carbon: 20 grams (too much)
recipe 2
water: 1 liter
gelatine: 200 grams
glycerine: 100 grams
carbon: 6 grams
recipe 2 - adjusted
for mold size 45*75 cm
water: 750 ml
gelatine: 150 grams
glycerine: 75 grams
carbon: 4 grams
Guar Gum
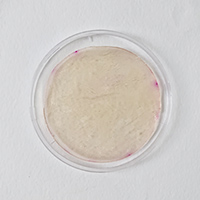
I found a recipe on materiom that uses guar gum. It was weird that it didn't require cooking but I decided to try it anyway. I didn't put it in the oven to dry, maybe that was the deal breaker as the mix didn't dry for 3 weeks and when it finally did the material was a very thin and fragile layer sticking to the mold.

So I tried cooking it. I barely put it for 5 minutes on the stove and it became jelly-like and started to burn. I took it off and tried spreading it in equal thickness in the petri dish but this was tricky as it was lumpy and sticky. When it dried, it was very flexible and stretchy. It has good resistance and doesn't tear easily. Some downsides is that it started sweating when we turned on the heater in the house and it feels a tiny bit sticky. But after two weeks of sweating it is now completely dry. I think it has a lot of potential and I would love to experiment more with it.

Notice the little paper stuck to the material? I made this material at grandma's house and was worried I'd lose the recipe (as I didn't find a recipe to follow so I made some trials and errors). So I wrote the ingredients on a piece of paper and put it on the edge of the petri dish on the mix. A silly descision but it opened the way to more questions. The paper got stuck very well to the material and the ink did not bleed. Maybe guar gum could be used as a varnish on ink? Could it be used as glue?
Guar Gum recipe
water 40 ml
glycerine 5 gr
guar gum 1 gr
Sodium Alginate
A different kind of recipe. Working with alginate is pretty weird because it does not require cooking but instead needs to be coated with calcium chloride to cure and be waterproof. We mixed the ingredients with a hand blender then left them for an hour in the fridge to get rid of the bubbles.
Sodium Alginate recipe
water 200 ml
alginate 12 gr
glycerine 30 gr
optional a spoon of vegetable oil
It should be cast in a thin layer and cured with calcium chloride from all sides. We put a peice of fabric on a frame and sprayed it with calcium chloride, then spread the alginate in a thin layer and sprayed the top as well. It shrinks a lot (about 20%) when dry and has a nice shiny look.
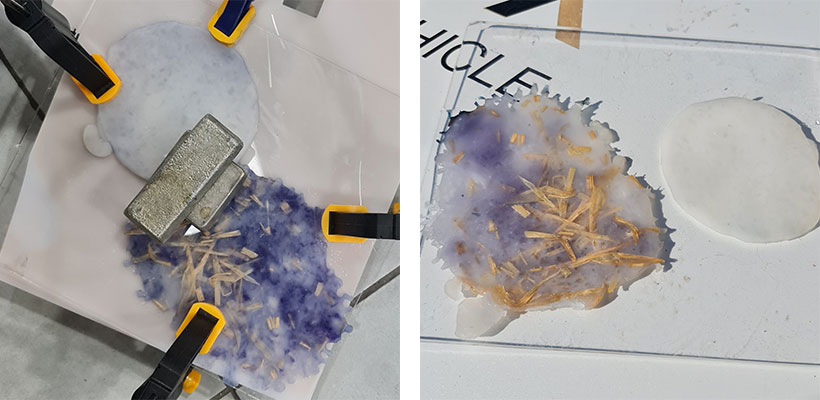
I tried to mix some plant fibers with the alginate and cast it in a thicker layer. When we squeezed it between two acrylic sheets it exploded from the side and had a baby! Hehe. The baby did not get any calium chloride so it remained squishy and I just threw it away at the end.
Bioyarn
The same alginate recipe could be put into a syringe and extruded to make bioyarn. We extrude the alginate steadily into a jar with 1:2 ratio of calcium cloride to water. We took the yarns carefully from the calcium chloride, as it can have irritating effects, and washed them in the sink. We braided them and hung them to dry. I tried making a very long braid but when it dried, the top part became close together because of the gravity pull.
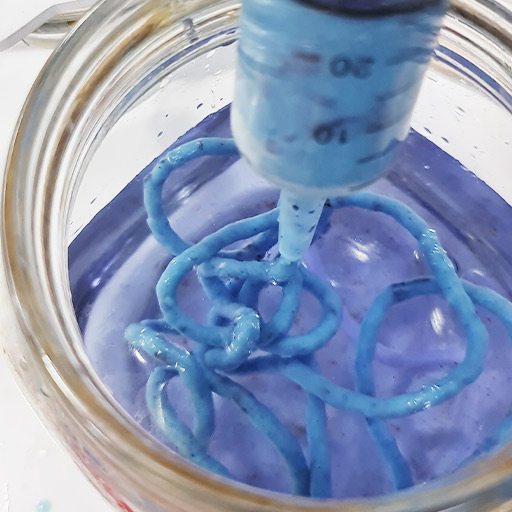

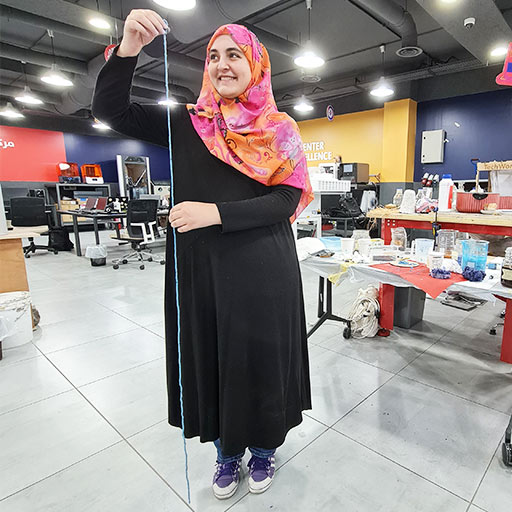
I happened to have some paper pulp dyed with hibiscuc with me that day to show Claudia how I managed to dye the paper and she had this idea to add it to the alginate mix. We tried turning it into yarn but it kept breaking apart becuase of the pulp clumps. I managed to make this 168 cm long piece! Anyway, when it dried it became very fragile because of the paper pulp.
Bioprinting
And still with the same recipe, we can extrude the yarn to print 3D shapes. I tried printing with my composite alginate and paper pulp. It actually worked better than the alginate alone. Although it broke a little (as you notice in the video), but when it dried it held it shape very well. Pieces with alginate alone got flattened when dried.

In conclusion, adding paper pulp to yarn didn't work well but using the composite mix in printing was better than alginate.
Alginate-pulp recipe
Prepare the same alginate recipe above.
Prepare paper pulp by blending some paper.
If you wat to dye the paper, you will have to scour it for half an hour, then mordant it for half an hour, then boil it in a dye bath until it holds the color.
Make sure to get all the dye stuff out of the dye bath before putting paper in. I had some hibiscus flowers in the paper pulp mix wich made it impossible to print. We had to take them out.
I added rice glue to my paper pulp to make it sticky. Put 1/4 cup of rice in a pot with 3/4 cup water and boil them for 10 minutes. The water will be almost all gone (the rice will absorb it). Blend the rice with a handheld blender until you get rid of all grains. Mix it with the paper pulp until you feel the mix is like clay.
We had to mix the paper clay with some water and blend it again to make it easier to mix with the alginate gel.
We didn't really measure how much paper we added but it was about 2:1 alginate to paper pulp.
Load into the syringe and print.
Ruwwad Workshop
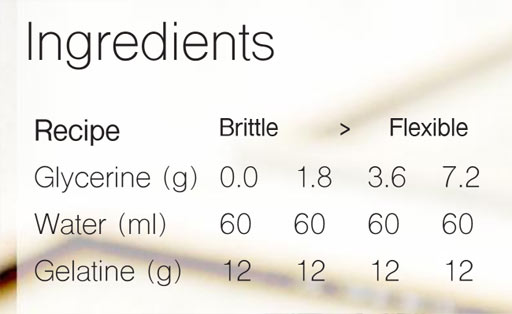
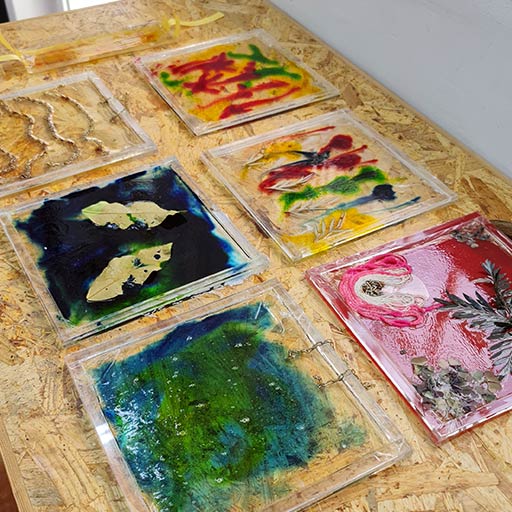
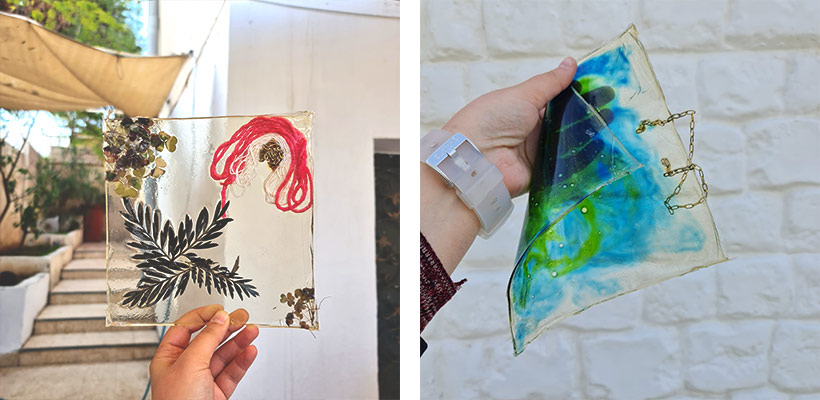
I decided to tansfer this knowledge to my students at Ruwwad makerspace. We had lots of fun scavenging for items to decorate our plastic panels. We followed this simple recipe from the Bioplastics Cook Book by Margaret Dunne trying the whole range from brittle to flexible.
Outcomes
Grown Biomaterials
Kombucha Leather
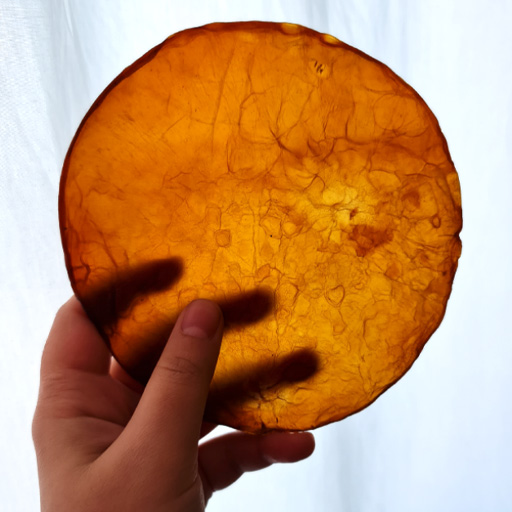
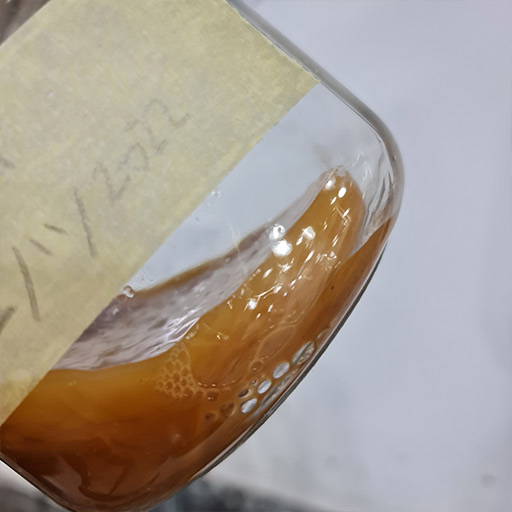
I had some experience growing Kombucha leather, I have grown 4 pieces last year. Then I forgot to feed my kombucha one time and it dried and got all moldy so I threw it away. This was an excellent chance to get back again but I just had terrible luck in the lab for some reason. All the pieces I grew got moldy. Suhaib on the other hand had amazing results ("because of the sh*t he added" according to Claudia) and even made his final Fabricademy project about kombucha.
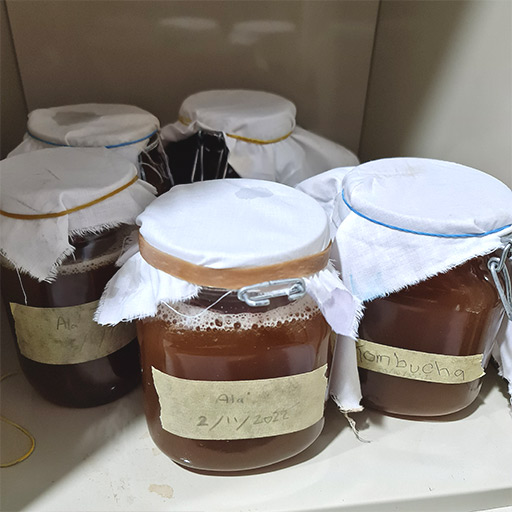
First we must grow the SCOBY from the kombucha drink. Skip this step if you have cool friends who make their own kombucha drinks (I got my first SCOBY from a friend). Then, we wait for the SCOBY mother to "give birth" to other SCOBYs. We now call the jar where we grow the SCOBYs a "SCOBY hotel".
Use this recipe to make the mother scoby and kombucha leather:
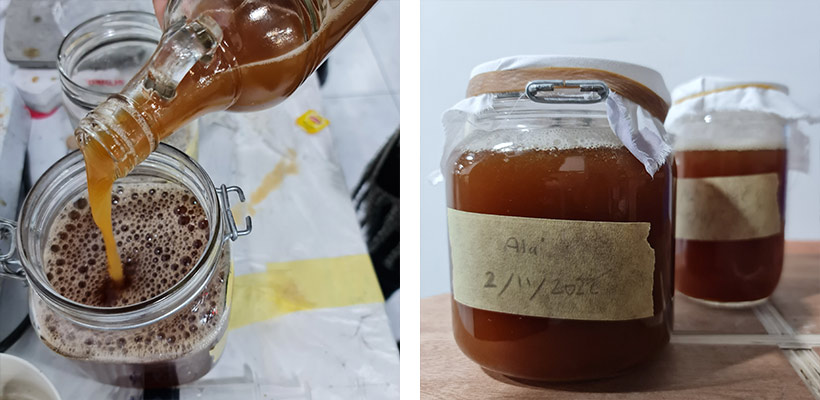
Kombucha Leather Recipe
boil 1 ltr water
add 200 grams sugar
leave 6 black tea bags in the solution until it is room temperature
add 250 ml white venigar (add more if you see mold when the SCOBY starts growing)
add 500 ml kombucha tea
leave it around 4 weeks to grow the SCOBY mother
We left the soon to be SCOBY hotels in a locker. They look like a gathering of Arab men.
After about a month, I checked on my hotel and it was all moldy.
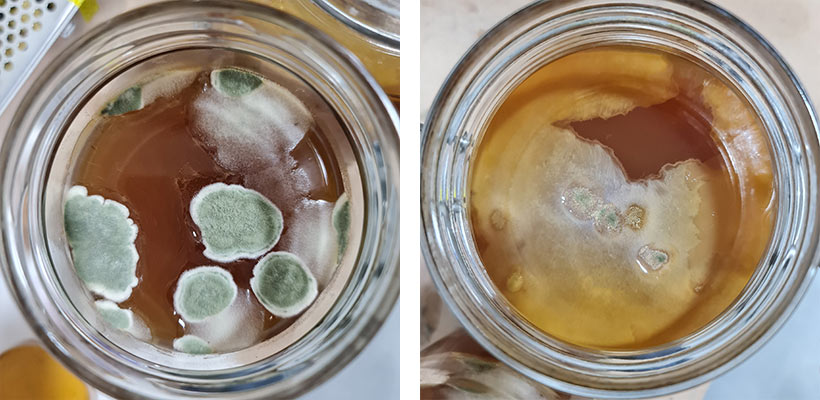
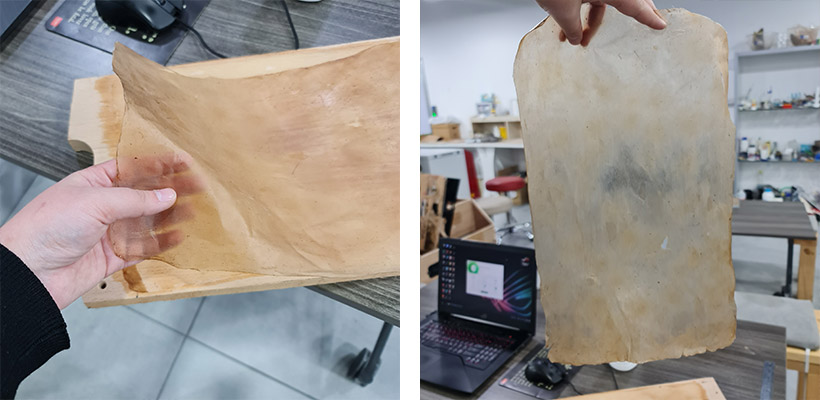
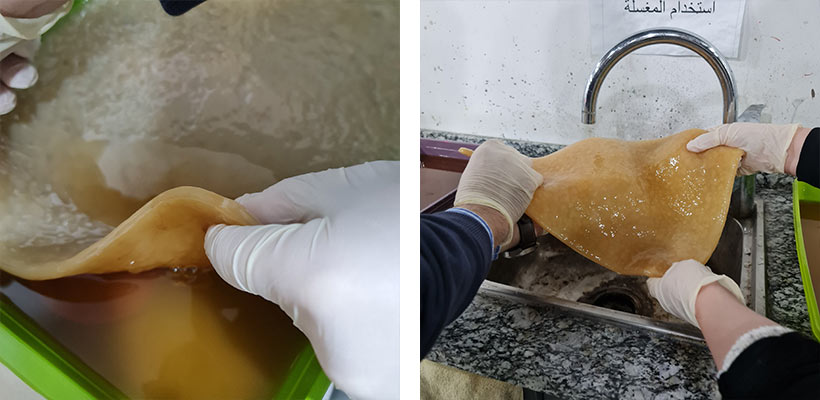
I had another jar which didn't look good either, but was less moldy. I used that SCOBY. I took it out and put it in a tray to make a bigger piece of leather. I used the same recipe minus the kombucha tea. I added some of the tea from the SCOBY hotel instead. Suhaib added date molases and it turned out so good so I stole some of his hotel tea. I used to blend the SCOBY when I add it to the bigger tray. This way the leather grows much faster and more coherent but you sacrifice the SCOBY. This isn't a big deal if you maintain a SCOBY hotel. But I didn't blend it this time.
Here are some photos I took of Suhaib making his leather. I didn't take photos of my tray becuase I was not feeling hopeful at all.
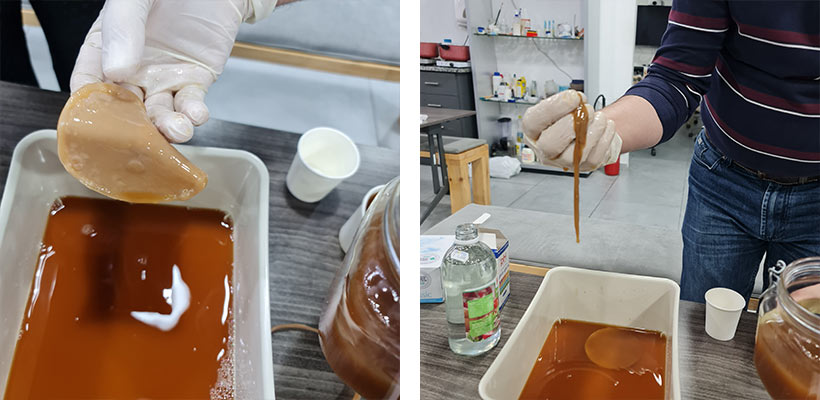
Two weeks later and this is what my tray looked like. Poor and thin.
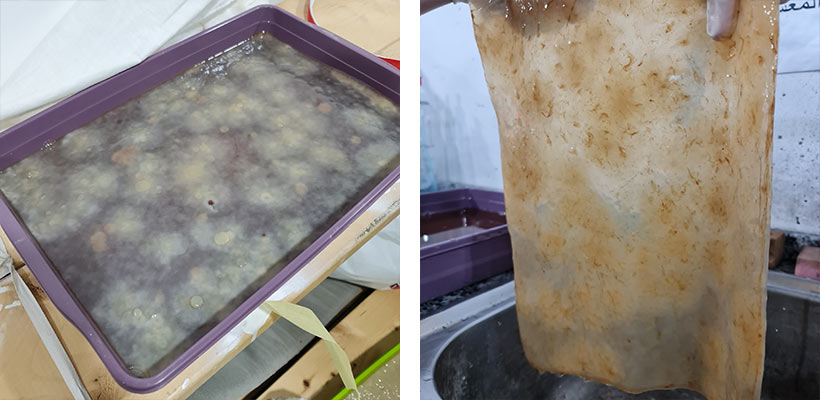
On the other hand, this is what Suhaib's looked like. So thick and beautiful.
I rechecked my hotel and there was a fantastic thick SCOBY waiting in the little tea left. I took it home and made a bigger hotel. Some time later I'll make another try at making kombucha leather.
Anyway, here is my poor thin piece after it dried.