Fabrication

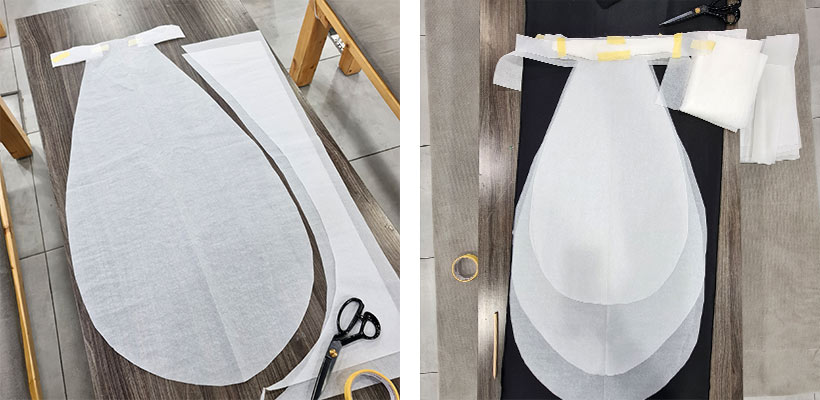
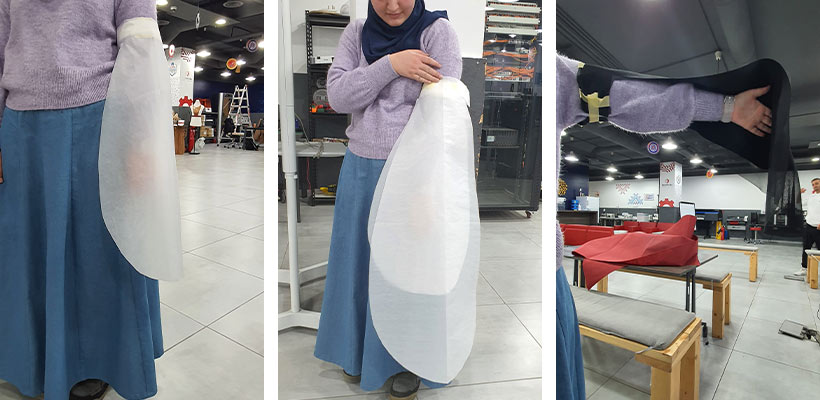
Initial Prototyping
The best way to start designing is making a paper prototype. I started by cutting a couple of butter papers to test and decide on the size for the sleeves. Then each sleeve went through a different fabrication journey depending on the techniques and materials used.
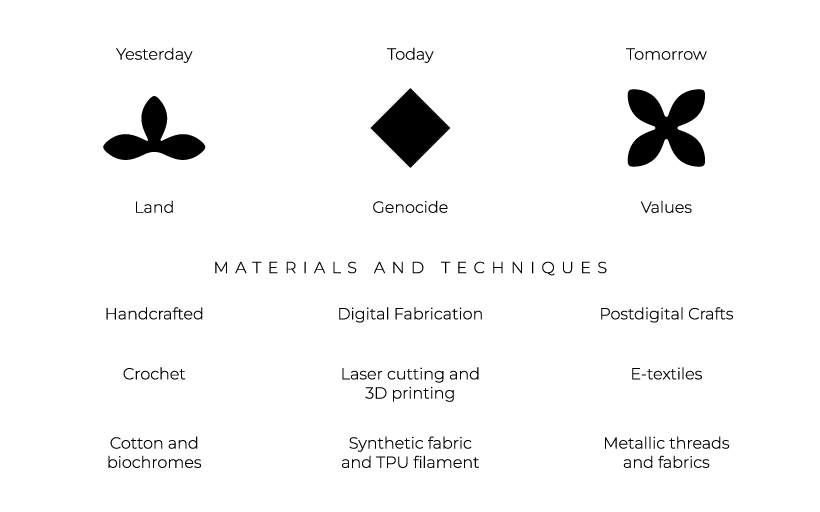
Yesterday
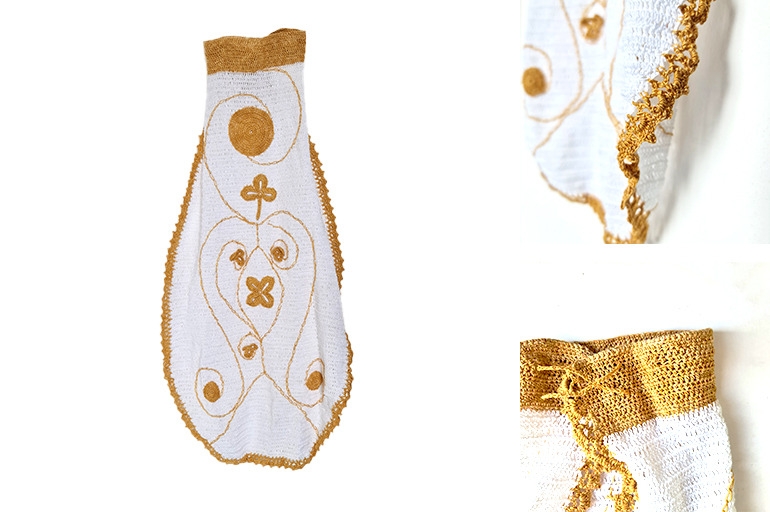
This sleeve is crocheted by my mom and aunt. Mom put a lot of love and effort for hours and days to make it. I love how it turned out.
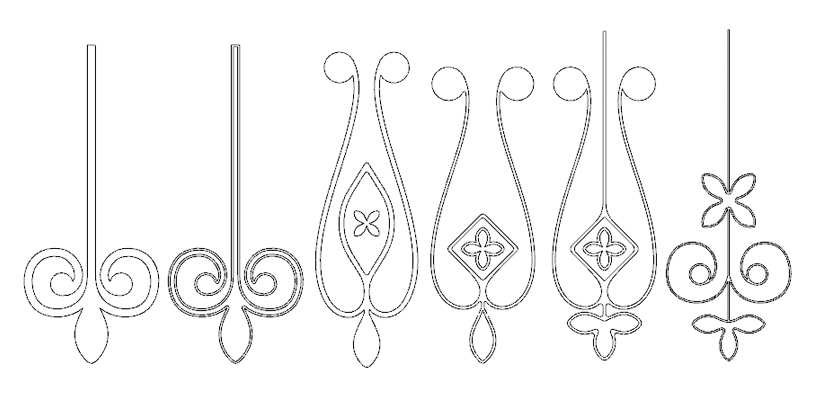
I started with sketching the design for the motifs and then adjusting it on Illustrator.
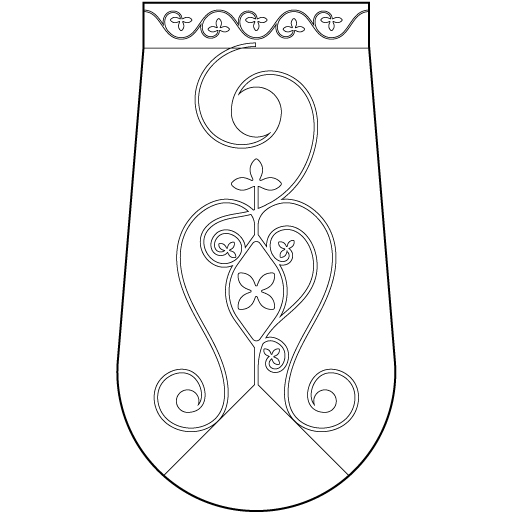
I used the laser cutter to cut in on butter paper to be a reference.
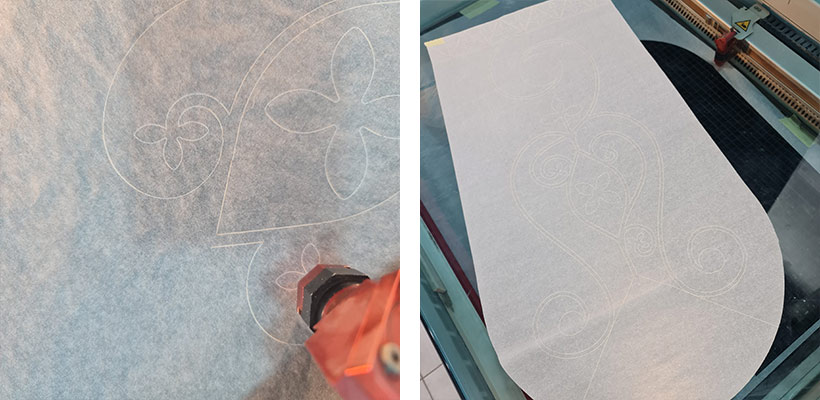
Laser cut settings for butter paper
Laser cutter: Trotec speedy 400
Cut: power 10 / speed 2
Score: power 10 / speed 5
Dyeing Threads
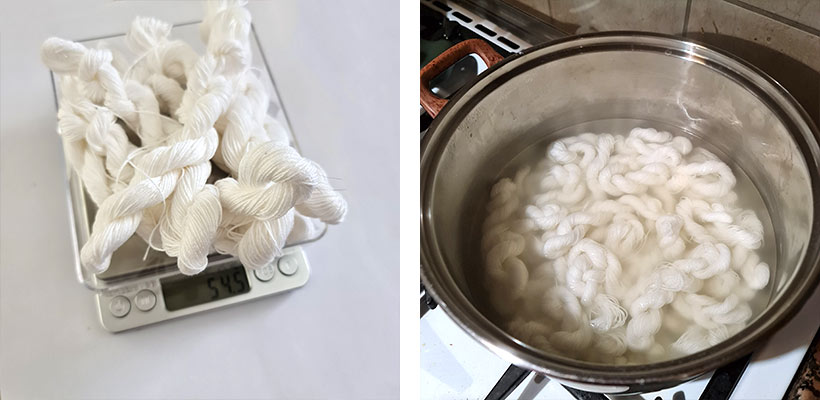
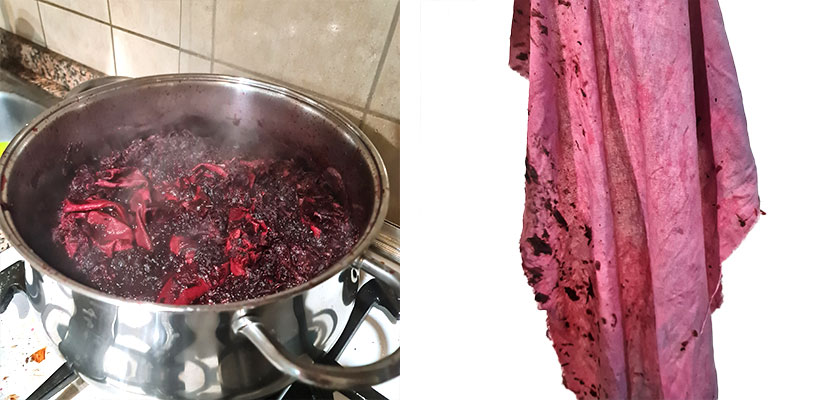
At first, the plan was to sew crochete motifs onto dyed cotton fabric. The motifs will be golden and the fabric probably black, but as black is hard to get I'll maybe go for dark grey or deep purple or pink. I started by preparing and dying the cotton threads with onion skin. I bought crochete threads size 10, my aunt Tamara said it will look better with thinner threads. In total I bought 6 balls each weighing 100 grams, just in case. I weighed, scoured, and mordanted the fibers. I started with 170 grams.
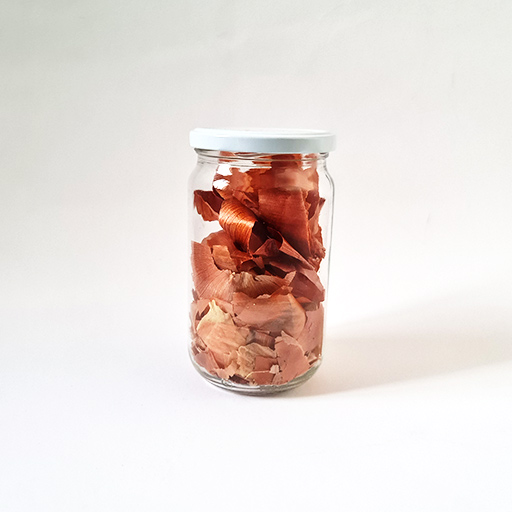
I forgot that I had saved this jar of onion skins since the biochromes week.
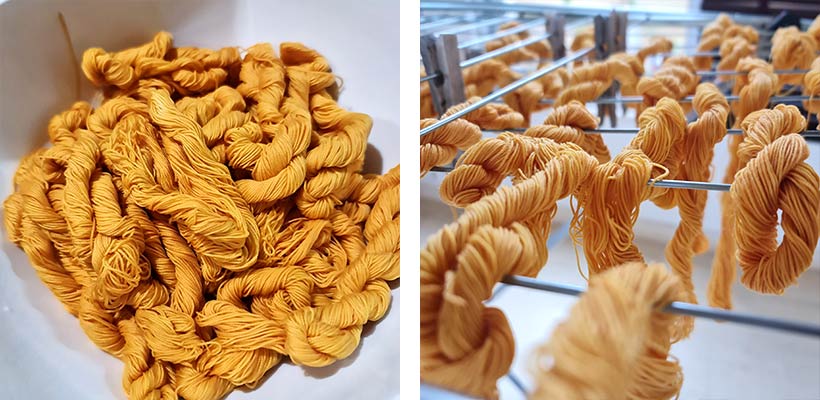
It was satisfying to watch the white turn to gold.

Now they look like spaghetti in the bowl. I put them on the drying rack to dry. To speed up the process I untwisted them, and later moved them on the heater when we turned it on.
I wanted to give the fire motif a different color, red maybe. I looked up red dyes and found that madder gives an orangy red, I was looking for someting more like maroon. Claudia suggested I give safflowers a go. Getting red from safflower is very tricky, as you must first wash away all the yellow dye it has, then you get a pink dye, then you turn the bath to an alkaline solution to get the red.
I started with 20 grams safflower to dye 10 grams of cotton threads, it is recommended to use a 1:1 or for deeper colors 2:1 ratio of dye stuff to fibers. I had some linen fabric scraps and used them to sew this little pouch to hold the flowers.
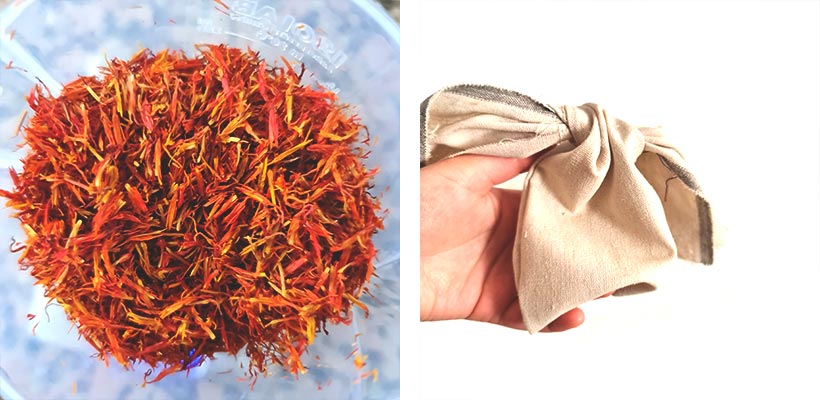
I put the flowers in the pouch and into a jar of cold water. The color of the water changed to yellow then brownish red within an hour.
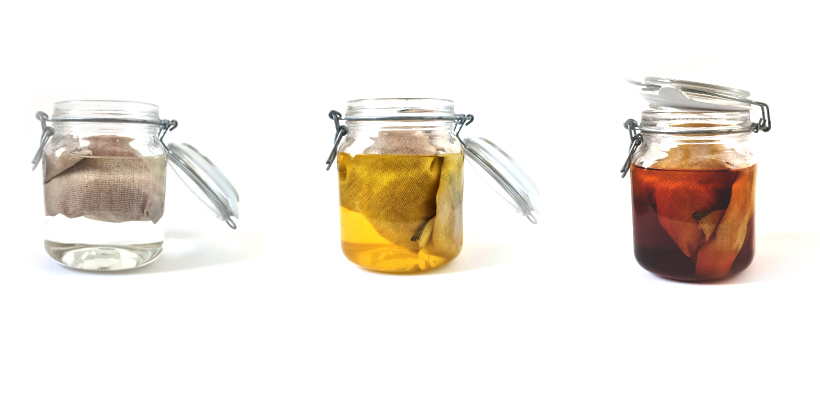
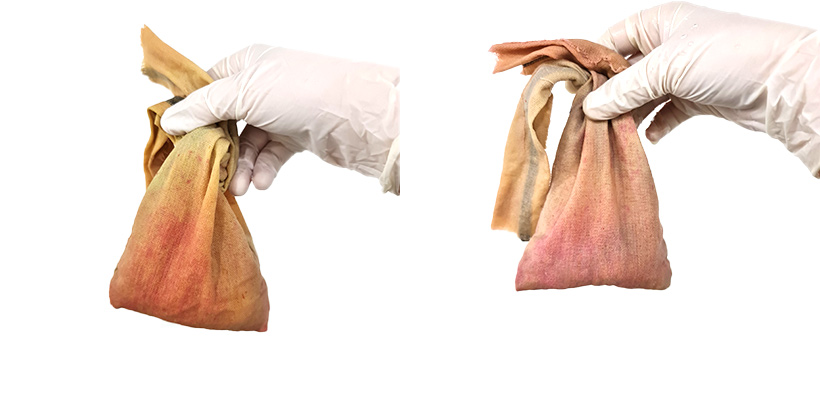
I kept some yellow dye in case I need it. Then I washed the safflower 5 or 6 times, each time soaking it in new water for an hour or so then washing it under the tap. I coud see on the pouch the color turning from yellowish to pinkish.
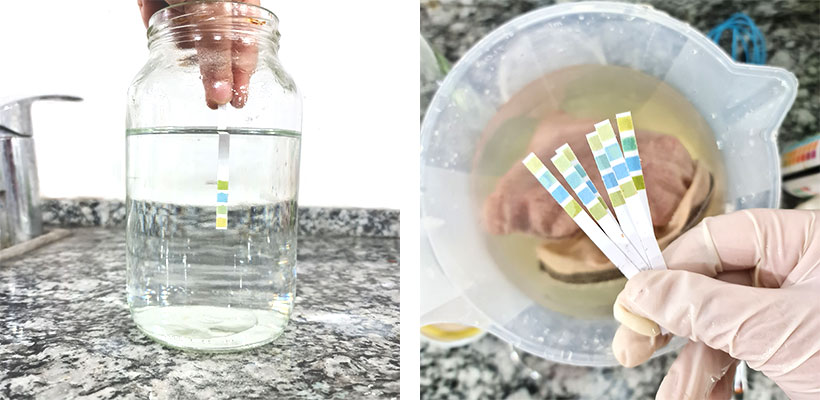
I filled the jar with 1 litre water and added about 80 grams of soda ash to make it alkaline. It has to reach pH 12. I kept measuring the pH after each 20 grams. It remained around 7 and 8 and wasn't changing. I repeated the process again after thoroughly cleaning the jar just in case and still the solution was not becoming alkaline. I gave up on this idea.
As I had some cotton fabric scraps, I threw one in with the safflower jar that couldn't turn alkaline just to see what happens. The water was yellow. After an hour I pulled out the most surprising pink! When it dried it became a little bit lighter but it was beautiful.
Dying Fabric
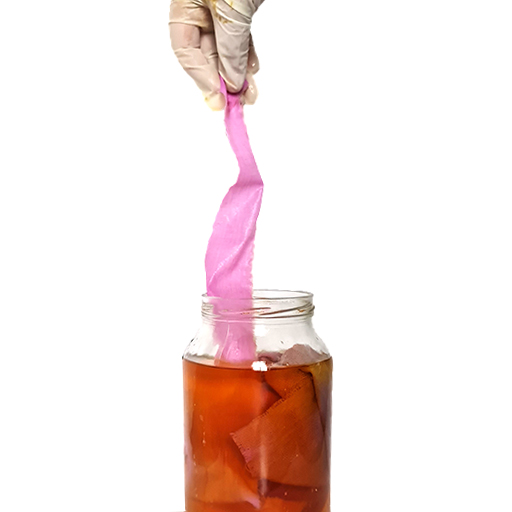
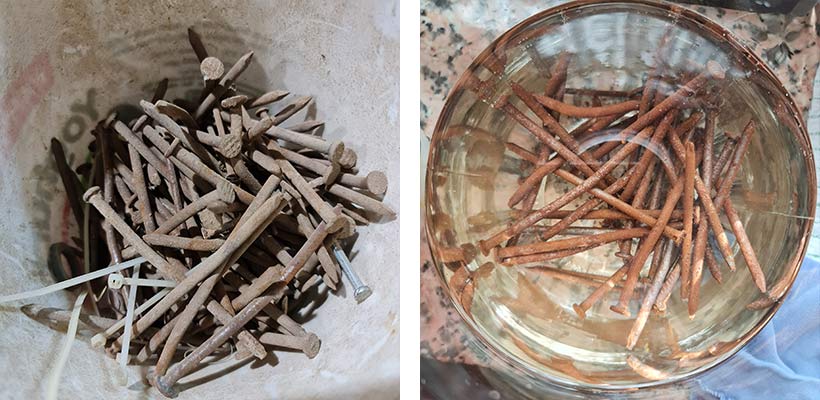
Now that I had the threads ready, I started thinking about the base. I decided to try and go for black. I looked for some tips and tutorials online and the process was very long. The fabric has to be dyed three or four times, with several hours on the stove each time. I decided to test a tiny piece of the cotton fabric I got to see how it holds the color. In all the recipes I found, iron is used as a modifier. Luckily, my dad keeps all sorts of stuff in the boiler room. I found a bucket full of rusty nails. What a treasure! I added a bunch into a jar with 1 litre water and 500 ml vinegar.
I decided to try two dyes: carob pods and hibiscus flowers. The carob pods give the darkest shades as I found online, and I chose the hibiscus to get a purplish undertone. I read that one usually gets an undertone close to the original dye bath color when trying to get black. I left a cotton piece on the edge of the pan with the hibiscus bath to try and get some form of ombré.
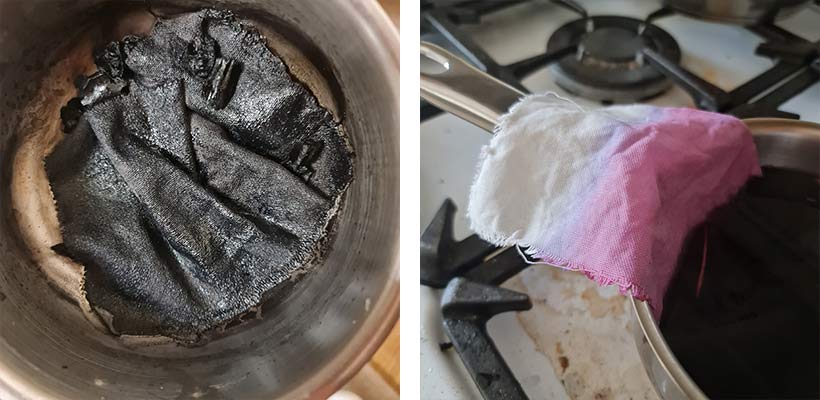
The carob gave a pitch black color! But when it dried it turned to a light grey. What a pity. I dyed the piece again and only got a slightly darker grey. The hibiscus turned grey at the edge that soaked the longest in the dye bath. I put some crocheted motifs my mom was trying out on both pieces to decide which will go better. I didn't like any of them. Neither did my family.
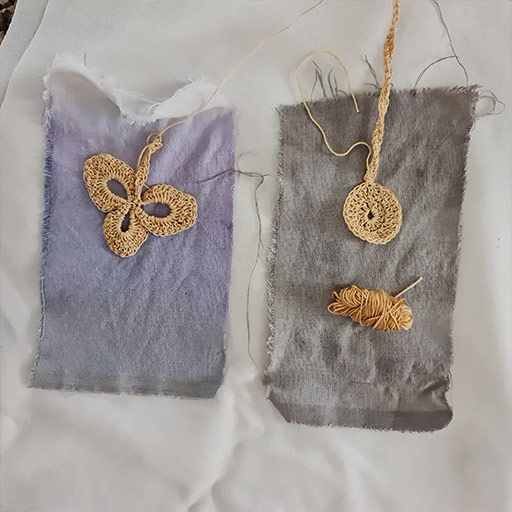
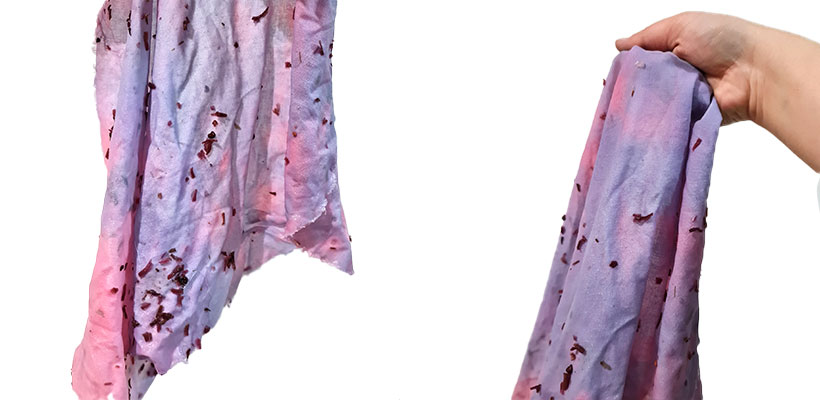
I made a final try to dye the fabric but this time I decided to go for a deep purplish color. I prepared a big hibiscus dye bath, cut 4 sleeves (to sew each two together), prepared the fibers, and threw them into the dye bath. I kept them boiling for one hour to get a color as deep as possible. When I first took them out I had high hopes as the color was a good enough dark pink, but when I washed them they started turning light pink and blue. And when they dried they turned a pale purple.
After all these failing experinments, I changed my mind and had this idea of making the whole sleeve with crochet. I had almost two weeks left for fabrication so I was worried about this decision, but I asked my mom and she said it could be done and would look nice.
Fabrication
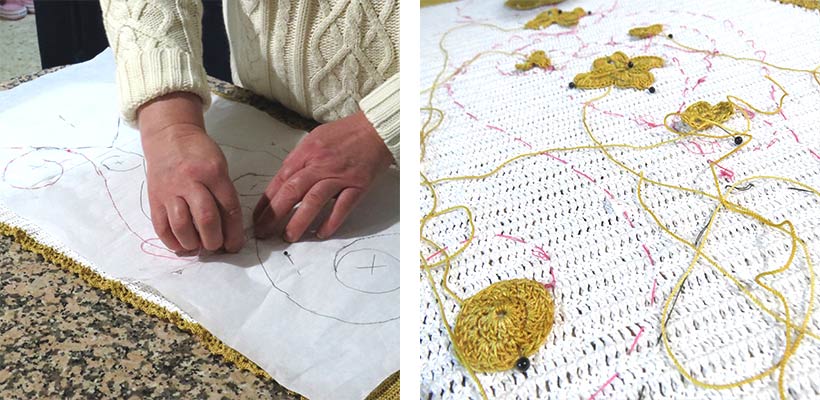
Mom crocheted the whole sleeve from white cotton threads and used the butter paper cutout as a guide for the size. She spent 3 days on each sleeve, then sent them to my aunt with dyed threads so she could add the golden border. Mom crocheted the motifs and sewed them on the sleeves and embroidered the curvy lines onto the sleeve directly. To get the exact curve, she traced the lines on two butter papers to make two copies of the laser cut pattern. Then she used a pink thread to trace the lines on the sleeve for guidance and removed it after she embroidered the pattern with dyed cotton threads.
Materials and Techniques Summary
Materials:
-
cotton crochet threads - 600 grams
-
onion skins
Techniques:
-
biochrome dyeing
-
crochet
Result
Today
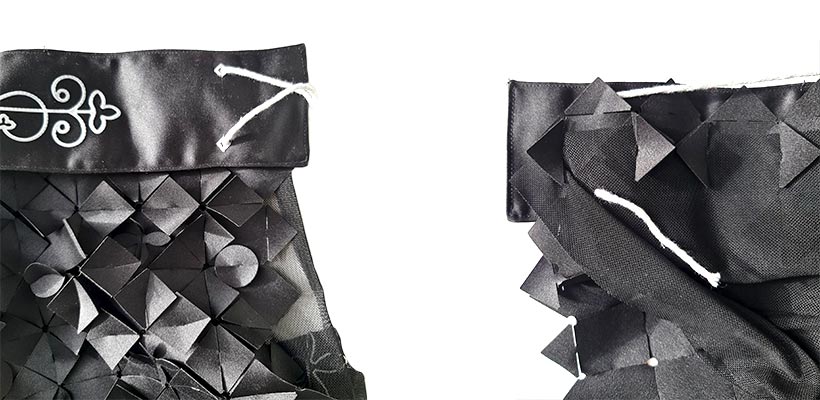
This sleeve is made of two layers, a layer of modular pieces that represent land and the loss of land, and a layer of tulle with 3D printed motifs that represent people carrying their values and going on through life.
Modular Explorations
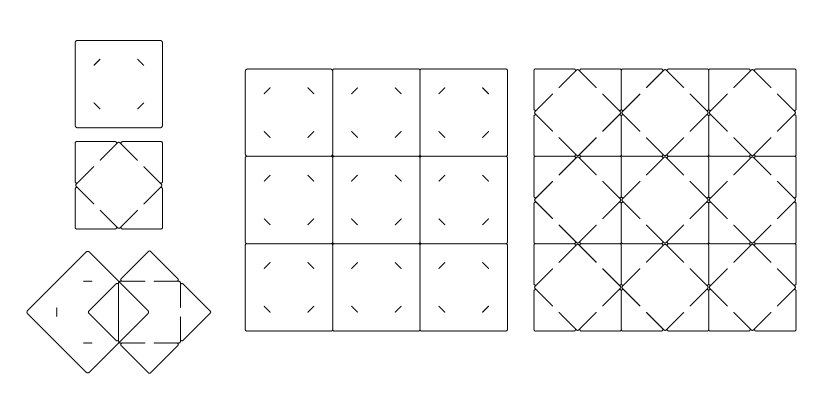
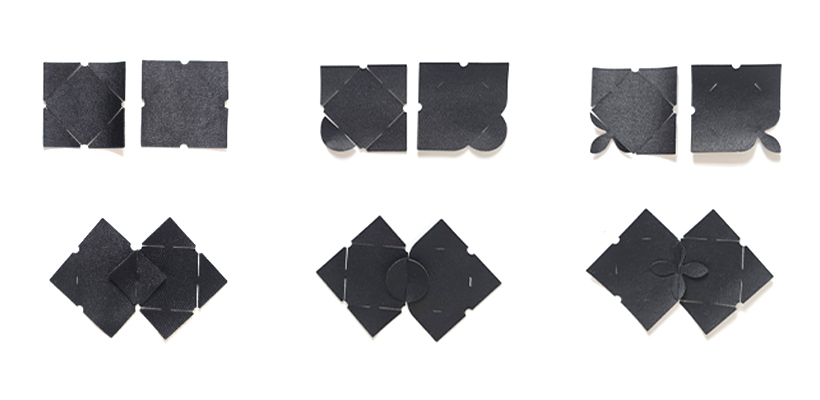
I started by drawing different motifs on Illustrator, adding some slits to make female pieces, and laser cutting them on felt. I didn't have any specific outcome in mind, I was just exploring different possibilities.
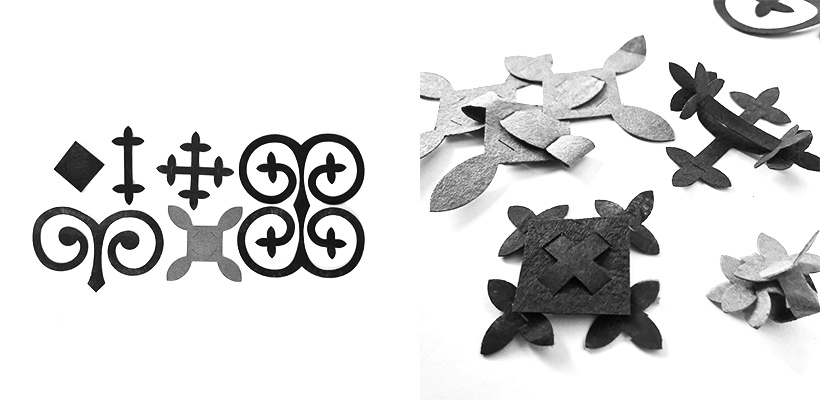
I felt this won't go anywhere unless I decide what I want. This is when I sat down and sketched the designs for the present and the past. Now I know I have to make square modules. So I made these simple squares. But I want them to fade out or scatter as they go down. I looked at the pieces put together from the front and the back and saw I could create smaller squares from the modules. These squares will represent lans and will fade away as we go down the sleeve, by inserting the male part from the other side and hiding it at the back.
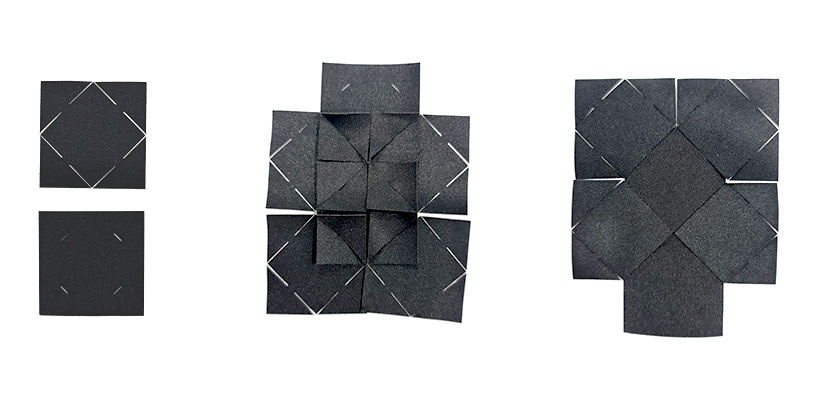
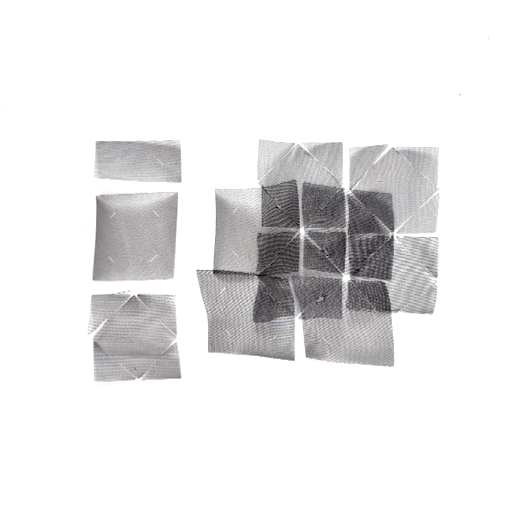
I tried a translucent fabric thinking the fading away effect will be clearer, but the opposite was true, since now I can't hide any parts behind parts. So I settled on the black fabric I got. I'm not sure what it is but when I bought it, I asked for a stiff and thick satin fabric and the shopkeeper gave me this. It works wonderfully with the laser cut and with modular design.
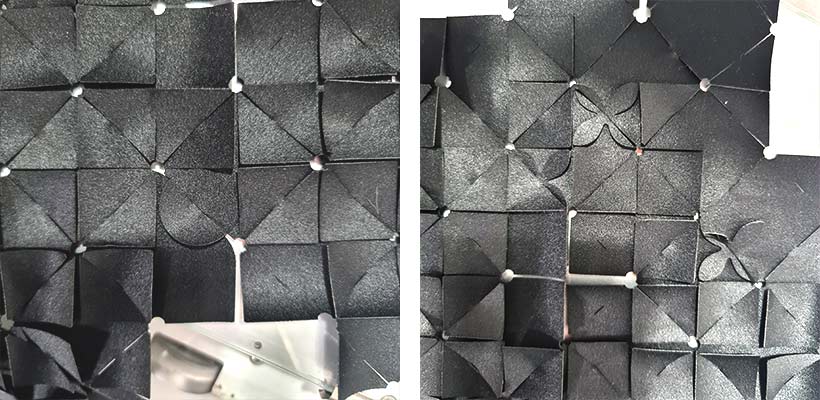
I assembled the first prototype for the sleeve with the tulle layer.
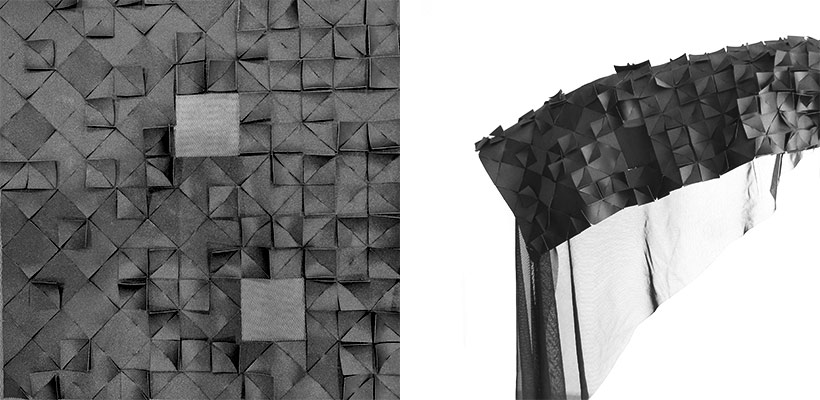
I think it is turning out beautiful. There were some points I thought could be better. The very straight edge doesn't give a feeling of scattering and loss, and the square modules are very square. I made more explorations.
This was the first trial.
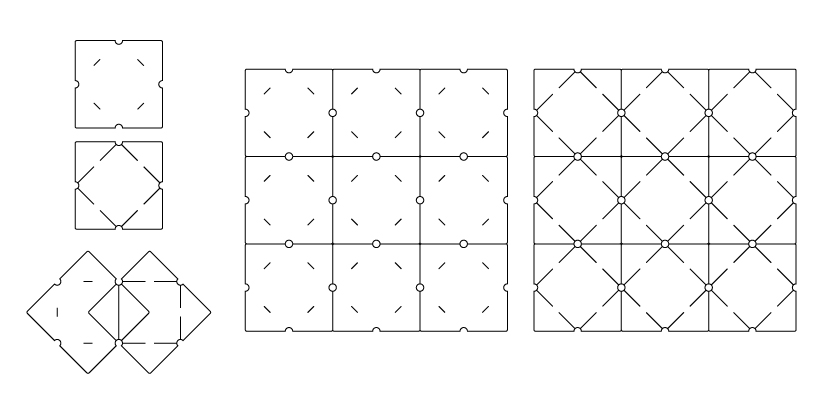
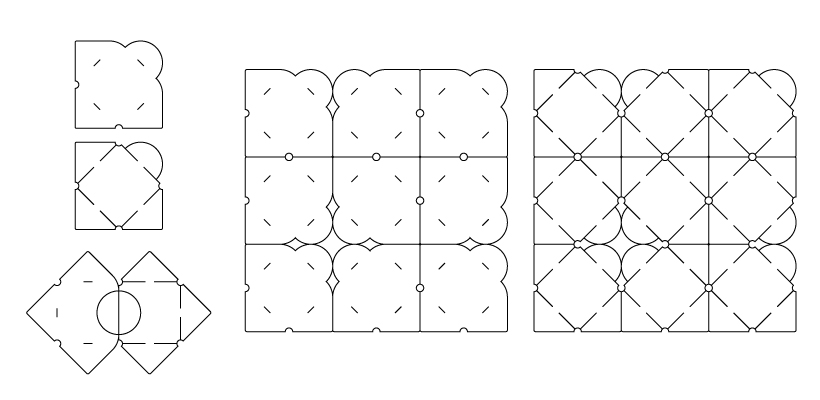
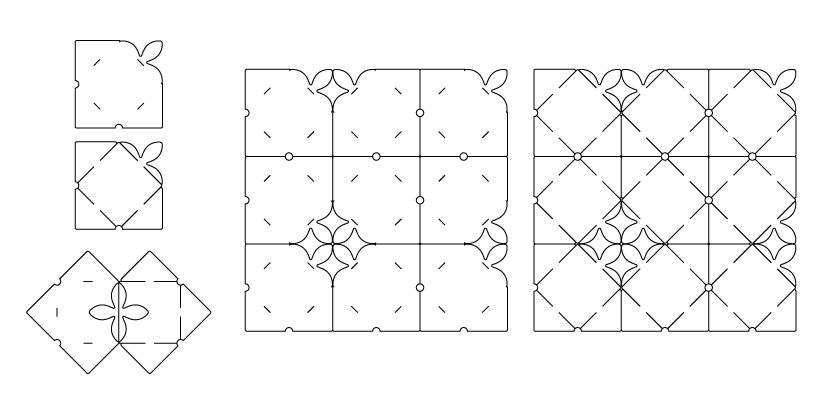
Claudia suggested we add little details inspired from the motifs to the modules. I added a trefoil (a fire symbol when assembled), a circle, and tiny circles. I love the little negative circle spaces.
I tried to tessellate the modules to reduce fabric waste as much as possible. At the end, there were tiny waste pieces but it is good enough. They looked satisfying in the laser machine.
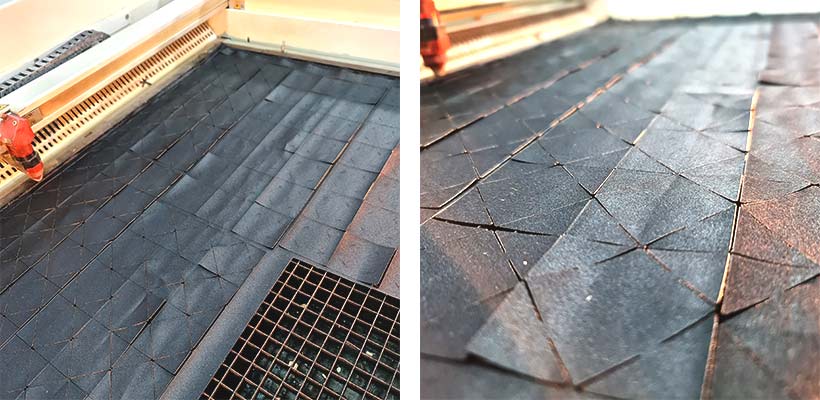
Stiff satin laser cut settings
Laser engraver machine: Trotect Speedy 400
Power 30 | Speed 1.5
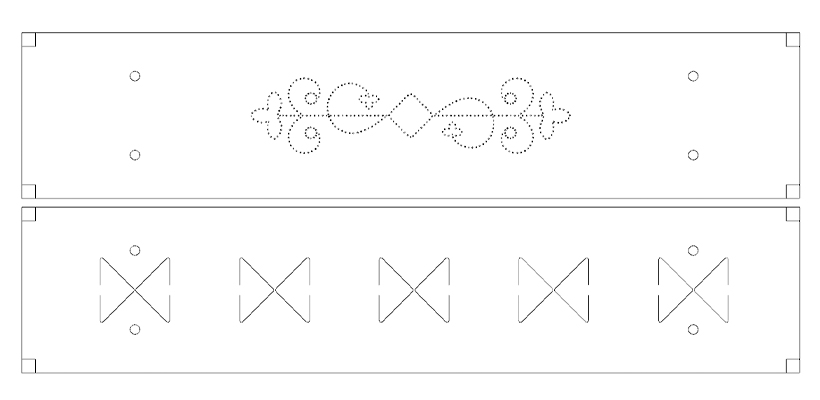
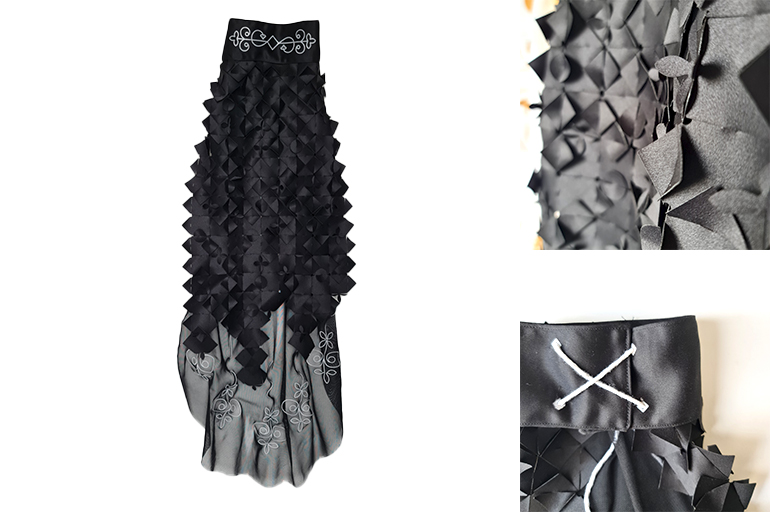
I designed a top rectangle piece to hold the top row of the modules and be adjustable to fit on the top of the arm. It is made of two layers: a layer with cuts to attach the module pieces and a layer with a 3D printed ornament. I printed the ornament using TPU filament with the sandwich technique: I printed two layers on the bed and put the fabric over them then printed another 4 layers. I had tiny holes cut on the fabric to help the top and bottom TPU layers stick together. I lined the holes on the side with TPU also. These holes will hold a lace that adjusts the width of the sleeve and secure it when it is worn. I tried to make the whole sleeve without sewing but I found it neater to sew the two layers of the top piece together.

3D Printing Motifs
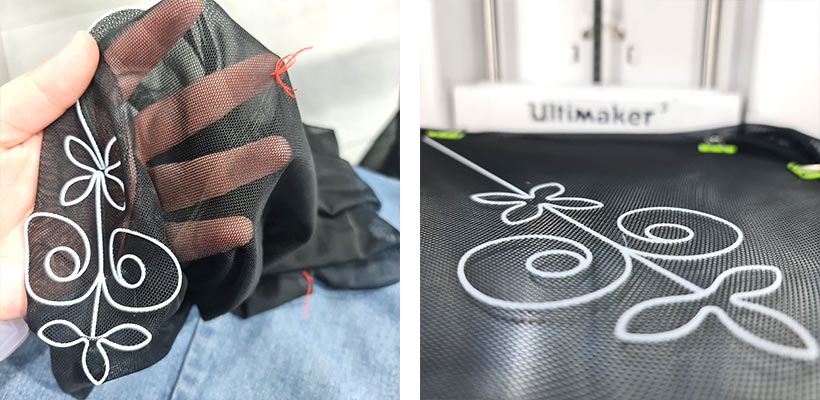
I spent hours and hours making different experiments of 3D printed motifs on tulle. After some while, I started setting my laptop by the Ultimaker 3 printer as I entered the lab. Everyone uses the S5 printers so I had this all for myself. I printed two layers on the bed then added a pause in the G-code so I can stretch the tulle fabric on the bed and secure it with little clamps. Then four more layers are printed.
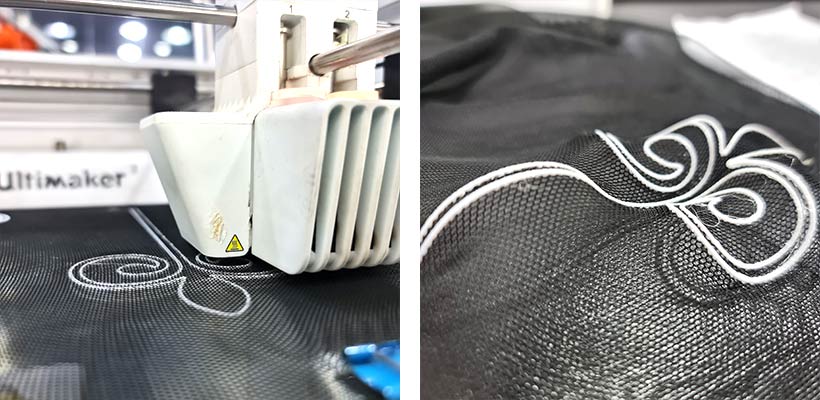
I tried printing with white TPU and yellow PLA. I thought the yellow will look more gold so I'll have all the motifs on all the sleeves in gold, but it was a silly yellow color.
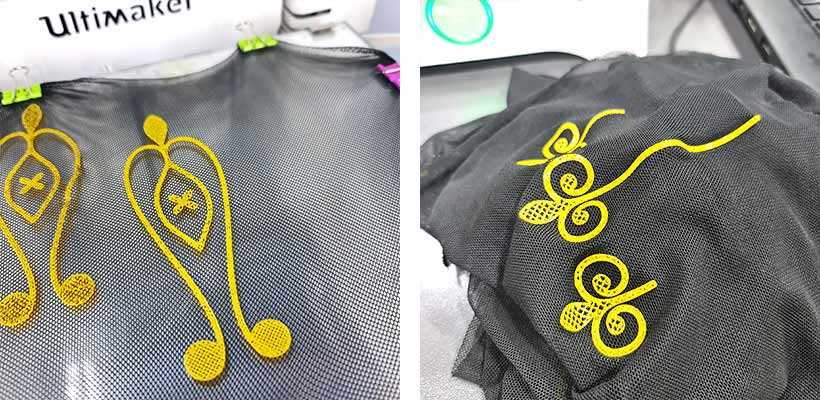
I was exploring how the print will deform the tulle to give interesting waves, so I tried different motif designs.
TPU 3D printing settings
Printer: Ultimaker 3
profile: 0.15mm
top/bottom thickness: 0.7 mm
infil density: 10% (but there wasn't really any space for infill)
print speed: 10 mm/s
enable prime blob
plate adhesion none
add a pause at layer 2
Fabrication
At last, I settled on the white TPU, added a fire motif inside the people's souls, and decided on making the prints with a single line. For the final piece, I laser cut the pattern of the sleeve to know excatly where the motifs should be printed on the tulle. I tied a little red thread at the start and end of each motif to help me place the fabric in the printer to print in the right place.
I started putting all the pieces together and realized I want to rotate the modules to make them rhomboids rather then squares to make the edges more frayed. I adjusted the top piece to fit the rotated modules and changed the ornament it had. I cut tens and tens of modules from the three designs: plain rhomboids, with circle corner, and with trefoil corner.
I attached the modules to the top piece and had little slits cut on the tulle fabric to attach it without sewing to the top piece as well. I used a recycled cotton yarn to secure the sleeves when worn.
And I spent hours assembling. First, I assembled all the trefoils and circles into pairs, decided on their approximate places, then assembled all the pieces.

Materials and Techniques Summary
Materials:
-
stiff satin fabric - 1 meter
-
2-way stretch tulle - 1 meter
-
TPU filament - 1.5 meters (10 grams)
Techniques:
-
laser cutting
-
3D printing
Result
Tomorrow
In this sleeve, I wanted to explore the meeting of digital fabrication and handcrafts to venture into postdigital crafts. In all the sleeves, I used a mix of digital fabrication and handcrafting but to varrying degrees. In the first sleeve, the digital fabrication was used only to make guides. In the second, the handcrafting part was limited to assembling the pieces. In this sleeve, I tried to make a balance between the two, in addition to exploring e-textiles.
The design shows the Circassian people venturing into the four corners of the world, but our shared values always connect us and light up in our souls.
I wasn't sure about the design or fabrication techniques of this sleeve until two weeks to the final presentation! It went through 2 very different ideas before settling into e-textiles: biomaterials and AR.
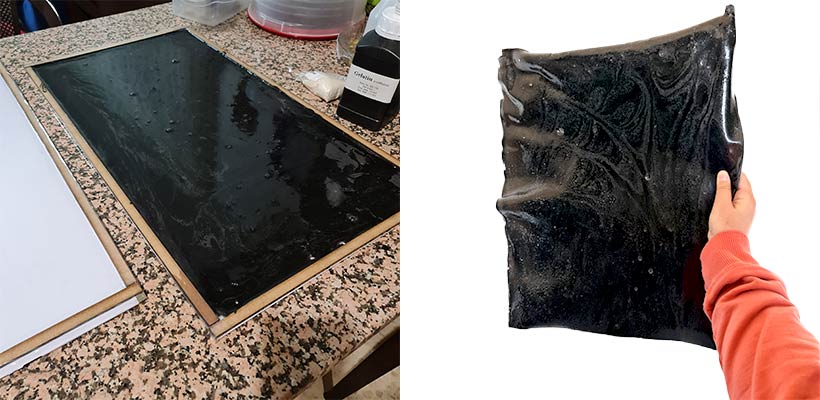
Biofabricated Materials
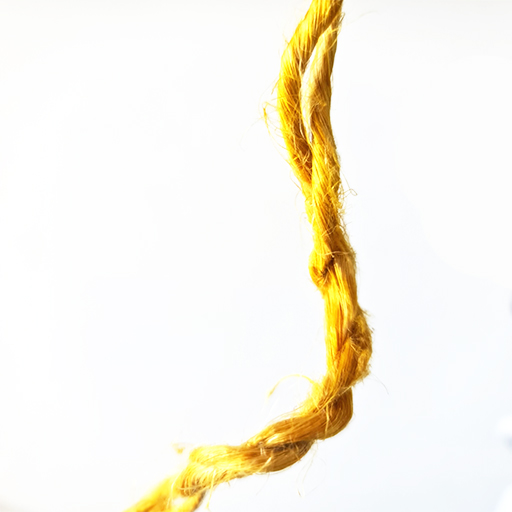
I thought I could express the postdigital crafts concept if I crafted the materials then used the digital fabrication to make the sleeve. The plan was to make a huge black bioplastics sheet and cut it into the shape of the sleeve using the laser cutter. For the ornament, I would dye flax thread with onion skins to give a golden hue and weave them into small laser cut holes on the sleeve.
The flax fibers have a funny adventure behind them. We had some at the lab from last year, probably Haneen brought them. No one knew what they were or from where to get them. We dyed some with onio skins and I fell in love with how they turned. They really looked like gold. So I took this and went downtown to ask around what is this materials and where can I buy more. I wanted to ask Haneen but thought I can have a little adventure and maybe discover something interesting on the way. I spent two hours walking around at night from one shop to the other, each shopkeeper telling me to ask at this shop or that. I went into alleys I've never been to and met a cool touristic guide with a group of tourists who tried his best to help but to no use.
Nobody knew what this material was or where to get it. Everyone kept referring me to craft shops and thread shops. Until one young kid who was working in a tiny herbs shop (probably with his father or uncle) saw it in my hand while I was asking around and his eyes lit up. He jumped in and told me I can find this at the shops that sell constrauction tools and materials. I went back home as it got late and showed it to my mom. She said it is called kutkut and used to wrap water pipes to keep them from spilling at the connections. The young kid was right!
Young eyes have the ability to look beyound the surface. All the old men thought it was some sort of rope despite me explaining it was more like hair. I even went into herbs shops asking about it and they kept referring me to wool and gift packaging shops. Only the young kid saw it for what it really was. They are flax fibers and can be found in construction materials shops.
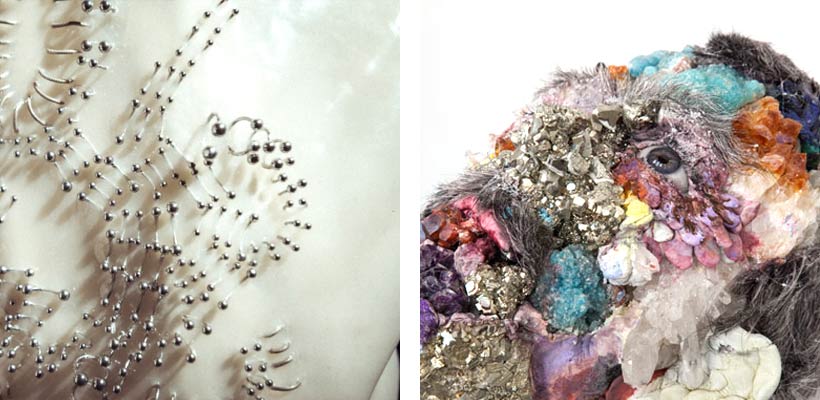
I wanted the sleeve to look something like Iris van Herpen's works (on the left) or David Altmejd's sculptures (right). A fusion of different materials of the future.
I had a discussion with several people about how tangible heritage fades with time (hence we use biomaterials to express it) but intangible heritage continues in people's souls. I went into debates of hoe intanginble heritage disappears in it doesn't have a tagnible counterpart, which is why it is important to preserve the tangible. Some expressed that using biomaterials to express culture is controversial as it doesn't "preserve" it. Anyway, amidst all this debate, Claudia pointed out that biomaterials are tricky when moving them across countries to different exhibitions. And that was actually the point that made me cross this idea. Because after all, my goal is to share the Circassian culture.
Community Workshop
When I started developing the concept of the project, I met with my friend and teacher Sam Rahma to discuss how we can use AI to explore the future of Circassians. He started explaining concepts of deep web and scratching the surface and data mining. I told him I'm having a difficulty finding resources about the Circassian motifs and he said we have to gather a lot of data for the AI so we may have to use AI to search the deep web but we have to validate and guide the search to get the data we want. I was excited about this but the idea started to seem like a lot of work with a lot of uncertanity.
Involving the community in the design process seemed more sensible than using AI. And so came the workshop.
I contacted my friend Yasmin HajHasan who volunteers as a part of the cultural committee at Al Jeel Club to arrange for a workshop with the Circassian community about the meaning of motifs. This was in the last phase of the project after I gathered all the data I could find and developed the motifs library. We arranged everything in a week and it was a beautiful day.
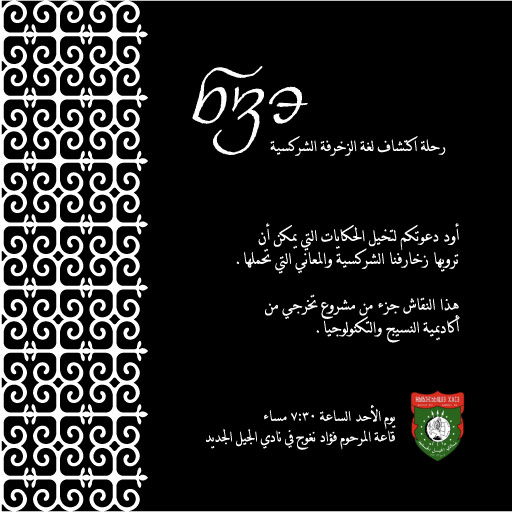
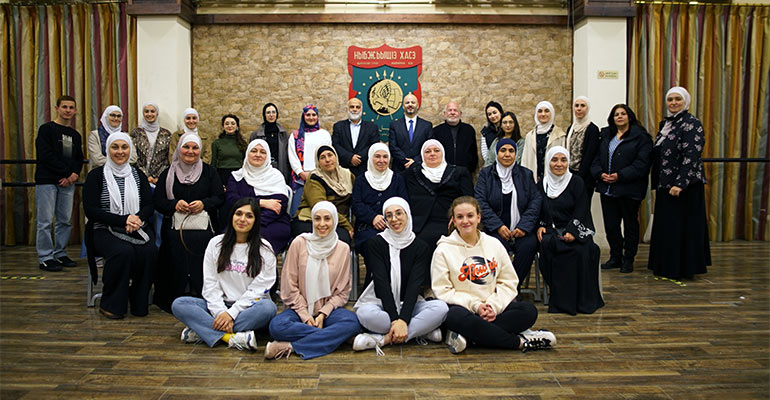
I put an add about the workshop on my Instagram and Facebook pages and invited my friends and family and some artists I only knew on Instagram but always wanted to meet. Since we planned everything in a short time, everybody was skeptic and expecting few people to come. My dad kept telling me to personally call everyone I want present at the workshop and not depend on messages. Yasmin and the committe were expecting only 10-12 people to come. But to everyone's surprise more than 30 people came. I was thrilled to see most of the artists I contacted via Instagram! Even my grandma came, which was the most beautiful surprise! When she entered the room, everyone stood up as a sign of respect and they gave her a seat at the center of the room, this is from our society rules (Khabza, in Circassian). We kept adding chairs and expanding the circle as people came in. Aunt Tamara made us Haliva (Circassian savoury pastry we only get to have in special occasions for some reason).
The workshop took place on March 5, 2023. I started by explaining what is Fabricademy and telling them about my final project. I made sure to introduce everyone to the concept of "open source" and that everything we produce here will be a part of a digital library accessible by anyone, anywhere. I contacted my cousin and talented cinematographer Shamel Beno to capture the event. I had already contacted him before about shooting the final video. He was very excited about the project!
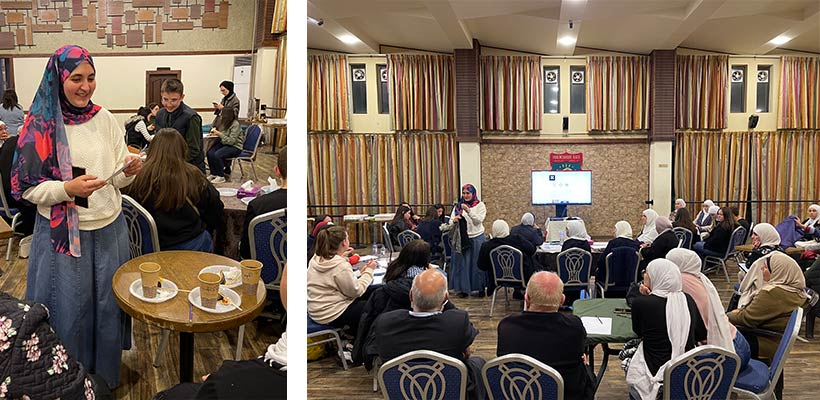
After discussing the motif meanings, I gave everyone papers and pencils to try and sketch a design that represents the Circassian future using the 6 main motifs and their varitations or any other motifs they come up with. Everybody from all ages and backgrounds participated! I asked my cousin Sinareet to explain her concept in front of everyone to encourage them to share their drawings as well, and we had several people telling the story of their designs. At the end, I gathered the designs and digitalized most of them.
I had an idea of turning the designs into 3D models and exploring some AR. So the last sleeve would be a blank sleeve with a QR code that lets the spectator see different designs from the community in augmented reality. Claudia said this would be running away from actually designing the final sleeve. She had a point. Also, after hours and hours of research, I found that free AR options had limited capabilities and it was very expensive to achieve what I had in mind. The community designs will be a part of the digital library and I have to come up with a design for the sleeve of tomorrow. In two weeks.
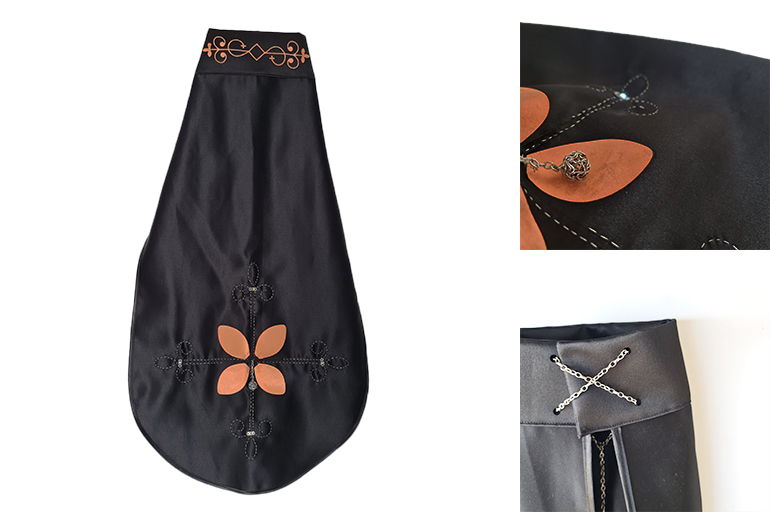
E-textiles
Using e-textiles was actually the first idea I had for the sleeve but both Claudia and I were hesitant about it as we didn't want the sleeve to look like a "christmas tree". Using leds should be for a reason. After eliminating biomaterials and AR, we revisited e-textiles. I thought about how to utilize the leds in the design. I discovered that when designing an e-textile, we should think about two points:
- Designing the loads. A load is the part that uses the energy in the ciruit to perform a function, like LEDs, motors, and speakers. You shouldn't put lights around "like a christmas tree" but there should be a reason and a story for using each load.
- Designing the actuators. The way you control the circuit's components should make sense and be a part of the story.
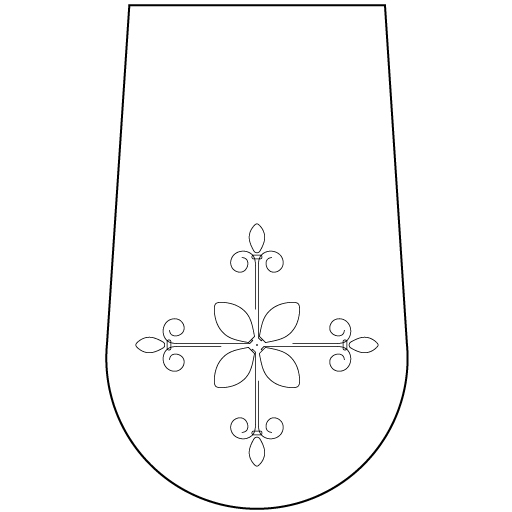
I thought about using LEDs to indicate the light of hope in poeple's souls. And I chose a tilt switch to make the sleeve light up as it moves. I started by cutting motifs from copper fabric and sticking it to the black fabric using double face tape just to see how it will look. I didn't like the people motifs in the copper fabric and it was hard to control the swirls when gluing, so I switched this part to conductive thread.

I drew the design on Illustrator and cut the sleeve from the same black fabric I still had using the laser cutter. I scored the design onto the fabric to guide me where to assemble the circuit's parts. I also cut the copper fabric using the laser engraver with the same settings.
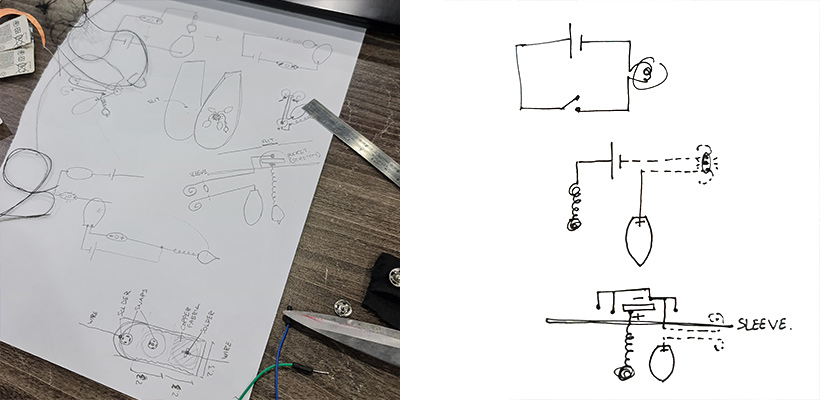
When I started assembling the circuit, I had some trouble thinking what parts to connect with what. I drew some sketches to explore how to connect the different parts and the switch. A tiny sketch of a simple circuit helped organize my thoughts, especially that I was freaking out about finishing on time.
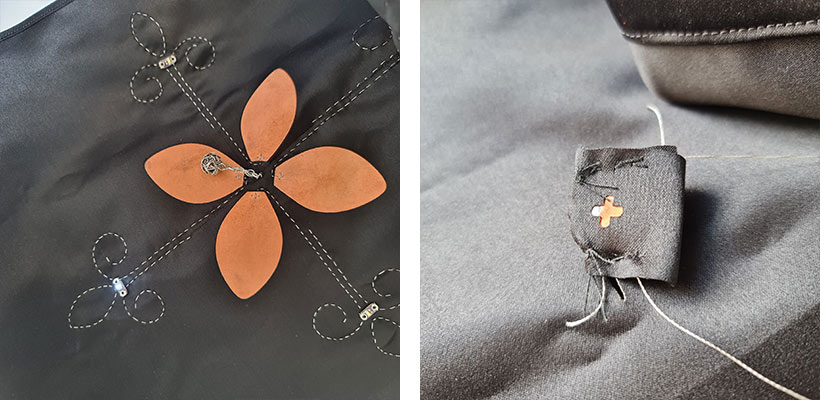
I glued all the copper fabric pieces to the sleeve and sewed the ciruit paths with silver thread by hand. Claudia was impressed by my sewing skills and called Emma to show her. I felt proud and thrilled when they expressed how neat my sewing is. Claudia said to Emma, "I told you we will witness a miracle this week!"
I bought different conductive chains and pendants to test and see what looks better on the sleeve. I attached a pendant to a chain using a little conductive hoop and added some conductive thread just to be sure, then attached this to the sleeve using the conductive thread. I kept a multimeter close by and kept checking the connectivity. I had lots of challenges:
- The multimeter gave me that the connectivity is too weak between the copper petal and LED, I freaked out but Claudia told me to test it and the light worked well.
- Second, the pendant on the chain sometimes touched the negative threads which resulted in a short circuit. I brainstormed ideas to solve this with Claudia, Murad, and a kind young man who is taking Fabacademy. I decided to shorten the negative threads so they are outside the reach of the pendant by cutting a circle from some scrap paper with its radius a little longer than the chain and using it as a guide to where to stop the thread.
- The battery was disconnecting a lot and the young man from Fabacademy tried to help me and measured the voltage in different points. At last I removed the snaps (press studs) and used conductive fabric instead to increase the surface area. It worked.
When I finished attaching the circuit, I made a tiny pounch for the battery and marked the plus side so I can change it easily.
Materials and Techniques Summary
Materials:
-
stiff satin fabric - 1 meter
-
silver conductive thread
-
copper fabric
-
Lilypad leds - 8 lights
Techniques:
-
laser cutting
-
e-textiles (assembled and embroidered by hand)
-
sewing
Result
Digital Library
The main challenge I faced in the making of this project was the lack of documentation and resources about Circassian motifs and their meanings. It was important I document my findings and explorations to share with the Circassian community and all the people around the world. I decided to make a little website. I tried and compared different website builders on the web including, GoDaddy, Wordpress, Squarespace, Weebly, and Site123. As a designer I was struggling with the templates and limited editing capabilities I had in all these. At last, I found Webflow. It is a lot harder to learn and use than the rest, but it gives lots of design flexibility. And its free features are much better than the rest (I am planning to upgrade to a paid plan but when I'm sure about the design and best form and webhost).

Check the website here
Fabrication files
-
File: Present top and tulle ↩
-
File: Modular rhomboid pieces ↩
-
File: 3D people motif ↩