03. Circular Open Source Fashion
INSPIRATIONAL RECYCLING PROJECT
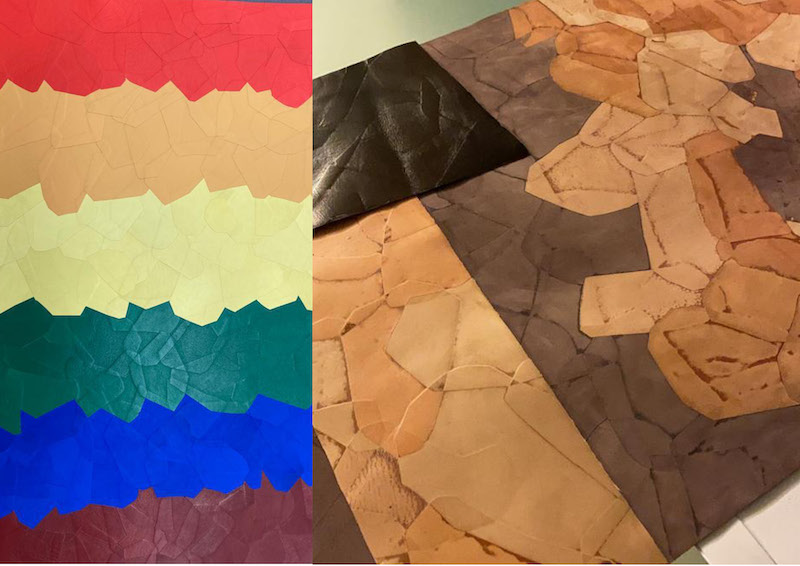
This is the recycling project of a dear colleague from Florence. He is Filippo Fanini and for some years he has been working on leather recycling. From leather scraps it creates patchwork that can be reused for a fashion product. For my belt I was inspired by this type of recycling method. My modules can be recovered from scrap items. My module is designed to create an interlocking of elements that can recreate large parts of fabric. In this case I developed the elements horizontally, to create my belt, but in the future I would like to be able to develop this module also in height, so as to be able to obtain from these joints even meters of "fabric" to be used for accessories or clothing.
At the following Link you will find the new collection of backpacks that Filippo Fanini has created with leather scraps.
Here below the video of this wonderful fashion recycling initiative
EDMOS - Discovering from Filippo Fanini on Vimeo.
His concept for the Edmos collection: My aim was to study the construction of the body and the accessory together, to create spacious pieces, that would be sculpted as close to the body as possible. This is what contemporary lifestyle is about - dynamism, and in any road or vehicle you drive you need your backpack to be comfortable.’ Sharp and aerodynamic, as defined by the designer himself , this capsule is ’capturing the beauty of travelling’: exploring the elements of nature, its solitary, roaming spirit, surrealistic phenomenons and landscapes, which are translated in the palette of the season: copper, icy silver and tin, shiny petrol and metallic turquoise.
INSPIRATION & MY FINAL MODULAR
My leather belt
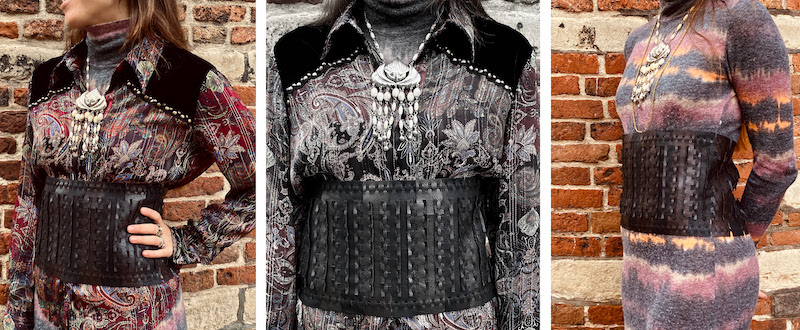
Thanks for the pic Linette
In this week I learned how I can create a modular elements, structures and connections, it was very interesting, I think that this project it was a challenge for me and I'm so happy because I created something that works and that is in my style.
My belt is also on the Browser Circular Fashion , click on this Link
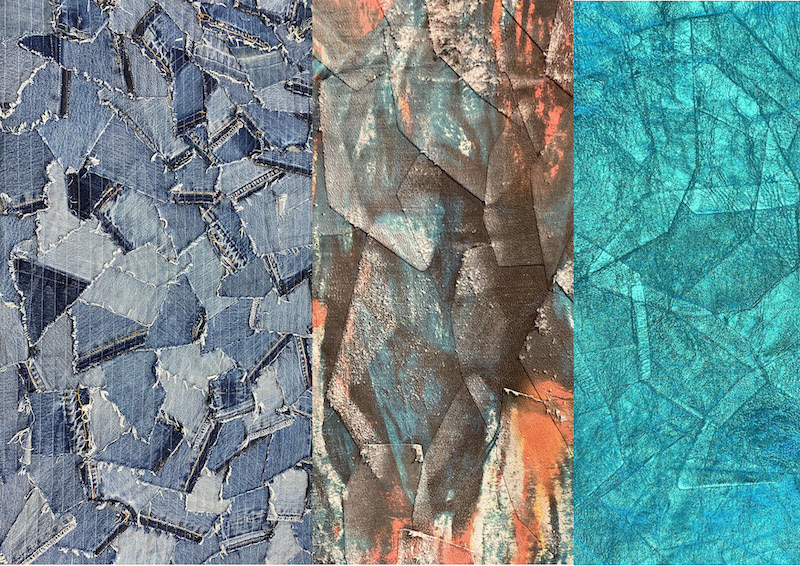
Here below you can find the starting ispiration. I have always been attracted to the world of leather, expecially about the patchwork and weaves that we can create. One of my favorite stylist is Alexander McQueen, and in this week my goals it was create a belt / corset in that style with a modular element.
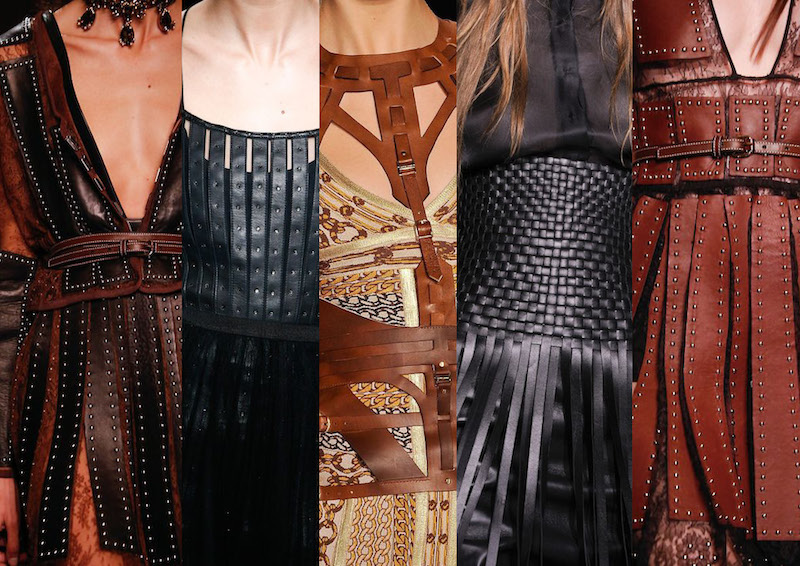
Pinterest Photo, you can find under Credits all the artist
1 step : TRY WITH PAPER
I changed my idea a lot of times... At first I wanted to create a braid moduls and Cecilia advised me to develop a module like this. But for the short time and another idea I thought of something different.
BRAID MODULS
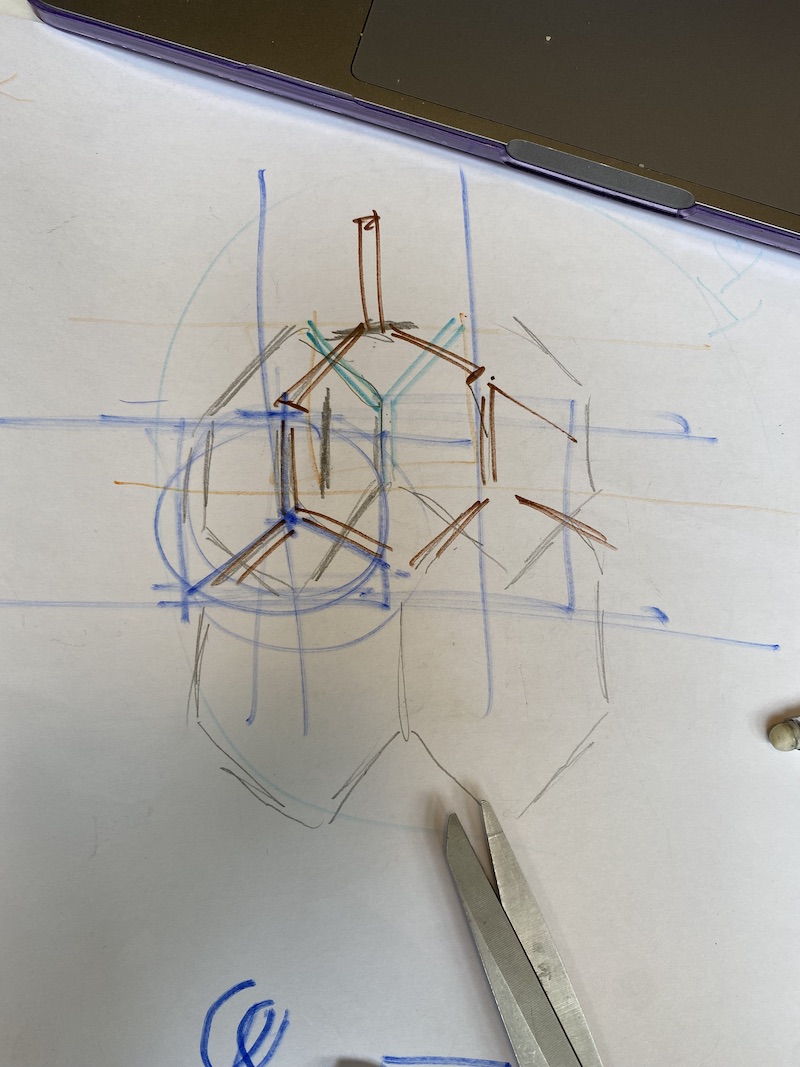
MY FINAL MODULS IN PAPER
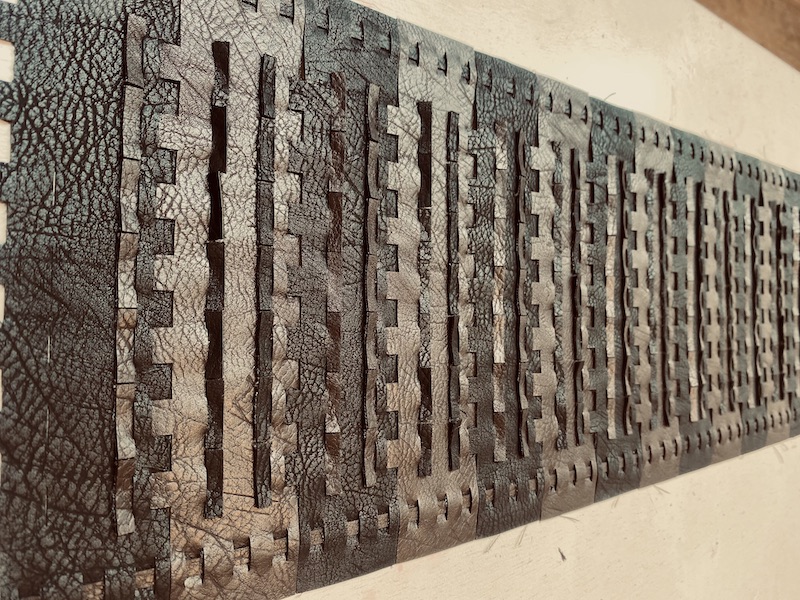
I started to develop a different and final moduls, here below my work-in-progress paper. I took inspiration from geometric ionterloks

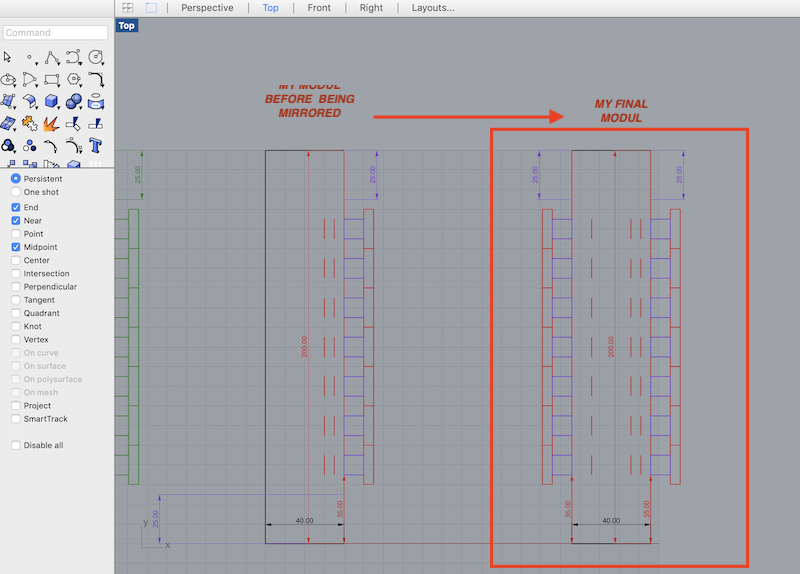
2 step : Create your moduls on RHYNO
After testing my form on paper I can create it on Rhyno, creating the final for cutting with precise measurements.
HOW TO CREATE ON RHYNO Here below all my steps:
- 1 Create your form, in my case is a rectangle 4,5 cm x 25cm
- 2 If you want to move that one, write on command MOVE and select the poit that you want to move, the same if you want to ROTATE
- 3 If you want to create a line you have to write LINE in command, and put all your measurment
- 4 If you want to measure a line write in command DIMALIGN
- 5 My right side of the form is ready, now I just need to MIRROR this part and create the left side, so my form will be ready
- 6 When your modul is ready you have to follow these passage below, so you can create the final file for LightBurn:
- 7 Ungroup
- 8 Explode
- 9 Seldup, with this command you can delete all the duplicate lines
- 10 Join
- 11 Ungroup
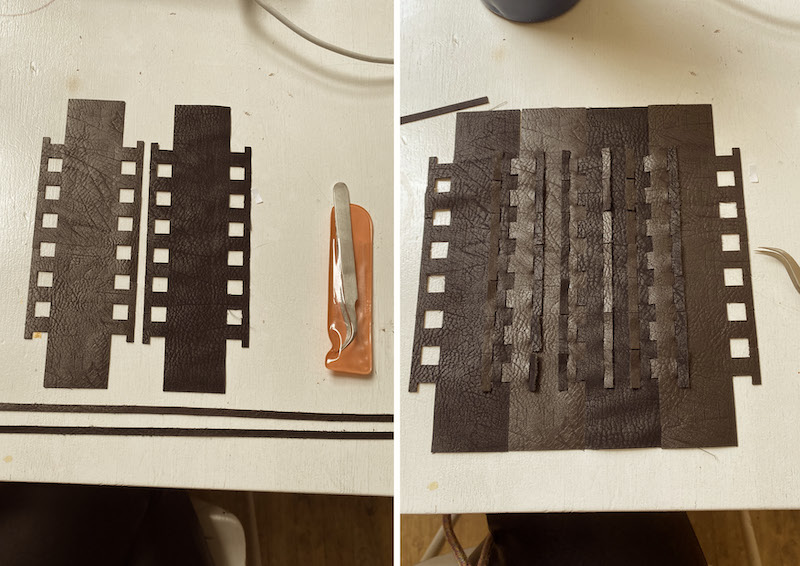
- It's important to put in different colors the different parts to cut. In my case, I need 2 different colors, one for the outline of my modular element and another one for the cutof the interlock inside my modul. You can see below my different colors: GREEN for the outline and pink for the cut inside the modul.
- Now you have to create a grid with all the pieces that you want to cut following the passages:
- Write in command ARRAY and write how many moduls you want to cut
- When your grid is ready you can export as a DXF
It is very important for laser cutting that all the pieces FIT TOGETHER IN THE PLACEMENT.So the laser cut will only pass 1 time and cut multiple pieces together.
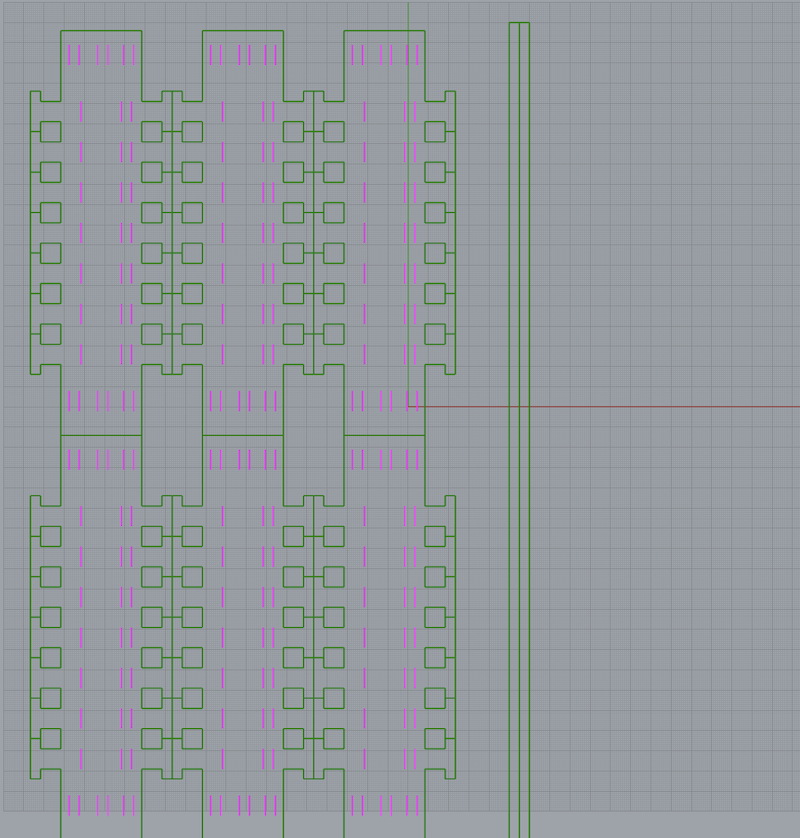
The last one passage that you have to do is EXPORT your file as a DXF. Here below you can find my DXF file :)
3 step : LIGHT BURN & LASER CUT
- Import your file on Light burn
- The first command EDIT —> DELETE ALL DUPLICATES
- Organize your placement as you want, try to optimize the spaces. My placement was horizongtal because my leather's measurment it was 1.30 x 0,50 mts
- Check the nozzle of the laser machine from your surfaces and check also the thickness of fabric in different place, the fabric must be flat
- Make a test before cut all your pieces, I made a test for 3 squares, with difference SPEED and POWER, here below the different results.
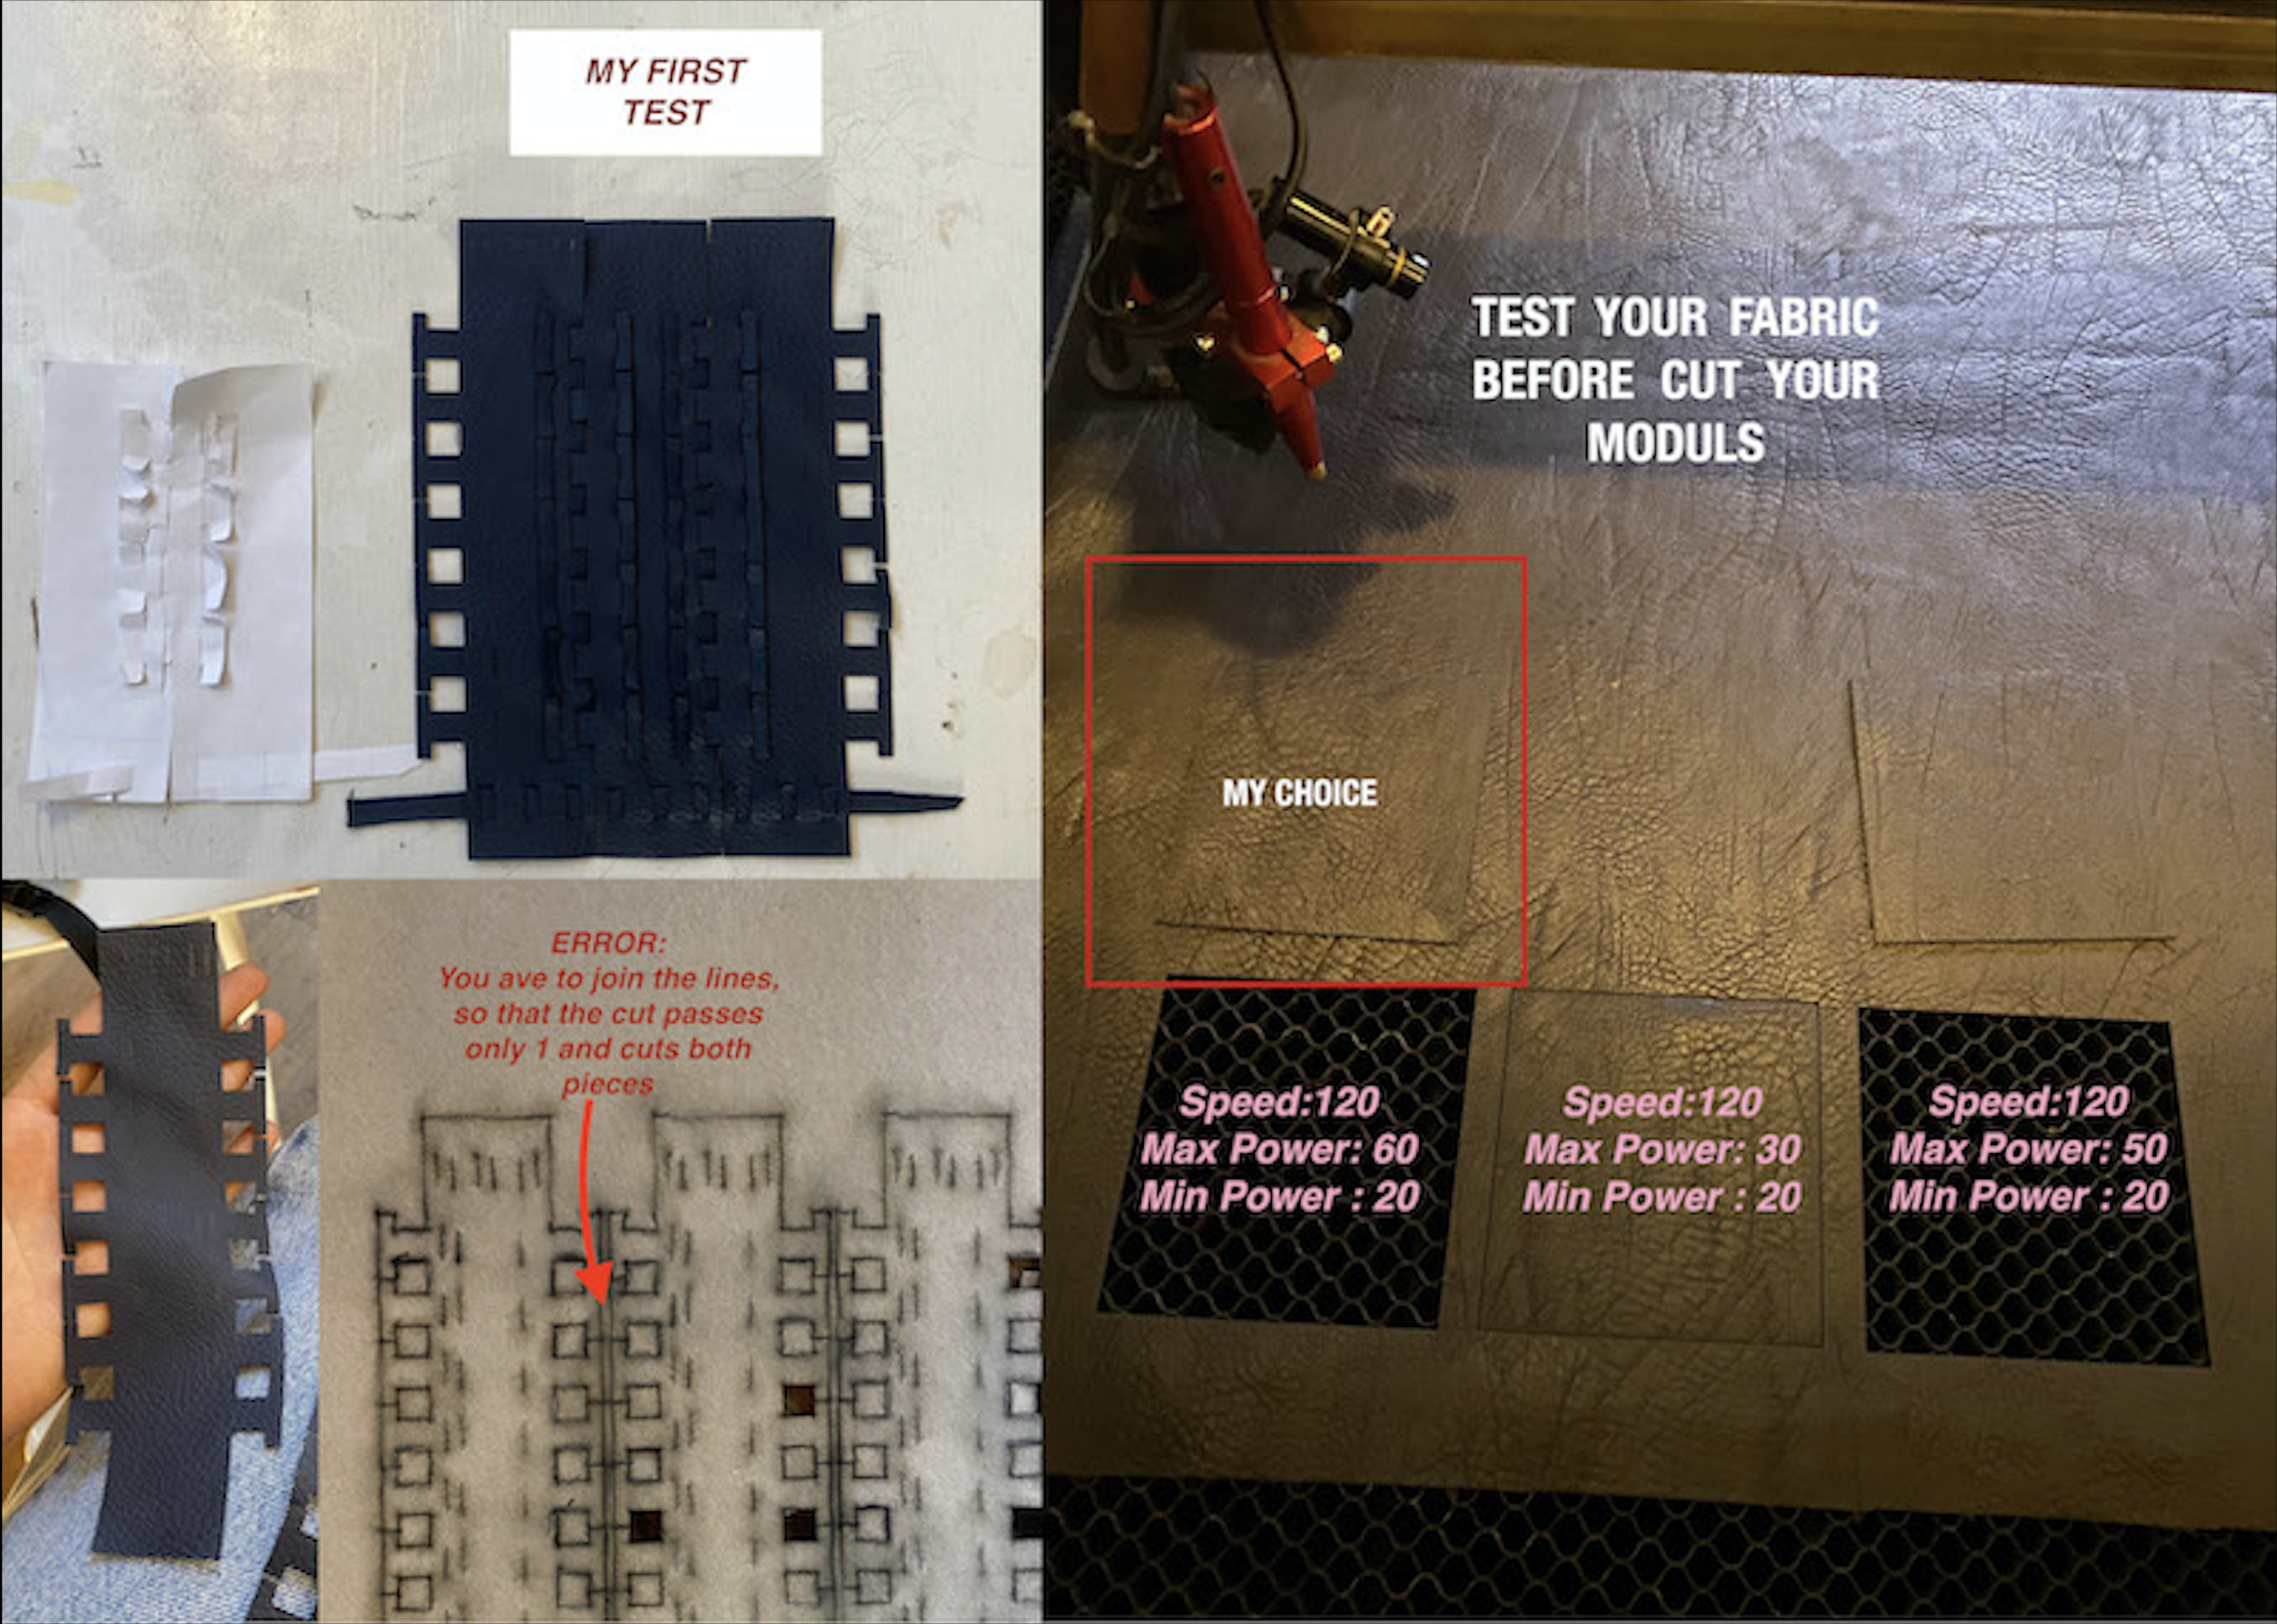
- Check your FRAME and start with the squares test
- After your test you can go ahead with your moduls
- Check your placement frame again and if it is right you can press START
I hope everything's all right!!!!!
GOOD JOB MY DEAR FRIEND LASER MACHINE, All the pieces came out well and the leather had no problems when cutting. For your information below you will find my parameters:
- SPEED : 120.00
- MAX POWER : 60.00
- MIN POWER : 20.00
- NUMBER of PASSES: 1
4 step : How I assembled my pieces
In the video below you will find how I assemble my module pieces. I wanted to cut two different types of leather colors, so as to create a contrast that I liked.
Tools
- Rhino3D : in this software you can create your modular element
- Illustrator : you can create your modul also in Illustrator
- Laser machine : with this machine you can cut all your elements for the interlocking
Credits
- Photo from Pinterest : Dior - Alexander McQueen - Valentino
- Filippo Fanini : website