6. BioFabricating Materials
Research
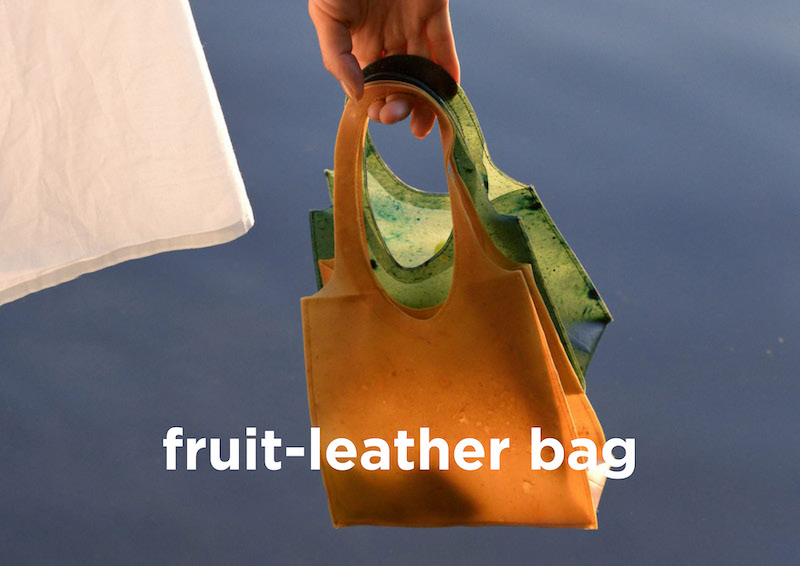
At this Link you can find the Dezeen article related to this amazing collection of fruit leather bag
TAPIOCA BASE
Tapioca is a food made by grinding the tubers of bitter cassava, a tropical plant widespread in South America, Africa, and Asia, also known as yucca or cassava. The first experiment we did, was to create the tapioca base, it was interesting to see how this material is moldable.
TOOLS
- Scale
- Moulds
- Whisk
- Pot
- Stove
- Spoons
Here below you can find all the ingredients to be used :
- 250 ML water
- 25 gr tapioca
- 10 gr glycerine
- 10 ml vinegar
Put some water in the pot and heat it slightly. Add the vinegar and glycerin. Add some tapioca and start swirling with a whisk so that it all gets absorbed. Turn on the stove and set the temperature to 3, don't let the water boil. when the mixture starts to get a little more usual start swirling with the whisk until the consistency is like the one in the picture below.
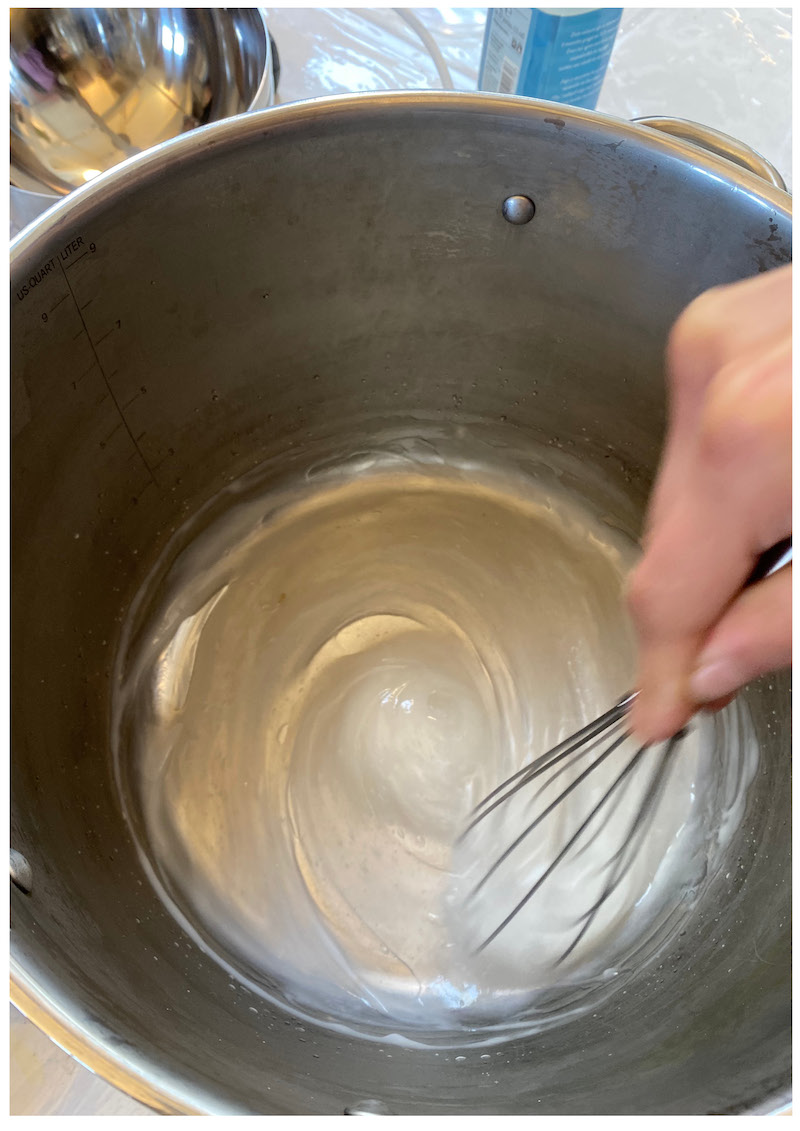
When your mixture is ready quickly pour it into your molds, it hardens quickly. I poured the tapioca base into a petridish and texture to see how well the bioplastic took shape. Then you can put your samples in a dehydrator overnight and the next day you will find a clear, plasticized film.

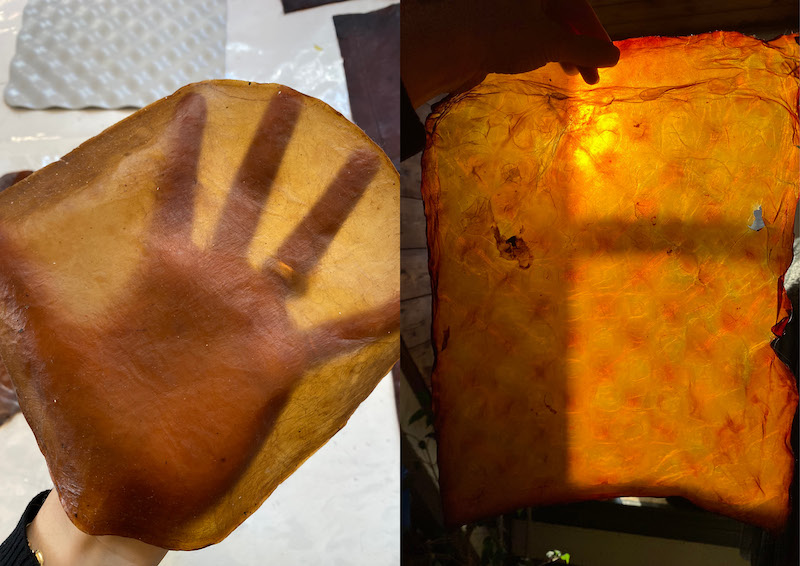
MANGO BIOLEATHER WITH TAPIOCA
In our mango experiment, we divided into two groups.
My classmate Ju and I left the peels in the mango mixture, while Linette decided to remove the peels from the mango. Thus we got two different sizes of mangoes: without peels : 176 g with peel : 350 gr
TOOLS
- Scale
- Moulds
- Whisk
- Pot
- Stove
- Spoons
- Mixer
- Spatula
Below is the recipe that Ju, Linette and I followed * 526 gr of mango * 5 gr of salt * 20 gr of vinegar * 25 gr of tapioca
GOOD TO KNOW: 1 un lemon (as a preservative e stabilizer) A bit of Cinnamon to avoid molding DO NOT boil water
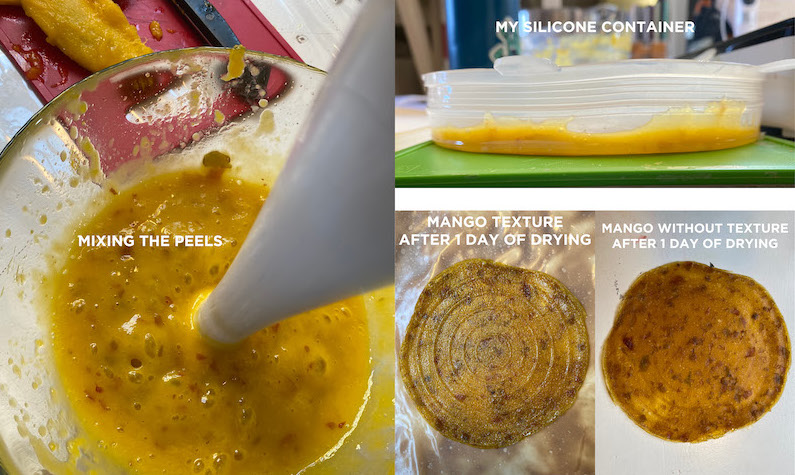
When all your ingredients are inside the pot, let it cook a little bit and then you can whisk the mixture to get slightly smaller peels inside. Now you can decide where to pour your mixture what texture and thickness to give it. I decided to put it in this silicone container with a circular texture to see when the contents would take texture.
When the mixture is in your form you can put everything in the oven for 12 hours at 40 degrees, the oven should always be ventilated.
my mango leather after 12 hours in the oven:
BIO FOAM
I always wanted to learn how to make foam, I find it such an interesting and sensory material, moldable according to the pressure of your touch, it was fun.
TOOLS
- Scale
- Moulds
- Whisk
- Pot
- Stove
- Spoons
- Soap
- Mixer
Below are the ingredients to make a good bio foam, consider that I made the amounts doubled to get more material, so if you want less you will have to halve my measurements.
- 96 gr Gelatine
- 16 gr Glycerine
- 240 ml Water
- table spoon SOAP
- tbd pigment
As a first step, slightly heat your water in the pot.
- When it is slightly warm add youe plasticiser, the Glycerine will bond with the Gelatine, the Polymeer
- Add the Gelatine, your Polymeer
- Mix gently te ingredients until they form a smooth mix.
- Add a table spoon of dishwashing soap to the mixture
- Boil for 15/20 minutes, turn constantly because as the water heats up the risk of your soap sticking to the pan is high. Turn with the whisk energetically.
- In the meantime you can think about your surfaces and molds to be filled.
- After 20 minutes your mixture is ready, I put it in the mixer, this way you get the best mixture, because with the mixer air enters the liquid and micro bubbles are created which are perfect for the final result
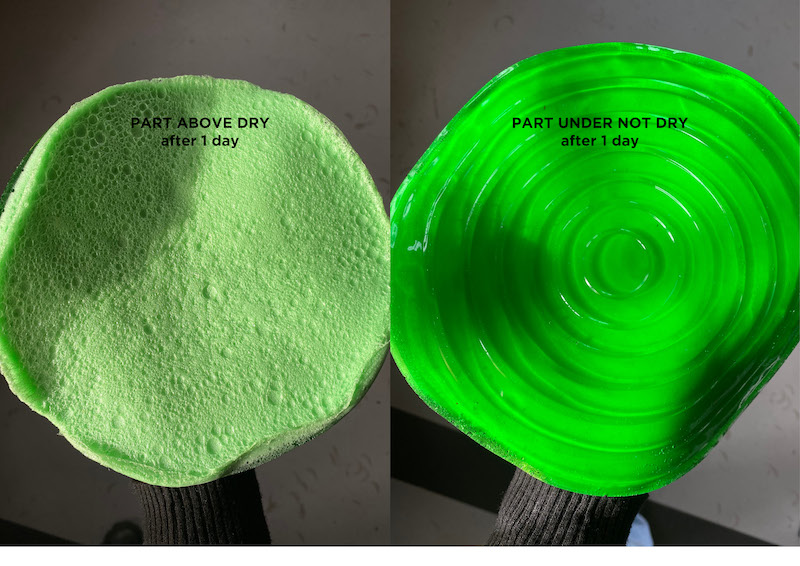
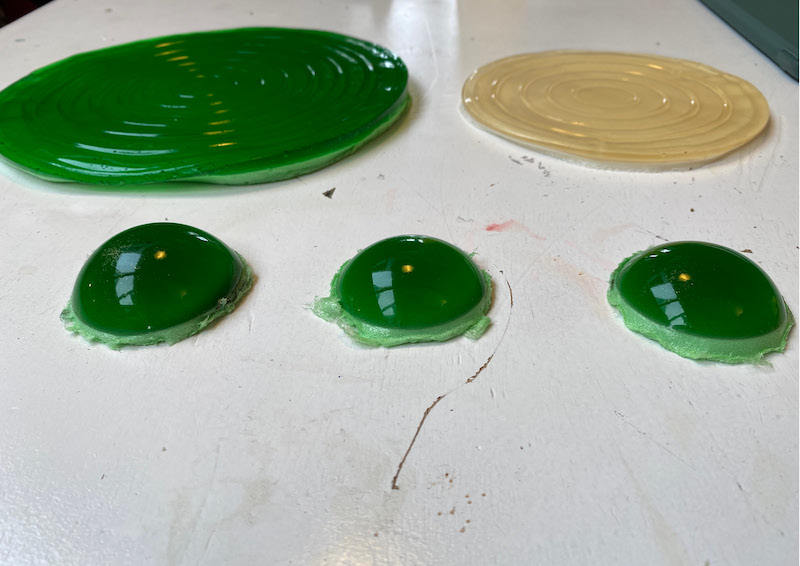
- if you want to color your compound this is the perfect time. You can add food colors, pigments, whatever you like. I added green food coloring with even a little yellow to get this shade of green
- Now you can fill your surfaces
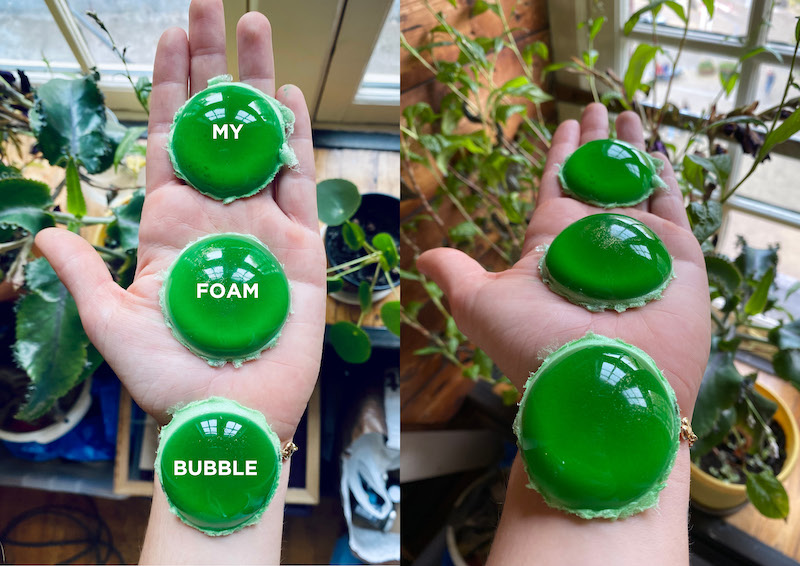
- I used the same container I used for the mango, silicone container. Also I wanted to try putting my bio foam in plastic balls.
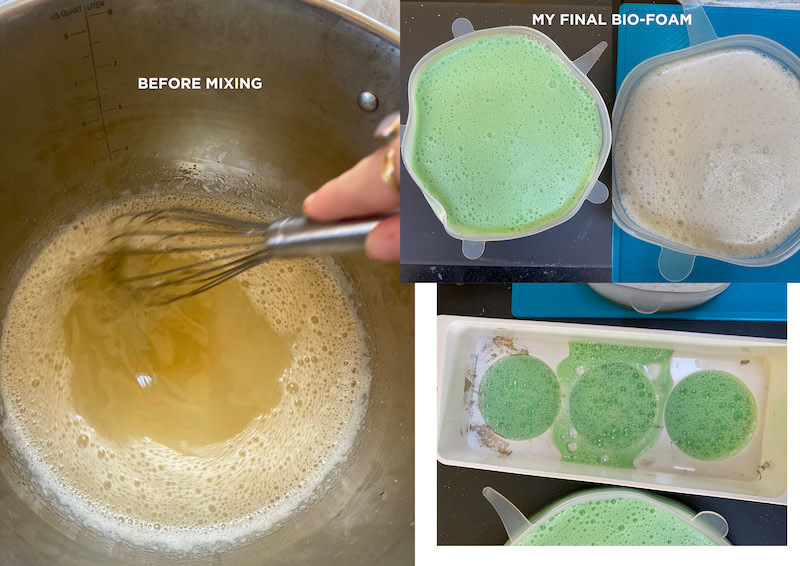
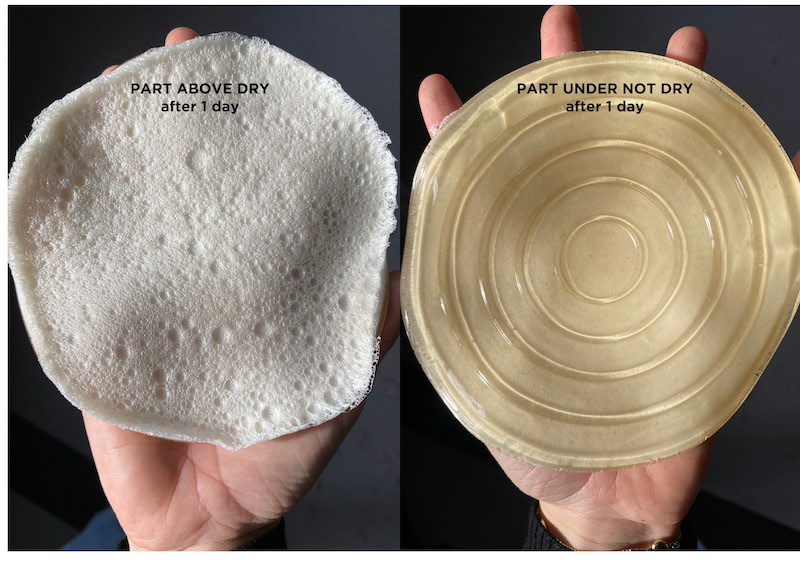
now you can put your material to dry in the oven. I let the bio foam dry outside; the oven was full. This way it will take a little longer to dry but after two days the compound will be dry.
Here below you can see how the drying progress of my bio foam :
Alginate, flexible bioplastic
It was very interesting to learn about this material.
It is fun to see how with water mixed with Calcium Chloride it creates a tough patina that allows everything to be contained inside.
When Cecilia introduced us to this material, she told us that often during marathons we see small balls containing water that runners can "eat" . My creative mind immediately went to an image related to Botter Paris's latest collection that created this type of accessory. It would be interesting to develop something similar with this material.
BOTTER PARIS COLLECTION SPRING 2023 READY-TO-WEAR
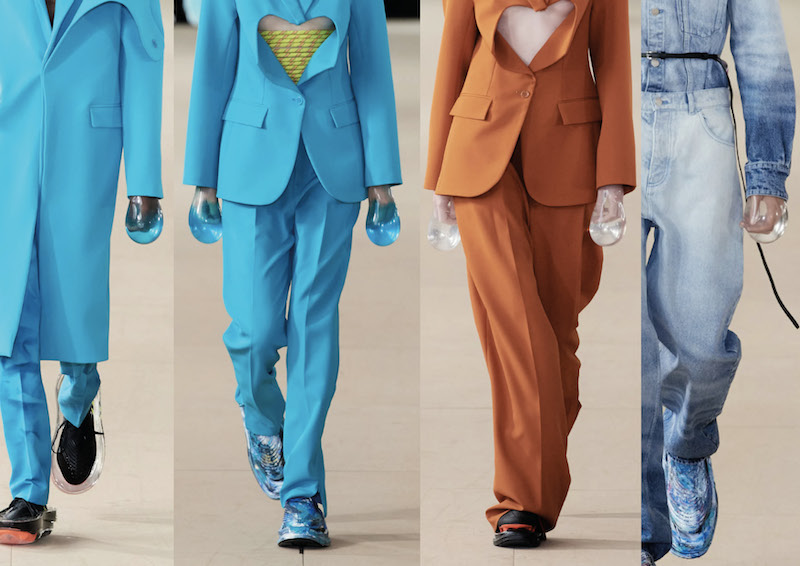
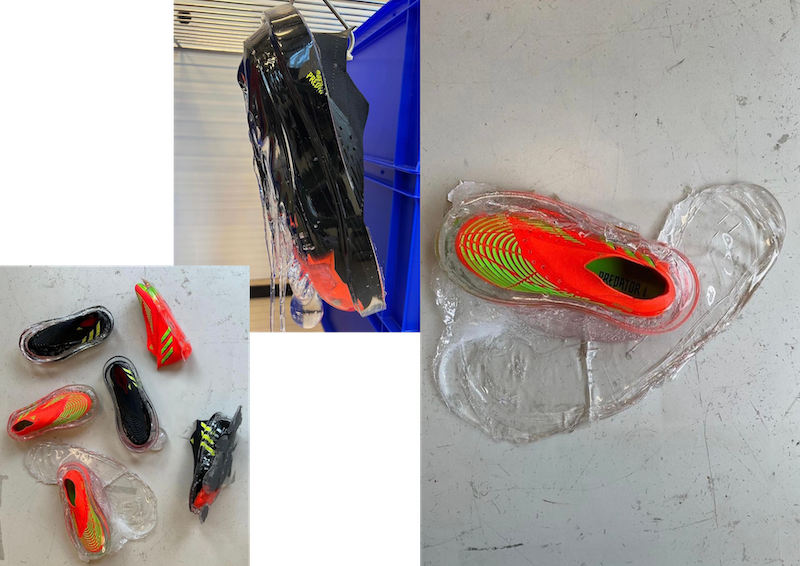
the latest collection of this brand features many materials that come close to this type of plastics, especially for shoes. In the hands I think they were simply balloons containing water. I think for my future experiments with alginate I will be inspired by the concept of this collection.
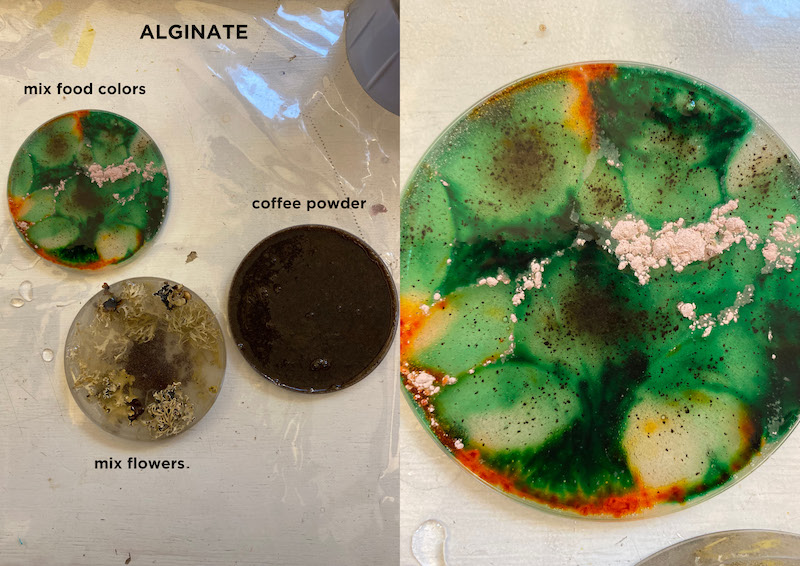
My experiments don't look so good after they dry. As soon as I poured the alginate into my petri dish the appearance was wonderful, they looked like little evolving bacteria. But as soon as I sprayed the Calcium Chloride, they all slowly receded.
I had placed inside, colors, coffee powder, flowers. I liked the idea of my material almost crystallizing, creating a perfect disk with elements inside. I love this kind of artwork. But unfortunately slowly as it dries, the uglier it gets.
Anyway, below you will find all the ingredients to create a good container of elements with alginate:
GOOD TO KNOW: * with gliceryne you can have a transparent effect * with sunflower oil you can have a matte white effect
you can create 3 different kind of Alginate recipes, here below i write for you all these 3 different types:
This first kind of Alginate recipes is what I created.
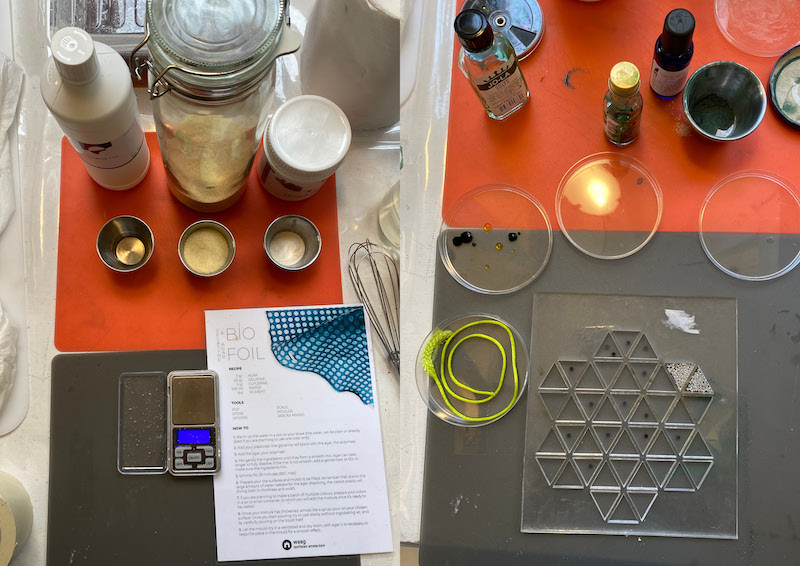
Flexible thin Bio- Foil
- 12 gr Alginate
- 30 gr Glycerine
- 400 gr Water
- 10 ml Sodium Chloride Hidrate
- 100 ml Water
This recipe works best when casted in very thin foils. The foil will shrink in both size and thickness, but the amount of water will help the mayterial in casting very thin even sheets.
Flexible thin Bio - SHEET
- 12 gr Alginate
- 40 gr Glycerine
- 400 gr Water
- 10 ml Sodium Chloride Hidrate
- 100 ml Water
This recipe works best when casted in sheets. It will shrink in size and thickness, but less that the foil - make sure you let the liquid sit and spread befor you start curing it.
Flexible BIO-PLASTIC
- 12 gr Alginate
- 20 gr Glycerine
- 10 Sunflower oil
- 200 ml Water
- 10 ml Sodium Chloride Hydrate
- 100 ml Water
This recipe works best when casted in thicker sheet foils. Te foil will shrink in both size and thickness, but it will be strong and durable.
Here below you can see some of my experiments with BIO-FOIL:


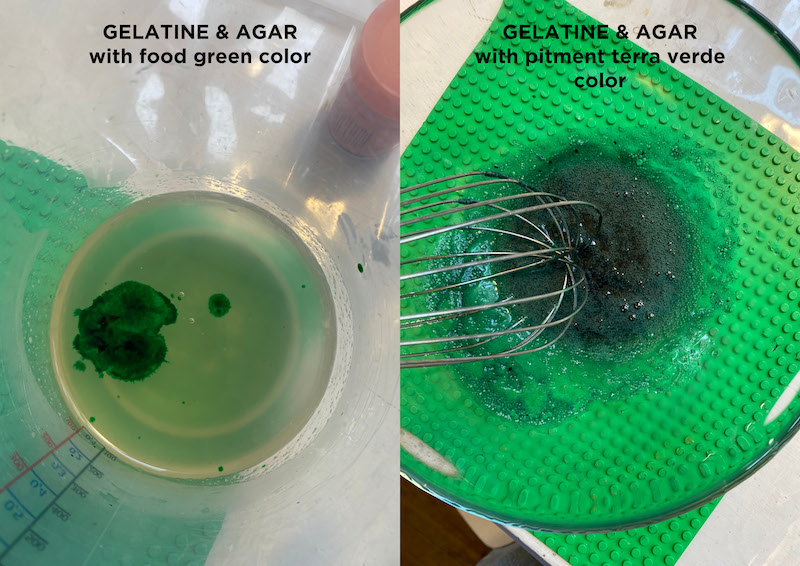
GELATINE & AGAR
This is another bio material that I wanted to learn how to create, it is always a bio plastic.
Below I explain all the steps to follow:
- 3 gr Agar
- 20 gr Gelatine
- 5 gr Glycerine
- 500 ml Water
- tbd Pigment
TOOLS
- Scale
- Moulds
- Jars for mixing
- Pot
- Stove
- Spoons
Here below all my steps :
- Slightly heat the water, I set the heat of my stove to max 60 gr. The water should not boil.
- At this point you can add Agar, Gelatine and Glycerin
- Mix Gently the ingredients until they form a smooth mix.
- Simmer for 20 minutes (60c max)
- In the meantime you can think about what color to use and what kind of container, texture you want to model with your bio foil
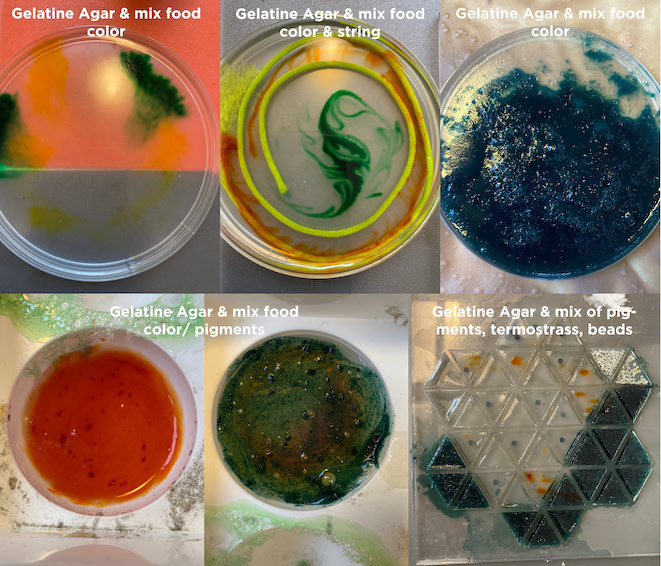
- After 20 minutes you will see that your liquid will thicken a little and after a few minutes after turning off the heat you will see that it will become similar to a syrup. When you have this consistency you can start filling your containers.
Below you will see my experiments. I enjoyed experimenting with elements within my bioplastic layer, with threads, sequins, thermorhinestones, and different colors.
Kombucha Leather
Kombucha is a fermented drink related to beer, wine, kvass and tepache – but also to many other fermented foods such as yogurt, water kefir, kimchi, sauerkraut and fermented vegetables – rich in beneficial properties for our body. Kombucha is in fact an important food rich in "friendly" bacteria, antioxidants, polyphenols and B vitamins. It is also an excellent ally in the purification of liver and blood and ideal for strengthening the immune system.
The preparation of Kombucha consists of fermenting sweetened tea with a particular culture of yeasts and bacteria called SCOBY and from its prolonged fermentation Kombucha vinegar is obtained or in our case Kombucha Leather :)
This fermented tea drink has a very long tradition behind it, it has been drunk for over two thousand years in the East, and today it has also become famous in the West as it is rich in benefits and properties becoming a highly sought after drink in many nations.
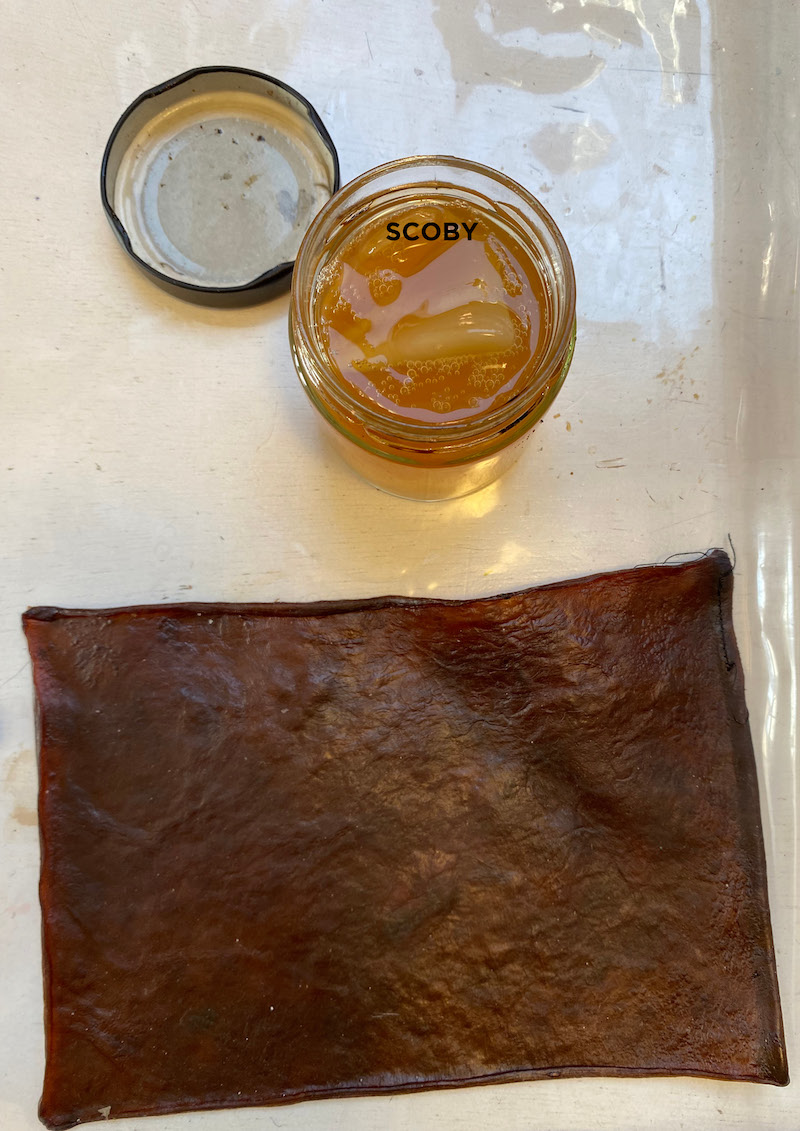
SCOBY: WHAT IT IS AND WHY IT IS SO IMPORTANT?
SCOBY is in Kombucha the most important and essential element to start the fermentation of the drink that we like so much, both in the most classic version and in the continuous fermentation. SCOBY stands for Symbiotic Culture of Bacteria and Yeast – culture of bacteria and yeasts that live in symbiosis with each other.
TOOLS & Material
- Plastic container
- PH strips
- Tape
- Sugar
- Vinegar
- Water
- Beer
- Scoby
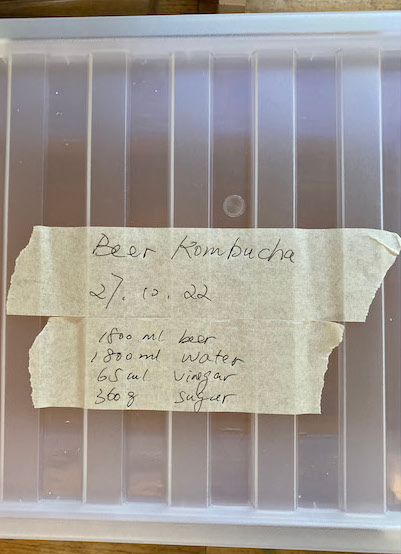
I decided to create my own kombucha leather with beer. Below I will write all the steps you need to follow to achieve it:
I doubled the doses slightly to get more material.
- 360 gr Sugar
- 1,8 litres of Water
- 1,8 litres of Beer
- Scoby 2 square 5x5 cm of scoby
STEPS :
- Before inserting the ingredients clean your box, it must not contain "bacteria"
- You can fill your container with all these ingredients and measure the acidity with a pH test. It must be around 4/5 (yellow/orange).
- If your Ph is ok, you can put your SCOBY inside and stick a bit of tape on the corner of your plastic container, so a bit of air can enter inside your box. It is important for fermentation to have some oxygen.
- Now find a space in your room quite warm, not too much but there must be some heat.
- From now on leave your liquid in his space and wait for the Kombucha to grow :)
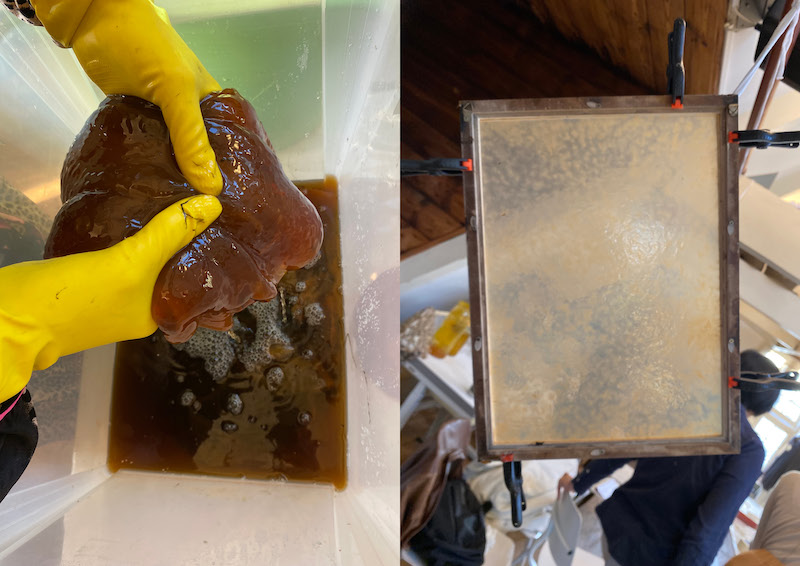
After a month and a half my layer was ready to be washed and left to dry.