BIO- PLASTIC: NEW TEXTURES
RESEARCH & INSPIRATION
In this second week, I started experimenting with different types of recipes. At first I wanted to test the consistency, so I did several tests with Agar and Gelatin. I wanted it to be something very flexible and transparent, because my goal is to have a flexible bio-plastic covered with feathers, because the proposal I will make in terms of materials must respect the possibility of being able to work well in the creation of clothes or accessories. So, in the first week of testing I decided to work on the recipe in terms of the balance between flexibility and thickness, and also to find a good thickness to cover all the feathers inside. Also, another important goal for me is to find a recipe that will allow me to make something waterproof because for the production of clothes or accessories it is a good point to have a bio-plastic that is strong enough.
Before testing all these recipes, I did a bit of research. It was very helpful to follow Cecilia's recipe information and Laura and Loes'documentation.
My goal for these tests is to find the right consistency of the bioplastic between flexibility and structure.
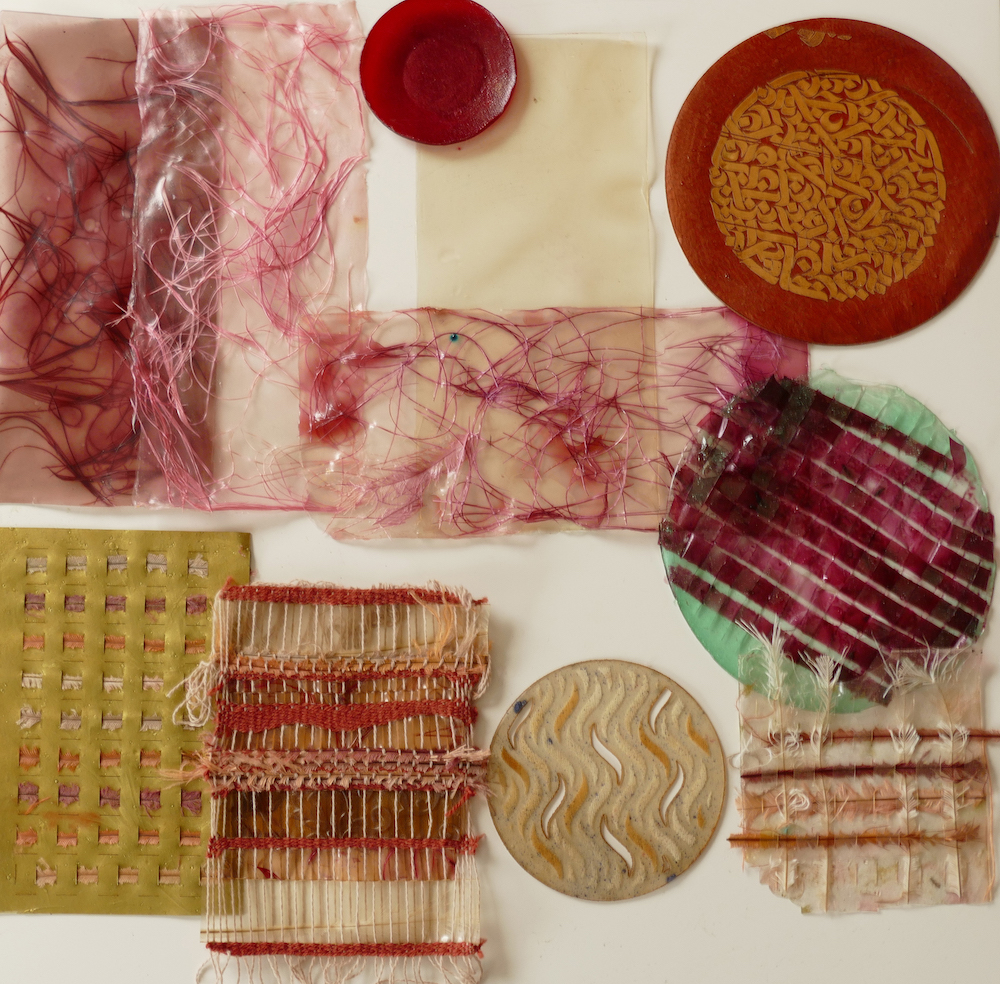
Final samples :
- customised bioplastic with feathers
- customised bioplastic with lace/other bio-plastics
- Samples of bioplastic in different colours for weaving
- Samples of bioplastic to be processed with the laser machine
TEST
TEST n.1
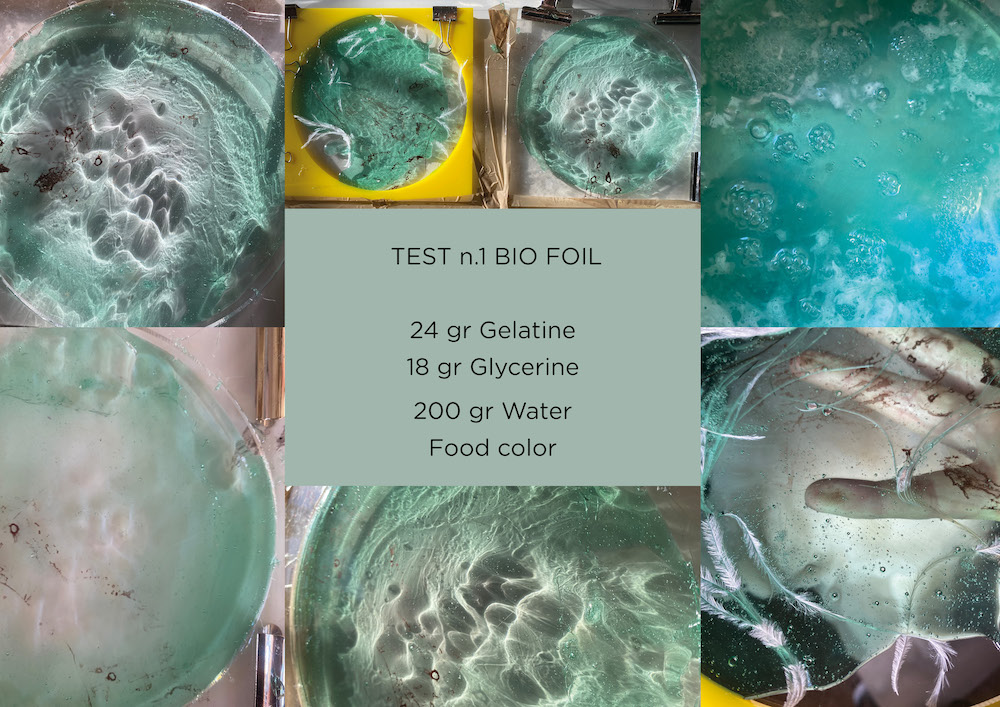
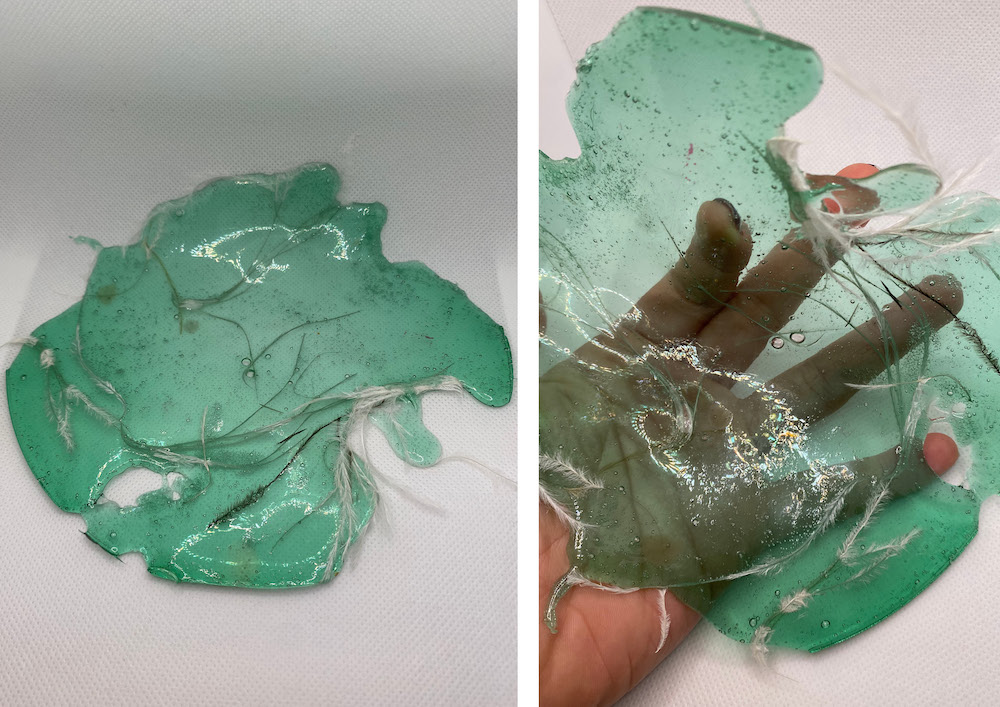 Final Results & Comments:
I obtained two different thicknesses for this recipe, depending on the amount of gelatine I poured. I obtained one sample without feathers and one with feathers. The final result of the one without feathers can be seen in test no.5, I used it as a base for processing with agar strips.
It is very flexible and handling it keeps the same appearance, it does not take creases and the surface is very smooth and also very resistant in terms of elasticity.
To achieve this colour I used liquid food colours.
Final Results & Comments:
I obtained two different thicknesses for this recipe, depending on the amount of gelatine I poured. I obtained one sample without feathers and one with feathers. The final result of the one without feathers can be seen in test no.5, I used it as a base for processing with agar strips.
It is very flexible and handling it keeps the same appearance, it does not take creases and the surface is very smooth and also very resistant in terms of elasticity.
To achieve this colour I used liquid food colours.
TEST n.2
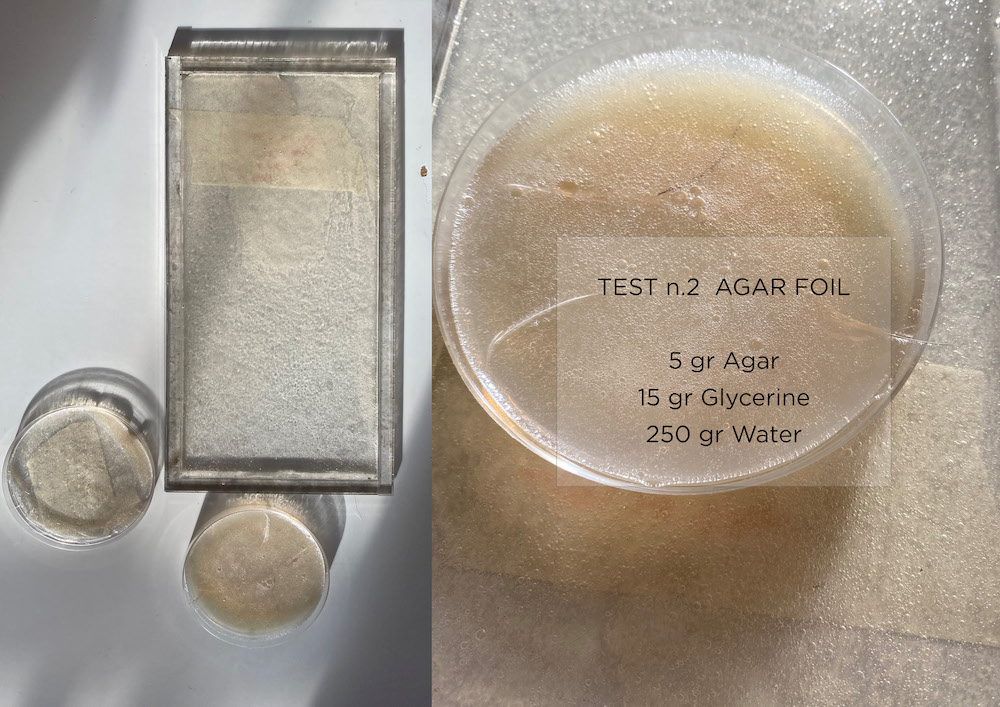
 Final Results & Comments:
I found this agar recipe interesting.
The sample is very flexible, not rigid at all. The appearance is less interesting than jelly and lumpy. The surface is smooth, but it is difficult to achieve a shiny, bubble-free appearance. To the touch, despite being dry, it still retains a wet feel. Consider that when using agar the appearance will always be quite opaque.
Final Results & Comments:
I found this agar recipe interesting.
The sample is very flexible, not rigid at all. The appearance is less interesting than jelly and lumpy. The surface is smooth, but it is difficult to achieve a shiny, bubble-free appearance. To the touch, despite being dry, it still retains a wet feel. Consider that when using agar the appearance will always be quite opaque.
Customising agar foil and feathers
TEST n.3

 Final Results & Comments:
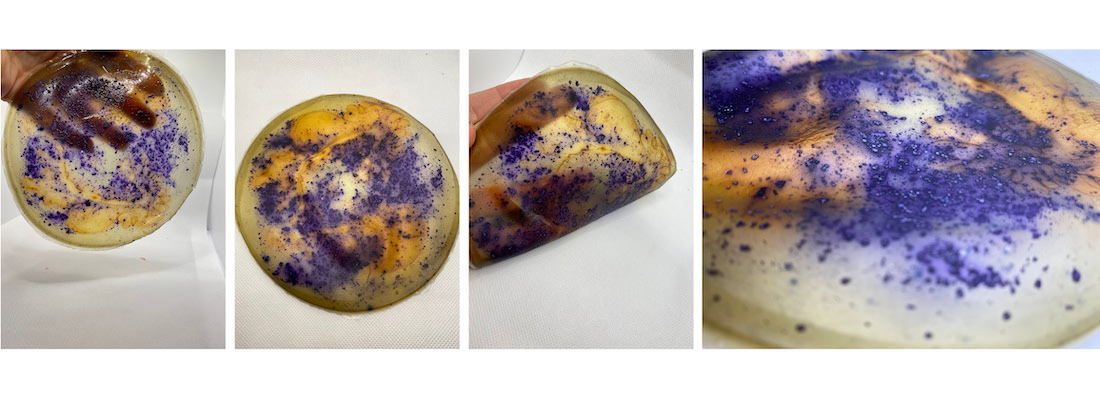
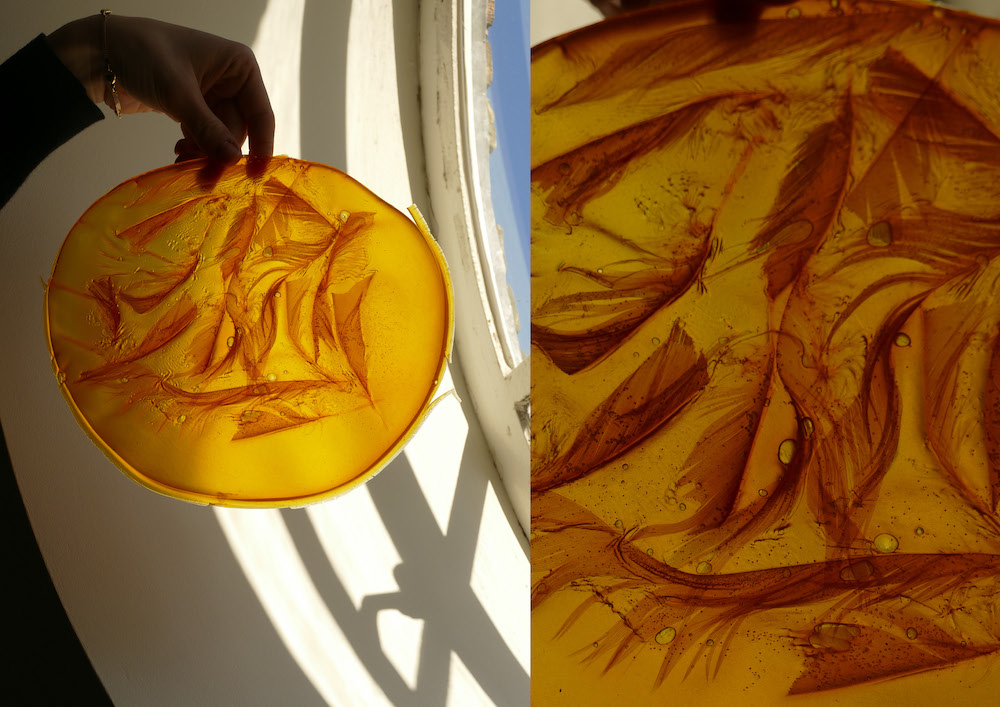
When working with gelatine without the use of colours, the risk is to have a very yellow and dull looking sample. But I have noticed that when I use colours, especially liquid food colours, you get much shinier surfaces. I don't really like the consistency, I find it very stiff and difficult to mould. Especially as you can see in the sample with the feathers inside it is deformed, probably also because the feathers I used are very stiff considering the rib. The smell is also very pungent.
Final Results & Comments:
When working with gelatine without the use of colours, the risk is to have a very yellow and dull looking sample. But I have noticed that when I use colours, especially liquid food colours, you get much shinier surfaces. I don't really like the consistency, I find it very stiff and difficult to mould. Especially as you can see in the sample with the feathers inside it is deformed, probably also because the feathers I used are very stiff considering the rib. The smell is also very pungent.
TEST n.4

 Final Results & Comments:
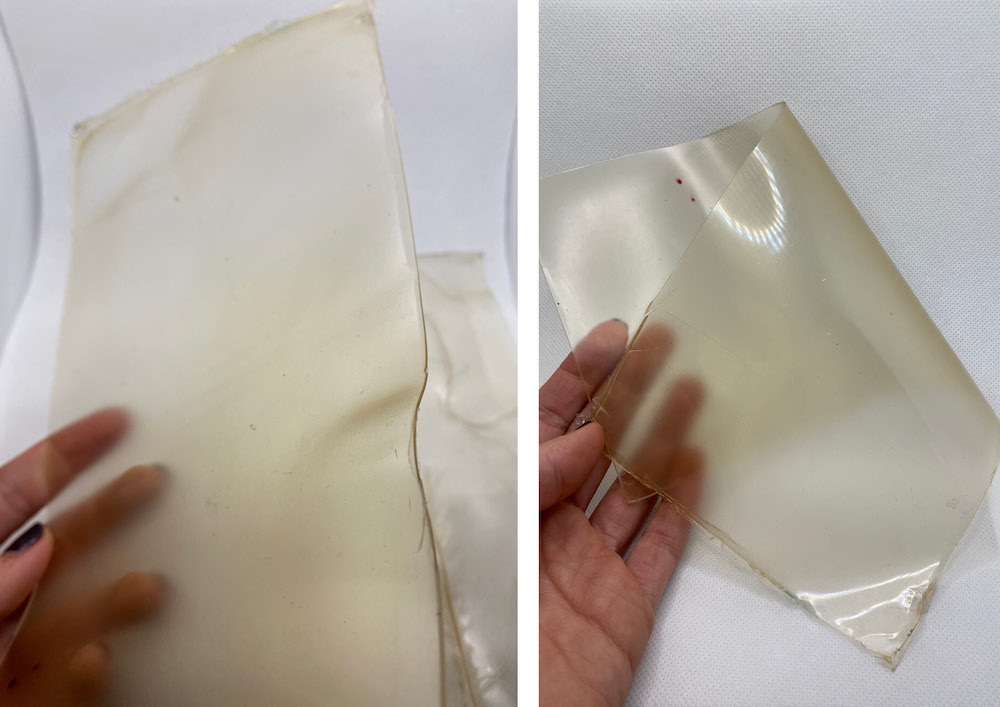
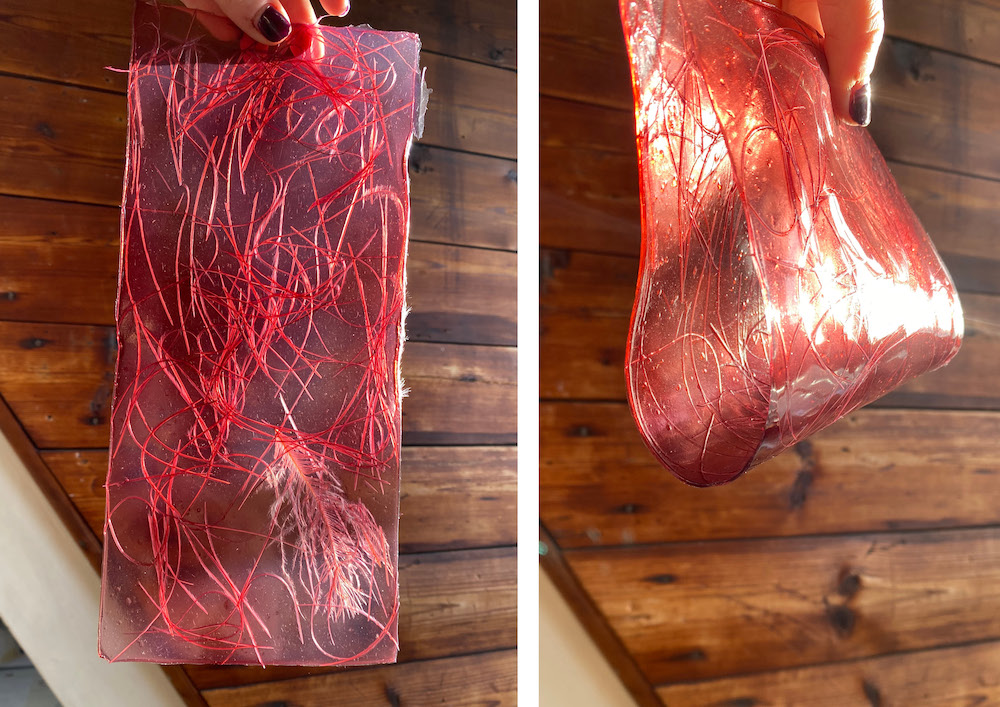
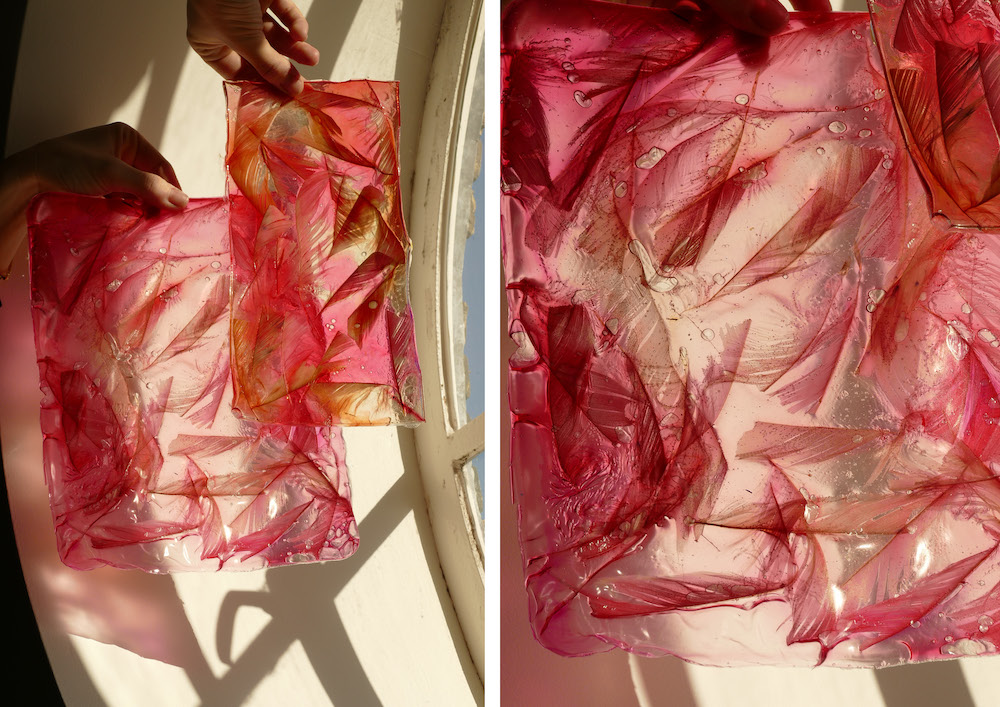
It is one of my favourite first tests in terms of flexibility and consistency. It looks very shiny and transparent, but it is also very flexible and does not crease. Make sure the thickness is sufficient, otherwise you will get a thin and brittle layer. If you dose the thickness well when pouring it onto the surface, you can obtain a very strong but at the same time mouldable bioplastic. It feels moist and a little sticky to the touch.
To achieve this colour I used liquid food colours.
Final Results & Comments:
It is one of my favourite first tests in terms of flexibility and consistency. It looks very shiny and transparent, but it is also very flexible and does not crease. Make sure the thickness is sufficient, otherwise you will get a thin and brittle layer. If you dose the thickness well when pouring it onto the surface, you can obtain a very strong but at the same time mouldable bioplastic. It feels moist and a little sticky to the touch.
To achieve this colour I used liquid food colours.
TEST n.5
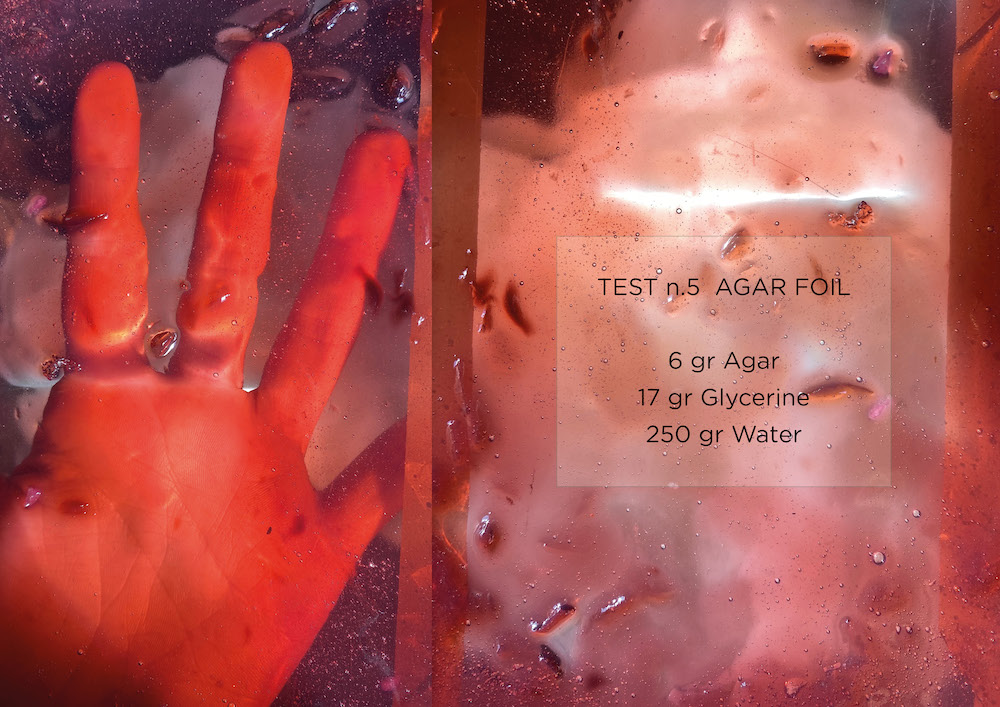
 Final Results & Comments:
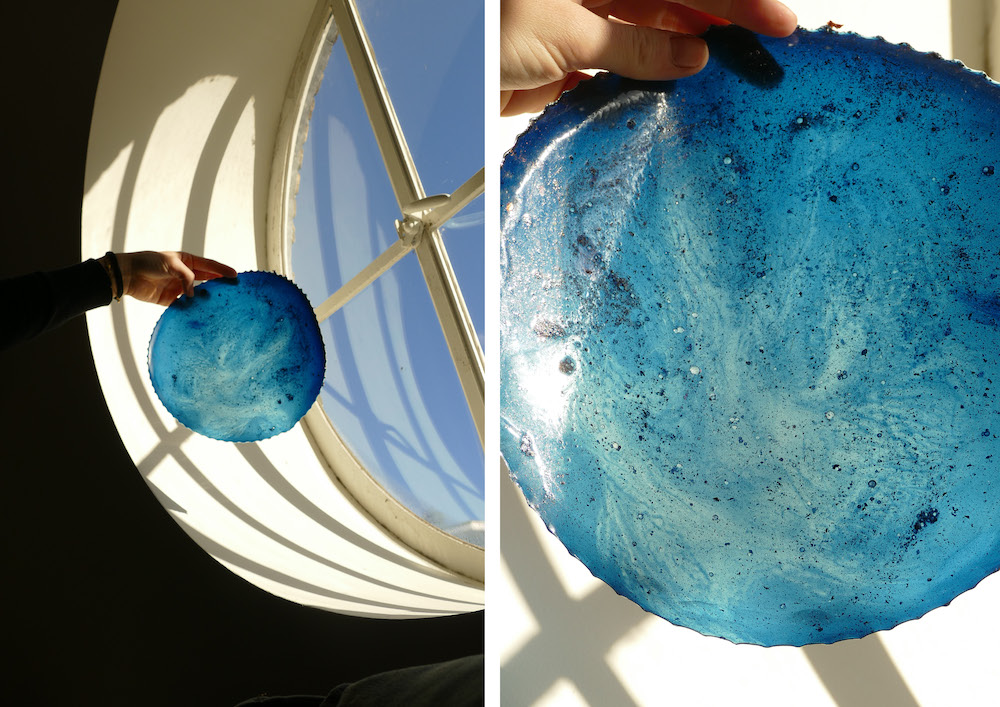
The appearance of this sample is very opaque, but I obtained a surface with fewer bubbles than in test No. 2. It is not very strong and tends to break easily, but it has very good flexibility and is not sticky. I used this sample for a test run on test no.1.
To achieve this colour I used liquid food colours.
Final Results & Comments:
The appearance of this sample is very opaque, but I obtained a surface with fewer bubbles than in test No. 2. It is not very strong and tends to break easily, but it has very good flexibility and is not sticky. I used this sample for a test run on test no.1.
To achieve this colour I used liquid food colours.
TEST n.6
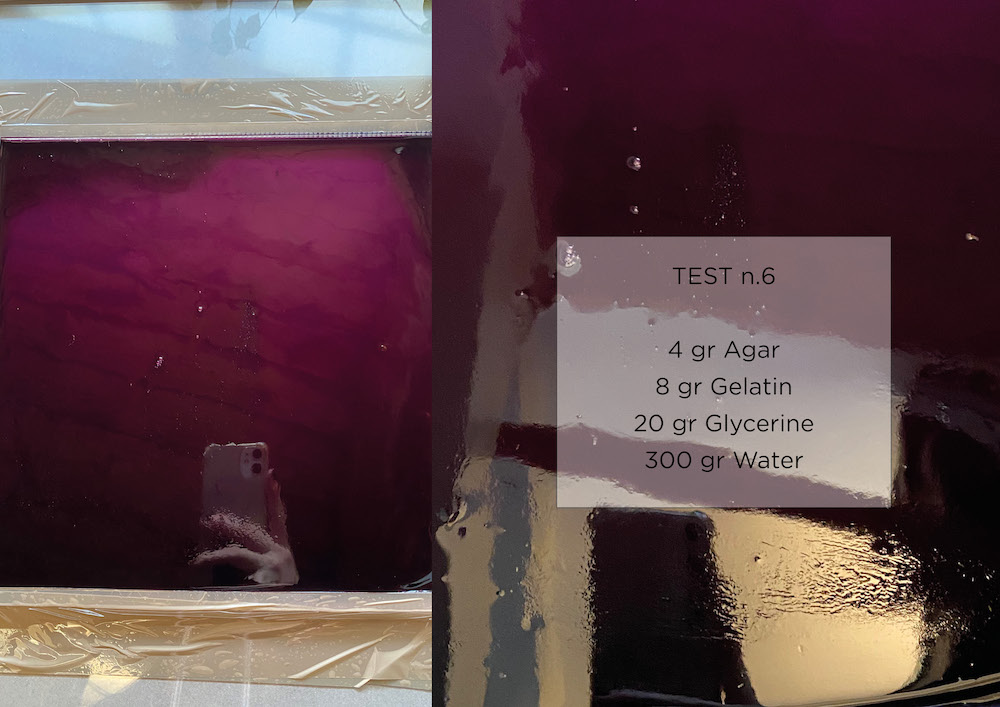 Final Results & Comments:
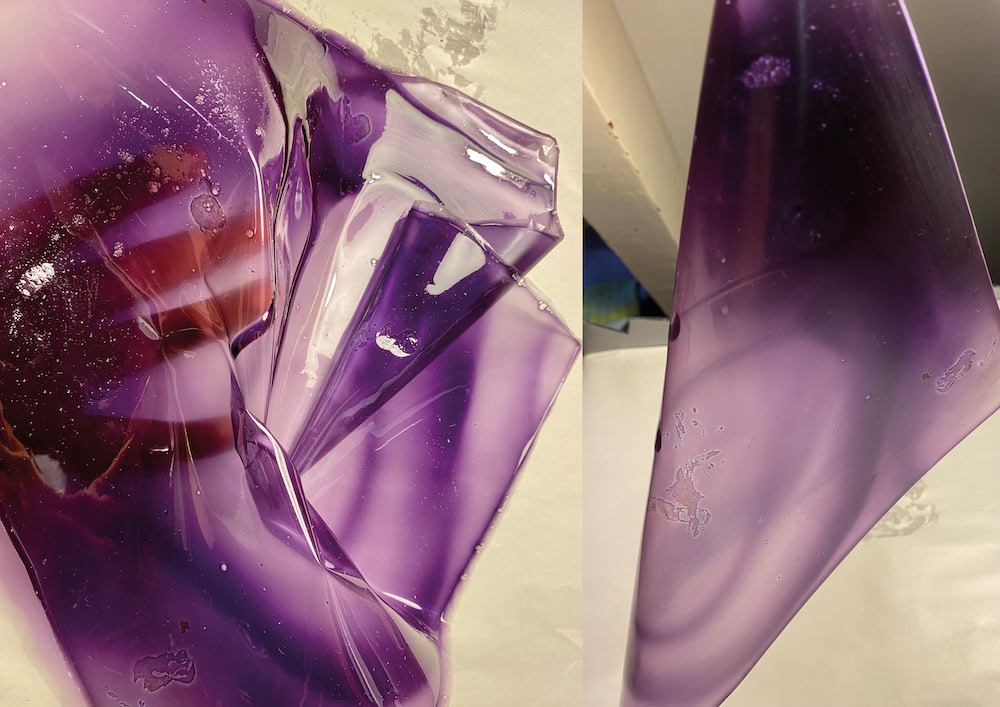
This test has an appearance very similar to latex.
It is very shiny, extremely flexible but actually very brittle and sticky. It is very difficult to work with this material because it does not have much structure.
Final Results & Comments:
This test has an appearance very similar to latex.
It is very shiny, extremely flexible but actually very brittle and sticky. It is very difficult to work with this material because it does not have much structure.
TEST n.7
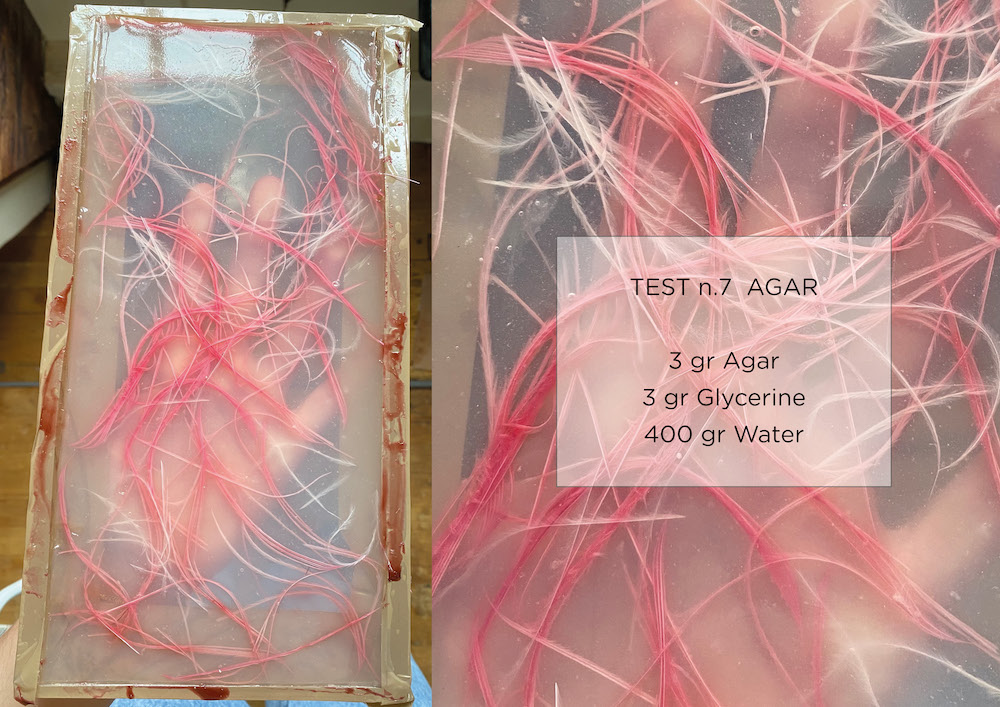
 Final Results & Comments:
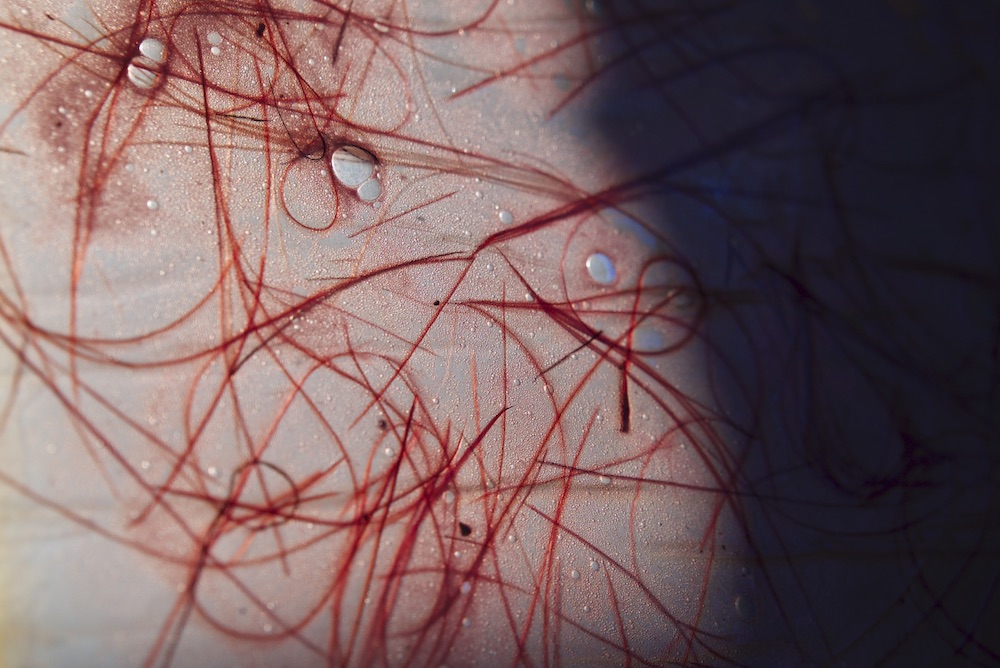
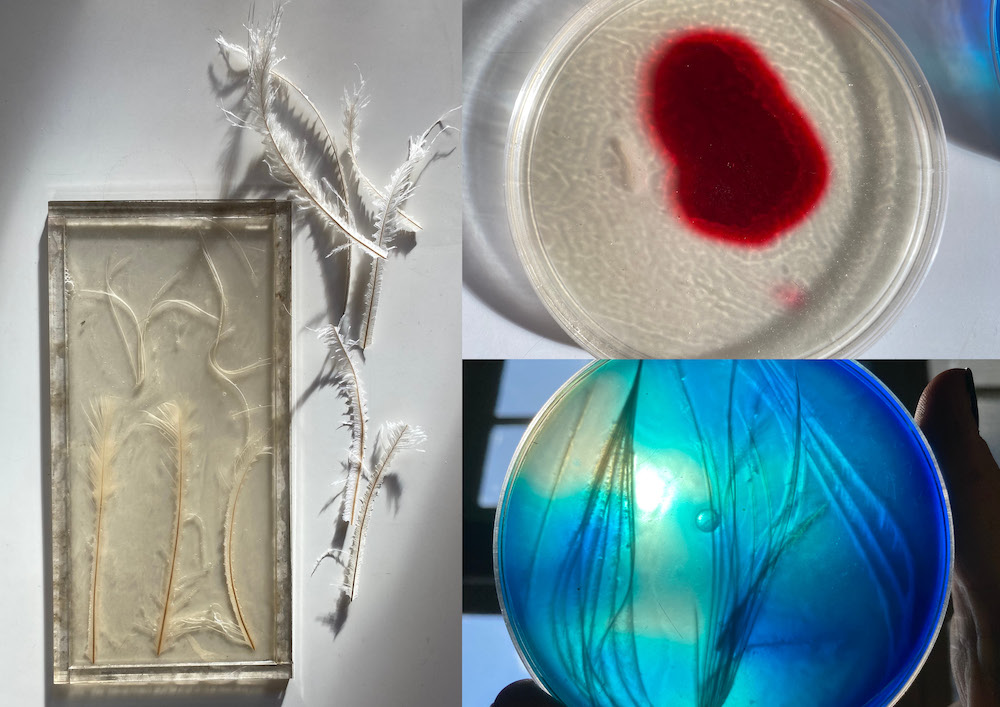
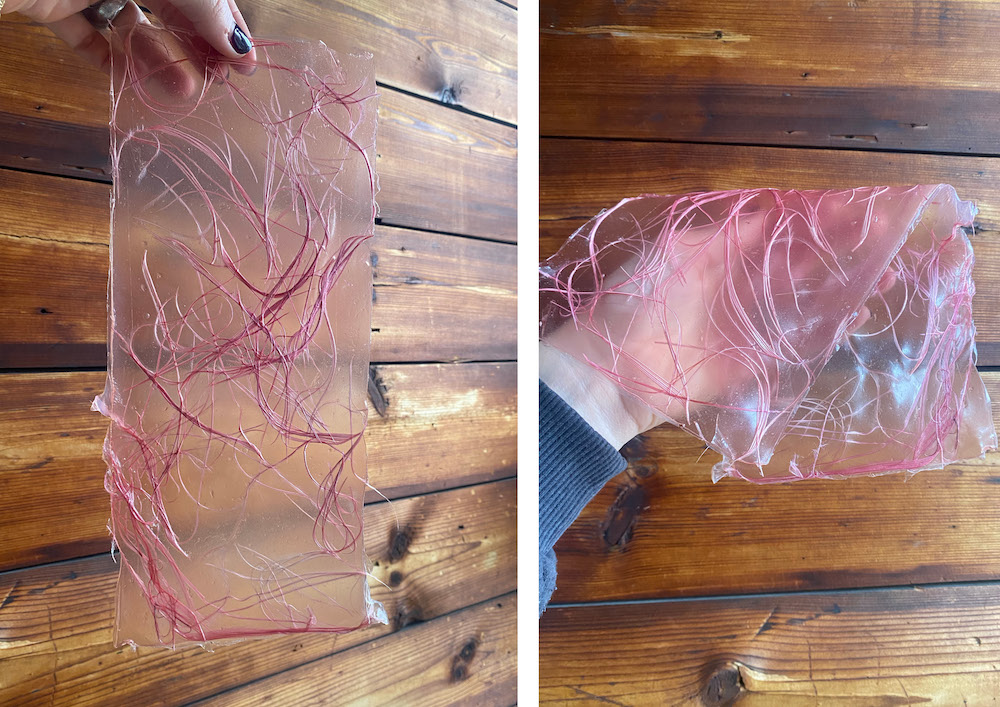
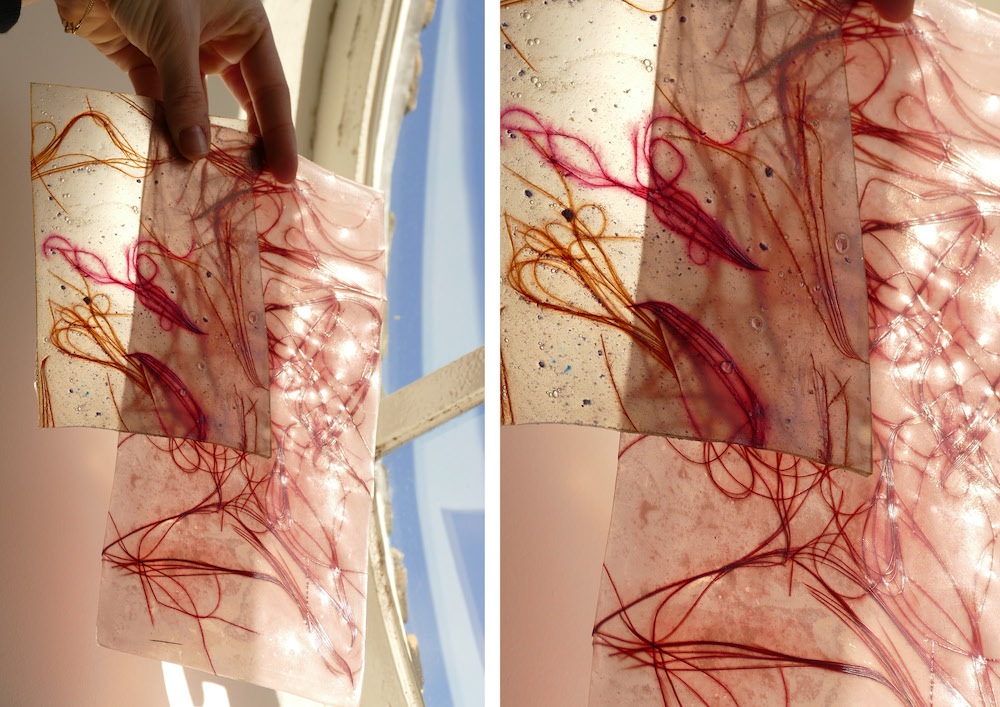
The appearance is interesting because the bio-plastic tends to disappear, bringing out the texture of the feathers, actually taking the shape of the feathers inside. To the touch you can feel the feathers and their texture, so the agar does not totally cover the elements inside. Despite its very fine thickness, it is very strong and extremely flexible. The appearance is slightly opaque but transparent.
In this case, I did not use any colouring in the recipe.
Final Results & Comments:
The appearance is interesting because the bio-plastic tends to disappear, bringing out the texture of the feathers, actually taking the shape of the feathers inside. To the touch you can feel the feathers and their texture, so the agar does not totally cover the elements inside. Despite its very fine thickness, it is very strong and extremely flexible. The appearance is slightly opaque but transparent.
In this case, I did not use any colouring in the recipe.
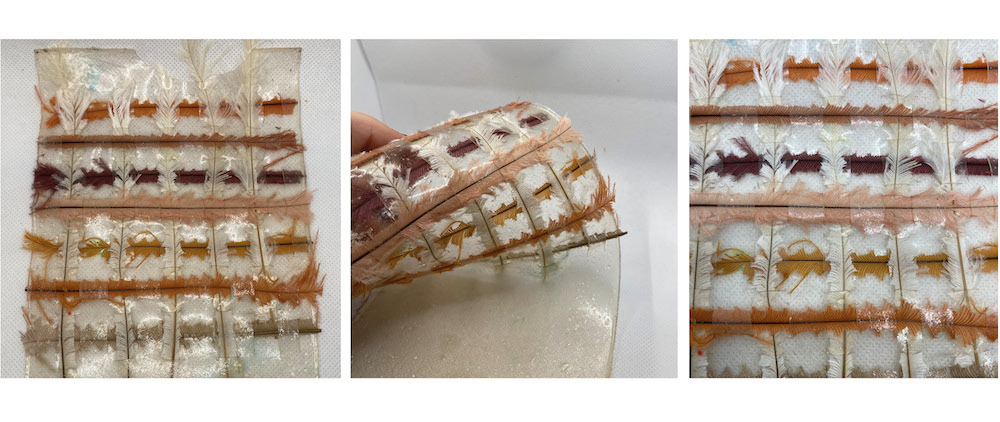
TEST n.8
 Final Results & Comments:
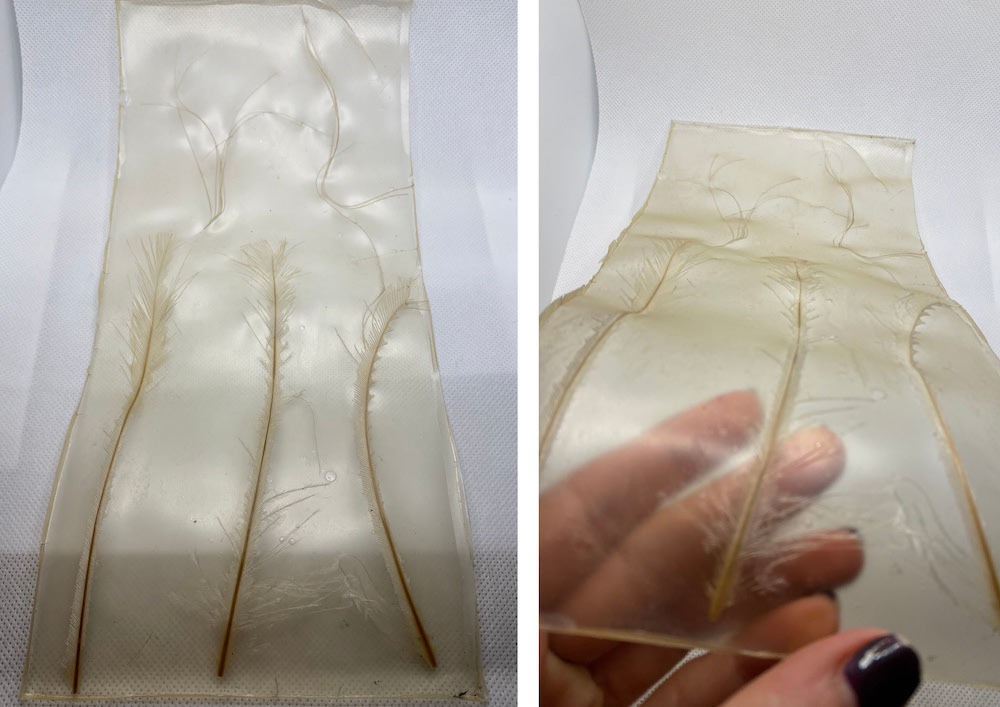
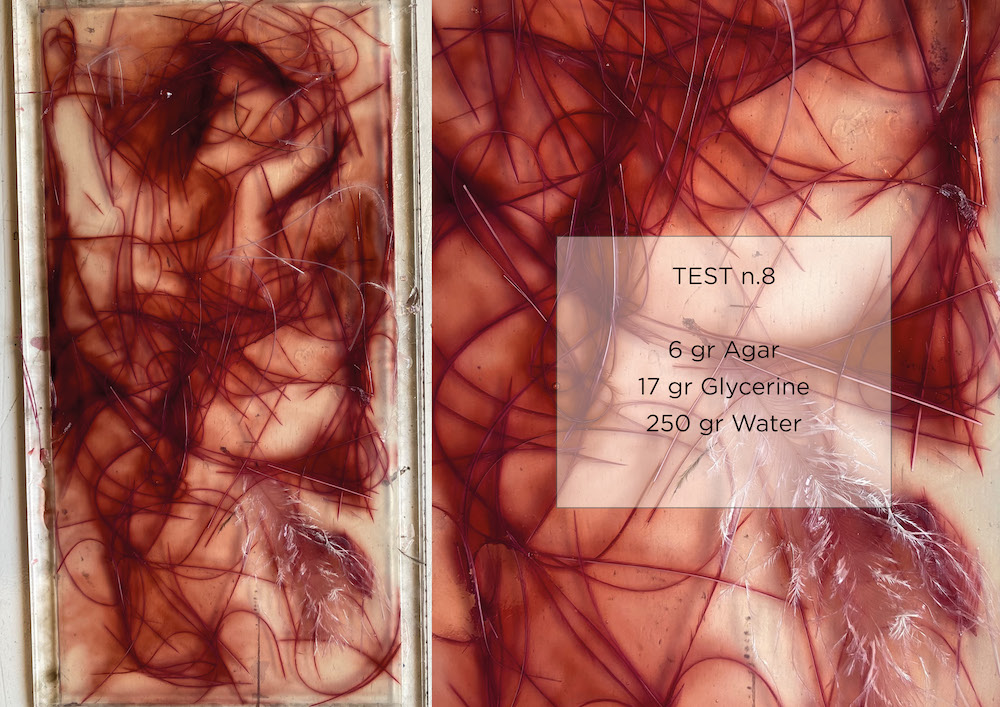
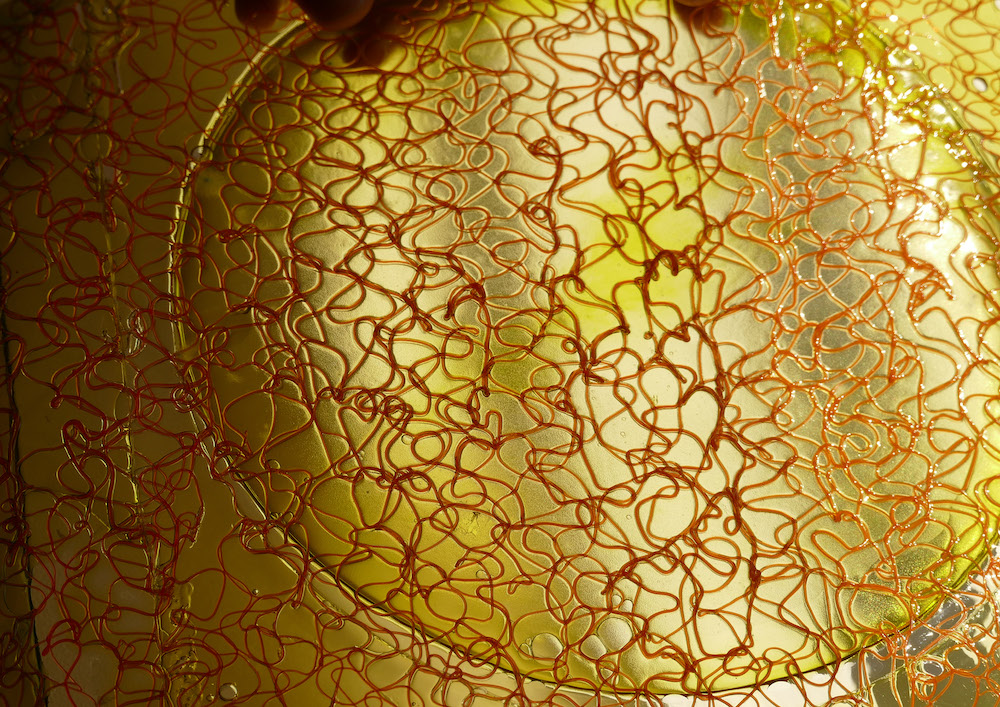
As far as recipes containing agar are concerned, this is a good result. The feathers, unlike in test No 7, are completely inside the bioplastic and the texture is very smooth. The flexibility and strength are very good, this is a good recipe to customise the feathers inside.
Final Results & Comments:
As far as recipes containing agar are concerned, this is a good result. The feathers, unlike in test No 7, are completely inside the bioplastic and the texture is very smooth. The flexibility and strength are very good, this is a good recipe to customise the feathers inside.
TEST n.9
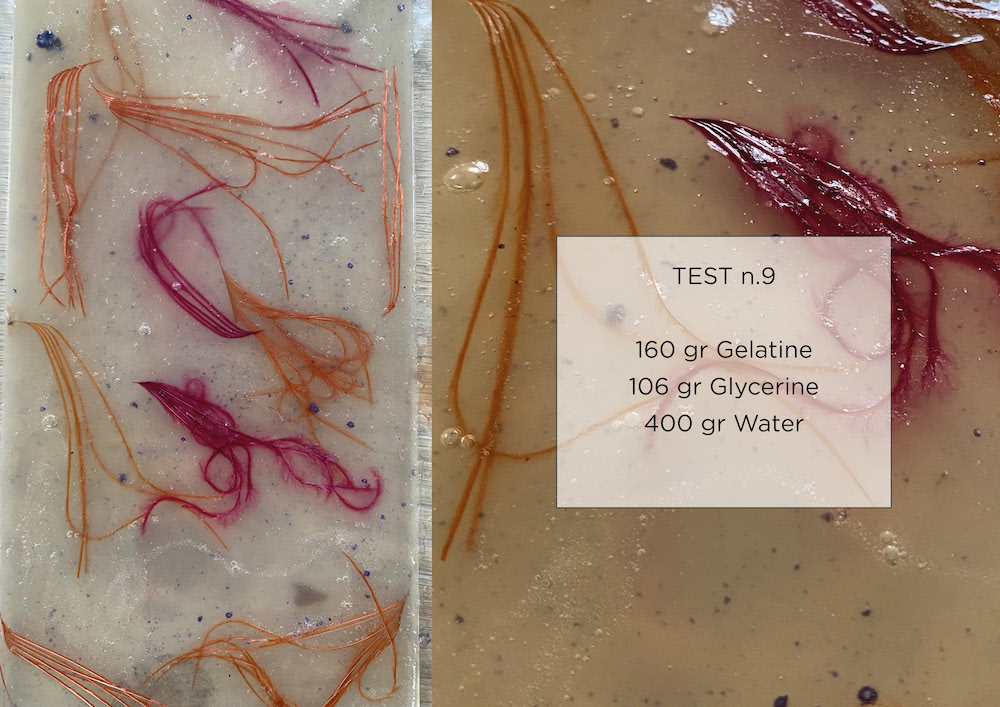 Process:
Final Results & Comments:
Process:
Final Results & Comments:
TEST n.10
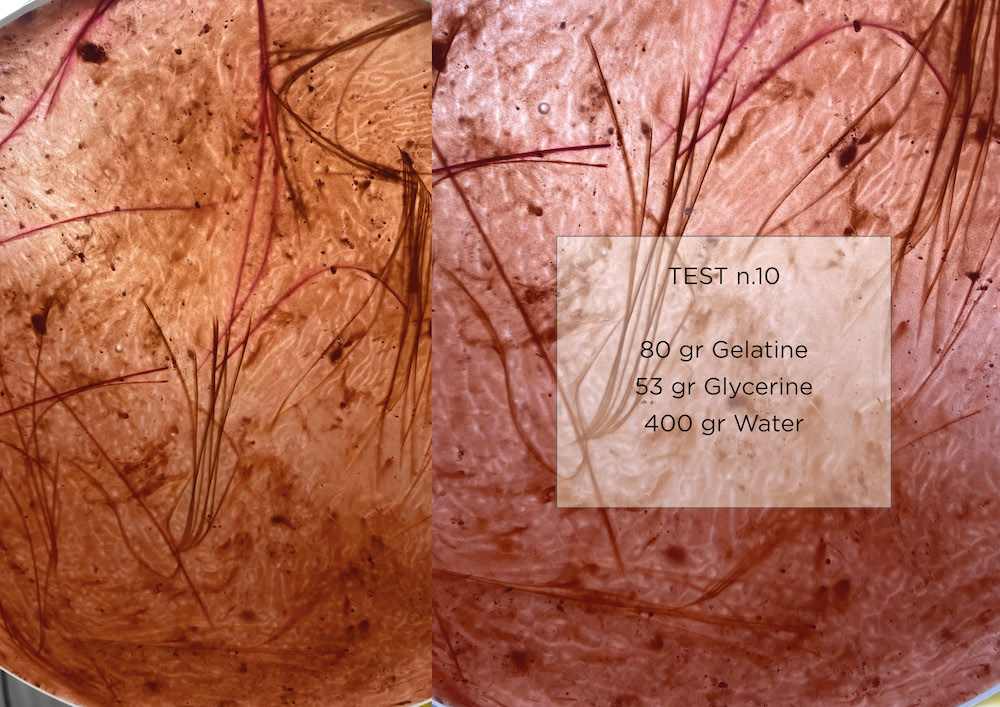 Process:
Final Results & Comments:
Process:
Final Results & Comments:
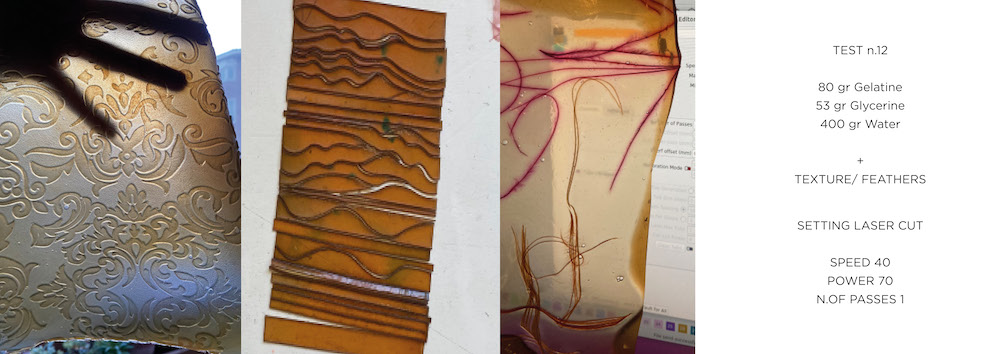
FINAL RECIPE
After a series of experiments with gelatin, I decided to use the recipe below because the end result gives me good results for customizing with feathers and other elements.
- 80 gr Gelatine
- 53 gr Glycerine
- 400 gr Water
TEST n.11
TEST n.12
TEST n.13
TEST n.14
TEST n.15
TEST n.16

CUTTING & ENGRAVING OF BIO-PLASTIC
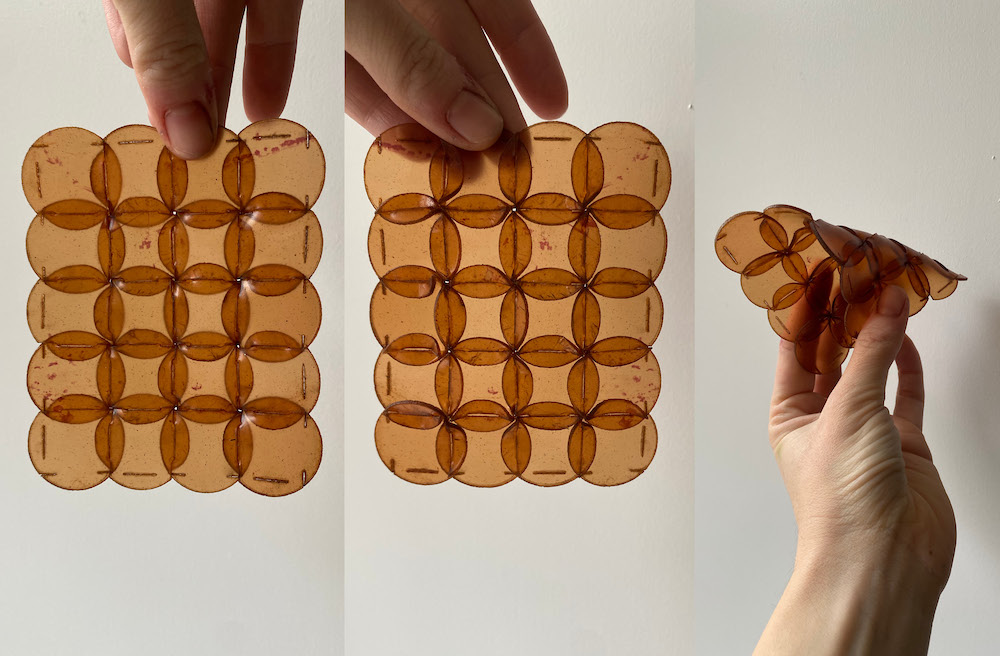
What I want to achieve with the laser cutting machine are both cuts that allow me to make Bio-plastic joints and texture engravings with patterns.
TEST n.1 BASE GELATINE RECIPE TEST 9.
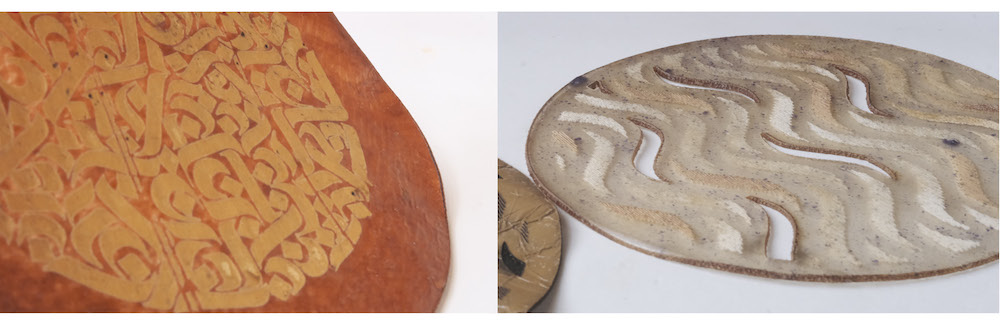
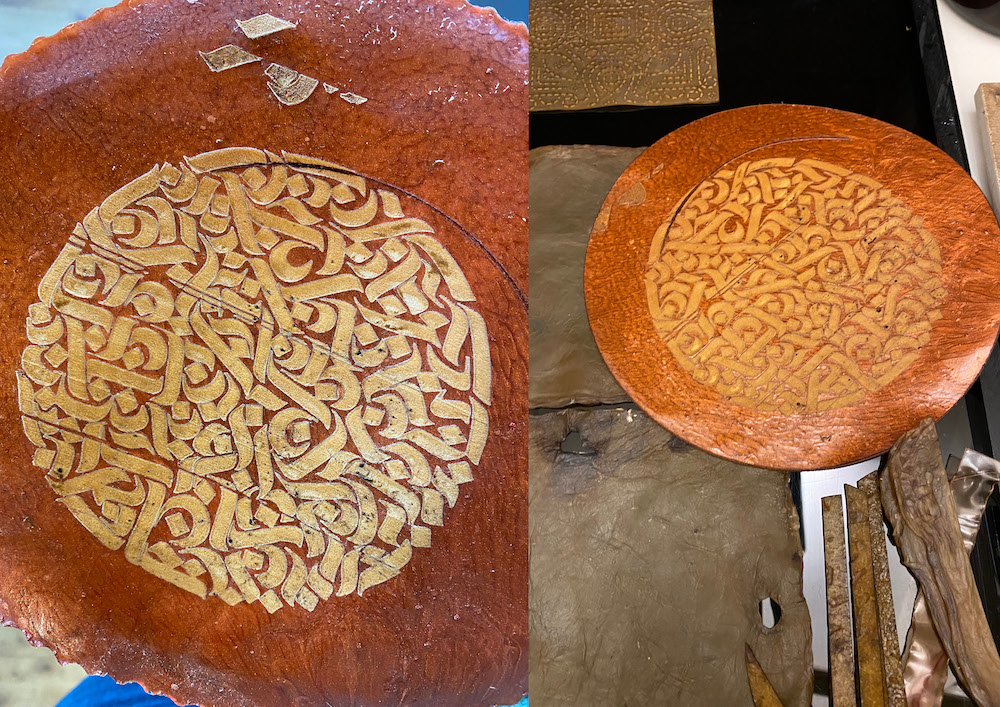
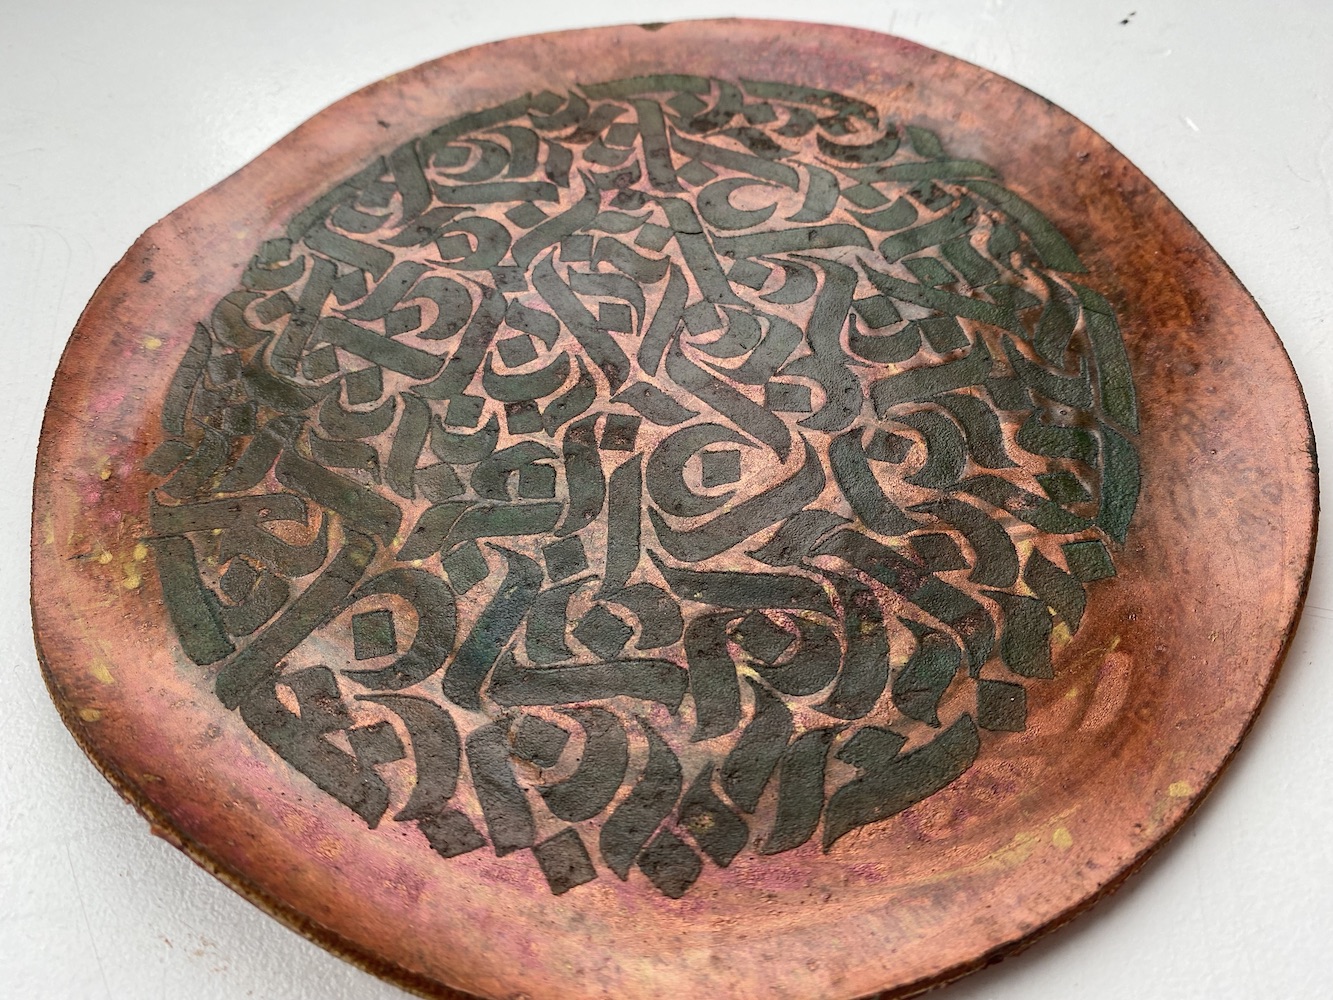
In this sample I experimented with different settings and techniques. As you can see from the final sample, there are cut parts and two different engraving settings. In order to achieve a three-dimensional effect.
TEST n.2 BASE GELATINE RECIPE TEST 12.
TEST n.3 BASE AGAR RECIPE TEST 2.
TEST n.4 RECIPE TEST 12.
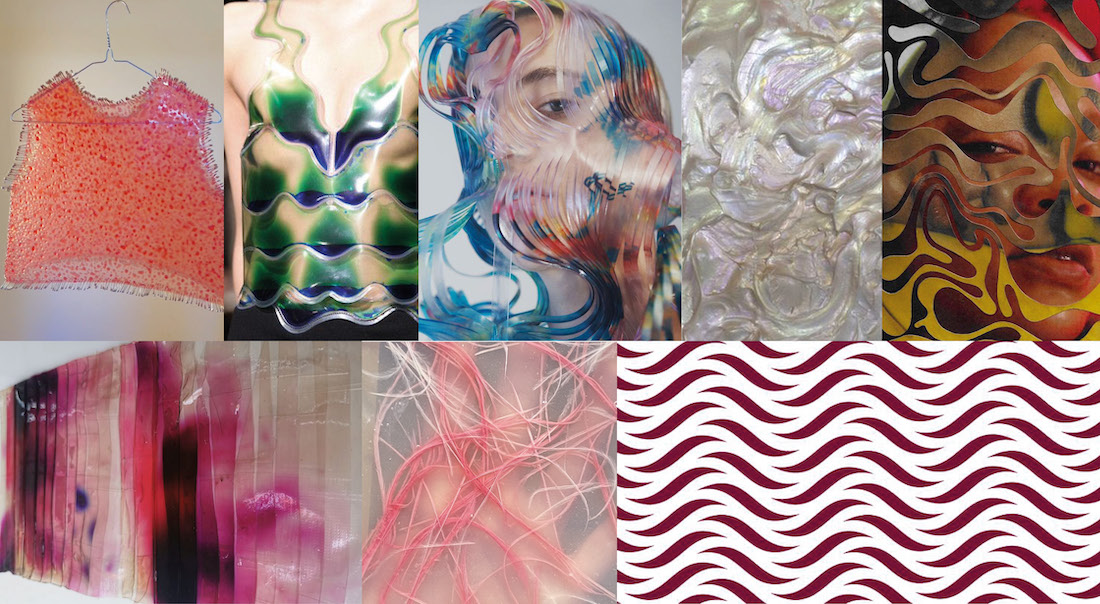
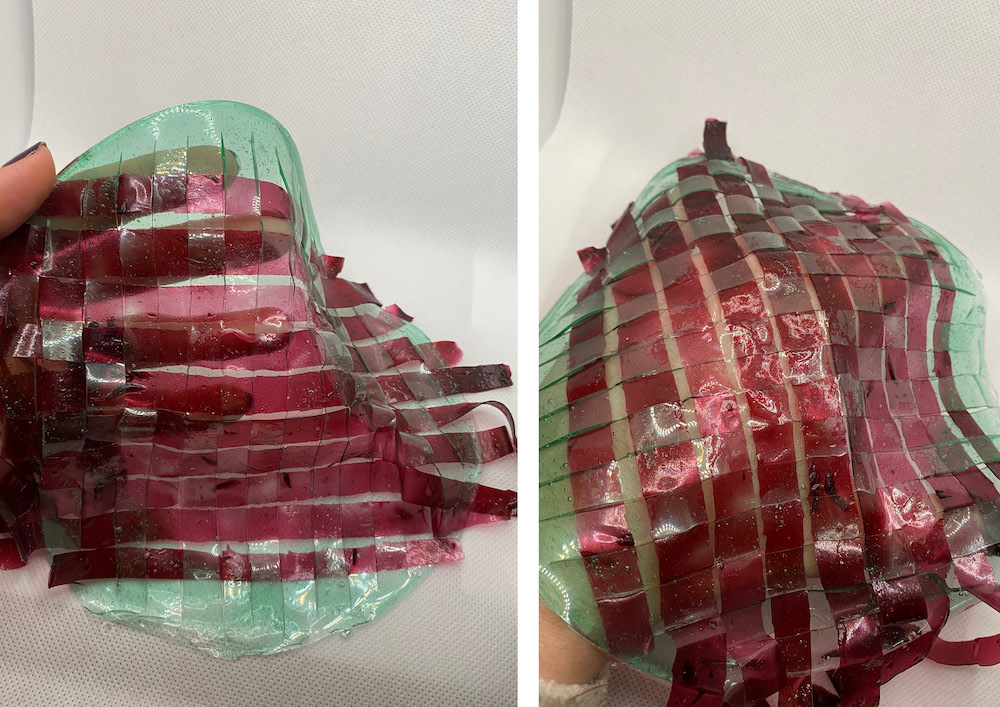
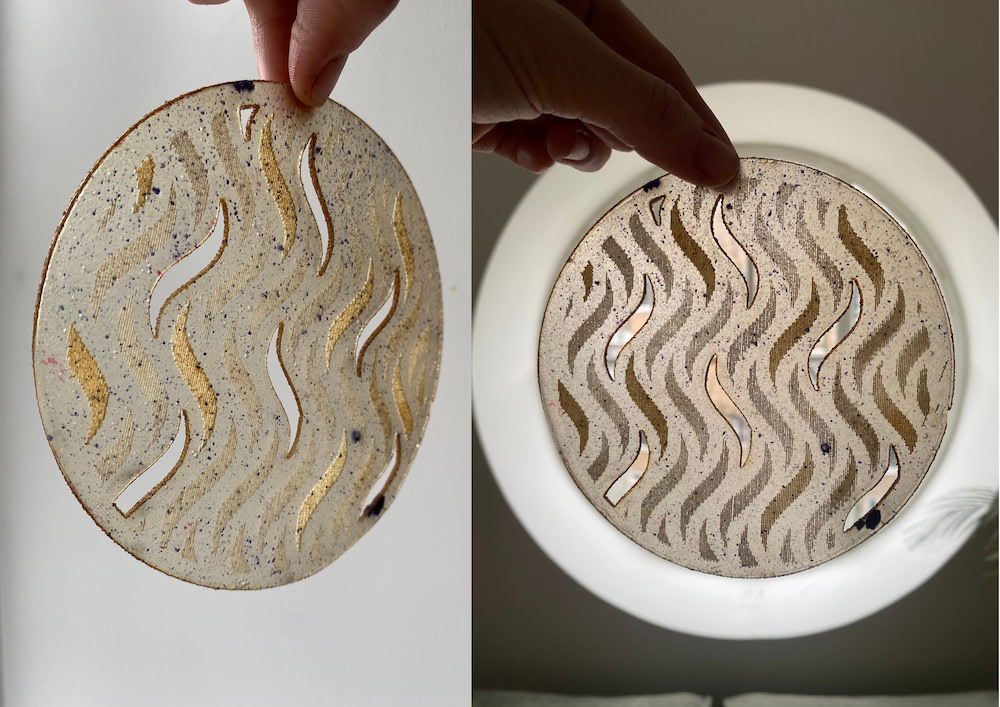
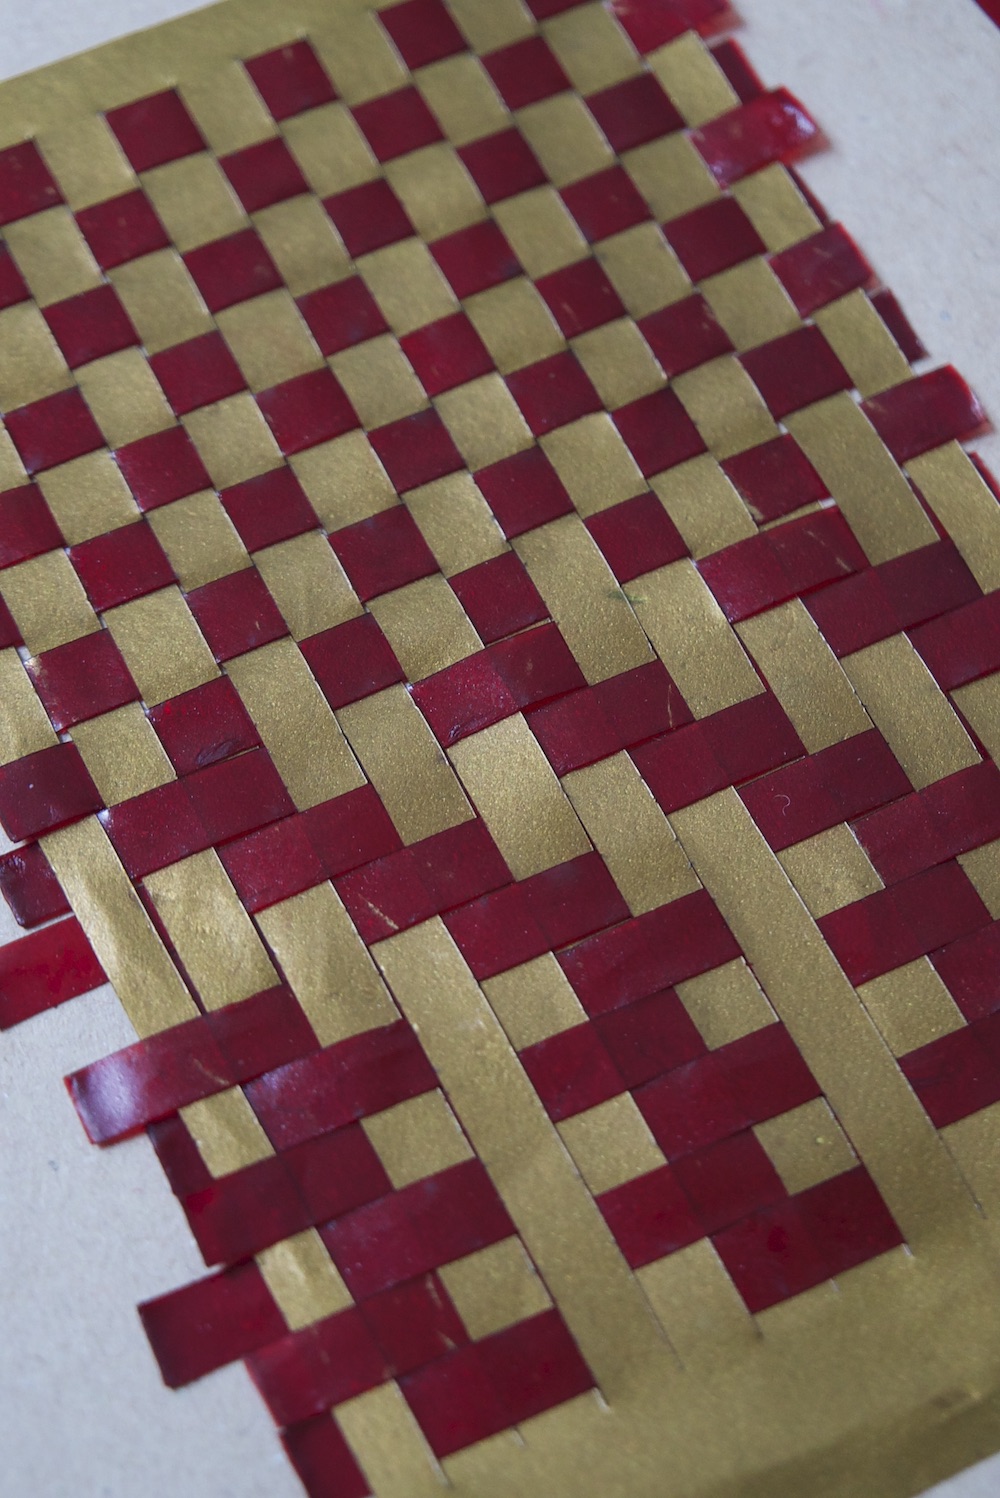
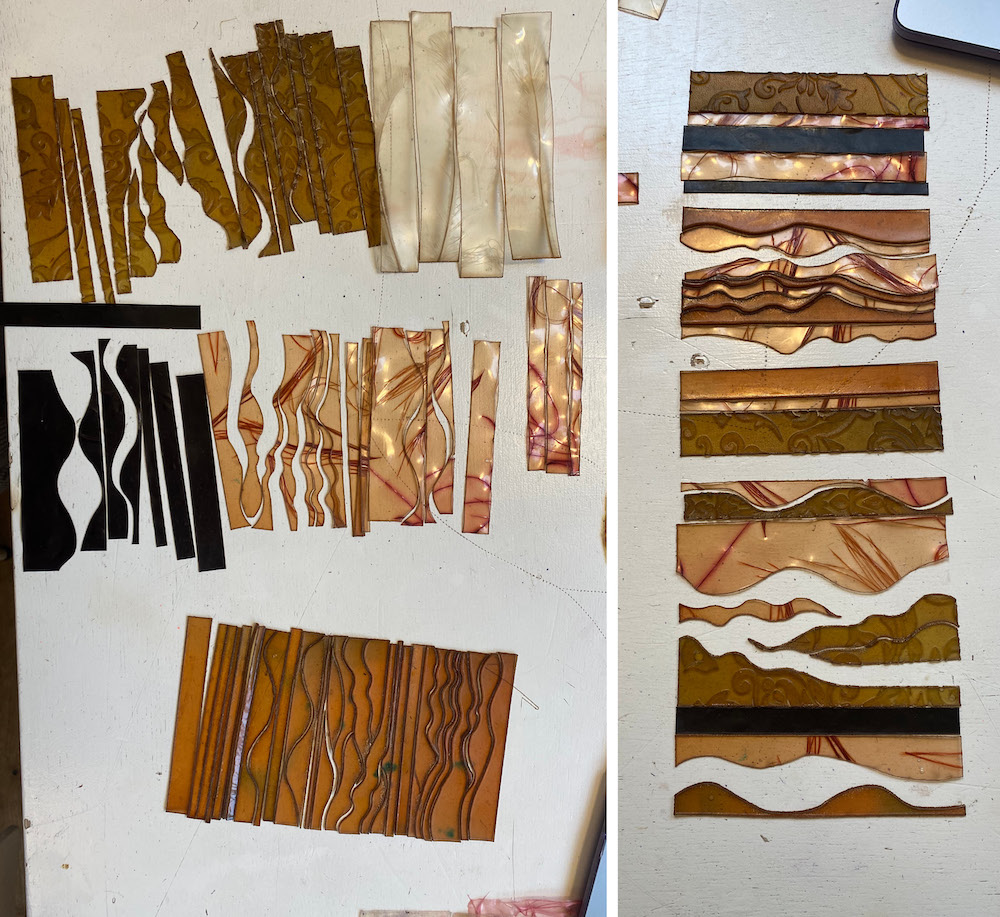
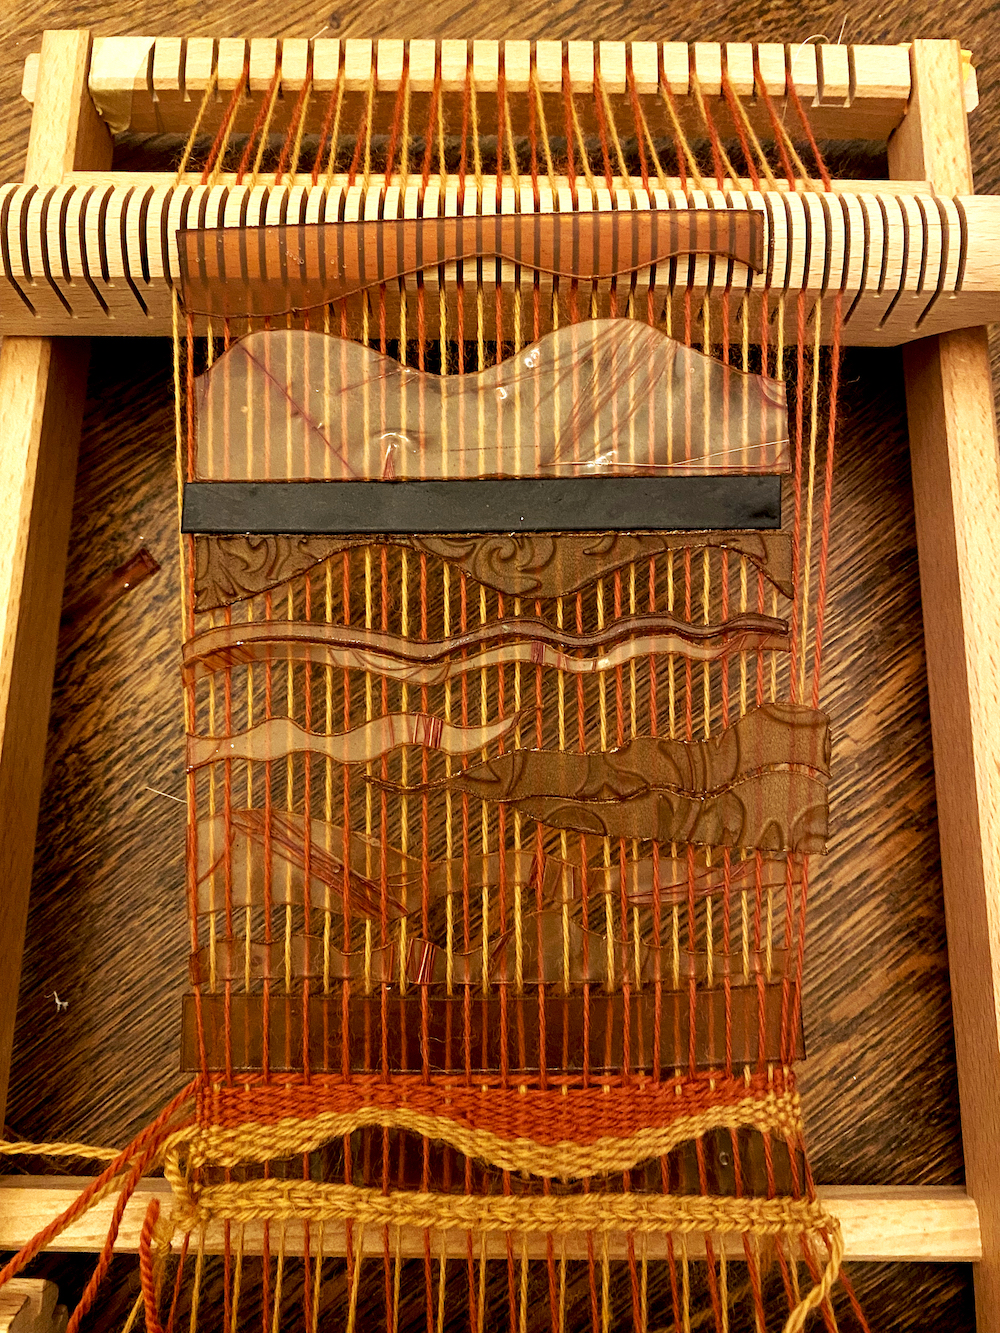
With all the bioplastic samples I had this week, I thought it would be nice to create a pattern that mixed all these samples. I was inspired by a corrugated pattern and mixed five different bioplastics.
What I would like to do is weave a 'pattern' like in the image below. This could be a sample that will be part of my archive.
TEST N.5E
SETTING SPEED: 400 POWER: 75 MIN POWER:20 FILL
TEST N.6E
SETTING SPEED: 300 POWER: 90 MIN POWER:20 FILL
FINAL SAMPLES & TECHNIQUES
DYEING TECHNIQUES
WITH NATURAL DYES
LIQUID COLOR
PIGMENTS
TEST n.11