12. Soft robotics
RESEARCH & INSPIRATION OF THE WEEK
This week for me it was very interesting to see how different textures can be created. I know that the goal of the week was to create an inflatable that could have enough movement to create a grip. But at first taken from inspiration I focused on experimenting with textures using the laser technique.
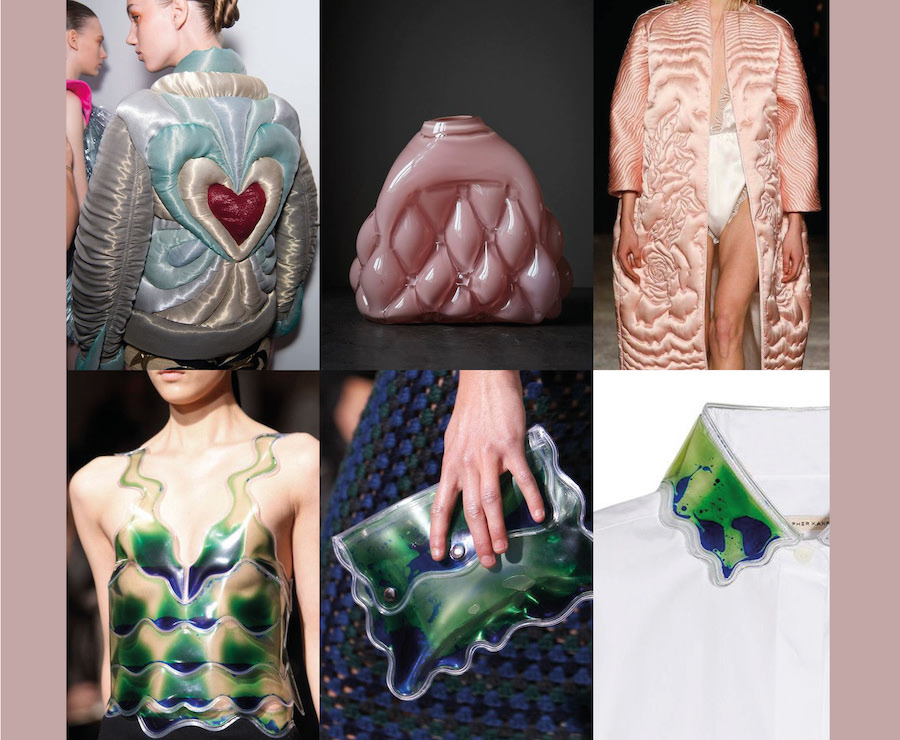
I thought about the world of padding and I found it interesting to experiment with different textures to apply to that world.
My textures of the week :)
My Designs of the week :))
HANDMADE INFLATABLE with baking papers & vinyl sheets.
It was fun to create inflatables by hand, without the use of machines but only with scissors and paper. To do this you can use baking papers and you will also need two layers of vinyl sheet.
Below you will find a clear outline of how to follow this process
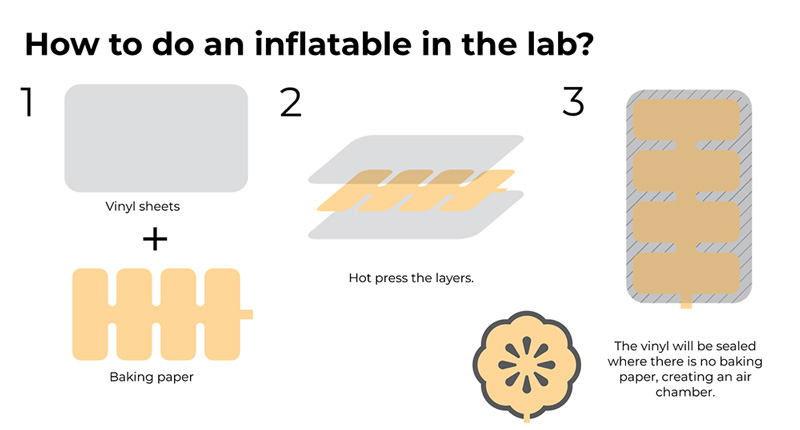
STEPS:
- Think about your design, try to think of a shape that makes sense, make sure that the air has room to pass and that it does not get stuck between your shapes
- When you have a clear shape in mind you can draw it and cut it out in baking paper.
- Choose the color of your vinyl sheets and insert your shape between the two layers, make sure that a small rectangle of paper comes out of your sample, so that you can stick the straw
- Now you can centrally place your sample on a layer of baking paper on the heatpress machine base and on top of your sample.
- Press the Enter button and wait 10 seconds. The machine must be at 150 gr
Below some videos of my first handmade samples:
Tools
- vinyl sheet
- baking paper
- scissors
- pencil
- straw
- heatpress
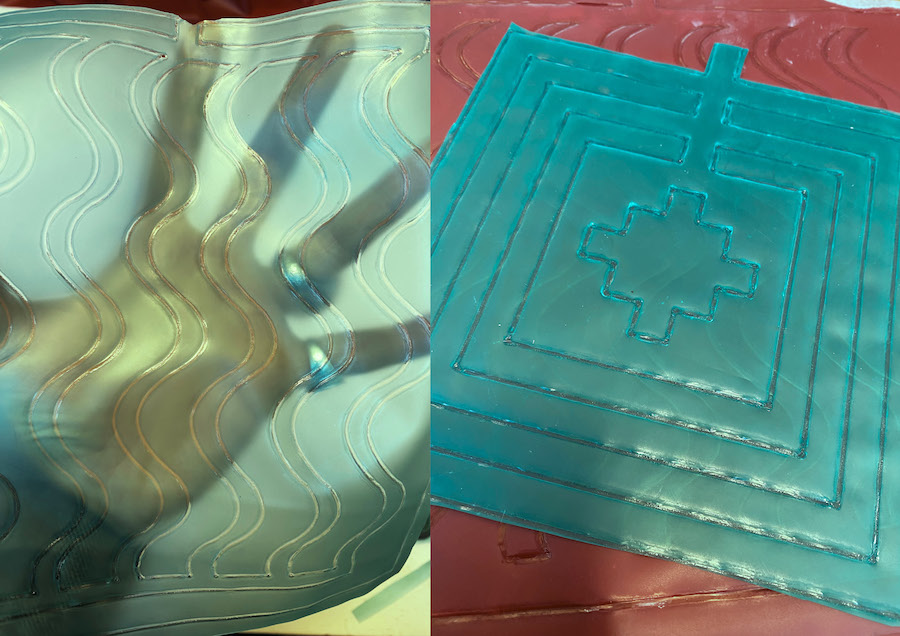
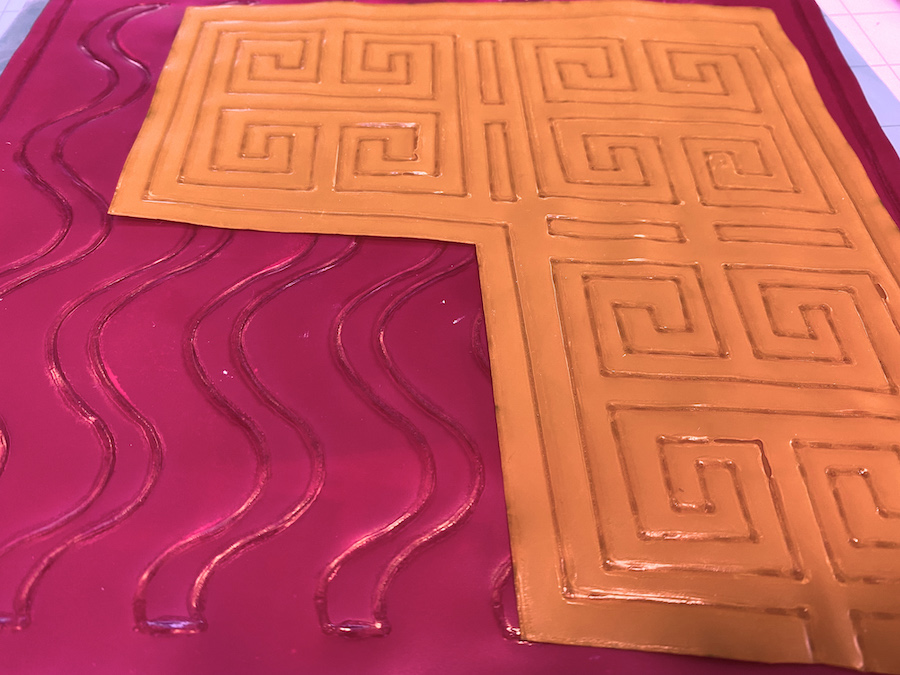
TPU + Lasercut Inflatebles¶¶
I understood that the laser machine was my favorite, but this week I totally fell in love.
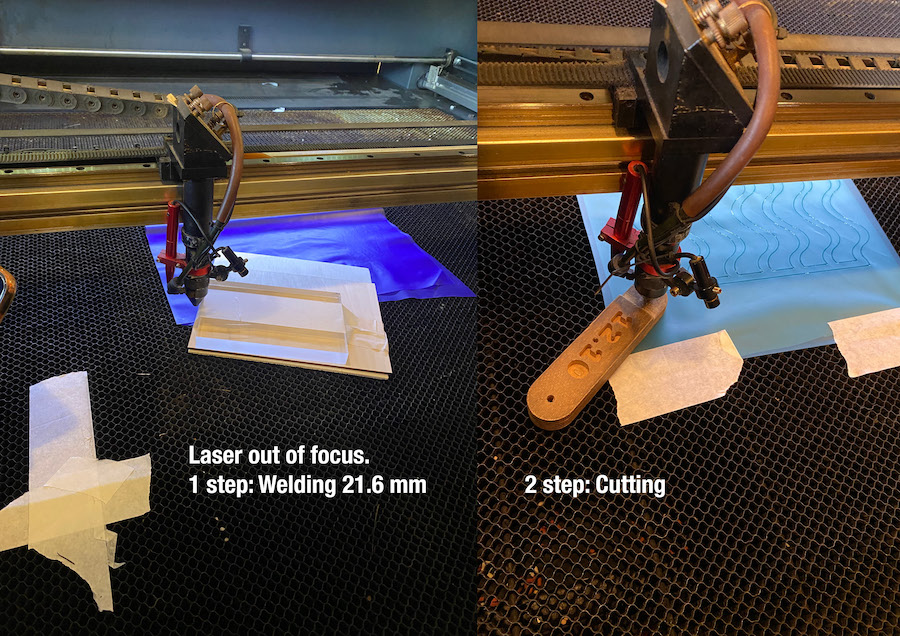
I discovered that in addition to cutting you can also weld surfaces, I think with this technique I will have fun creating many textures. If you do not want to cut a surface, just adjust the distance of the fire, bringing it slightly out of focus. So you move it slightly higher. You will have to do tests first, to find the right distance.
The advice is to try different settings to understand based on the material you will use which is the best. In addition to fire you also need to test the speed and power of the machine. In our first test we used a distance of fire from the surface of 21.6 mm and I must say that it is also the same distance that I used for my samples.
Only once I tried to use a different firing distance, 15 mm and with a speed of 100 and a power of 20, but in this case my sample did not weld, only in the geometric parts, in round shapes it has difficulties.
Below is the setting I used for all the different colors of TPU in my tests:
- SPEED: 100
- MAX POWER : 40 %
- MIN POWER : 10 %
- FOCUS DISTANCE: 21,6 MM
STEPS:
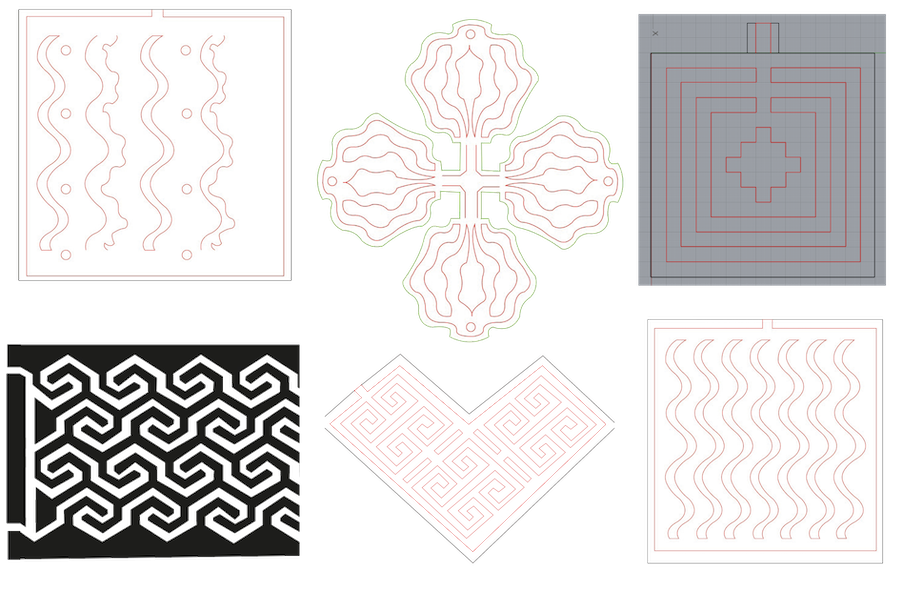
- upload your file to light burn, make sure you don't have double lines and click on auto join, IMPORTANT: creates two different layers colors, one for welding, which will have to work first, and the second for cutting that will have to work later with a different focus.
- Place the fabric on the base of the machine and once you have checked the frame stop it with scotch tape
- remember to turn on the fan of the machine, the TPU creates a lot of fume
- Do not make my mistake, make sure that when you work on the welding part of the fabric remove the flag in Output
Below you will find photos of all the samples with different patterns that I tested. I liked the idea of creating more inspirational textures for future padding work. Each sample has a different movement, horizontally, vertically, but I believe that for the goal of the week the one that comes closest to the correct movement is the "red cauliflower"
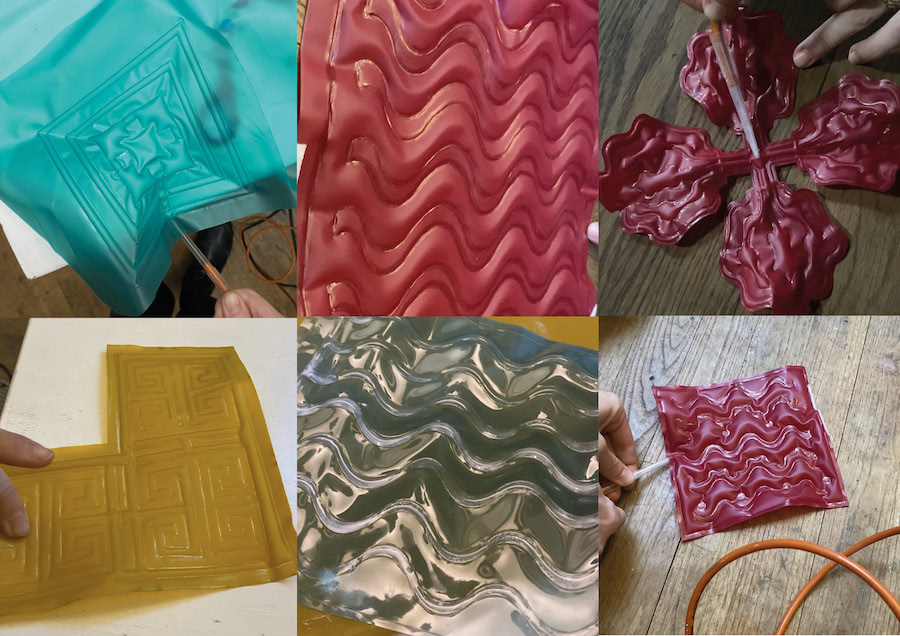
In this video you can see all my inflatables of the week. I found it interesting to make some samples with the transparent TPU, I think I will test my cauliflower with the transparent TPU by inserting colored powder inside and see what effect it will have. Below you will find results soon
Tools
- TPU in different colors
- Laser machine
- Scissors
- Straw
Molds for silicon inflatables
For the next process I decided to create an inflatable with latex. The silicone effect felt too thick and I didn't like it. I wanted to make something much more subtle so that you could better feel the air inside.

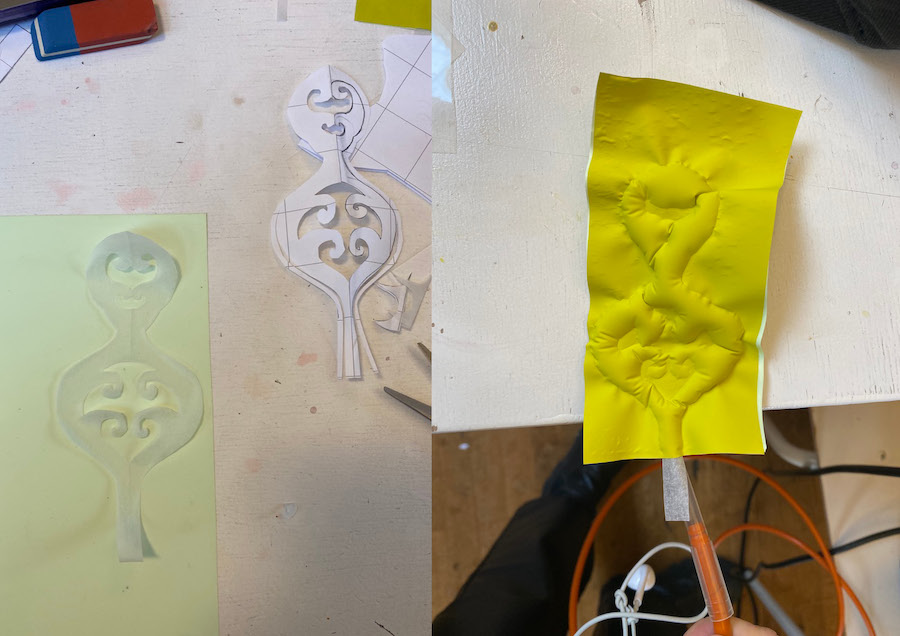
For the first test I decided to see how one petal of my cauliflower would work. So I took a leaf out of my design and worked on that.
Also in this case I worked with the laser machine. First you need to create all your different layers so that you create your mold. Working with the lattex I worked on very thin layers, about 1.5mm. Below is a photo of all my cut layers.
I made one mold for my inflatable with space for air, and a second mold with just the outline to simply create texture within my flower outline.
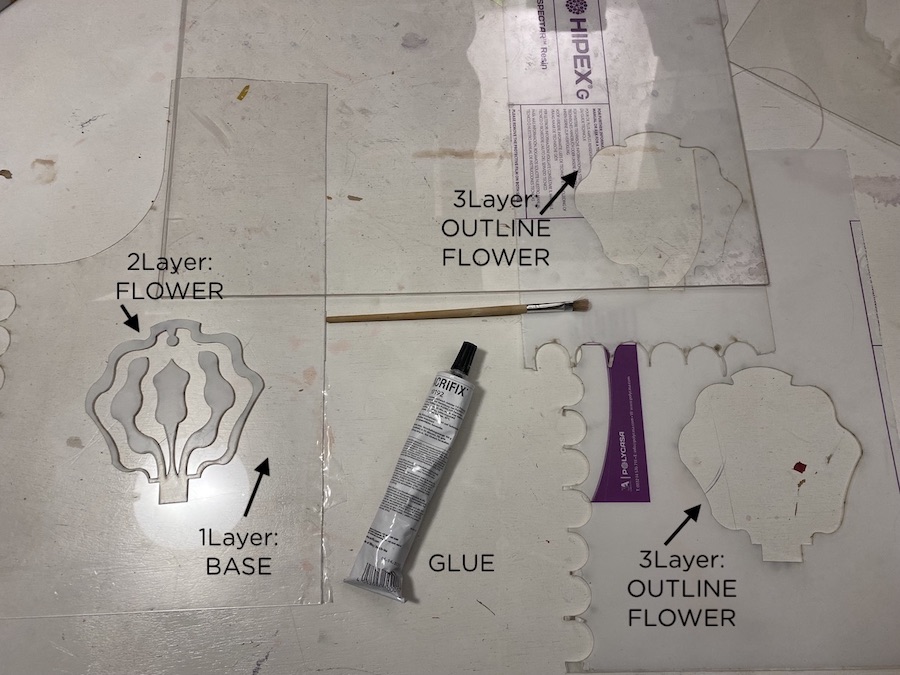
Here below you can find the setting that I used to cut my different layers of acrylic:
- layer thickness: 1,5 mm circa
- number of layers you need for the latex inflatable: 4
- number of layers you need for the texture mold : 1
- SPEED: 60
- MAX POWER: 75%
- MIN POWER: 20%
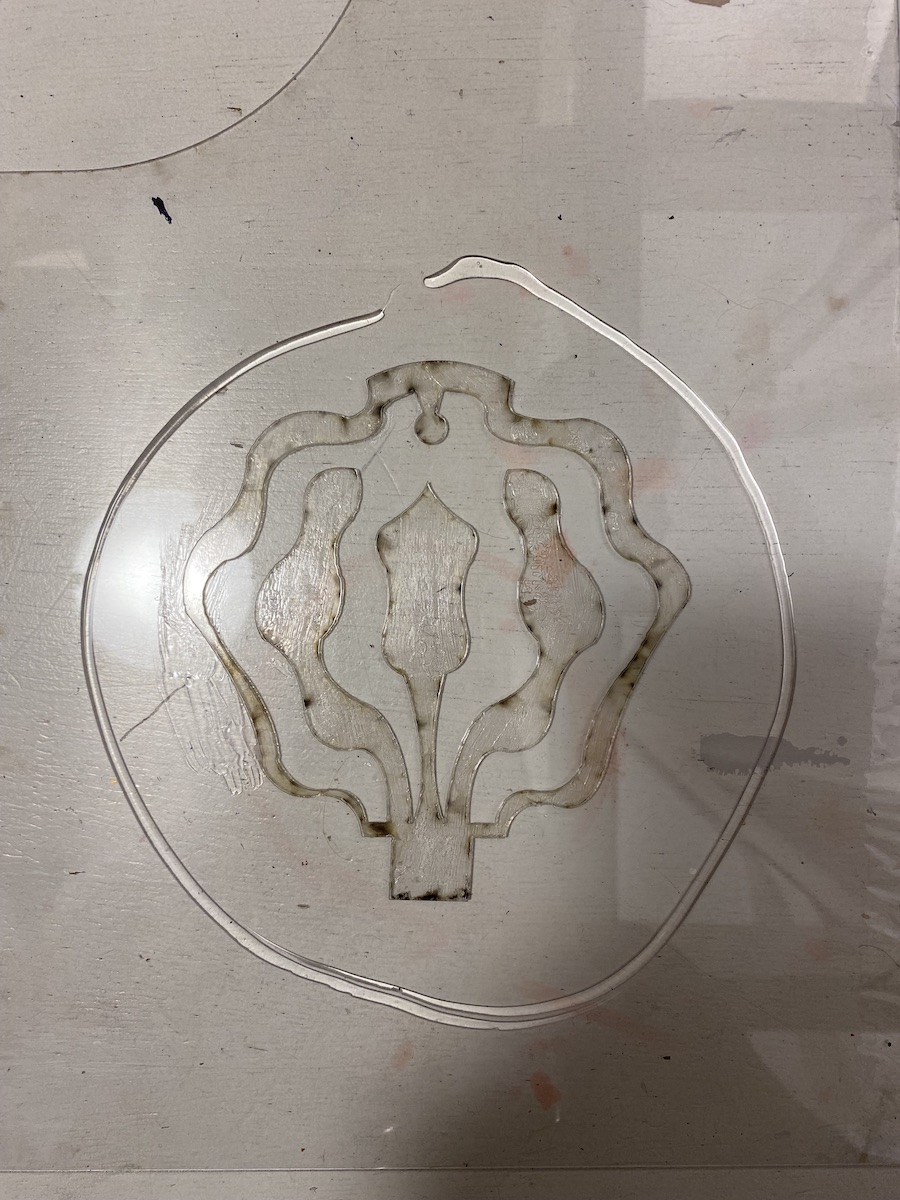
When your pieces are all cut you can proceed with filling them with latex.

Steps:
- Remove the paper from the acrylic boards
- Find a base that has a balanced slope level, otherwise your liquid will risk spilling or concentrating on just one side of your mold.
- Glue all the pieces together
- Secure all of your pieces to the base, so that the liquid cannot escape. I also used scotch tape in the case of the texture mold.
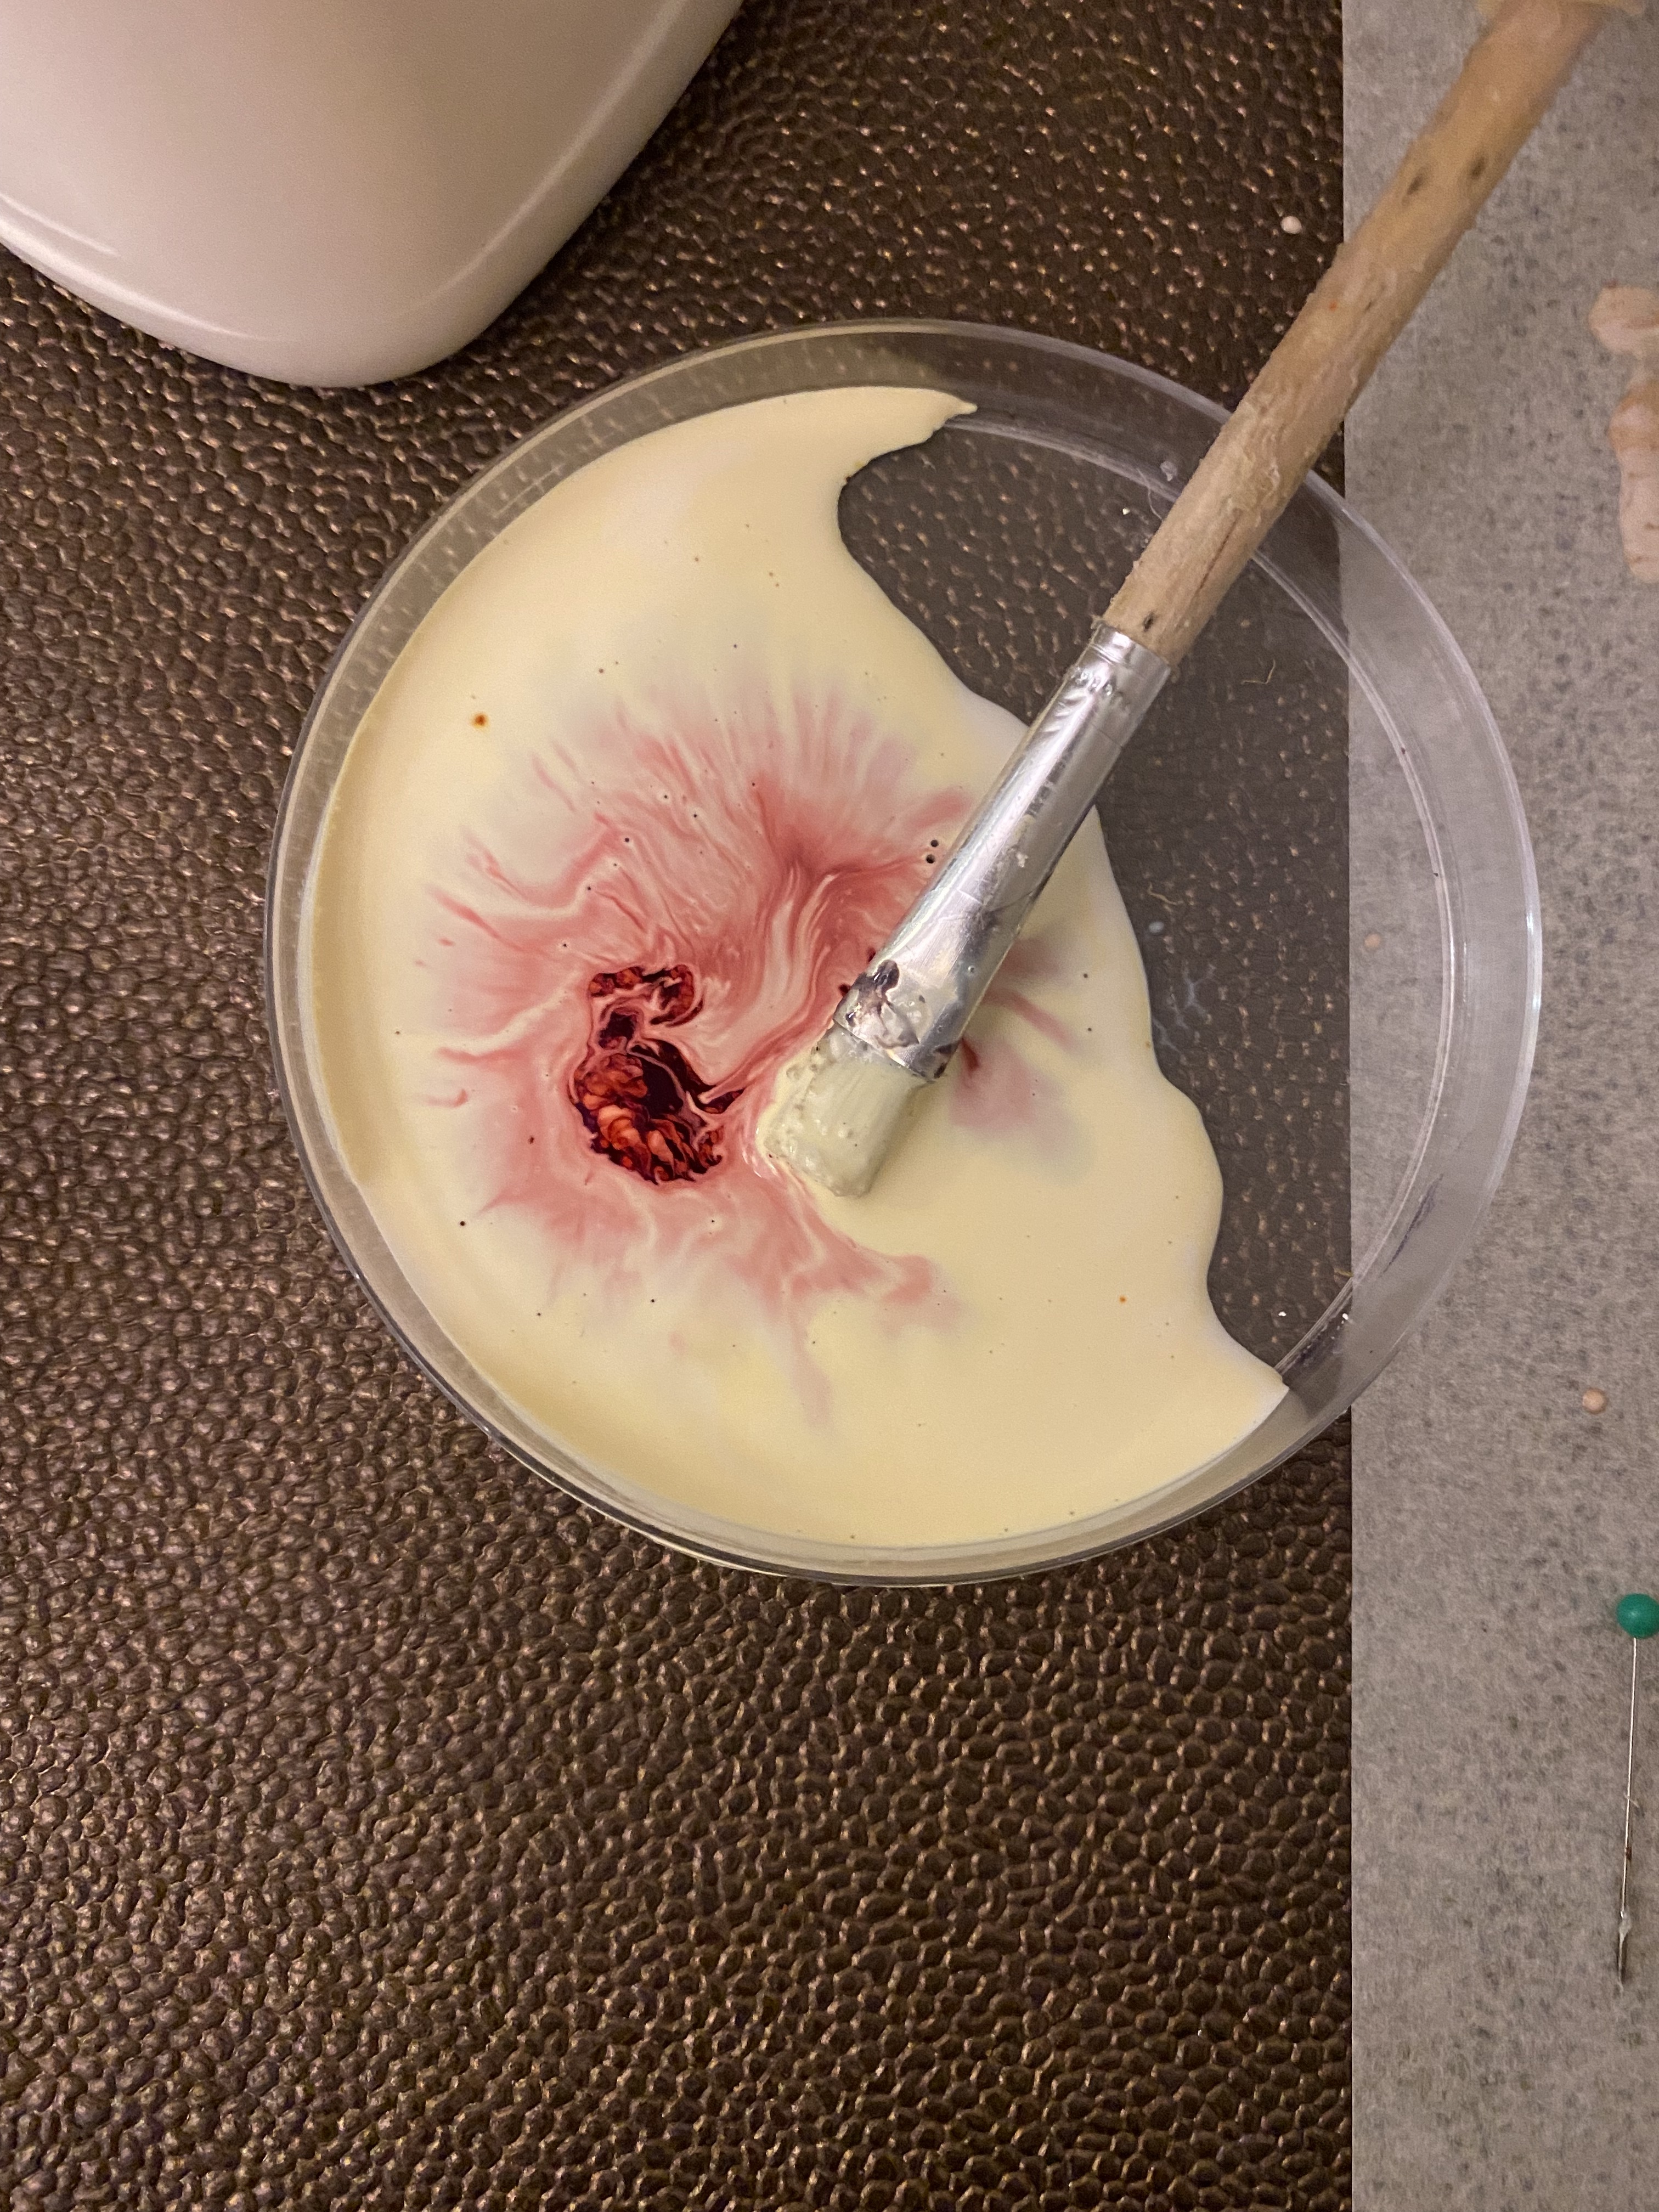
- First pass a layer of latex on the base with a brush, a thin base so that you have a uniform texture. I did it in the texture mold, but I forgot to do it in the inflatable mold.
- I mixed some liquid color together with the lattex, so as to have a marble effect texture, just pour a few drops and do not mix the color well, pour the mixture
- When the mixture is in your mold, wait a few minutes and you will see some bubbles appear, help yourself with a needle and burst them so that your texture is homogeneous.
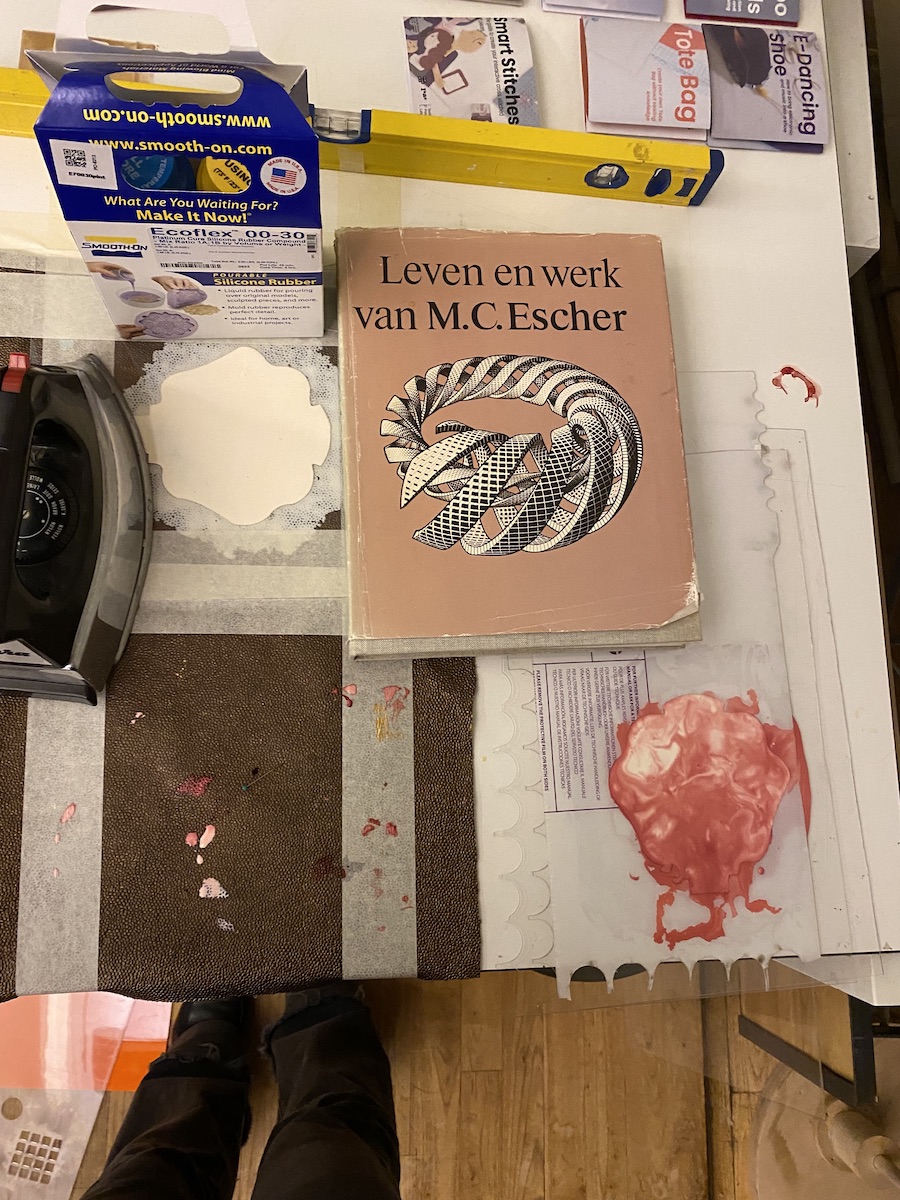
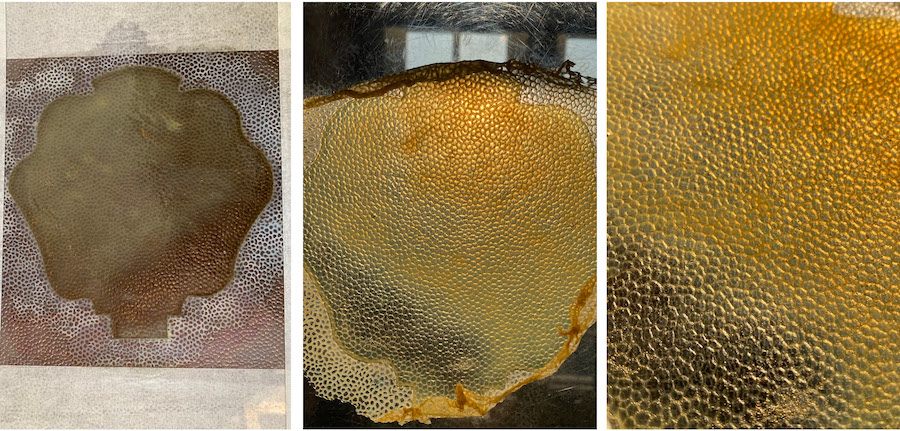
Results after 64 of drying
Here below some pictures about my experiments after 64 hours of drying
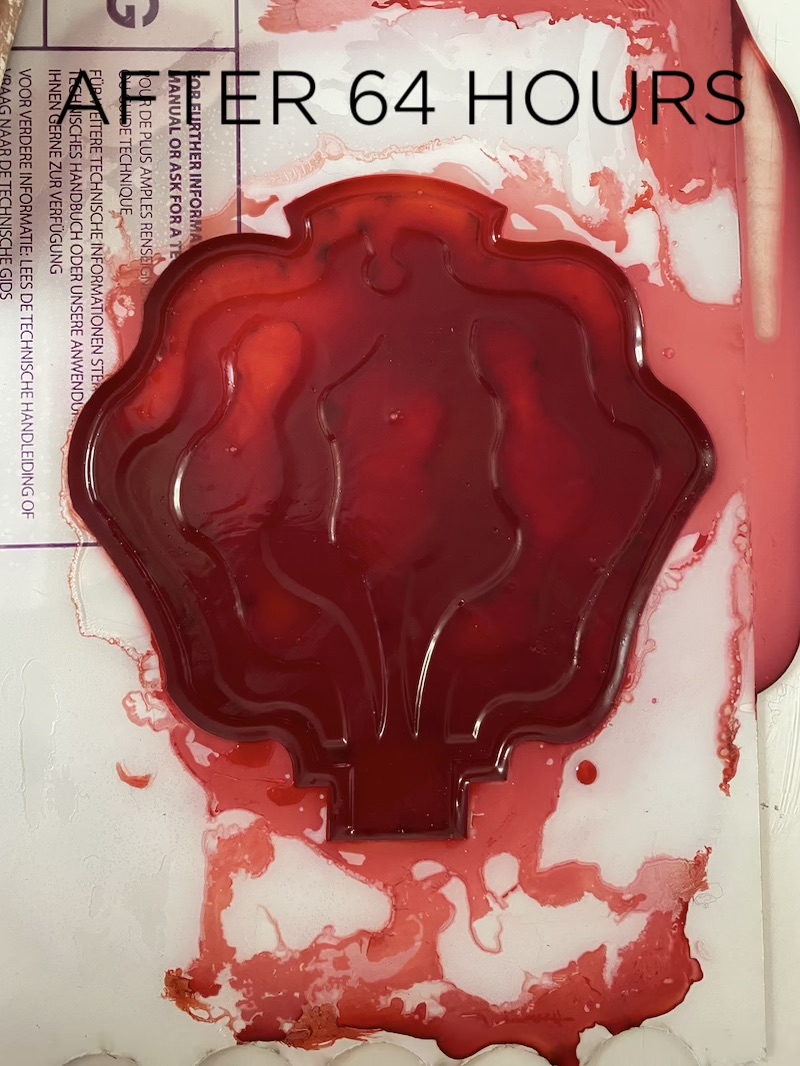
This is an experiment that i did with leftover lattex mixed with gold powder color. I wasn't sure about the end result using liquid color/powder color. So I did some tests. In the case of the red liquid color I wanted to get a marble effect mixed with the yellow color of the lattex, the result is very intense and I can't see the marble effect anymore, so 2/3 drops are really enough if you want to get a less intense color or something not homogeneous. I recommend first pouring the lattex into your mold and then adding 2/3 drops inside the mold and with a needle try to spread the color, but do not mix it together if the goal is to obtain a marble effect..
As for the powder colors, when I poured a small dose into the lattex it seemed that it did not amalgamate, and that many clots remained, so I decided to do a separate test and see the result. I must say that the final result is beautiful after 64 hours of drying, I got that marble effect I wanted, and all the golden dust in the days has melted very well, in fact there are no more clots.
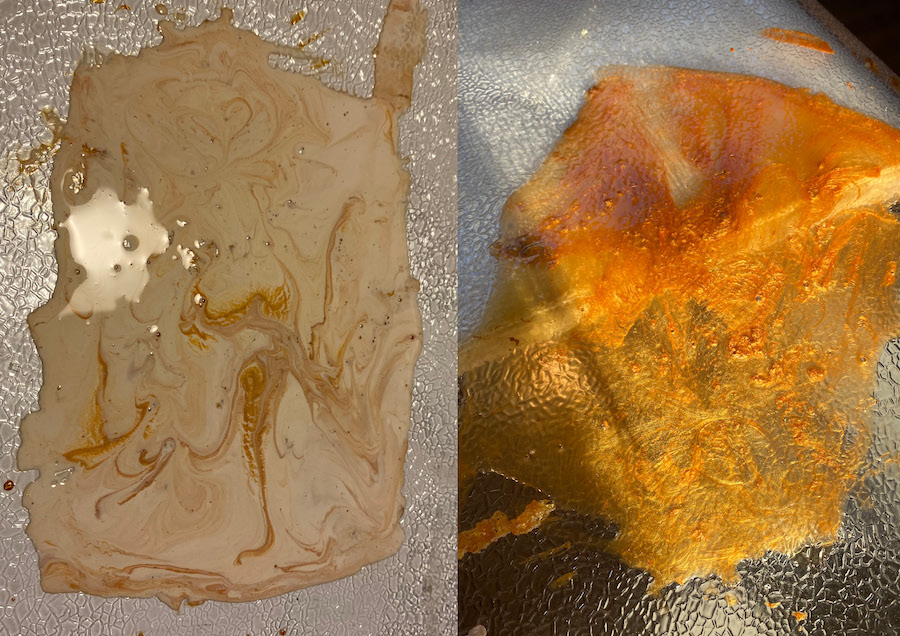
I can therefore say that you get two different effects, both very intense, the trick is to dose the amount of color well.
Tools
- Acrylic Layers
- Lattex
- Laser machine
- Scissors
- Straw
- Brush
- Needle