13. Skin Electronics
Research
Again, as with the Werable week also for Skin Electronics, the bar is definitely raised for me who is not an electronics enthusiast. Let's say I'm more for innovative but traditional fashion :) but above all, as my mind is full of ideas, I always try to follow the hardest path to create something new, and for my level of knowledge of electronics it's best if I keep a low profile.
But in this inspiration section I will let you dream.
Unfortunately, I was unable to attend class during the week and only found myself working on my assignment a few months later.
Artists
You may have guessed that I am a fan of masks, in fact I find them really fascinating and there are artists I have been following for some time who always leave me particularly inspired.
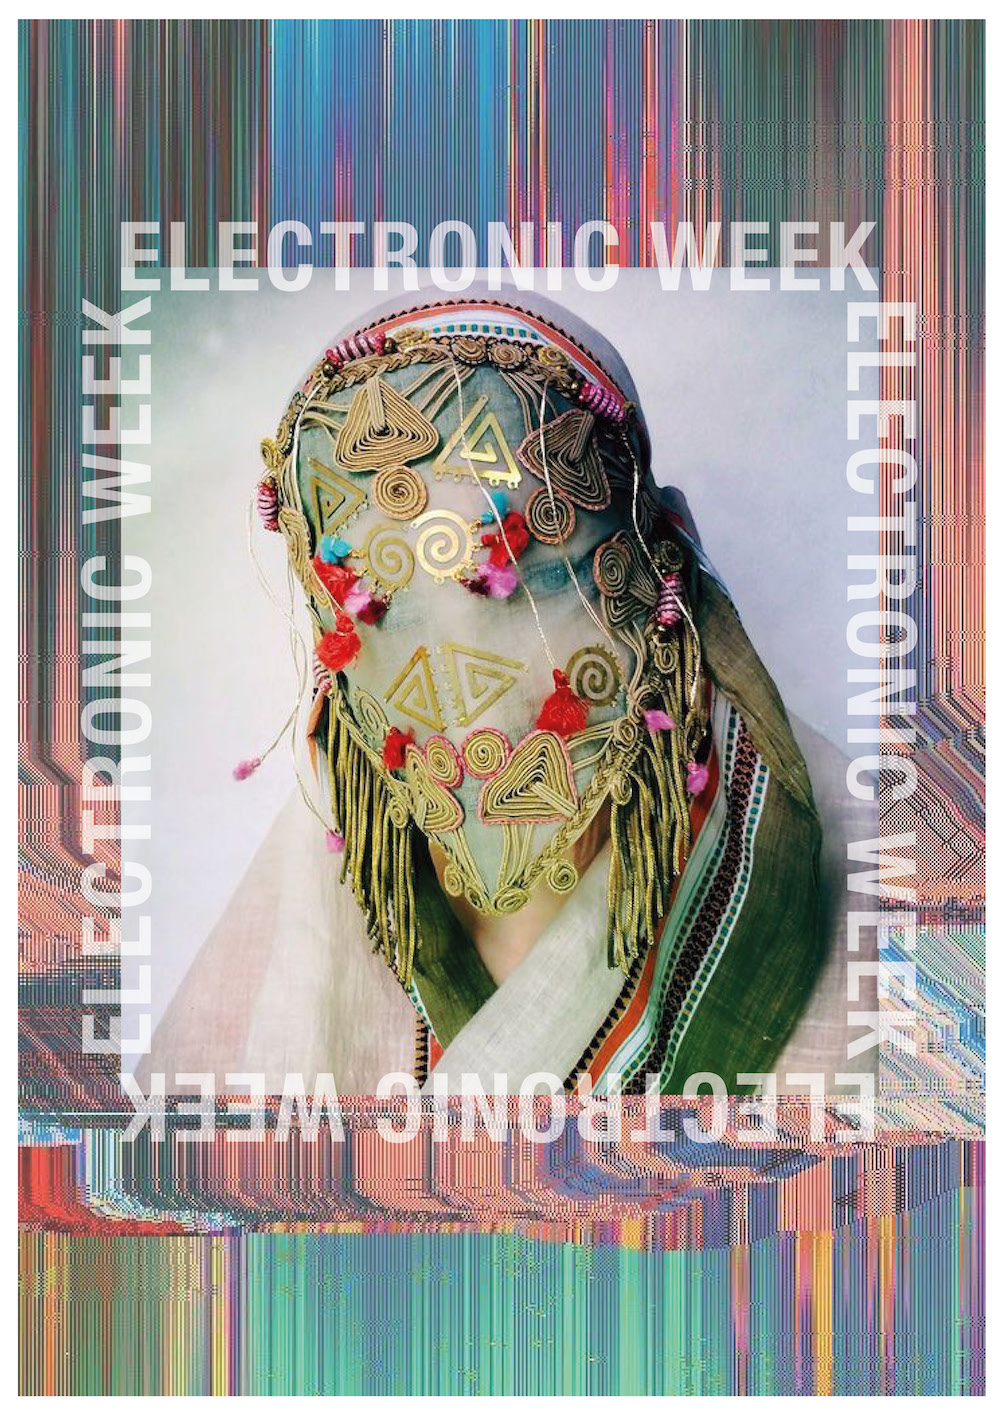
Damselfrau, Magnhild Kennedy

He's definitely my favourite artist, I've been following him for years and I love what he does and how he does it, I'll put a link to his website and to an interesting interview he did a few years ago.
I know there are not many electronic elements in this one either, but think how interesting it would be to be able to work on masks like this with electronic elements.
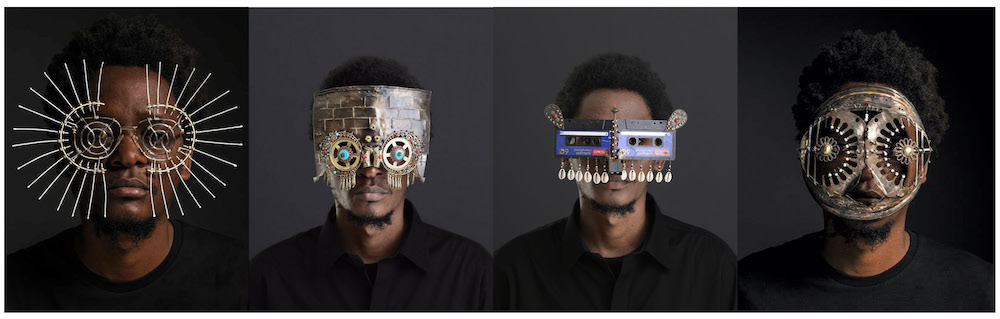
Cyrus Kabiru
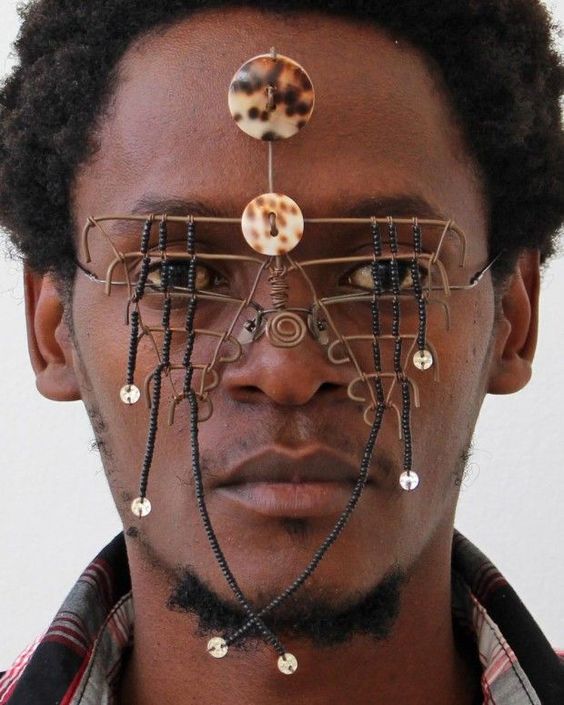
This artist also doesn't work with electronics, but I like how this self-taught Kenyan artist Cyrus Kabiru creates extravagant glasses out of found pieces of metal and other reclaimed materials on the streets of his hometown, Nairobi. Kabiru has been making his futuristic glasses since childhood and devotes much of his time to producing artwork for his C-Stunner series of glasses and matching photographs.
It is also interesting how he has defined his style, Afrofuturist, if indeed I feel very close to this style and the futurist accent could be given by the electronics part in my case.
Take a look at the article I found on him at this link!
INTO TO ATTINY
An ATtiny85 is a microcontroller from Atmel. For those already familiar with Arduino (ATmega), it is not incorrect to say that it is one of the little brothers of an Arduino.
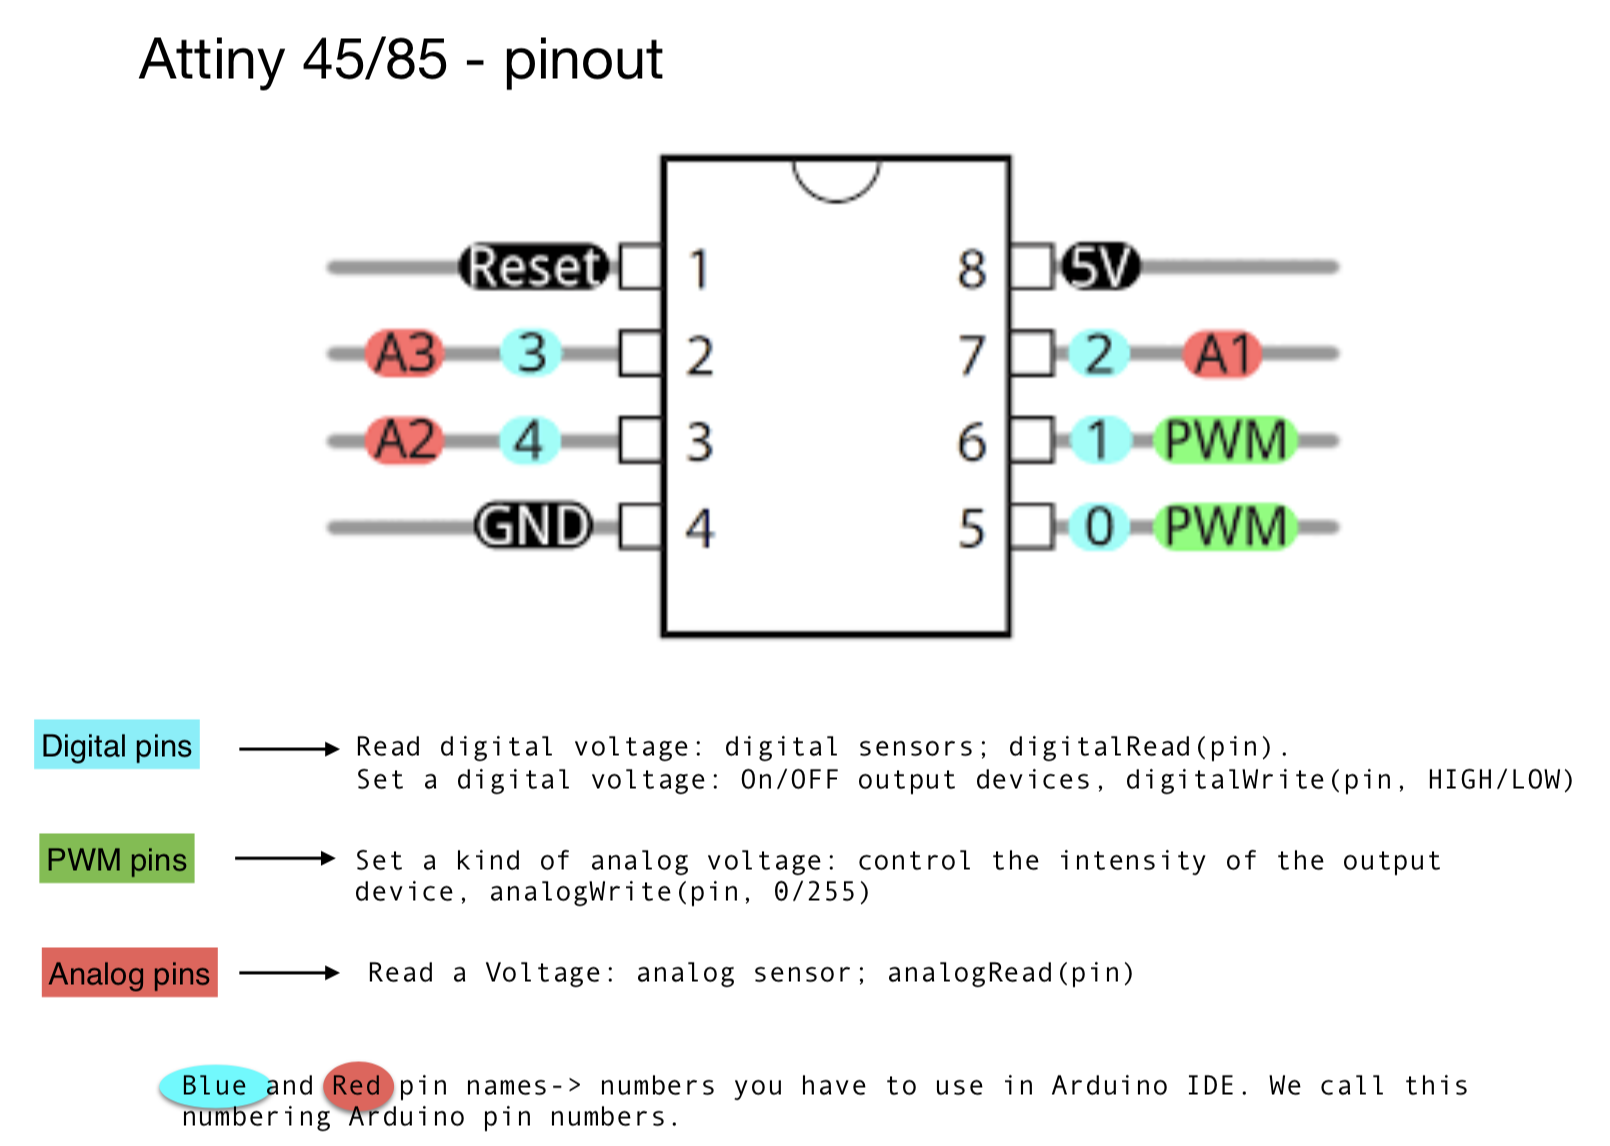
Comparing an ATtiny with an Arduino is incorrect because by Arduino is meant not only the ATmega series microcontroller, but the whole development board.
How to program the Attiny
The first step is to prepare the Arduino Uno so that it works as an ISP.
In the following sub-chapter you will find all the steps that you need to follow:
- PREPARING YOUR ARDUINO
- CREATE THE CONNECTIONS
- PROGRAM ATTINY
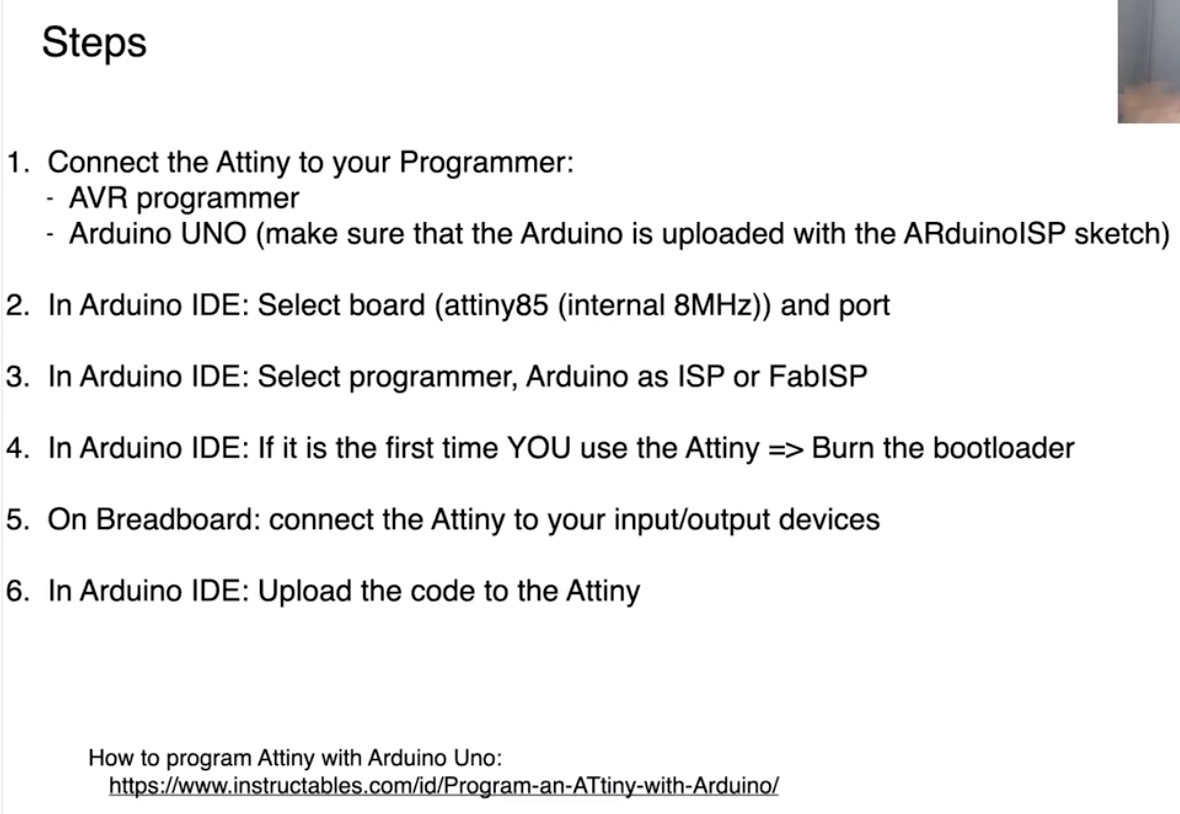
STEP 1: Arduino as a programmer
In this first step we need to transform Arduino UNO in programmer, uploaded the right code ArduinoISP in your arduino uno, follow the steps below:
- OPEN Arduino software
- File - Exemples - ArduinoISP it means In System Programming
- You will see a code appear, you don't have to change anything you just need to upload it to your external Arduino, once uploaded your external board you can disconnect and it's ready to be connected to your Attiny
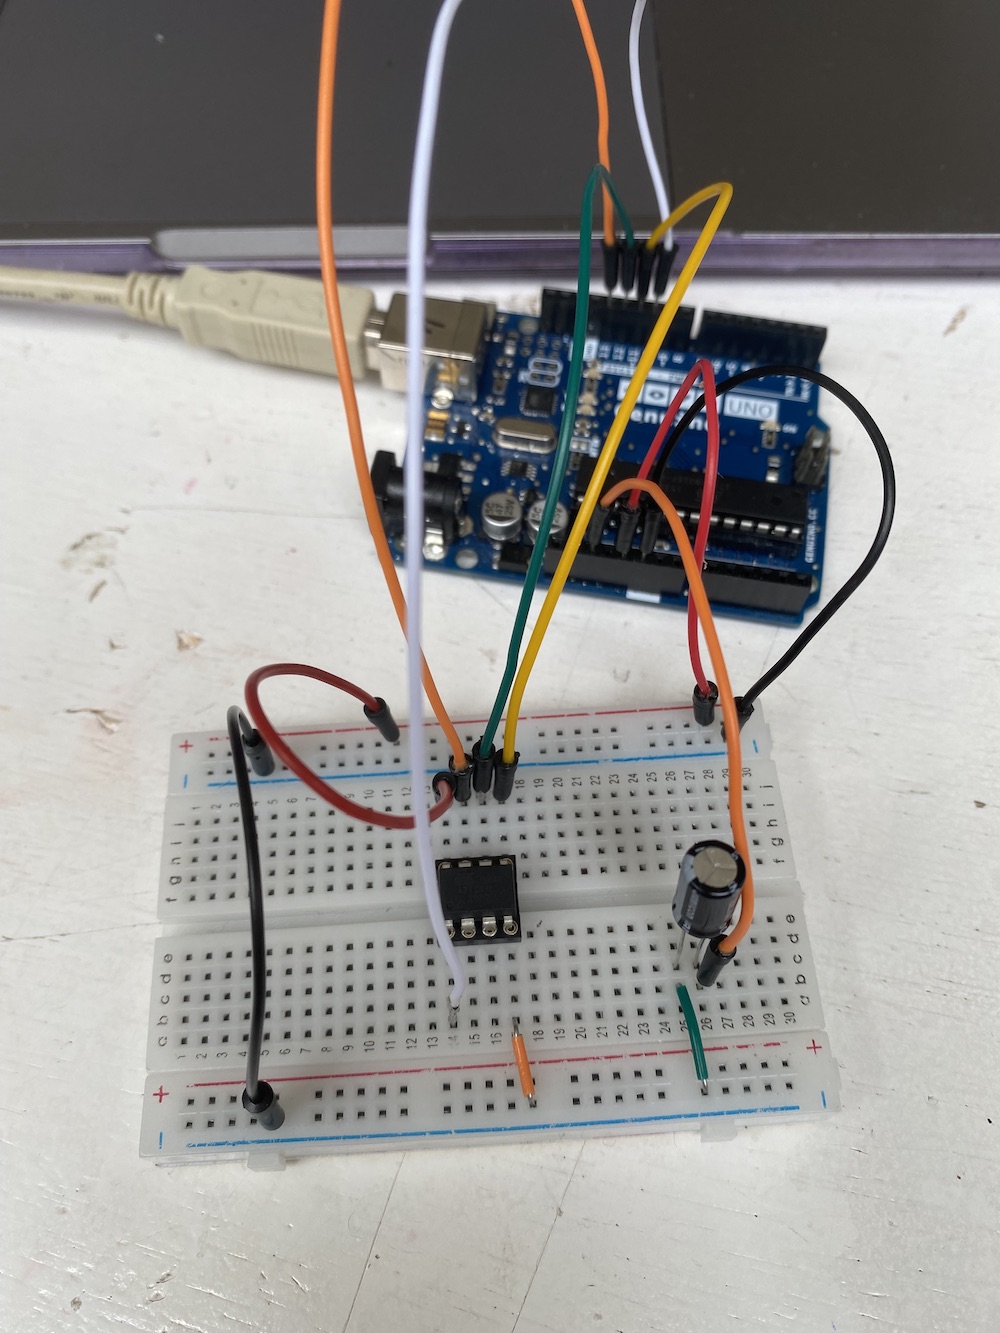
STEP 2: Create the connections
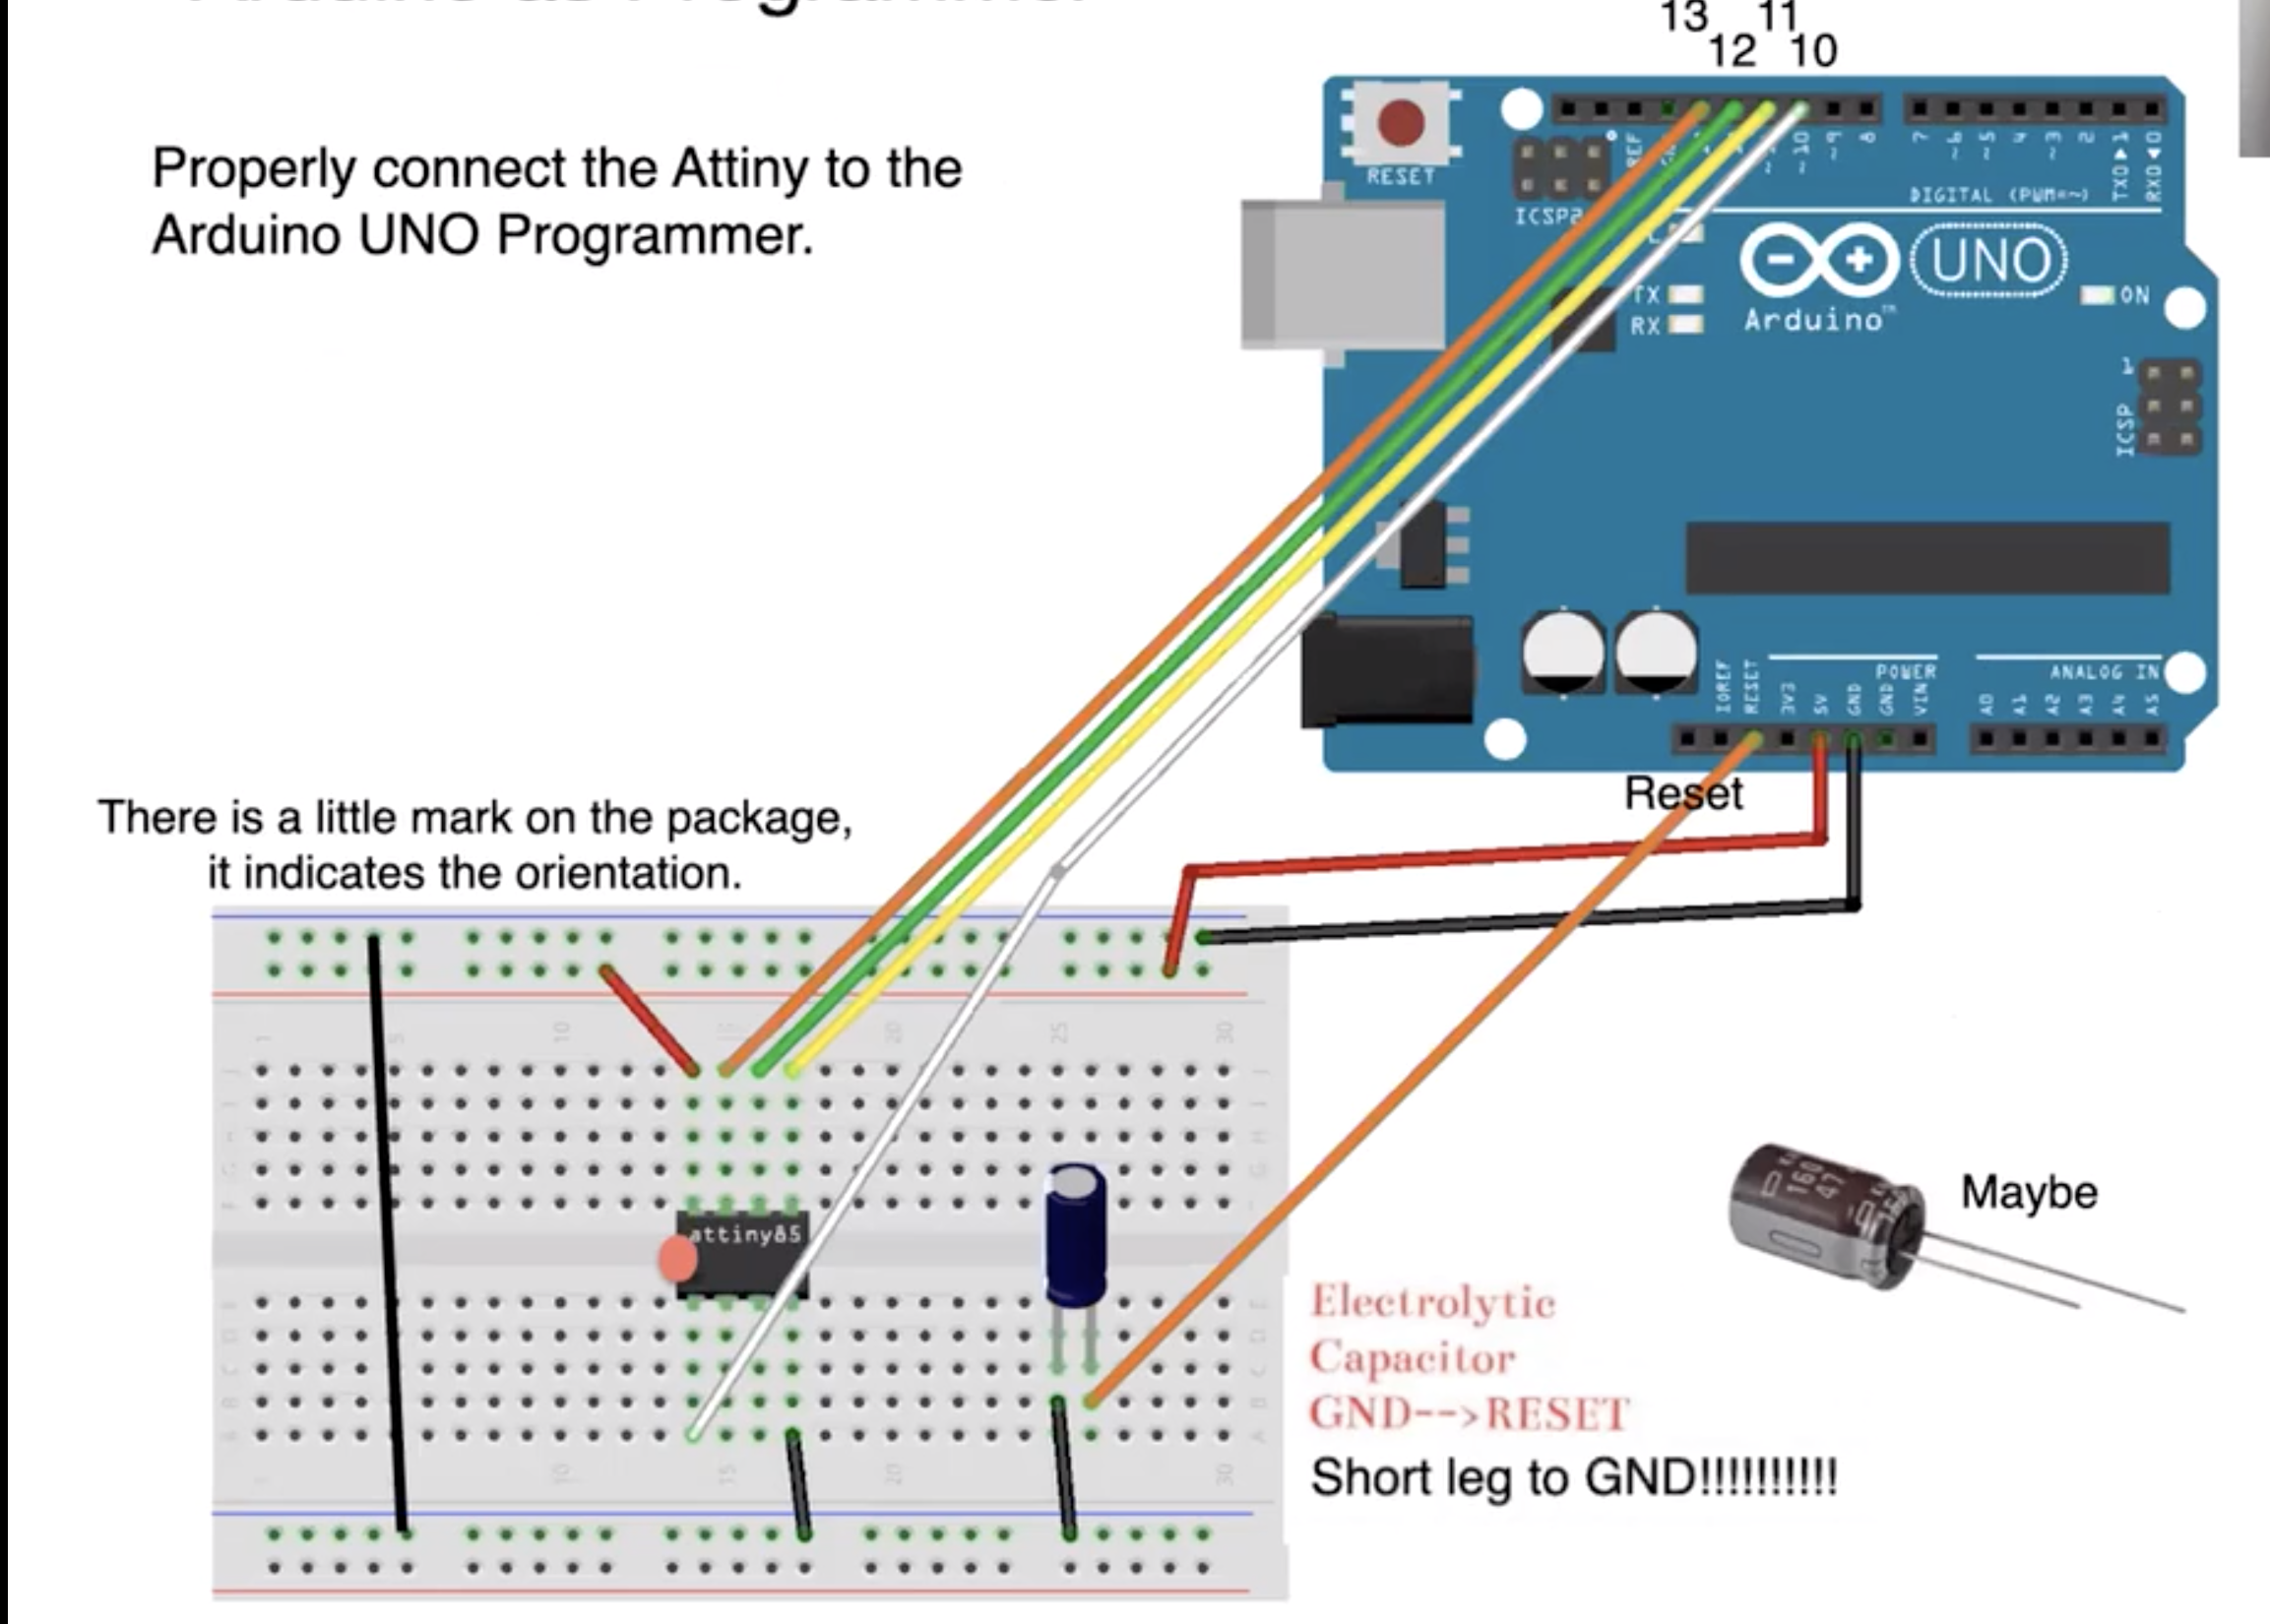
Be patient, and make all the connections, you will need 4 pins for Programming and 2 pins for Power, an extra component can be the Capacitor, but be careful with the orientation, it has two terminals the longer one must be connected to the RESET of the Arduino and the shorter one to GND. If you don't, the capacitor may explode :)
You use these pins of the Attiny to upload the sketch, once the code is uploaded I can use these pins as I want: to read Voltage (input) or to set Voltages (output)
STEP 3: How to program the Attiny
Now you can proceed to configure the Arduino IDE.
First you need to add the board.
From the "File" menu -> "Preferences..." set the "Additional boards manager URLS:" field to:
https://raw.githubusercontent.com/damellis/attiny/ide-1.6.x-boards-manager/package_damellis_attiny_index.json
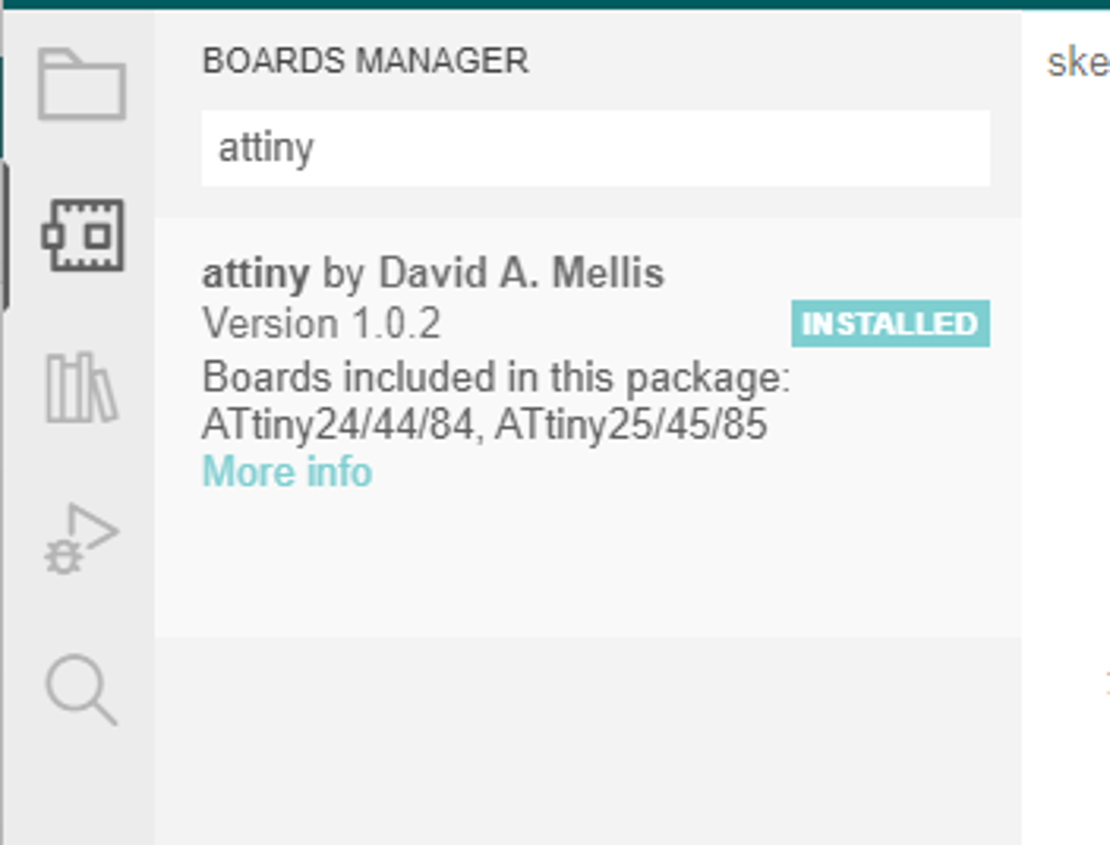
Next click on the "Board" button from the bar on the left and install David Mellis' "attint" board:
Now connect your board and under Tools you will need to update some parameters follow this list you see in the picture
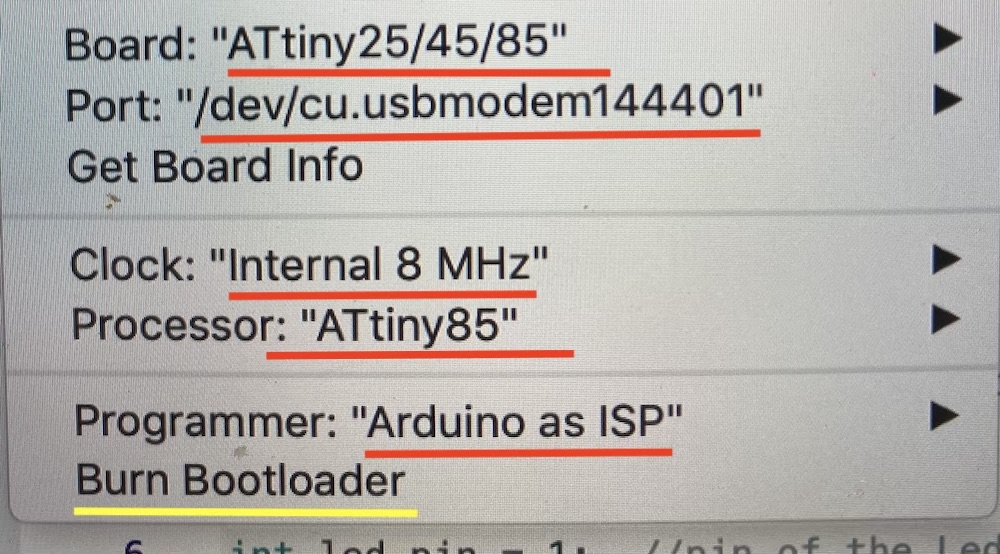
when your parameters are all entered correctly you are ready to proceed with the next step :
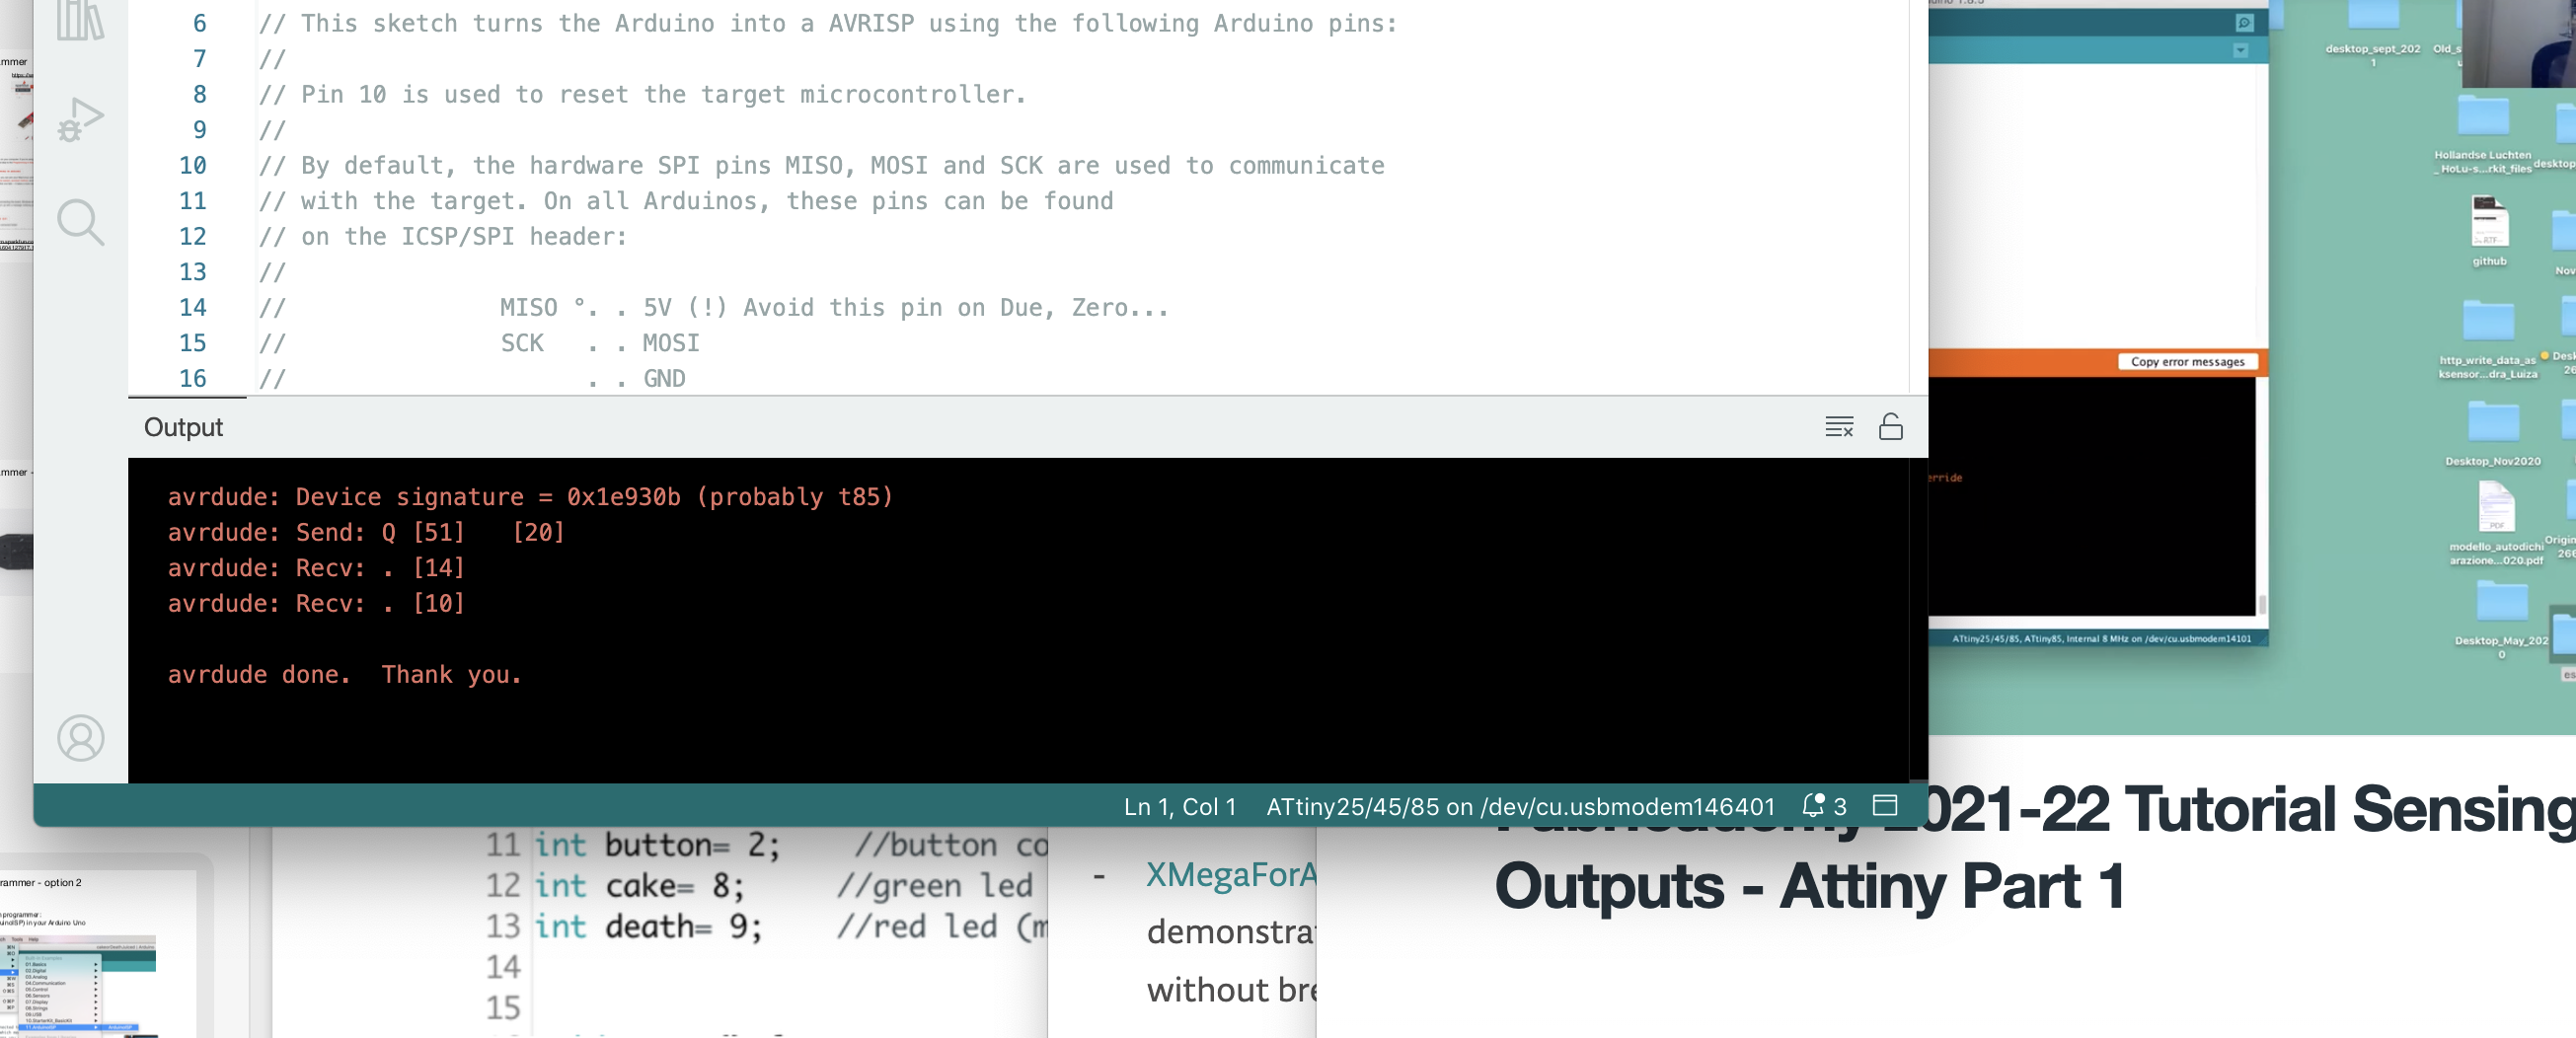
BURN BOOTLOADER ...cross your fingers that all is well. Basically it is a code that will check your Attiny if it is working.
If all goes well you are ready for the next step....you should get a screen like this.
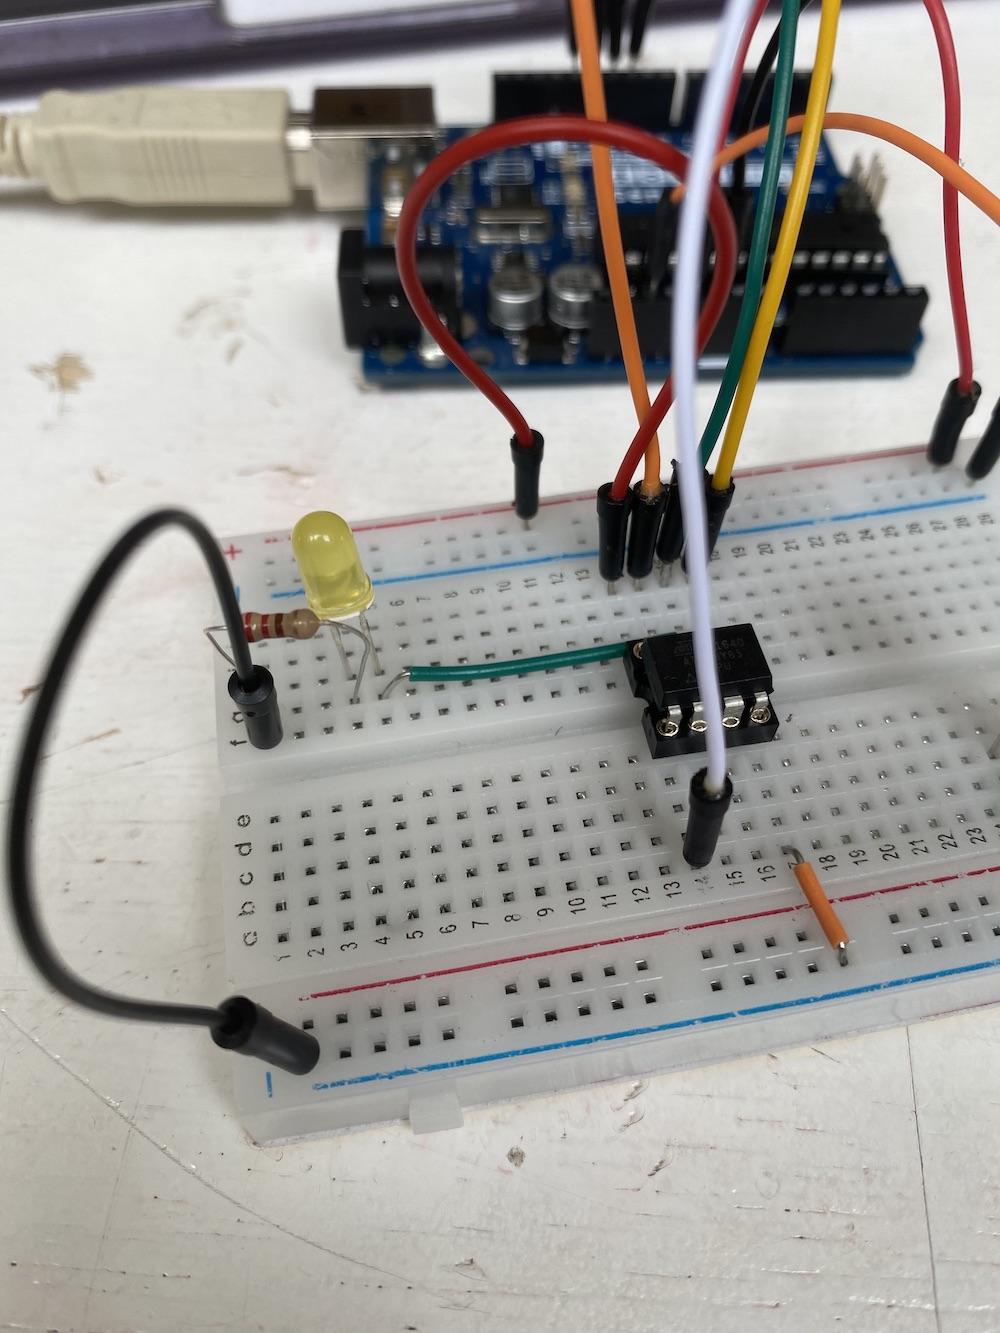
STEP 4: On Breadboard: our goal LED
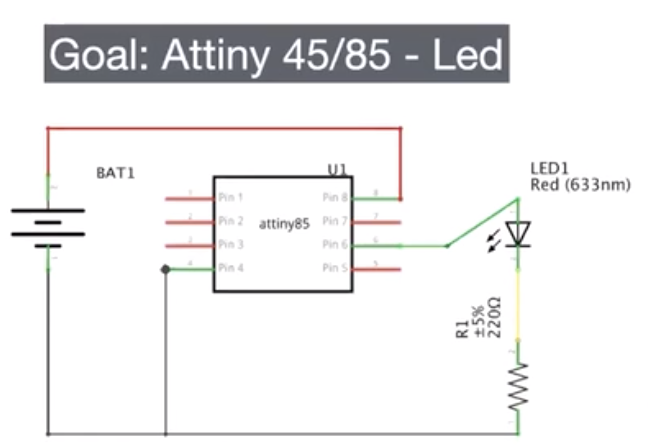
What you have to do now is to add a 220 OHM resistor and the LED you want to make light up, but follow the diagram below and you will find everything you need to do.
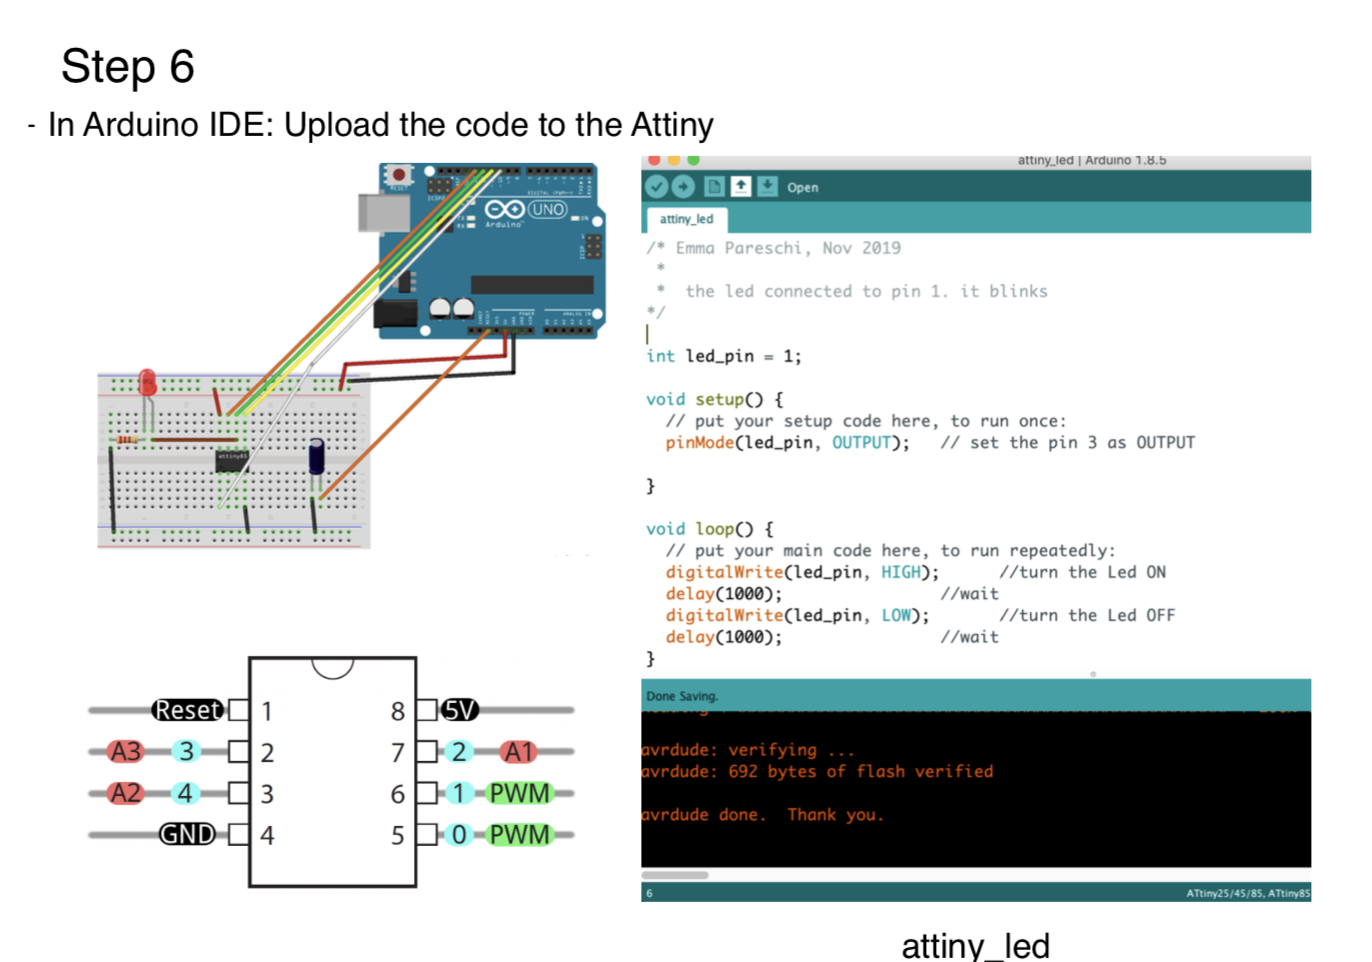
once your connections are ready you can download the link with the code that emma provided and upload it to your external board.
/* Emma Pareschi, Nov 2019
 *
 *  the led connected to pin 1. it blinks
*/

int led_pin = 1;  //pin of the Ledx

void setup() {
  // put your setup code here, to run once:
  pinMode(led_pin, OUTPUT);   // set the pin 1 as OUTPUT

}

void loop() {
  // put your main code here, to run repeatedly:
  digitalWrite(led_pin, HIGH);      //turn the Led ON
  delay(1000);                //wait
  digitalWrite(led_pin, LOW);       //turn the Led OFF
  delay(1000);                //wait
}
Unfortunately I have to stop here, having done these tests when FabricAcademy was over I could not find the necessary resources/people to help me find solutions to my final error.
When I transferred the code, the error it gave me was: ERROR: TO UPLOAD THE SKETCH YOU NEED A PROGRAM.
But I had a program, that's the first step I ran, so I really don't understand where my error came from. Also, the BURN BOOTLOADER was successful so there should be no problem with my Attiny.
Also after several trials of reloading there seemed to be no real connection.... But I have already done all the steps 2 times from start to finish and without help it was really hard for me to find solutions.
After a series of searches and inquiries around I had to abandon the project.... I hope to find a solution in the future.
