5. E-textiles
Every week at Fabricademy, i am more execited and nervouse about the new thing we will learn. This week started with learning and understanding basic physics. For me personally this was the hardest week but also a very interesting one.
Research
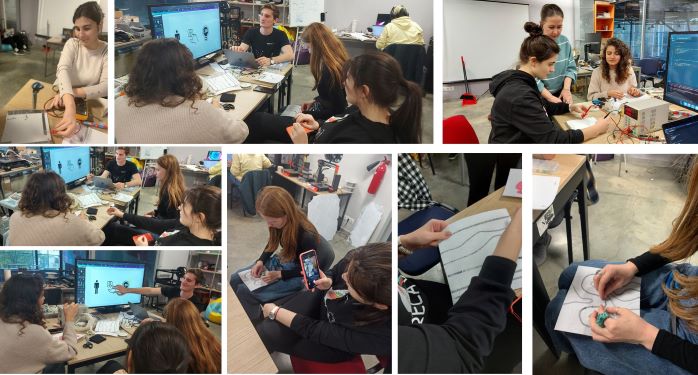
At the begining we had a great lecture on E-textiles given by Liza Stark. This helped us to start this week and to understand what we will be doing. I can say that i was kind of scared because this is quite a foreign theme for me. But nevertheless i, together with my colleagues from ZipHouse, and with the help of our locul instructor from microlab started to work on tutorial given to us. The first thing i do, by tradition is to browse the Fabricademy participants pages from last years to see and understand were i will head. The ones that helped me are: Diane Wakim, V I C K Y + L U A N and Loes Bogers. Then i rewatch the tutorials.
The basic information we need to know and understand about electricity :
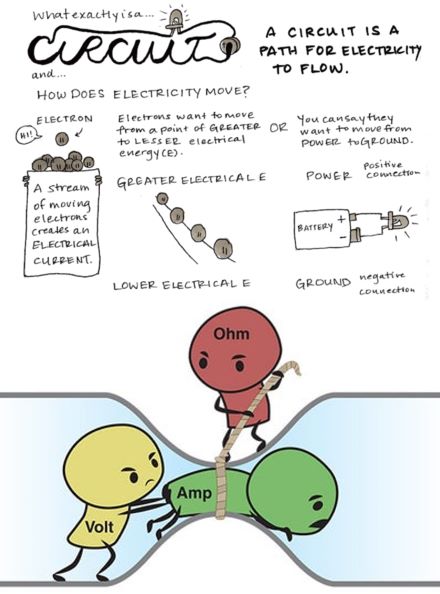 Current : the "flow" of electrons. We mesure the intensity of current : it's the number of electrons/second passing through one point of the circuit. The unity of mesure is Ampere and the symbol I.
Voltage : the electrical pressure, the "force" between two points in the circuit. The unity of mesure is Volt and the symbol is V.
Resistance : an opposition force to the circuit. We add resistor to "balance" the circuit. If we increase the value of the resistor, the intensity of the current decreases. The unity of mesure is Ohm and the symbol is Ω.
These three components are associated as following :
This is the Ohm law: V = I x R
References & Inspiration
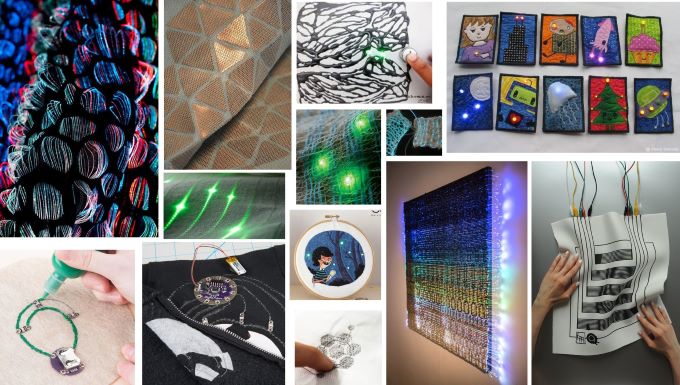
As per usual my first source of inspiration is Pinterest. In the next image i gather some of the photos that inspire me.
Process and workflow
After all the research and tutorials, with the help with our local instructor from microlab we started to do the tasks for this week which are:
- Fabricademy participants will have to produce one digital and one analog soft sensor experimenting with the materials available at the lab.
- They will have to use arduino to read and understand their soft sensor.
- Try to reproduce the same sensor with different materials/techniques (hard/hard hard/soft soft/soft):
- Create your one digital and one analogue soft sensor
- Program a LED interaction with your soft sensor
- Intergate it in a swatch using hard-soft connections
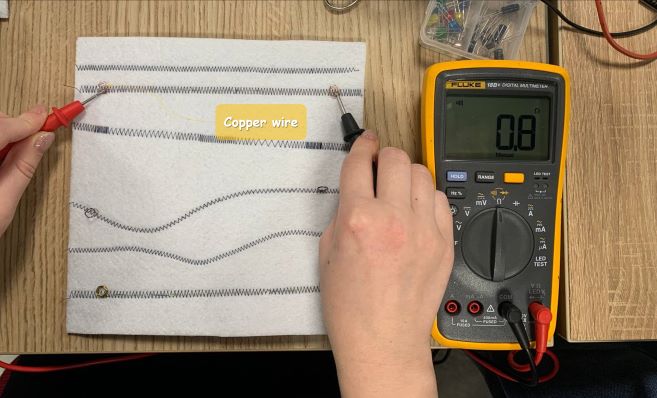
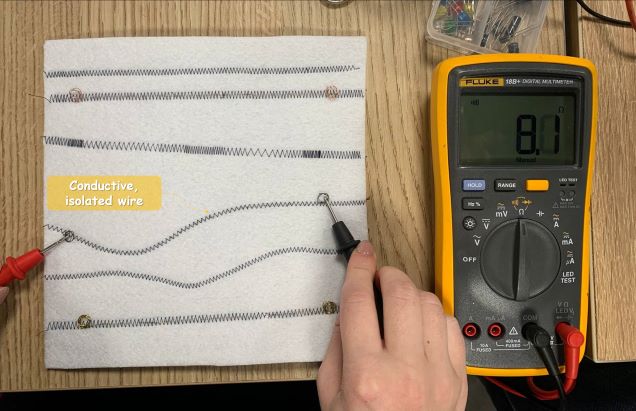
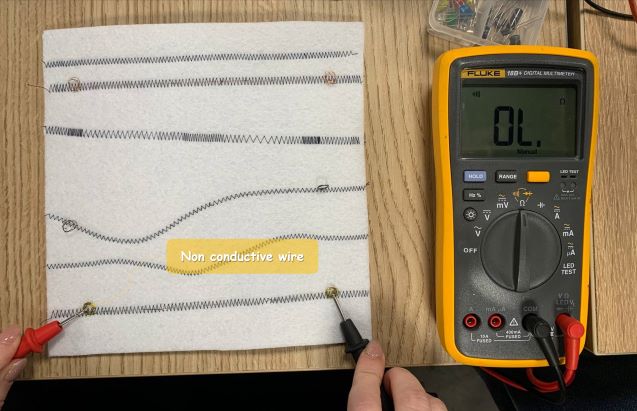
Testing different material and wires
First we started with testing different material and wires, because we didn't have the conductive thread so we had to substitute it with other materials.
Arduino and led basic circuit
After that we started to draw the basic circuit and to create it usig the led and the breadbord. after that we connected it to the arduino and then created the nececery code.

This code on the Arduino and led example
#define ledPin 7


void setup() {

  // initialize digital pin LED_BUILTIN as an output.
  pinMode(ledPin, OUTPUT);
  pinMode(2,INPUT_PULLUP);
  Serial.begin(9600);


}

// the loop function runs over and over again forever
void loop() {
 if (digitalRead(2) == HIGH);
 {
    digitalWrite(ledPin, HIGH);
    Serial.println(digitalRead(2));
}
else
{
    digitalWrite(ledPin, LOW);
    Serial.println(digitalRead(2));
  }
}
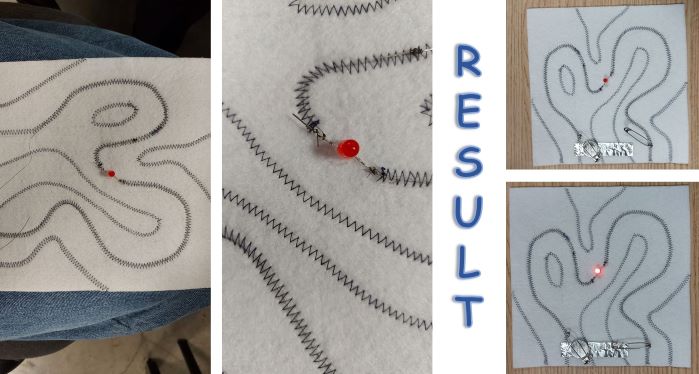
E-Textile Continuity Tester
Then we followed the tutorial and made an E-Textile Continuity Tester. In our case we used felt as the base, conductive wire and tape, coin battery, safety pins, led, resistor and a needle. First we did some zigzag stiches on the felt to create the passage where the conductive whire will go. then we started to disable everything and here are the results.
Analog sensor- prototyping
The next thing we did was to create a analog sensor. For the first one we used felt, conductive tape, velostat, double sided tape and some safety pins to keep the sandwich together.

and here we are testing it
After confirming everything is ok we used the arduino to see the code needed and the difrent values a preasure gives it.
This code maps on the Serial Plotter the Analog values taken from the velostat swatch
#define velostatPin A7


void setup() {

  // initialize digital pin LED_BUILTIN as an output.
  pinMode(velostatPin, OUTPUT);
  pinMode(2,INPUT_PULLUP);
  Serial.begin(9600);
  int val = 0;


}

// the loop function runs over and over again forever
void loop() {

    digitalWrite(2, HIGH);
    int val = analogRead(velostatPin);
    val = map(val, 0, 1023, 0, 500);
    Serial.println(val);

}
Digital sensor- prototyping
Based on this one we created a digital sensor, but this time we used a conductive material and the sponge. Here are the test results.
Here we tried to integrate the digital sensor we made
Connect the soft sensors to a fabric swatch
In order to have this assignment complete, i need to connect the soft sensors to a fabric swatch with soft connections.So following this scheme i stated to do my circuit.
Results
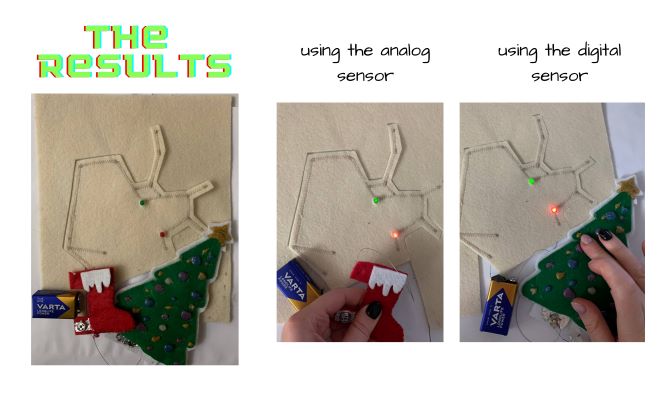
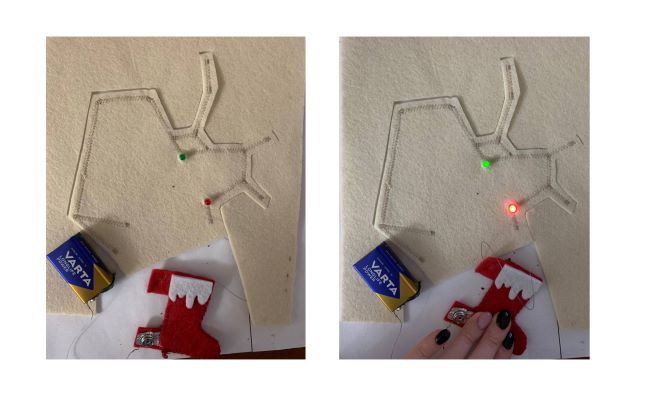
Analog sensor
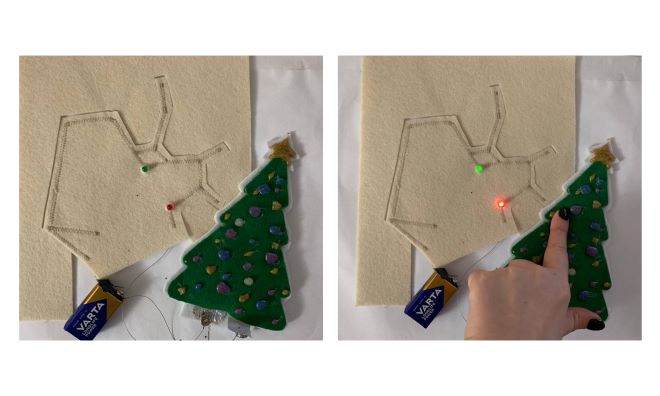
Digital sensor
Individual Work
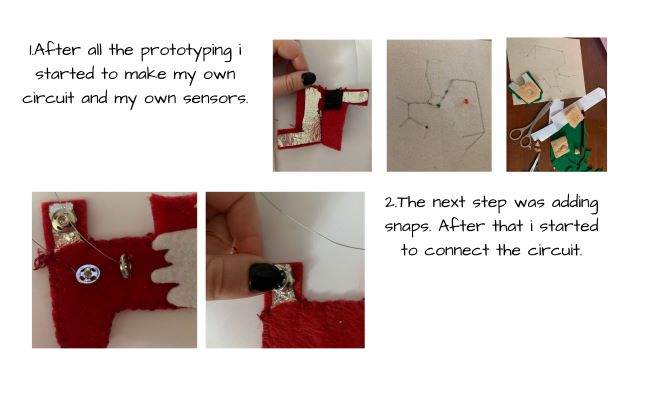
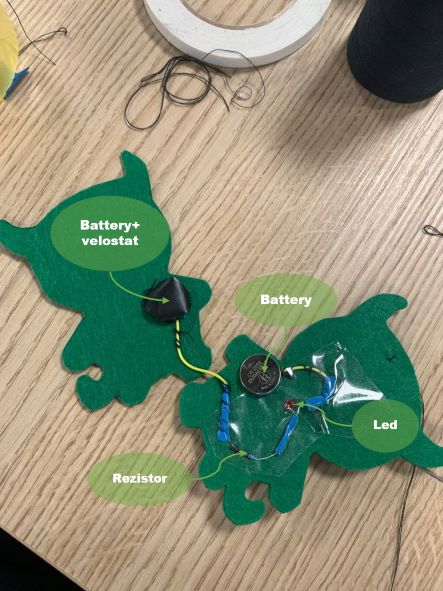
After all the testing and swatches done together with the whole ZipHouse team we decided to create an individual item so all of us can test your ability and what we learned this week. I first started to browse the internet in search of inspiration but thanks to my little niece i got i nice idea to create an interactive toy. I remember my first reaction of joy and excitement when the led light up, an i decided to use this as an inspiration and to start working. First i did my scketch and selected the necessary material. These were: felt of 3 colors, 2 coin battery, red led, resistor, conductive wire and velostat.

Here is the circuit we got inside the toy. I put a piece of tape on it to protect the circuit from the filling of the toy so that the toy can function normally and without any problems.I used the velostat between the batteries to be able to create different pressure and power of the light from the led.
Results
