10. Open Source Hardware - From Fibers to Fabric
 This week is one of the most challenging but, at the same time, seems very interesting. Also on this week we will work as a group on building Hilo’s spinning machine 2.0.
Research & Ideation
Prior to this week we had a brainstorming session where we discused what kind of machine it should be. After seeing the many interesting machines during the lecture, we were of course inspired and a little intimidated. We strugggled between two options: the spinning machine and knitting machine. But because it is our first try, we decided to start with the simple.
As always i start by browsing the Fabricademy page with the results of the students from previous years. This week Lara Campos and Ana Correa were the main source of information.
HILO from Studio HILO on Vimeo.
Process
As a first year node we decided to build the HILO’s spinning machine 2.0. We thought that it was a good assignment for the team. After the lecture on Open Source Hardware we devided the work in our team of 5 members. Here is the list of the roles each teammate has.
-
Elena Bannaia - gathering of the materials, laser cutting;
-
Elena Rotaru - photo video documenting;
-
Elena Florea - improvement of the pattern in rhino, parametric change;
-
Valentina Frunze - circuit connection;
-
Aliona Raru - preparing of the fibers to spin;
-
All - assembling together.
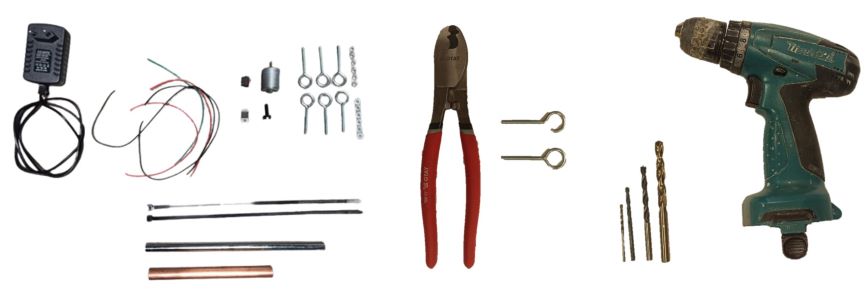
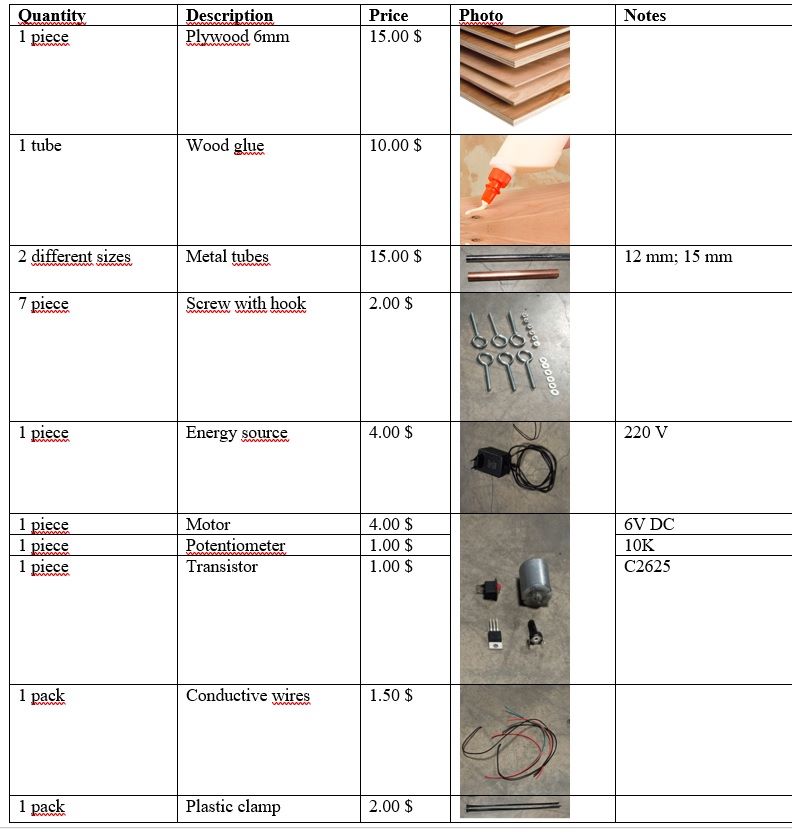
Gathering of the materials
The first step in any project is to gather all the needed materials. Elena Bannaia was the one responsible for this step. This is a crucial part because if we dont have all the needed materials then the project can stop mid way and the a lot of time will be wasted for nothing.
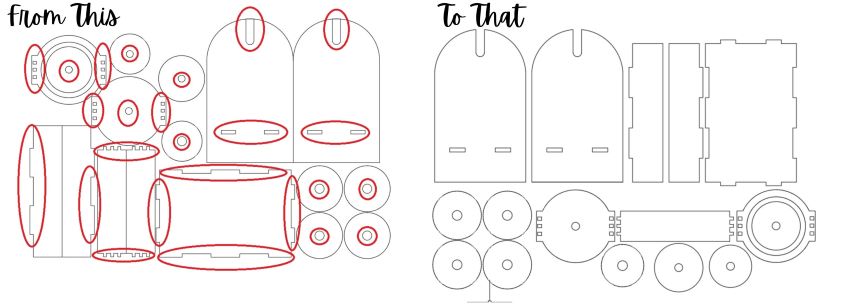
Improvement of the pattern in rhino, parametric change
Because this is a completly new type of assignment for us at first we were kind of lost, and decided to strat the work from somehow adapting the patterns to us. For this part of the project the responsible one was Elena Florea. More informations about this step can be found on her page. After analyzing the basic design, we decided to change the inner radii of the disc holes that depends on the metal tubes purchased. Also the size of the assembly mode of the elements was changed. All changes were made in AutoCAD.
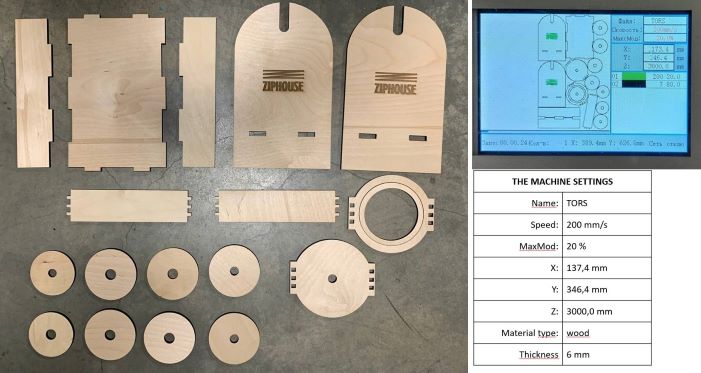
Laser cutting
This step comes after improving the patterns. The one responsible for this step was Elena Bannaia. She coordinated the work with the laser cutting assistant and with the group. Here are the elements obtained after the laser cutting. Also the laser parameters.
Circuit connection
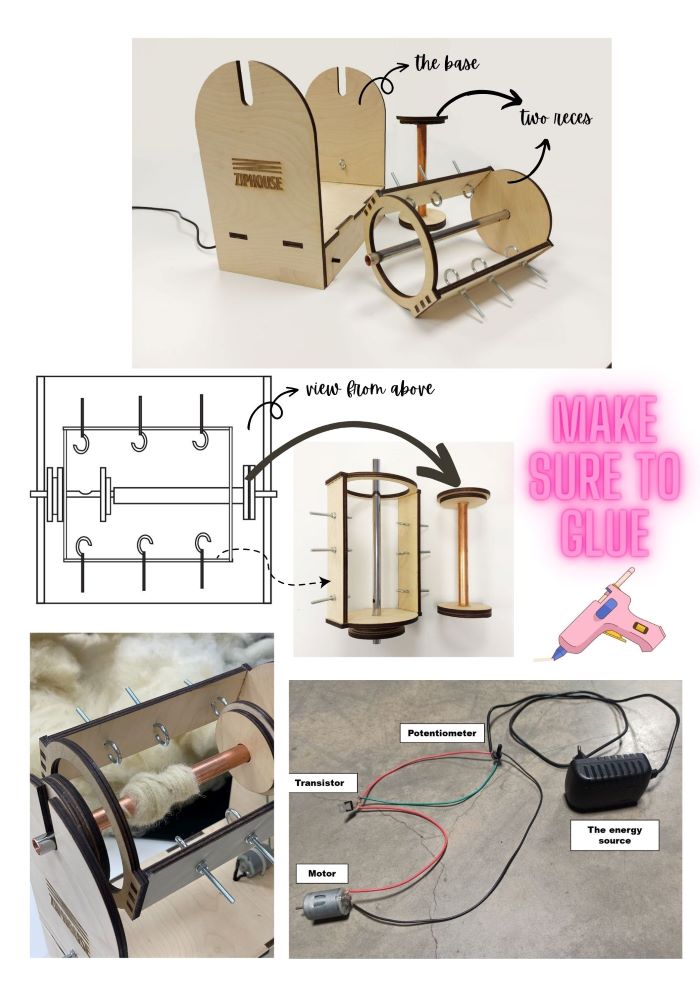
I started the work by drawing the scheme for the basic circuit of the Hilo’s spinning machine 2.0. From this we gather the materials such as, motor, the energy source, potentiometer and transistor.
- ES - energy source ;
- M - motor;
- P - potentiometer;
- T - transistor.
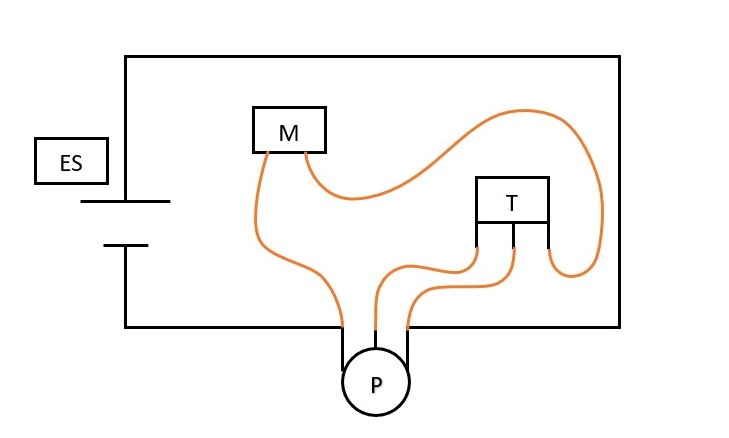
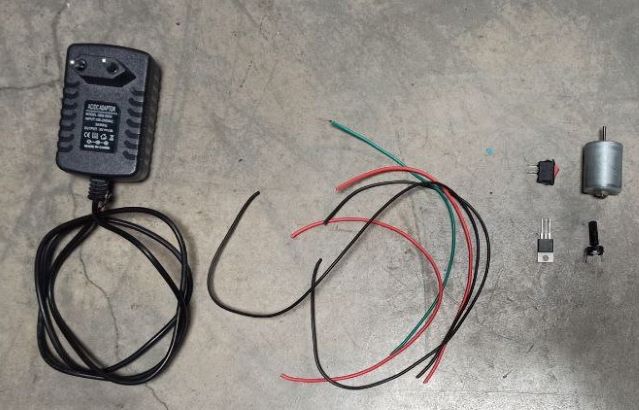
Following the basic scheme i started to connect the circuit. Here is the final basic circuit for the Hilo’s spinning machine 2.0. For a saver use in isolated every connection i made.
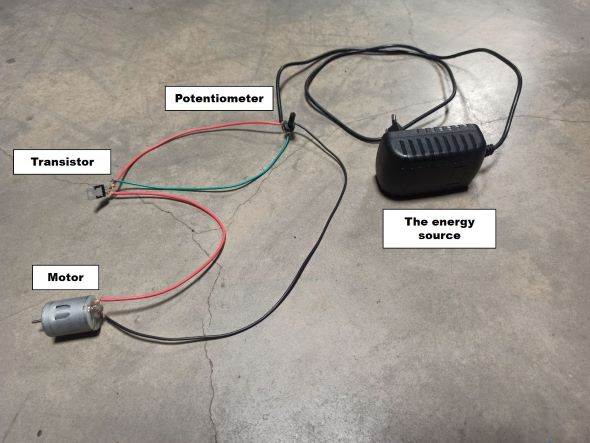
As a diversification from the basic spinning machine, we decided to add a switch that will help us to turn on/off the machine without doing the plugging/unplugging every time. This was done as a last minute change, so for future adaptations and changes, a switch should be added in pattern design and in the circuit scheme.
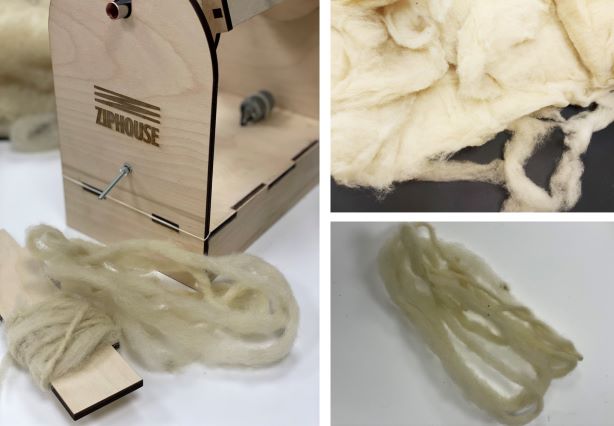
Preparing of the fibers to spin
This step was also fun. The one responsible for this was Aliona Raru. For this step we took wool and started to brush it. After that we created the thread that can be put thru the machine.
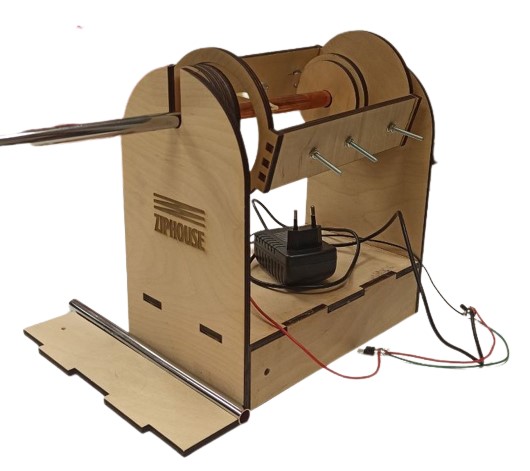
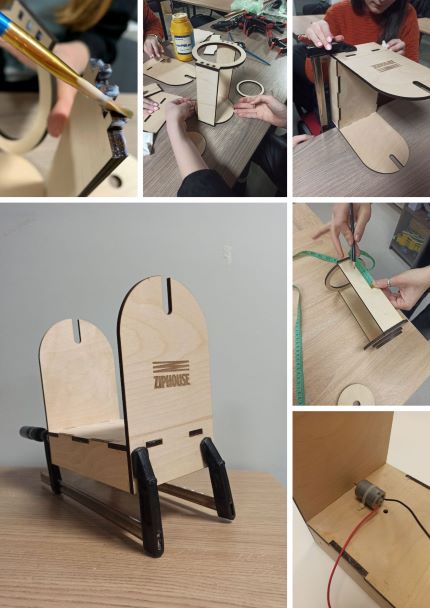
Assembling the spinning machine
This part was the most interesting, but was quite challenging because we had to figure out what and how to glue and assemble everything. We didn't understand at first if we had to glue the circles to the metal bars or not. After reviewing the pages of Olatz Pereda,we saw the indication taht we should glue everything so it's not floppy and everything can work ok.
Results
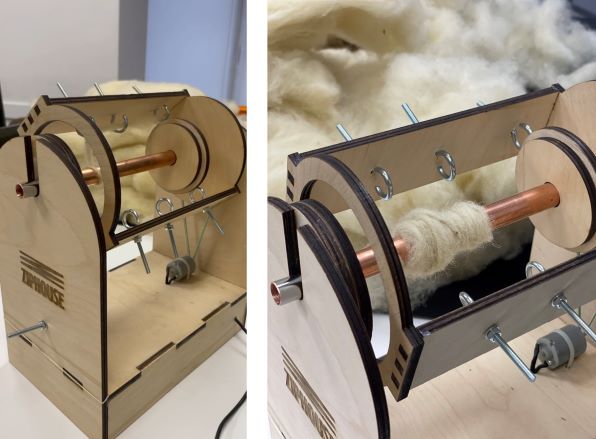
Conclusions
After making this spinning machine, we identified some problems that could be improved:
-
The length of the cable should be longer;
-
Plan the Circuit before cutting the pieces at the laser.