10. Open Source Hardware - From Fibers to Fabric
Research & Inspiration
This week is the 10th week of Fabricademy course and the first one in which we had to work as a group on building a Hilo spinning machine Version 1. The week was one of the most challenging, we had to split and to share the tasks. In order to get all the things done by the end of the week.
Prior to this week we had a brainstorming session where we discused what kind of machine it should be. After seeing the many interesting machines during the lecture, we were of course inspired and a little intimidated. We strugggled between two options: the spinning machine and knitting machine. But because it is our first try, we decided to start with the simple.
I'm pretty sure that in the near future we will unite our streights and we'll experiment with the construction of other machines too.
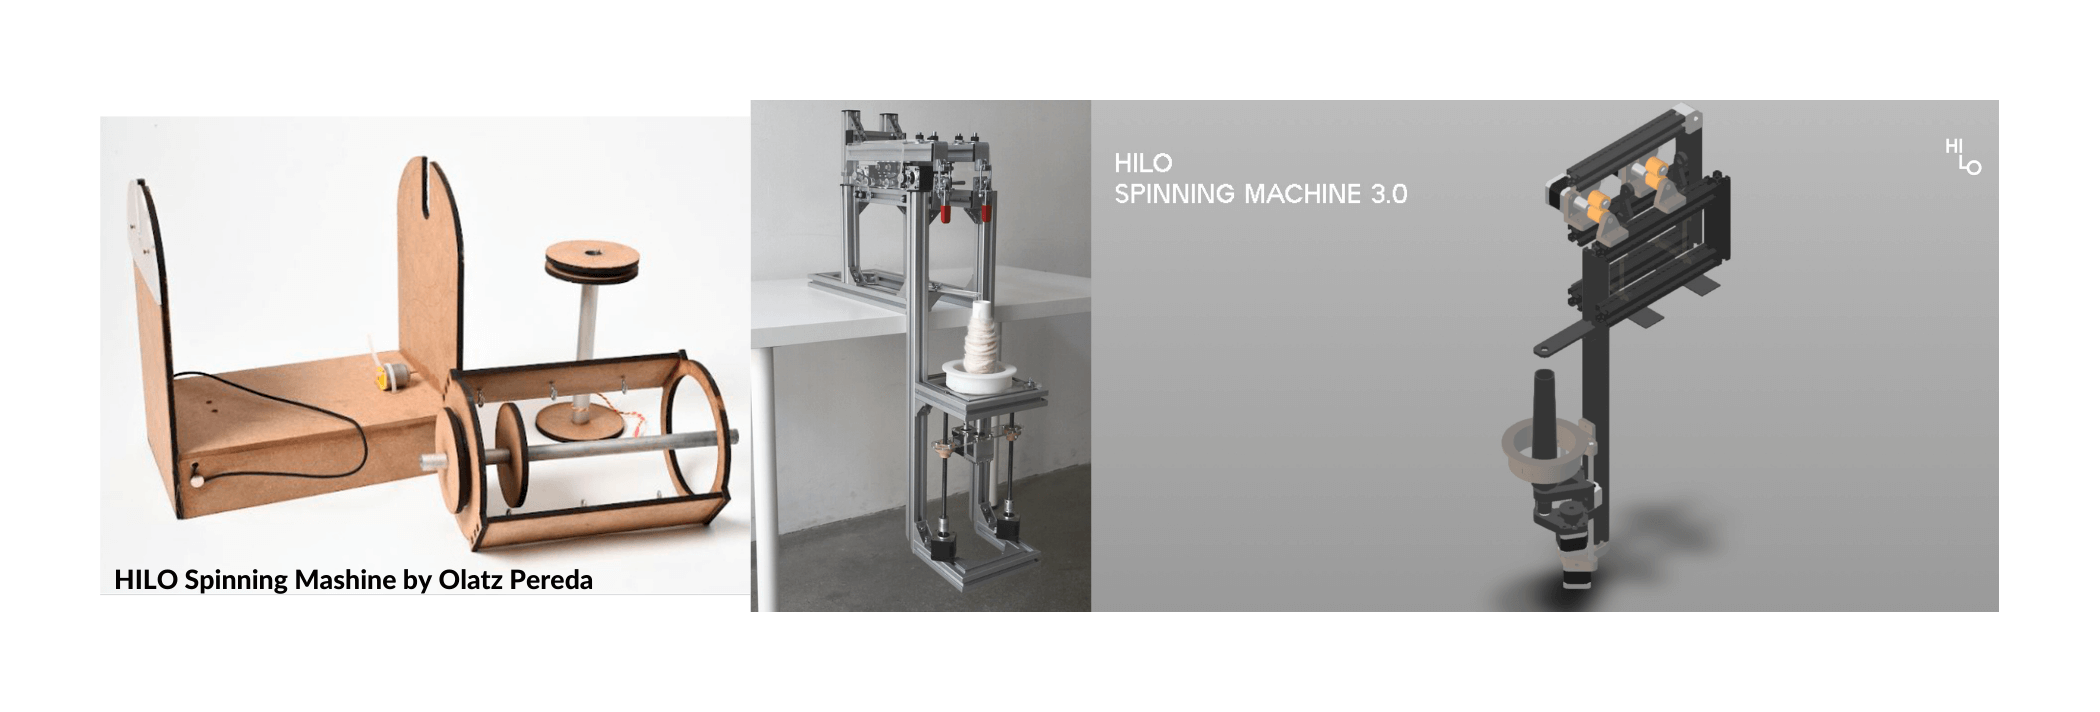
Speaking about inspiration, there is always a primar inspiration from the lecture slides. And of course the inspiration from browsing the Fabricademy page with the results of the students from previous years. This week Lara Campos, Ana Correa and Olatz Pereda were the main source of information.
HILO from Studio HILO on Vimeo.
Here are also some interesting ideas of machines:
* [Loes Bogers](https://class.textile-academy.org/2020/loes.bogers/) TextileLab Amsterdam 2019-20_
* [Pauline Gamore](https://class.textile-academy.org/2020/pauline.gamore/projects/1-final-project/) _TextileLab Lyon_
* [Gabriela Lotaif](https://class.textile-academy.org/2020/gabriela.lotaif/assignments/week07/)
* [Carolina Delgado](https://class.textile-academy.org/2020/carolina.delgado/projects/Nature-Based%20Food%20Packaging/Process/3-alginator/)
Role distribution
We thought that it was a good assignment for the team. We decided to divide the work into roles in order to have a good result in the end.
Here are the roles distributed between our team:
| Participant name | Elena Bannaia | Valentina Frunze | Elena Rotaru | Elena Florea-Burduja | Aliona Raru |
|---|---|---|---|---|---|
| Role distributed | gathering of the materials, laser cutting | circuit connection; | photo video documenting; | improvement of the pattern in rhino, parametric change; | preparing of the fibers to spin; |
Assembling part was done together!
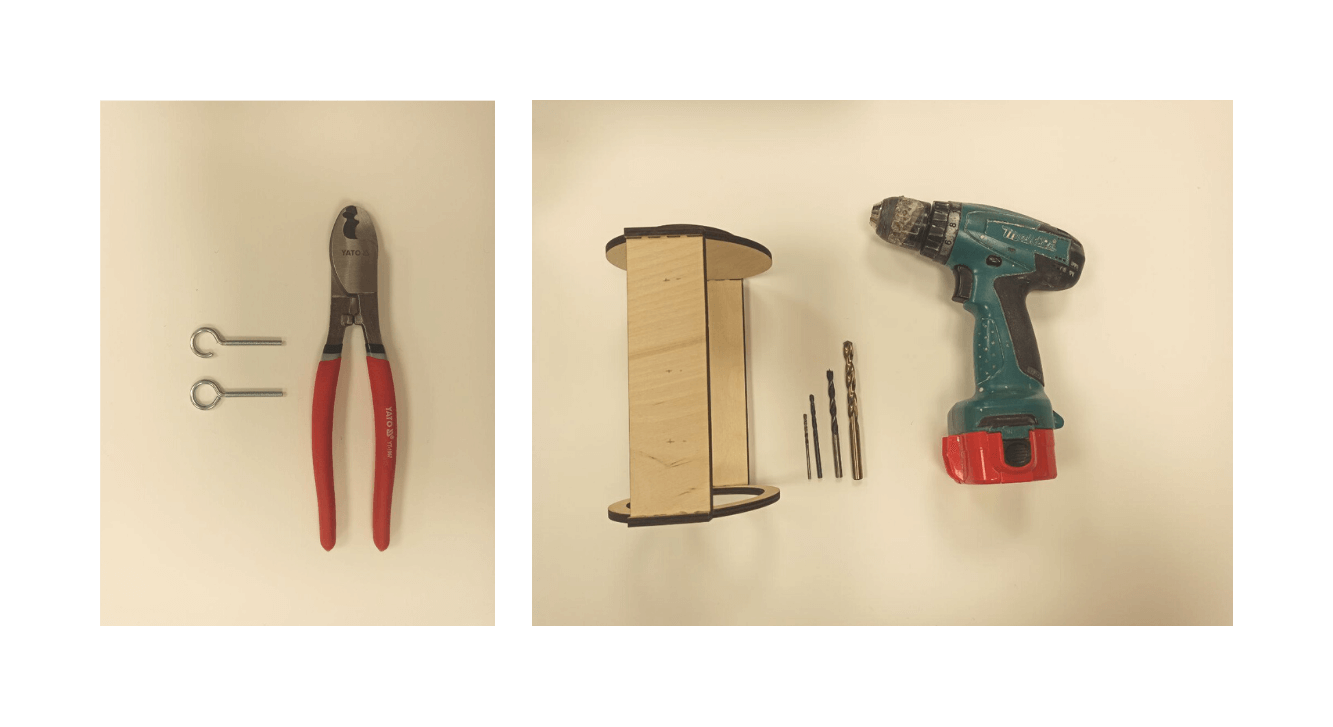
Materials and Tools
We started simple, by analyzing a video of the procces behind Lara Campos final project, where she used this type of machine to spin the wool with seeds.
The spinning machine looks quite simple from one side, but it consists of metal elements, wooden elements and electric circuit. One of my mission for this week was to gather all the materials to start the work.
This is the list of required components:
Tools
- Rhino
- AutoCAD
- Photoaparat
- Soldering iron kit
- Electric Screw Driver
Materials
| Qty | Description | Price | Photo | Notes |
|---|---|---|---|---|
| 1 piece | Plywood 6mm | 15.00 $ |  |
|
| 1 tube | Wood glue | 10.00 $ |  |
|
| 2 different sizes | Metal tubes | 15.00 $ | 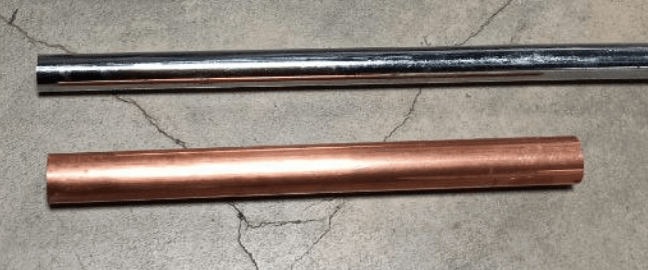 |
12 mm; 15 mm |
| 7 piece | Screw with hook | 2.00 $ | 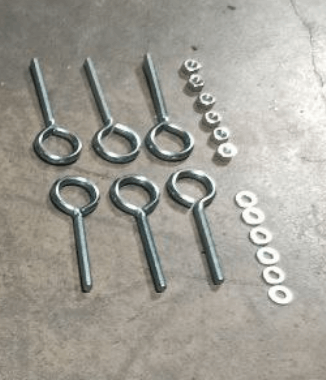 |
|
| 1 piece | Energy source | 4.00 $ | 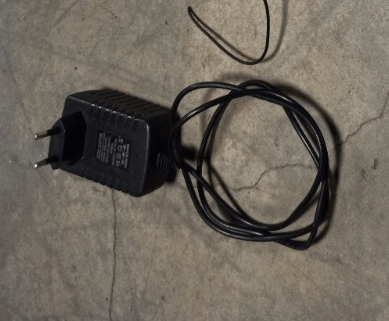 |
220 V |
| 1 piece | Motor | 4.00 $ | 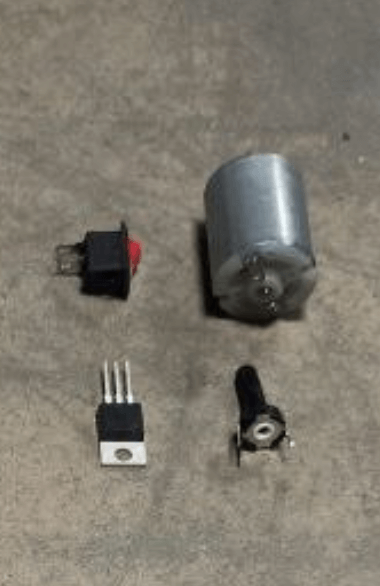 |
6V DC |
| 1 piece | Potentiometer | 1.00 $ | |
10K |
| 1 piece | Transistor | 1.00 $ | |
C2625 |
| 1 pack | Conductive wires | 1.50 $ | 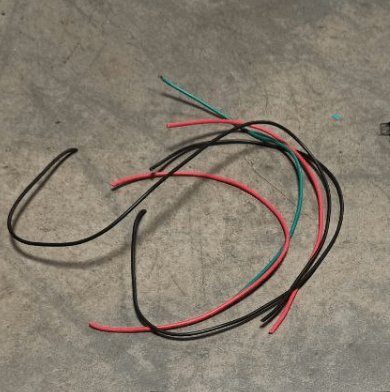 |
|
| 1 pack | Plastic clamp | 2.00 $ | 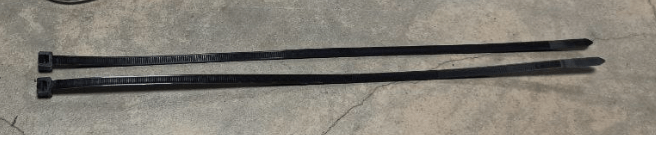 |
Design¶¶
The existing pattern1 of the spinning machine we found on the page of Lara Campos, but we came with some modifications that would allow the assembly of the machine.

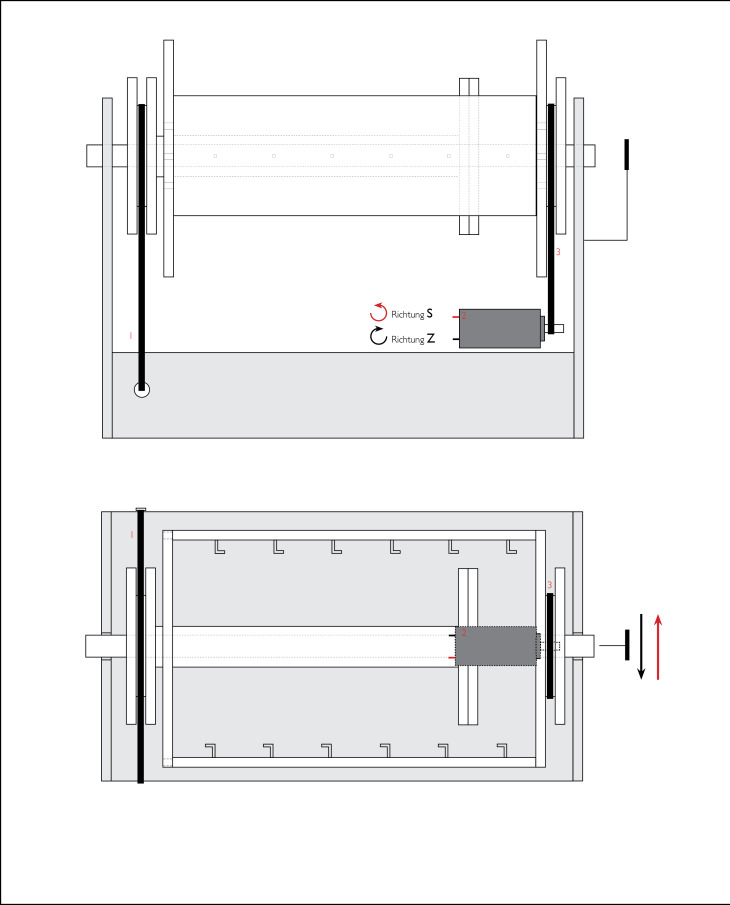
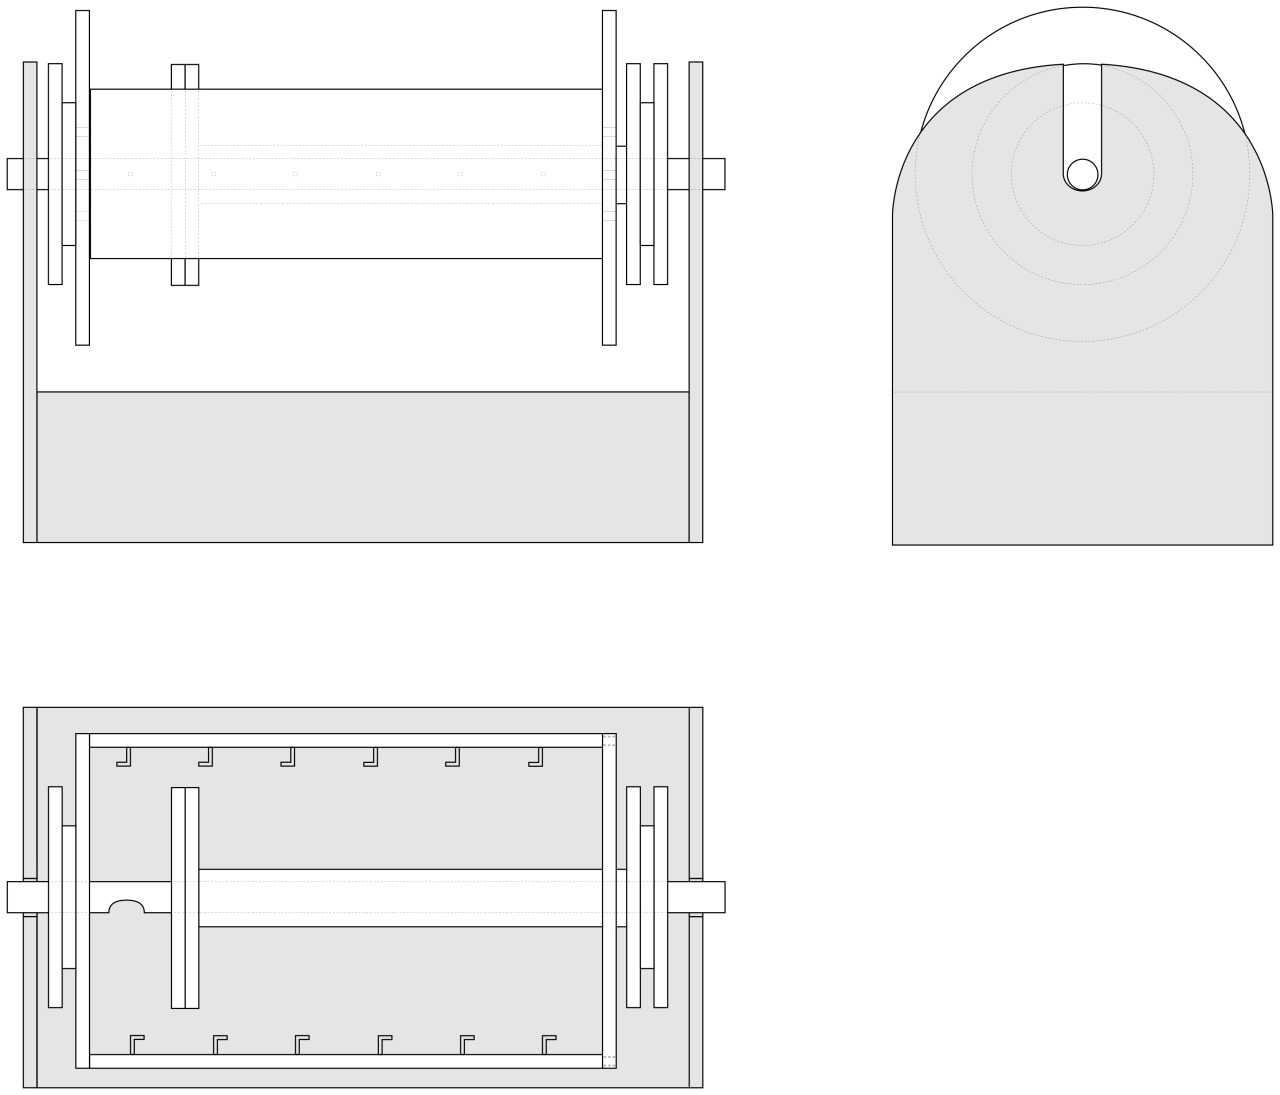
This task belonged to Elena Florea-Burduja. Therefore, after careful consideration, we decided to change the inner radius of the disc holes. Their size depends on the metal tubes purchased. She also changed the size of the assembly mode of the elements. All changes were made on the AutoCAD software.23

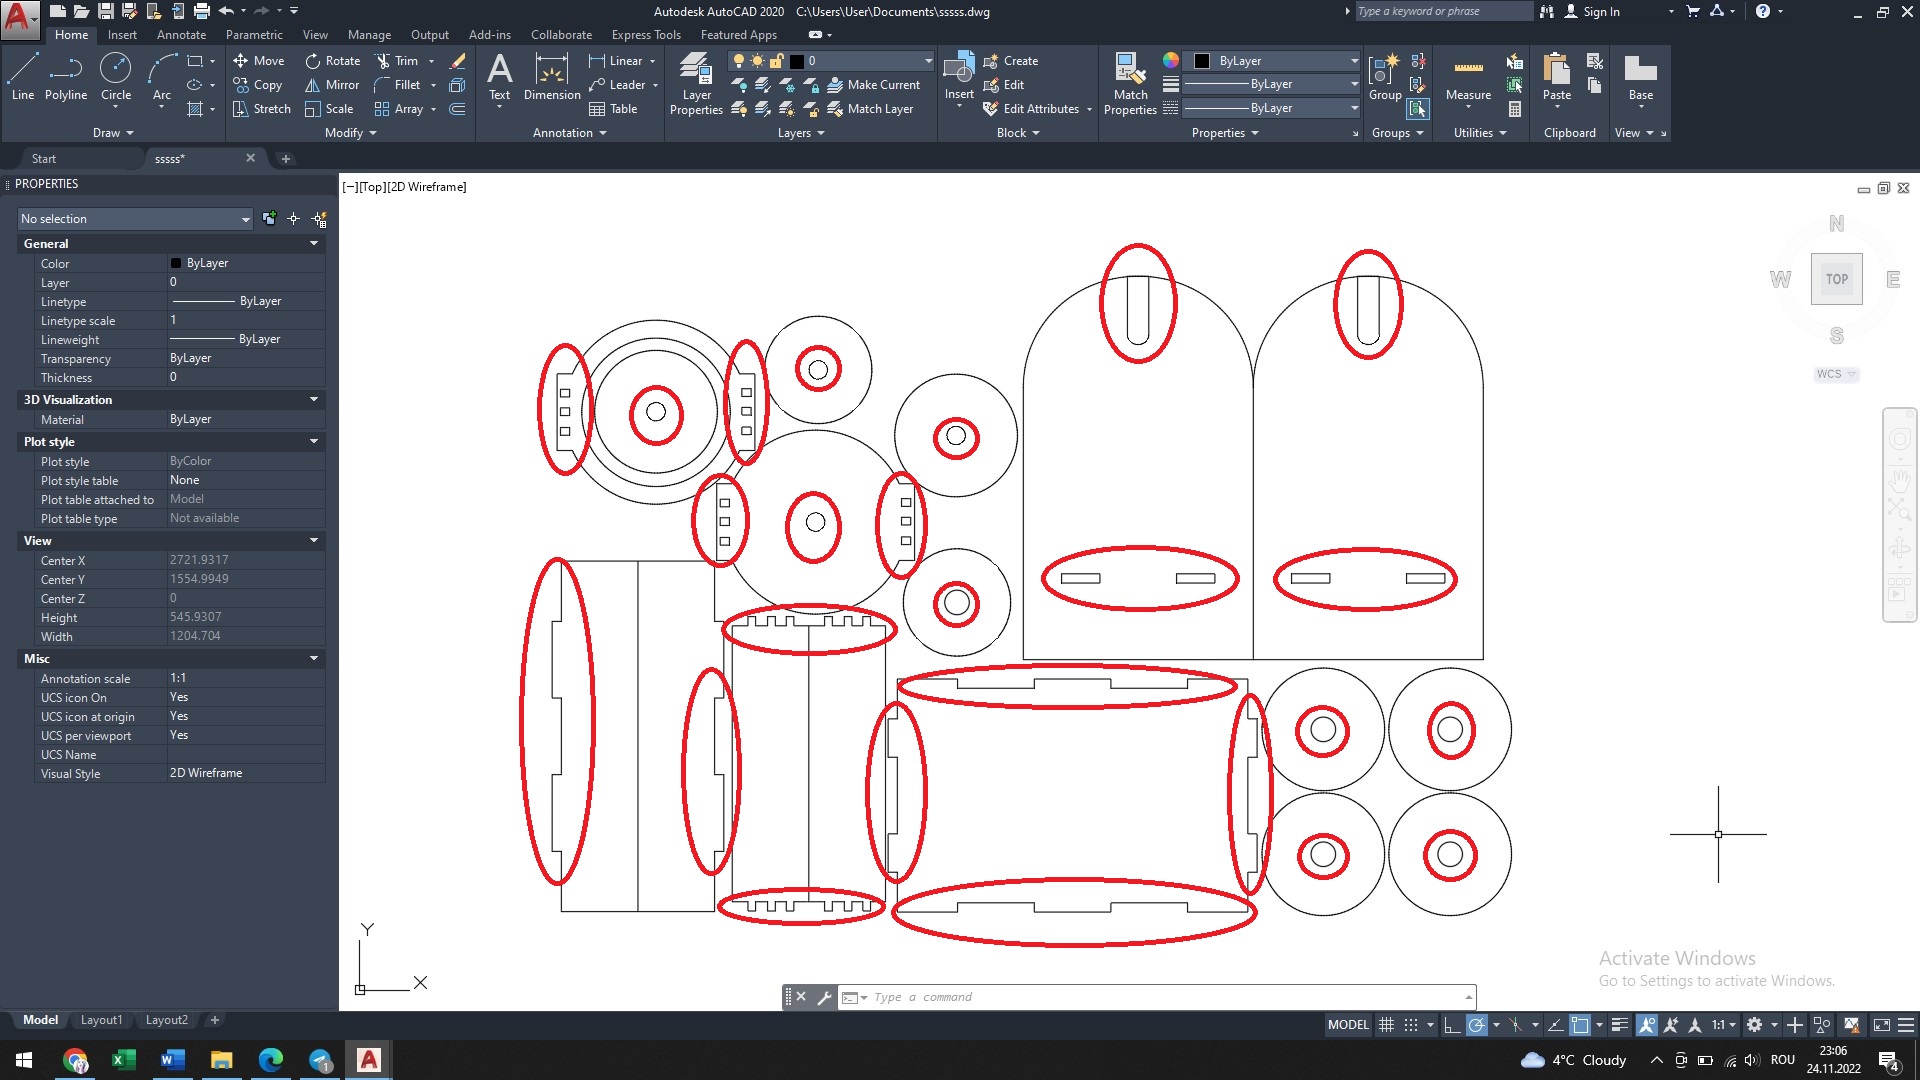
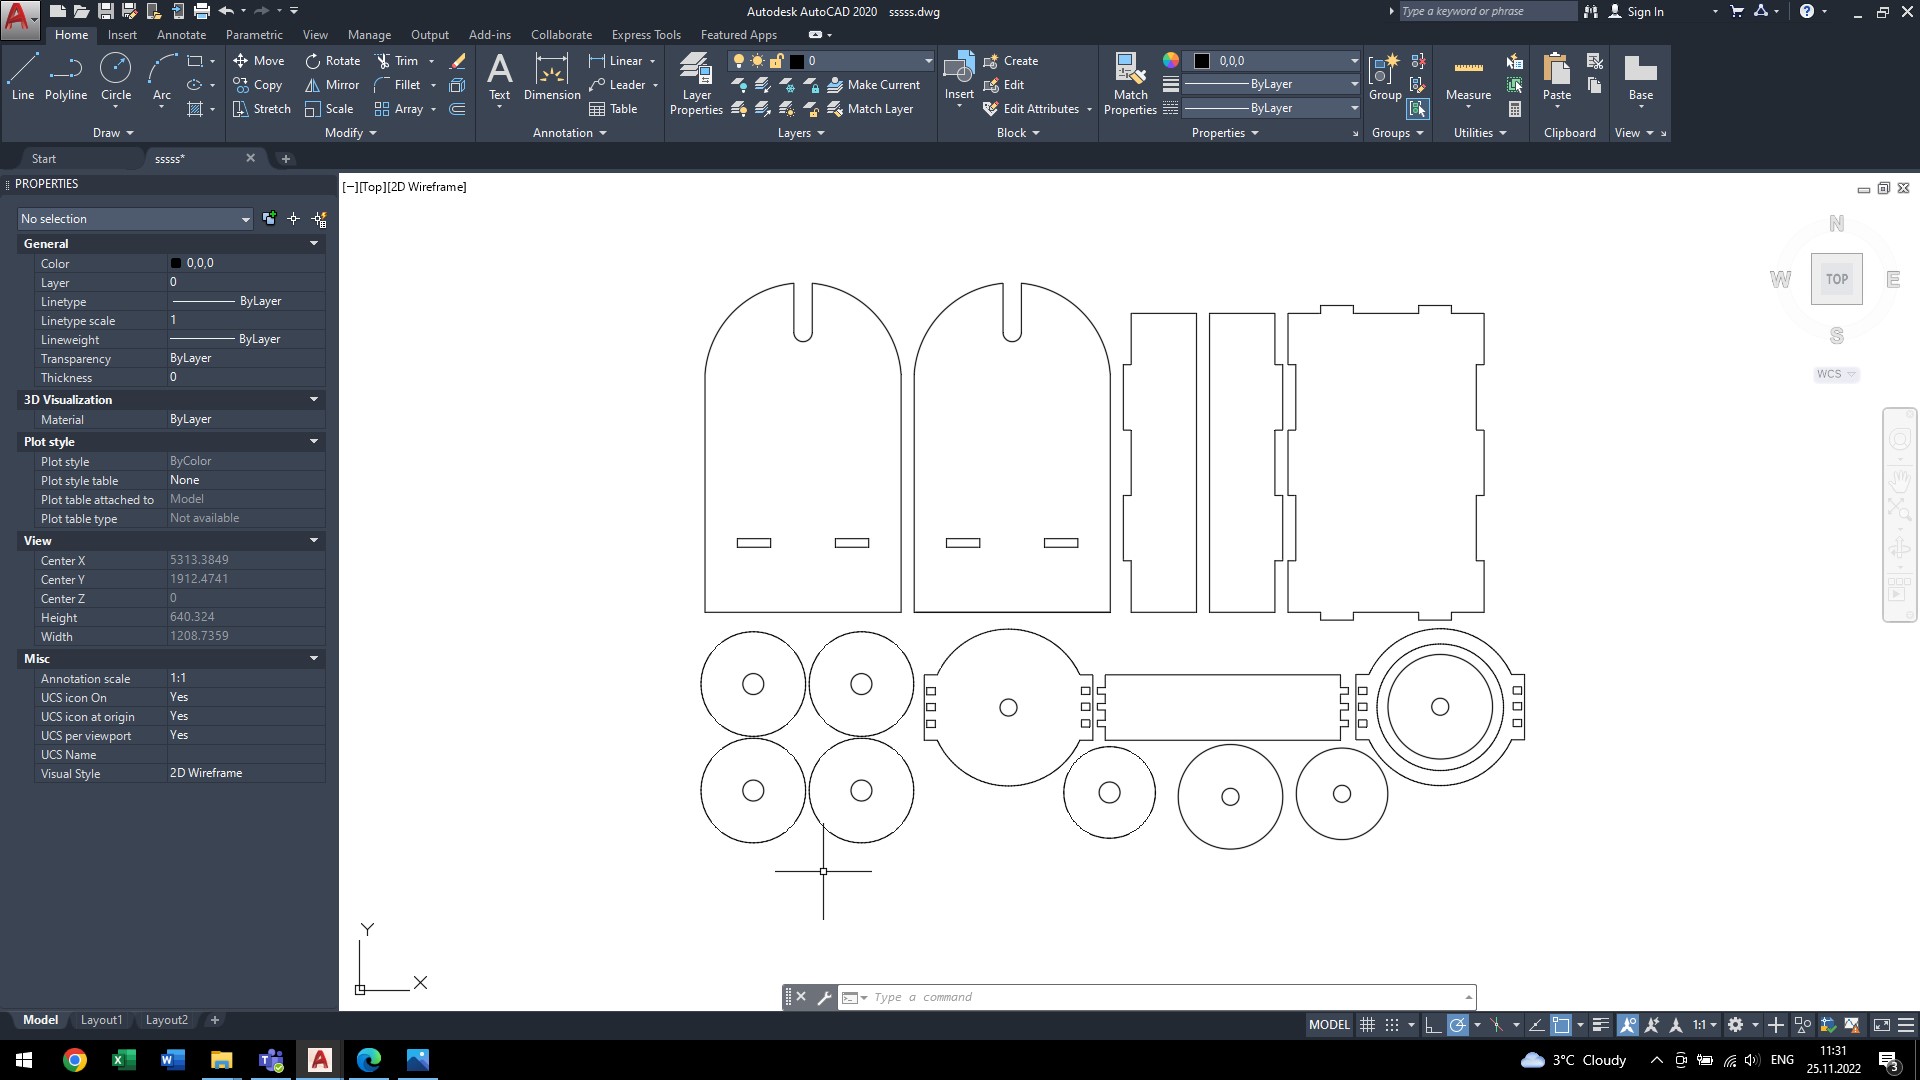
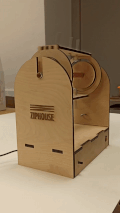
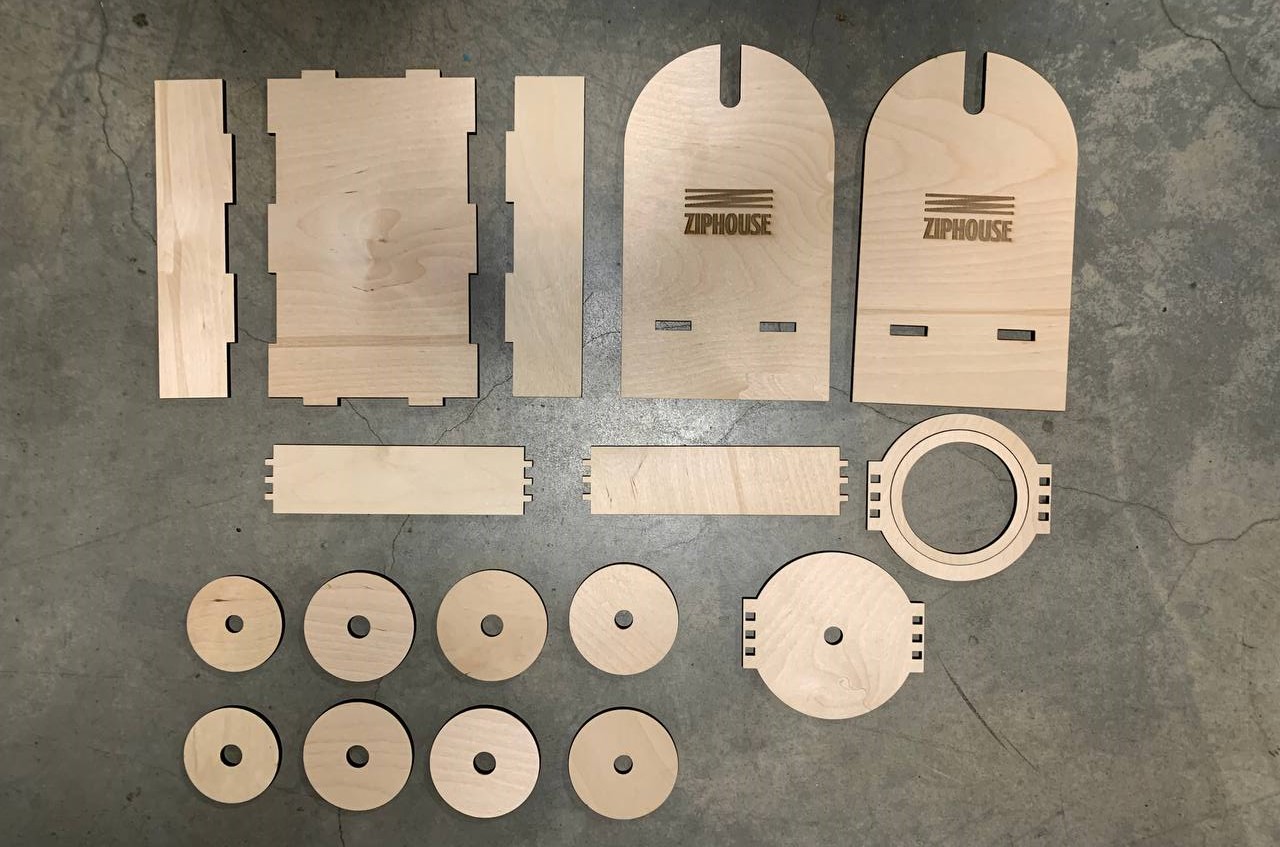
With the document saved in dxf format, I went to the FabLab for laser cutting. With the help of the local instructor, I cut the necessary elements. I also added some custumisation to the document by aplying the logo of Ziphouse for engraving it with laser.4
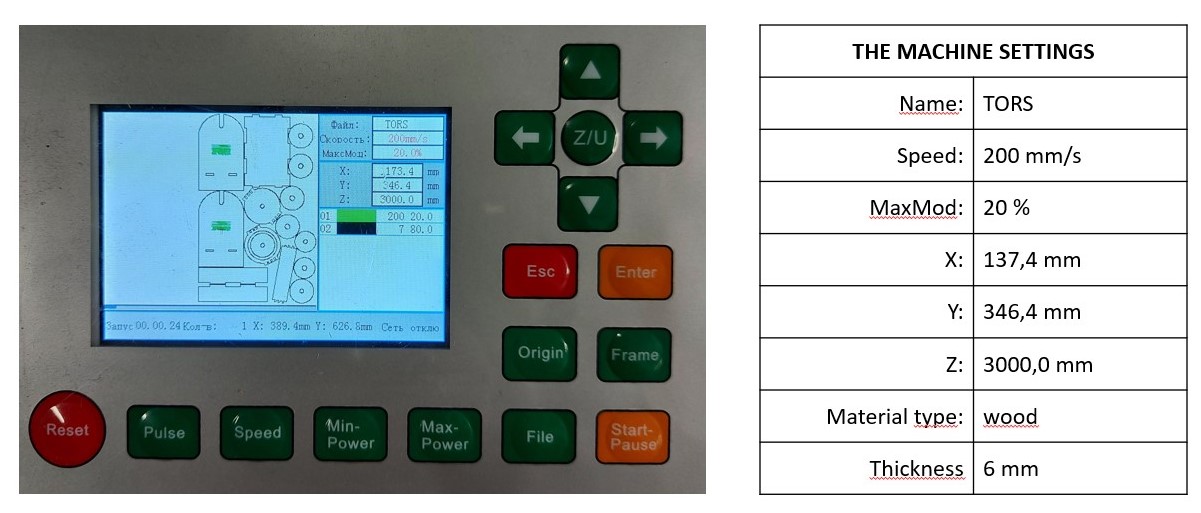
The laser cutting parameters were as showed below:
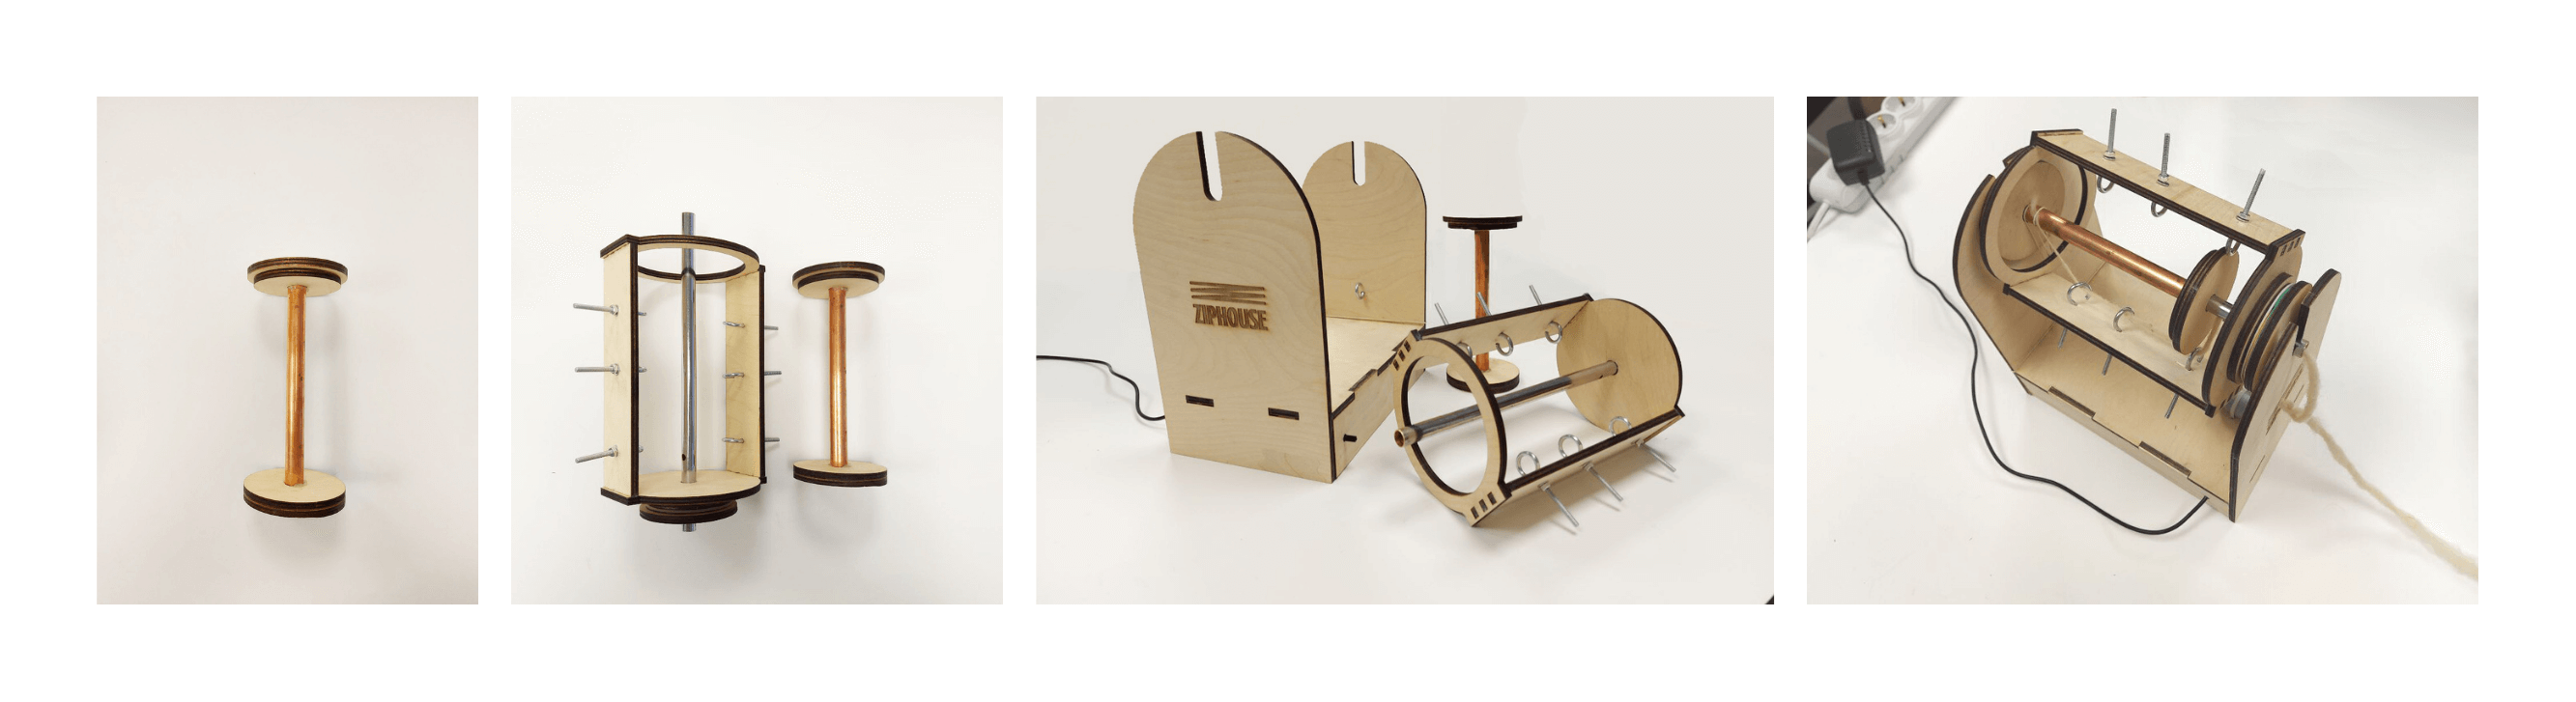
Assembly¶¶
The phase of assembling of the details was an interesting and chalanging one. Each wooden element has to be glued and attached with special clamps until the glue dries. You can follow the process in the photos attached below:
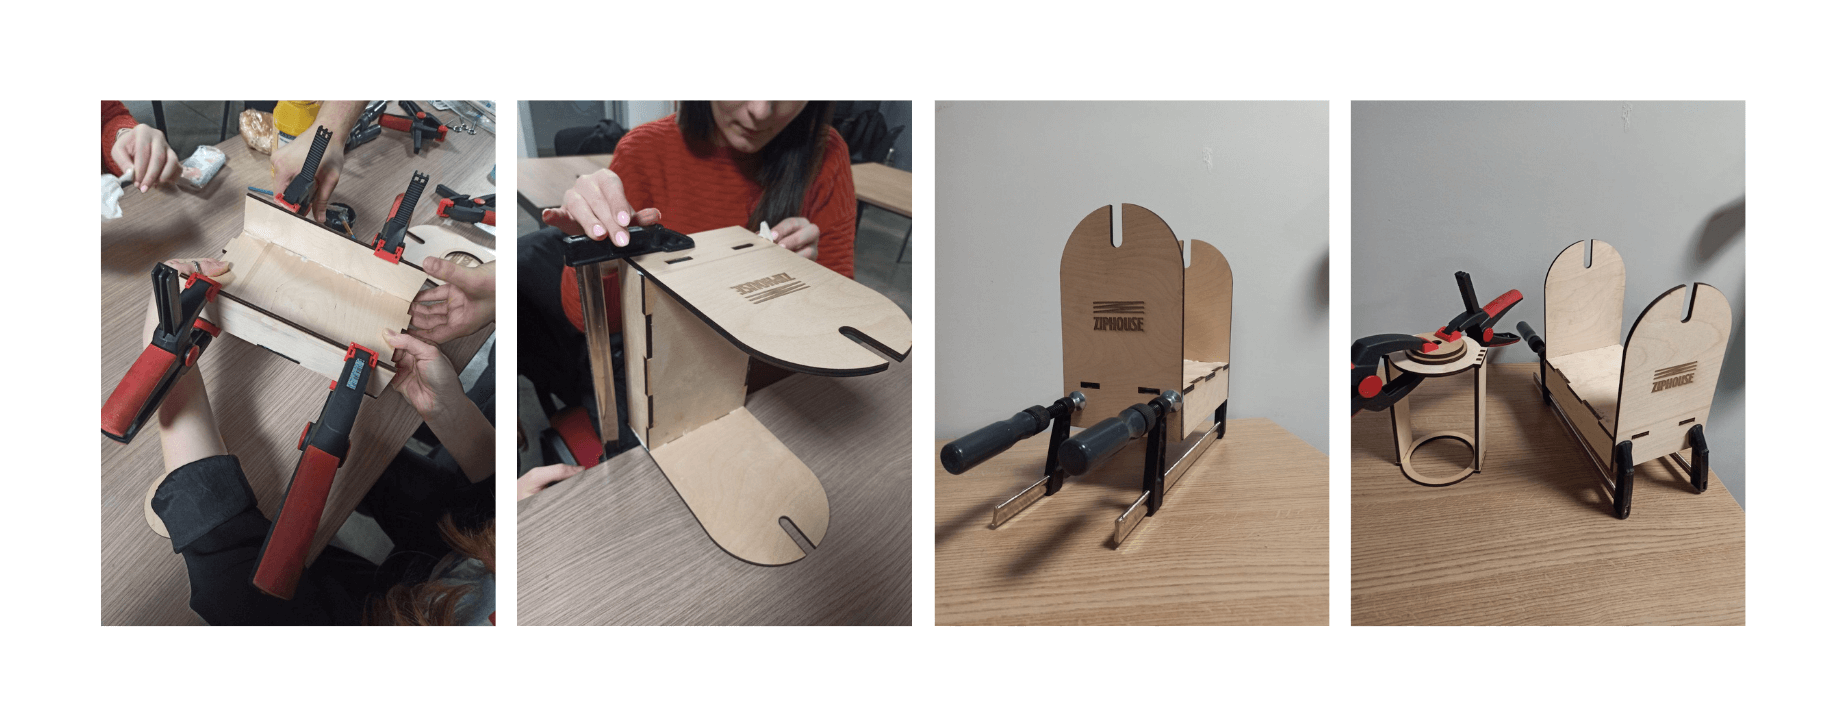
Then the rotating part of the machine was glued.

Circuit connection
An important part of making the spinning machine work is connecting the electrical circuit. On this phase Valentina Frunze took the lead. And everything turned out very well.
Here is the drawing for the used circuit and the assembling of the circuit elements:
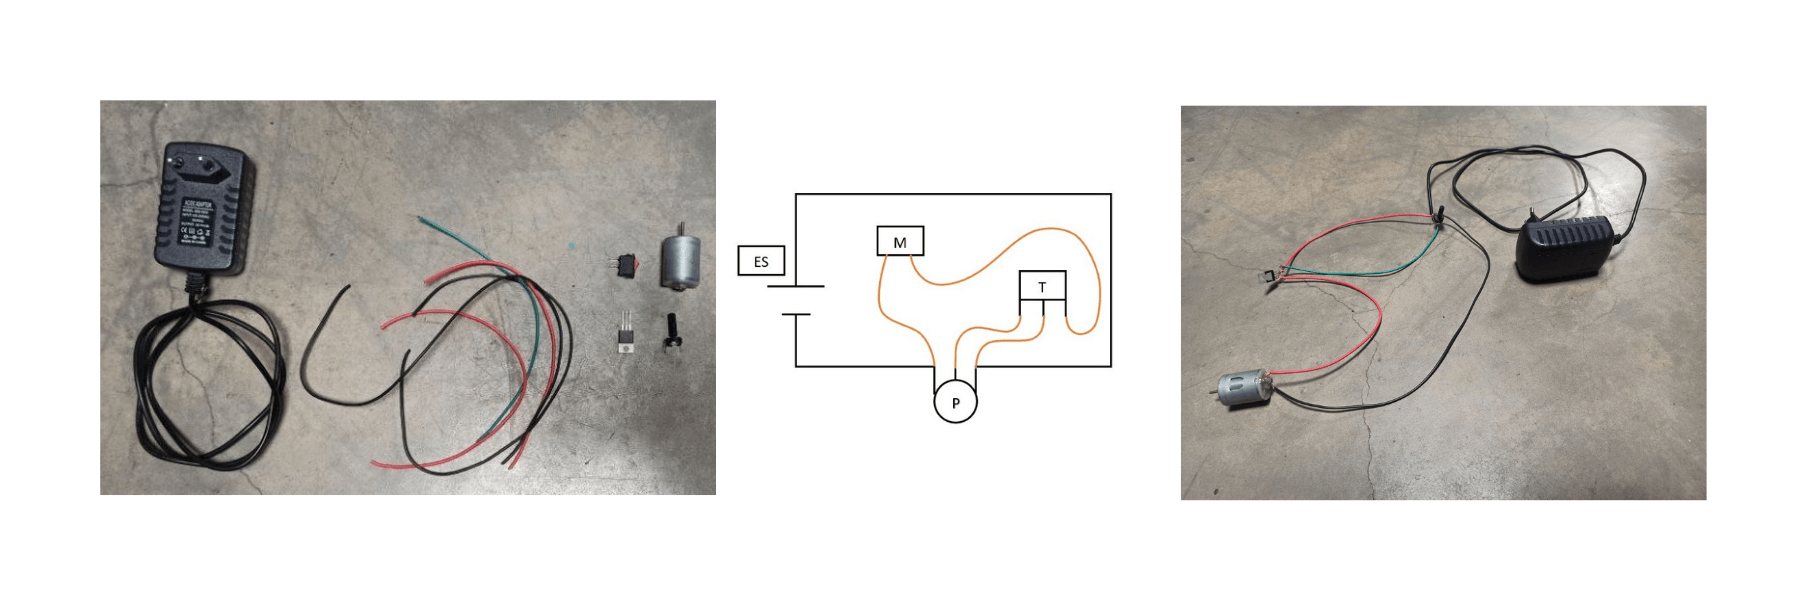
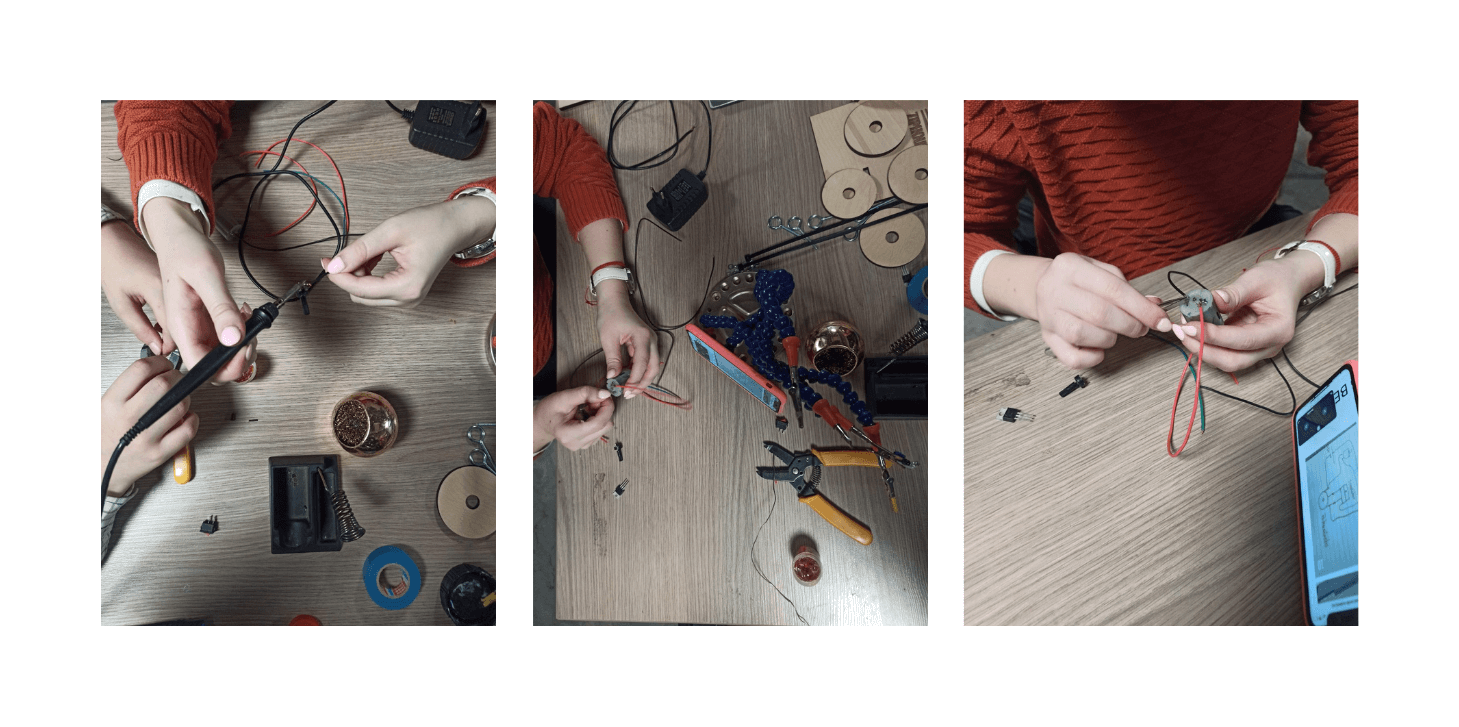 As a diversification from the basic spinning machine, we decided to add a switch that will help us to turn on/off the machine without doing the plugging/unplugging every time. This was done as a last minute change, so for future adaptations and changes, a switch should be added in pattern design and in the circuit scheme.
Testing
Preparing of the fibers
This phase was very interesting and quite fun!
The responsible for this was Aliona Raru. This phase was about to prepare the raw fibers of wool by starting to wash and brush them.
Then process called Scratching is carried out by hand or with special tools, such as a "dagger" (a kind of comb for wool).
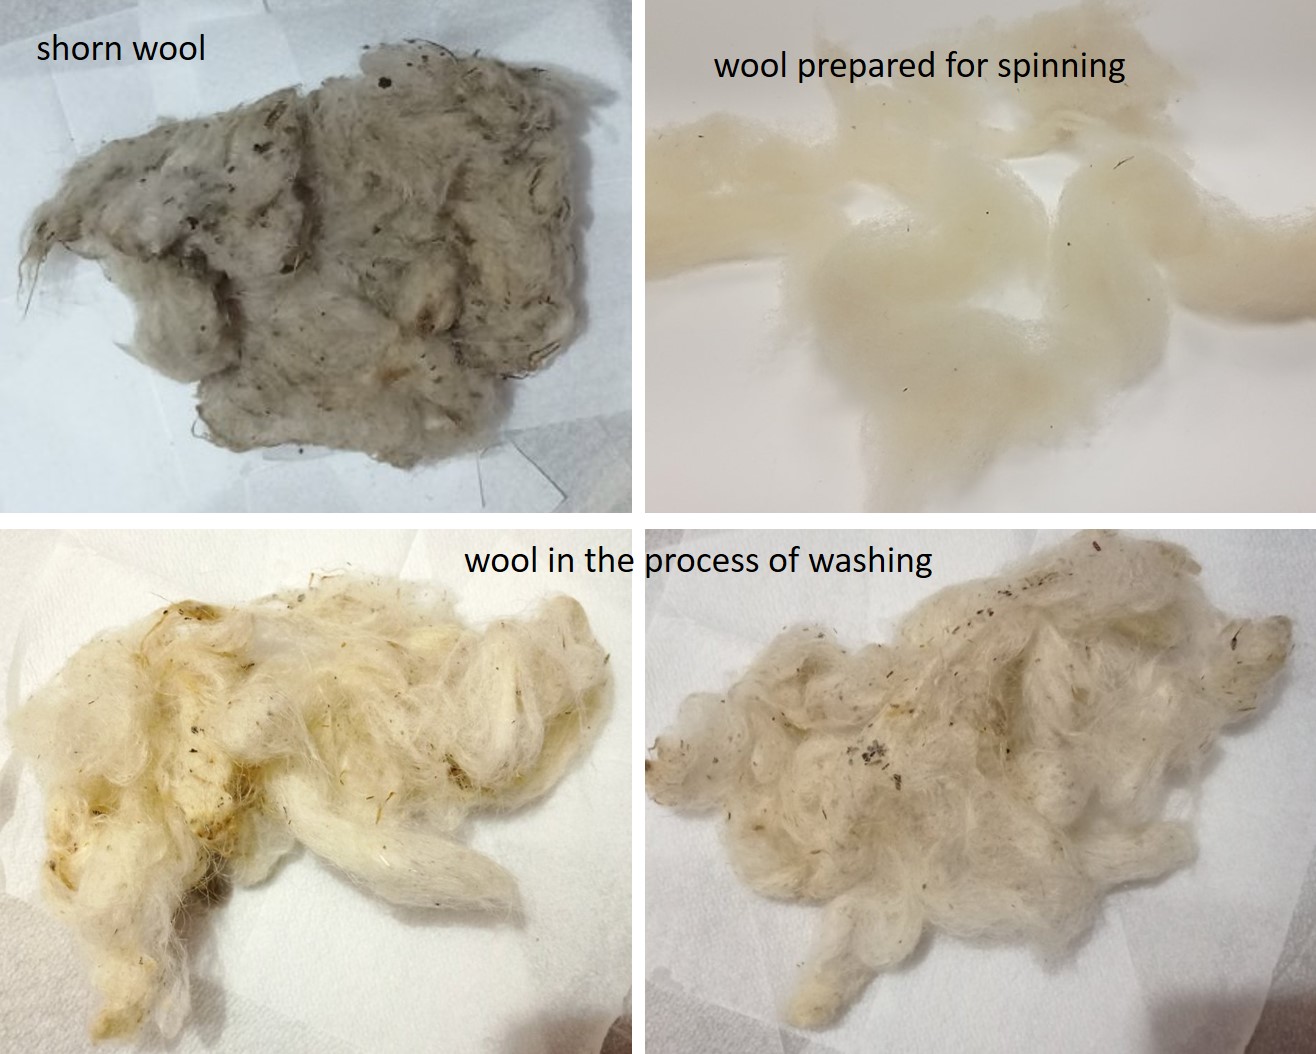 After that we get the uniform soft clouds of wool. Now, we can create the thread that can be put through the machine.

Gallery
 Beautiful pictures of the old process of spinning.
The rest of the photos were taken by Elena Rotaru, which was responsible for documenting this week. Here are some more photos and videos that shows the whole process of assembling our spinning machine.
The result
Notes
After making this spinning machine, I could identify some problems that could be improved:
- Placing the engine - would be better to laser cut the hote in the base of the machine for placing through it the cable;
- The length of the cable should be longer;
- For a thin thread, it's necessary to spin at least 2 times.