2. Digital bodies
Research & Ideation
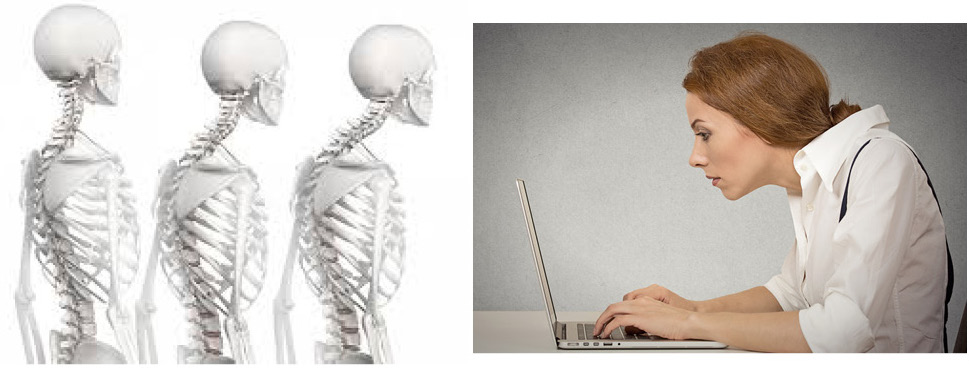
Since I have started to work more on the computer I have developed bad postures. I've started feelin more pain in my neck so for this project I decided to work with the troubles I am dealing with at the moment with my body. When working alot in the computer, sitting down, It is important to keep good posture, Sit on a good chair and if possible, lift the computer screen to eye level svo you don't bow to look at it. Then it is also good to have a. seperat keyboard and mouse.
Symptoms of poor posture
- Rounded shoulders.
- Potbelly.
- Bent knees when standing or walking.
- Head that either leans forward or backward.
- Back pain.
- Body aches and pains.
- Muscle fatigue.
- Headache.
References & Inspiration
My insparation was from sculpturers who work with the body in abstract and emotional way. Most of the work below represent heaviness, like carying the load on your back and working hard physical jobs. I connect that to the poor posture where you start feeling like all the work goes straight to your back and neck even thoug you may not be working in a very physical way, sitting in front of the computer. Even though the Electrical Pylons have a way of representing the work for electricity stream around Iceland by having the electrical pylons be put in human form holding the wires in their hands and in a motion of walking.

Meet Graham I have known about this project for some time and think it is a good refrence for this week, looking into how the human body can be manipulated to endure our terms of lifetyle.
The Transport Accident Commission (TAC) created "Graham,"
Refrences
- Vatnsberinn / 1937 / Ásmundur Sveinsson
- Helreiðin / 1944 / Ásmundur Sveinsson
- Electrical Pylons / Duncan Geere / Wired UK
- Óþekkti Embættismaðurinn / 1993 / Magnús Tómasson
- Meet Graham / Patricia Piccinini / Transport Accident Commission Victoria
- Posture Coretor
- Forward Head Posture
Tools
Process and workflow
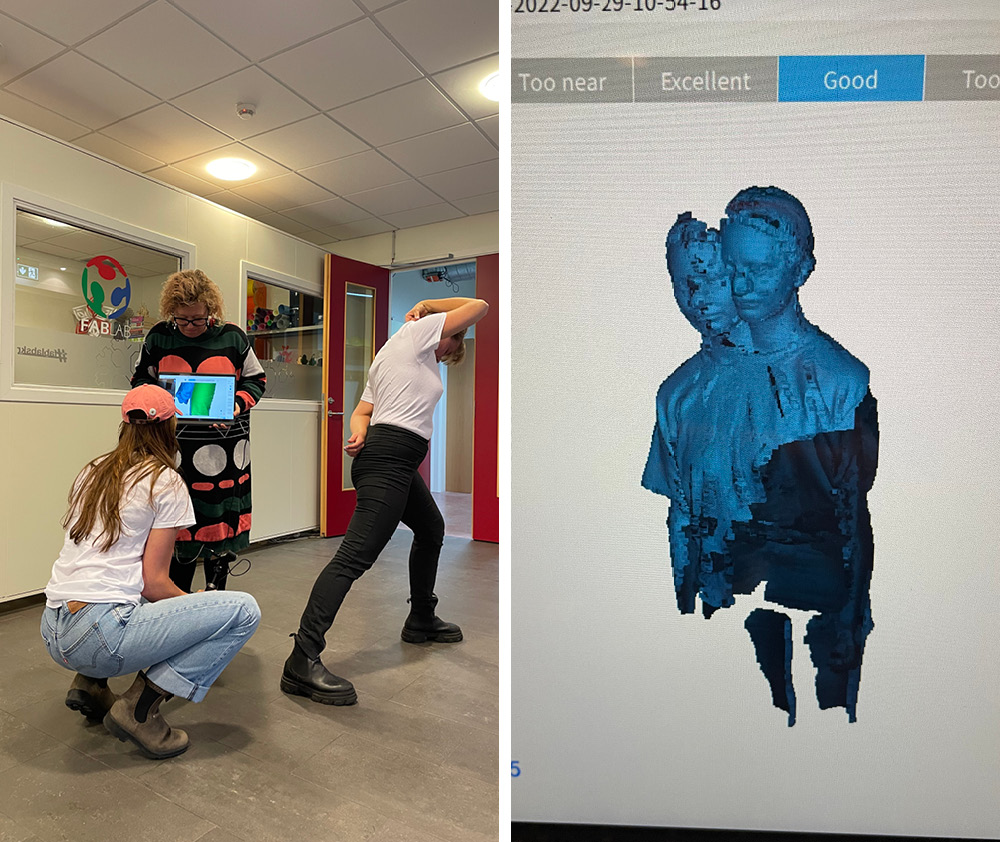
Went to the FabLab at Sauðárkrókur and worked with their 3D scanner called, Revopoint Pop 2and the software Revo Scan. All of us in team Iceland were able to make a 3D scan of ourselves by helping out each other.
How to make a 3D scan
- wear light color as the scanner can not read black and dark colors weel
- pick a pose and keep very still (choose the pose well since your will have to hold it for a long time)
- follow the screen on the computer rather then the real object being scanned
- Go really slow if you are scanning
- Make sure to cover the whole objects so there are no gaps
- export as an OBJ
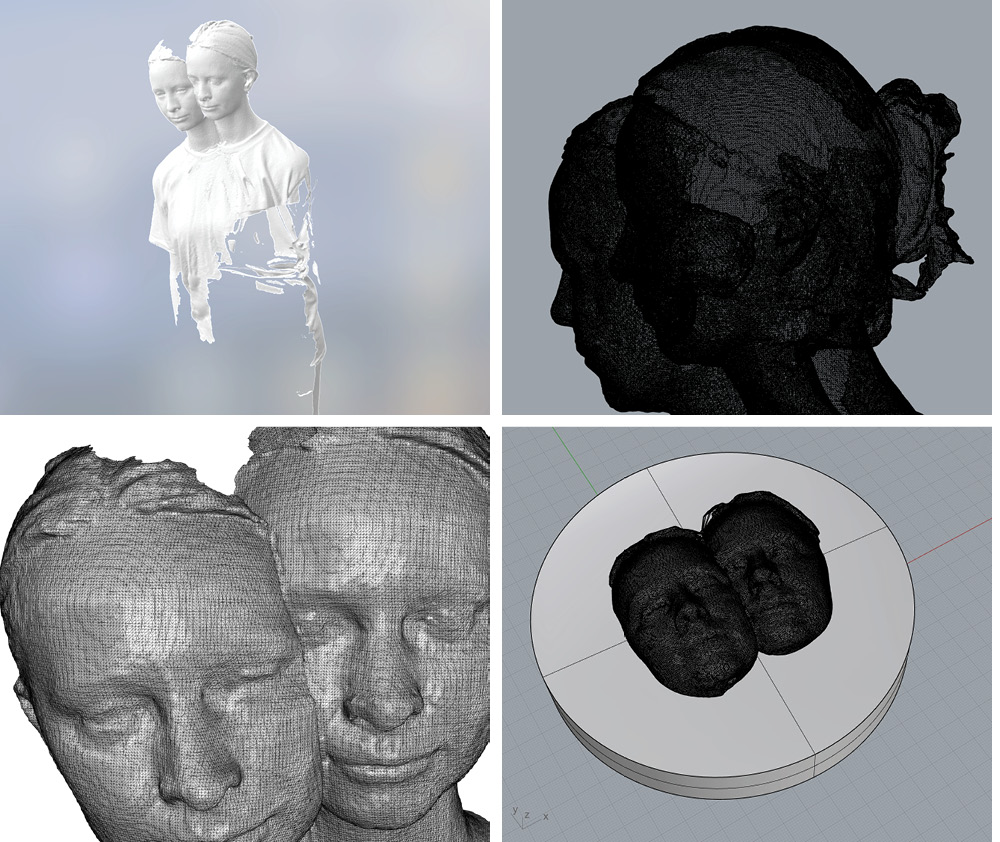
Having fun with cuting up the mesh into a small object that could be 3D printed and hung up on the wall
Makehuman
This model 1 was obtained by MakeHuman. I did not fix any setting on the model exept the pose I found in pose album called prostate01. The pose was already in the makehuman album of poses so it is easy to find. Next was to import the Stl file to Rhino7 and cut the mesh and make a mannequin.
step-by-step
- Makehuman
- pose/animate
- Pose
- Prostate01
- Save file
- Export/STL/OBJ
Rhino
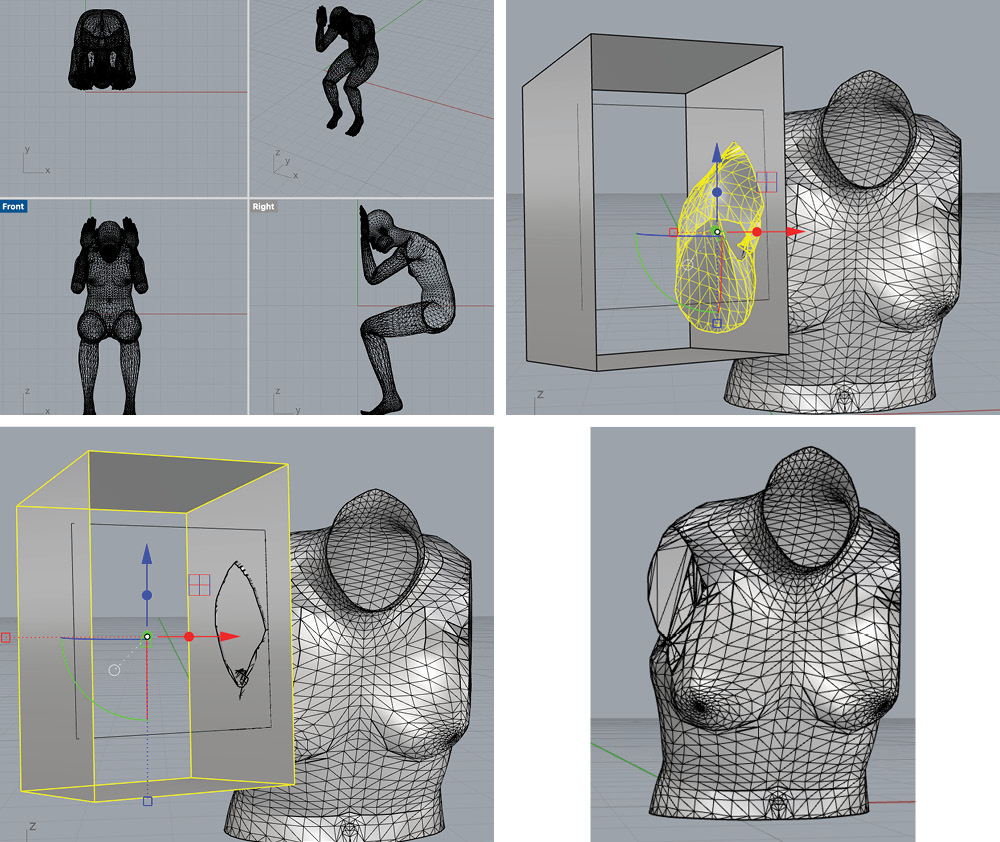
I had to turn the model from laying down to sitting upwards before cutting. I used the polyline and meshsplit to cut of the feet, hands and head. I had trouble closing the holes that appear after cutting the model. The hole or cap needs to be cleancut to be able to use the cap comand to close the holes. So I had to use commands surface and MeshBooleanDifference. Placing the surface on the model where I want it to cut and cap the hole at the same time. It worked really well and I had a this model2 without and holes.
Slicer for Fushion 360
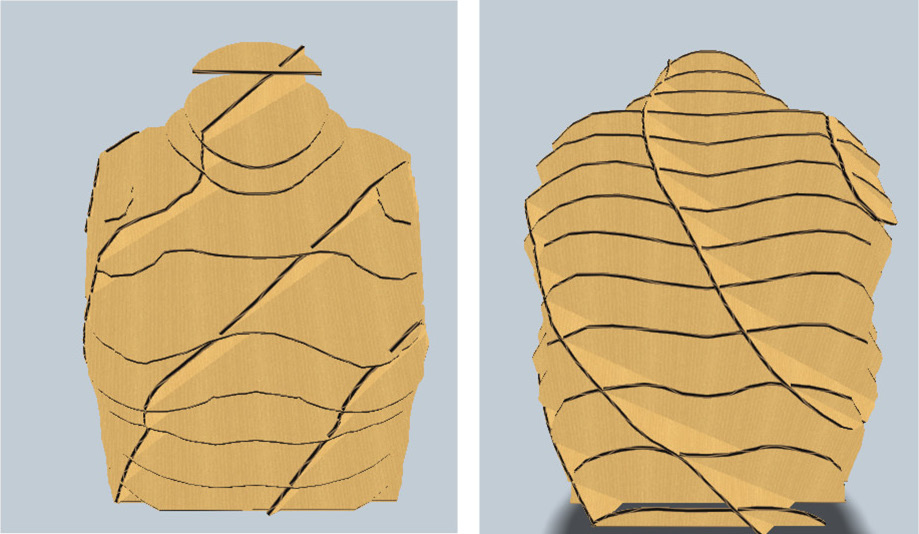
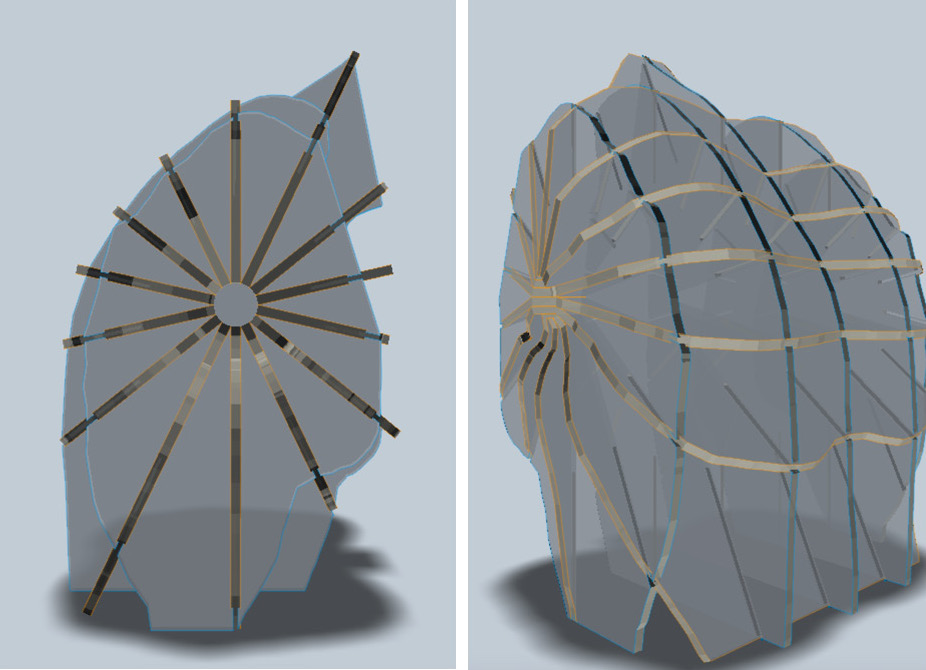
The laser cut nesting 3 was created using Slicer for fusion 360. When you import a stl model remember to change the up-axis to Z to have your model upright.
I tried different ways of slicing the mannequin and had fun changing the cutting direction. My goal was to have the cutting direction focus on the bad body posture the 3D model had, even though many other slicing ways were very interesting like this one below using curve slice and changing the cutting direction. I ended up exporting the fushion sliced mannequin5 into PDF4 lasercut file since the Epilog at the TextileLab reads PDF rather then DXF3.
 I had trouble with the slot offset mesures. First they were at 2.2 mm and that kind of closed the gap for assebling so by reducing the offset down to 0.01 it worked and I could assemble my mannequin.
Lasercutting & Assembling mannequin
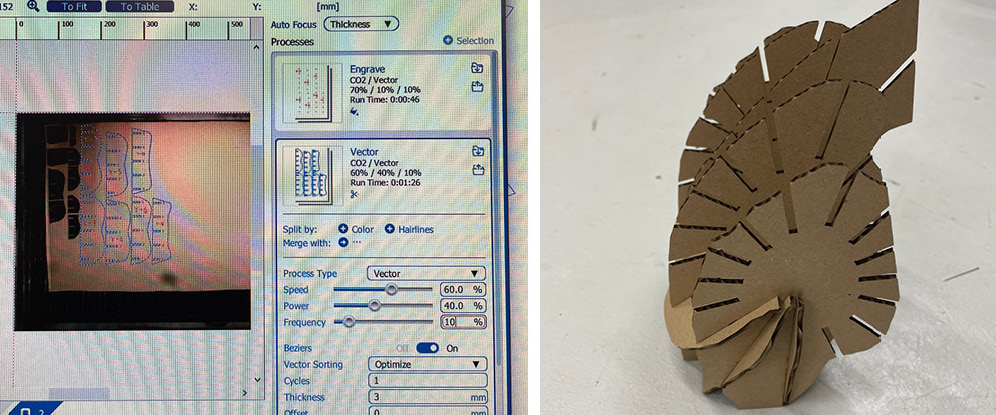
At the TextileLab in Blönduós there is an Epilog lasercutter that reads PDF files. It has an inbuild camera that allows you to places cut directly on material before cutting. Material
Cardboard 3mm thicness 440x600mm size Fushio Slicer slot offset 0.01
Setting for Epilog laser 60watt
vector: 60 Speed/40 power/10 frequency
Engrave: 100 speed/20 power/10 frequency
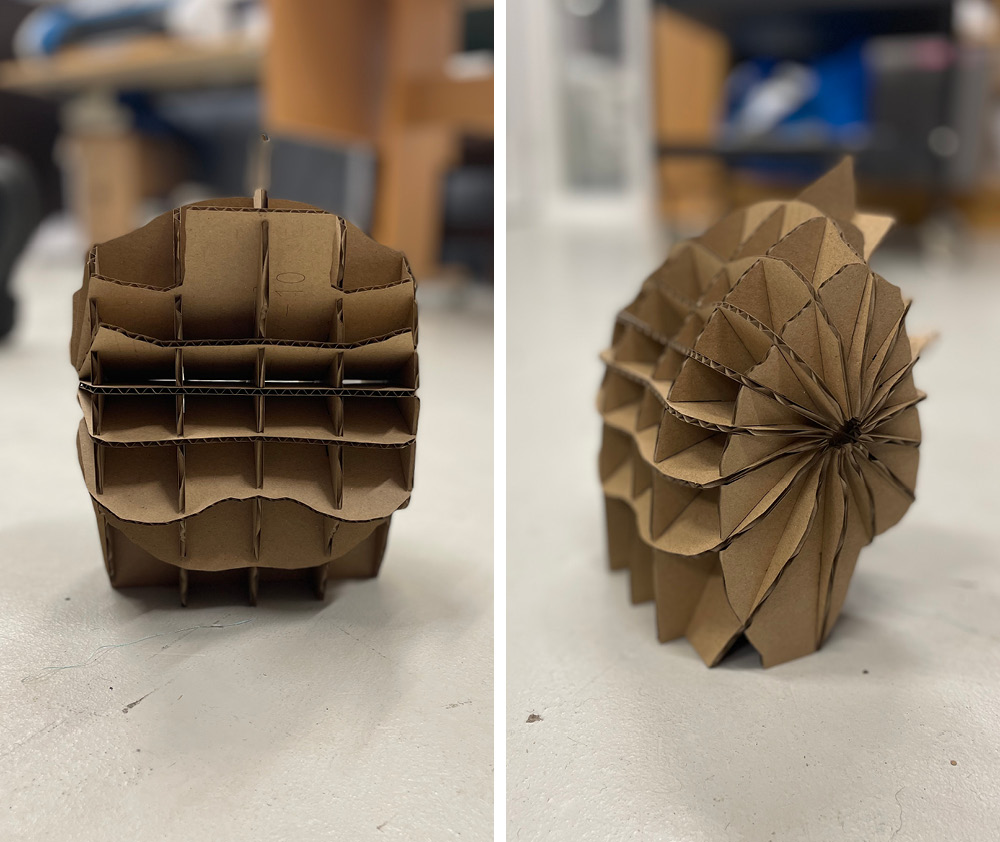
This mannequin was easy to put together by following the numbers on each piece and following the step-by-step from the fushion slicer.
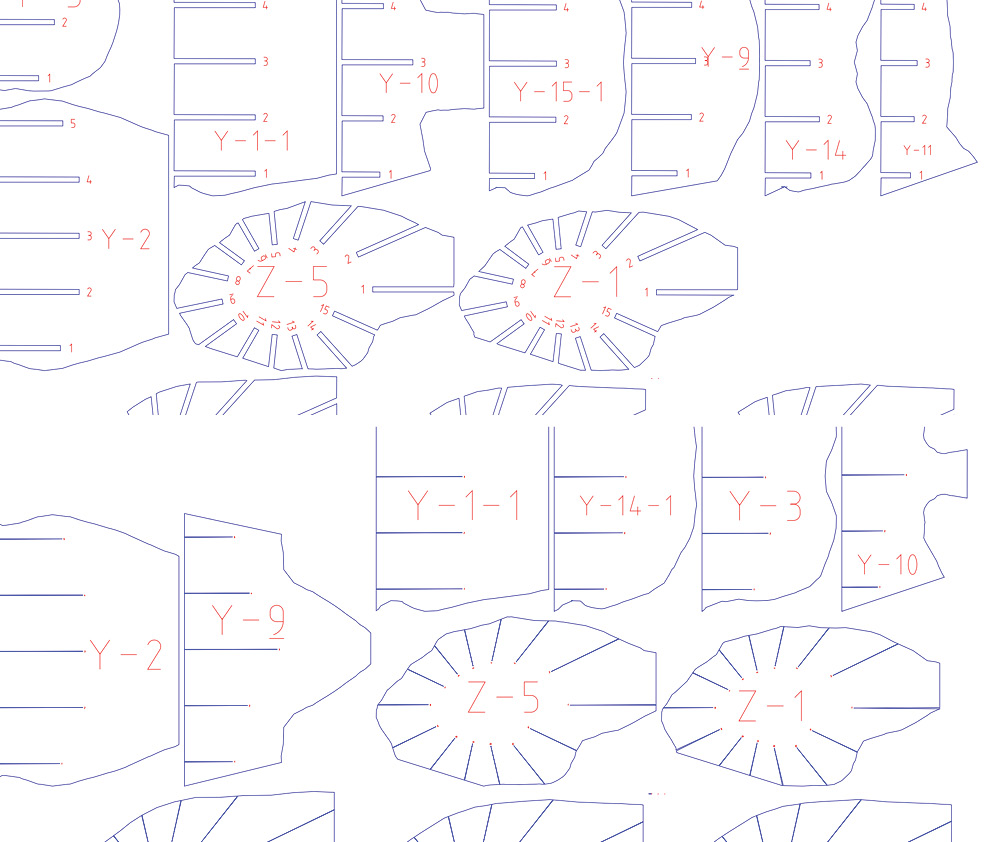
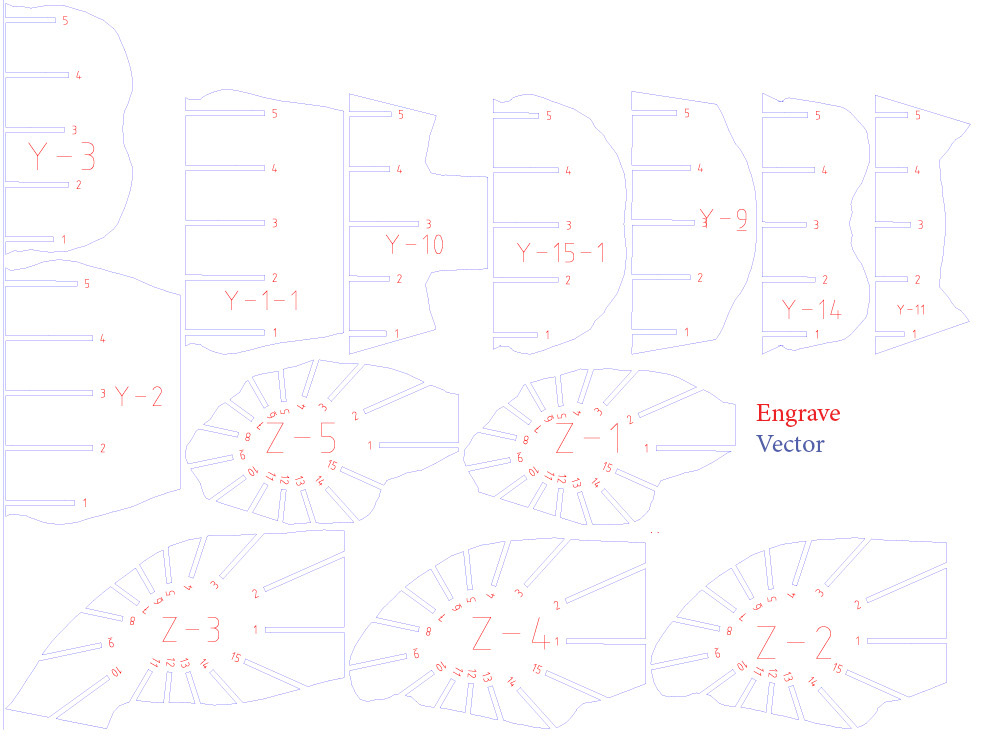 In the exported file from fushion I had all the lines color coded so everything red is engraved and blue vectored.
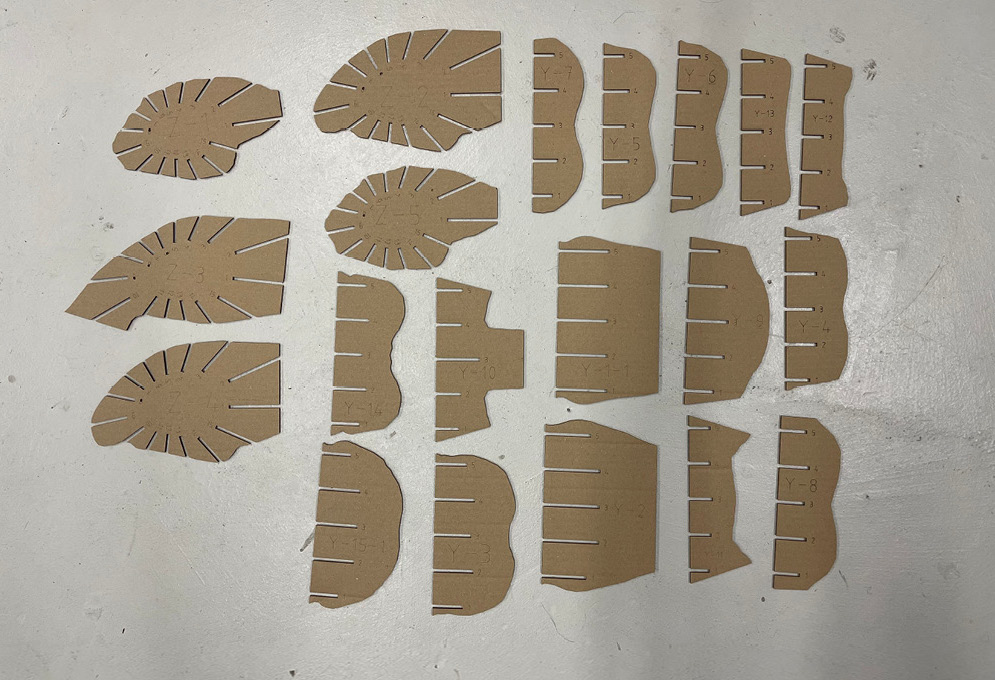 Here are the pieces lasercut and ready to be assembled
 This mannequin was easy to put together by following the numbers on each piece and following the step-by-step from the fushion slicer.
Fabrication files
-
file: Makehuman model ↩
-
File: 3d modelling of mannequin ↩
-
File: DXF Laser cut sheets ↩↩
-
File: PDF Laser cut sheets ↩
-
File: Fushion slicer file ↩