6. BioFabricating Materials
References & Inspiration
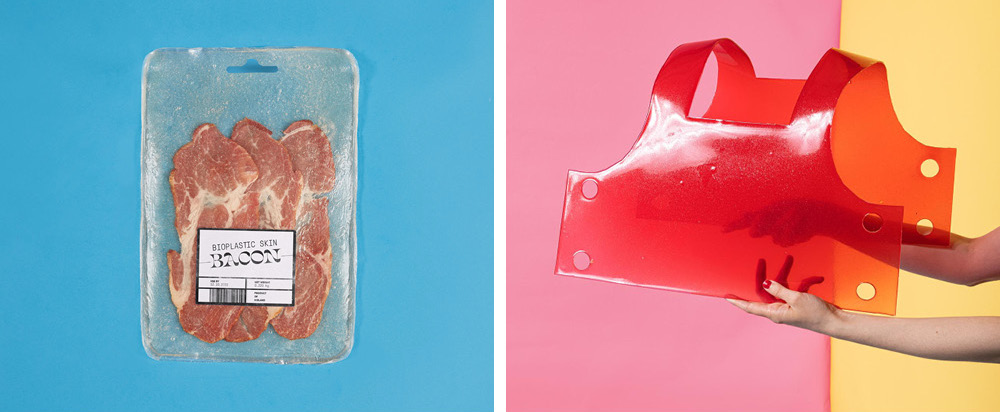
I have for a long time been inspired by the works from Valdís Steinarsdóttir. Projects like Bioplastic skin where Bioplastic Skin is a biodegradable packaging for meat made out of the skin of the animal itself. And the project Shape and repeat, a dialog about how we manufacture clothes. Instead of cutting out patterns and sewing, natural liquid material is molded into a two-dimensional shape and when the material dries out, the article of clothing is mostly ready to use, it only needs a few minor finishing touches.
Just Bones from Valdís Steinarsdóttir on Vimeo.
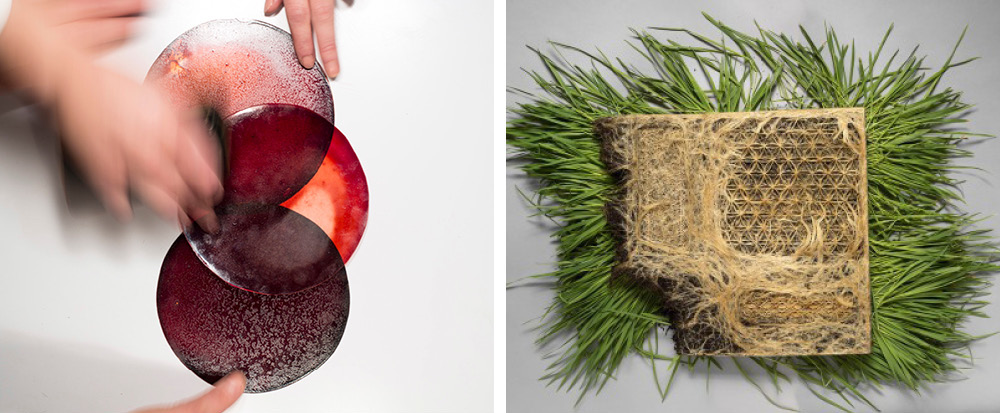
Diana Scherer interwoven, 2019 Scherer explores the relationship of man versus his natural environment. Through her installations she examines the boundaries between plant culture and nature.
Kind of biomaterial
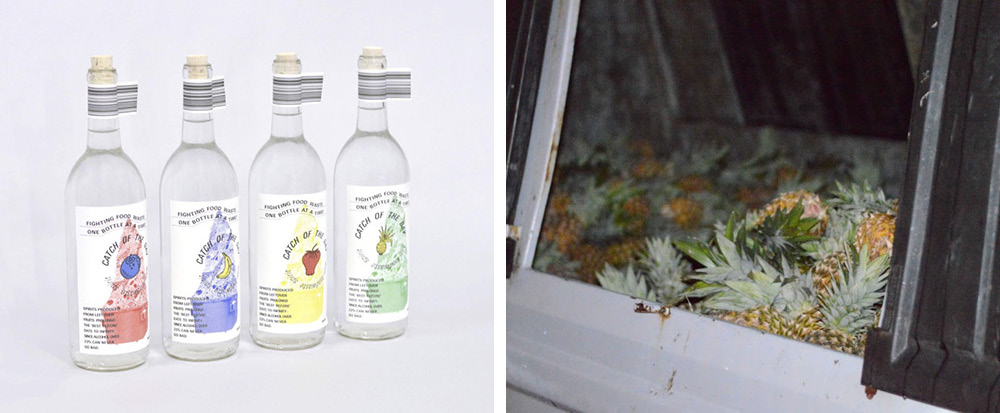
Björn steinar is a proudct designer working with waste as his main material. Catch of the day is a project aiming to reduce the amount of fruits trown to the trasch by grocery stores everyday. Finding the product the persrve for a long time, he distilled and fermented fruits into alcohol.
Natural Material Studio The starting point for the exploration is a self-developed foam composite based on charcoal and natural binder, which contrasts a shiny black appearance with a certain comport in the soft, tactile and inviting foam. From here, a playful, material-led form emerged.
Tools
Process and workflow
The Icelandic team worked togeather to create all the basic recipies of gealtine, agar and alginate. That was a great teamwork! IT was a collaborative week where we gathered local waste material such as fish scales, hops from brewery, black sand, coffee, eggshells and I can keep counting! It was a really great week. All the recipies we did you can find on our co created recipie book here (put book here)
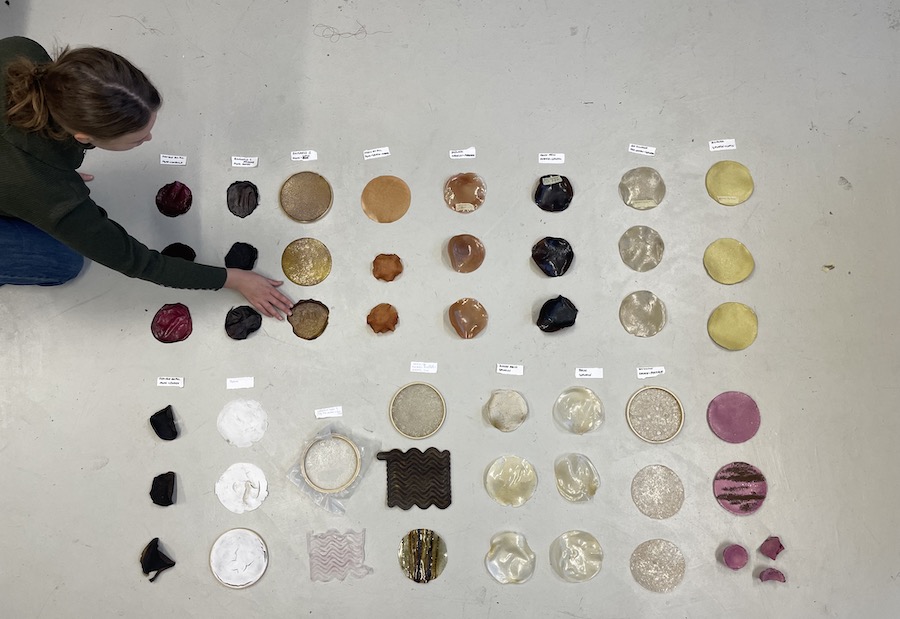
Overview material research outcomes
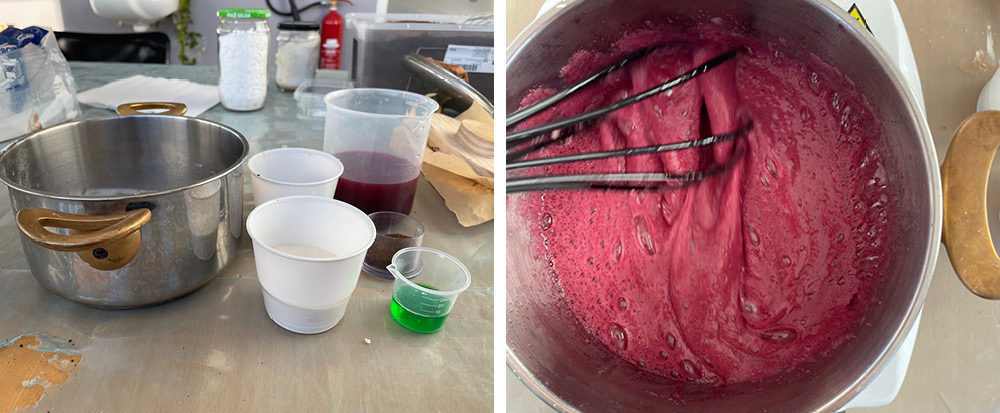
bio foam
A gelatine based bioplastic with cochiniel leftover dyebath. you can find the recipie in the recipie book, page 21.
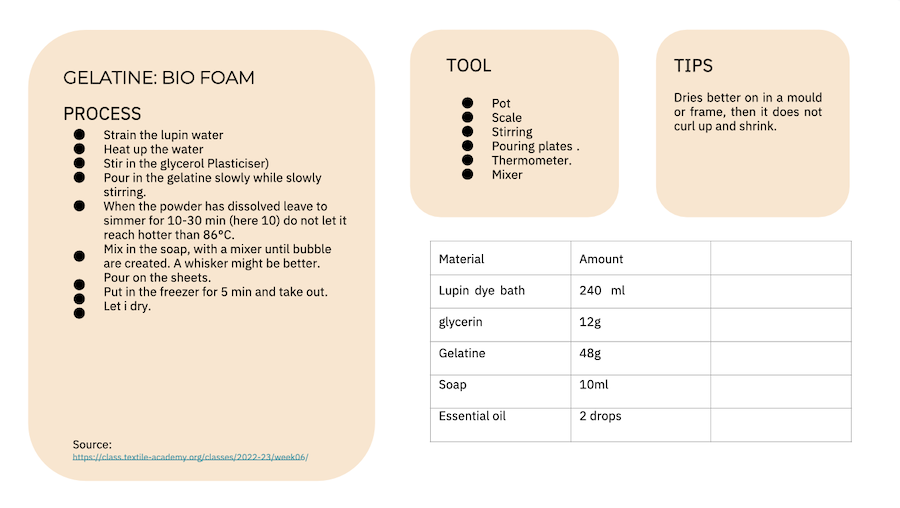 I used a normal wisk to make the foam, but straw to blow through and elextric wisk also works! I worked really well to put foam straight into the freezer for 5 minutes after after being pour into mould. I lets it keep it's shape better
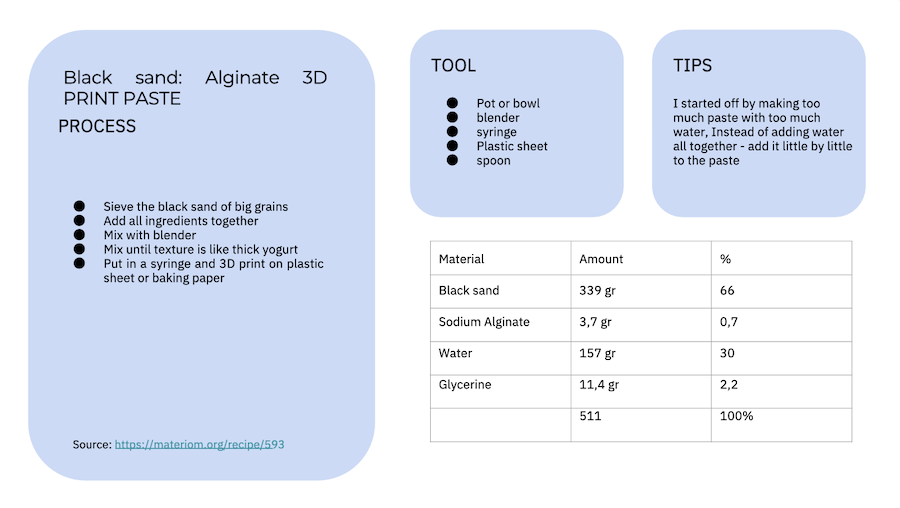
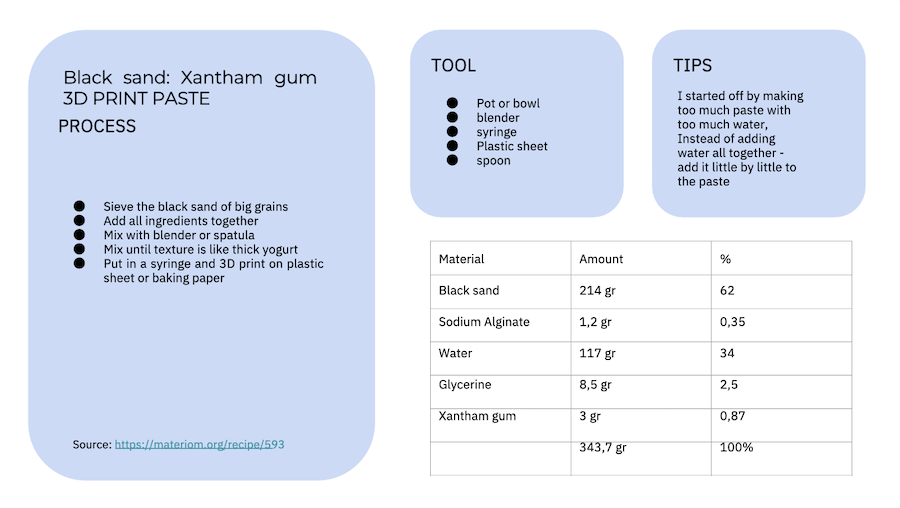
sand 3D paste
I started out by making too much sodium alginate based paste and added too much water so the solution was too loose and it did not change even though I added more and more sand to the paste. Ofcourse it was because sand does not absorb water so I knew I needed to change my stragety for this paste! I halfed the recipie and made the first one a pure alginate paste and the other mixed with xantham gum. By adding more alginate to the first paste I ended upp with a good texture fro 3D printing with. It was still too wet so whenever I tried to build on top it would only hold the structure for limited amount of weight. For the Xantham Gum added to the other half of the former alginate paste I ened upp with a good texture for 3D printing that could hold structure much better thatn the alginate based one. You can find the recipie on page 48 in the recipe book below.
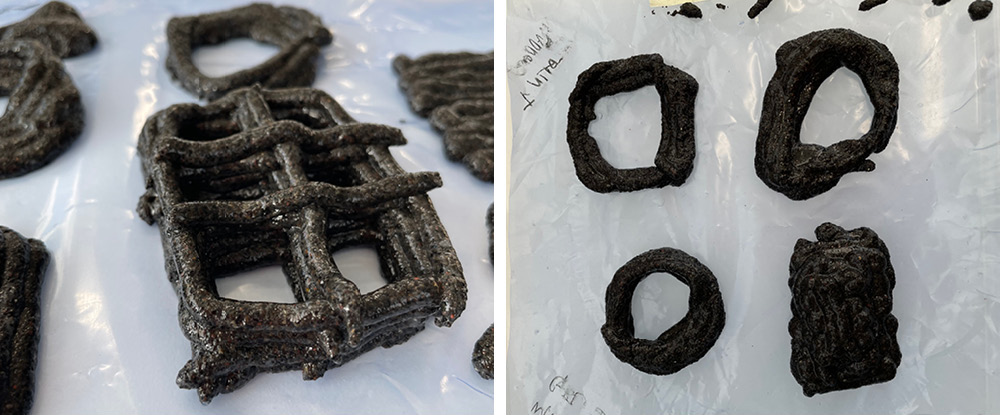
Things to take from 3D printing paste:
- try different structures to print out - some work better than others
- Add water little by little to the recipe to find the right texture - it is easier to add than takeaway
- adding sand to thicken paste is not the answer because it is also not a binder - to make paste thicker add more of binder(alginate, xantham gum)
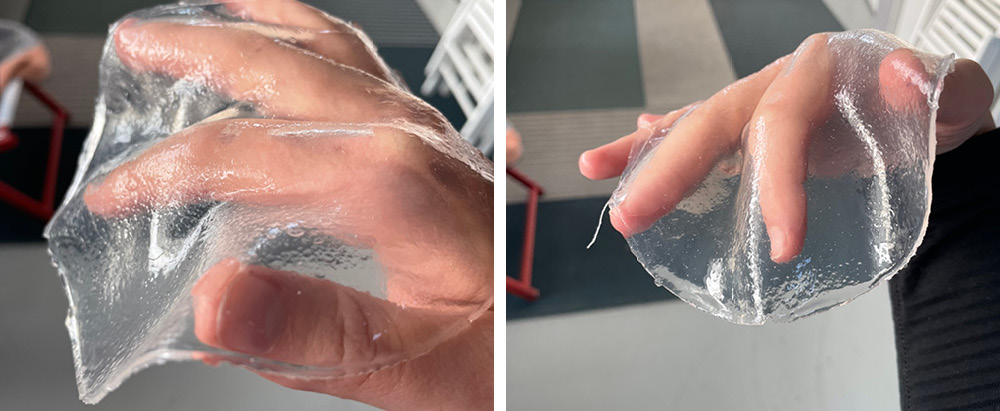
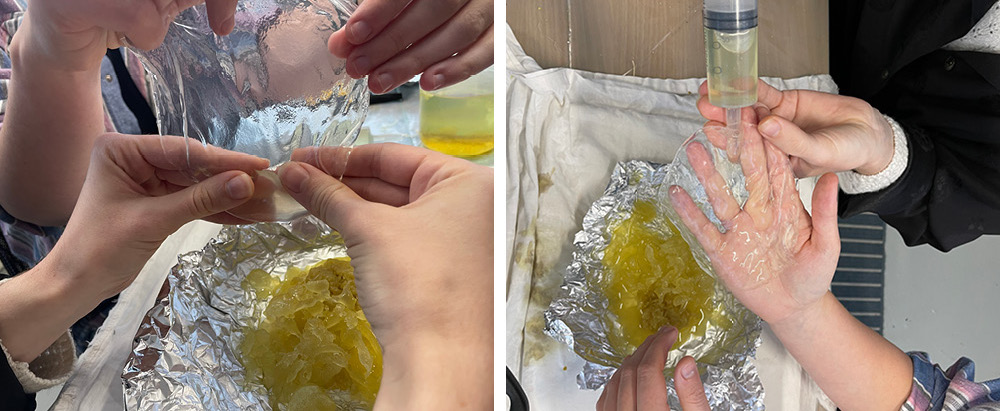
Alginate sheet & pocket
The recipies for alginate sheet you can find on page 37 in recipie book below!
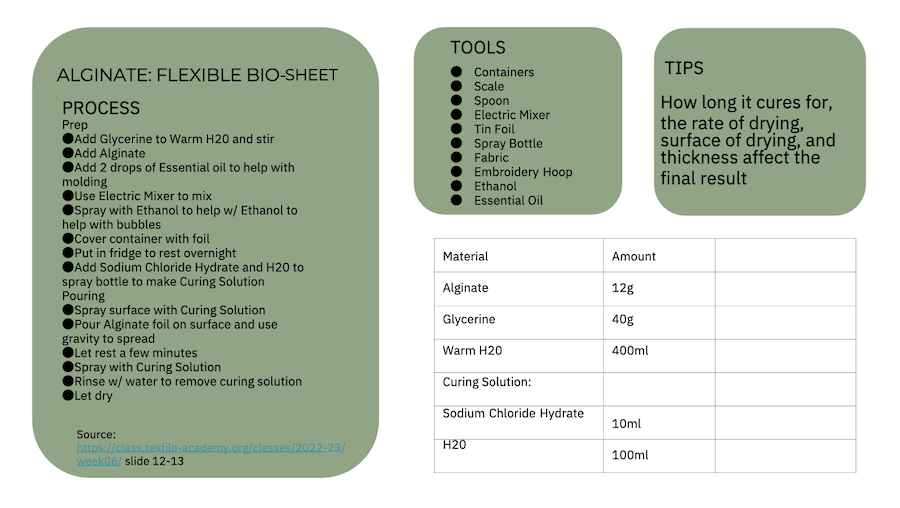
I liked the shine to the alginate and transparency. I tried out some pocket making only with failed tries but my classmates ended up with some good reasults.
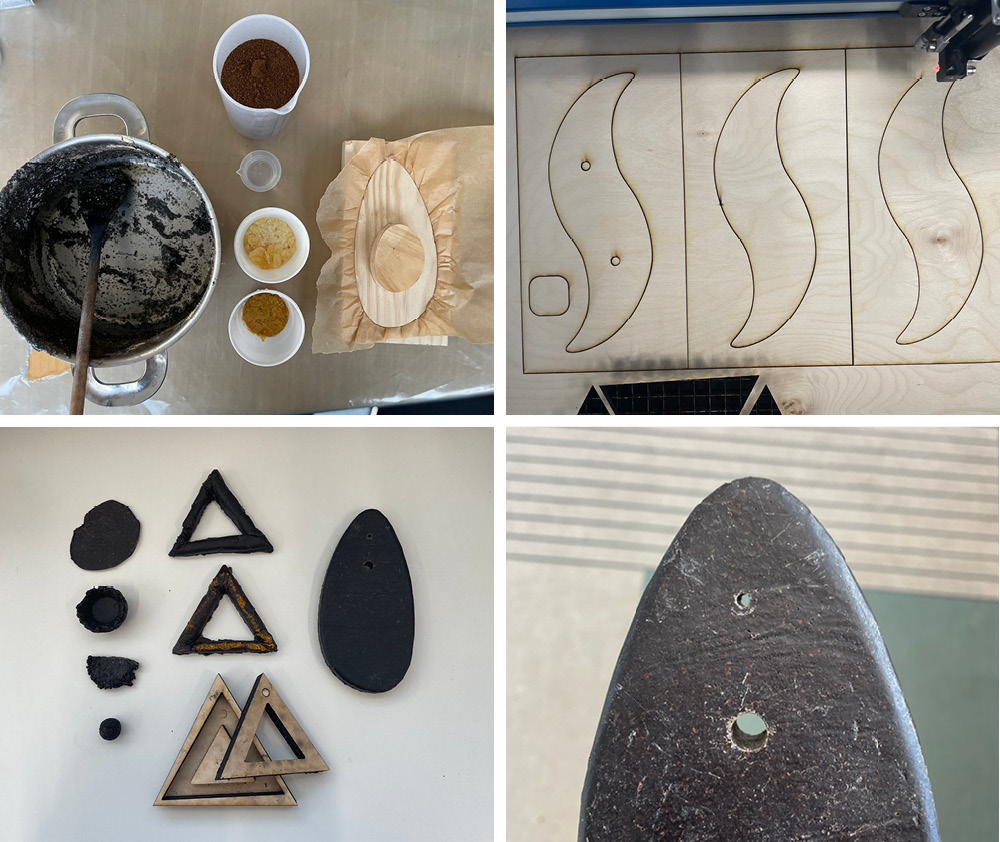
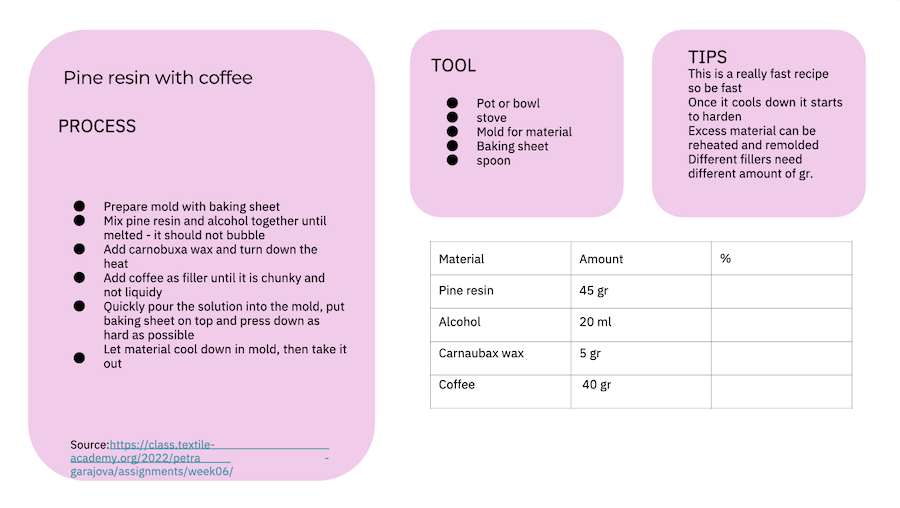
Pine resin & coffee
I have had this idea of making a coffee table out of coffee ever since I first tried making a pine resin biomaterial. I think it is a great way to reuse foodwaste with beautiful end results of hard, drillable briks. This project was too big for this week but i did some tests with making a mould available here 1 to lasercut. The mould is meant as a foot under a table board. I tried both using tea and coffee grains as that it what we drink alot at the TextileLab! I tried to see how much of filller I could add to the recipie but by adding to much filler the brik because grainy and rough to the touch.
Komubcha Karen
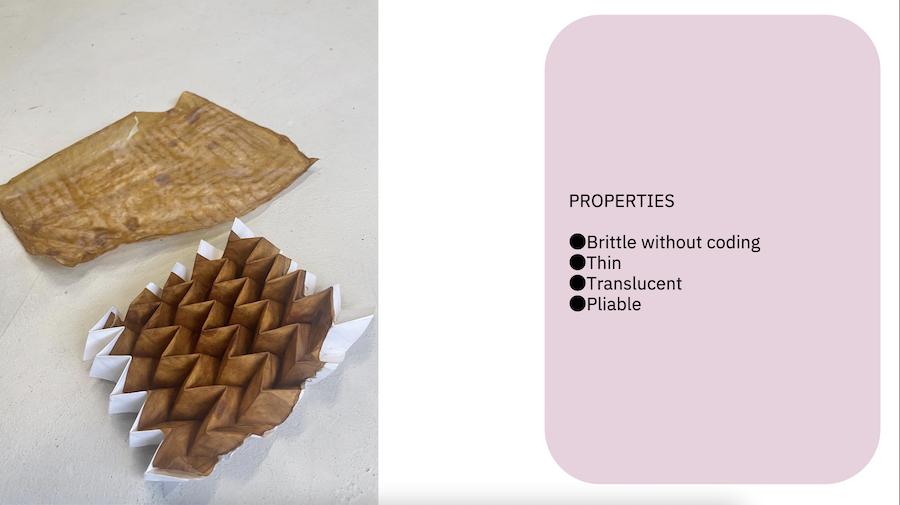
Right in week one of frabricademy we started our firt kombucha growth and named her Karen. She was made with love but still got a little mold on her. For 6 weeks we have been watching her and feeding her more black tea and sugar wherever she starts smelling alot and dehydrates. From this first growth we got a big but very thing sheet that ended up drying into a fragile sheet even though we doubled the leather before drying.
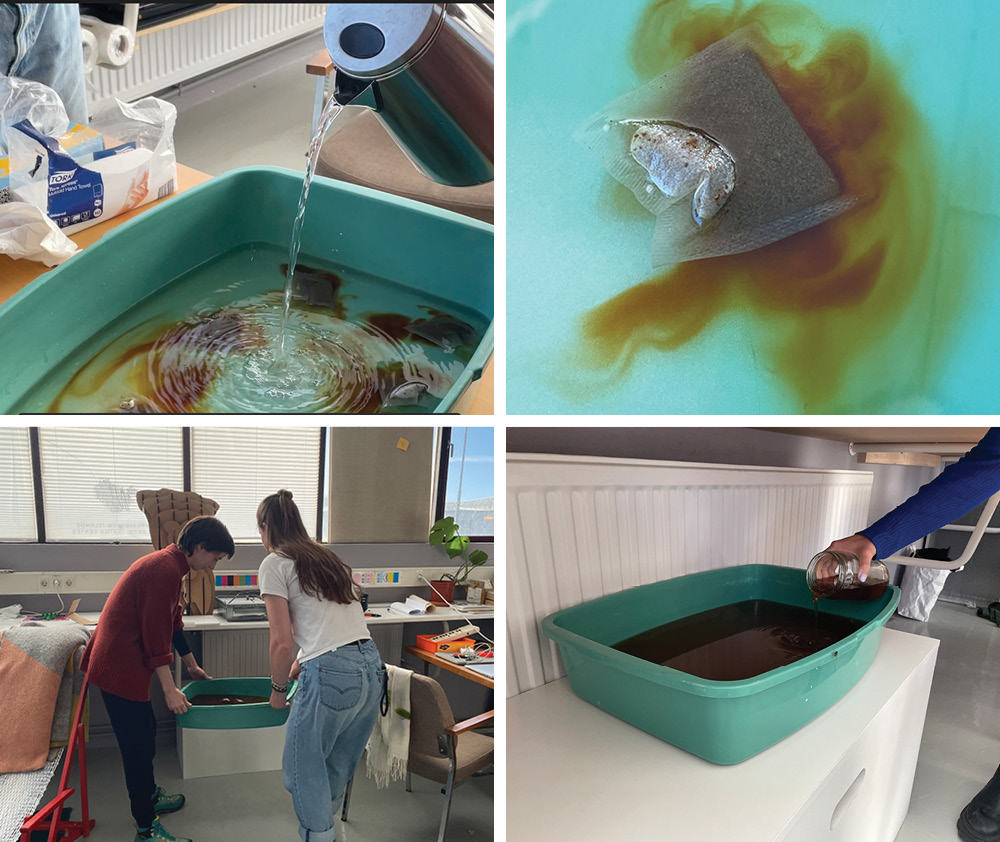
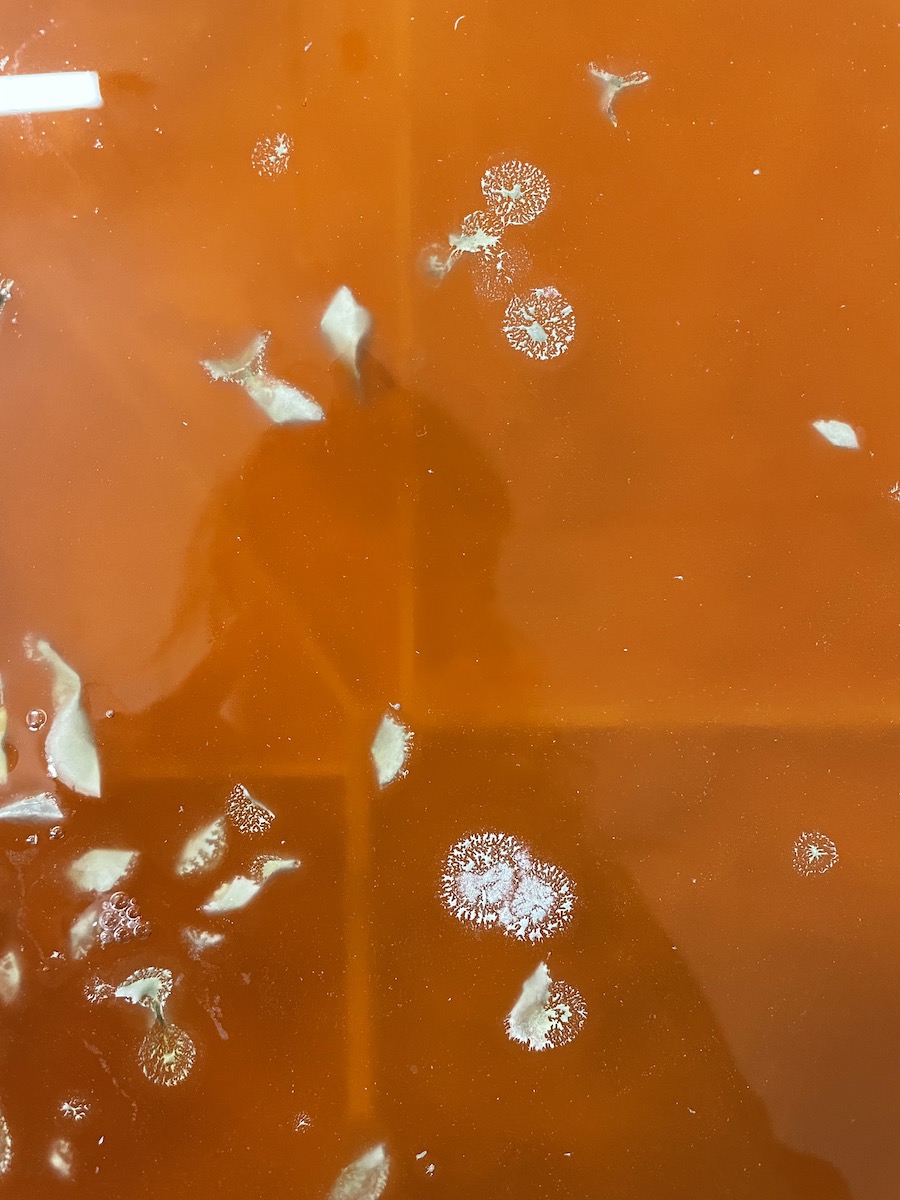 Ofcourse Karen is now a part of the Icelandic team so right away we started another strater but this time she got really moldie, and propably because the ph level was not acidic enough. So what we did was to take out all the mold starting to grow and reboil the kombucha solution and add vinegar to lower the ph level. But ofcourse remebering to take the scoby out and place in a sterile environment for time being. We will se how this worked in a few days but hopfully it worked!
recipie for Kombucha Karen
| Boiled water | sugar | tea(green/black) | vinegar | socby | Alchohol |
|---|---|---|---|---|---|
| 7 L | 700 gr | 7 bags | change ph level to 2 | 1 scoby bought this time | to sterilize all areas |
How too
- Sterile all equipments
- Start by boiling water then add it to the object planned to grow the kombucha in
- Add sugar to the water and let it dissolve
- Add teabag into the solution and let is stay until the water has cooled down (aprox: 2 hours)
- While the water is cooling down cover the box with textile or other things so prevent the solution from contamination
- When water had cooled down, remove teabags with a steile tool or hands
- Then add the scoby to the solution, cover and place in a warm place
Recipe book
BIOMATERIAL RECIPE.pdf by Fabricademy Iceland students
-
File: lasercut mold for ↩