10. Open Source Hardware - From Fibers to Fabric
Research & Ideation
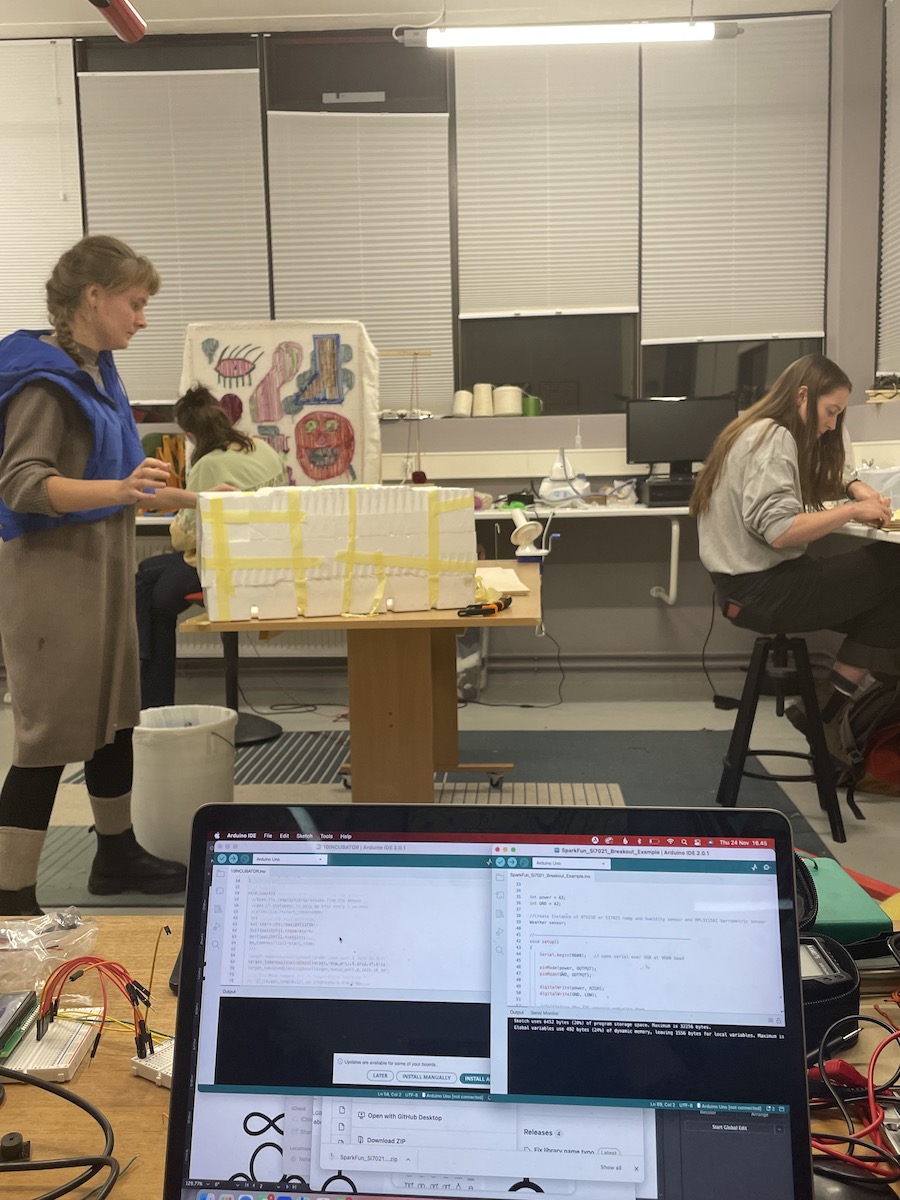 There is no incubator at the TextileLab in Iceland and therefor though it was sa great idea to make one this week since it is pretty essential when mgrowing bacteria, mycelium and other biomaterials. In Iceland we are never in danger to overheat but it gets really cold during wintertime so the incubator is a great input for the Lab and all students working within it.
References & Inspiration
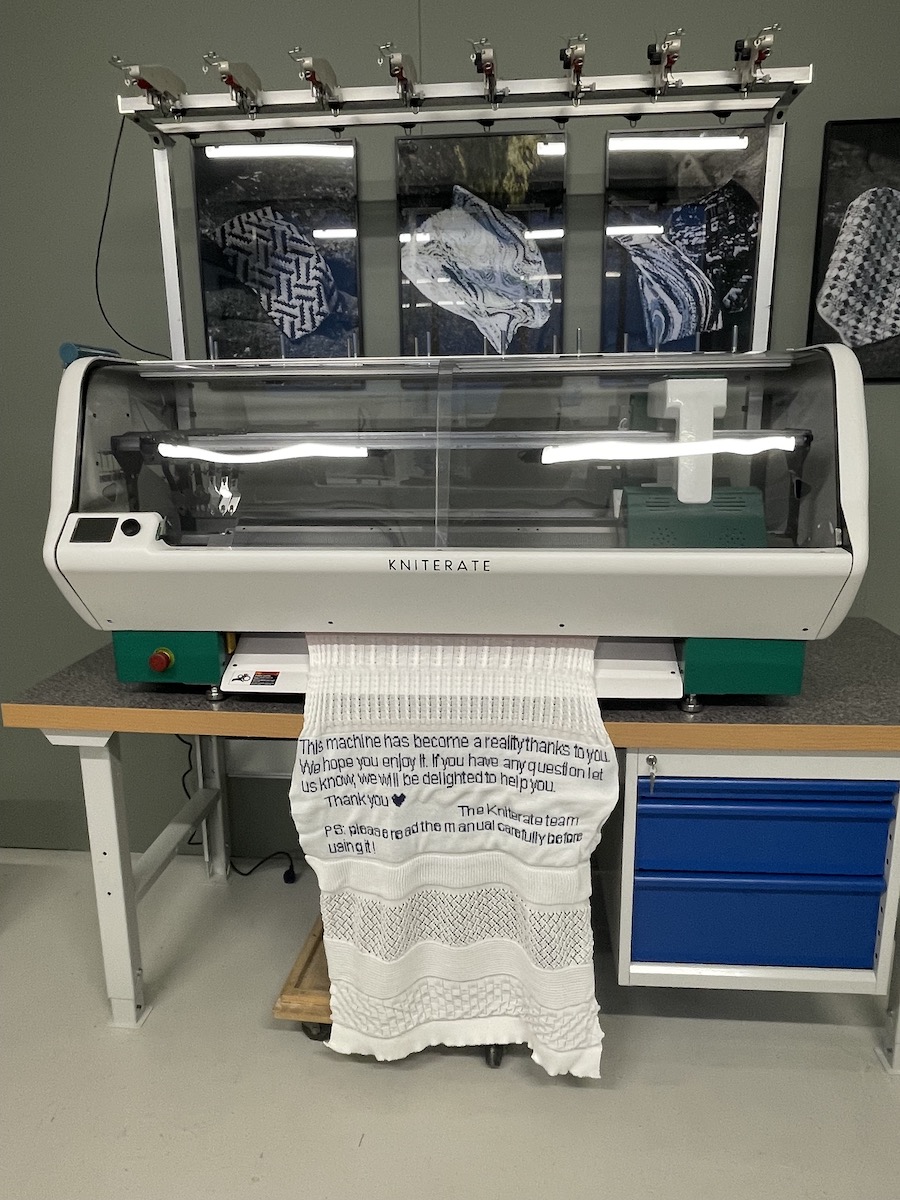 I was amizing to finally be able to put up the Kniterate which we at the Textile Center have waited for for over 2 years! When it finally came we figured out that we did not have a proper table to hold the weight of the machine so the table was assembled and machine lifted up the same day during this week. We had some external help for Blönduós townworkes. We can not wait to start playing with it and learning on the kniterate software.
I visited and Icelandic studio working with the machines and concept from precious plastic called Plastplan and I thought it was super cool what they were doing. So they made the open source machines from the precious plastic porject and have from there collaborated with some of the biggest stores and and buisensses in Iceland who want to start recyceling their plastic.
Tools
- ARDUINO UNO
- ARDUINO IDE
- 2D/3D MODELLING RHINO
- 2D MODELLING IILLUSTRATOR
- REGULATING TEMP
- SPARKFUN SENSOR CODE
- SPARKFUN LIBRARY
- CODE FOR CONTROLLING FAN
- LIQUID CRYSTAL - RELAY MODULES
Tutorials
This week we worked in a group to make an incubator for the TextileLab. We took refrences from both Low cost and accurate incubator and the incubator the Amsterdam team at Waag did in 2018. The links for both multiprocessing machine and instructables incubator are here below:
- WENDY'S DOCUMENTATION
- PREVIOIS YEAR DRIVE
- PREVIOUS FABRICADEMY
- PREVIOUS RESEARCH PAPERS
- HACKADAY
- INSTRUCTABLES
bill of Materials
| Qty | Description | Price | Link | Notes |
|---|---|---|---|---|
| 1 | Arduino UNO | 24 € | https://store.arduino.cc/products/arduino-uno-rev3 | Arduino kit also includes lcd screen and cable |
| 1 | SparkFun Humidity and Temperature Sensor Breakout - Si7021 | 10.95 $ | https://www.sparkfun.com/products/13763 | find alternative |
| 1 | Relay Module 5V | 7.39$ | https://www.amazon.com/HiLetgo-Channel-optocoupler-Support-Trigger/dp/B00LW15A4W/ref=sr_1_3?crid=34EFUN3VAR5WY&keywords=relay+module+5v&qid=1671532337&sprefix=relay+module5%2Caps%2C210&sr=8-3 | |
| 1 | USB A to B cable for the Arduino | 6.50 € | https://store.arduino.cc/products/usb-2-0-cable-type-a-b?queryID=undefined | |
| 1 | 75W incandescent light bulb | 2.83 $ | https://www.amazon.com/GE-41032-Incandescent-Globe-White/dp/B00FZYLF50/ref=sr_1_2?keywords=incandescent+light+bulbs+75+watt&qid=1669653476&sr=8-2 | Heating element can also be used |
| 1 | 12V computer fan | 16.99 $ | https://www.amazon.com/6000RPM-Antminer-Cooling-Dissipation-Machines/dp/B09L62QDH4/ref=sr_1_22_sspa?crid=5M8QIMX6D705&keywords=12v+fan&qid=1669653747&sprefix=12v+fa%2Caps%2C277&sr=8-22-spons&psc=1&spLa=ZW5jcnlwdGVkUXVhbGlmaWVyPUEzUkhHOTVSQ09IWUtNJmVuY3J5cHRlZElkPUEwOTA2Mzc3Mk5PTTBUMlQ3QTFYUyZlbmNyeXB0ZWRBZElkPUEwNTMzMTQ2MzQzUVJGTkhJNFZLSiZ3aWRnZXROYW1lPXNwX2J0ZiZhY3Rpb249Y2xpY2tSZWRpcmVjdCZkb05vdExvZ0NsaWNrPXRydWU= | we got our for free from an old computer |
| 2 | 12V power supply | 9.99 $ | https://www.amazon.com/ALITOVE-100-240V-Converter-Security-Surveillance/dp/B07VQHYGRD | order online |
| 1 | Piezo buzzer | 0.95 $ | https://www.sparkfun.com/products/21235 | this or alternative |
| 2 | 10k potentiometer | 3.15 $ | https://www.sparkfun.com/products/9939 | this or alternative |
| 1 | Small LCD screen | 9.99 $ | https://www.amazon.com/SunFounder-Serial-Module-Display-Arduino/dp/B019K5X53O/ref=sr_1_2_sspa?crid=2N6X4JEC2554E&keywords=arduino%2Blcd%2Bscreen&qid=1669654286&sprefix=arduino%2Blcd%2Bscreen%2Caps%2C188&sr=8-2-spons&spLa=ZW5jcnlwdGVkUXVhbGlmaWVyPUExSEhZOFZVUUJVWVVBJmVuY3J5cHRlZElkPUEwOTE5MzU4MUxFOUhQT0NPOUQ2ViZlbmNyeXB0ZWRBZElkPUEwNjg1NDY1M0hTTDVSTVhZQlNUQyZ3aWRnZXROYW1lPXNwX2F0ZiZhY3Rpb249Y2xpY2tSZWRpcmVjdCZkb05vdExvZ0NsaWNrPXRydWU&th=1 | also comes with the arduino kit |
| 6 | 4mm plywood/750x500mm | aprox. 60 € | https://handverkshusid.is/product/krossvid-birki-4mm76152cm/ | To make cabinate |
| 2 | 4mm acrilyc sheet/750x500mm | aprox. 60 € | https://handverkshusid.is/product/plexigler-glaert-3mm-a3/ | Shelves and door |
| 1 | Styrophome box | second hand | local grocery shop | To make the insulation in the cabinet (adapt the plywood cabinet to your styrofoam box) |
PIECES TO LASER CUT
There are a few files to lasercut and they are all available at our Google drive
MATERIALS
- rivet for the vent
- closing devices for door
- 4 mm Plywood for outer box
- 4mm Plexiglass for the shelves
Process
First we looked at the refrences we were working from. We has already prepared some of the elements needed for the incubator since we knew how hard it can be to ship things or find things locally in such a short time. The insulating box we got from the local grocery store!
Incubator rator by Margrét, Alberte and Alice
Code for incubator
The file1 for the arduino is below
/******************************************************************************
  INCUBATOR SKETCH
  This sketch will help you control the temperature (activation of a fan) depending on the collected temperature and humidity values via the sensor
  Participants Team : Alberte Bojensen, Alice Sowa and Margrét Katrin Guttormsdottir
  Local Instructor : Louise Massacrier
  Fabricademy 2022/2023 - Icelandic Textile Center Textilmidstod

  This sketch is built on :
    SparkFun Si7021 Breakout Example
      Joel Bartlett @ SparkFun Electronics
      Original Creation Date: May 18, 2015
      Updated May 4, 2016
      This sketch prints the temperature and humidity the Serial port.
    LCD Screen - Hello World !
      Library originally added 18 Apr 2008 by David A. Mellis
      modified 5 Jul 2009 by Limor Fried (http://www.ladyada.net)
      example added 9 Jul 2009 by Tom Igoe
      modified 22 Nov 2010 by Tom Igoe
      modified 7 Nov 2016 by Arturo Guadalupi

  The "SparkFun_Si7021_Breakout_Library.h" library used in this example can be found here:
  https://github.com/sparkfun/Si7021_Breakout/tree/master/Libraries
  The "Liquid Crystal Library" used in this sketch can be found here :
  https://github.com/arduino-libraries/LiquidCrystal

  Hardware Connections:

    Si7021 Temperature and Humidity Sensor
       GND -------------------  A2
       3.3V ------------------  A3
       SDA -------------------  A4
       SCL -------------------  A5

     LCD Screen
       VSS -------------------  GND
       VDD -------------------  5V
       V0 --------------------  outpin of the potentiometer (dedicated to LCD)
       V/W -------------------  GND
       DB7 -------------------  2
       DB6 -------------------  3
       DB5 -------------------  4
       DB4 -------------------  5
       E ---------------------  11
       RS --------------------  12
       LED+ ------------------  5V through 220ohms resistor
       LED- ------------------  GND
    LCD dedicated potentiometer
       VCC -------------------  5V
       GND -------------------  GND
       outpin ----------------  V0 of the LCD screen

    Relay Module
       DC+ -------------------  5V
       DC- -------------------  GND
       IN --------------------  A0
       NO --------------------  12V adapter
       COM -------------------  to + of the fan

    Potentiometer (for target temperature)
       GND -------------------  GND
       VCC -------------------  5V
       outpin ----------------  A1

*******************************************************************************/

//LIBRARIES
#include "SparkFun_Si7021_Breakout_Library.h"   //temperature and humidity sensors
#include <Wire.h>                               //include Wire library
#include <LiquidCrystal.h>                      //include library for the LCD screen

//SI7021 temp and humidity sensor
float humidity = 0;
float tempf = 0;
int power = A3;
int GND = A2;
Weather sensor;   //Create Instance of HTU21D or SI7021 temp and humidity sensor and MPL3115A2 barrometric sensor

//LCD Screen
const int rs = 12, en = 11, d4 = 5, d5 = 4, d6 = 3, d7 = 2; //pin for the LCD screen
LiquidCrystal lcd(rs, en, d4, d5, d6, d7);

//RELAY MODULE
const int RELAY_PIN = A0;  // the Arduino pin, which connects to the IN pin of relay
float floatMap(float x, float in_min, float in_max, float out_min, float out_max) {   //to map the potentiometer to the wanted range
return (x - in_min) * (out_max - out_min) / (in_max - in_min) + out_min;
}

//POTENTIOMETER
int analogValue = analogRead(A1); //pin for the potentiometer controlling the target temperature


//---------------------------------------------------------------


void setup() {
  //LCD Screen
  lcd.begin(16, 2);             //set up the LCD's number of columns (16) and rows(2)
  lcd.print("hello, world!");   // Print a first message to the LCD.

    Serial.begin(9600);   // open serial over USB at 9600 baud

    pinMode(power, OUTPUT);     //Initialize sensor
    pinMode(GND, OUTPUT);       //Initialize sensor

    digitalWrite(power, HIGH);
    digitalWrite(GND, LOW);

  sensor.begin();             //Initialize the I2C sensors and ping them

  pinMode(RELAY_PIN, OUTPUT); //Initialize relay_pin

    // initialize serial communication at 9600 bits per second:
  Serial.begin(9600);

}


//---------------------------------------------------------------


void loop() {

  //POTENTIOMETER - Get info and remap it to °C range
    int analogValue = analogRead(A1);           // read the input on analog pin A1 (Relay module)
    float target = floatMap(analogValue, 0, 1023, 15, 30); //potentiometer range is from 0 to 1023, remap it to a range from 15°C to 30°C

  //SENSOR - Get readings from all sensors
    getWeather();                               //Function to get humidity and temperature values from SI7021 temp and humidity sensor
    float tempc = ((tempf - 32) * 5 / 9);       //Converting temperature value (Farenheit) from sensor in Celsius degree

  //FAN - Control fan ON/OFF depending
    if( tempc <= target){                       // If the temperature value (°C) is smaller than the target temperature
     digitalWrite(RELAY_PIN, LOW);              // Then Fan is OFF
    }
    else if( tempc > target){ //23°C            // Otherwise, in case the temperature value (°C) is bigger than the target temperature
     digitalWrite(RELAY_PIN, HIGH);             // Then Fan enters a ON 5s / OFF 5s cycle until temperature value gets below target
     delay(5000);                               //5 seconds ON
     digitalWrite(RELAY_PIN, LOW);
     delay(5000);                               //5 seconds OFF
  }
  printInfo();                                //Printing informations on the LCD screen
  delay(1000);                                //Loop starts again every seconds
}


//---------------------------------------------------------------


void getWeather() {
  humidity = sensor.getRH();    // Measure Relative Humidity from the HTU21D or Si7021
  tempf = sensor.getTempF();    // Measure Temperature from the HTU21D or Si7021
                                // Temperature is measured every time RH is requested.
                                // It is faster, therefore, to read it from previous RH
                                // measurement with getTemp() instead with readTemp()
}


//---------------------------------------------------------------


void printInfo() {
  //POTENTIOMETER - Target Temperature
  int analogValue = analogRead(A1);
  float target = floatMap(analogValue, 0, 1023, 15, 30); //potentiometer range is from 0 to 1023, remap it to a range from 15°C to 30°C
  Serial.print("target T: ");   //String to be displayed in Serial Monitor
  Serial.println(target);       //Value target to be displayed in Serial Monitor

  //SENSOR - This function prints the weather data out to the default Serial Port
  float tempc = ((tempf - 32) * 5 / 9); //converting farenheit into celsius
  Serial.print("T");            // String "T" to be displayed in Serial Monitor
  Serial.print(tempc);          //Value tempc to be display in Serial Monitor
  Serial.print("C,");           // String "C" to be displayed following the value in the Serial Monitor

  Serial.print("H:");           //String "H:" to be displayed in the Serial Monitor
  Serial.print(humidity);       //Value humidity to be displayed in Serial Monitor
  Serial.println("%");          //String "%" to be displayed following the value in the Serial Monitor

  //LCD SCREEN - displaying the values from sensor and the target temperature from potentiometer
  // print the number of temperature since reset
  lcd.setCursor(0, 0);         // On LCD Screen set the cursor to column 0, line 0 (note: line 0 is the first row, since counting begins with 0)
  lcd.print("T");              // Display string "T:"
  lcd.print(tempc);            // Display tempc value
  lcd.print("C  ");            // spaces are to remove the d! "from hello world!"

  // print the number of humidity since reset
  lcd.setCursor(9, 0);         // set the cursor to column 9, line 0
  lcd.print("H");              // Print string "H:" on LCD screen
  lcd.print(humidity);         // Print the humidity value on screen
  lcd.println("%");            // Print string "%" following the value

  // print the number of temperature since reset:
  lcd.setCursor(0, 1);         //set the cursor to column 0, line 1 (second row)
  lcd.print("target T: ");     // print the string "target T:" on the LCD screen
  lcd.print(target);           //print the target temperature on the LCD screen

// the loop routine runs over and over again forever
}
Files
-
File: Incubator WORKING ↩