5. E-textiles
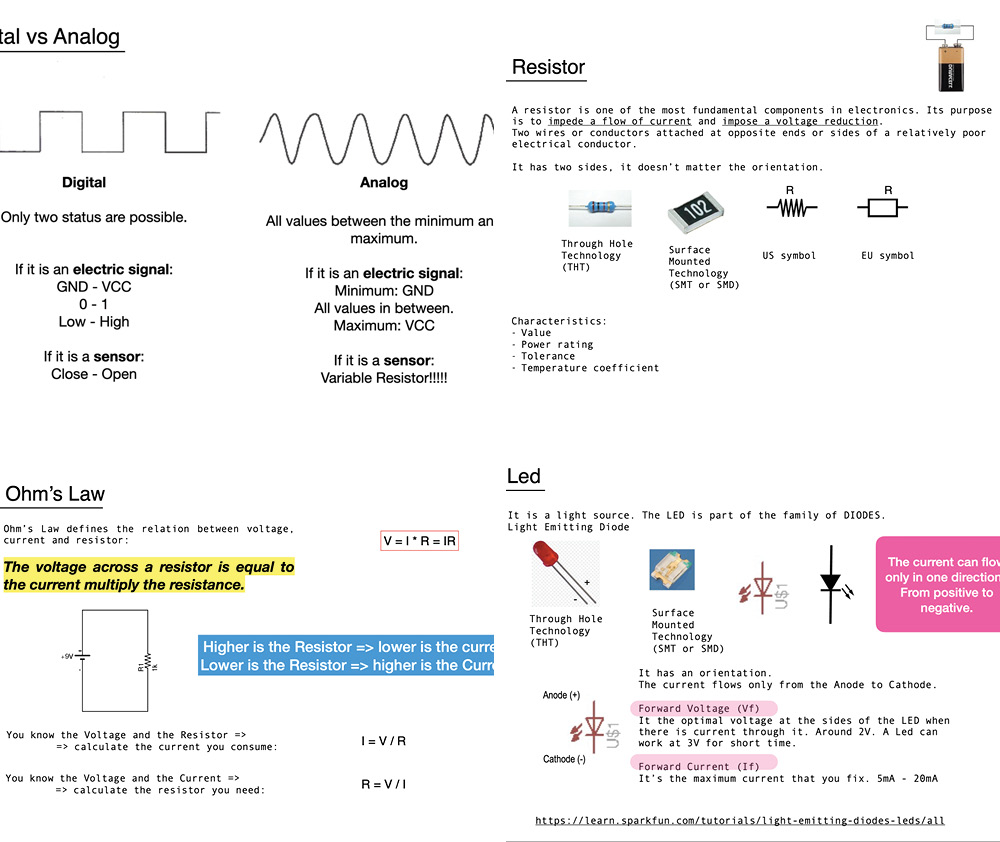
For this week I focused more on getting the technique and philosophy around electronics with some easy ideas. Trying to understand the difference between analog and digital sensors and what I found facinating around it.
References & Inspiration

Refrenses
sensors, stroke sensor, wind national geograpic, Zebra fabric stroke sensor, stroke sensor, silkworm movements
Tools
- Arduino UNO
- Kobakant
- Fabricademy 2022-23 TUTORIALS Basic Electronics and Sensors Part 1
- same but Part 2
- E-textile tutorial
- Intro into Arduino -tinkercad
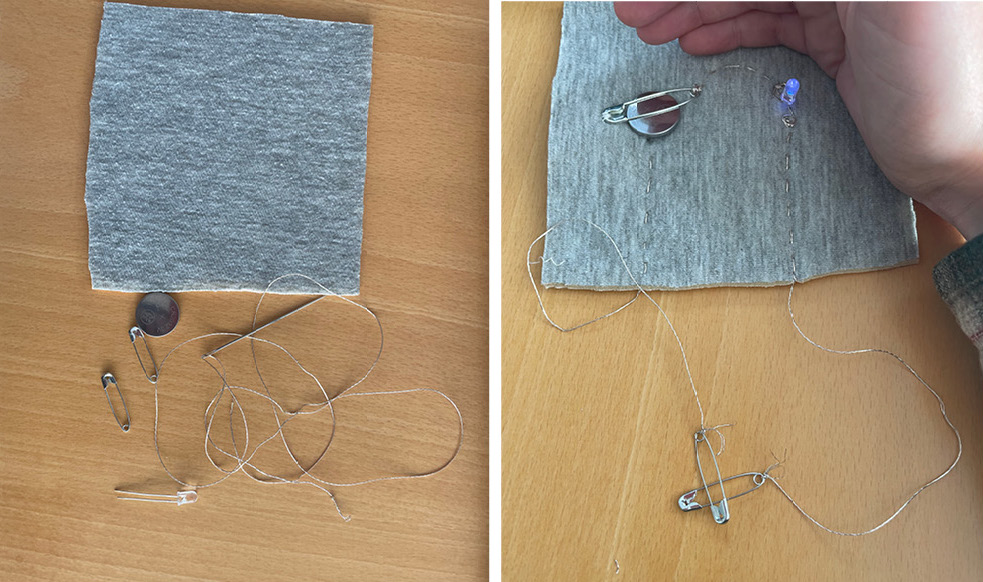
Material
- Conductive tread
- Conductive wool (to spin)
- Fabric to sew in
- non conductive thread
- velostad for analog sensors (pressure sensetive)
- needles
- scissors
- aligator clips
- saftey pins
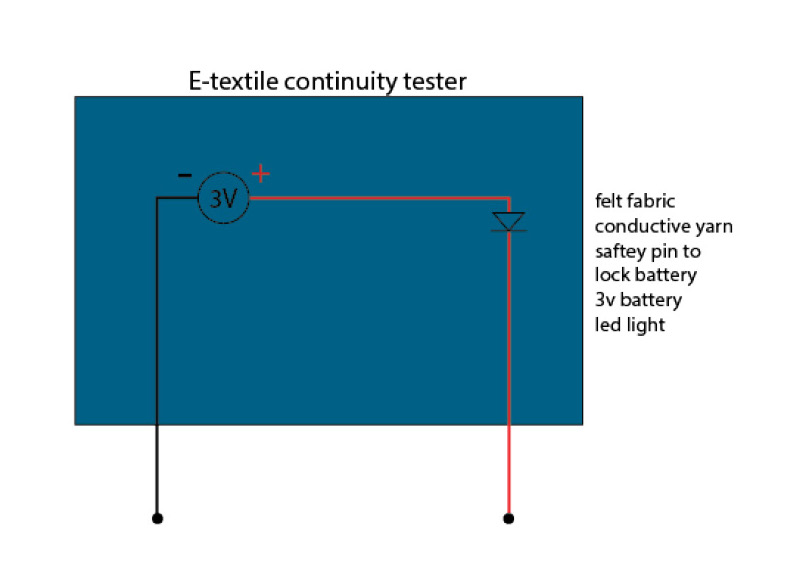
- 3V battery
- led light
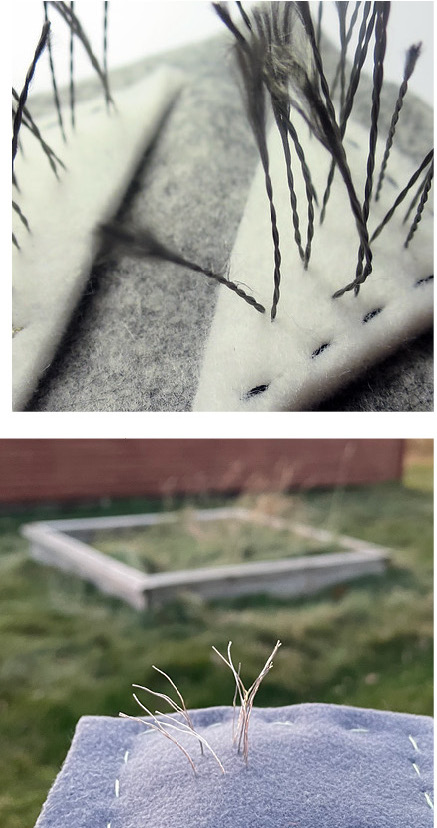
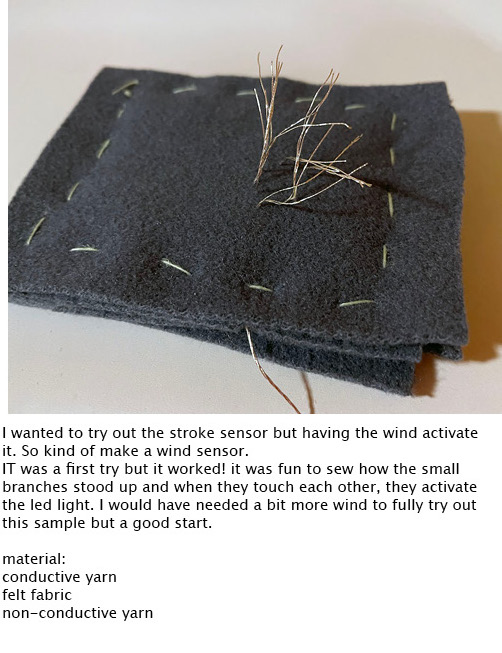
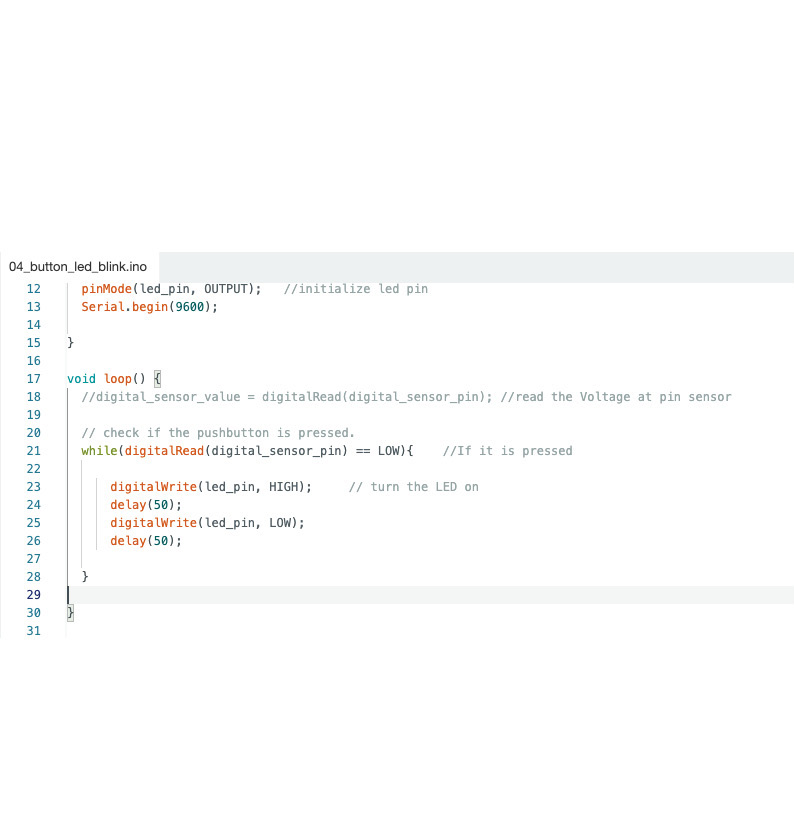
Digital sensor
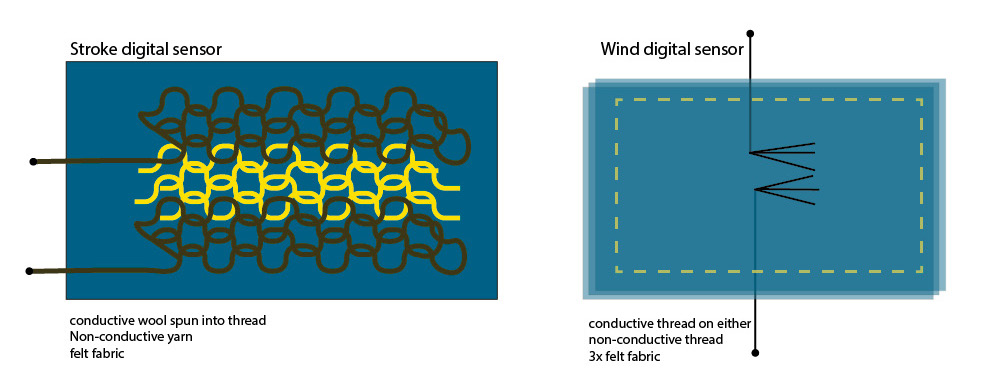

Could I make a wind sensor?
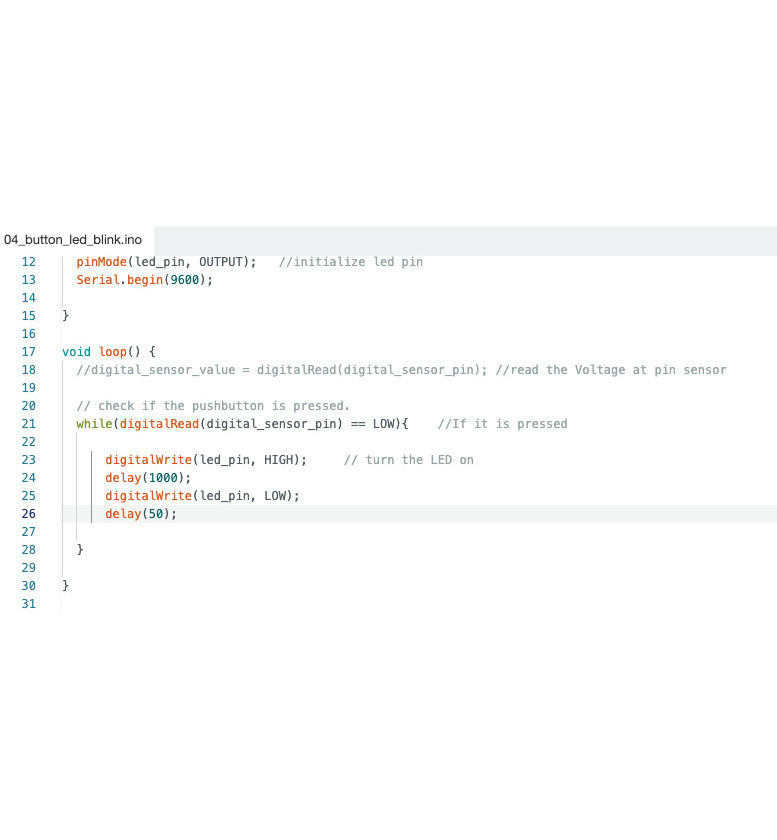
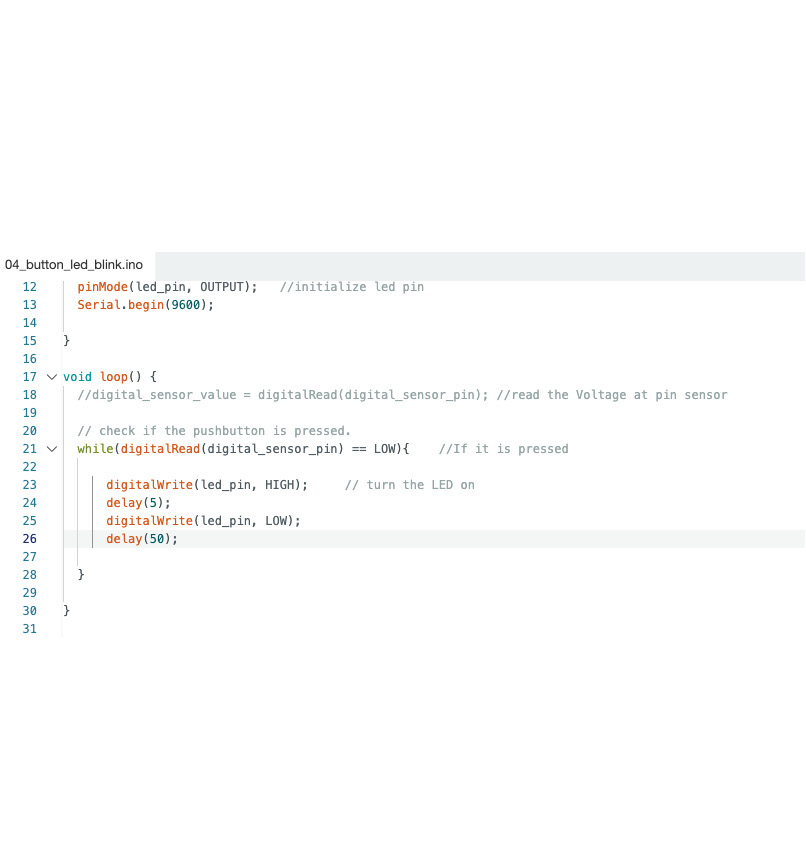
Arduino digital sensor coding
High(1000) / Low(50)
High(5) / Low(50)
High(50) / Low(50)
Analog sensor
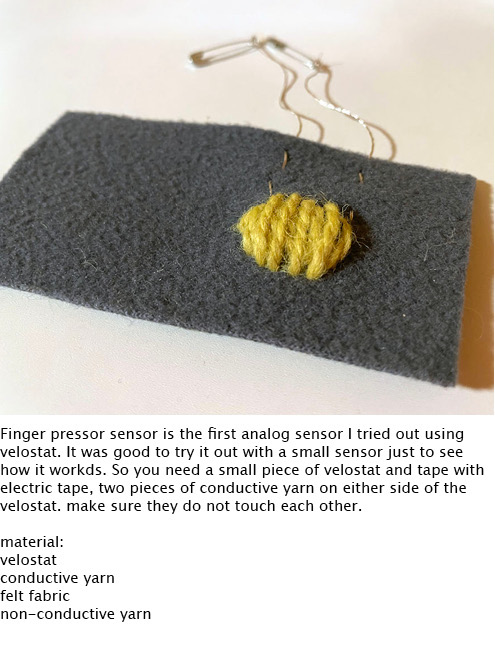
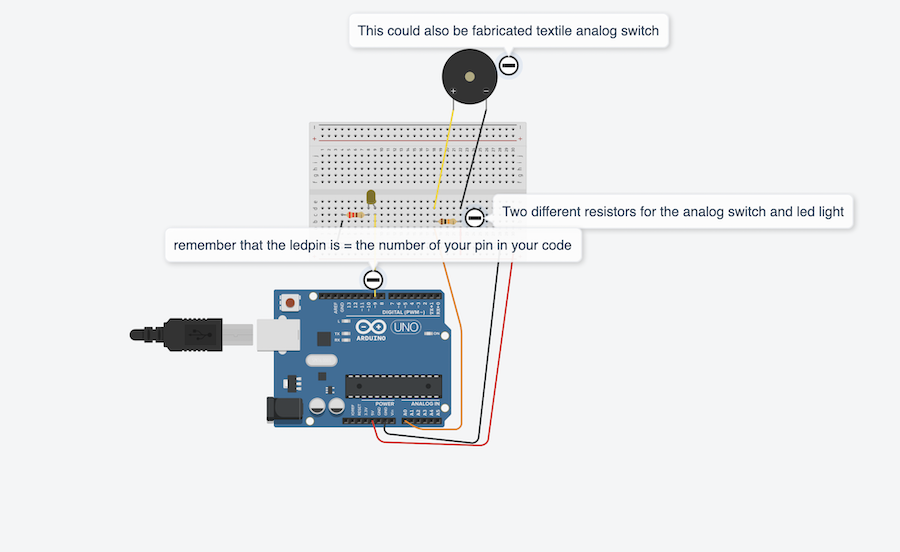
First tryout - finger pressor


Analog by movement
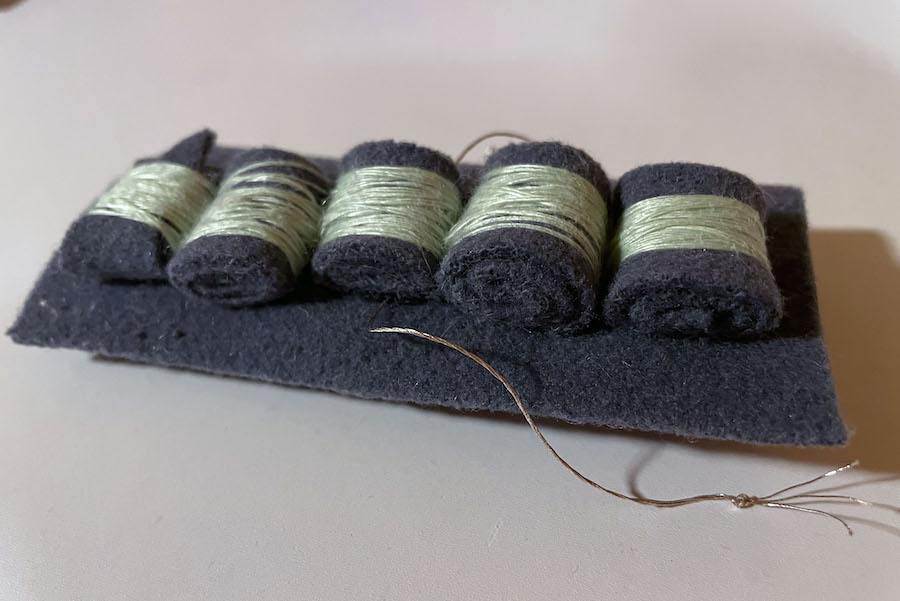 I wanted to make a test with movement and looking into the movement of a silkworm. I had done another project looking into movement and sound and thought it would be interesting to try it out with electronics!
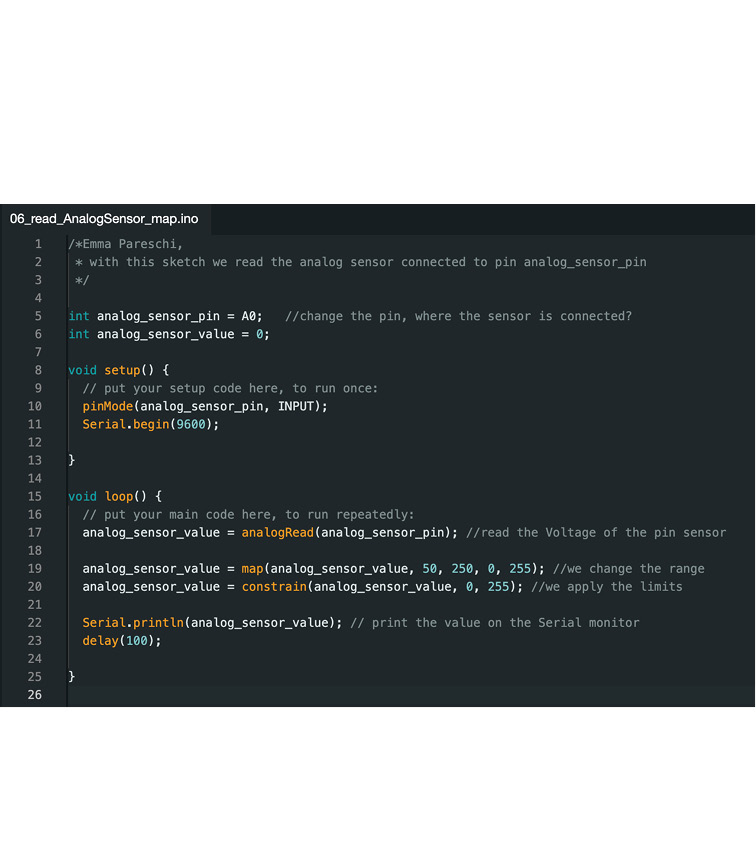
Adruino analog sensor code testing
Testing the sensor in maping, clicking on serial plotter to get the graph to appear. That shows the pressure on the velostat and how, when the movement happens the pressure drops or goes higher with pressure and release.
Working in tinkercad
/*
Blink
Turns an LED on for one second, then off for one second, repeatedly.
Most Arduinos have an on-board LED you can control. On the UNO, MEGA and ZERO
it is attached to digital pin 13, on MKR1000 on pin 6. LED_BUILTIN is set to
the correct LED pin independent of which board is used.
If you want to know what pin the on-board LED is connected to on your Arduino
model, check the Technical Specs of your board at:
https://www.arduino.cc/en/Main/Products
modified 8 May 2014
by Scott Fitzgerald
modified 2 Sep 2016
by Arturo Guadalupi
modified 8 Sep 2016
by Colby Newman
This example code is in the public domain.
https://www.arduino.cc/en/Tutorial/BuiltInExamples/Blink
*/
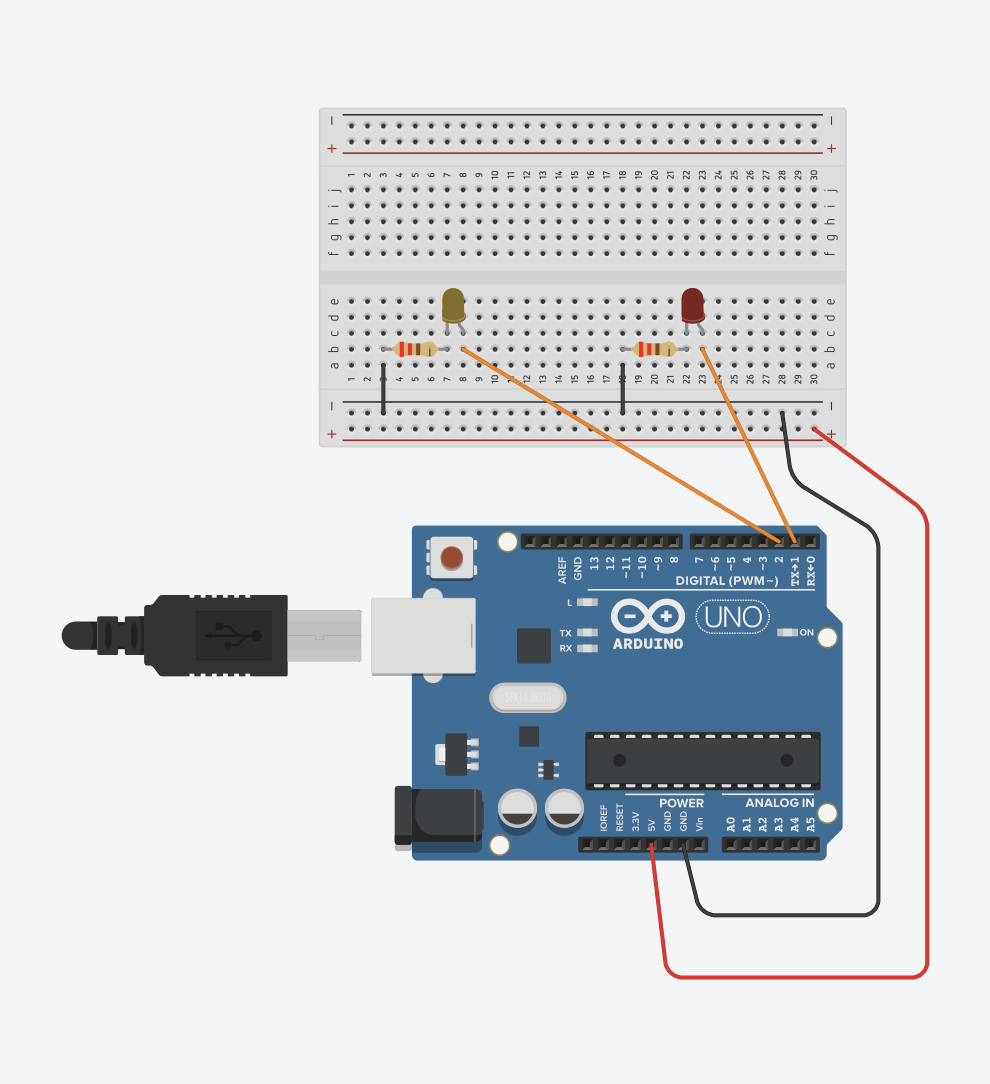
int led = 2;
// the setup function runs once when you press reset or power the board
void setup() {
// initialize digital pin LED_BUILTIN as an output.
pinMode(led, OUTPUT);
}
// the loop function runs over and over again forever
void loop() {
digitalWrite(led, HIGH); // turn the LED on (HIGH is the voltage level)
delay(1000); // wait for a second
digitalWrite(led, LOW); // turn the LED off by making the voltage LOW
delay(1000); // wait for a second
}
2 led blink at the same time
/*
  Blink

  Turns an LED on for one second, then off for one second, repeatedly.

  Most Arduinos have an on-board LED you can control. On the UNO, MEGA and ZERO
  it is attached to digital pin 13, on MKR1000 on pin 6. LED_BUILTIN is set to
  the correct LED pin independent of which board is used.
  If you want to know what pin the on-board LED is connected to on your Arduino
  model, check the Technical Specs of your board at:
  https://www.arduino.cc/en/Main/Products

  modified 8 May 2014
  by Scott Fitzgerald
  modified 2 Sep 2016
  by Arturo Guadalupi
  modified 8 Sep 2016
  by Colby Newman

  This example code is in the public domain.

  https://www.arduino.cc/en/Tutorial/BuiltInExamples/Blink
*/
int led = 2;
int led02 = 3;

// the setup function runs once when you press reset or power the board
void setup() {
  // initialize digital pin LED_BUILTIN as an output.
  pinMode(led, OUTPUT);
  pinMode(led02, OUTPUT);
}

// the loop function runs over and over again forever
void loop() {
  digitalWrite(led02, HIGH);   // turn the LED on (HIGH is the voltage level)
  digitalWrite(led, HIGH);   // turn the LED on (HIGH is the voltage level)
  delay(1000);
  digitalWrite(led02, LOW);    // turn the LED off by making the voltage LOW
  digitalWrite(led, LOW);    // turn the LED off by making the voltage LOW
  delay(1000);                       // wait for a second
}