12. Soft robotics
Research
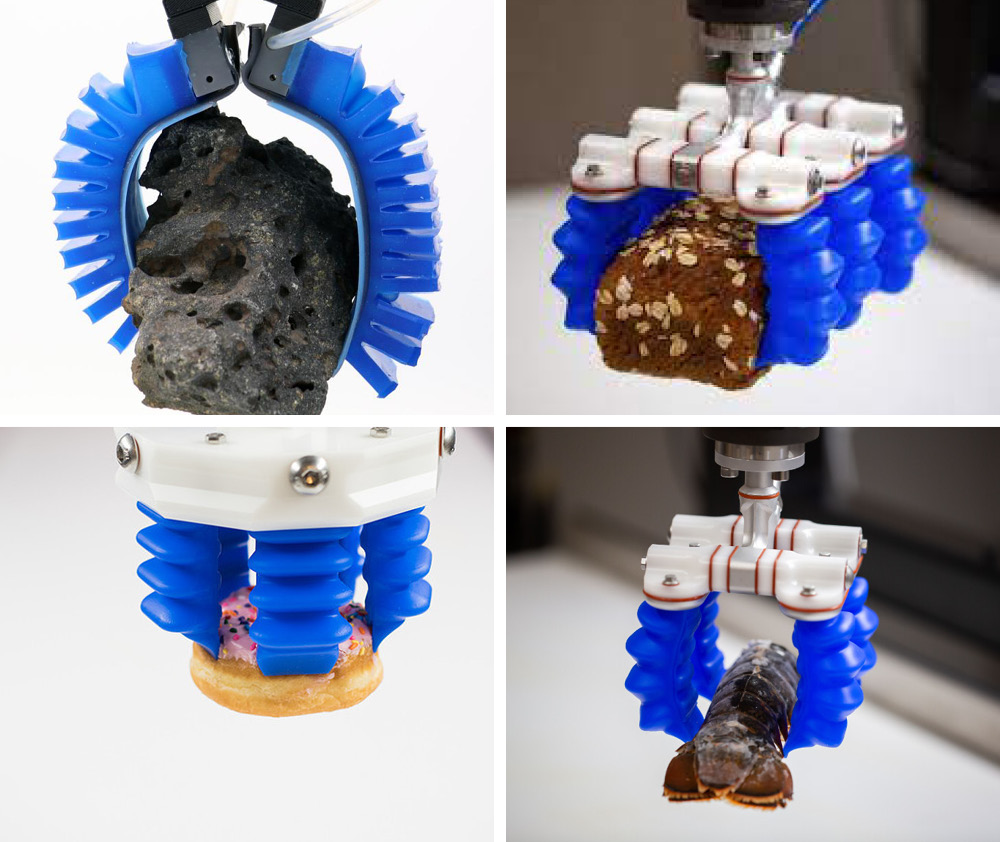
Soft robotics....AMAZING THINGS
References & Inspiration
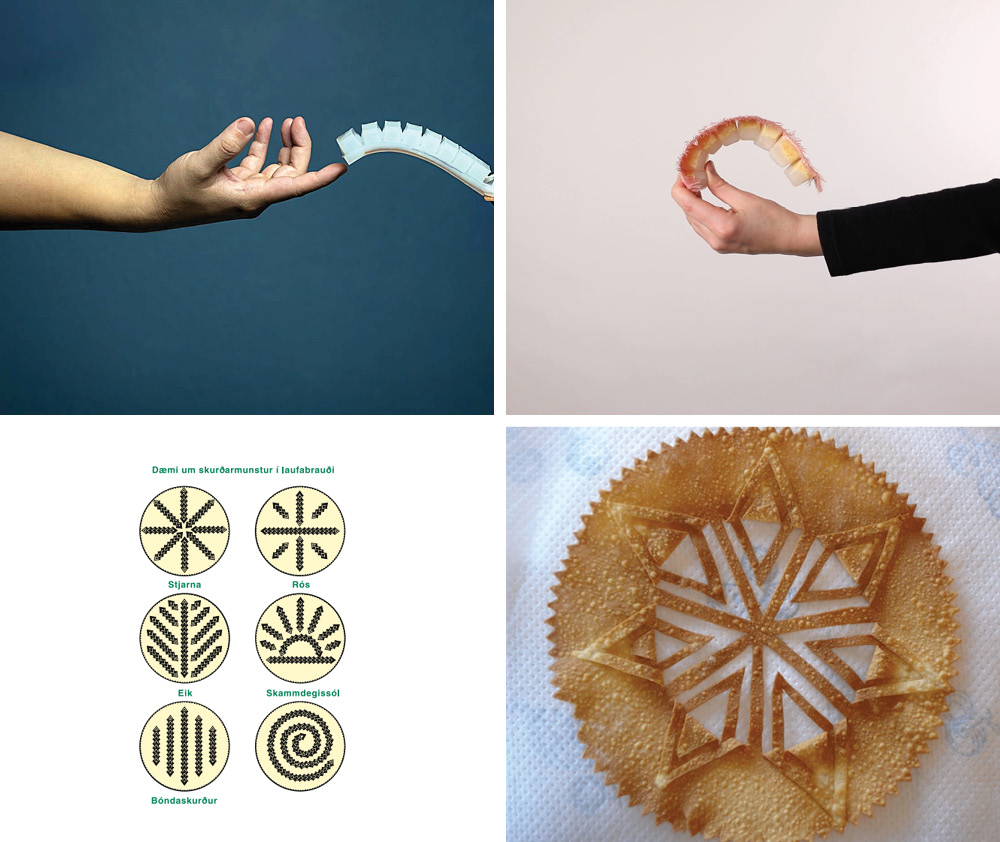
I like the movement of the soft robotics and infaltables. As I was much in christmas mood this week I could not resist working with patterns related to christmas traditions. Laufabrauð is an Icelandic tradition where family and friends usually meet up to cut out this type of flat bread in traditional patterns and then fry it in oil and eat it on with the dinner on christmas eve. I like the shapes of the patterns so I decided that would be my source of inspiration this week.
https://materiability.com/portfolio/hydro-active-pillow-structures/ Food picking grippers Soft robotics rehabilitation Homo Virdis Plant/Post human Good reads
Grass Bot from kuanjuwu on Vimeo.
This would make me soooo happy!
Tools
- [Adobe Illustrator]
- [Inkscape]
- [Rhinoceros and grasshopper]
- [Lasercutter]
- [Vinyl cutter]
- [Prusa 3d printer]
- [Heat press]
Materials
- Heat press vinyl sheet
- [baking paper]
- [Air pump]
- [3 mm straw or tube]
- [PLA for 3d printing]
- [Silicone 00-30]
Process and workflow with vinyl inflatables
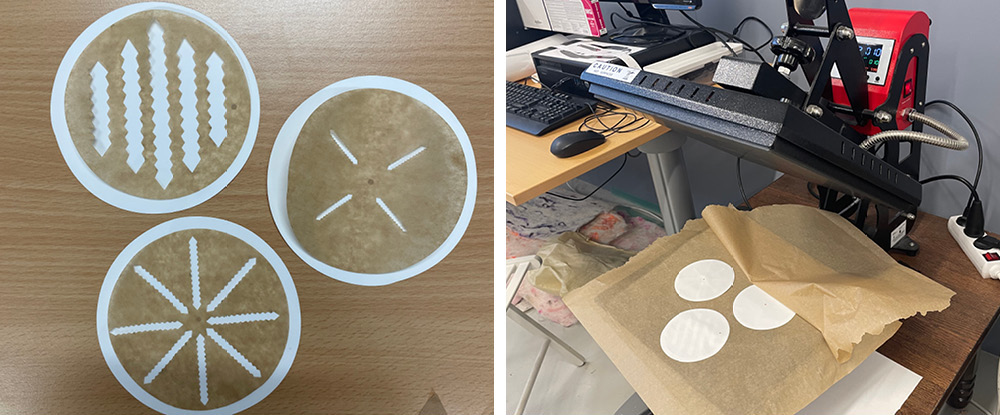
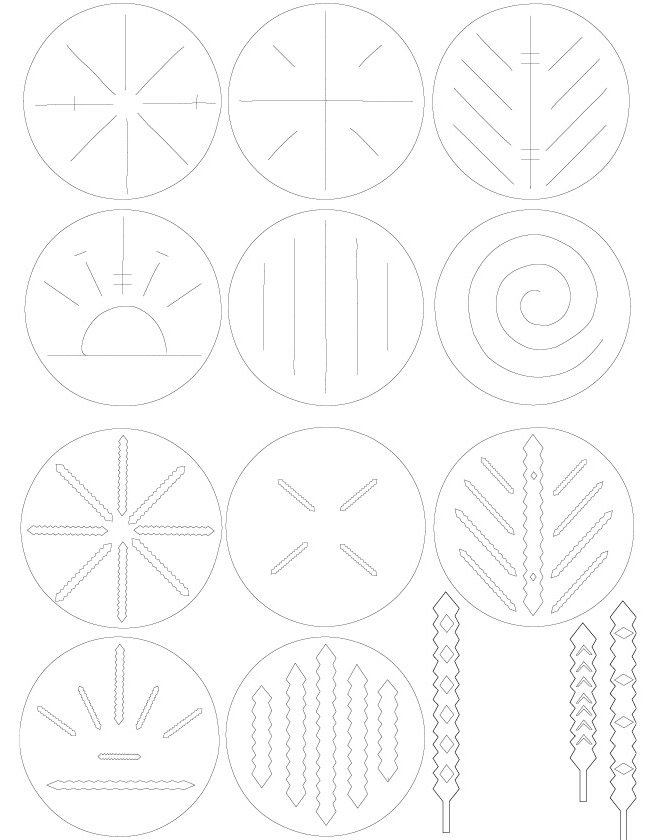 I began by seting the photo of laufabrauð patterns in illustrator and image trace it. I only got the lines like on the photo above which got be acutally thinking if I could use the solduring Iron to heat the vinyl material together (but we will get into that later!) I traced instead on of the triangle pattern and made the patterns with lines by myself and ended up with 5 different circles and 3 strings to lasercut the baking paper with. With the first tests I only lasercut baking paper and handcut the vinyl around it but.
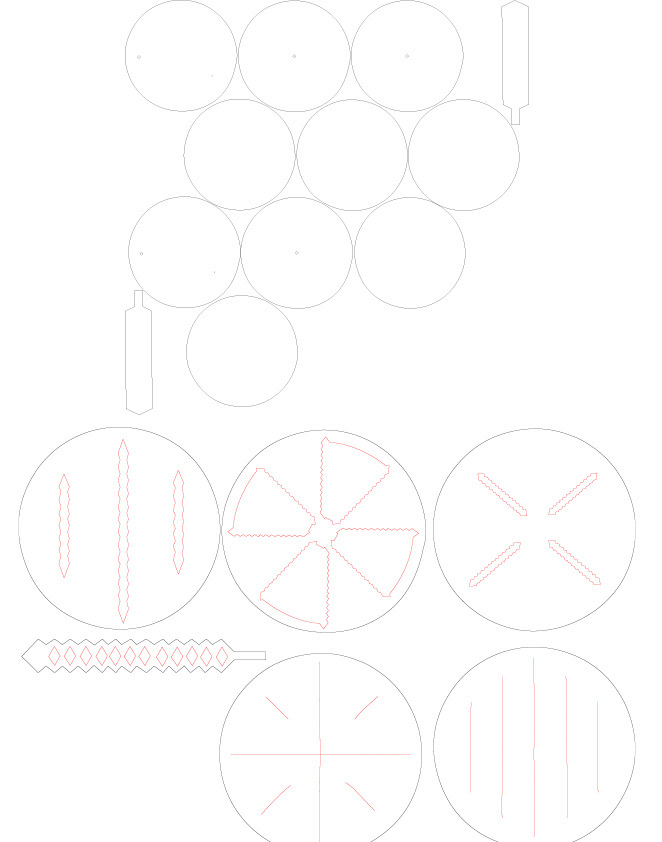
With the second test with vinyl material I learned from previous lasercut to color code the lines I wanted to be cut first. So the lasercuter would not cut the outlines first and then try to cut the inside pattern afterward, as the paper would become loose and everything could skew a bit. (below: on left: first try & Right: color coded)
Design by Margrét
Here is a photo of both the Vinyl template1 above and the lasercut template1below.
How to use the vinyl priner and cutter
At the TextileLab in Iceland we have a Versa Studio sign make BN-20 from Roland. To use that machine the file setting have to be very specific. The only way it works is to make your file either in Inkscape or illustrator and save it as a PDF. After that you have to open up your file in Inkscape again, go to Path -> Fill and stroke -> and change your lines to be 0.020 thickness, after that save it as a PDF. Open the file and do the steps below.
Roland vinyl cutter by Margrét In the printer properties get the with from the printer and manually type the length of your file. Then go to Printer Adjustments and choose the right setting of cutting and printing for you file, here I was only cuting so that is the setting I choose. For some weird reasons the final thing to do is to click on portrait and then press print and voila!
heat press and assebly
Now that I had all of my things either lasercut or vinyl cut the next step was to asseble then in the right order and heat press.
The shiny sides of the vinyl should meet each other with the baking paper inbetween. In the heat press have two sheet of baking paper on either sides of your object to protect both your project and the heater from damadge
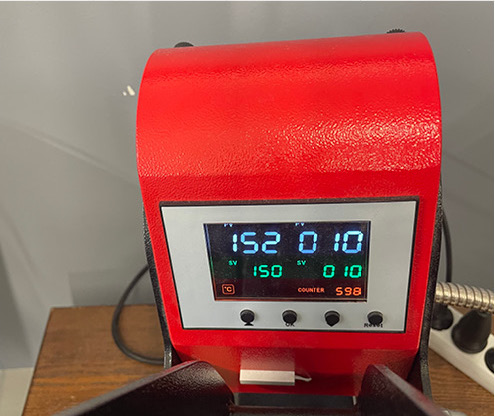
The settings for the heat press was 150°c and pressed for 10 seconds
Tests with my little babies!
Design by Margrét Katrín Guttormsdóttir
Design by Margrét Katrín Guttormsdóttir
Tryout with solduring iron heating the vinyl
Design by Margrét Katrín Guttormsdóttir
Process and workflow with mold and silicone
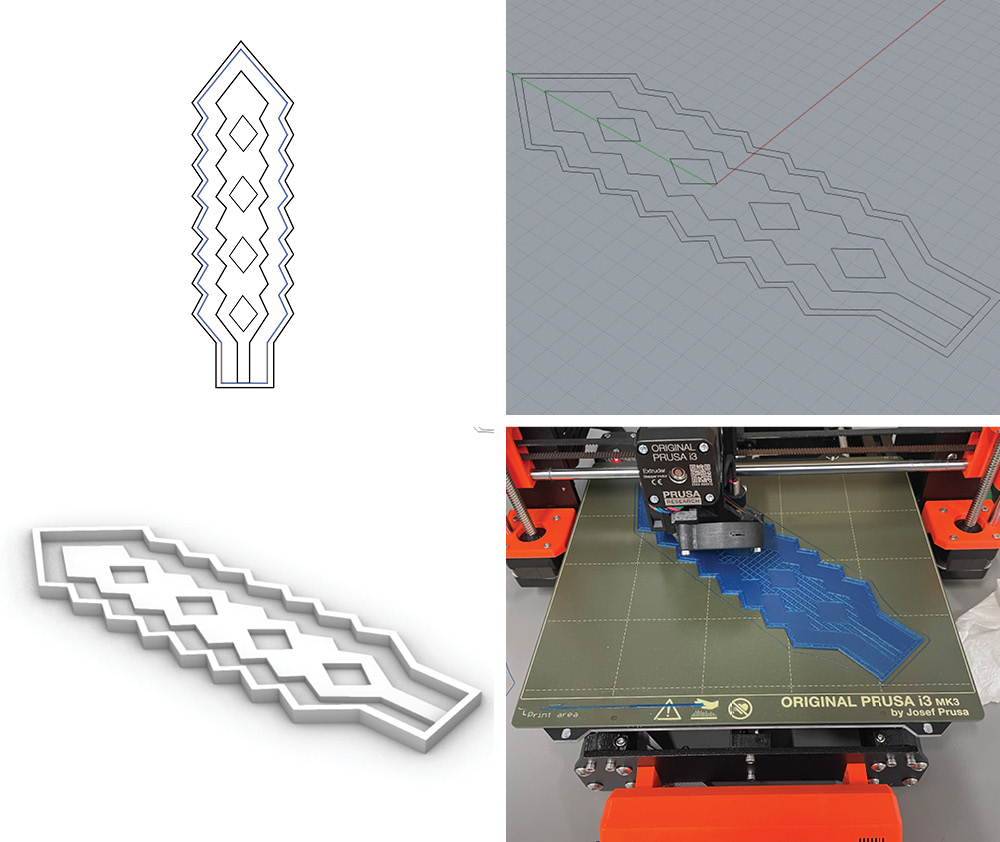
I took the file I had made in illustrator and copy pasted that into rhino and worked on extruding it in grasshopper and that is how I got this mold 3 in rhino and 4 in grasshopper to 3D print with this Gcode5 in the Prusa here at the Lab.
3D Model of laufabraud mold
Molding with silicon
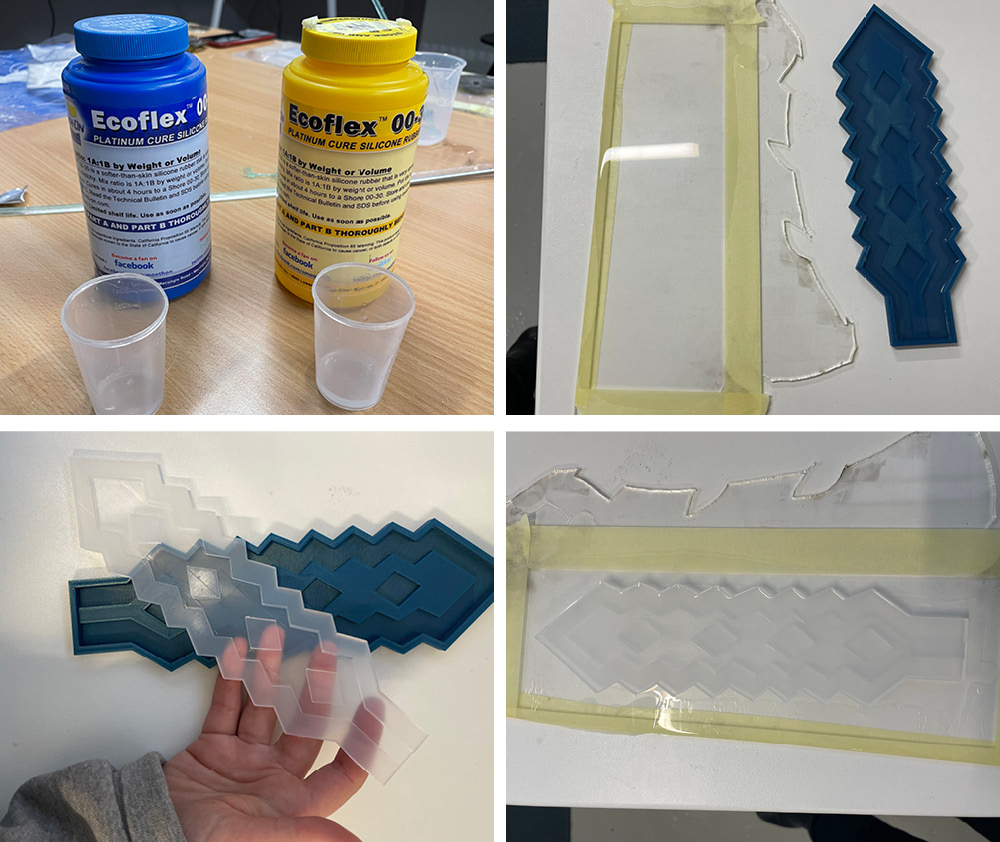
I used a Ecoflex 00-30 silicone that takes 4 hours to cure.
how to mix A/B silicone
- pour A part and B part in two seperate glasses pore to the same amount(here 60 ml each)
- Pour A part into a bigger glas and then while slowly mixing with a this straw or anyting alike mix the B part together
- By mixing the two parts slowly together you prevent the mex to absorb air and make bubbles
- When mixed together pour into your mold making a thin drain to make the pour slower and avoid bubbles forming in the mold
- Pour a thin layer onto a plexiglass or other alike(you can also pour it into fabric)
- Let the silicone cure for 4 hours
When the silicone has cured then slowly remove the silicone from the mold
*Mix a small amount of silicone on the silicone sheet on the plexiglass * place the silicon mold upon the thin silicone sheet * Pour a little silicone on the sides of the two parts to seal them anad make it airtight * let it cure for another 4 hours
Testing my silicone babies out!
Design by Margrét Katrín Guttormsdóttir
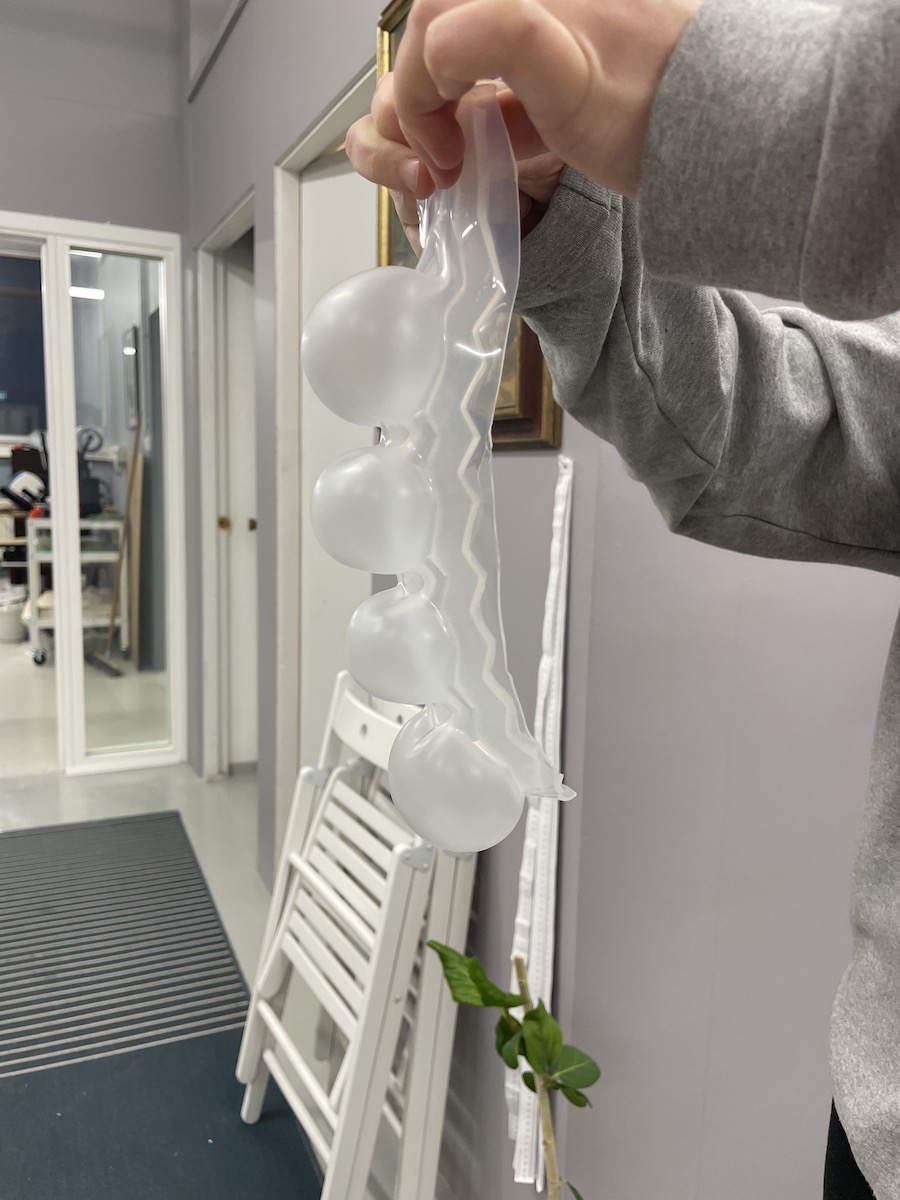 I was great to see how the silicone inflated with the laufabraud pattern. Because I had made the silicone sheet a bit thinner then the walls of the silicone mold it inflated more on one side and made these huge inflated balls that I think if they would have a seperate chamber could possibly move like a caterpillar?
Fabrication files
-
File: Laufabraud vinyl sheet ↩↩
-
File: Laufabraud lasercut sheet ↩
-
File: Laufabraud grasshopper file ↩
-
File: Laufabraud Rhino file ↩
-
File: Laufabraud Gcode ↩