2. Digital bodies
Introduction
This week we were tasked to use a 3D scanner, manipulate a 3D mesh, slice it, and learn how to laser cut in order to create a part of the human body. This was the week I was most intimidated by when looking at the course curriculum. However, as I went through each process everything started to come together and made a lot more sense. Now I am fairly confident in my abilities to use each tool or at least I am confident enough be able to play around with them on a basic level. Moving forward I now know that I need to spend time documenting after each process rather than at the end of the week. I am still trying to work out the work/life/Fabricademy balance.
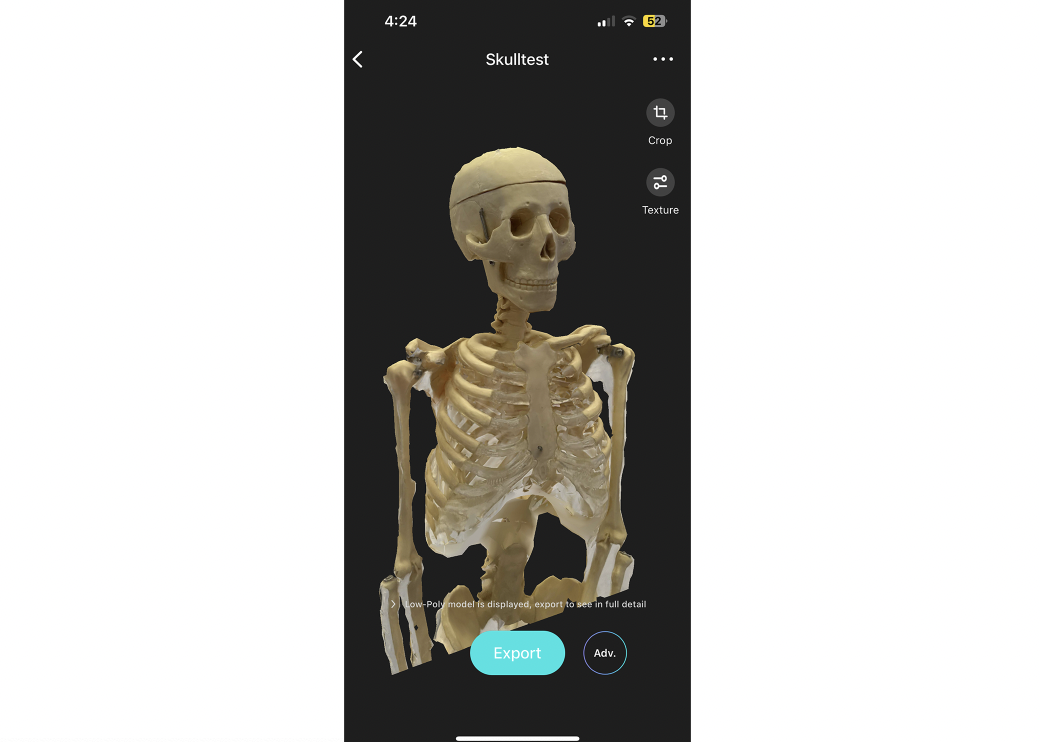
Someone during the tutorial (sorry I forgot to document who!) mentioned in the chat that KIRI Engine is a free app for the phone that is good at making 3D models. I found this to be a relatively easy tool that produced a detailed 3D image. I immediately tried out the app using a skeleton in my classroom. I was impressed with the final 3D model and look forward to trying it out on myself and other objects when I get the time.
My inspiration for this week was the Body Worlds exhibit and Kate Reed's work
Results
3D Scanner:
I used the KIRI Engine to do a 3D scan of a small skeleton I had in my classroom. The app provides instructions on how to take pictures so it can process a 3D image. I tried the Photo Scan option where you move from top to bottom in a spiral motion taking pictures along the way. The images are then sent off to be processed and then in a few hours you get a 3D image as shown below.
Manipulating 3D Mesh:
To merge these two objects, I just used the move tool and dragged them together as best I could as described under Materials and Methods below.
Slicing:
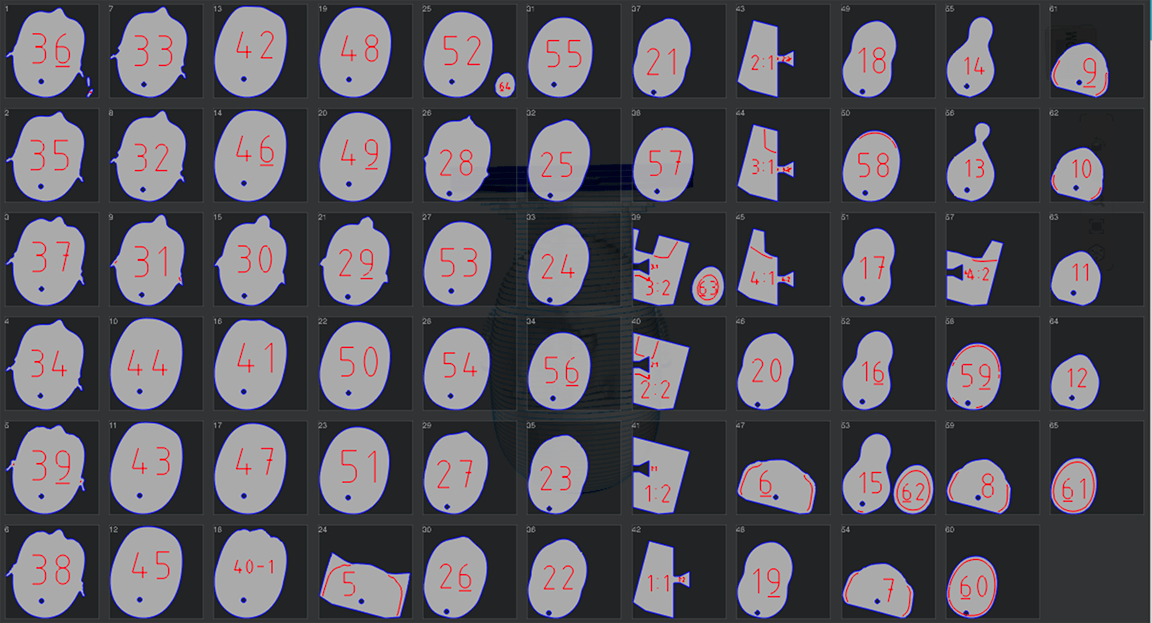
The 3D human head stl file from Thingiverse was uploaded to the Slicer for Fusion 360 software. I used horizontal stacked slices for the cardboard prototype. The final piece I wanted to use acrylic so I had to adjust the sizing of the slices as well as adjust for the number of slices (which were almost doubled, see laser cutting files below).
Laser Cutting File Preparation:
Laser Cutting Process:
The sliced stl file was uploaded to the Glowforge website. I used the cardboard pre-set on Glowforge.
Prototyping
Timelapse of constructing the prototype
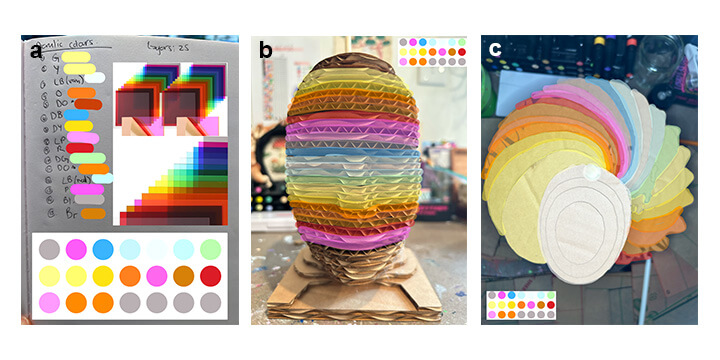
Figure 1. Brainstorming final product. I am using the cardboard head as a prototype for an acrylic piece. The concept for the final piece is for the middle layers to be able to move around a dowel located at the back of the head. This will allow one to move each individual slice of the head and reveal the engraved MRI image. The top and bottom 1/3 of the head is glued together, so only the middle portion can swivel.
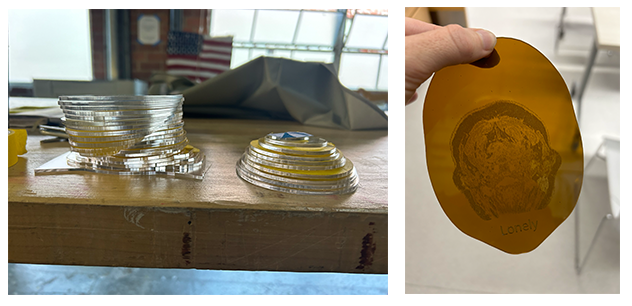
Figure 2. Acrylic slices for the final piece. The left image shows the clear top and base of the head. These pieces will be glued together. The middle pieces will consist of a rainbow of slices and each will have an image of an MRI scan on them along with a word. These words were specifically chosen as representation of various parts of myself.
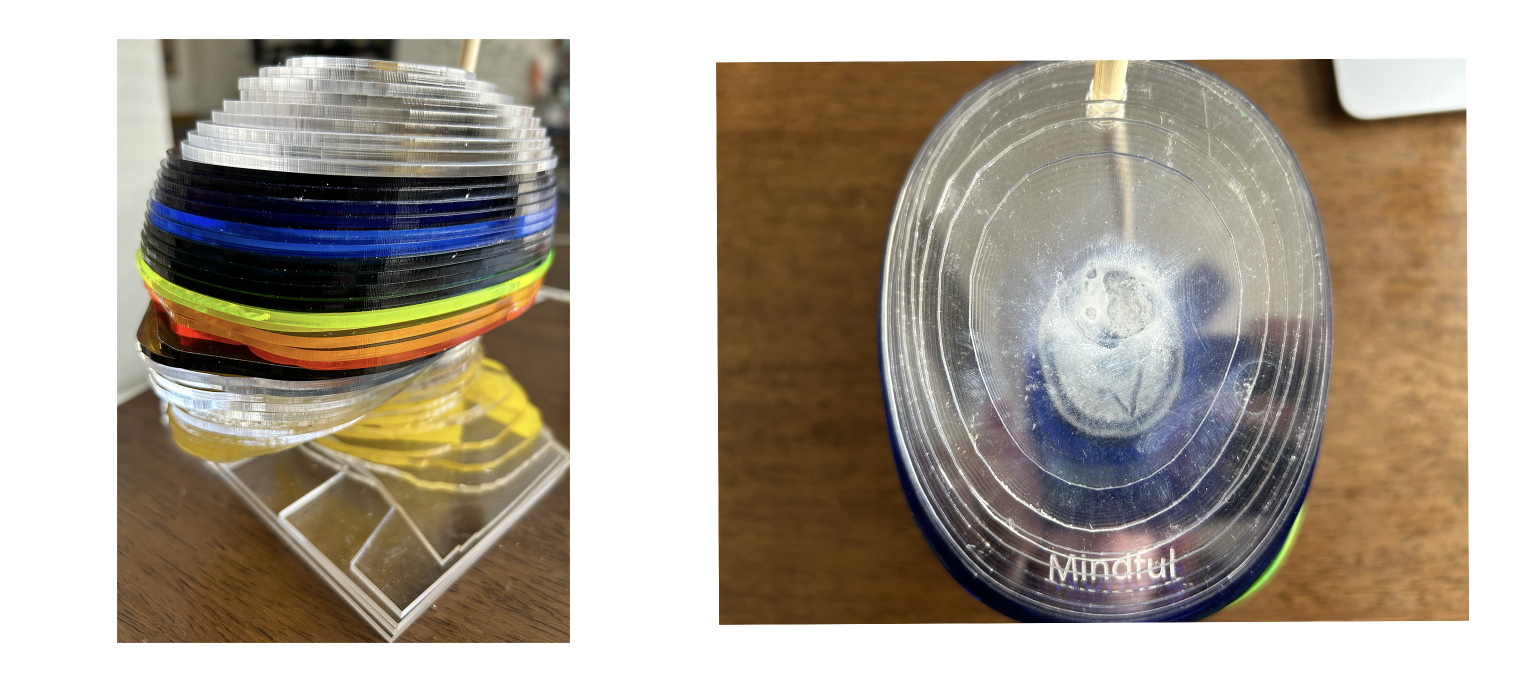 Figure 3. Final concept. Unfortunately, the laser cutter at school was out of commission severals times over the year and as we recently found out - it was due to the fibers from the felt from Week 3 that has been causing the issues! (more on that in week 3)... Anyways, this is as much of the acrylic pieces as I have managed to cut in between the times the fans have been somewhat functional. The final piece you will see the full rainbow and full facial structure.
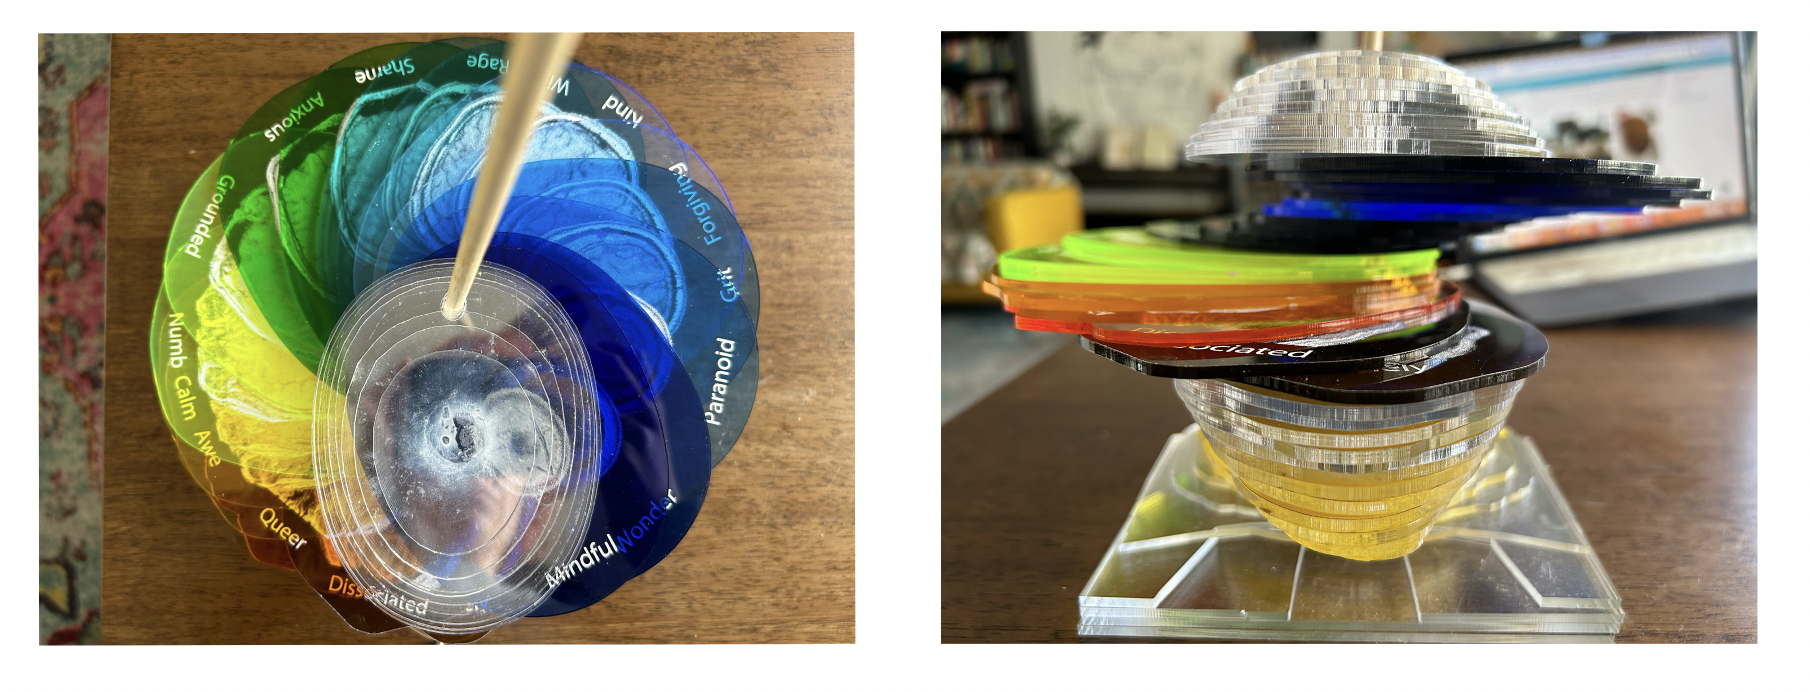 Figure 4. Parts of me. These images show the true meaning behind this concept. Each MRI brain scan layer represents a part of myself. I have PTSD. In this piece, I wanted to show the many parts that make up who I am. Sometimes the symptoms feel overwhelming and all-consuming so I made this to remind myself that I am not just my symptoms. I am a full human being, flaws and all. All parts of myself are welcome.
This is my first vulnerable and personal piece of art I have ever made for public viewing. I have been waivering back and forth of whether or not to share my personal struggles with mental health as it is so stigmatized around the world and this is an international platform. I am sharing this in the hopes that it might help someone feel less alone. I am also tired of hiding this part of myself and wish to live fully and authentically me.
The final concept came to me on a long run when I was training for my first marathon. I have learned through this training journey that running is immensely helpful in my healing process. I find it very meditative and is a great way to connect my mind and body.
Discussion
We teach SEL (Social Emotional Learning) at the school I work at and I wonder if this might be a creative activity that could be integrated as part of that curriculum. There is a similar lesson we do in which the student chooses specific parts of their identity, each part corresponding to a different colour, and creates a collage based on those colours. Perhaps students could do a similar activity but build a sculpture using painted pieces of cardboard or a simple acrylic sculpture to represent who they are as a high school student in that moment of time. Maybe they could even 3D scan their own heads and use that as the model! Just some thoughts.
Methods and Materials
KIRI Engine: This is a free 3D scanning app for the phone. It was easy to use and came with clear instructions and the end result was surprisingly detailed.
First, I set up the skeleton on the floor of my lab. The app instructs you to set up the object in a well light area that has other things in the background. The app uses those background items to help it sort the images (so don't use a totally white, blank space). Using KIRI Engine, I took 70 pictures of the skeleton starting from the top and slowly winding my way down in a spiral pattern to the bottom, changing the angle of my phone as I went. I then exported the images through the app to KIRI's server where it processed the images. It took about 30 minutes or so and then I got a notification that it was ready. I then exported the stl file onto my computer.
Thingiverse I used the 3D model Full Size Human Head Model for resting headsets on by lehthanis.
Moving objects with Rhino:
- Click on the objects to move.
- Type "Move" in the command line.
- Drag the objects along the axis you want to move them on.
Adobe Illustrator & Photoshop
Corrugated Cardboard Settings:
Cut: 150 / 50 (speed / power)
Score: 500 / 40 (speed / power)
Engrave: 1000 / 50 (speed / power)