10. Open Source Hardware - From Fibers to Fabric
Introduction
After browsing the possibilities of what I could build to enhance my biology lab, I landed on bioprinters. I was inspired by the work done in the Boeke lab that made a printer that printed genetically-engineered yeast of different colours onto a petri dish to create art (as shown below). I figured that a bioprinter may also be able to do something similar to that, if not even more.
 *Image from In Living Color.
I then began to do a bunch of research on bioprinters trying to find the cheapest one with the most well-explained instructions. I landed on the paper Inexpensive DIY Bioprinting in a Secondary School Setting.
Bioprinter Inspiration
DIY Bioprinting
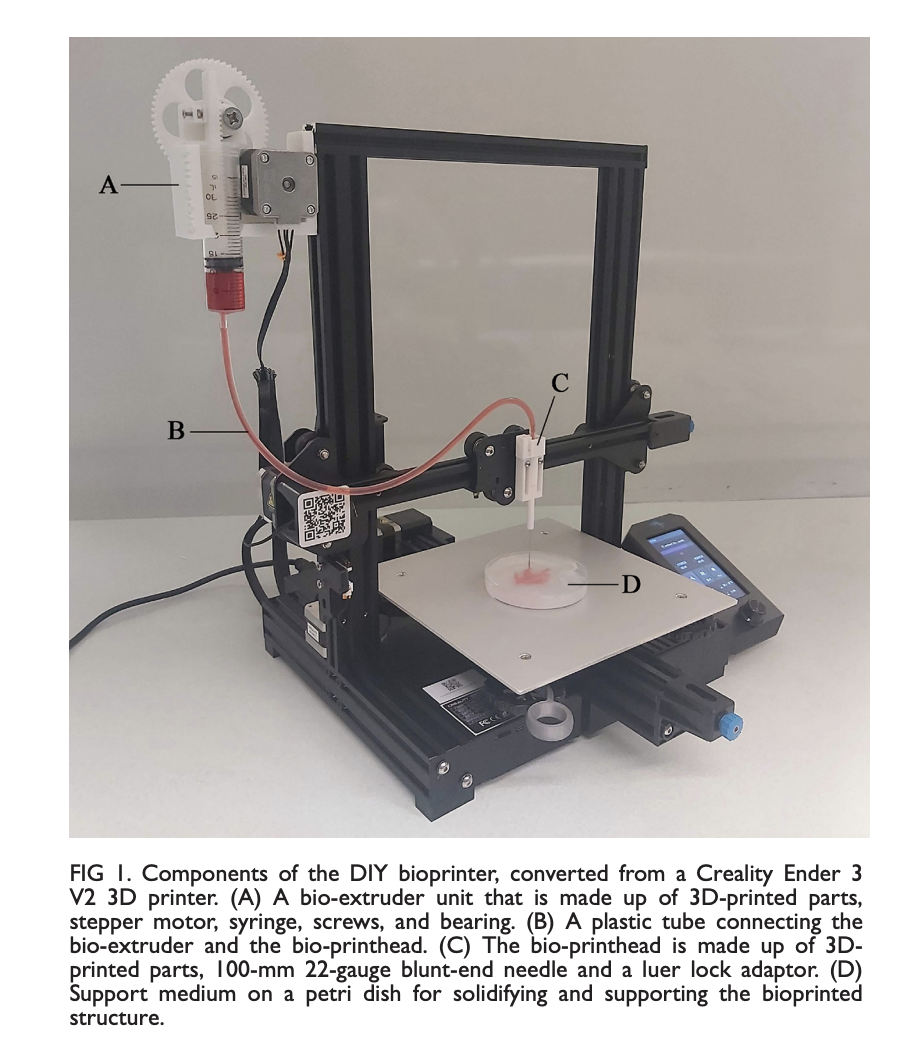
I decided on following the instructions published in Inexpensive DIY Bioprinting in a Secondary School Setting. Below are images from that paper.

Research
Constructing the Ender 3 v2
The first thing I needed to do was to get familiar with 3D printing. I had never done 3D printing before and was quite frankly intimidated by the idea. I bought two 3D printers, one for regular 3D printing and the other to construct the bioprinter. I then set up one of the Ender 3 V2 printers using the following videos for instructions.
Helpful videos for setting up the 3D printer:
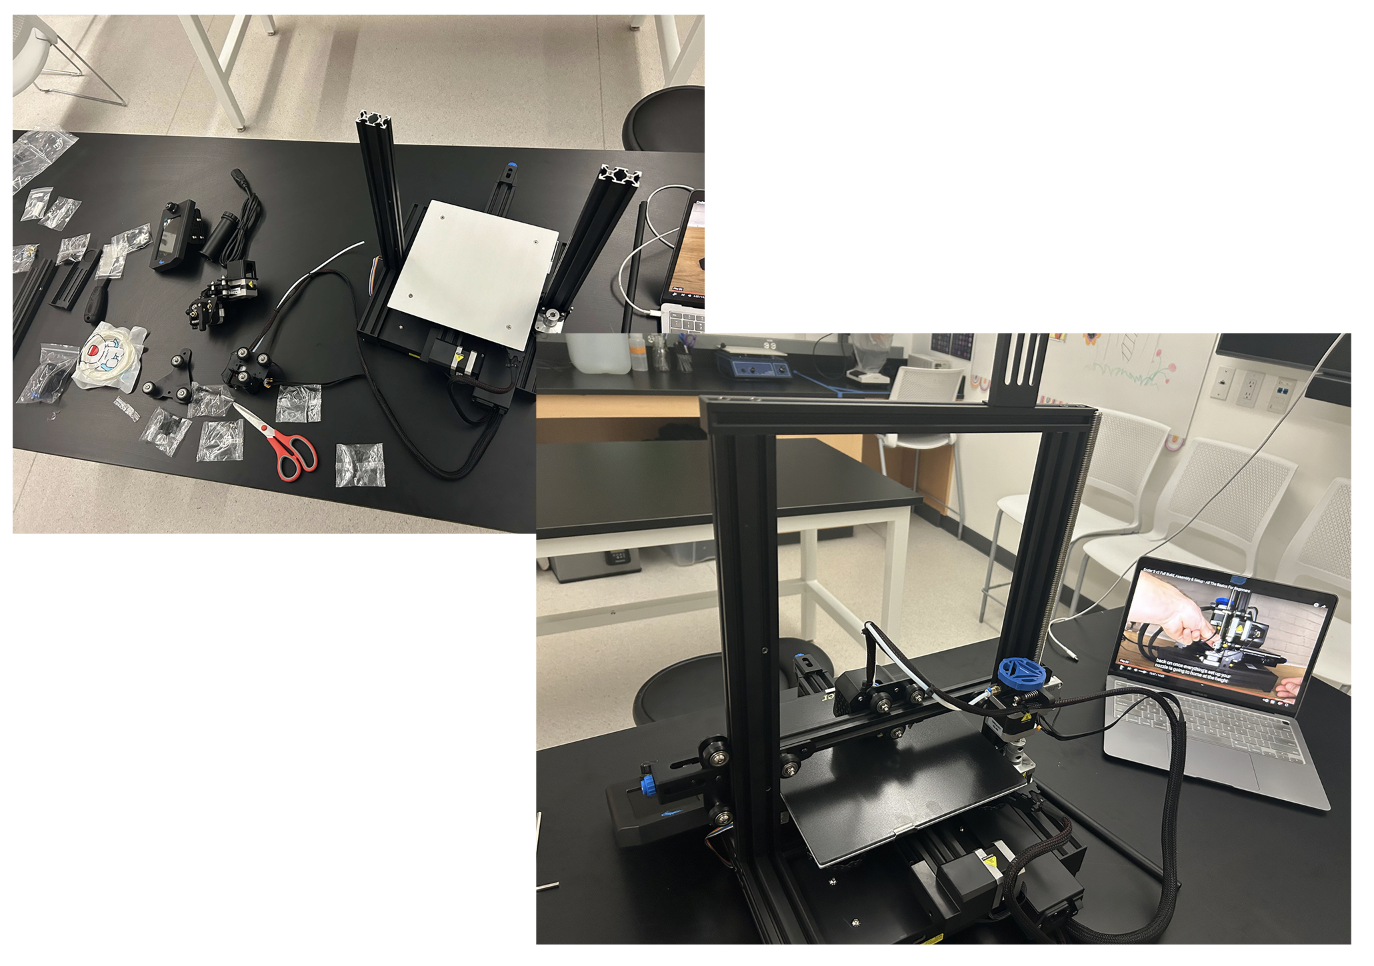 Figure 1. Setting up Ender 3 V2. I purchased two 3D printers and set one up to get an understanding of how it operates.
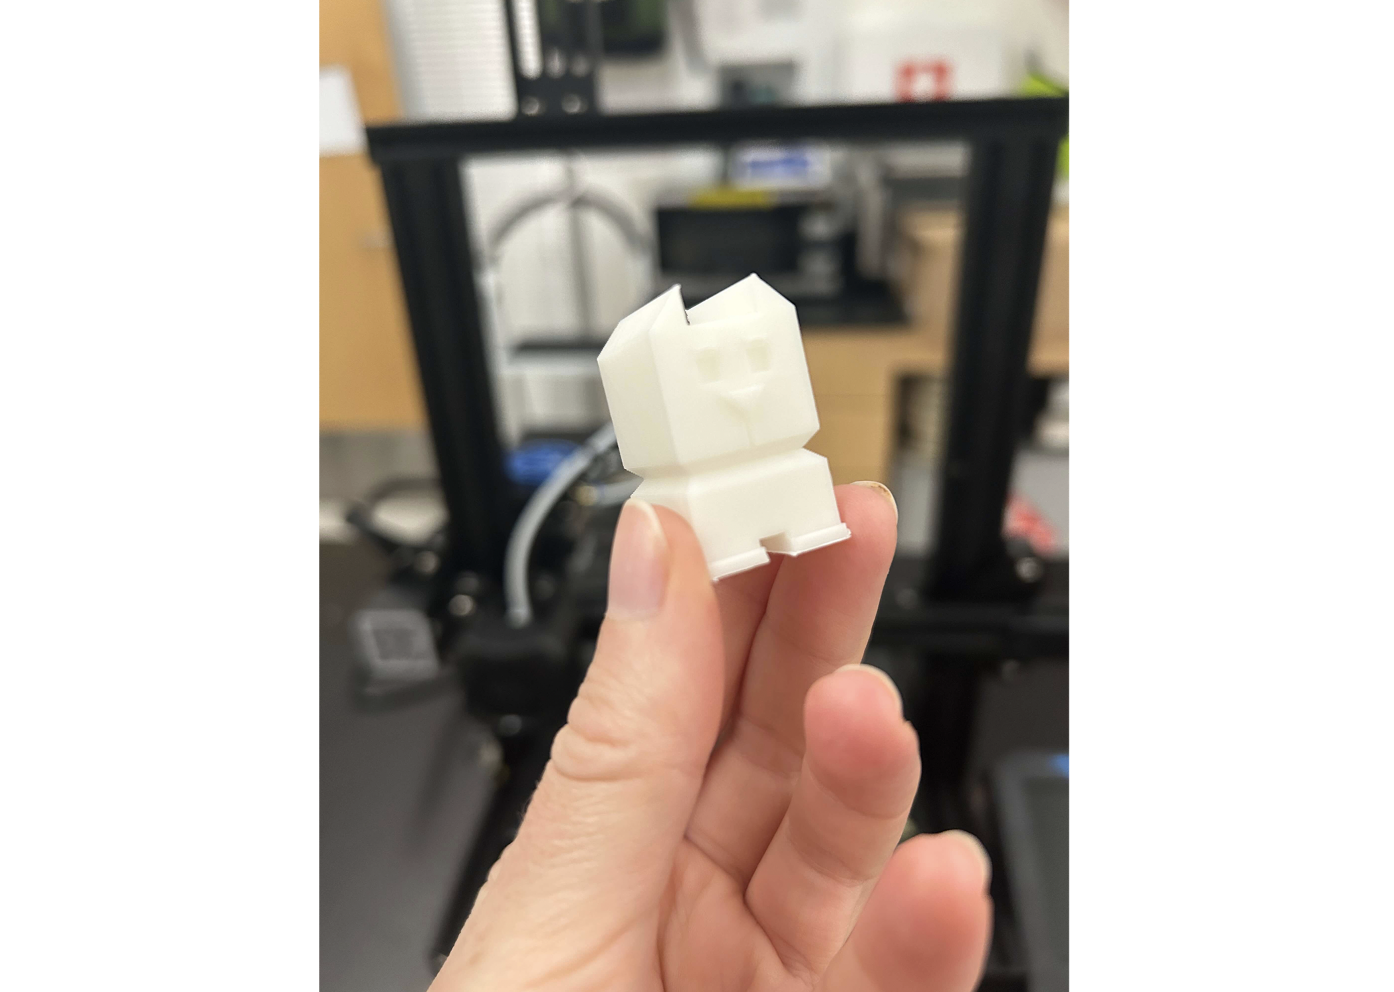 Figure 2. First print! This was my first ever 3D print! I was so stoked to have built a 3D printer myself and to have it actually work. I did get some help from my students towards the end who told me some great advise: smear the bottom plate with a glue stick prior to printing so that the plastic sticks and adjust the base hegith every time prior to printing. I don't know what I'd do without them!
Student-led hacking of Ender 3 v2
Ezri A. ('25) and Rowan F. ('25) in my Honors Advanced Biology and Biotechnology course decided to take on the challenge of building this bioprinter for their Bioart research project. Please check out their work in the Living BioLibrary Project under Bioplastics.
Here, I am documenting their progress as they move through the steps.
Step 1. 3D print Bio-extruder and Bio-printhead components.
I 3D printed all of their required pieces with the 3D printer I had previously set up.
Step 2. Assemble the parts.
Steps to Assemble the Bioprinter, from Appendix 2: Detailed steps to convert a Creality Ender 3 V2 3D printer into a bioprinter, Supplemental Materials:
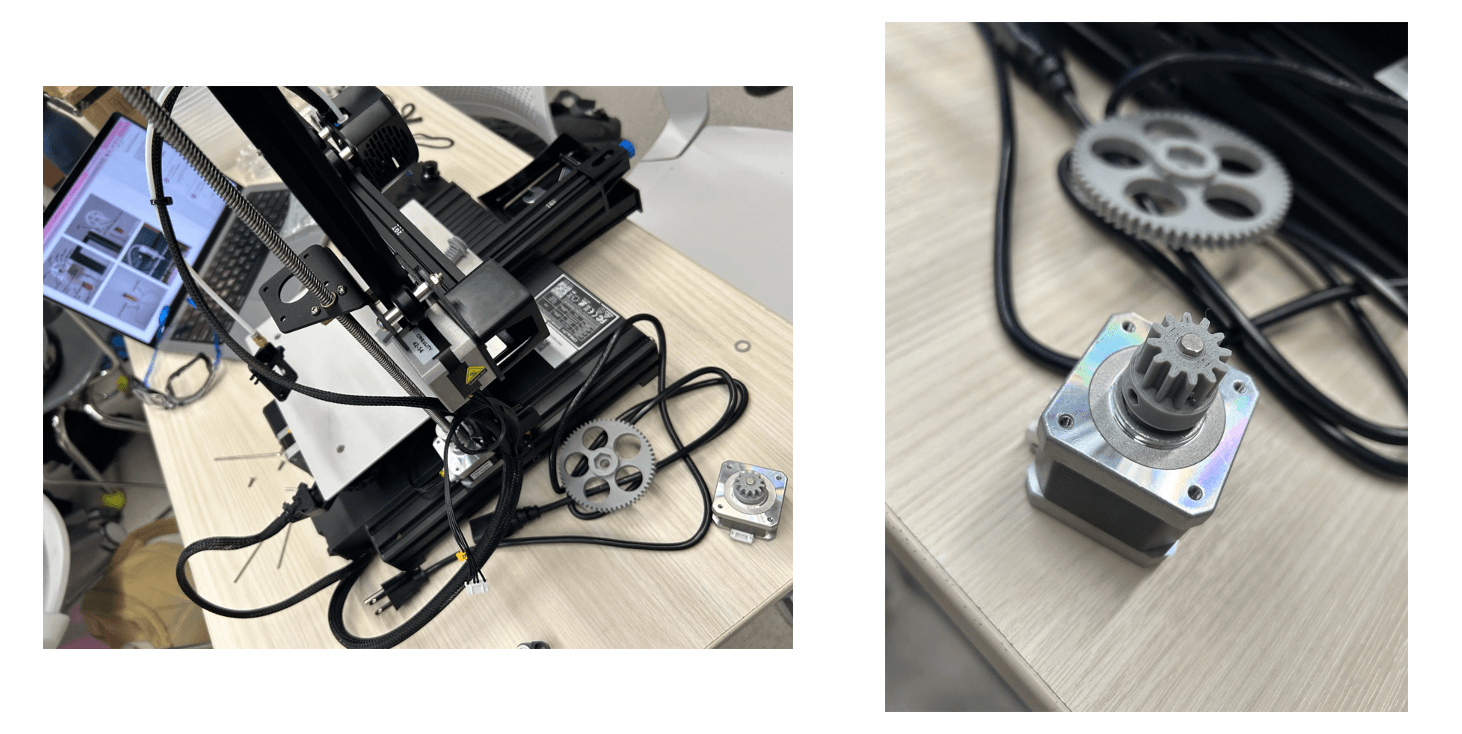
- Mount Stepper Motor: Remove the stepper motor from the original extruder and attach it to the 3D-printed bio-extruder body using three M3 x 10 mm screws.
- Fix Gear 1: Attach gear 1 to the shaft of the stepper motor.
- Connect Gears 2 and 3: Use an M8 x 40 mm screw to connect gears 2 and 3, then mount them on the extruder body with a 608 bearing.
- Attach Syringe: Secure a Terumo SS-30S 30 ml syringe to the bio-extruder body.
- Replace Plunger: Substitute the original syringe plunger with the 3D-printed plunger.
- Position Plunger: Place the 3D-printed plunger so that the stepper motor can rotate to push it via gears 1, 2, and 3.
- Adjust Plunger Tightness: Use an M3 x 10 mm screw to adjust the plunger's tightness.
- Connect Syringe to Needle: Attach the syringe to a 100 mm 22 Gauge blunt end needle using a 40 cm plastic tube and a luer lock adaptor.
- Install Printhead: Insert the blunt end needle into the bio-printhead and mount it on the X-axis carriage of the 3D printer.
 Above image from Appendix 2: Detailed steps to convert a Creality Ender 3 V2 3D printer into a bioprinter, Supplemental Materials
The students worked well together constructing the bioprinter 3D pieces and assembling them on to the 3D printer. Sometimes we had to wait for the correct pieces to arrive such as the 100 mm 22 Gauge blunt end needles and syringes so the process took a bit longer than expected.
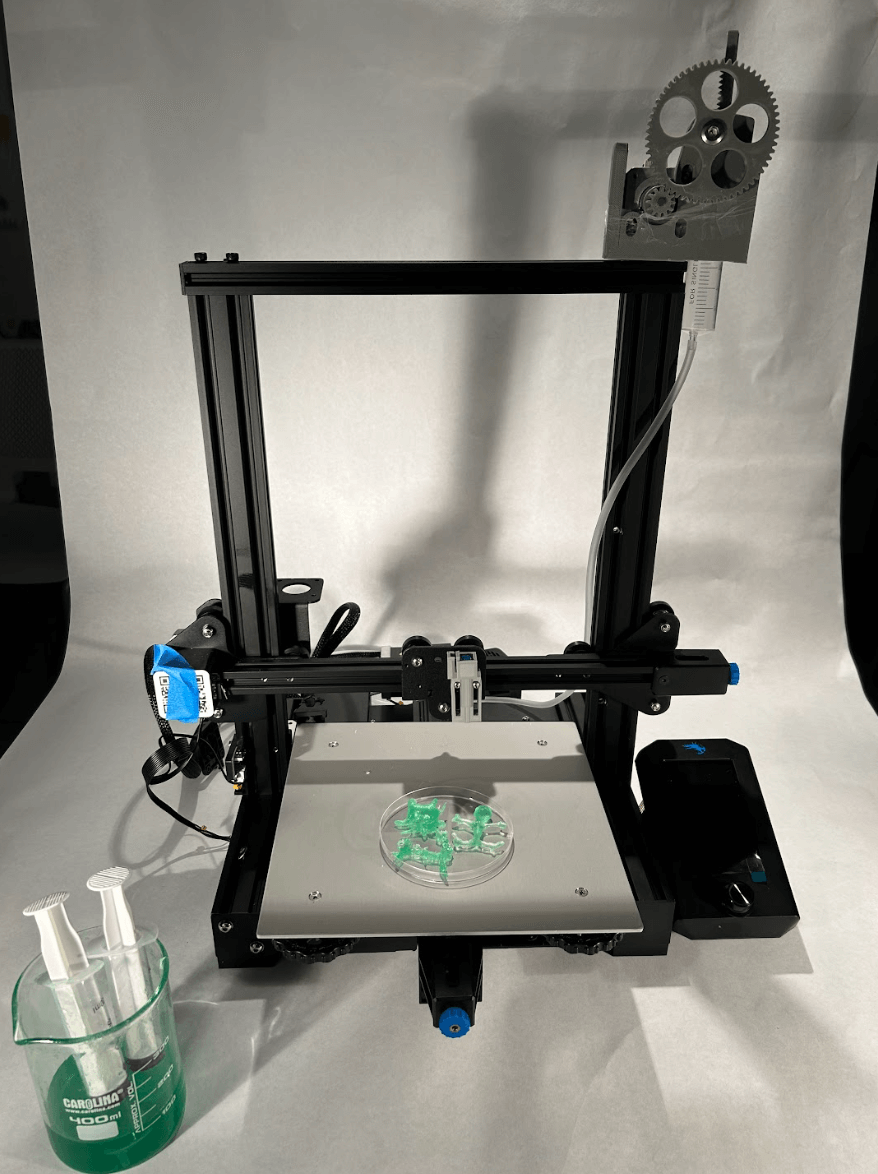
Step 3. Test bioplastic.
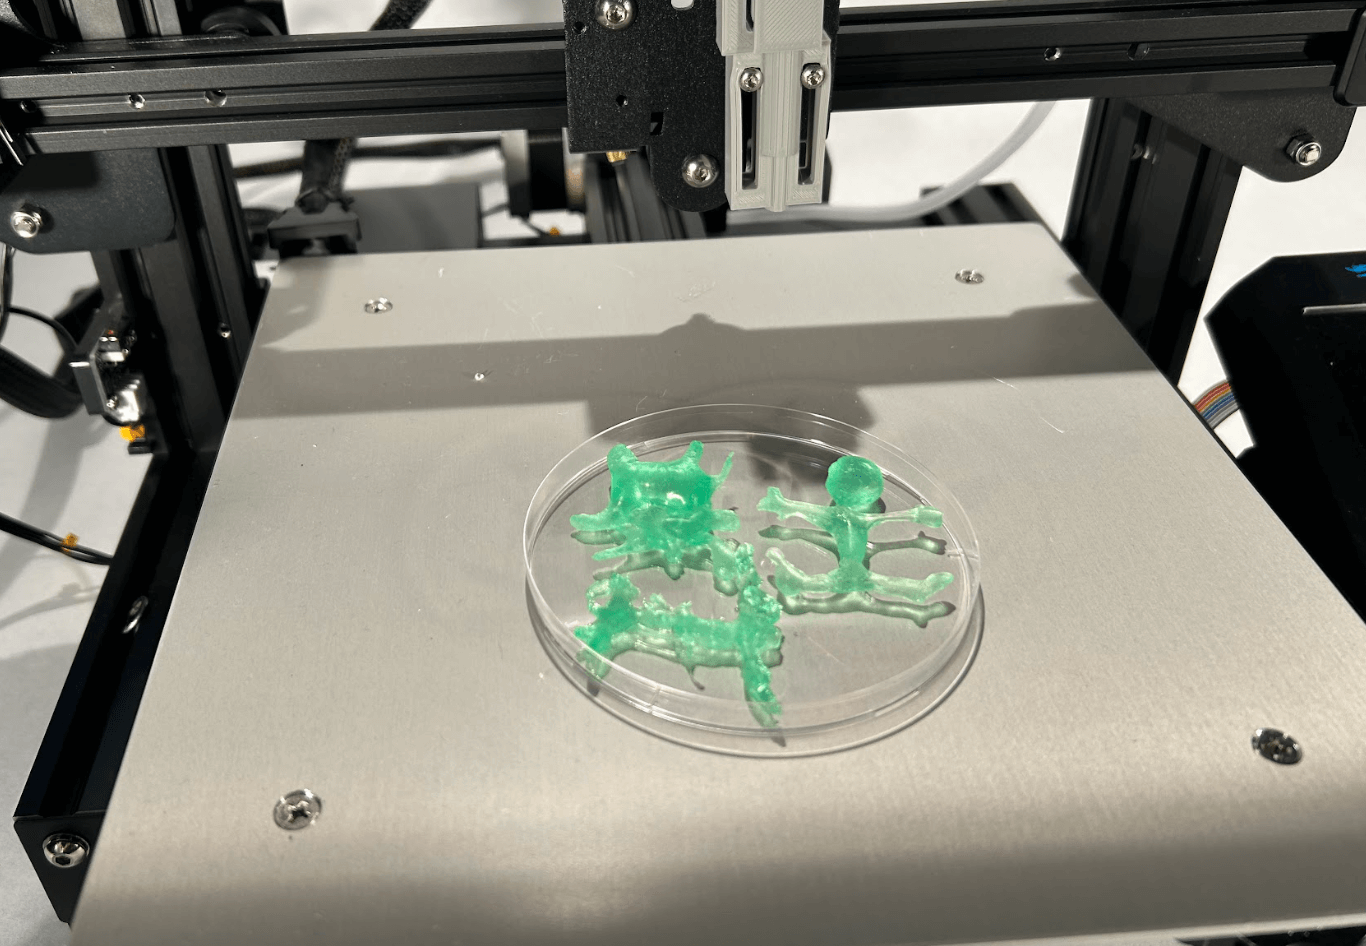
We used the alginate strings recipe from Loes Boges to test the 100 mm 22 Gauge blunt end needles. However, the alginate strings were too gel-like for the needles and so the students diluted the recipe with water. We tested using this recipe because it was similar to the bioink used in the bioprinter instruction manual. The bioink recipe in the paper is unclear when they refer to "cell culture" as it does not appear that they use a cell culture. Additionally, instead of using a liquid calcium chloride curing solution, the paper used an agar-based recipe. The bioink recipe from the paper will have to be further explored.
Future steps to complete:
This is a rather amibitious project for the time given and will take some time to finalize. Additionally, a student decided to tackle the first steps of this project and I needed to give time and space for that to happen. I will be taking over with the remainder of the steps this summer. Below I will describe the next steps I need to take in order to have a compelted and working machine.
Step 4. Upload code. Follow supplemental materials instructions for how to proceed.
Step 5. Test 3D bioprinter. Follow supplemental materials instructions for how to proceed.
Discussion
I always try to emphasize process over product in my classes because in science failure is inevitible. I am also bringing this up perhaps as an excuse since I only have the process to show rather than the final product for this assignment!
This project has been moving along thanks to the help of my two dedicated students. I am glad that they had the opportunity to engage with this project as a way to bring engineering with biology (as one of the students strongly prefers engineering). The students presented their work-in-progress at Science Night.
As I mentioned, I will be taking over this project now that my classes have ended. Unfortunately, I do not have a video of the bioprinter working as of now.
Materials and Methods
-
Ender 3 v2 ~$200
-
See supplemental materials at the bottom of the paper for detailed instructions on how to make your own 3D bioprinter.