6. BioFabricating Materials
Introduction
This week I gave a presentation (see video below) on mycelium-based bioart. In the presentation, I tried to summarize everything that I have learned over the past two years of taking workshops, lectures, and trying it out for myself.
For biofabrication week, I wanted to work with new materials. I focused on learning how to prepare bioplastics and grow bacterial leather. As I have been working more with bacteria during this program and at work, I've been discovering how much I enjoy and am interested by this often overlooked organism. Working with bacteria reminds me a bit of working with fungus and so maybe that is why I'm drawn to it.
List of resources that I have found useful in my exploration of mycelium-based bioart:
Books for Cultivation:
- Stamets, Paul. Growing Gourmet and Medicinal Mushrooms
- Cotter, Tradd. Organic Mushroom Farming and Mycoremediation: Simple to Advanced and Experimental Techniques for Indoor and Outdoor Cultivation
- Mccoy, Peter. Radical Mycology: A Treatise On Seeing And Working With Fungi Padilla-Brown, William: Cordyceps Cultivation Ebook
- Magic in the Dyepot by Ann Paulsen Harmer
- Mushrooms for Dyes, Paper, Pigments and Myco-stix by Miriam C. Rice
Online mushroom cultivation classes:
- Mycologos
- Double-Blind
Fungal Art Websites:
- Mushroom Color Altas by Julie Beeler
Mushroom People:
- Sidnee Obersingleton: fungal pigment research
- Sam Shoemaker: mushroom scuplture, mycelial materials, bioart
- Jess Manganaro: cordecyps, bioart, fungal pigment research
- Alan Rockefeller: mushroom ID, science
Biodata sonification:
Indigenous Usage:
- Fungal mycelial mats used as textile by indigenous people of North America
- Extraordinary Fungal Masks used by the Indigenous People of North America and Asia
Misc:
- How to build a Martha Tent
Results
Bioplastics
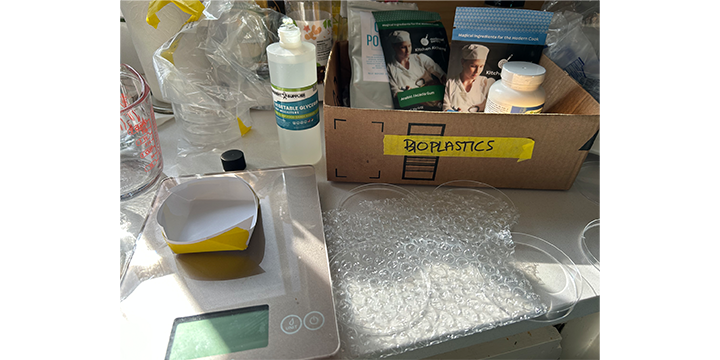
Figure 1. Gathering materials See "Bioplastics" tab under Materials and Methods for detailed recipes used.
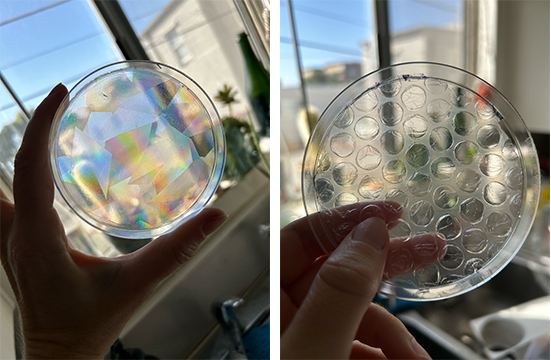
Figure 2. Making molds to test out a variety of textures for the bioplastics. I gathered a few different materials to insert into petri dishes to test different textures. The bubble wrap worked the best. The window prism sticker also worked but only momentarily. Once it dried, the bioplastic lifted off the sticker surface and so it never dried fully with the liness to form an iridescent prism. While it was still wet, it did work for a few minutes (see video).
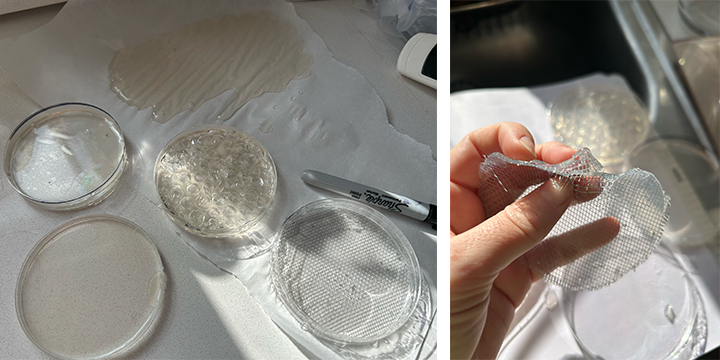
Figure 3. First batch of bioplastics. No additives were used to the original recipe. I wanted to get a baseline for what to expect since this was my first time with this recipe. I also used this batch to test a variety of molds. The wire didn't work very well and the bioplastic got stuck in it.
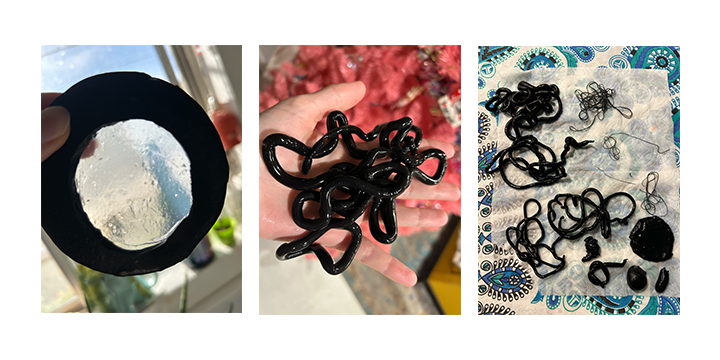
Figure 4. Activated-charcoal bioplastics. I added activated charcoal to the agar-based bioplastic recipe. I noticed that the addition of charcoal made the bioplastics a bit drier. I liked the look of the charcoal and also wanted to see if it could conduct electricity, so I added it to the alginate bioplastic recipe as well. I was hoping the charcoal-bioyarn would be conductive enough to light an LED with a 3V battery but it didn't work very well and the LED was very dimly lit. I also tried stacking clear bioplastic on top of charcoal bioplastic. They held together pretty well but were not solidely attached. I cut through the charcoal plastic to make a see through window out of the clear bioplastic layer.
Iridescent Bioplastic
Tour of my agar and alginated-based bioplastics
Bacterial leather
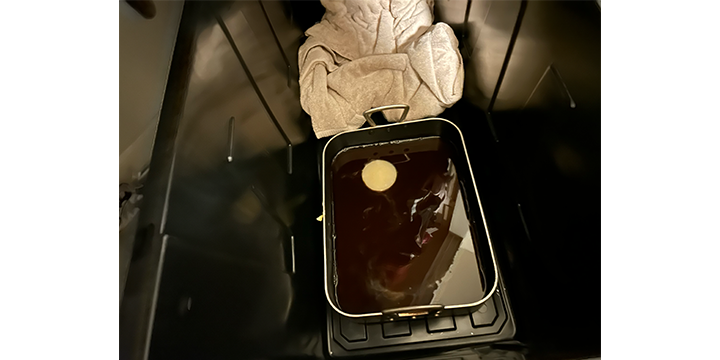 Figure 1. Kombucha fabric setup. Kombucha/bacterial leather takes about 3 weeks to grow. I will update this project when the leather has fully developed. This image is showing the setup to grow the SCOBY. The SCOBY is in a black tea + sugar mixture and will sit undisturbed in a warm dark place (the closet).
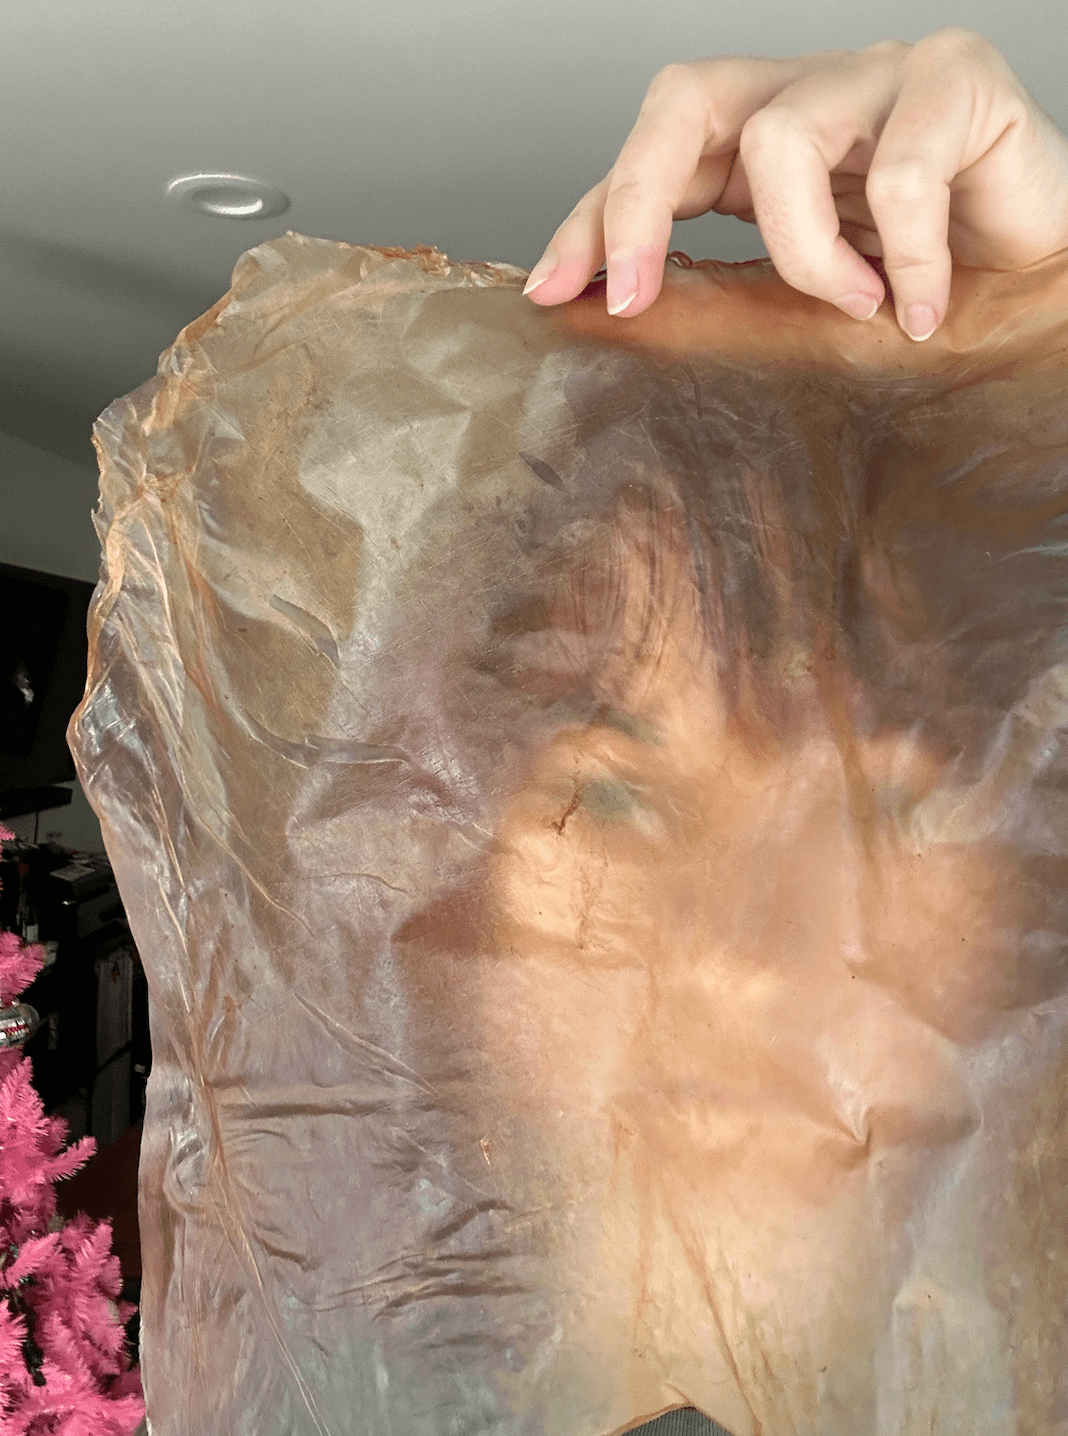 Figure 2. Finished product. This image was taken after 2 weeks of letting the SCOBY sheet dry. It was still sticky so I let it dry further so I washed it with a bit of soap. After washing it, the sheet got very crispy and crumbled into tiny pieces so I won't be doing that again. Still don't know how to solve the stickiness issue. Maybe I needed to dehydrate it rather than air dry.
Discussion
I wish I had more time to explore the different recipes for making bioplastic. I'm particularly interested in making yarn. I found the key to making the yarn was applying an even pressure to the syringe. It would be cool to get enough to crochet a hat or something with it. Maybe I will try adding the thermochromic paint in the mixture next time.
The SCOBY leather turned out pretty weird! It looked very much like human flesh so maybe next time I will add some natural dye to make it less creepy. Also, when the sheet fully dried it became brittle and easily crumbled. This maybe have been due to washing it with a bit of soap. Next time I will dehydrate the sheet rather than letting it air dry to try to prevent the stickiness from forming.
Methods and Materials
Bioplastics
Resources:
- Crafting Plastics
- Biomaterials
Materials:
- petri dishes
- agar agar
- alginate
- calcium chloride
- glycerine
- pots
- hot plate
- syringe
- plastic bags
Recipe for Bioplastic 2 (from biofabricating materials lecture):
4g agar
12 mL glycerin
200 mL water
1 tsp activated charcoal (optional)
-> mix well
-> heat at 80oC for 15 min
-> let dry
Recipe for Flexible Biosheet and Yarn (from biofabricating materials lecture):
12 g alginate
40 mL glycerine
1 tsp activated charcoal (optional)
400 mL water
-> mix well, use hand blender
separately, mix the following:
10 g Calcium chloride
100 mL water
-> pour alginate mixture into syringe for yarn (or molds for bio-sheet)
-> with even pressure, dispense the alginate mixture from the syringe into the calcium chloride solution
-> let dry
Bacterial leather
Resources:
- Instructables for Kombucha fabric
- Waag: Paper and Ink made of bacteria
Materials:
- Organic SCOBY Kombucha Starter Kit with Live Culture for Brewing Kombucha Tea - Urban Kitchen
- 6 bags of Early Grey Black Tea
- 1 cup cane sugar
- Large container
Method for growing Kombucha into a sheet (from Instructables):
- Thoroughly clean container that you will be using to grow the SCOBY.
- Heat one gallon of water to boiling and remove from heat.
- Add 1 cup sugar and 6 teabags.
- Stir, steep and let come to room temperature.
- Add the SCOBY and let it grow undisturbed in the dark (room temp) for about 3 weeks.