9. Textile Scaffold
Oh my gosh! Another exciting week has begun. I'm going to experience everything for the first time. I've never worked with crystallization, CNC, wood textiles, composites, etc. A week of learning is going to be incredibly exciting and amazing.
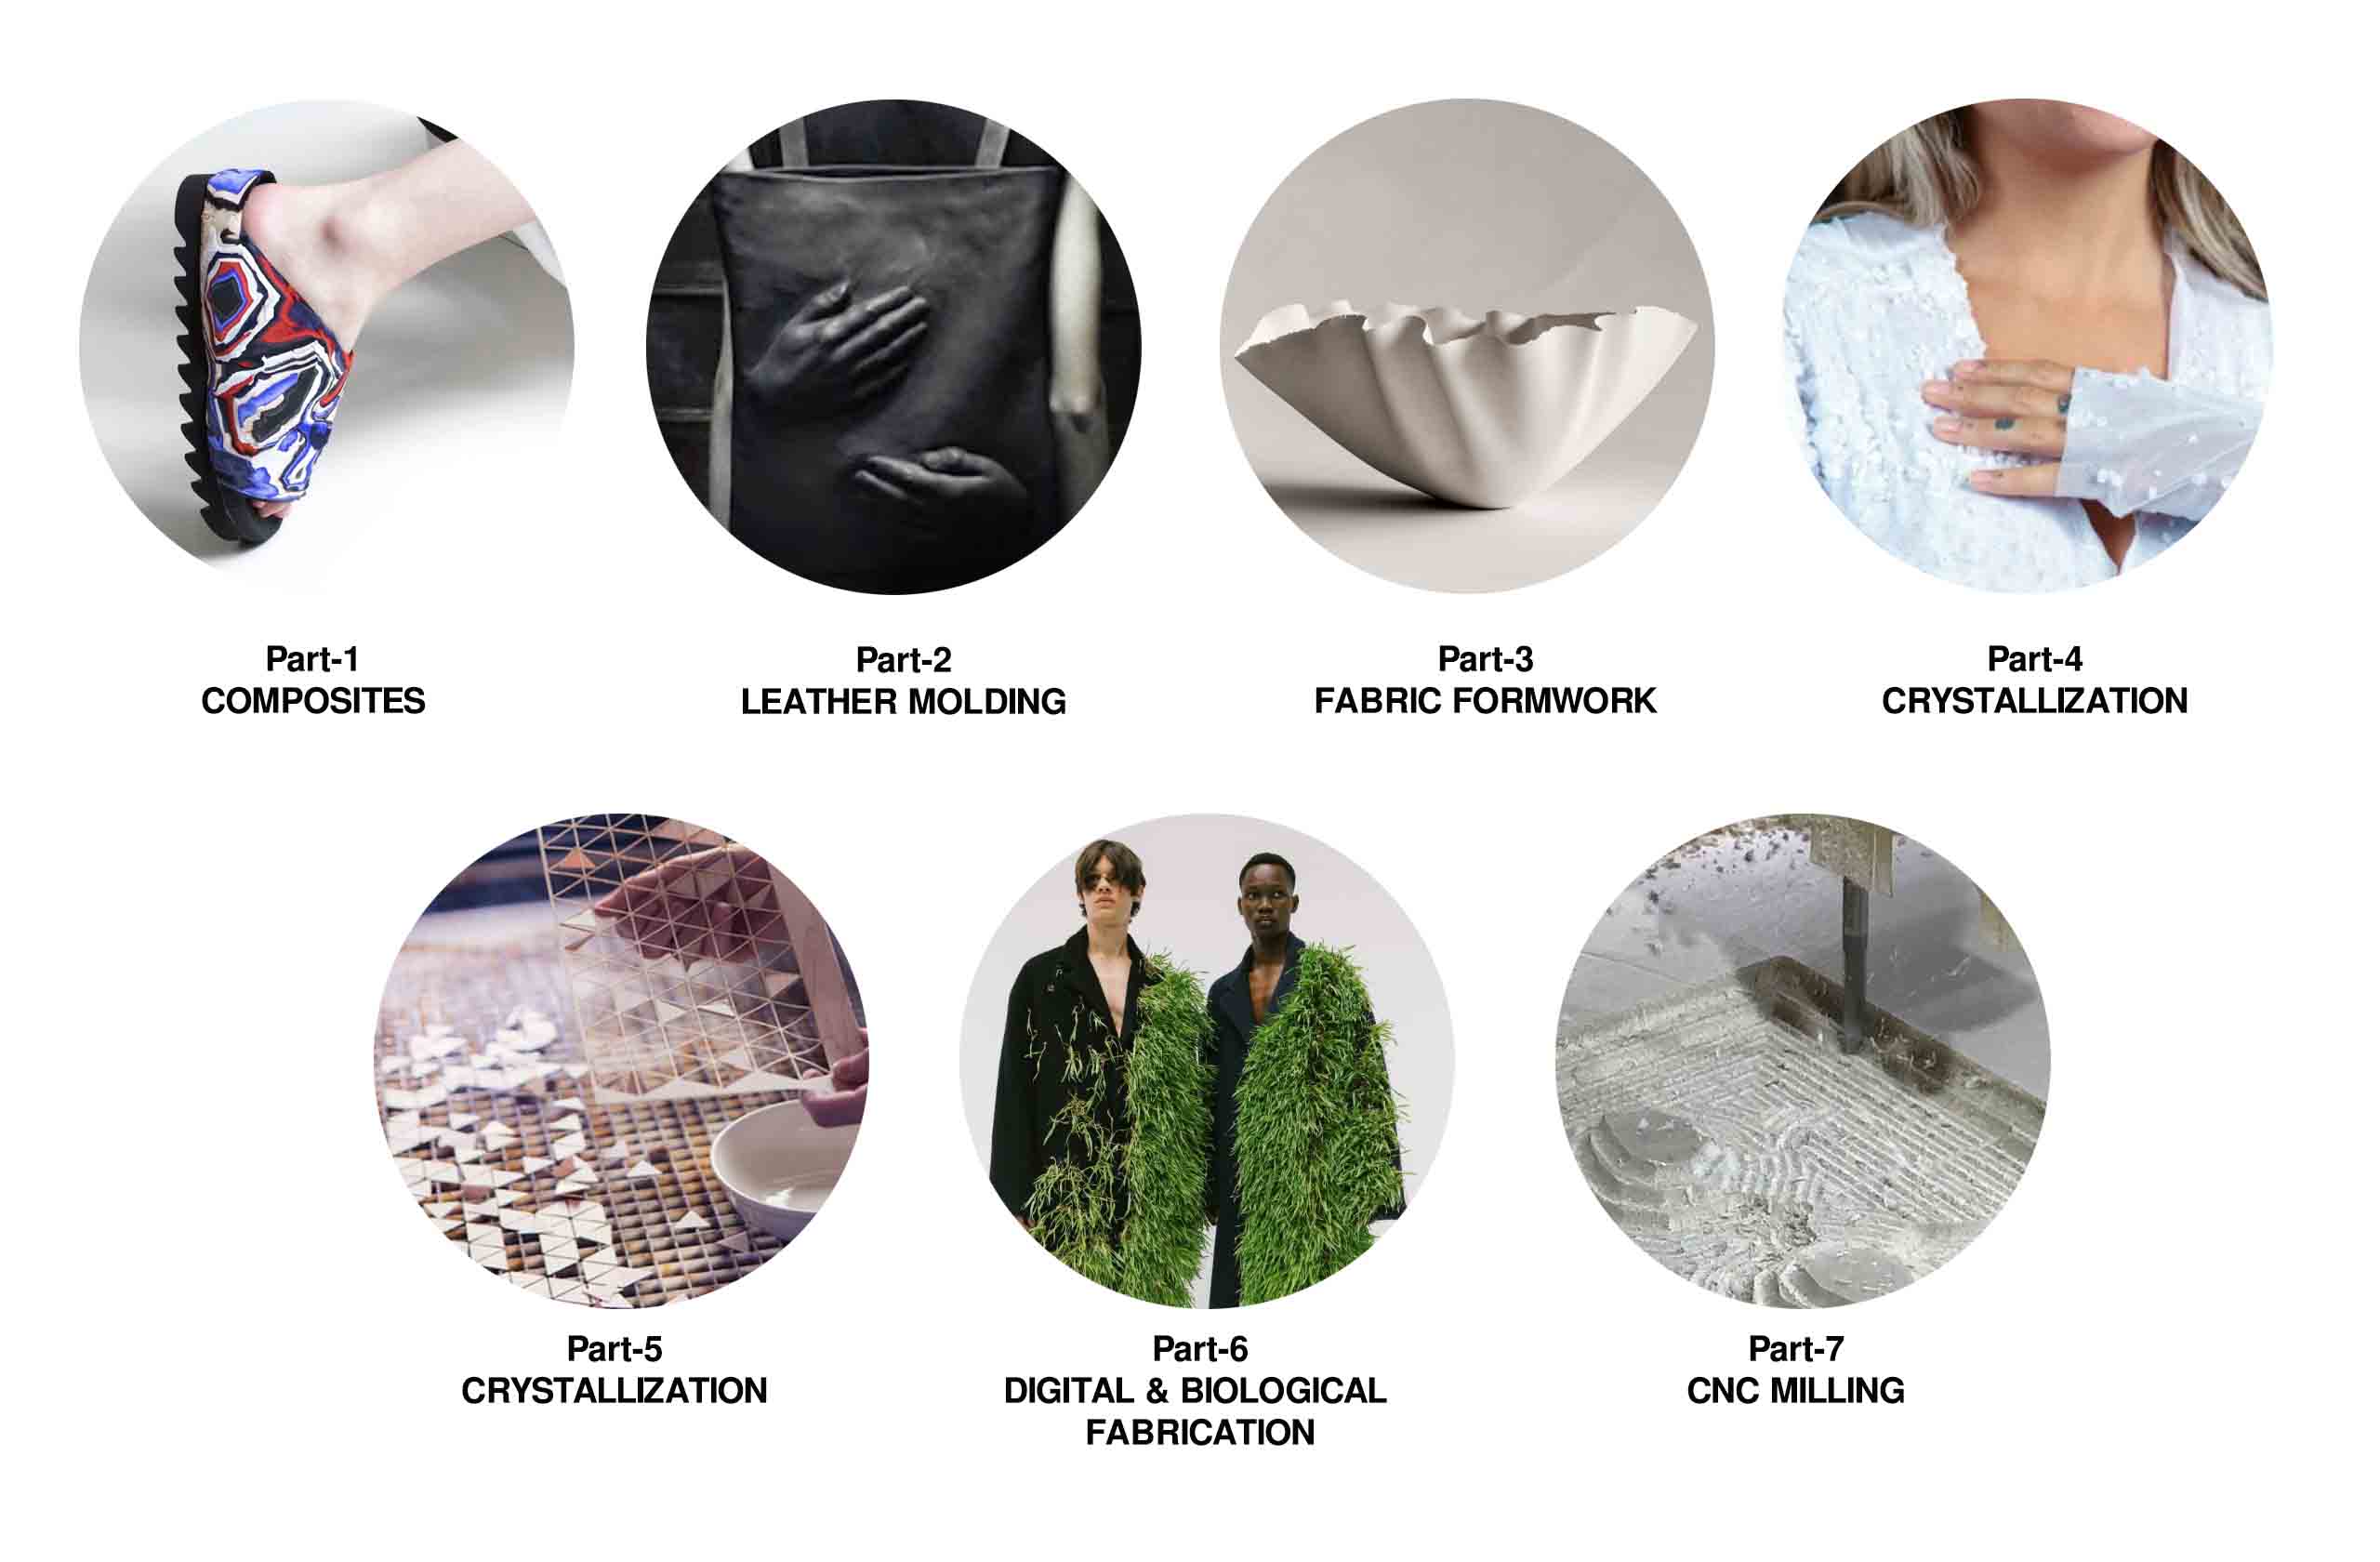
Based on the above, I will be focusing on a few topics because we will not have enough time to cover all of them.
Crystallization
Recipe
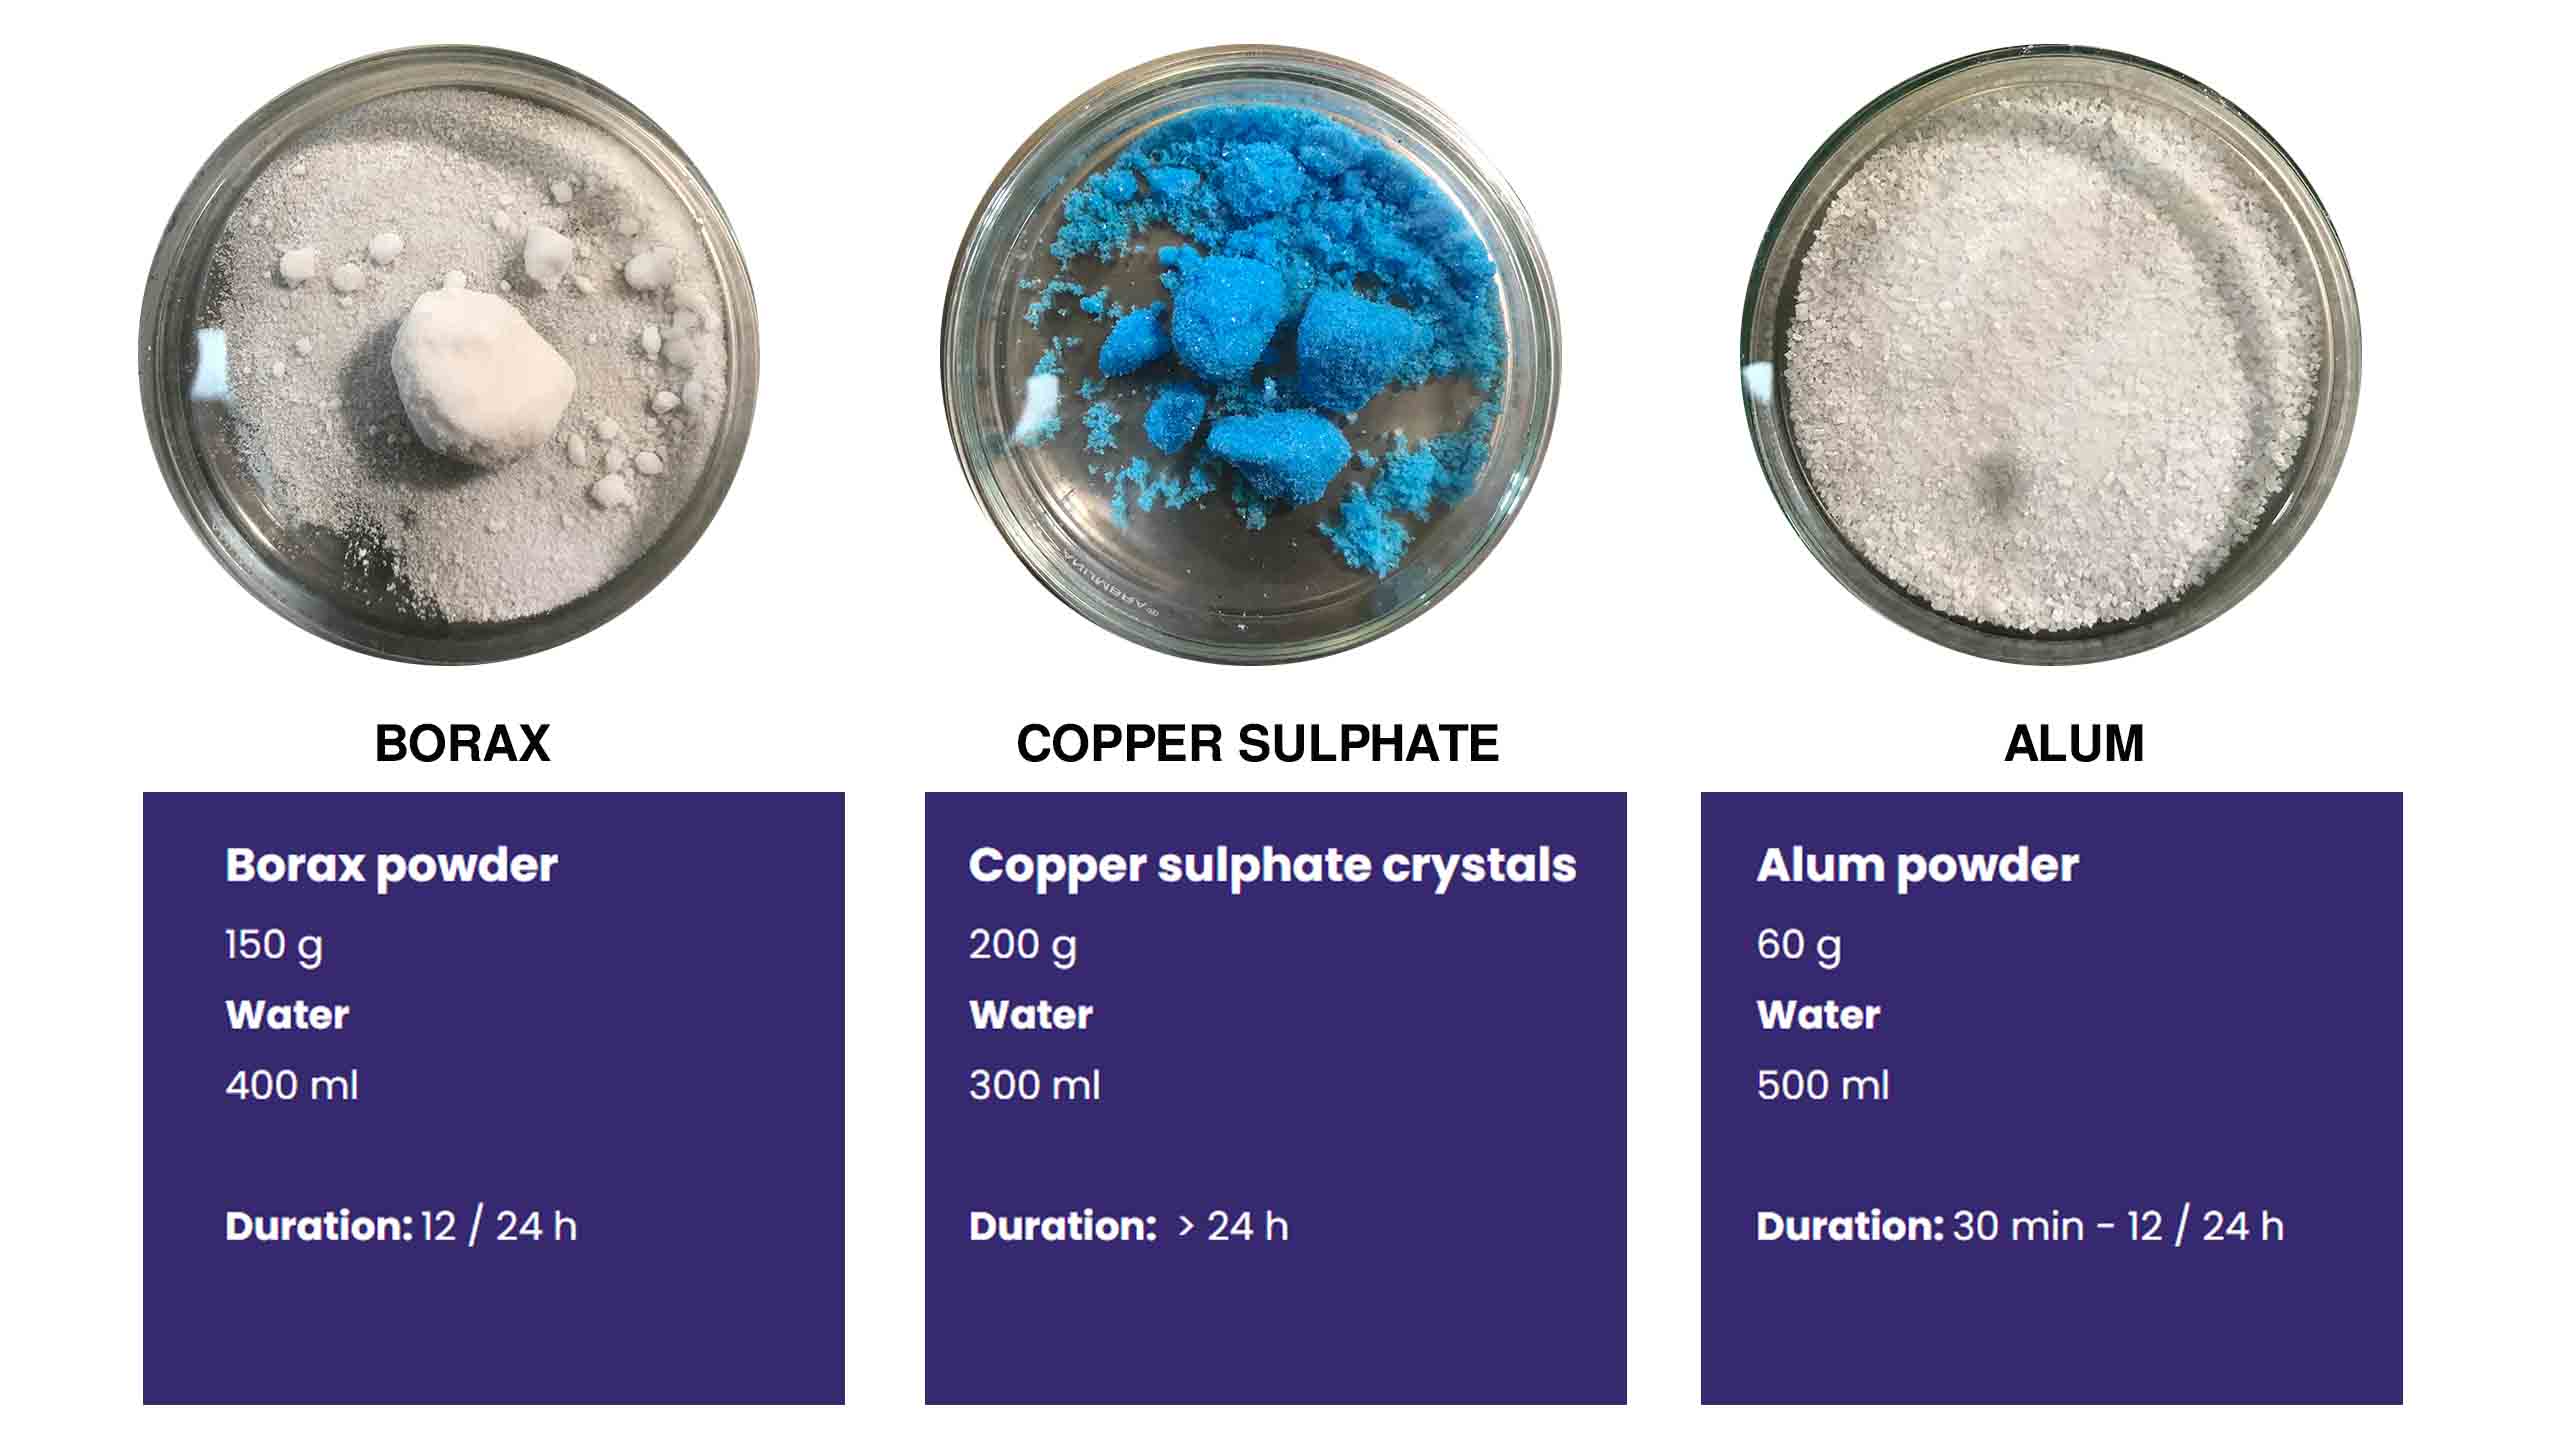
Below are the Crystals and its recipes to experiment.
Process
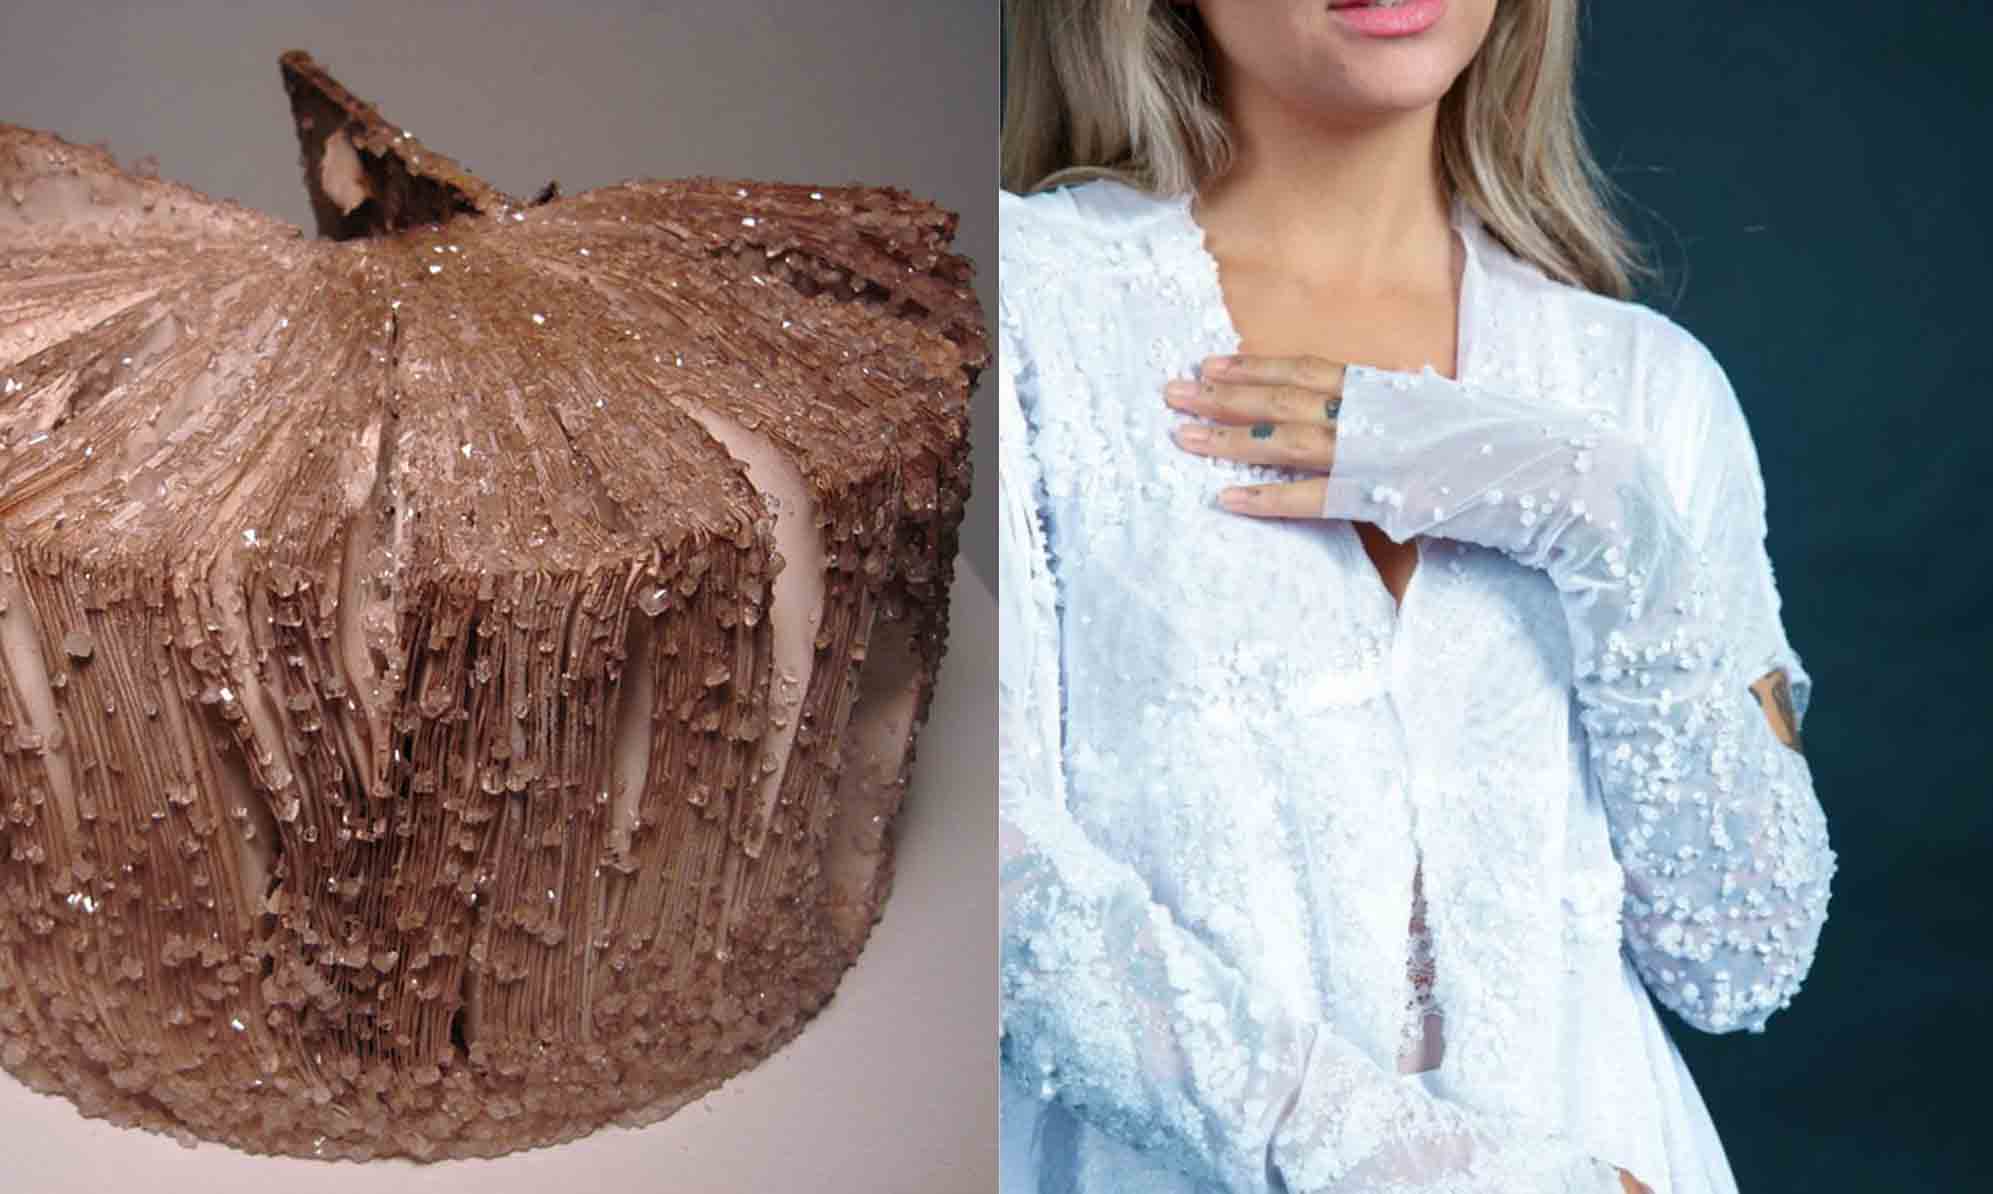
Borox Crystals with Mesh Textile
Borox
- Naturally occurring compound
- Laundry booster
- Soft crystals
- Dissolve in hot water
Required Materials
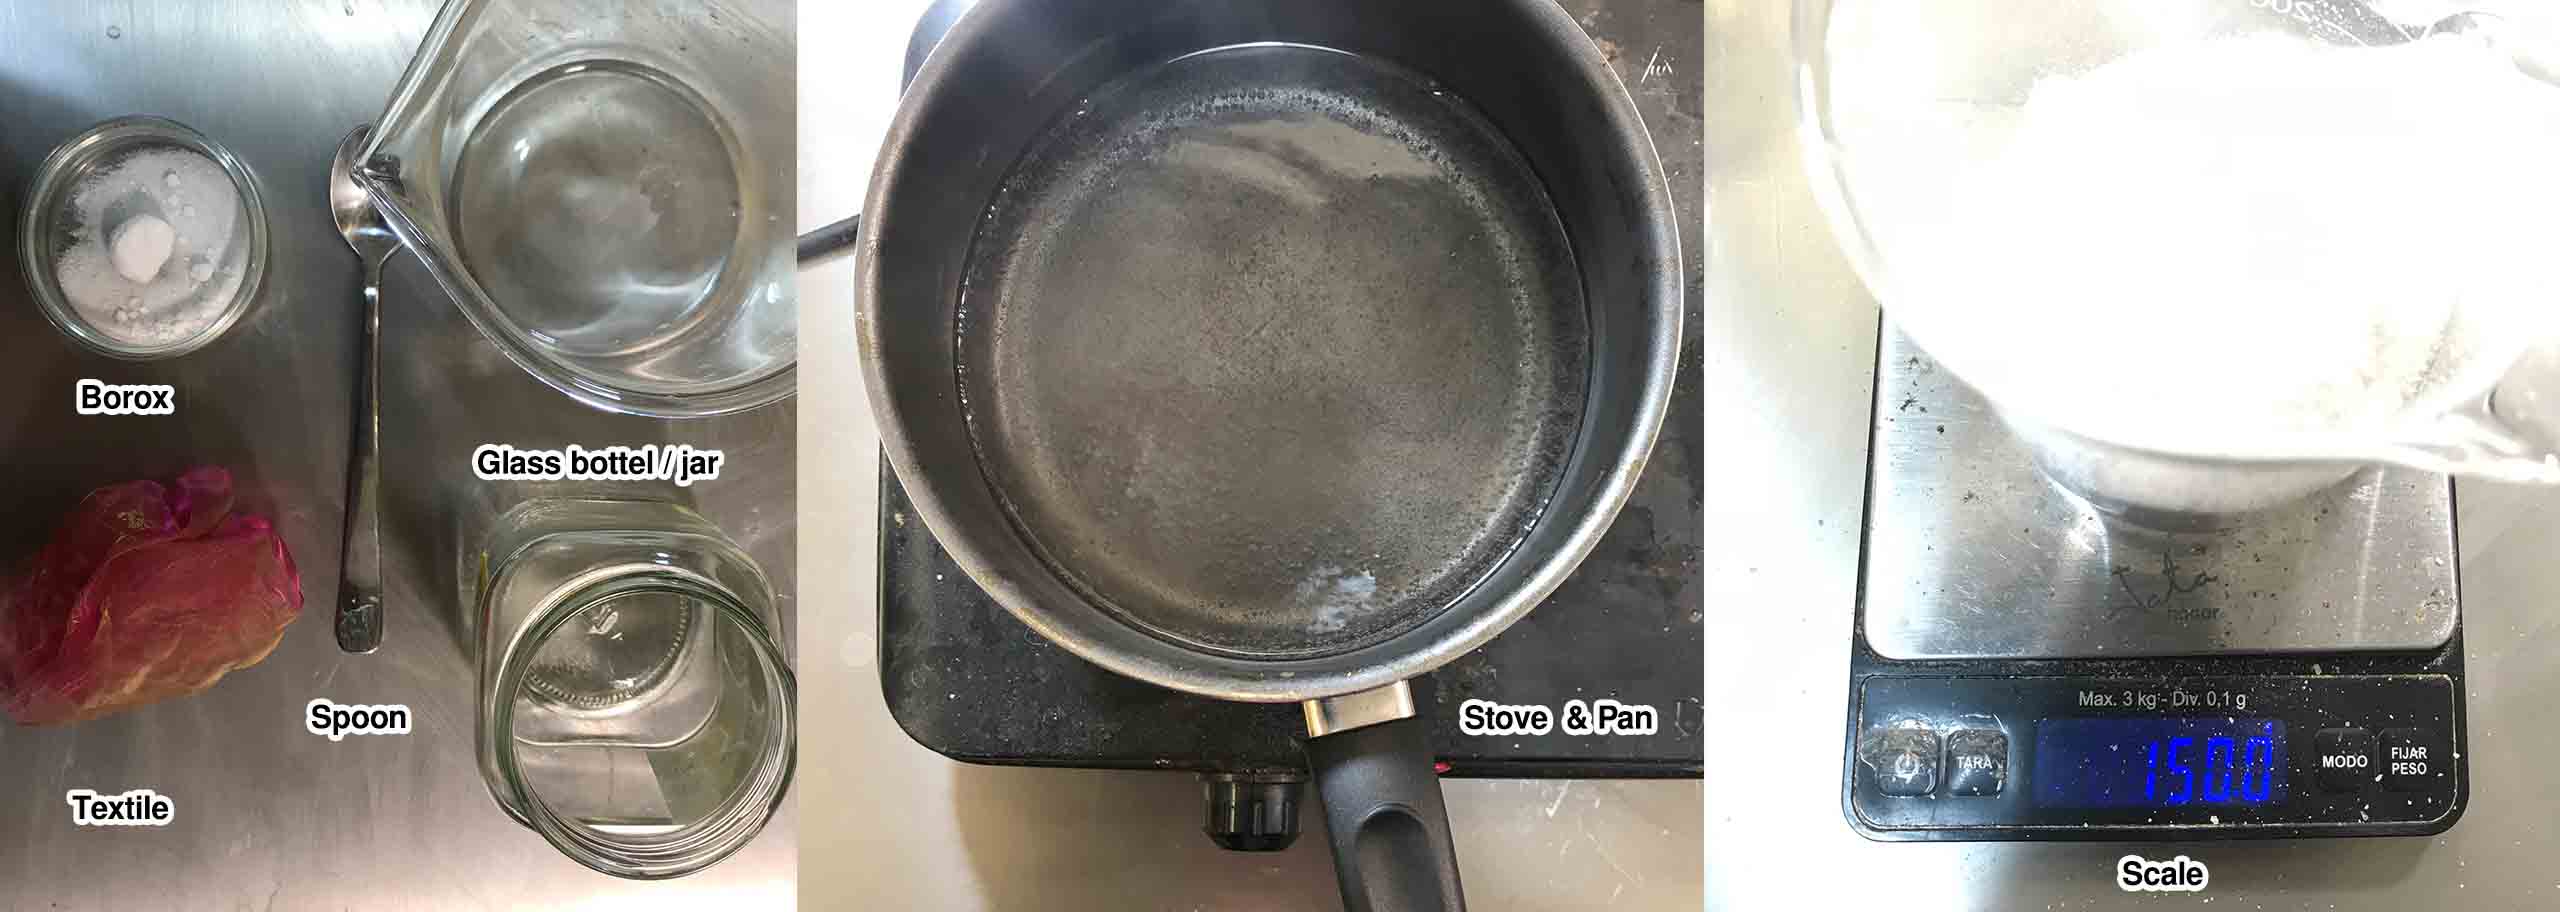
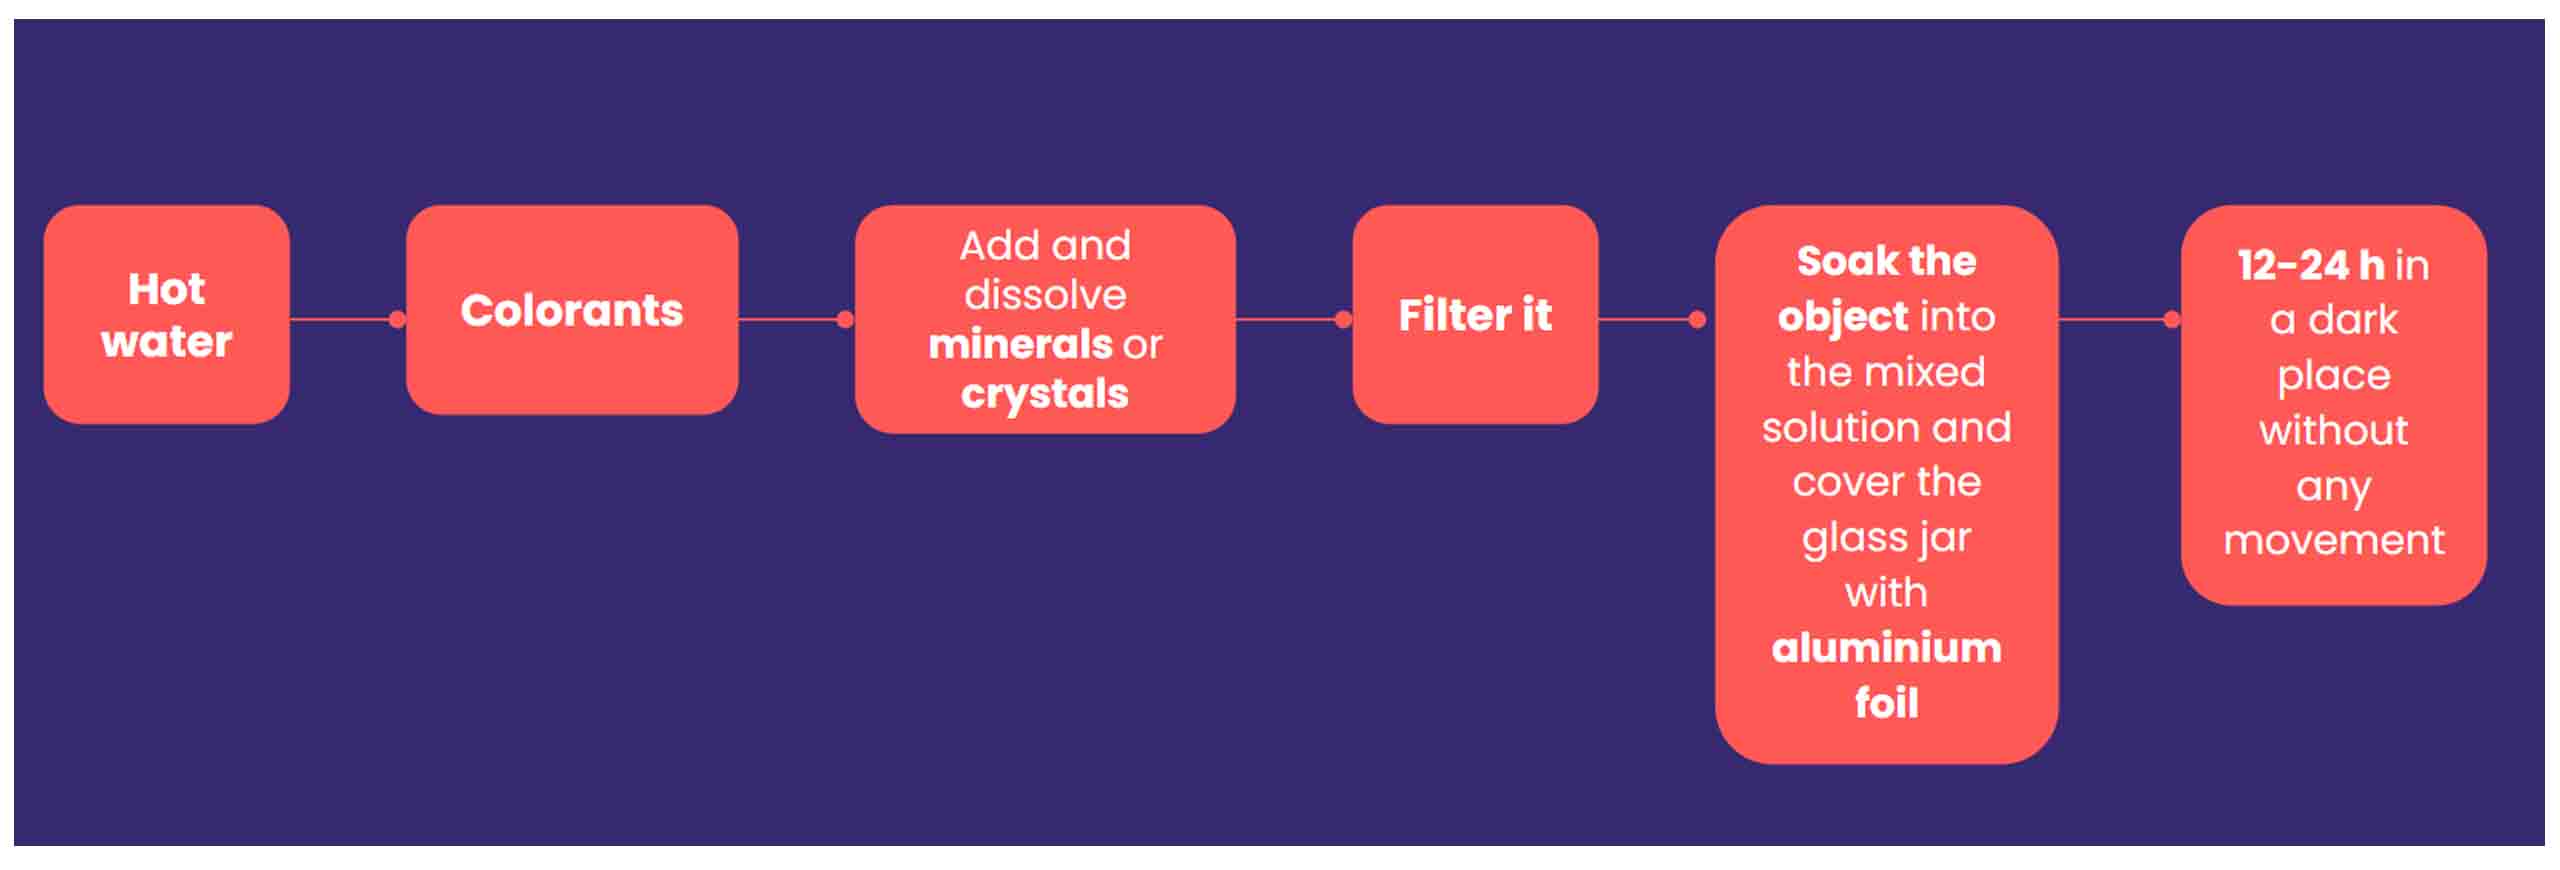
Borox Process
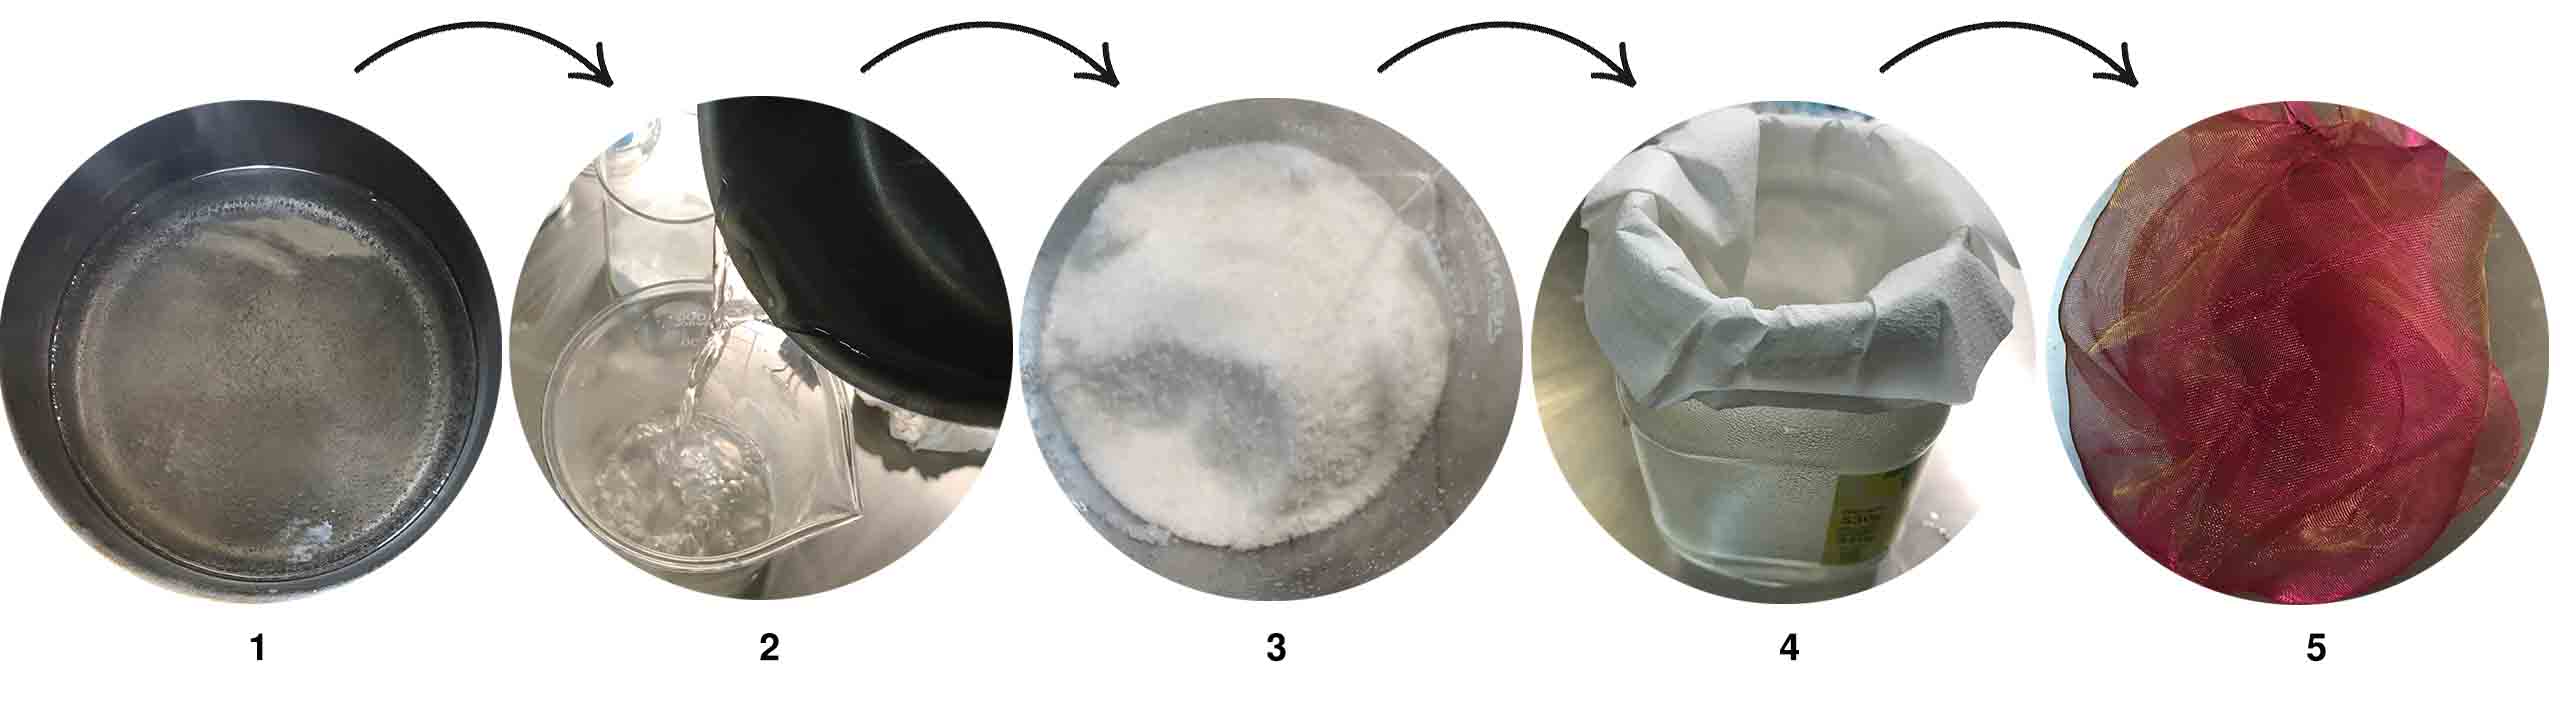
1- Take 400ml of water
2- Boil the water
3- Add and Dissolve the crystals.
4- Filter the crystallised water
5- Soak the object into the mixed solution and cover the glass jar with aluminium foil
6- 12-24 h in a dark place without any movement
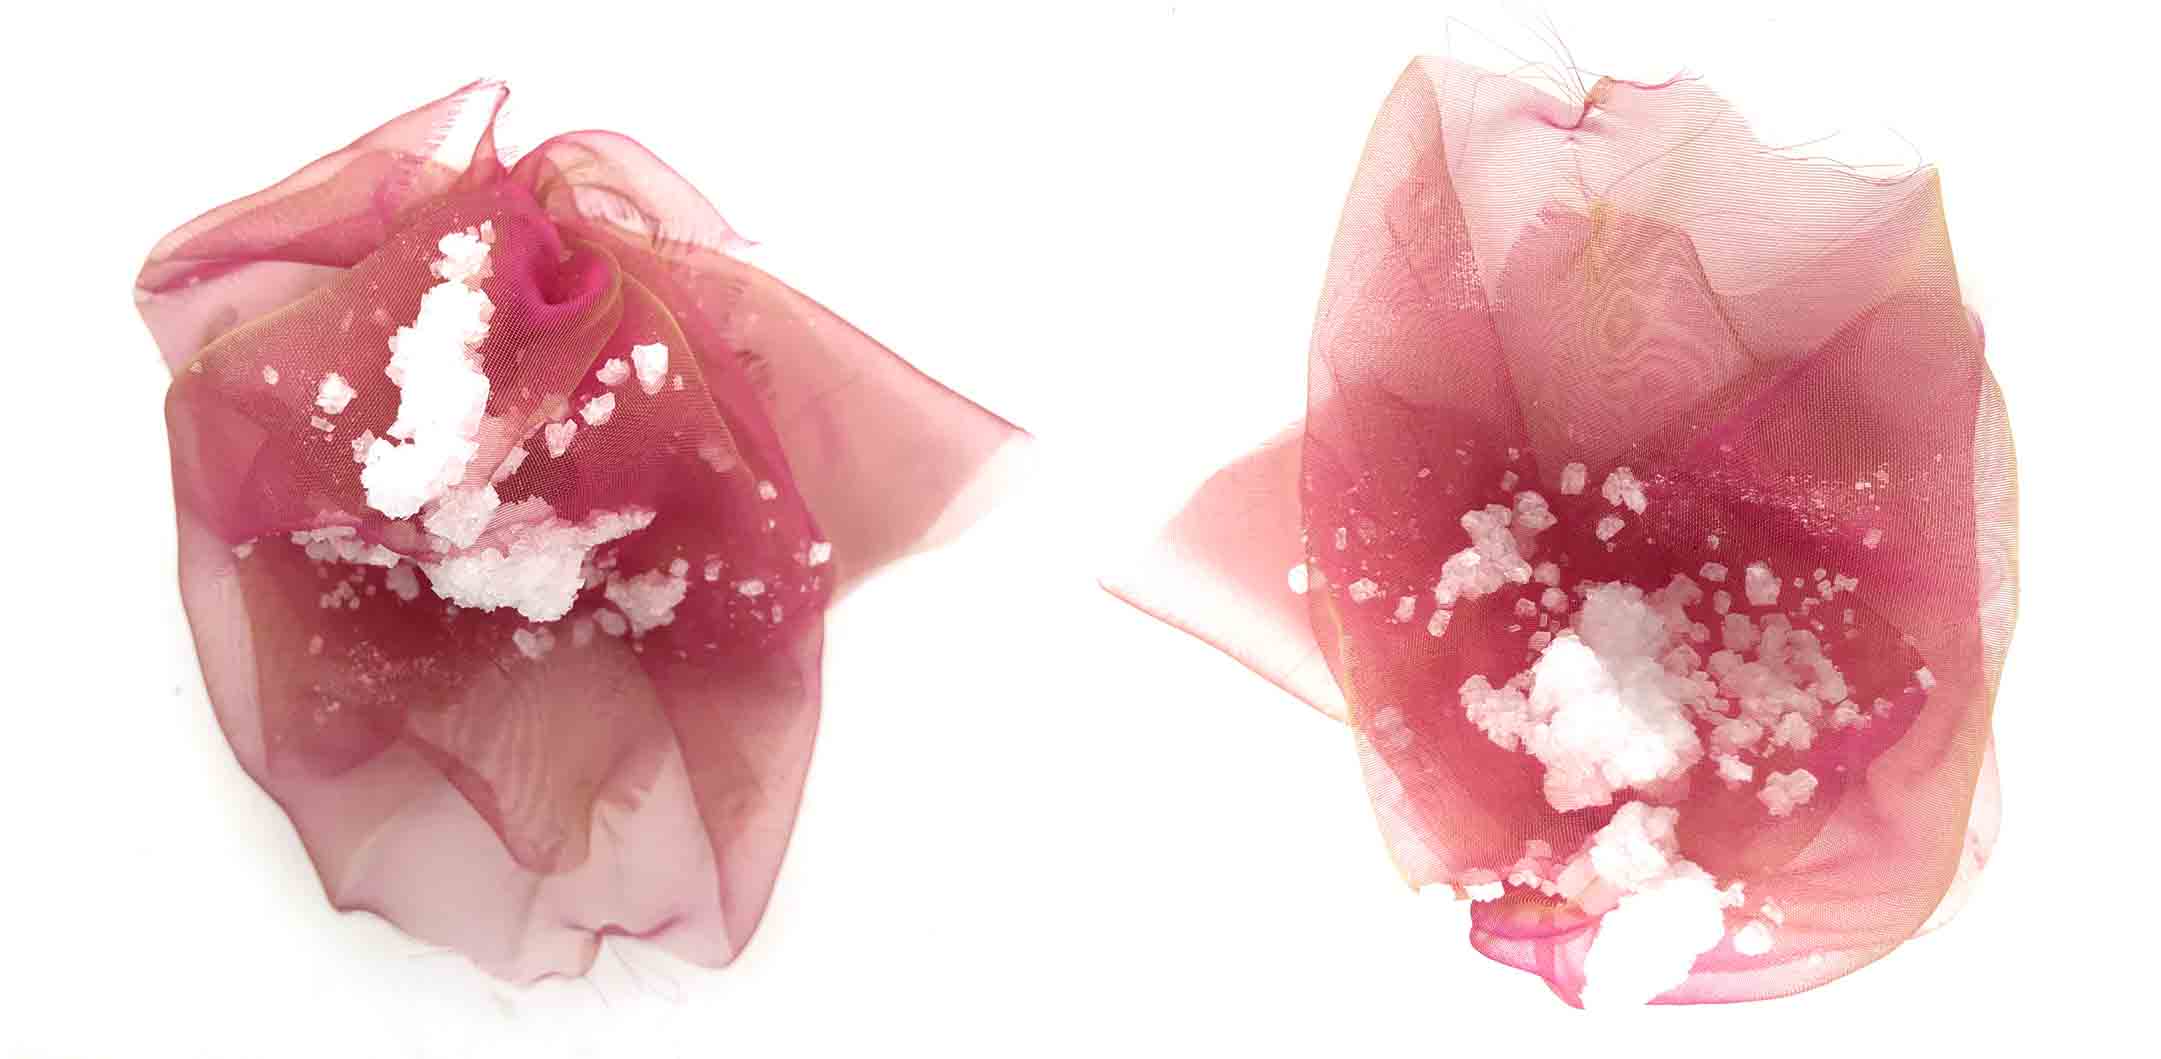
Final Result
Leather Moulding
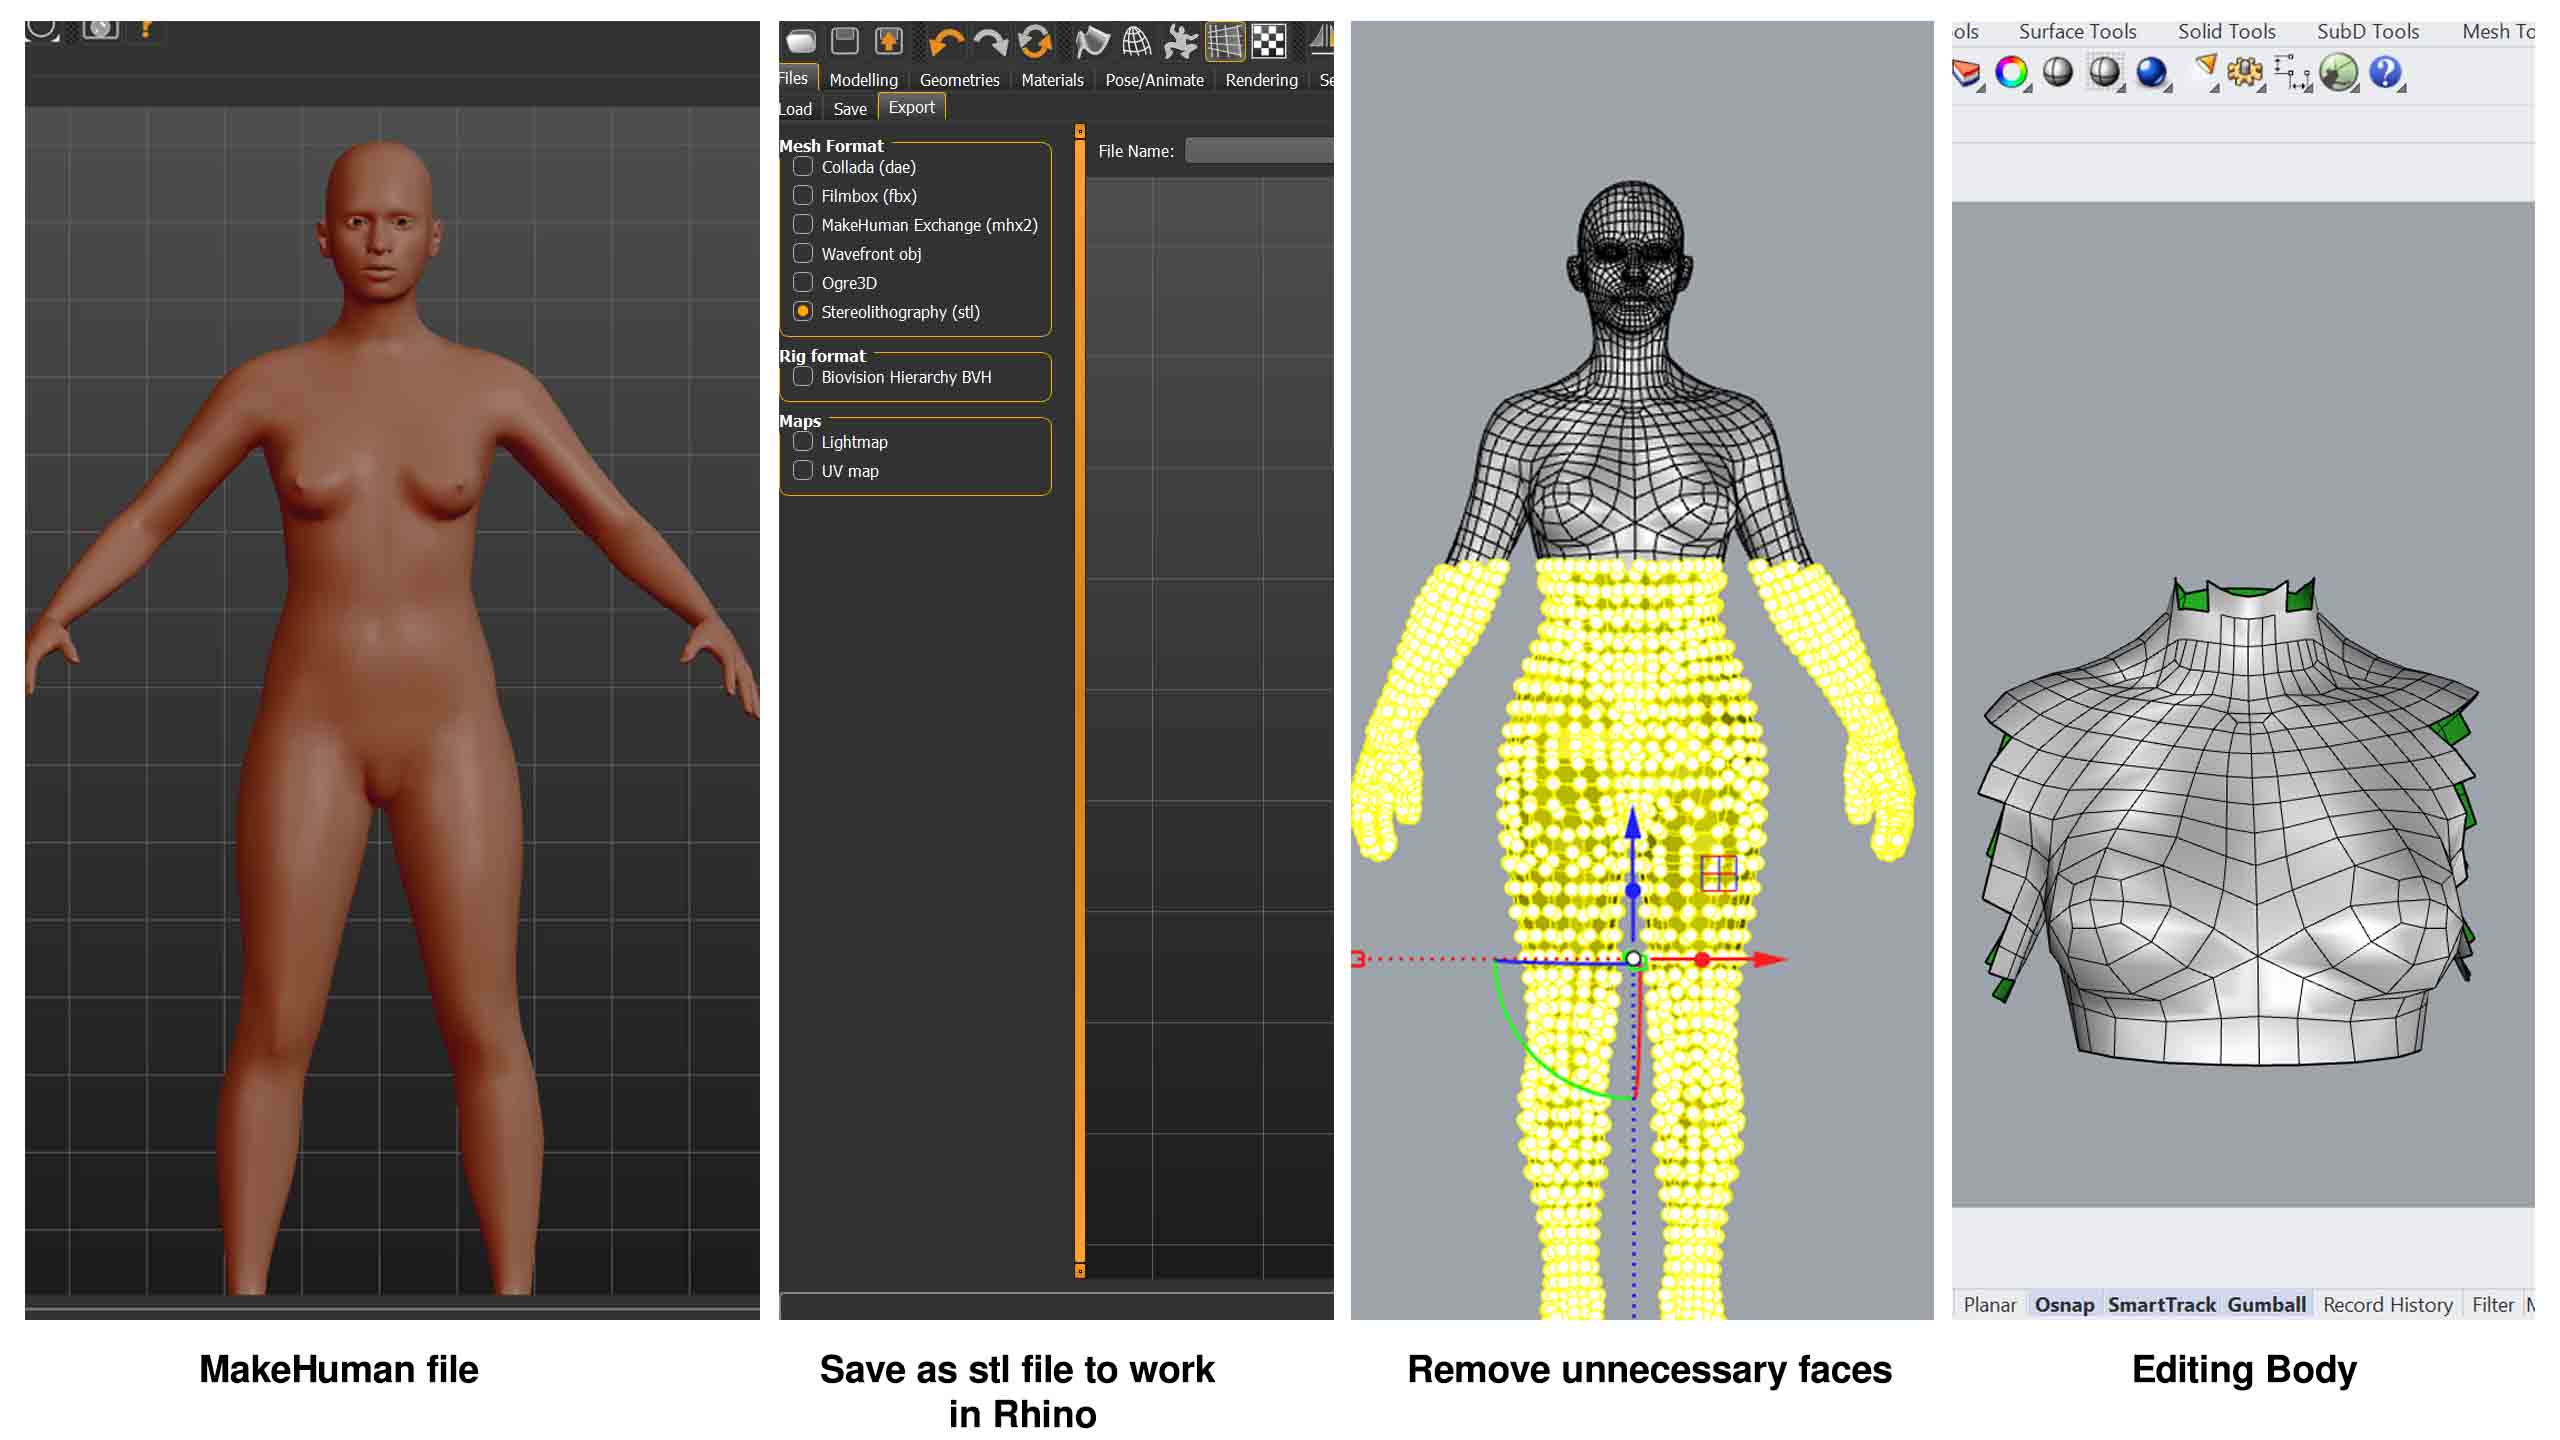
Design
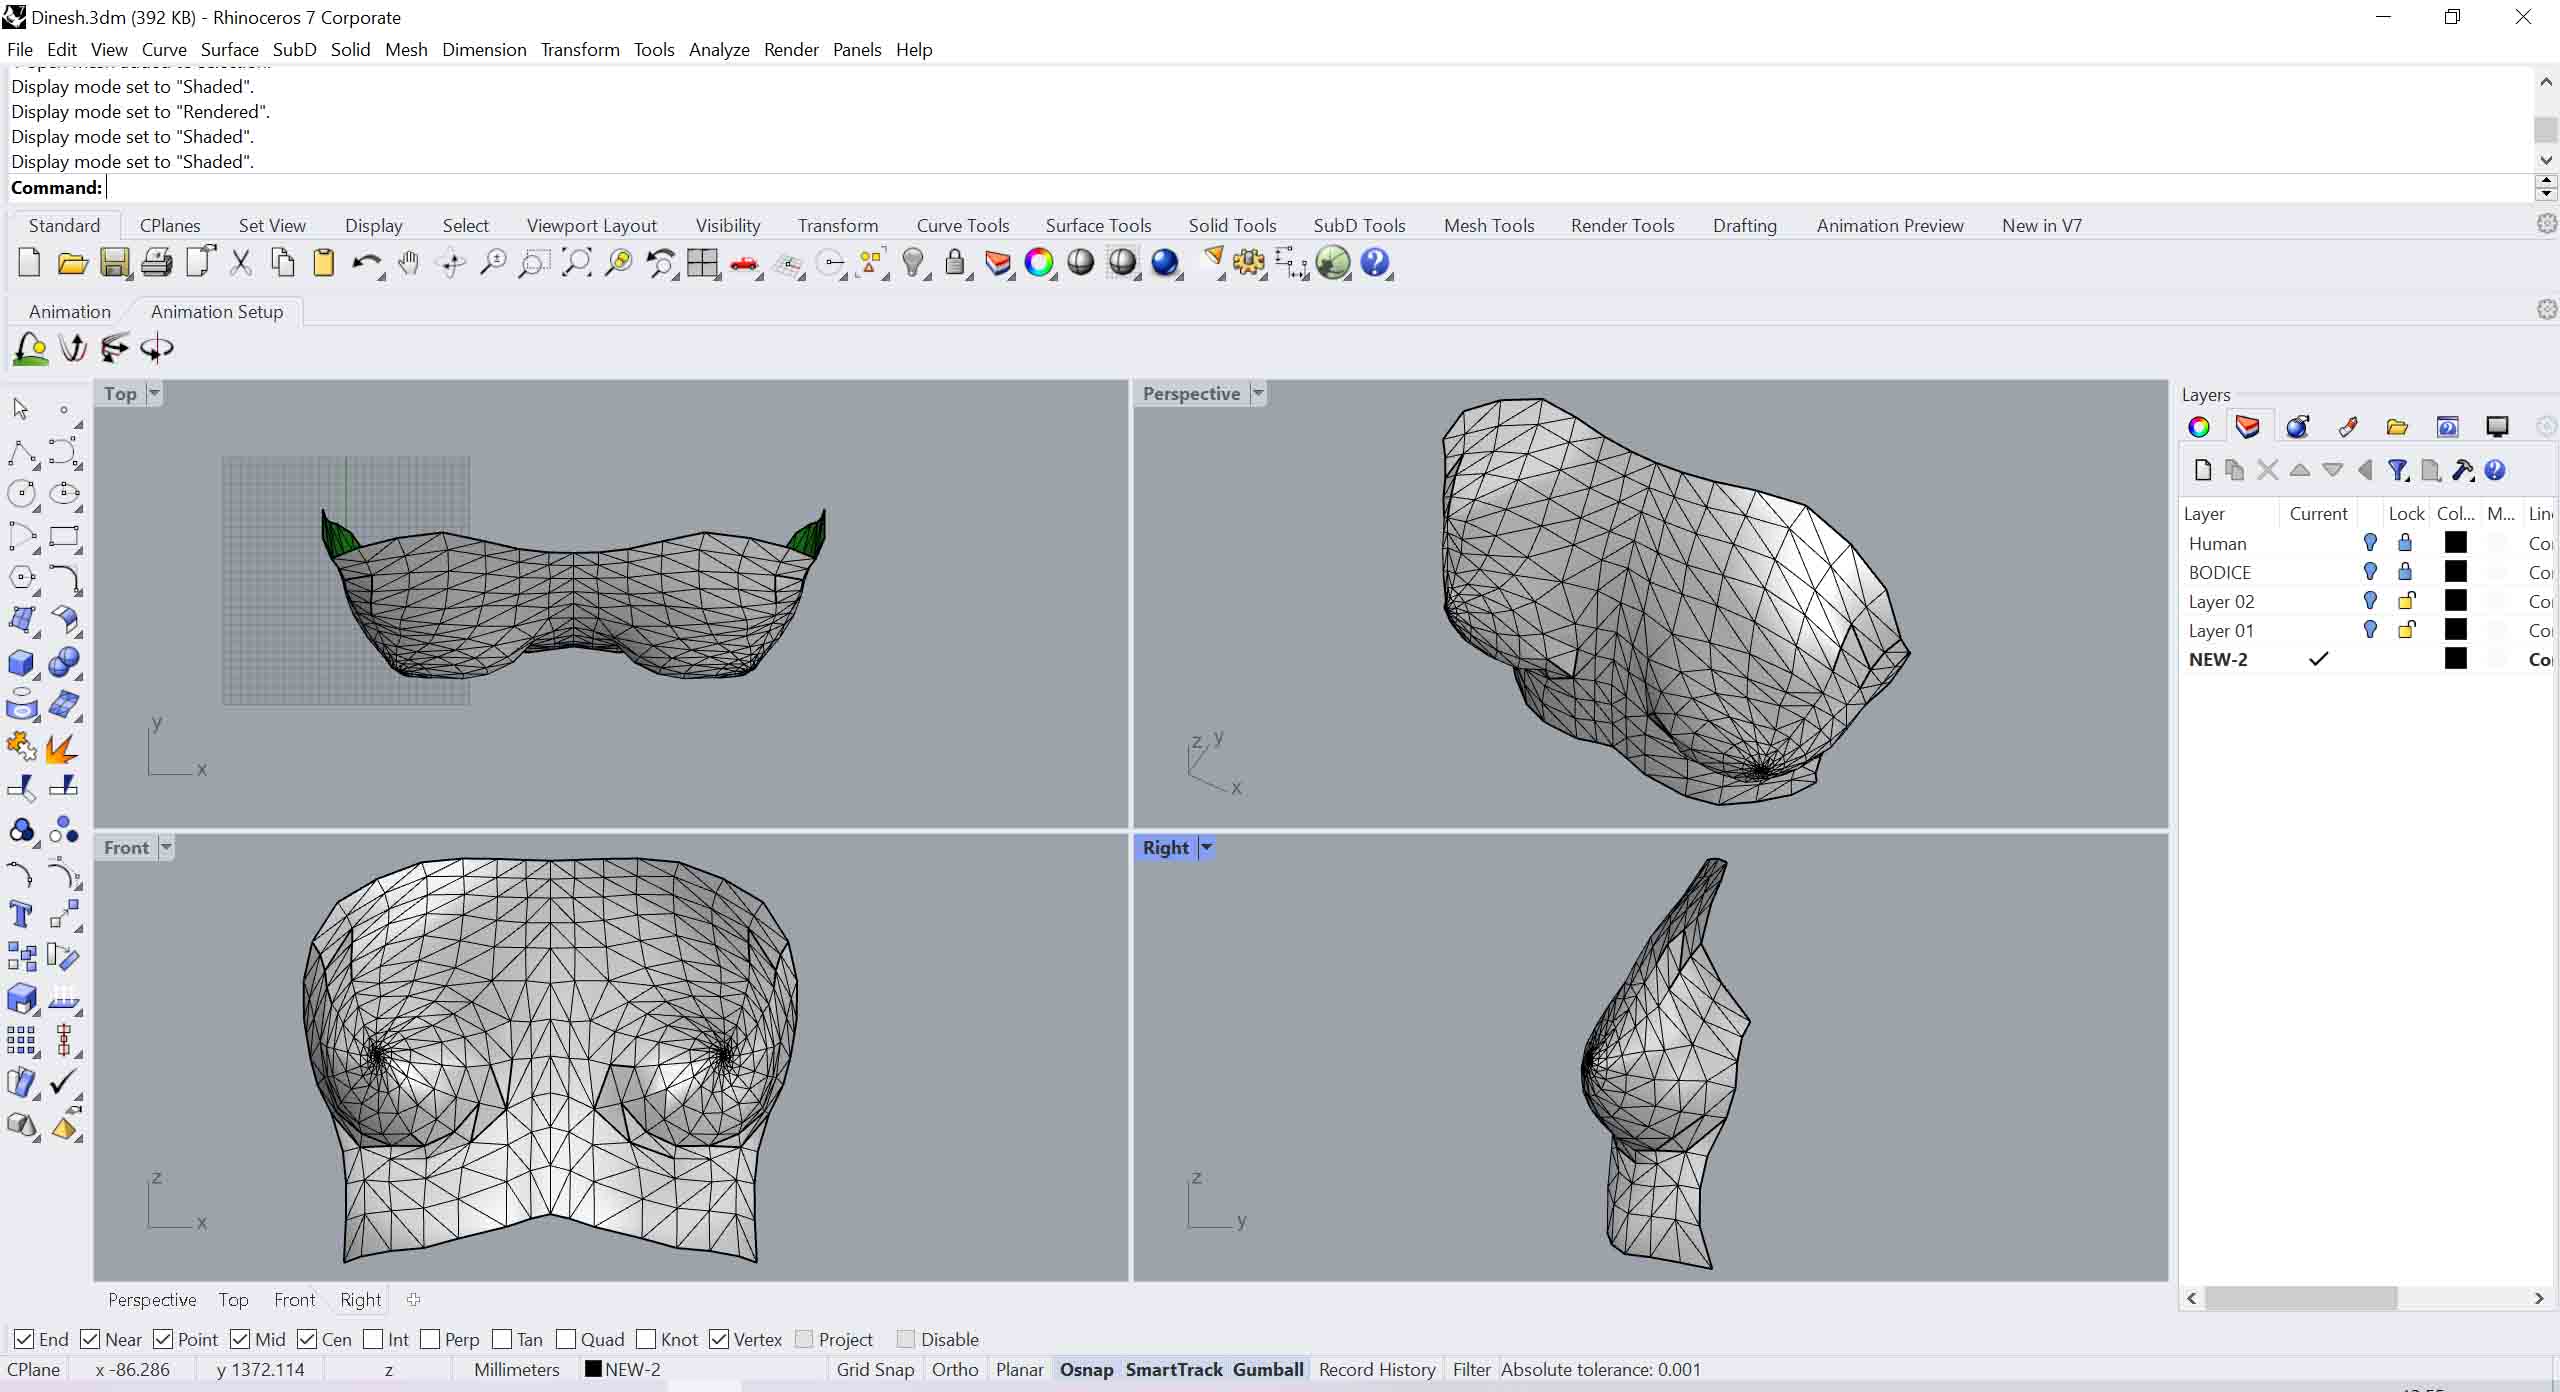
MakeHuman and Rhino process
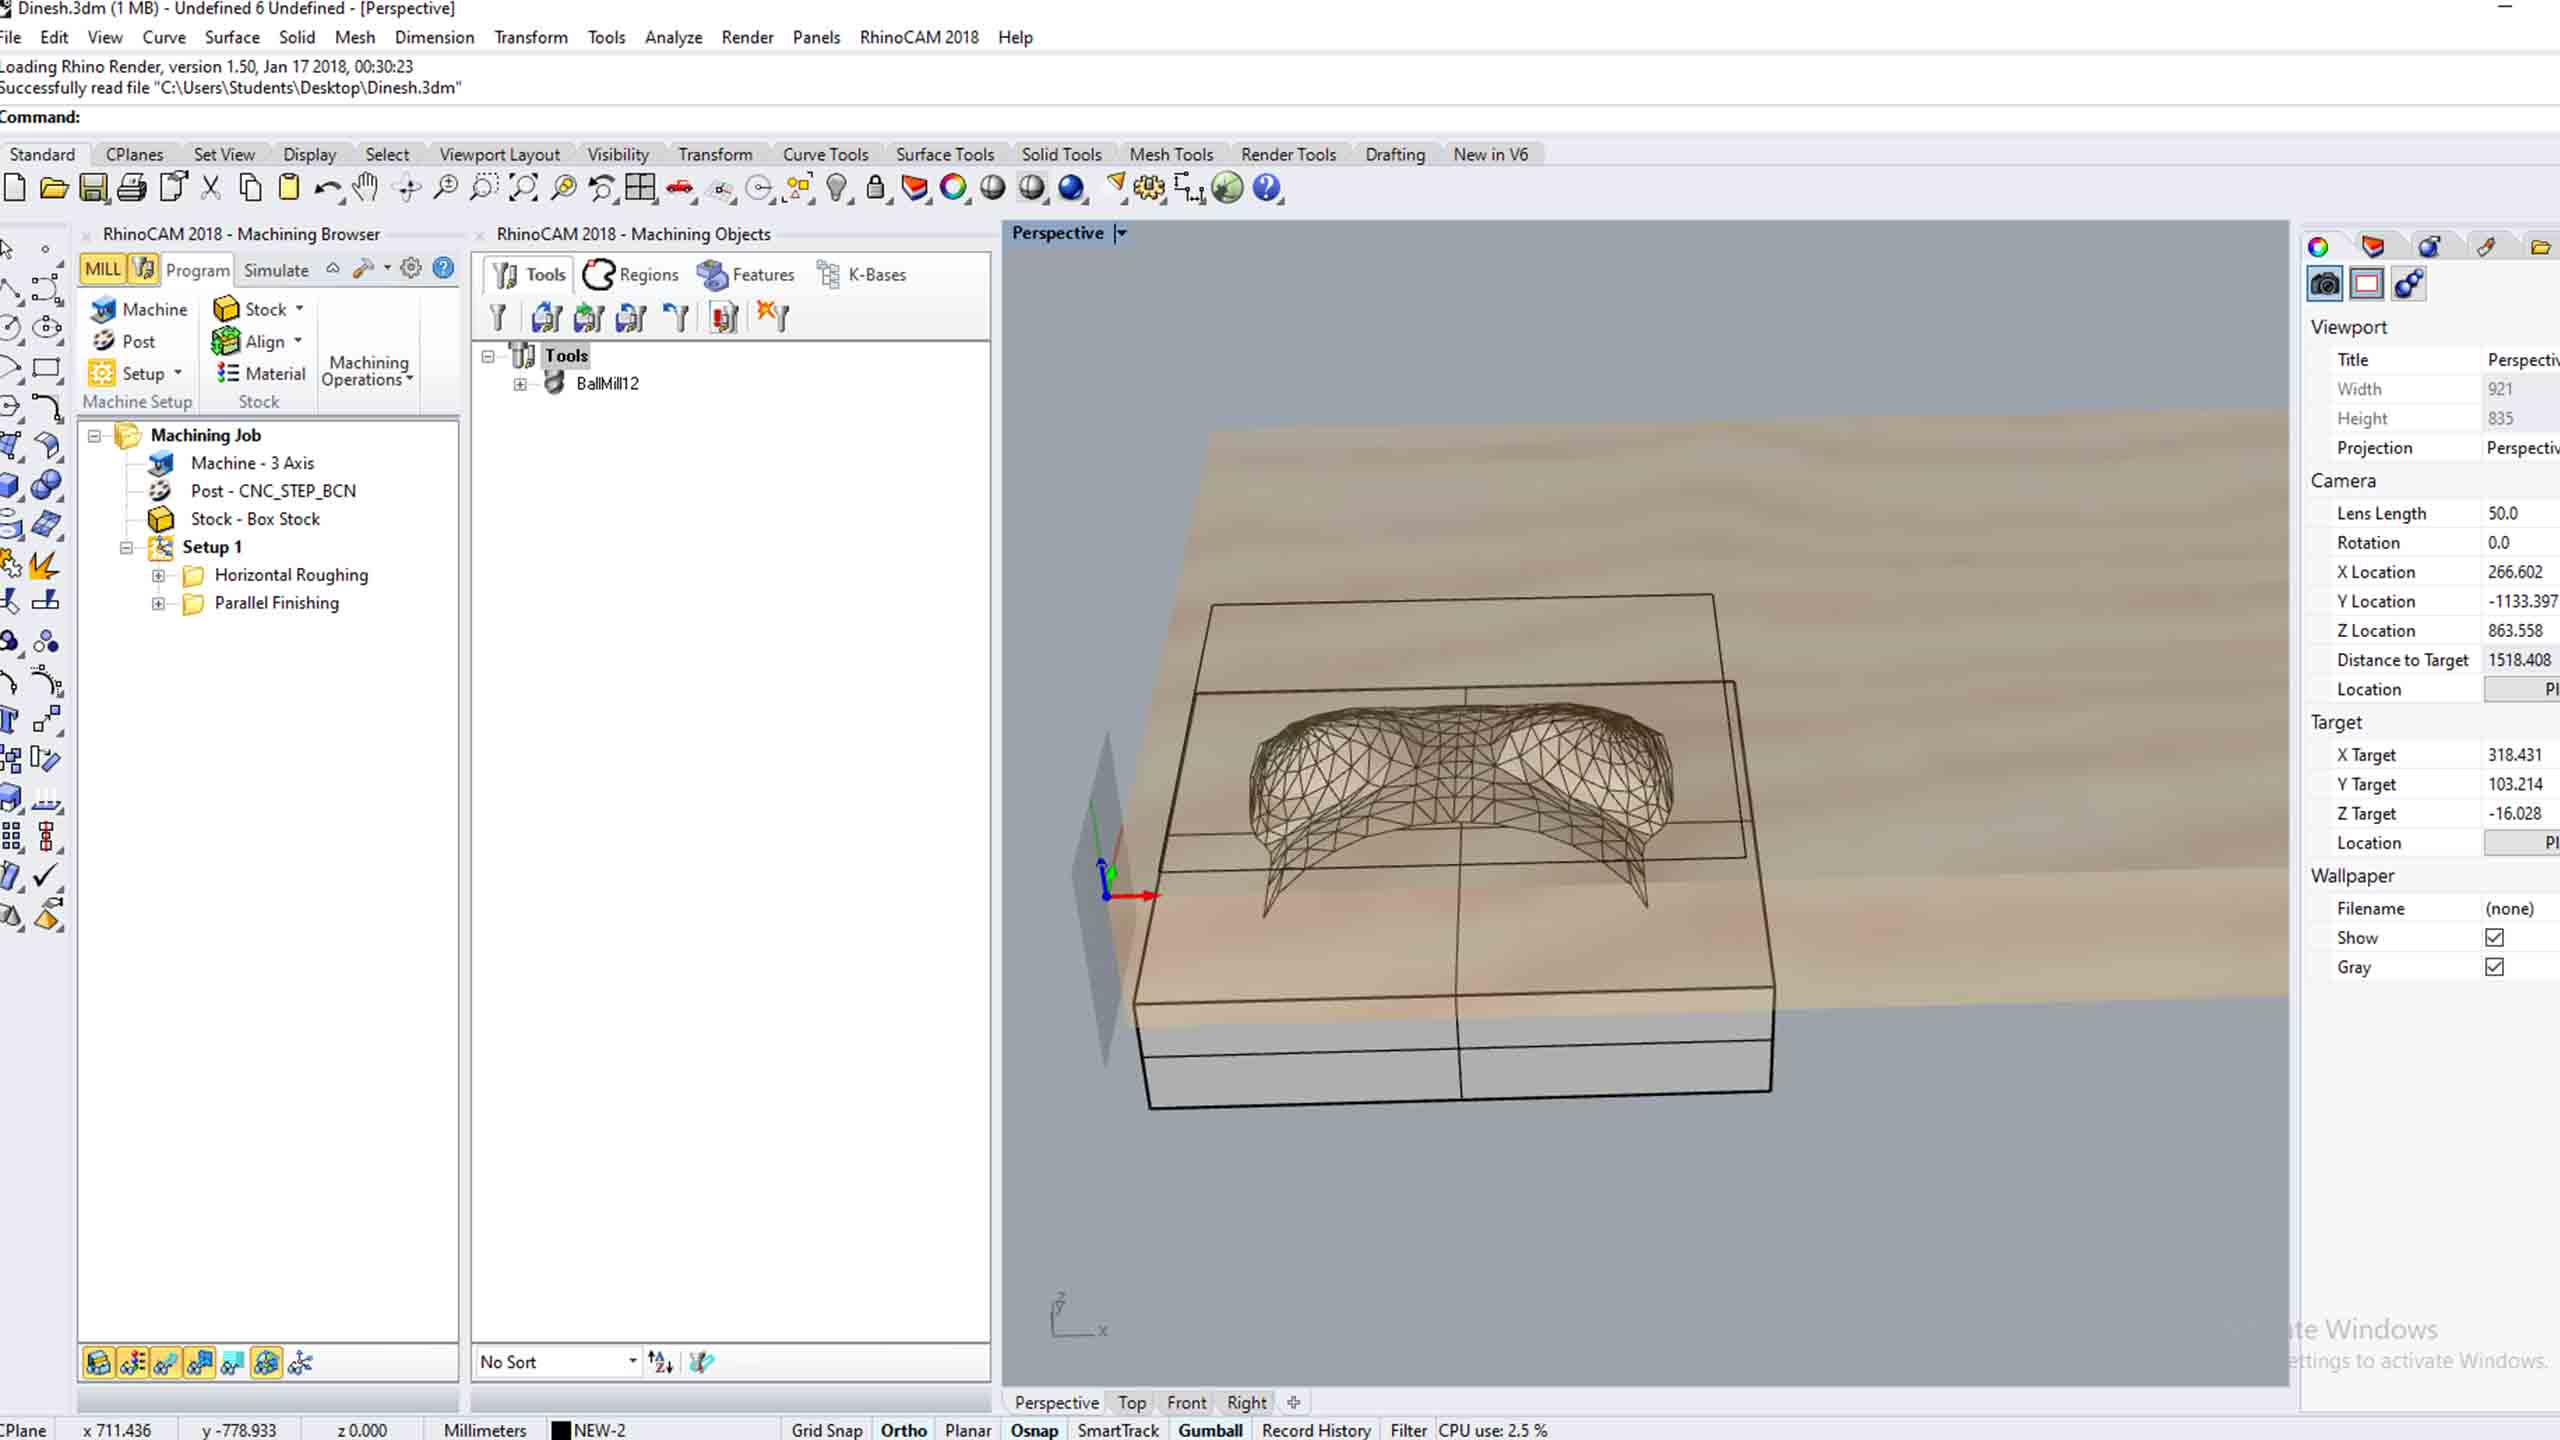
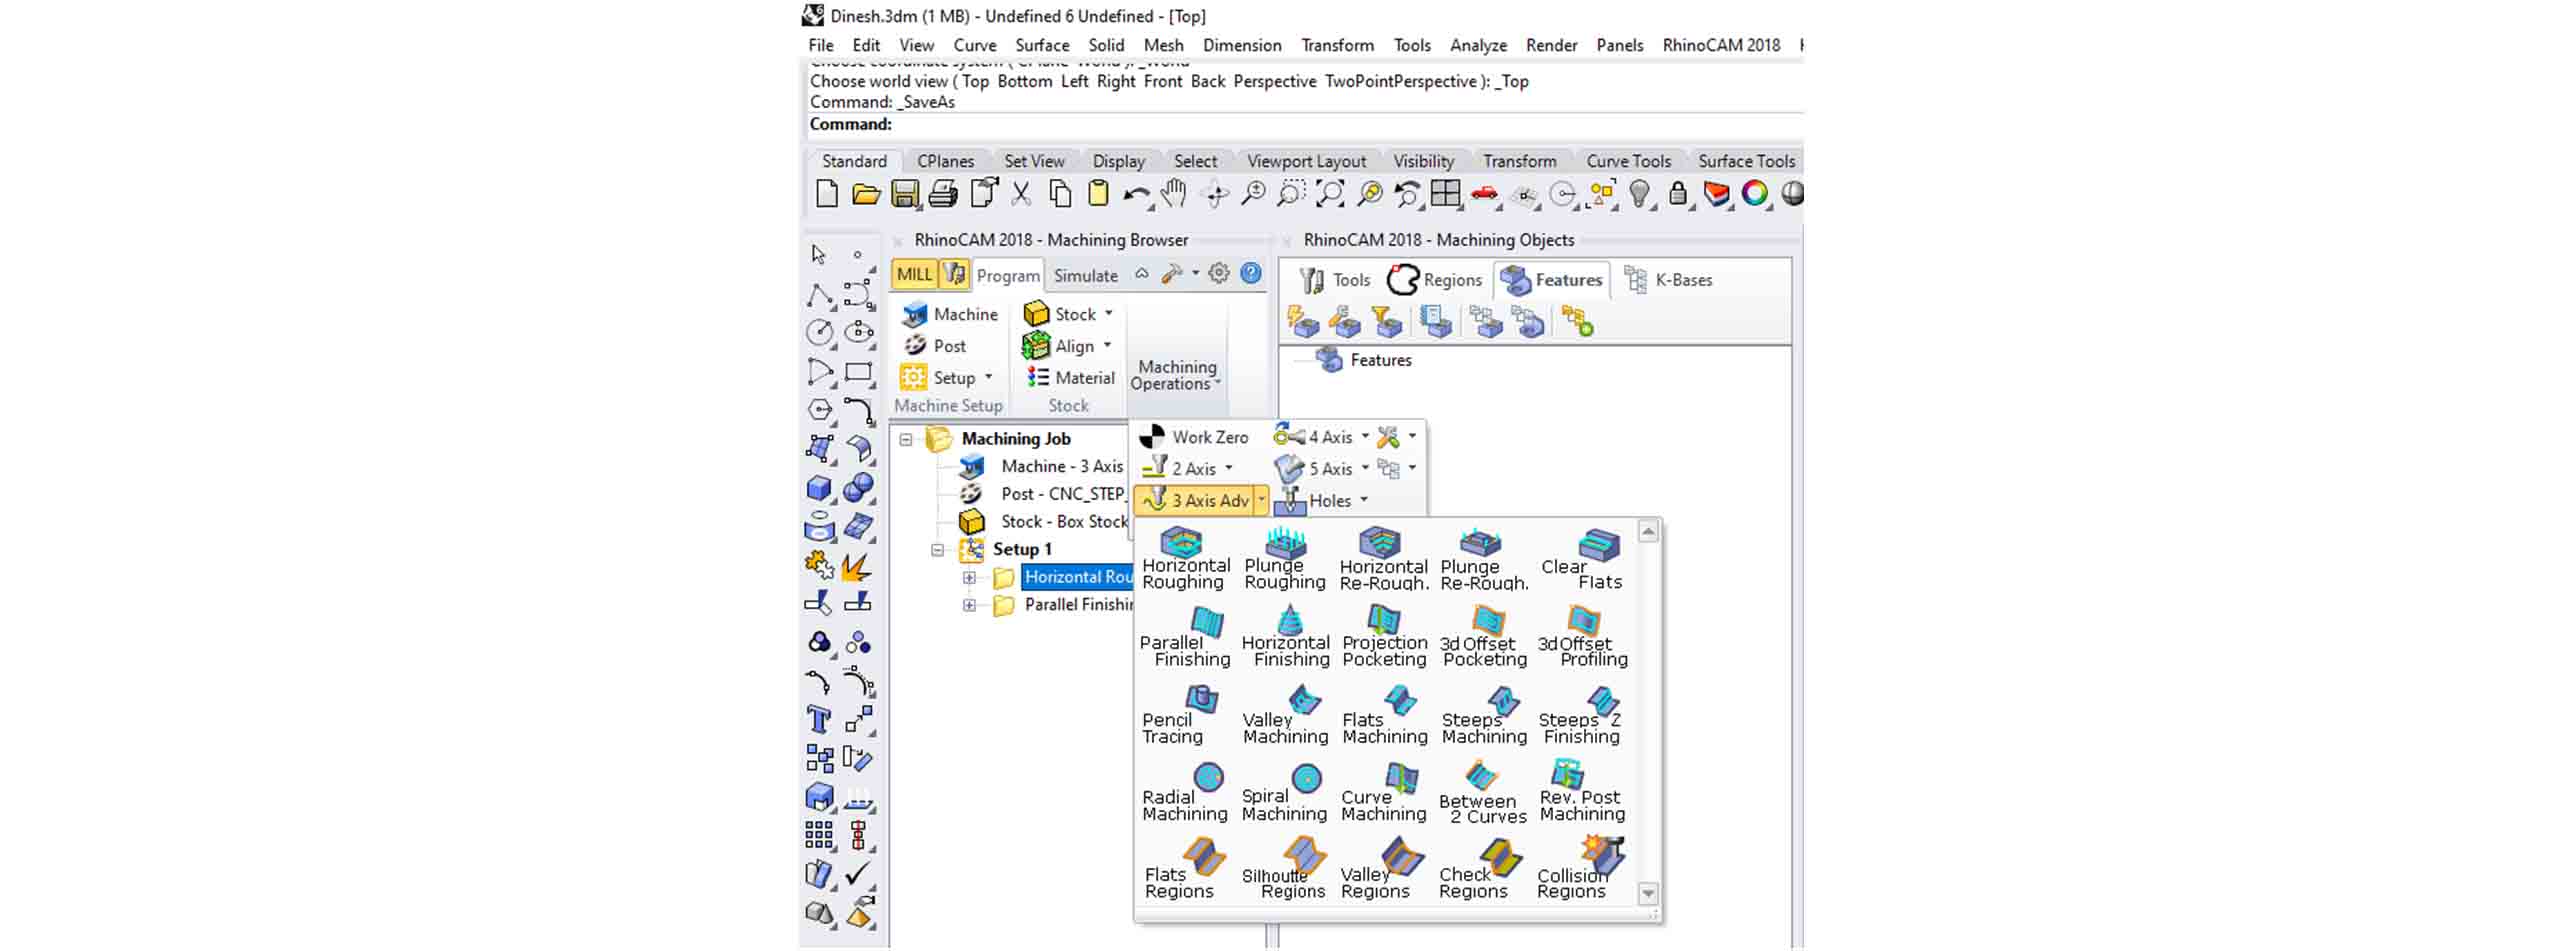
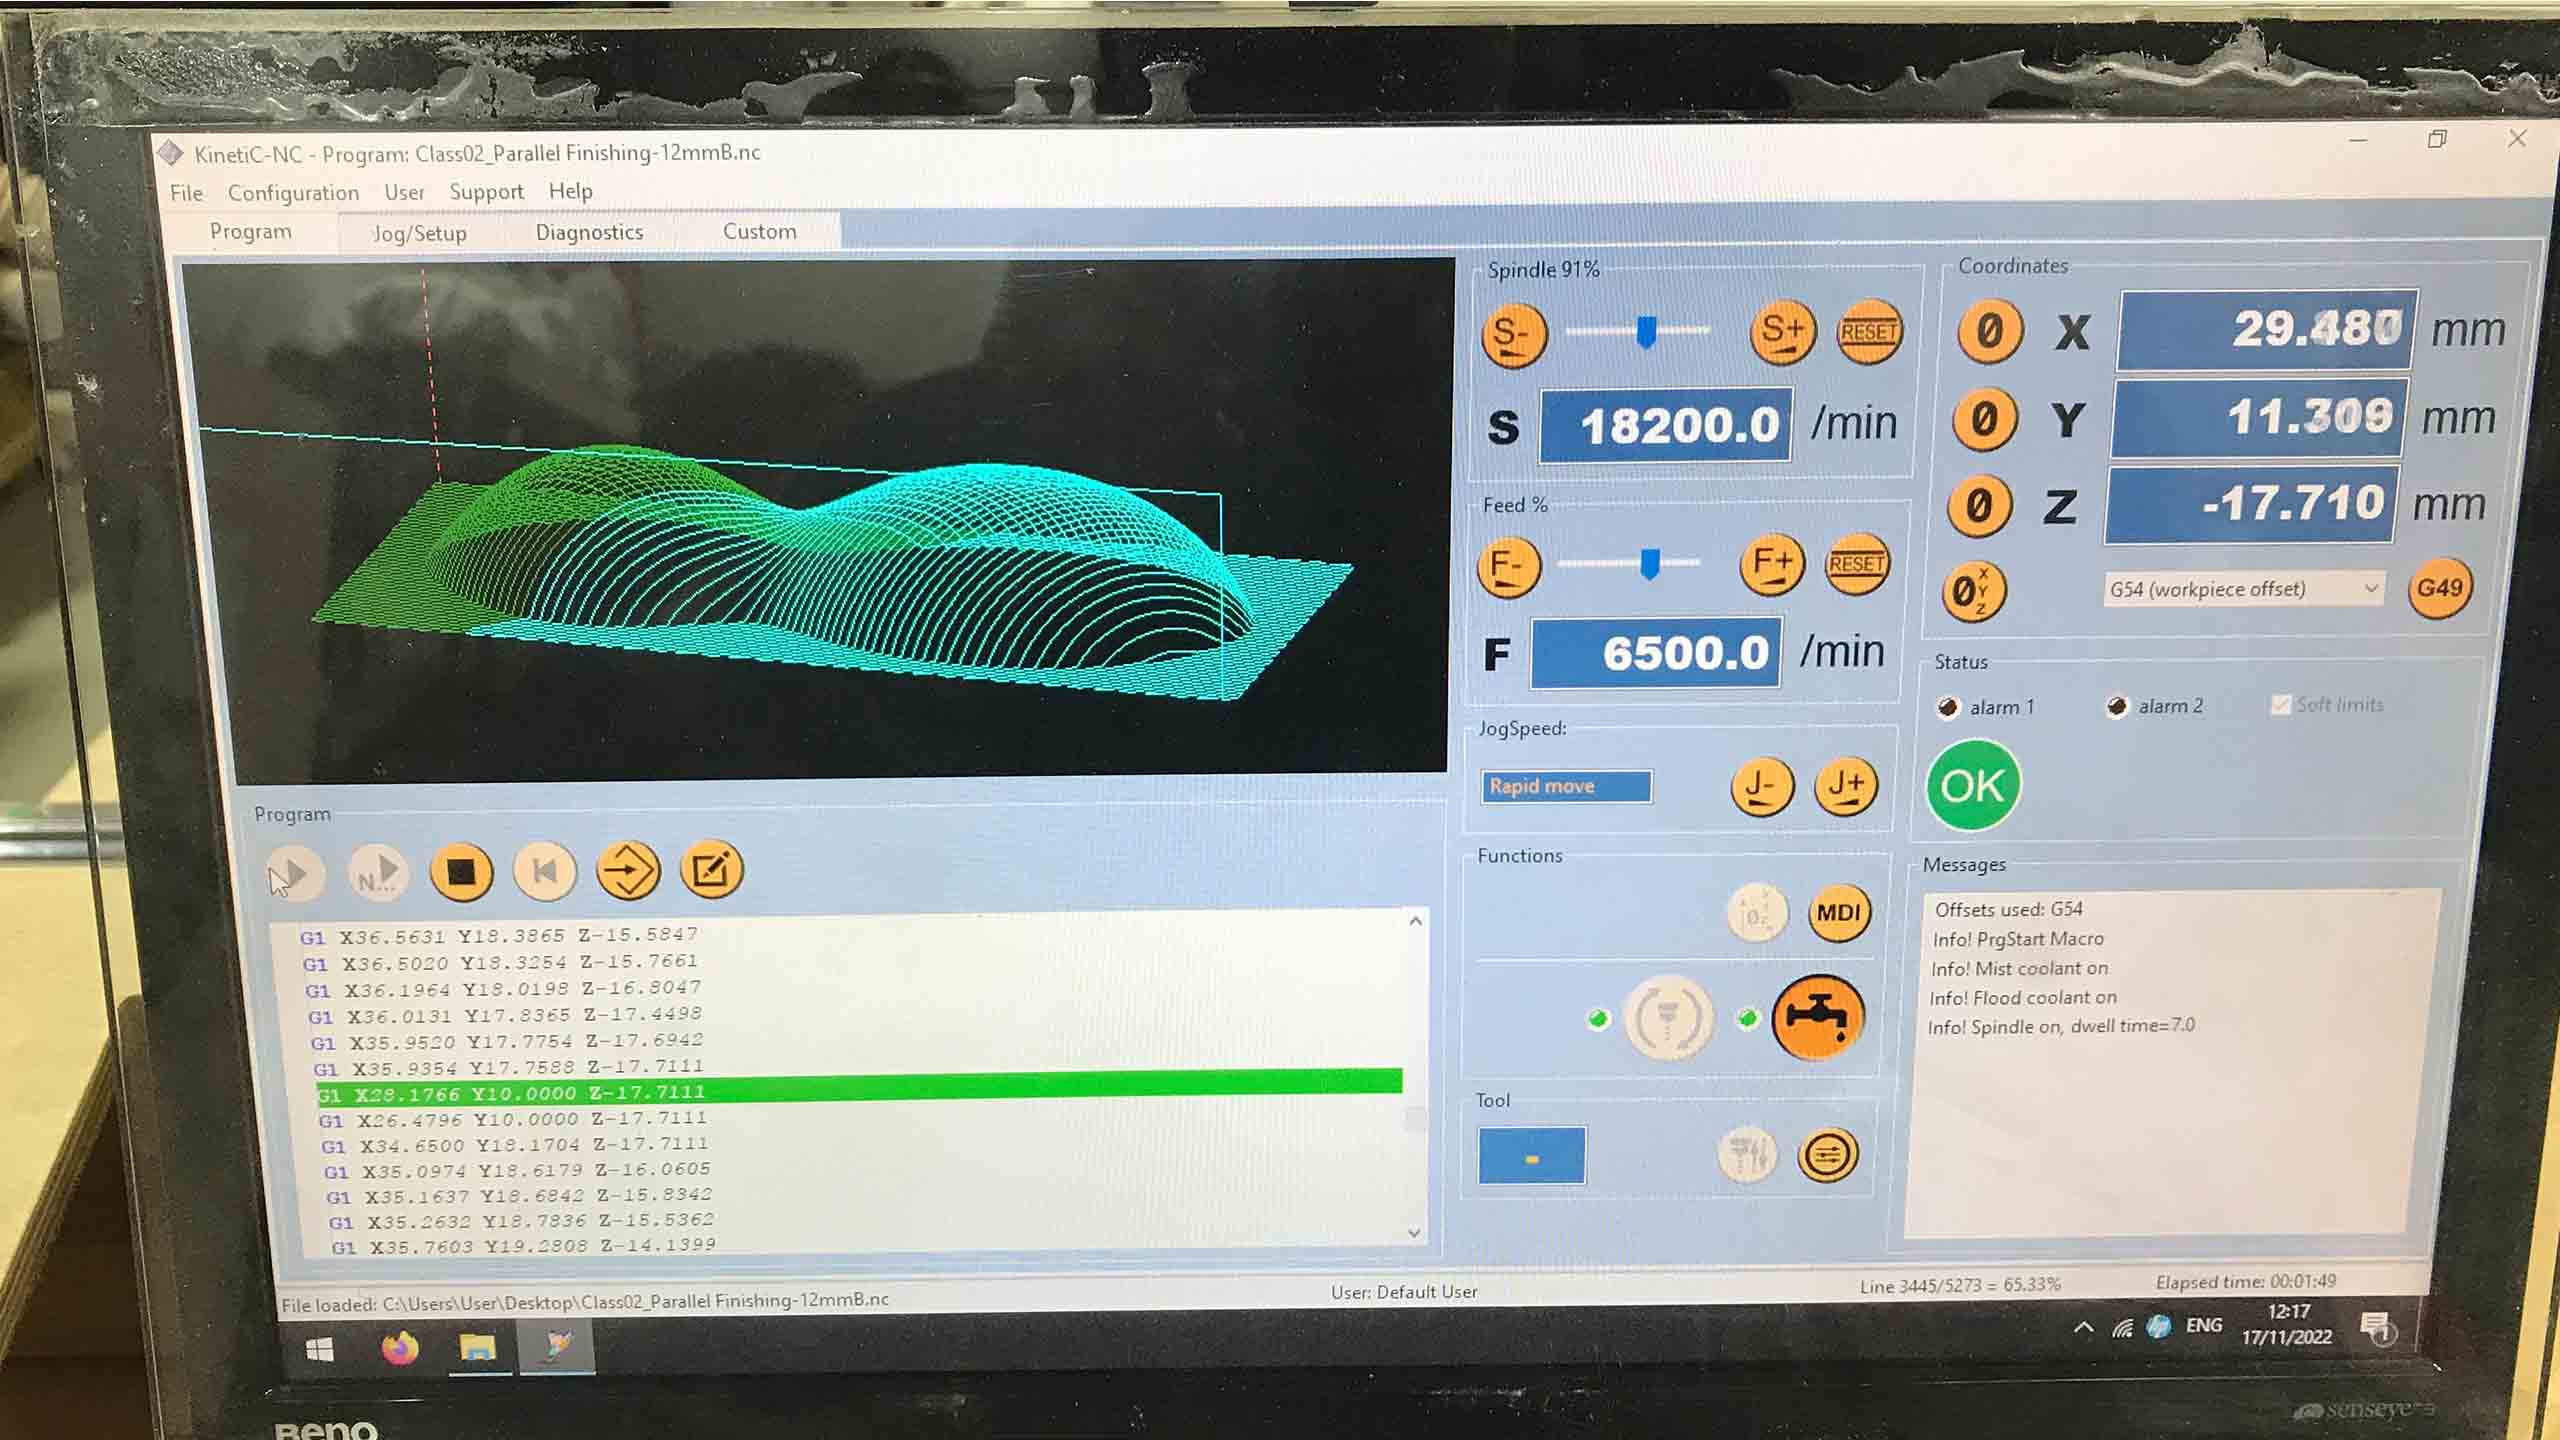
Rhino CAM
Rhino CAM workings
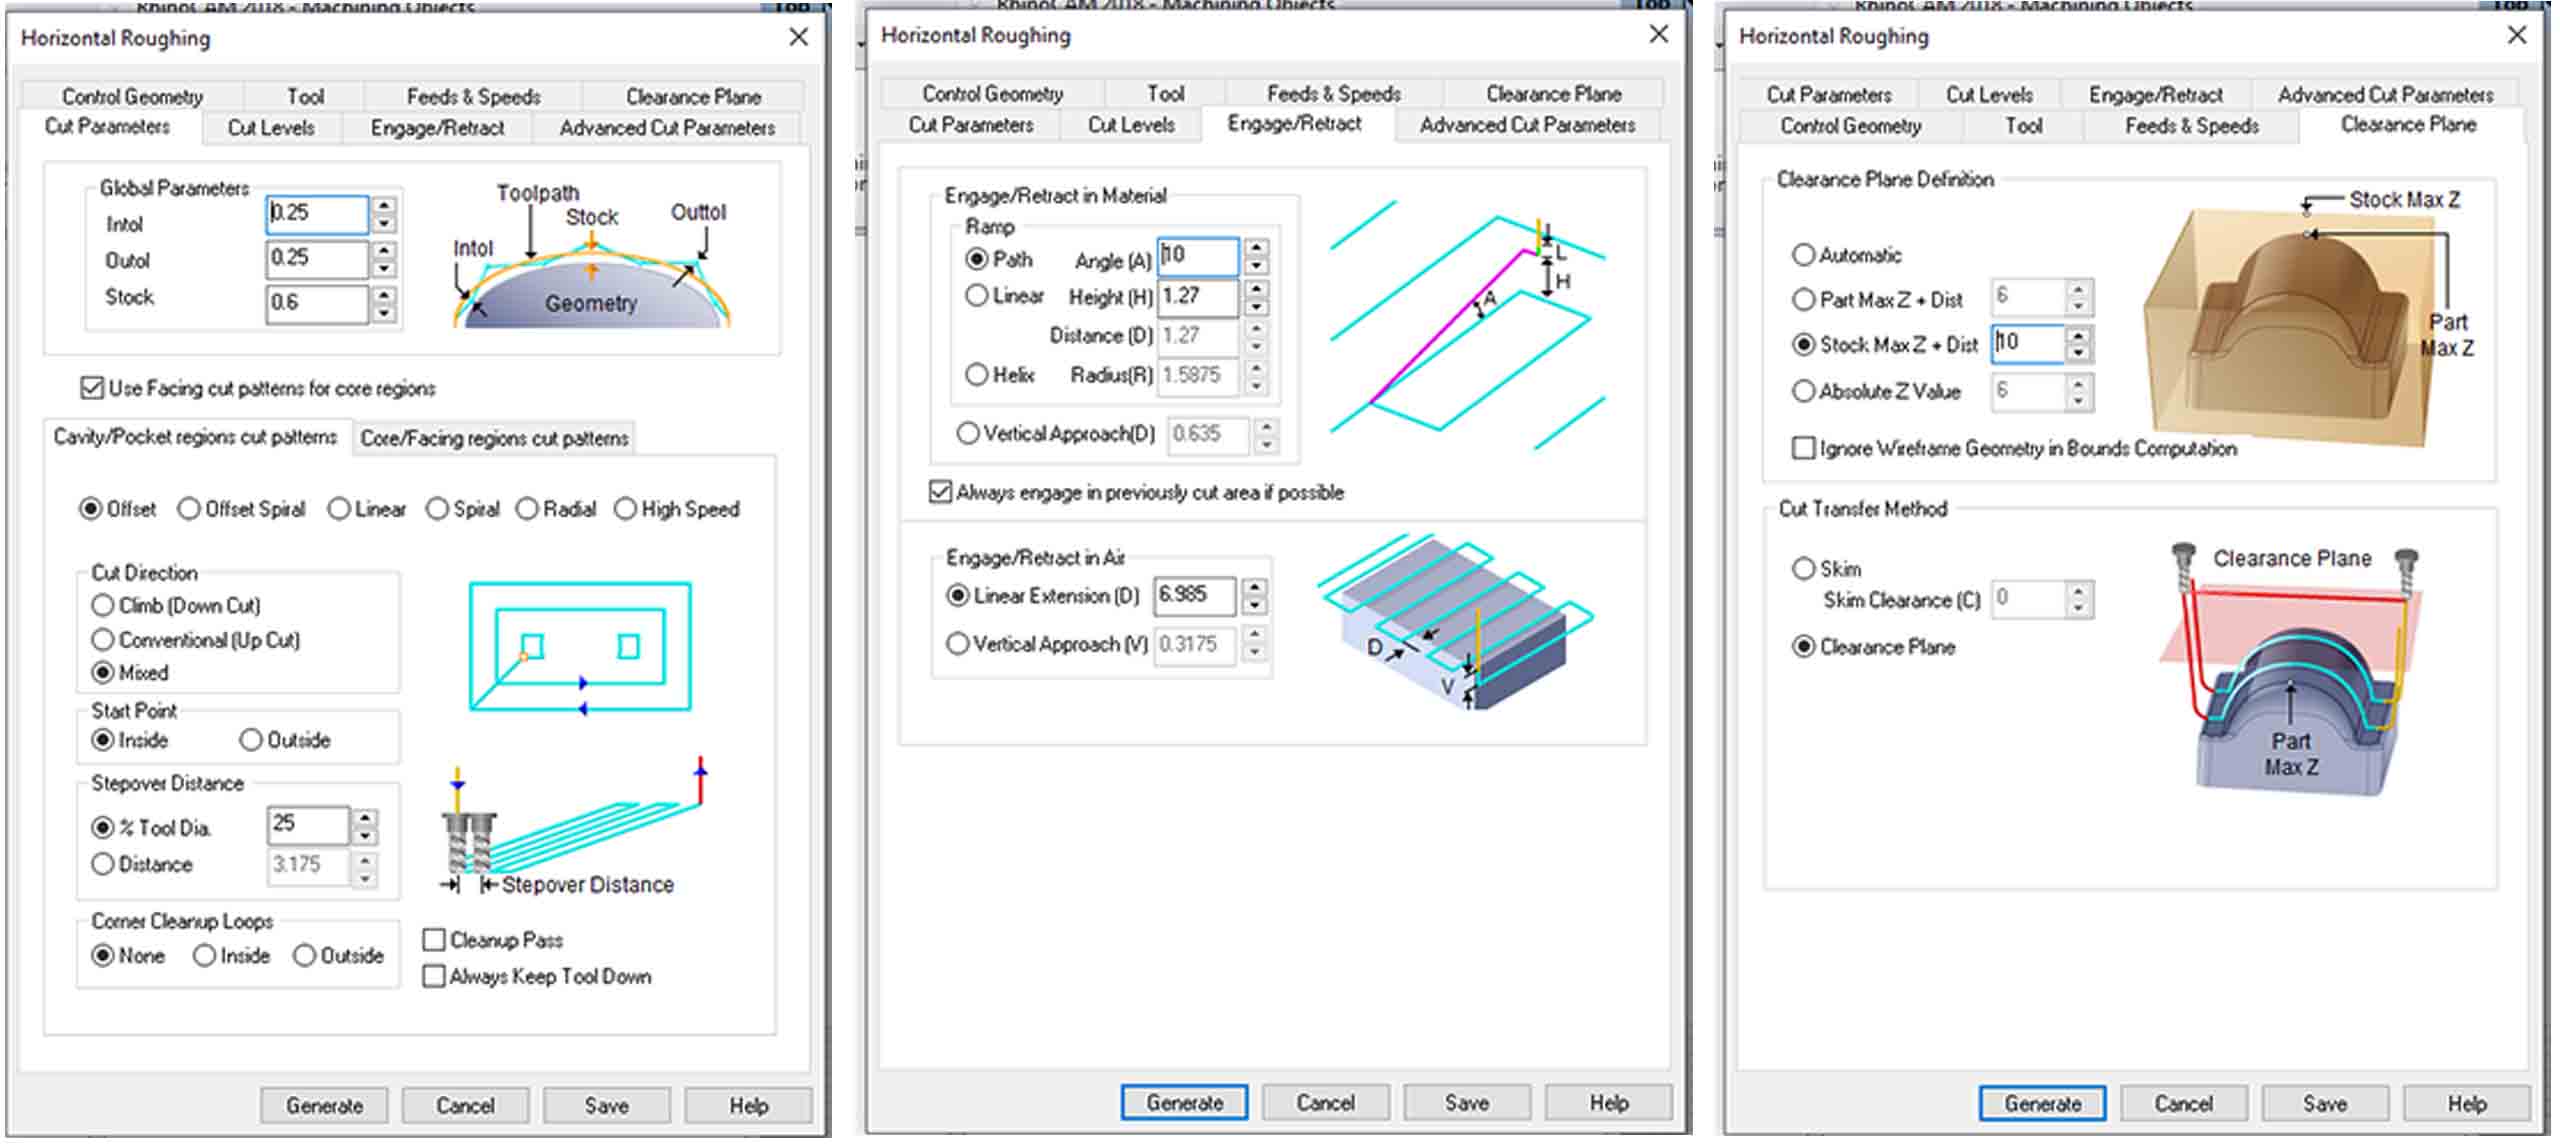
Rhino CAM Settings
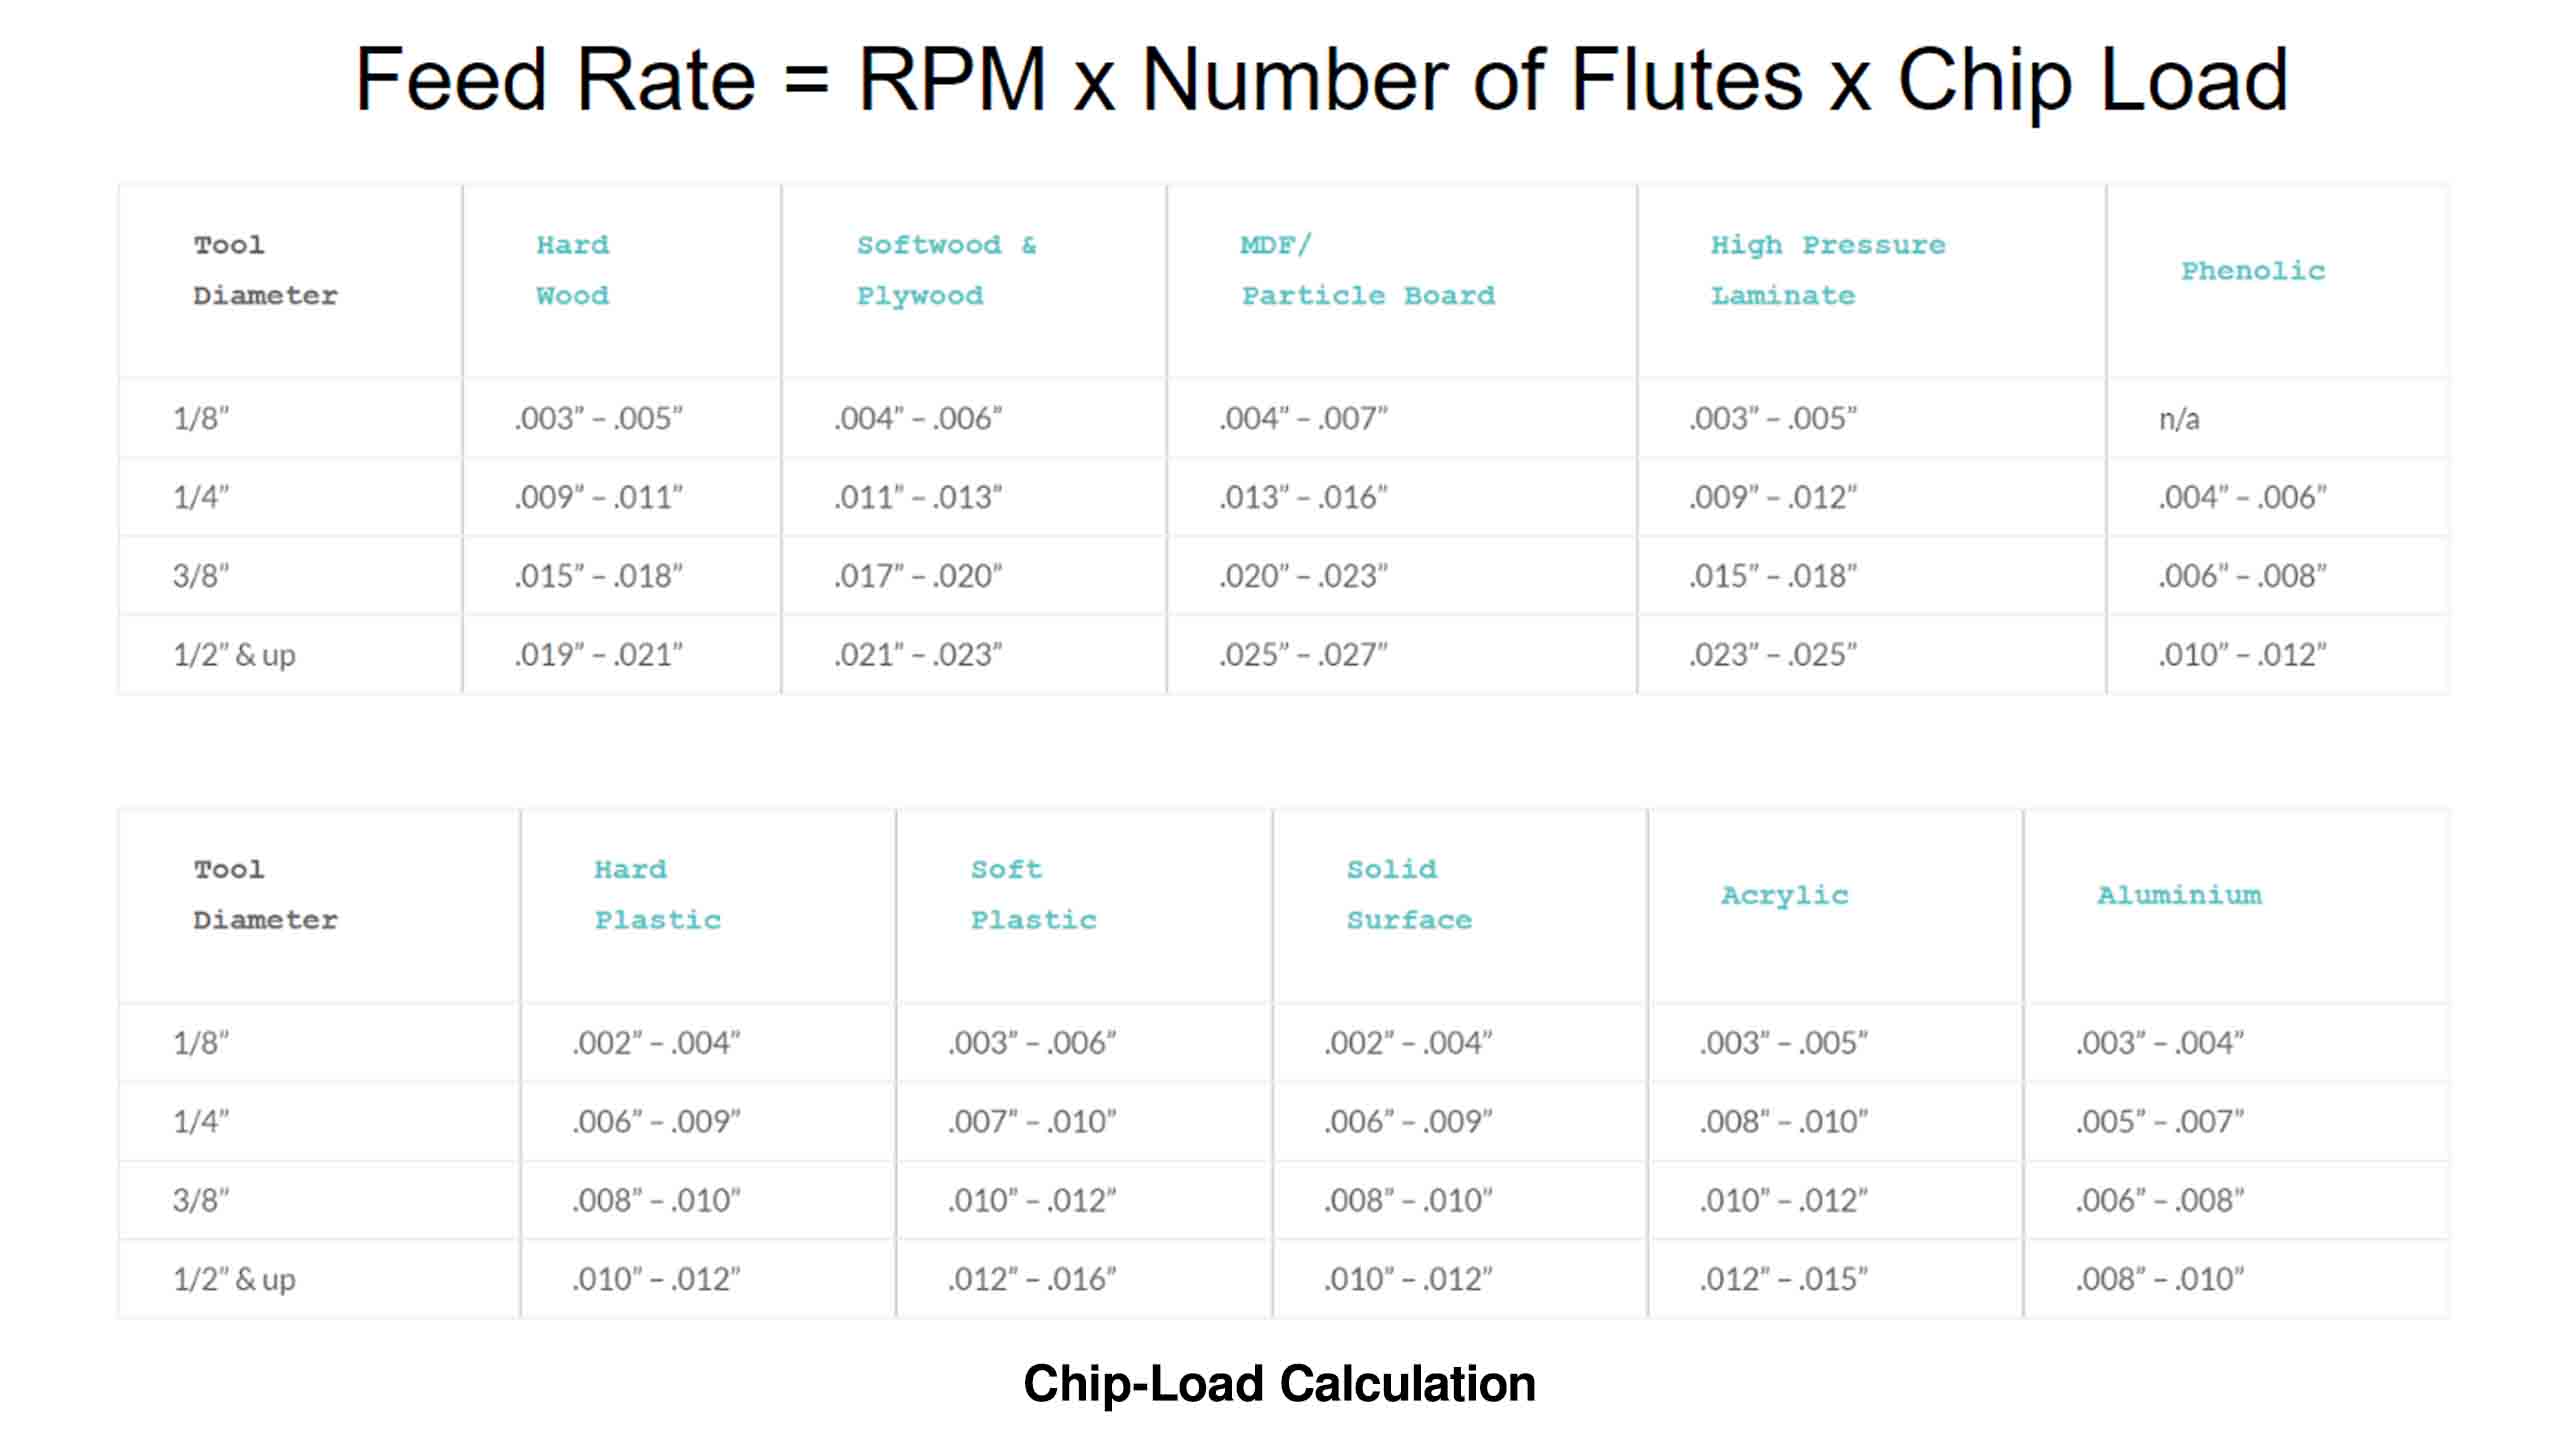
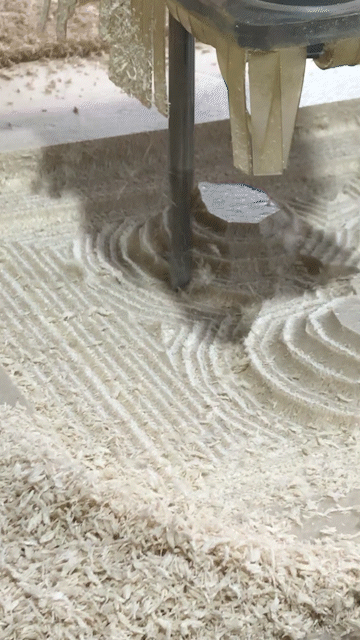
CNC Milling
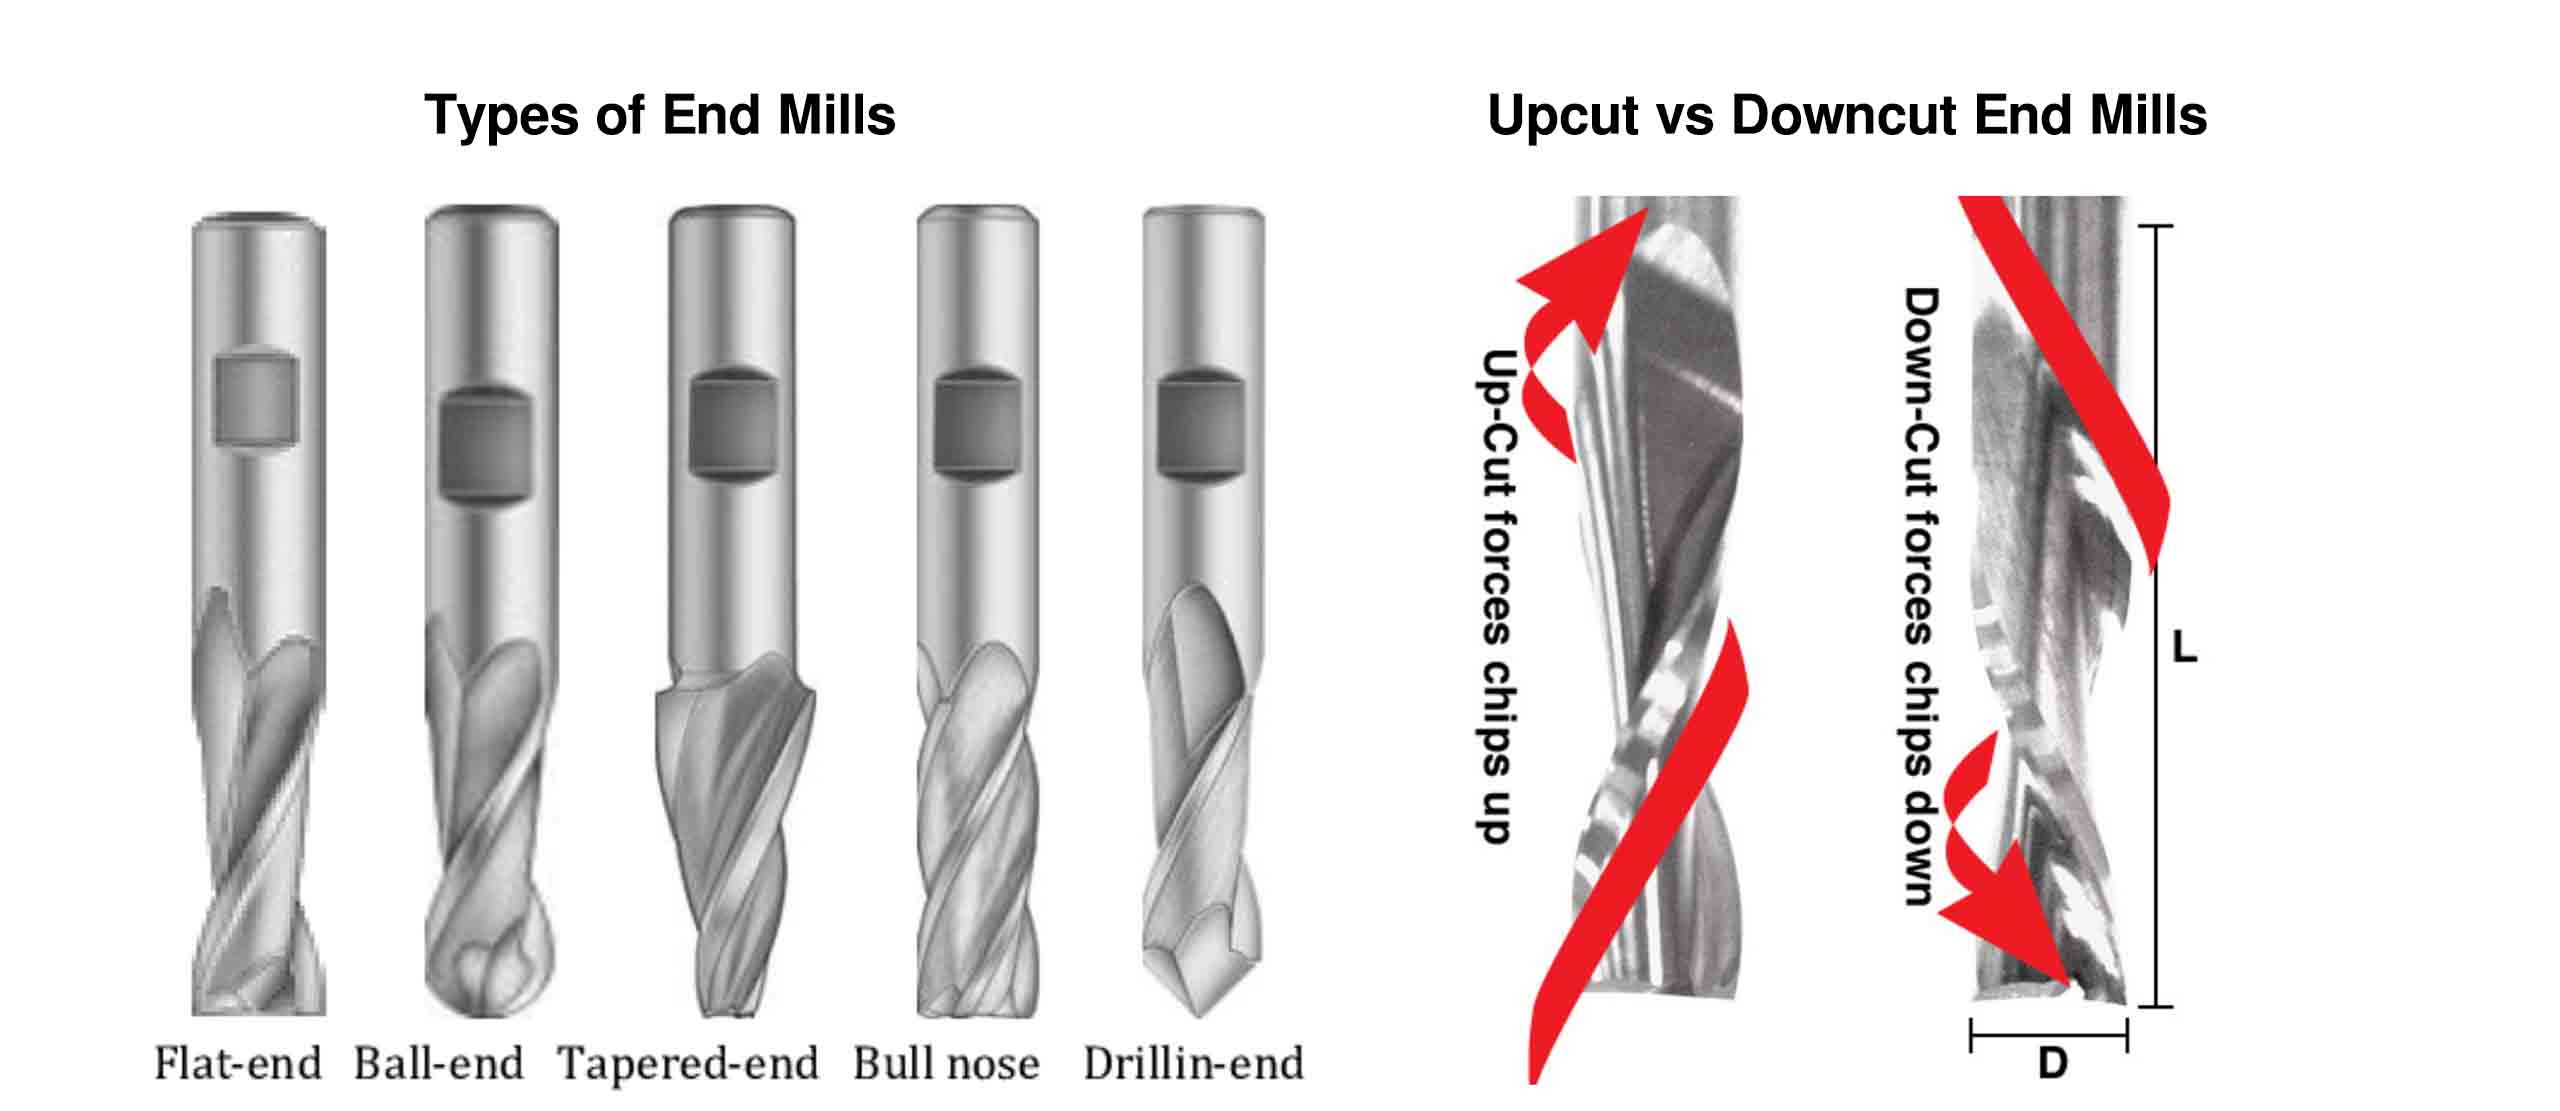
Saftey Tool
While working with CNC machines, it is important to wear safety gear.

CNC Meaching Setting
Clamp all the 4 sides before milling.
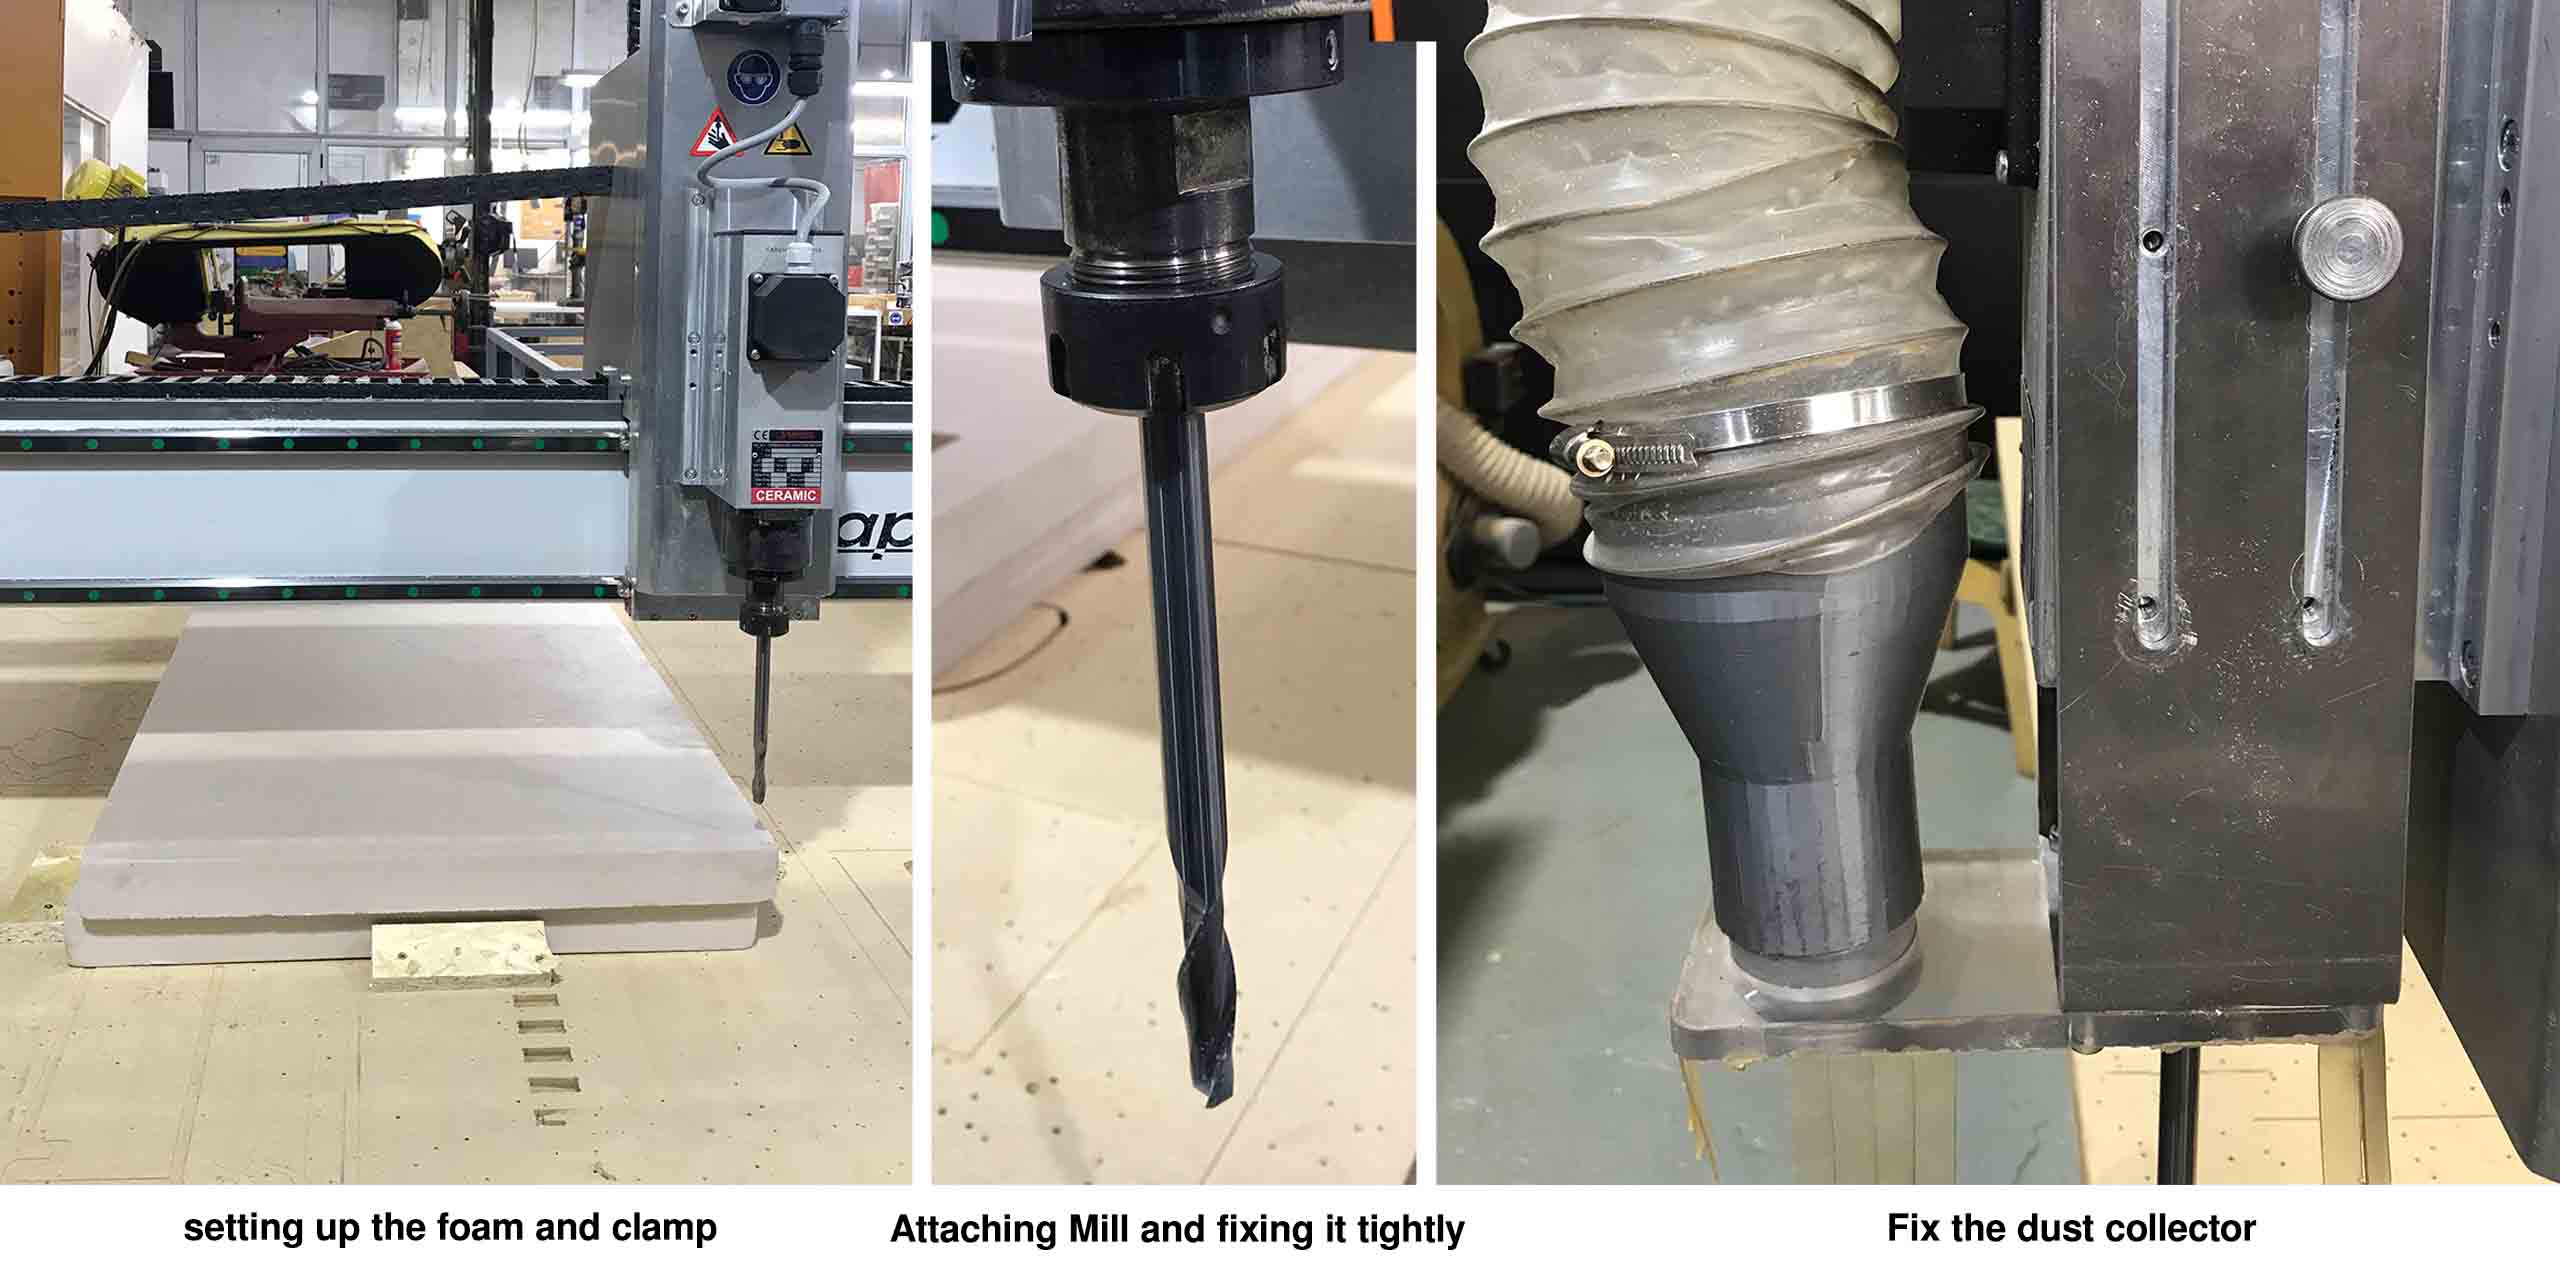
Computer Settings
Milling Process
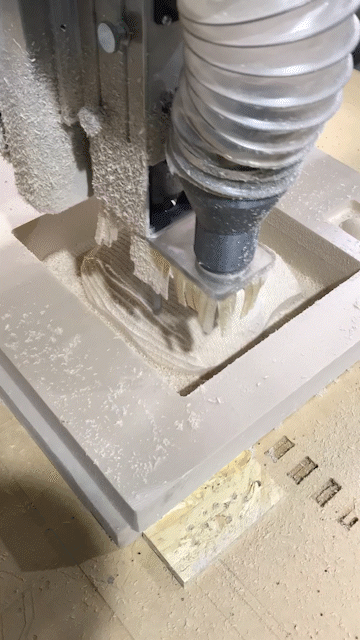
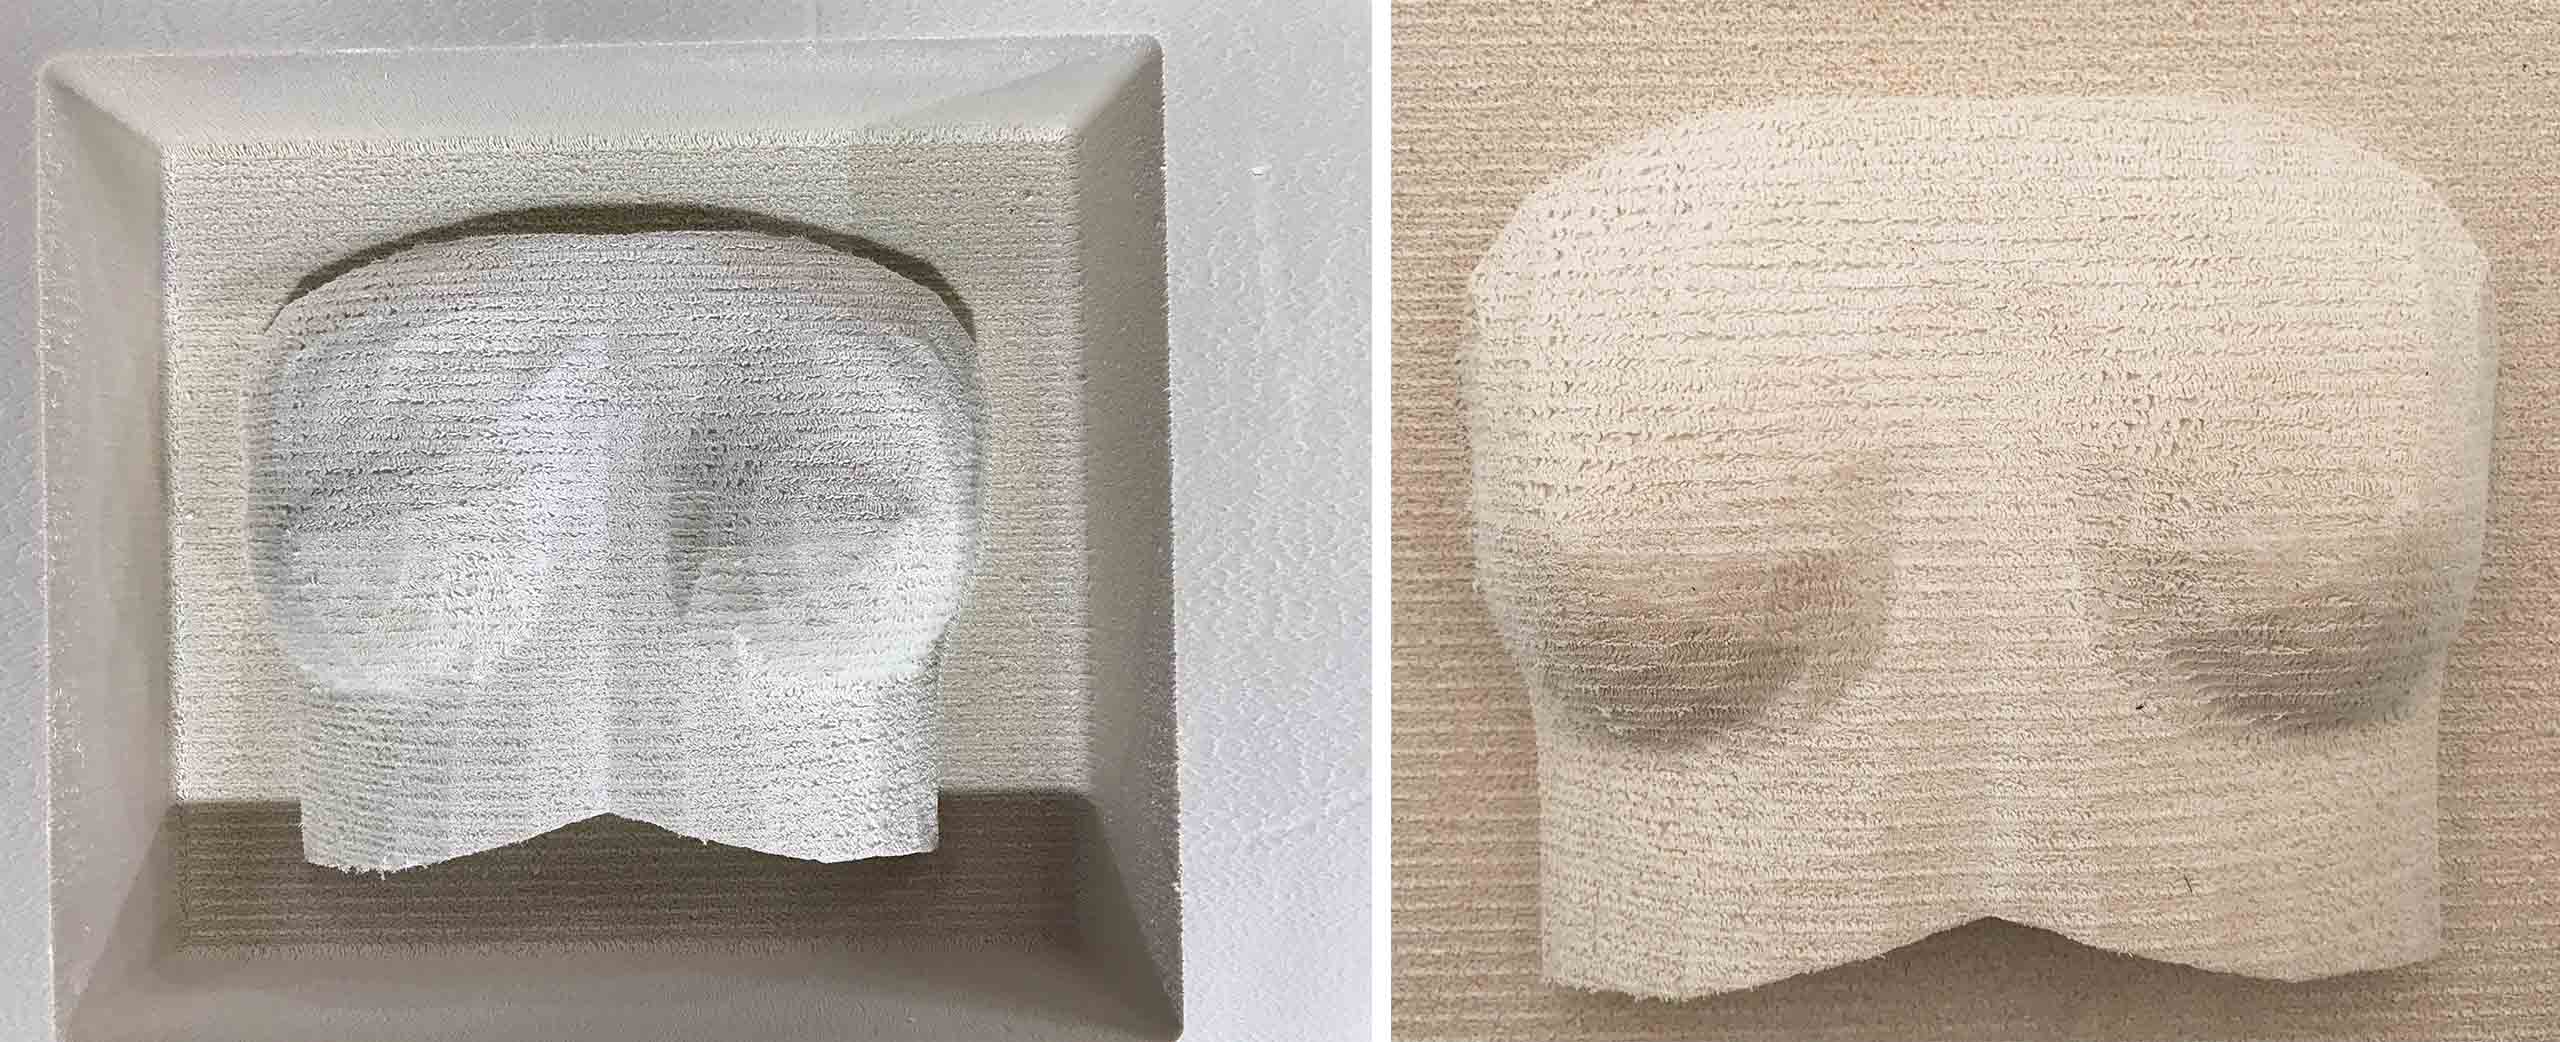
Final Mold
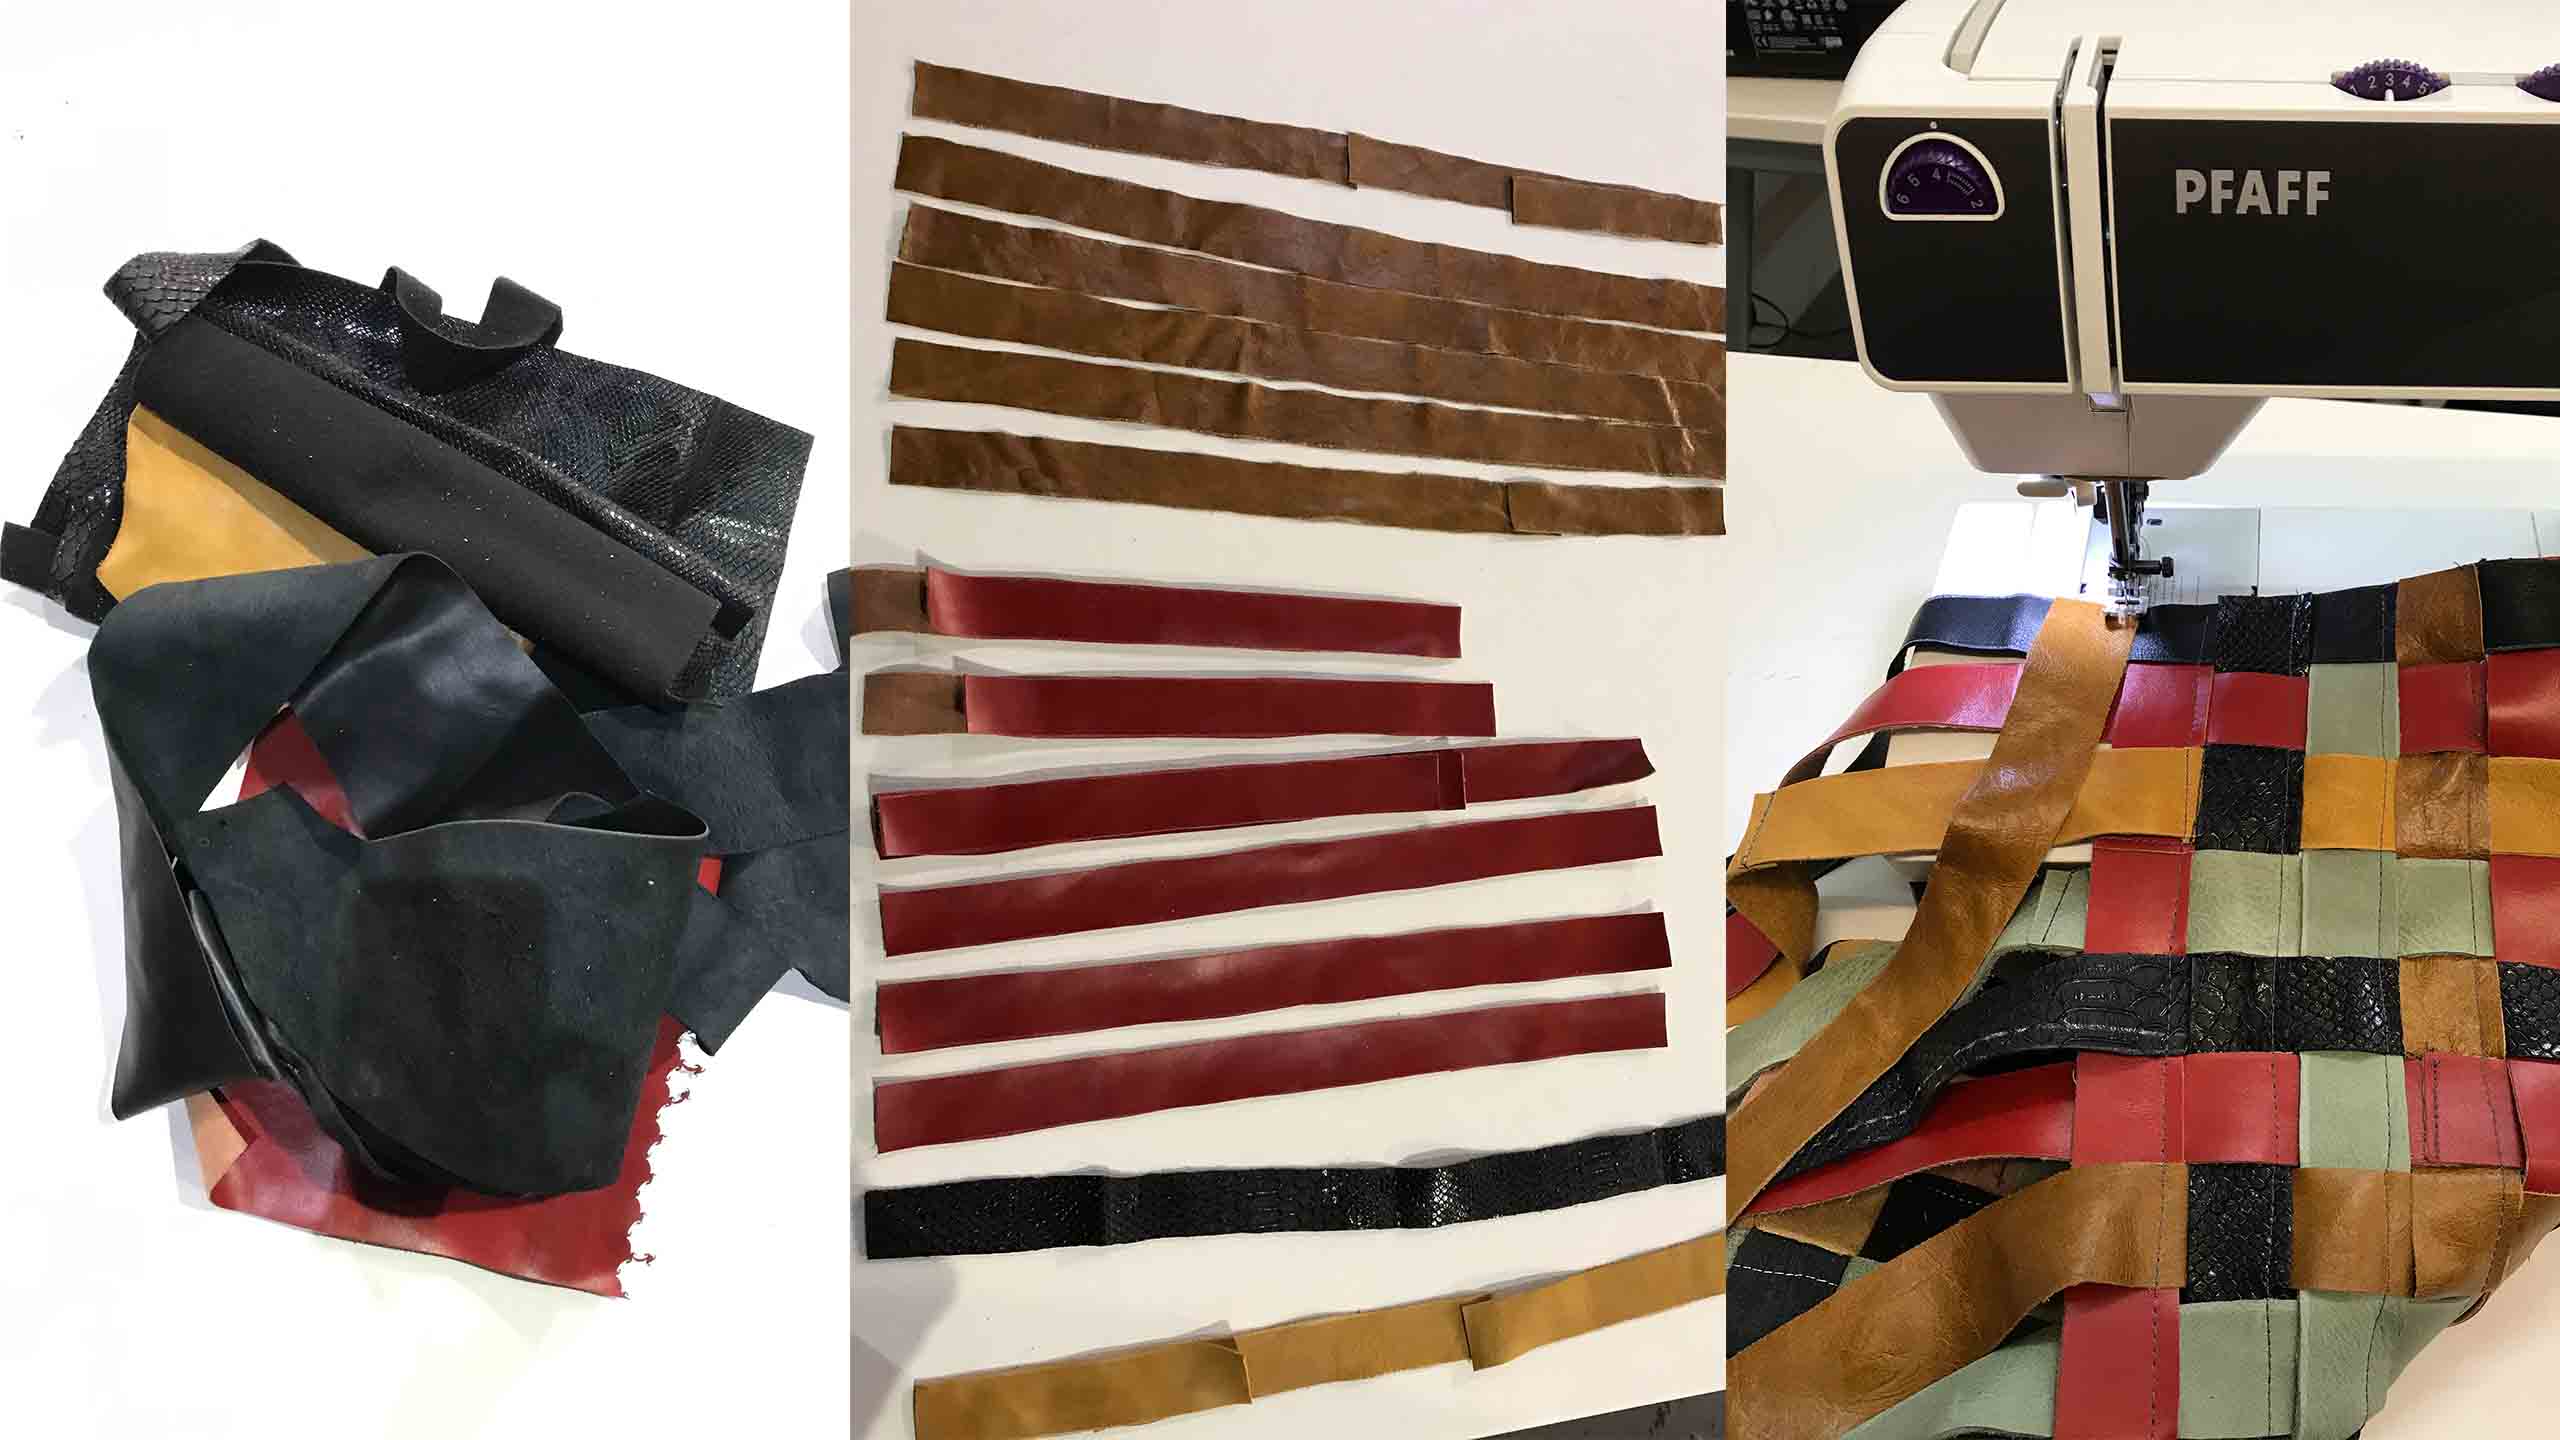
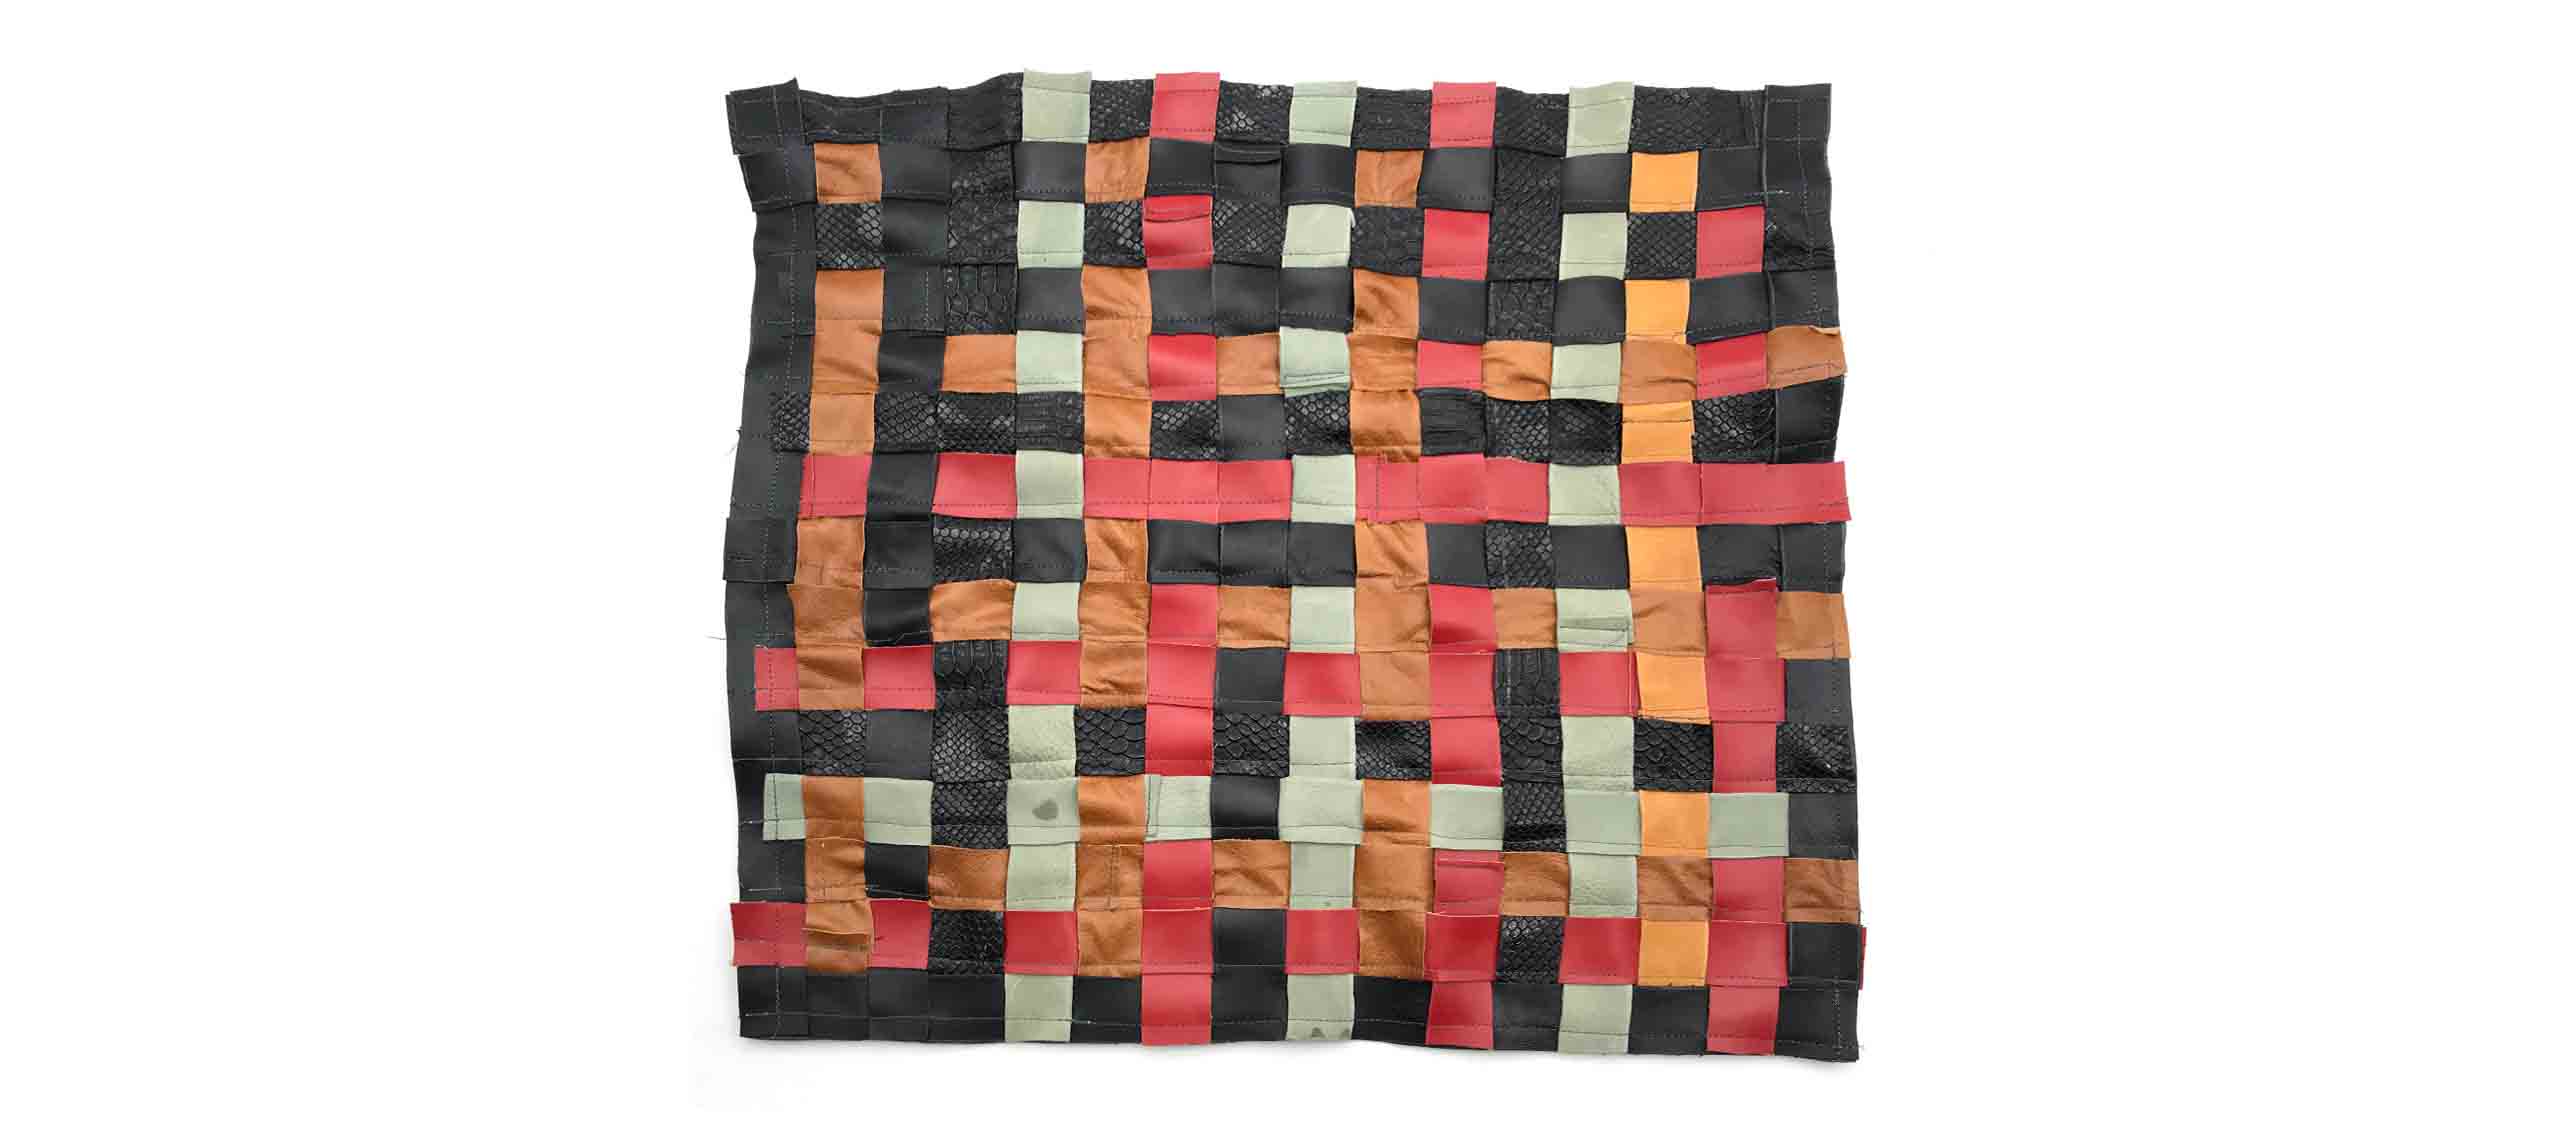
Leather Molding process
The moulding here is made from leather scraps. I cut them into strips, then weaved and stitched them together. Here are some pictures showing how the process is done and how it looks stitched.
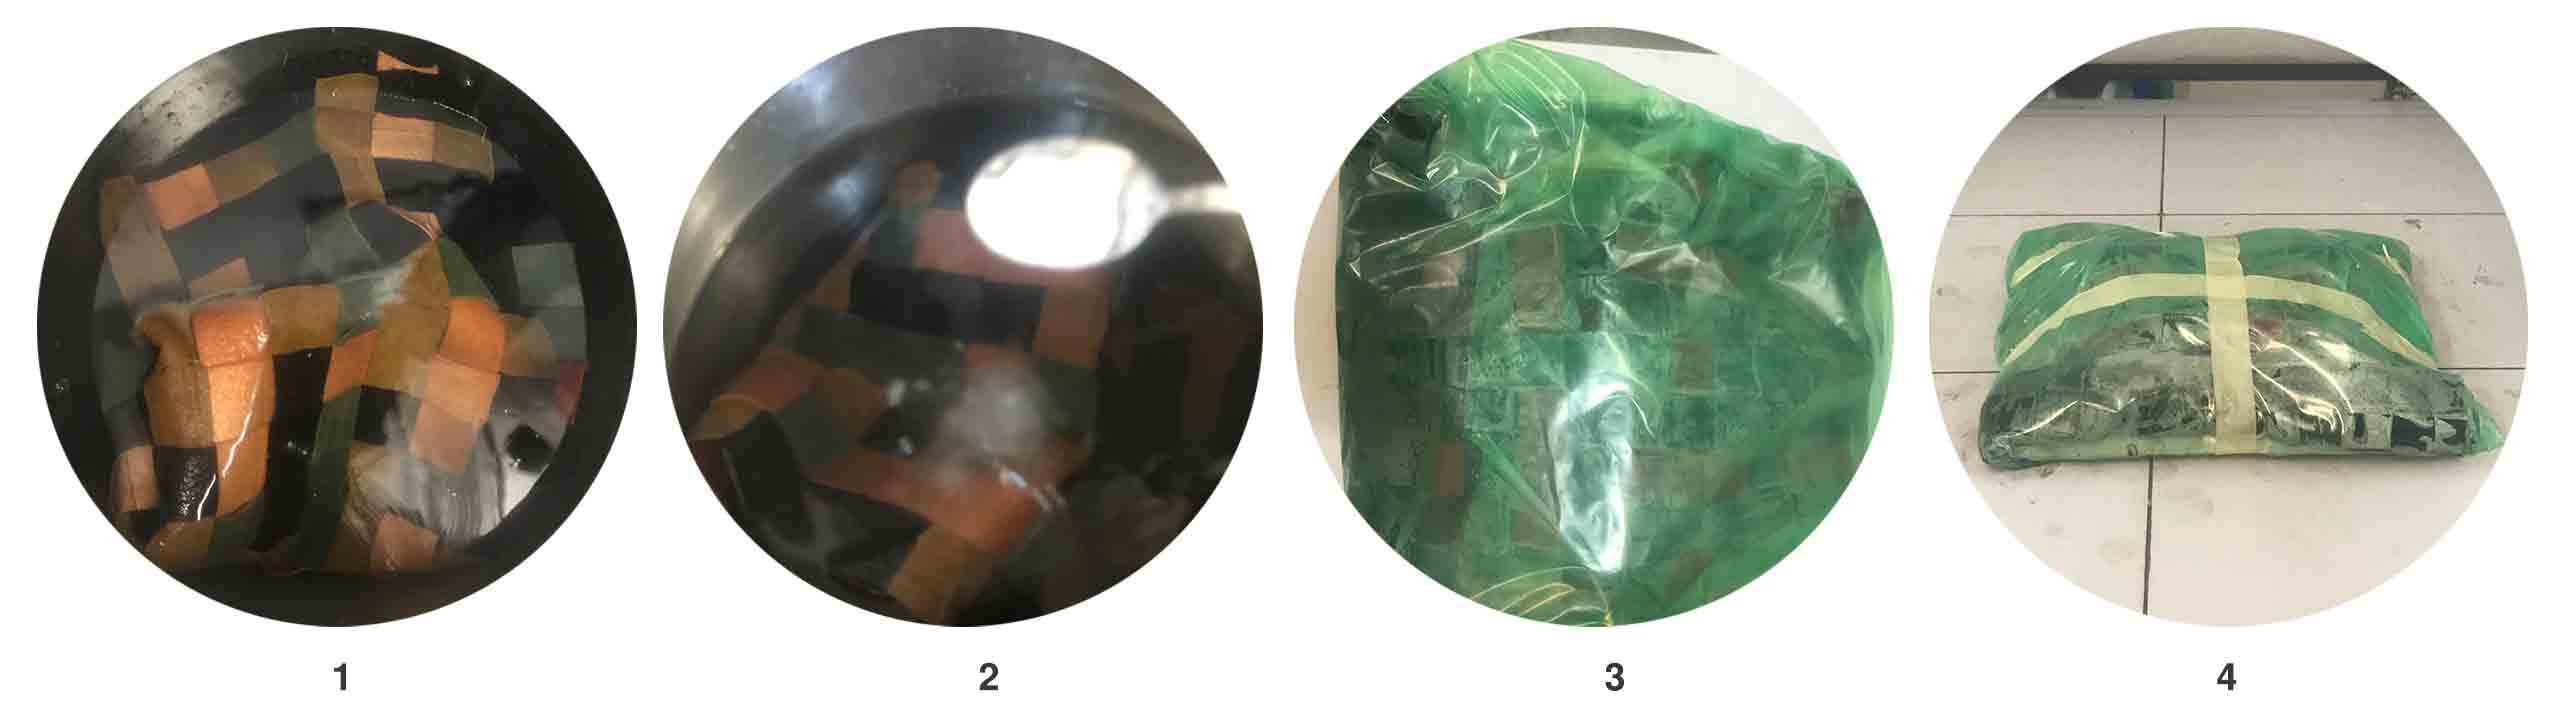
The following process shows how stitched leather is moulded.
1- Place them in cold water and let them soak for an hour.
2- Bring the water to a boil and place the fabric and baking soda in it for 2 minutes.
3- Once all the water has settled, cover them with mould and plastic to vacuum.
4- Allow the leather to mould in the vacuum for two hours or more.
Final Mold Look

Resin Moulding
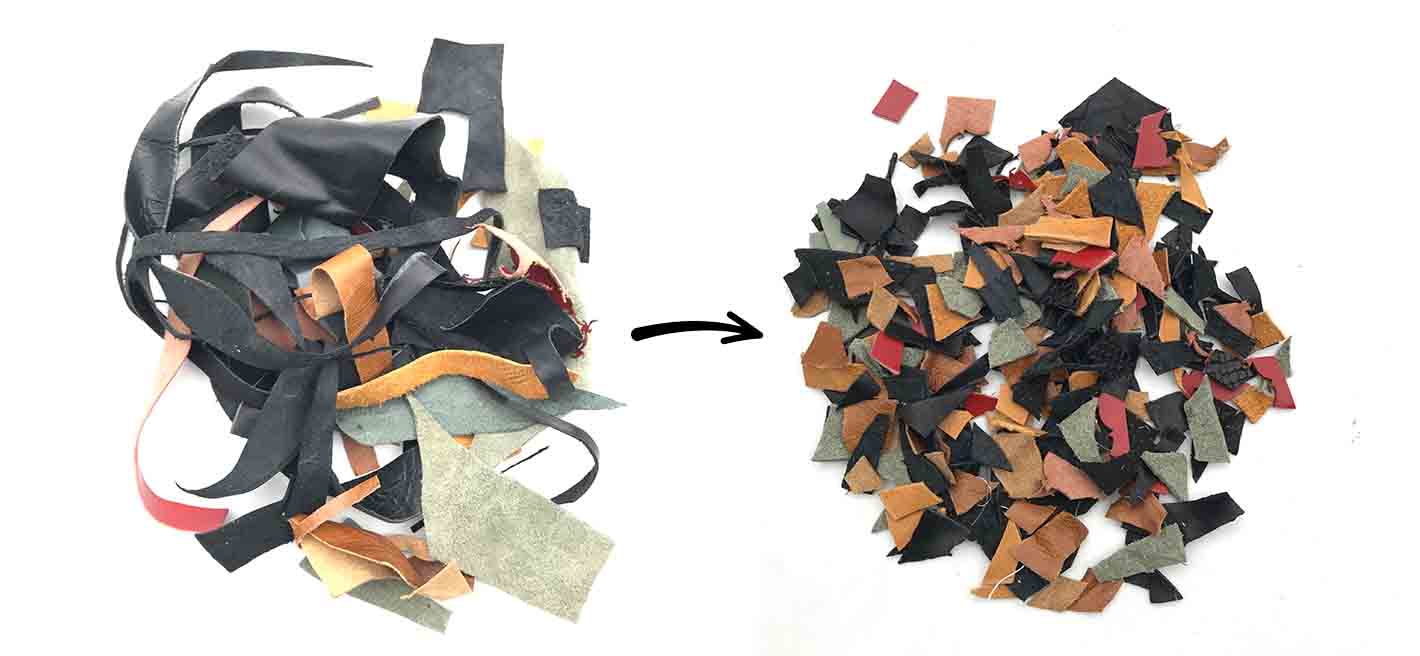
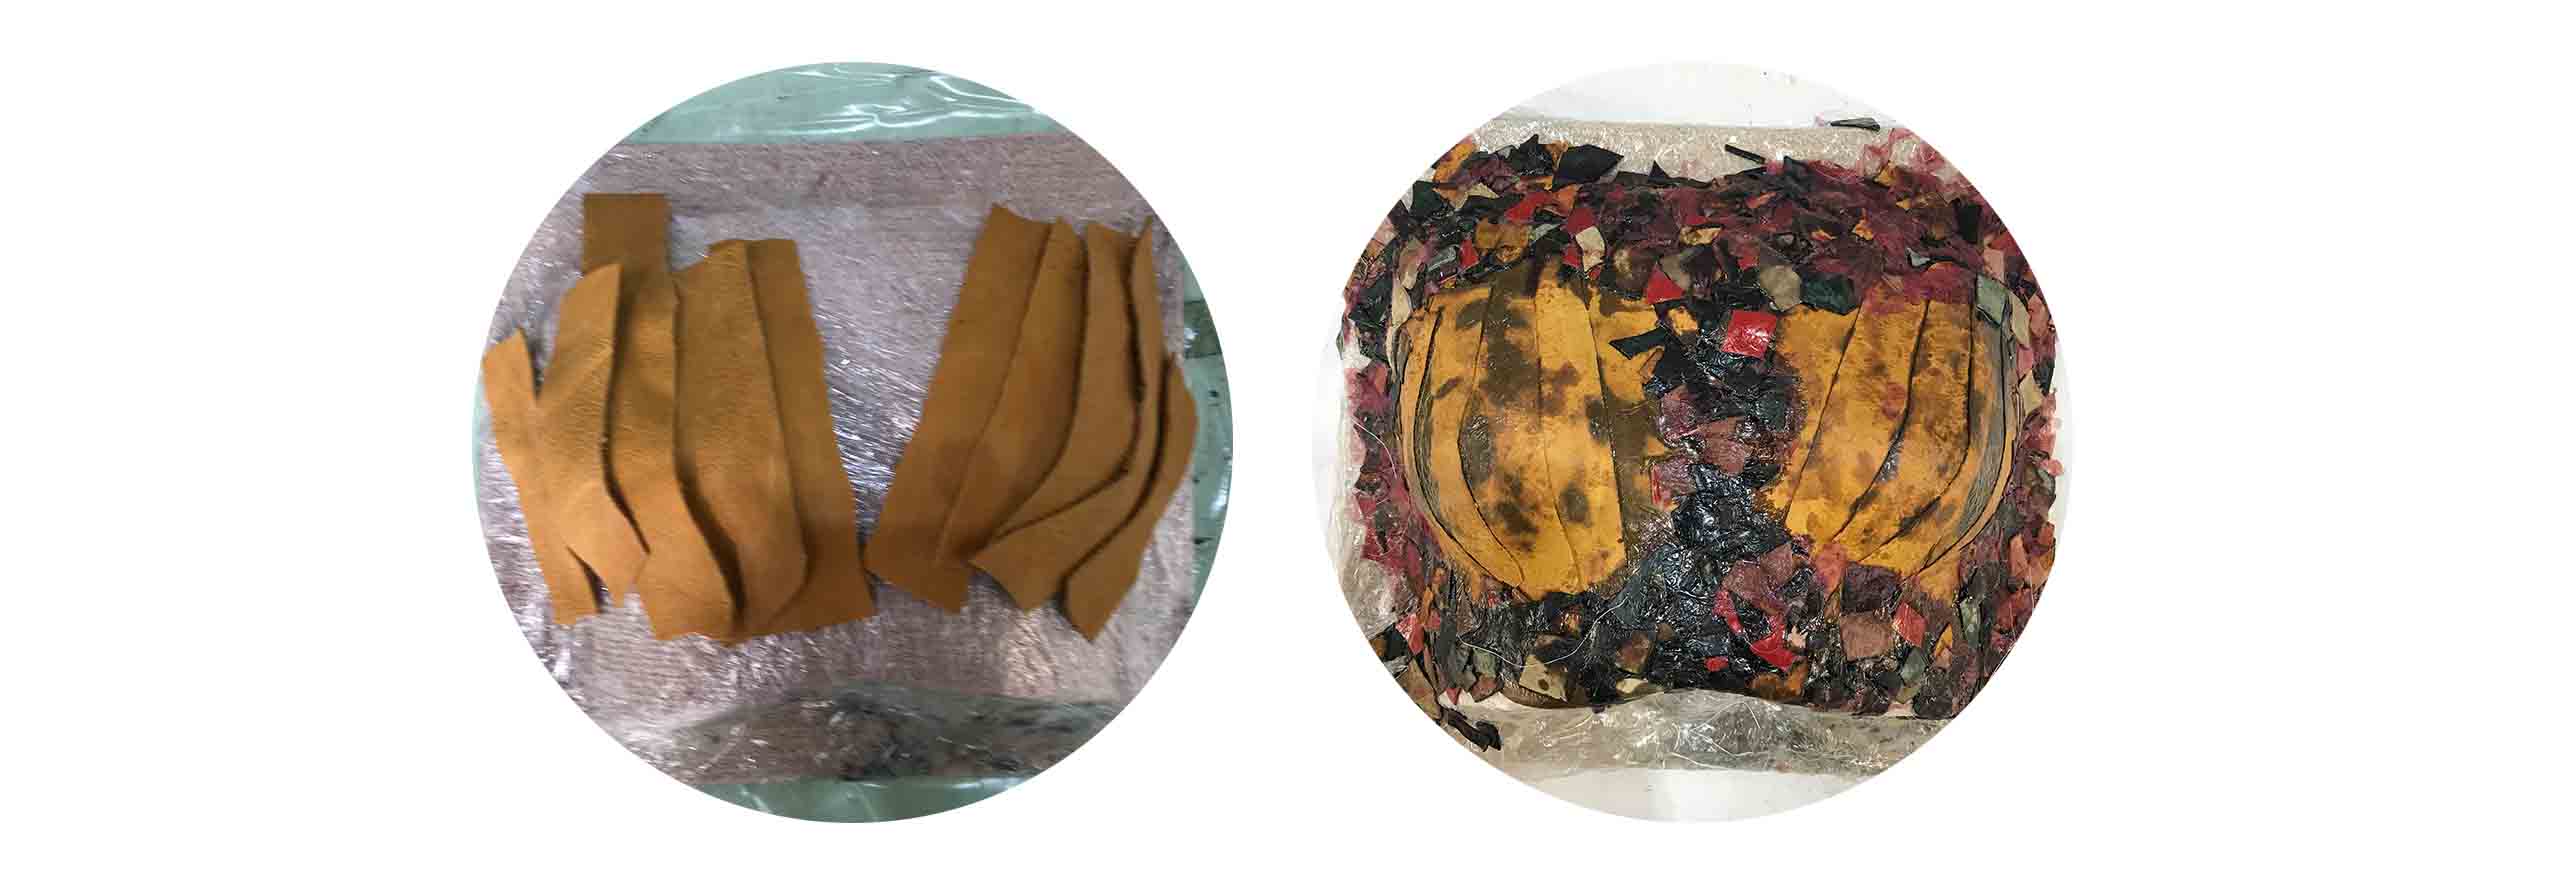
As part of the Resin Moulding experiment, I reused all the leather scraps from the previous leather moulding experiment.
Process
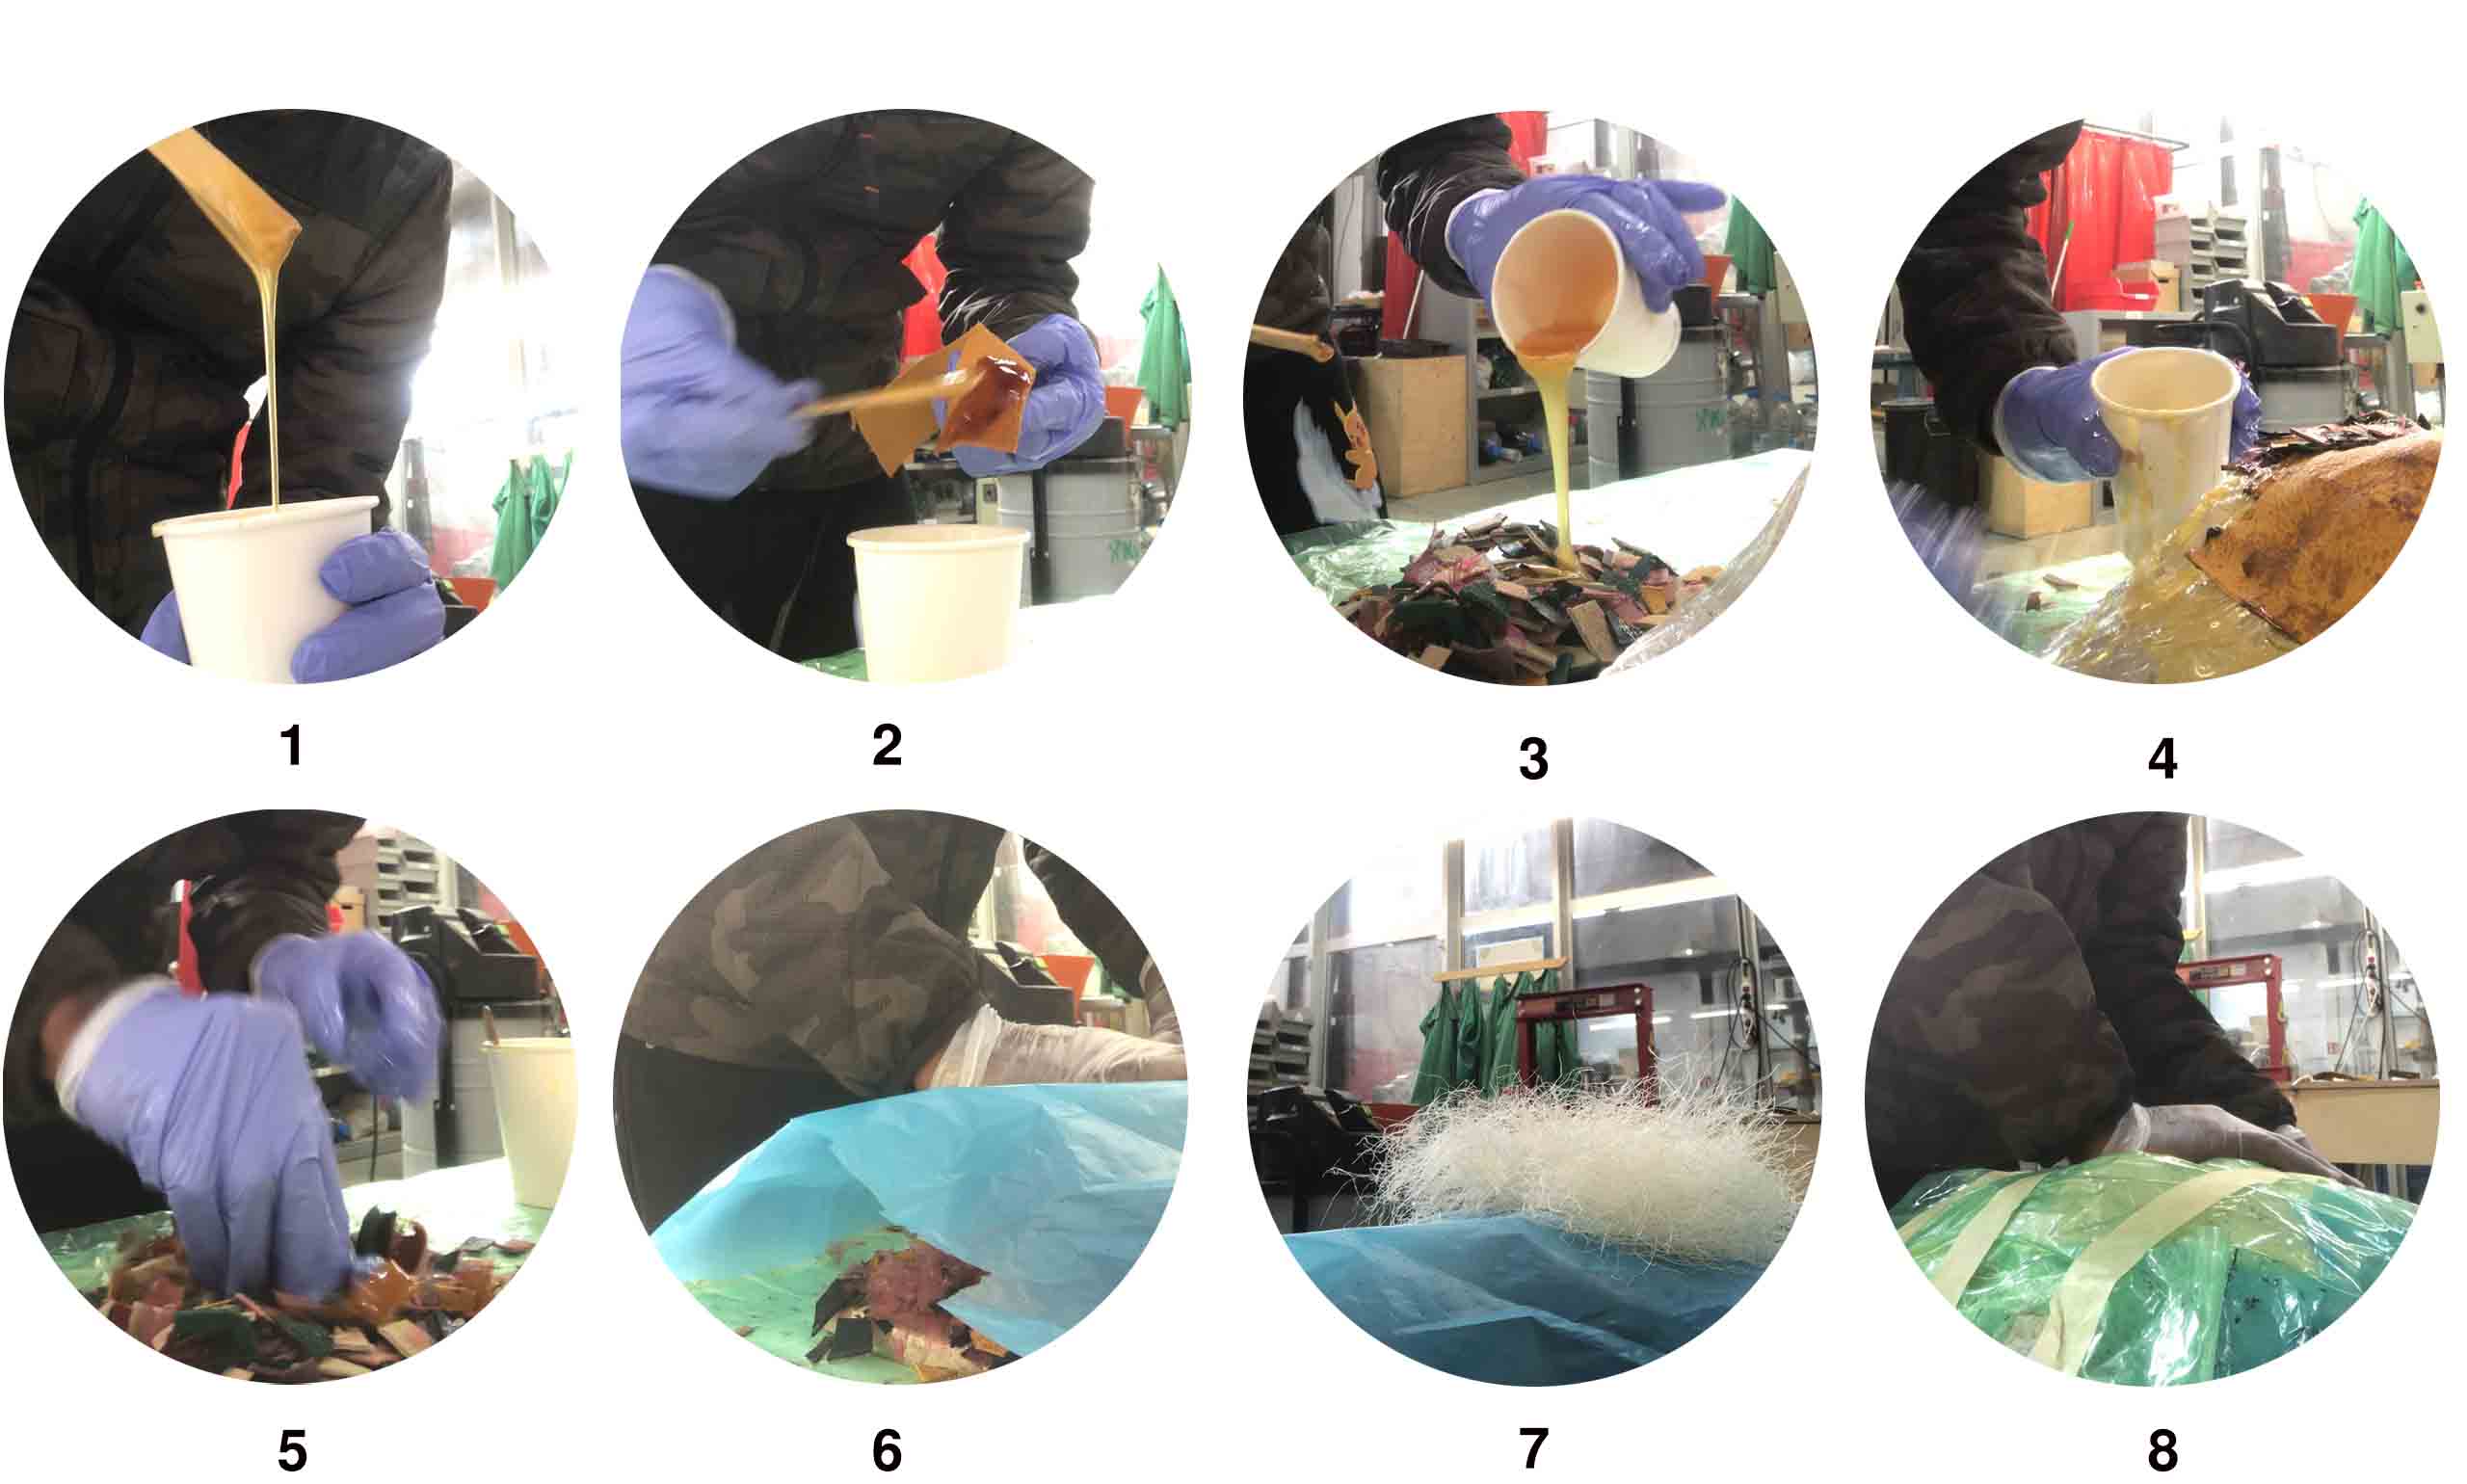
1- To make the model, I mixed 100grm resin with a 35grm mixture.
2- To make the bust circle more contrasting, I first applied it to the leather strips.
3 Using the smaller pieces, I mixed resin with them and poured it into the mould.
4,5- I also applied some resin on top of the mould and spread the pieces on top of the mould.
6- Cover the mould with a poured plastic sheet.
7- Spread the nest material over the sheet to absorb the excess resin.
8- Wrap it in the bigger's plastic sheet and seal it to vacuum it.
Final Result
Wood Textile
Reference
Wooden Textiles -- Designer Elisa Strozyk | euromaxx here
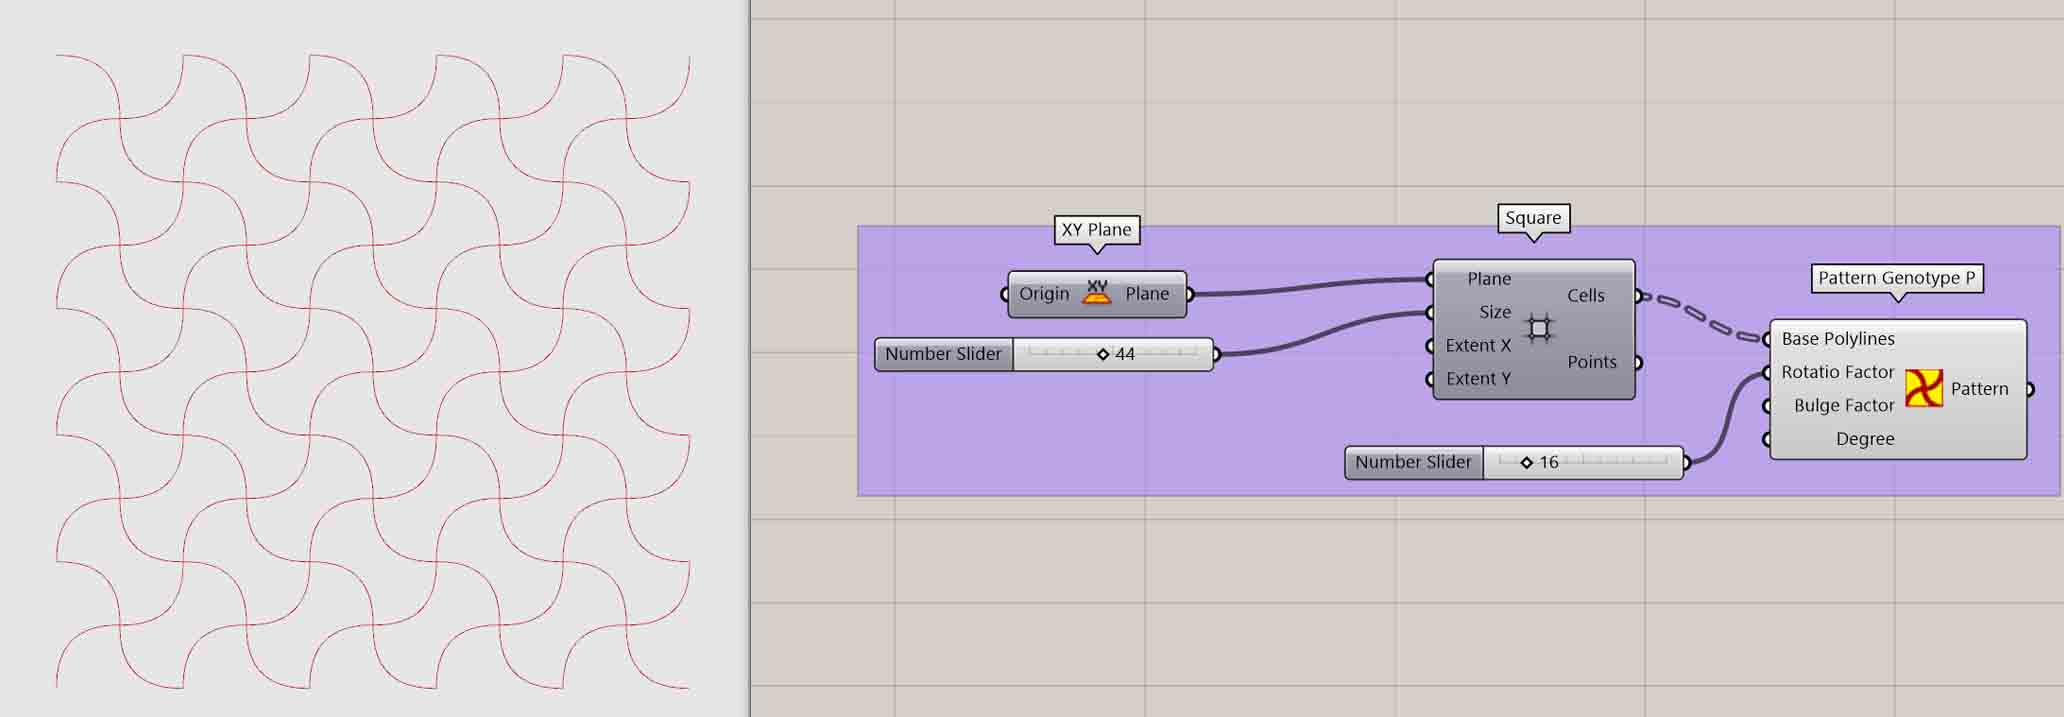
Design
Below are the final designs and its script.

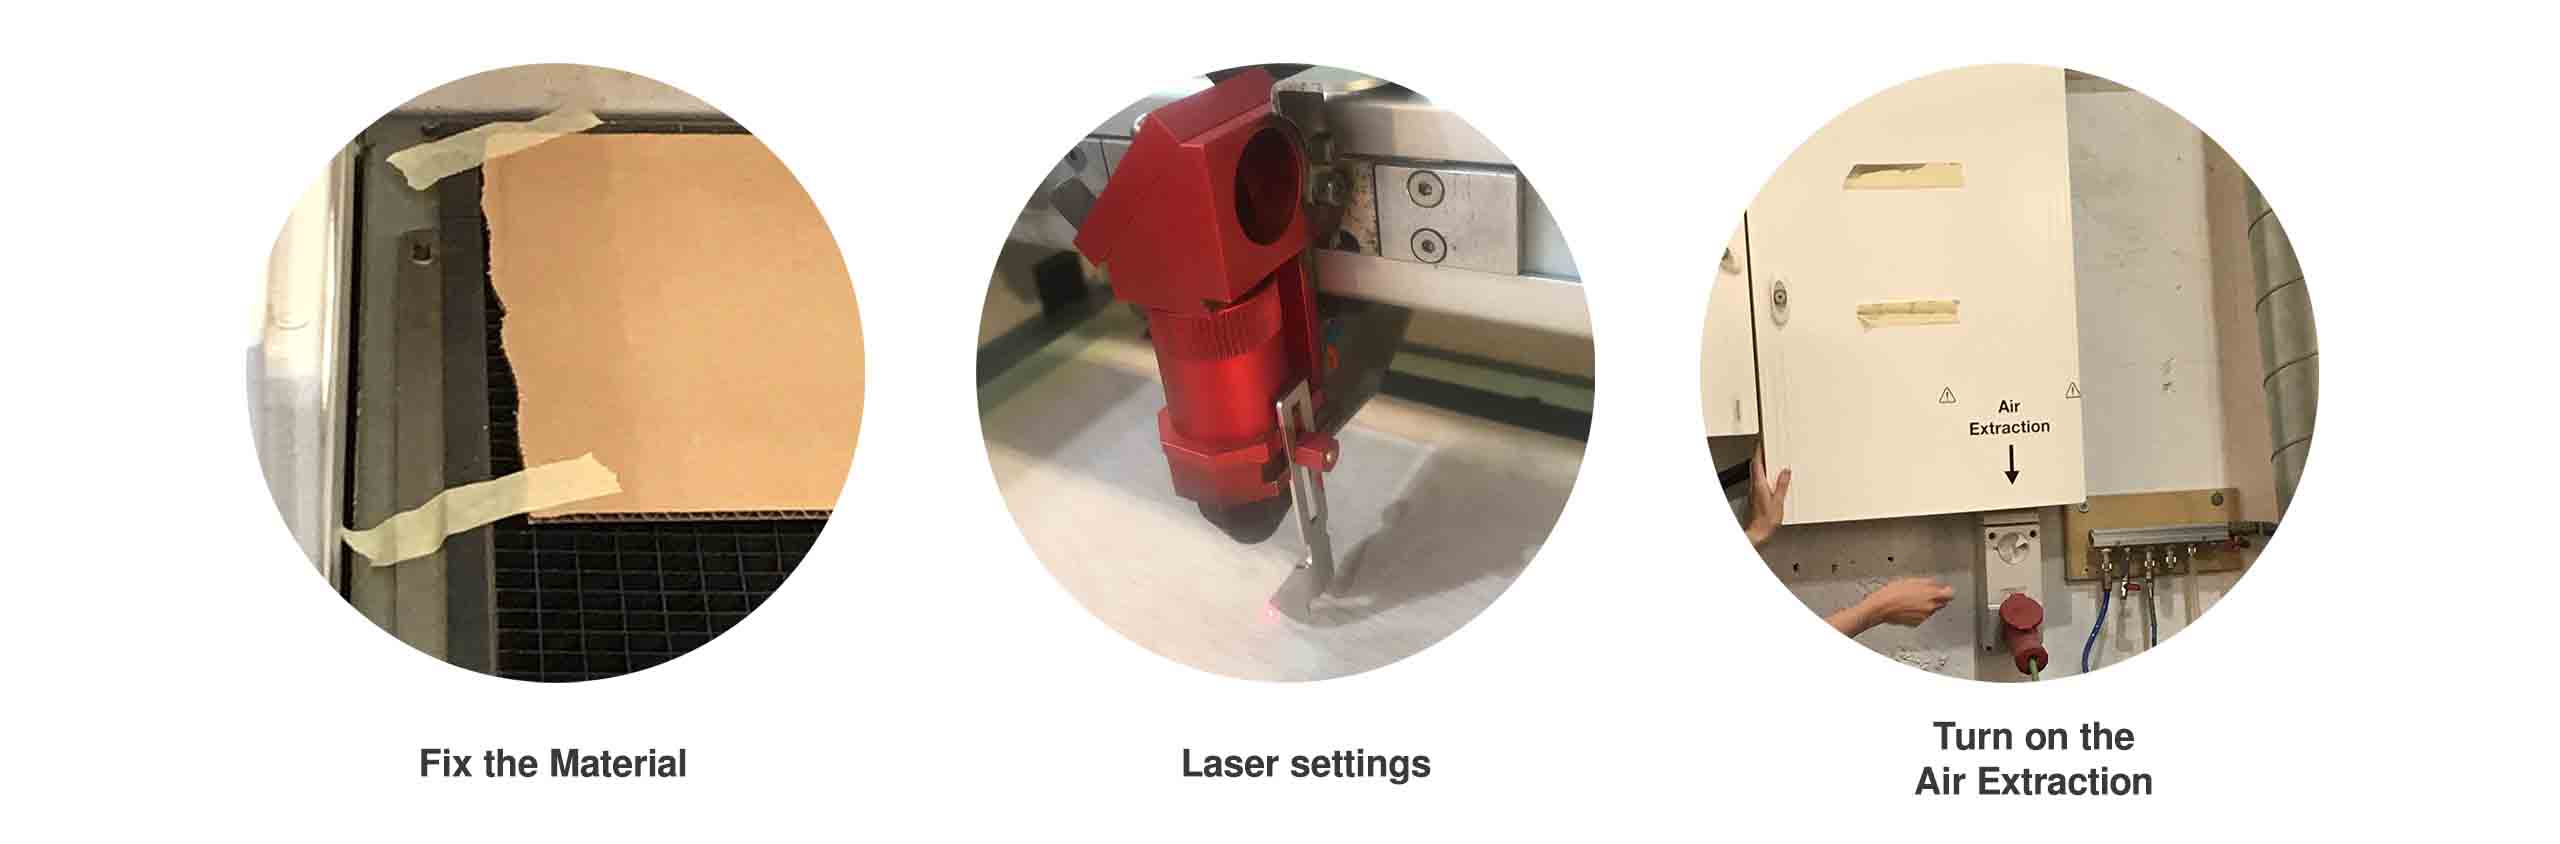
Machine Prep
Fabrication 1
Process
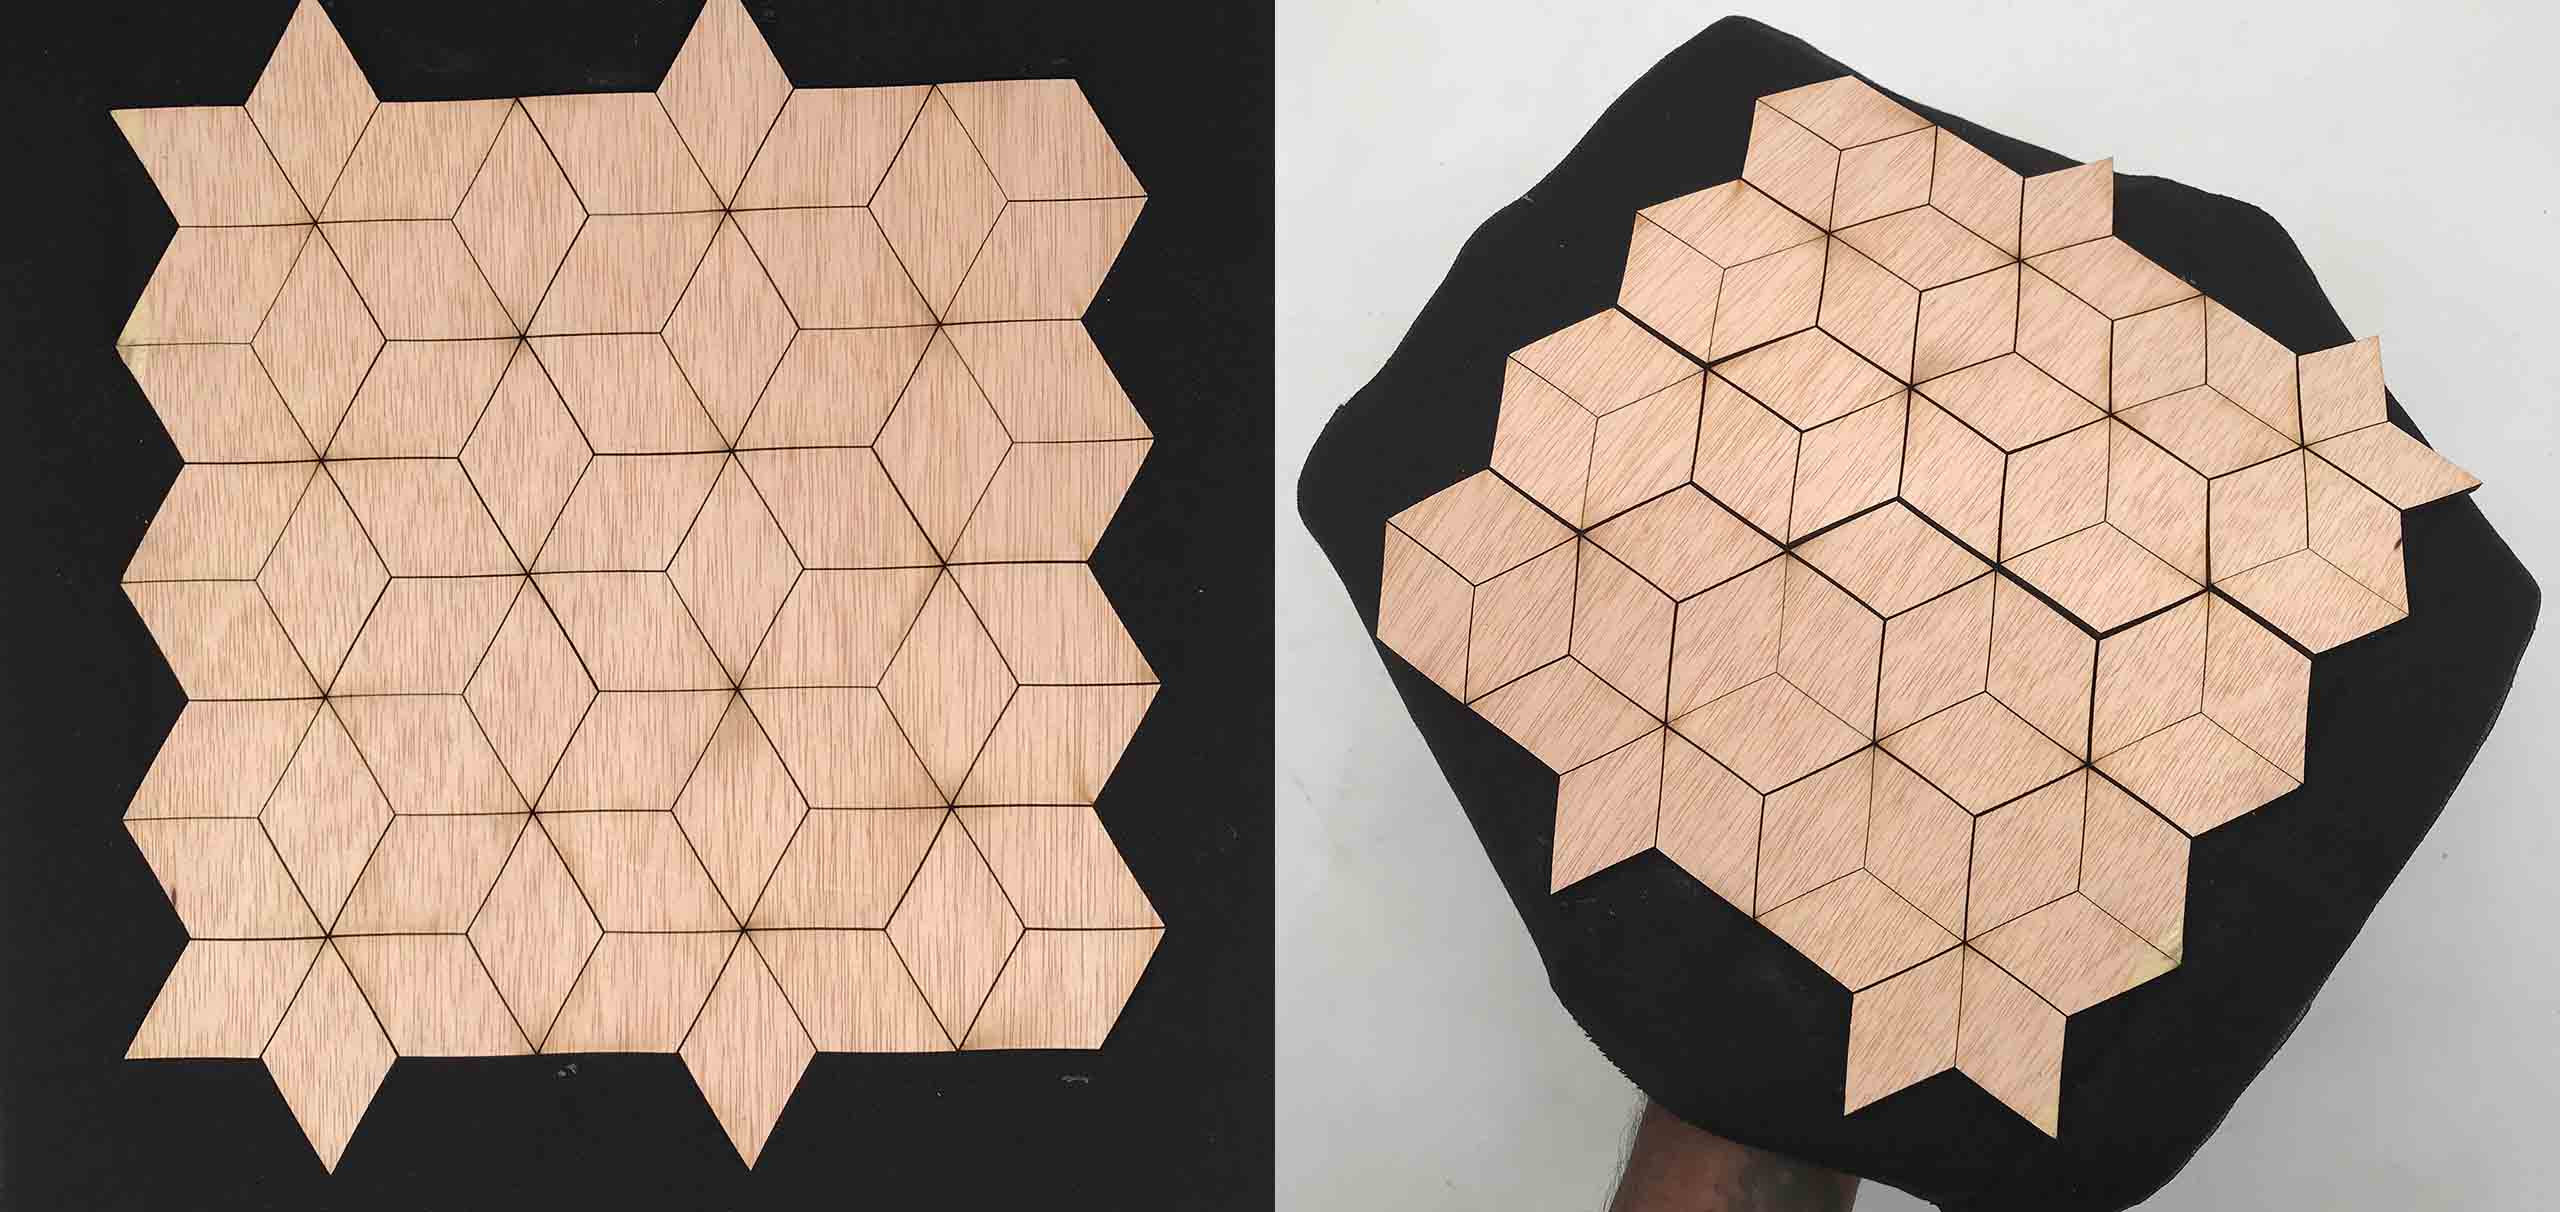
Lacer Cutting Process
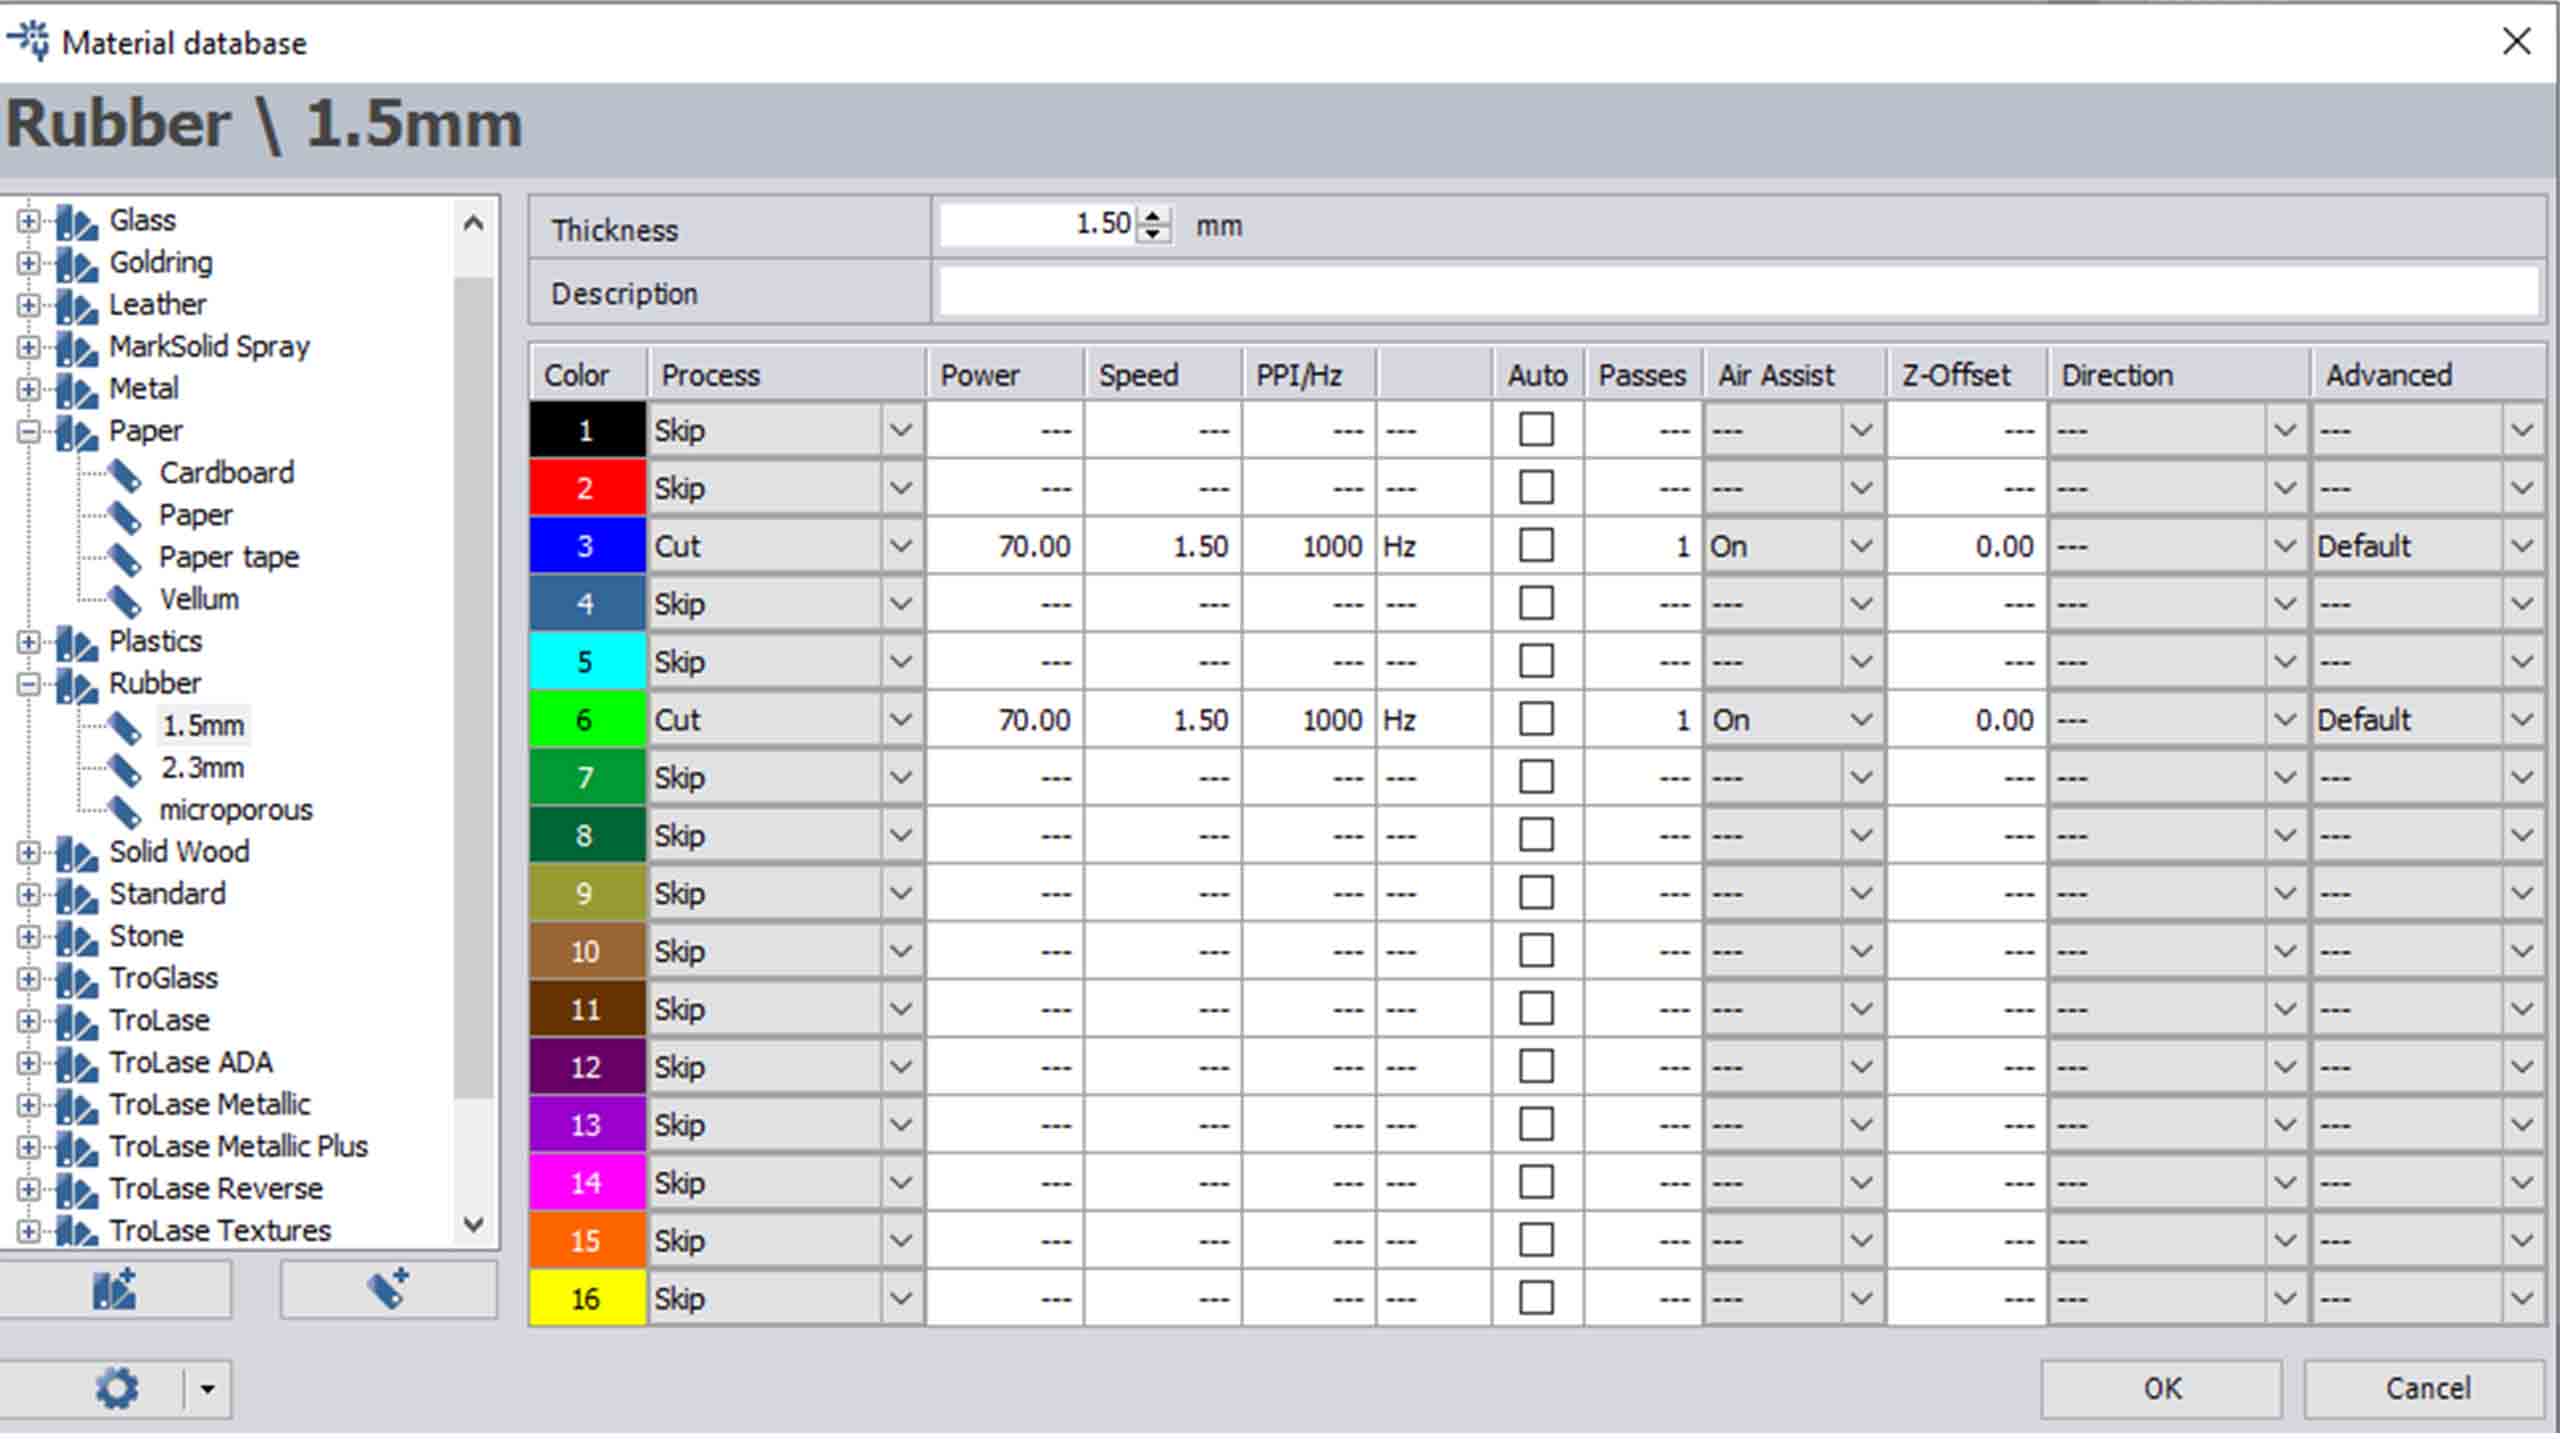
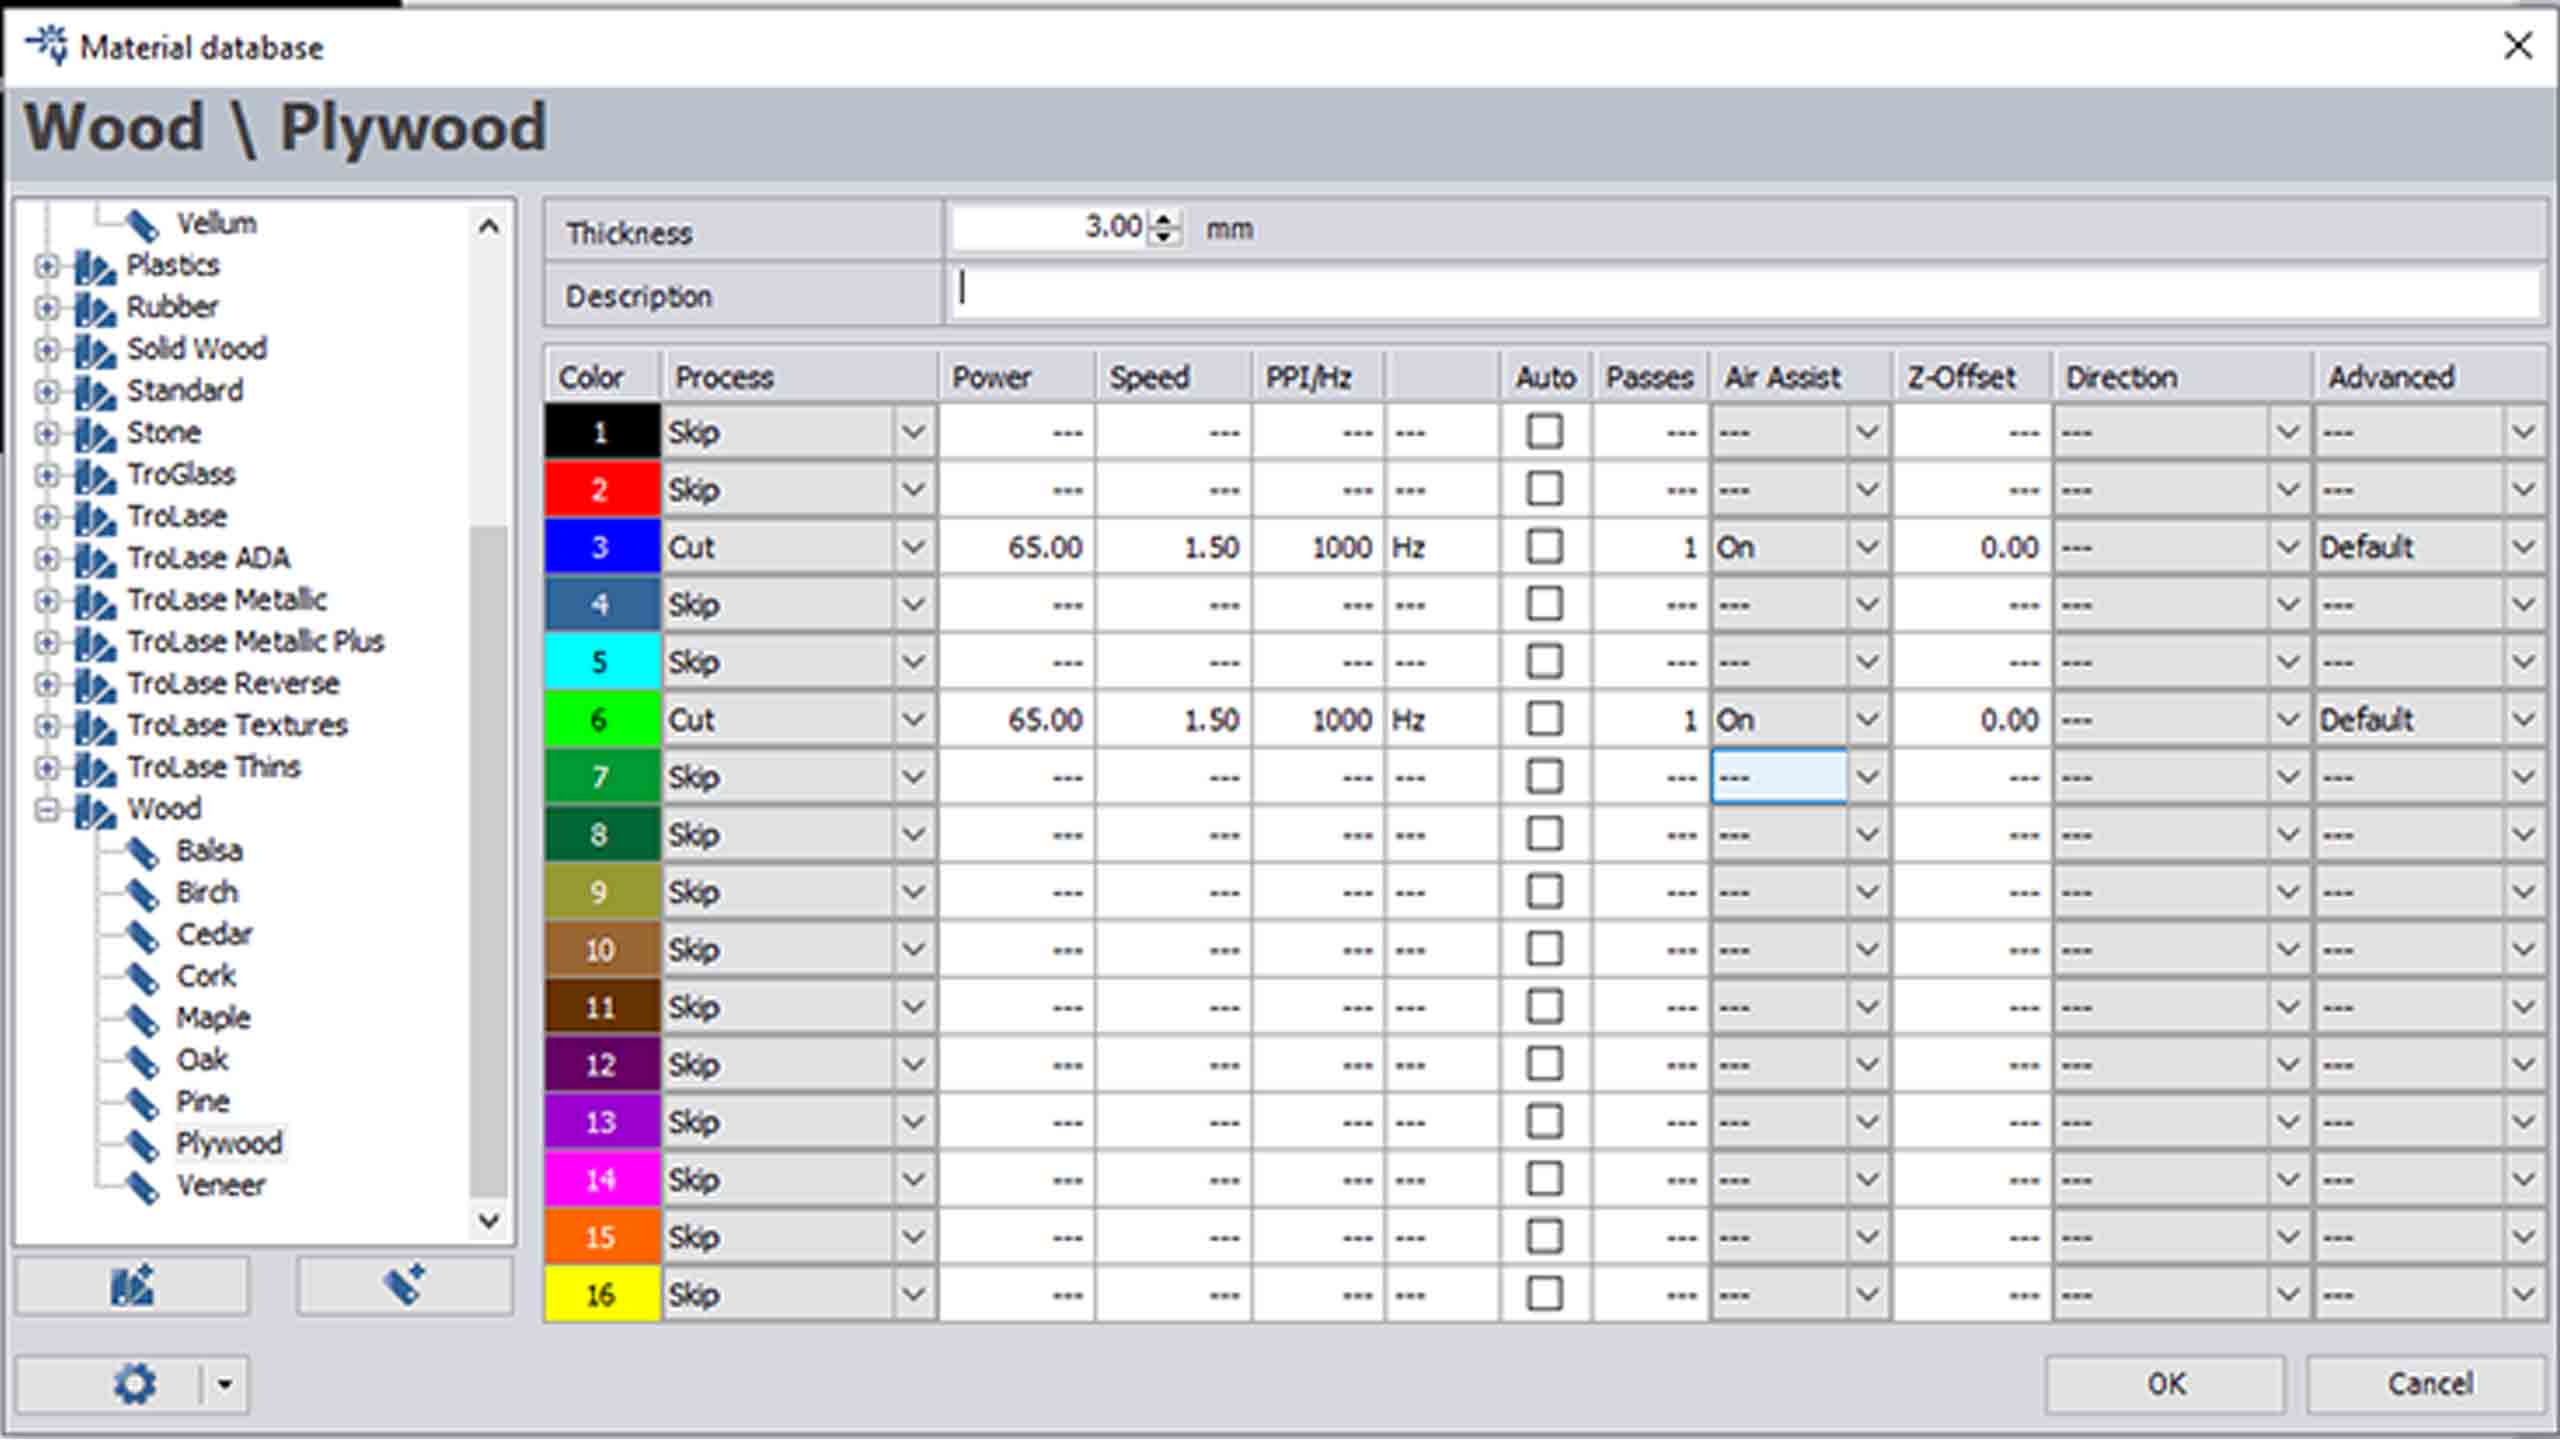
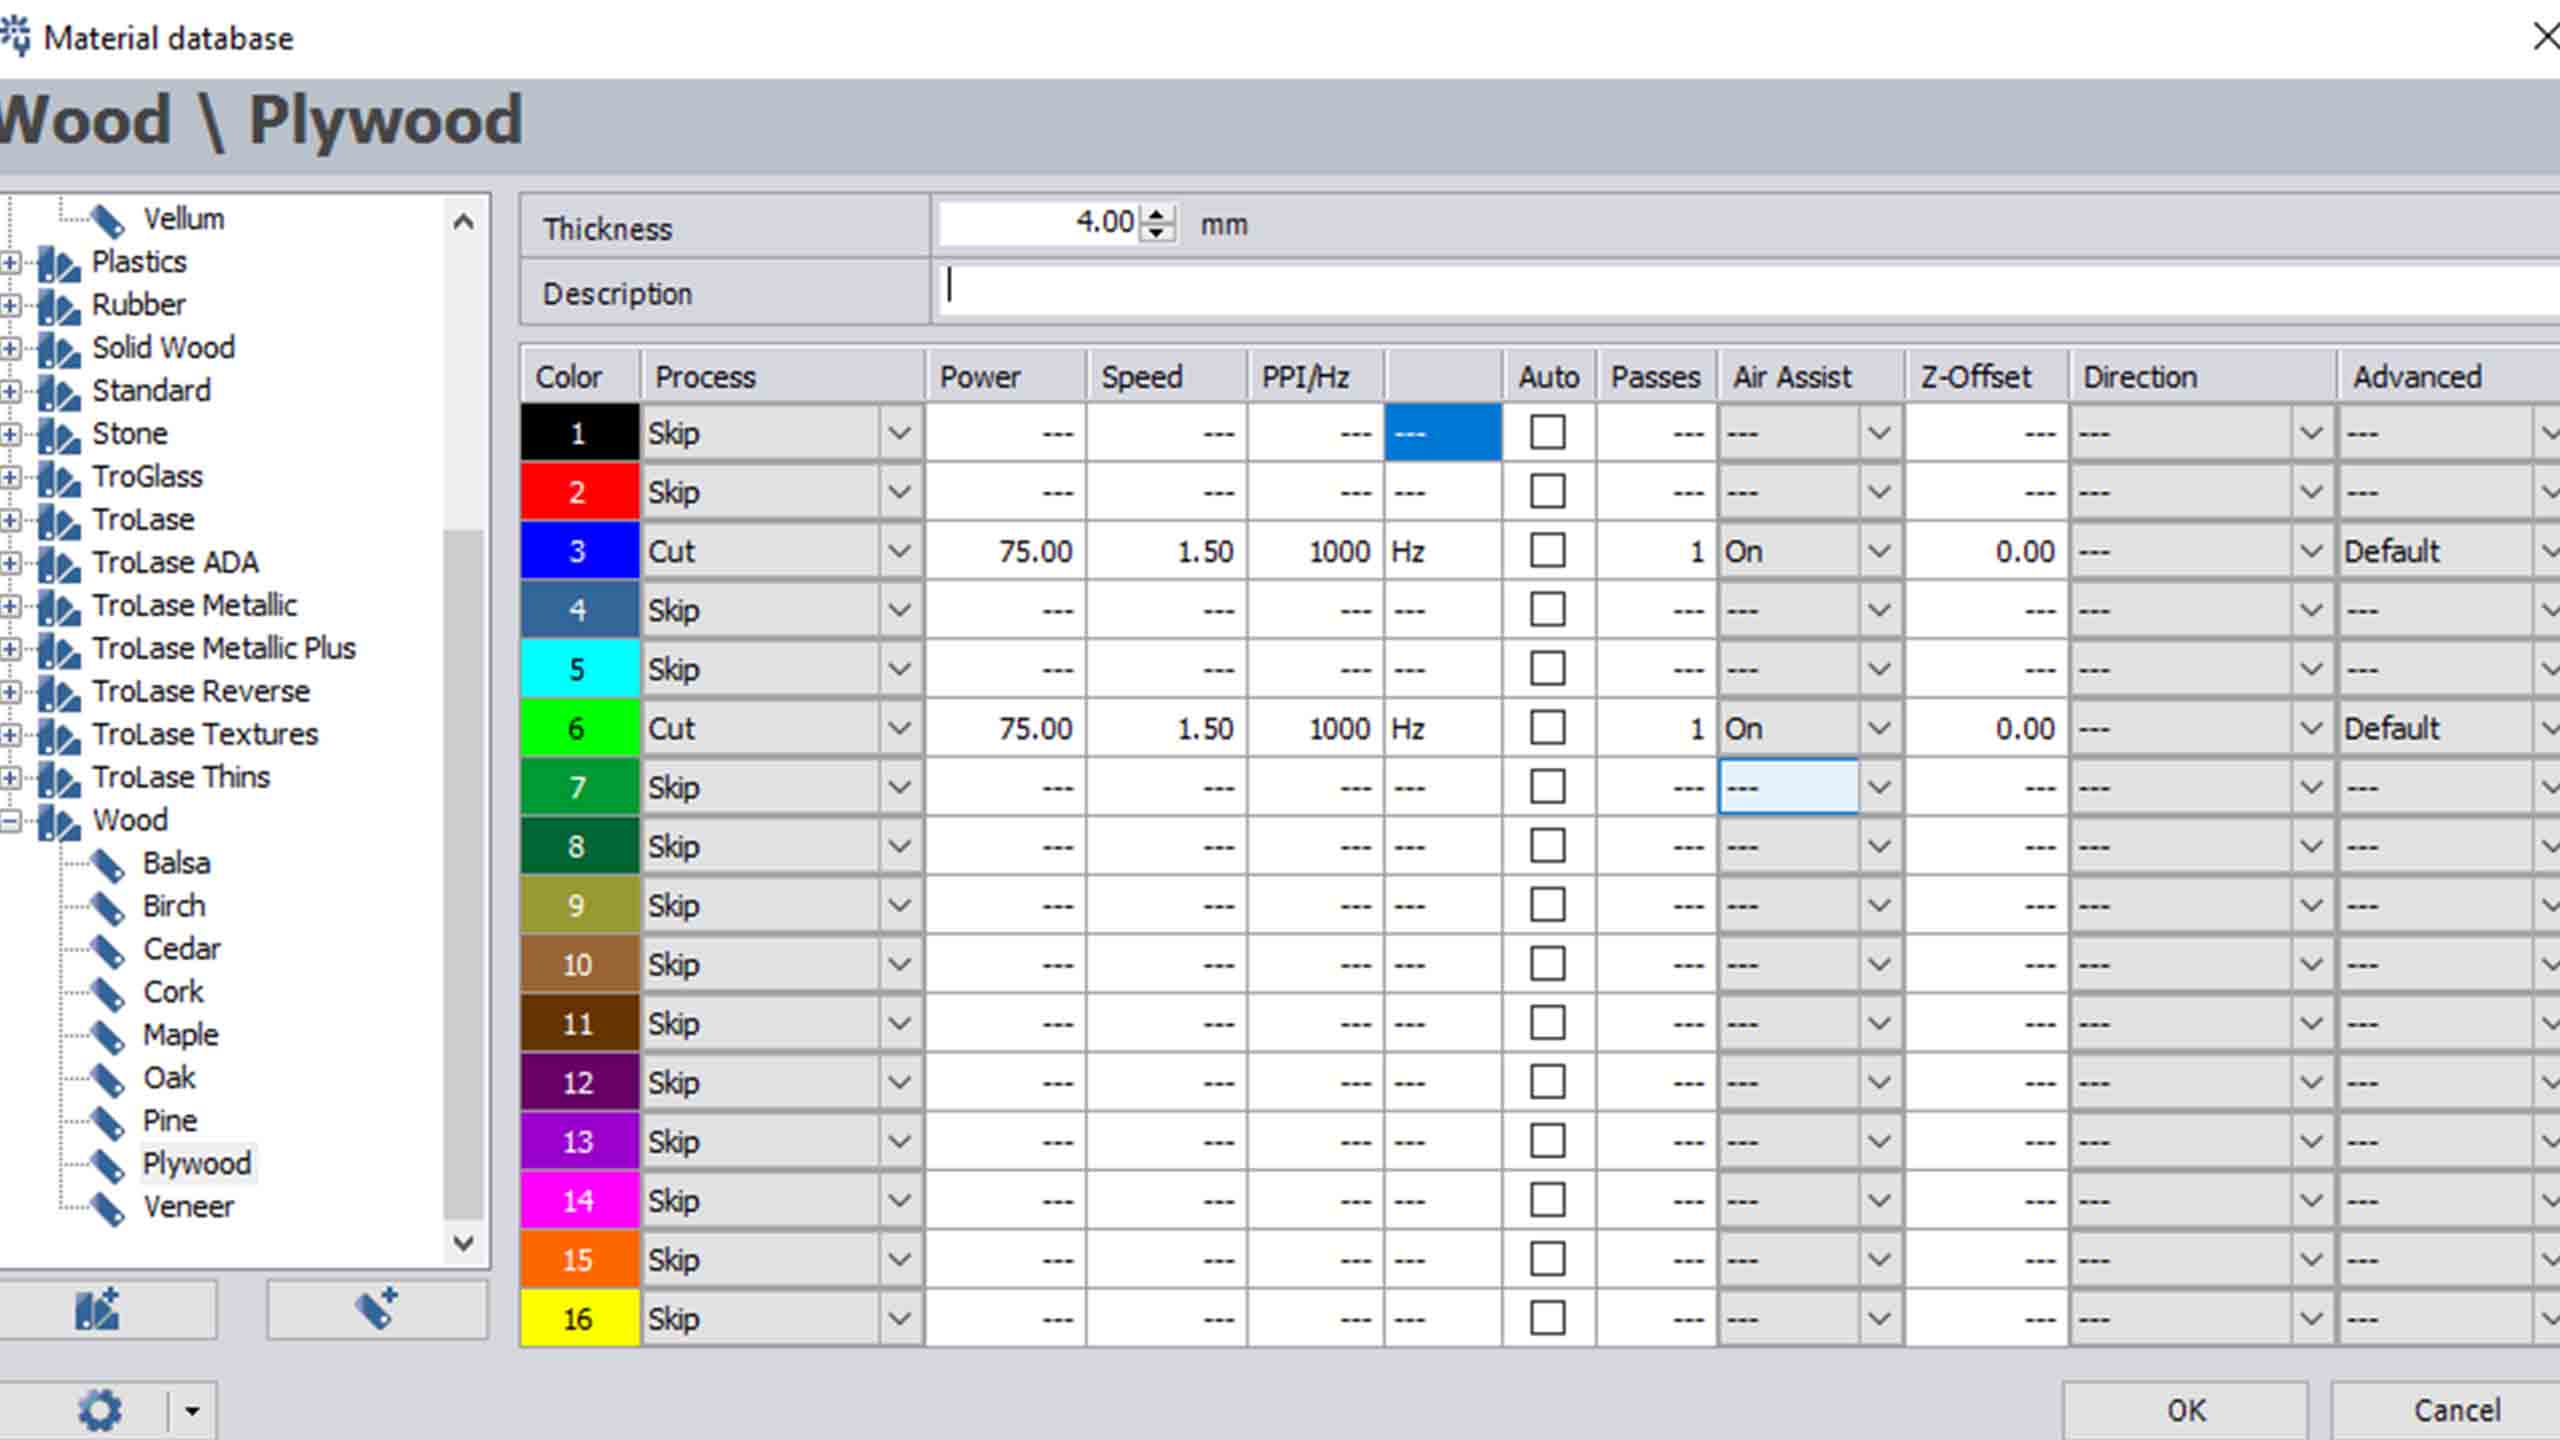
Machine Settings
Glueing Process
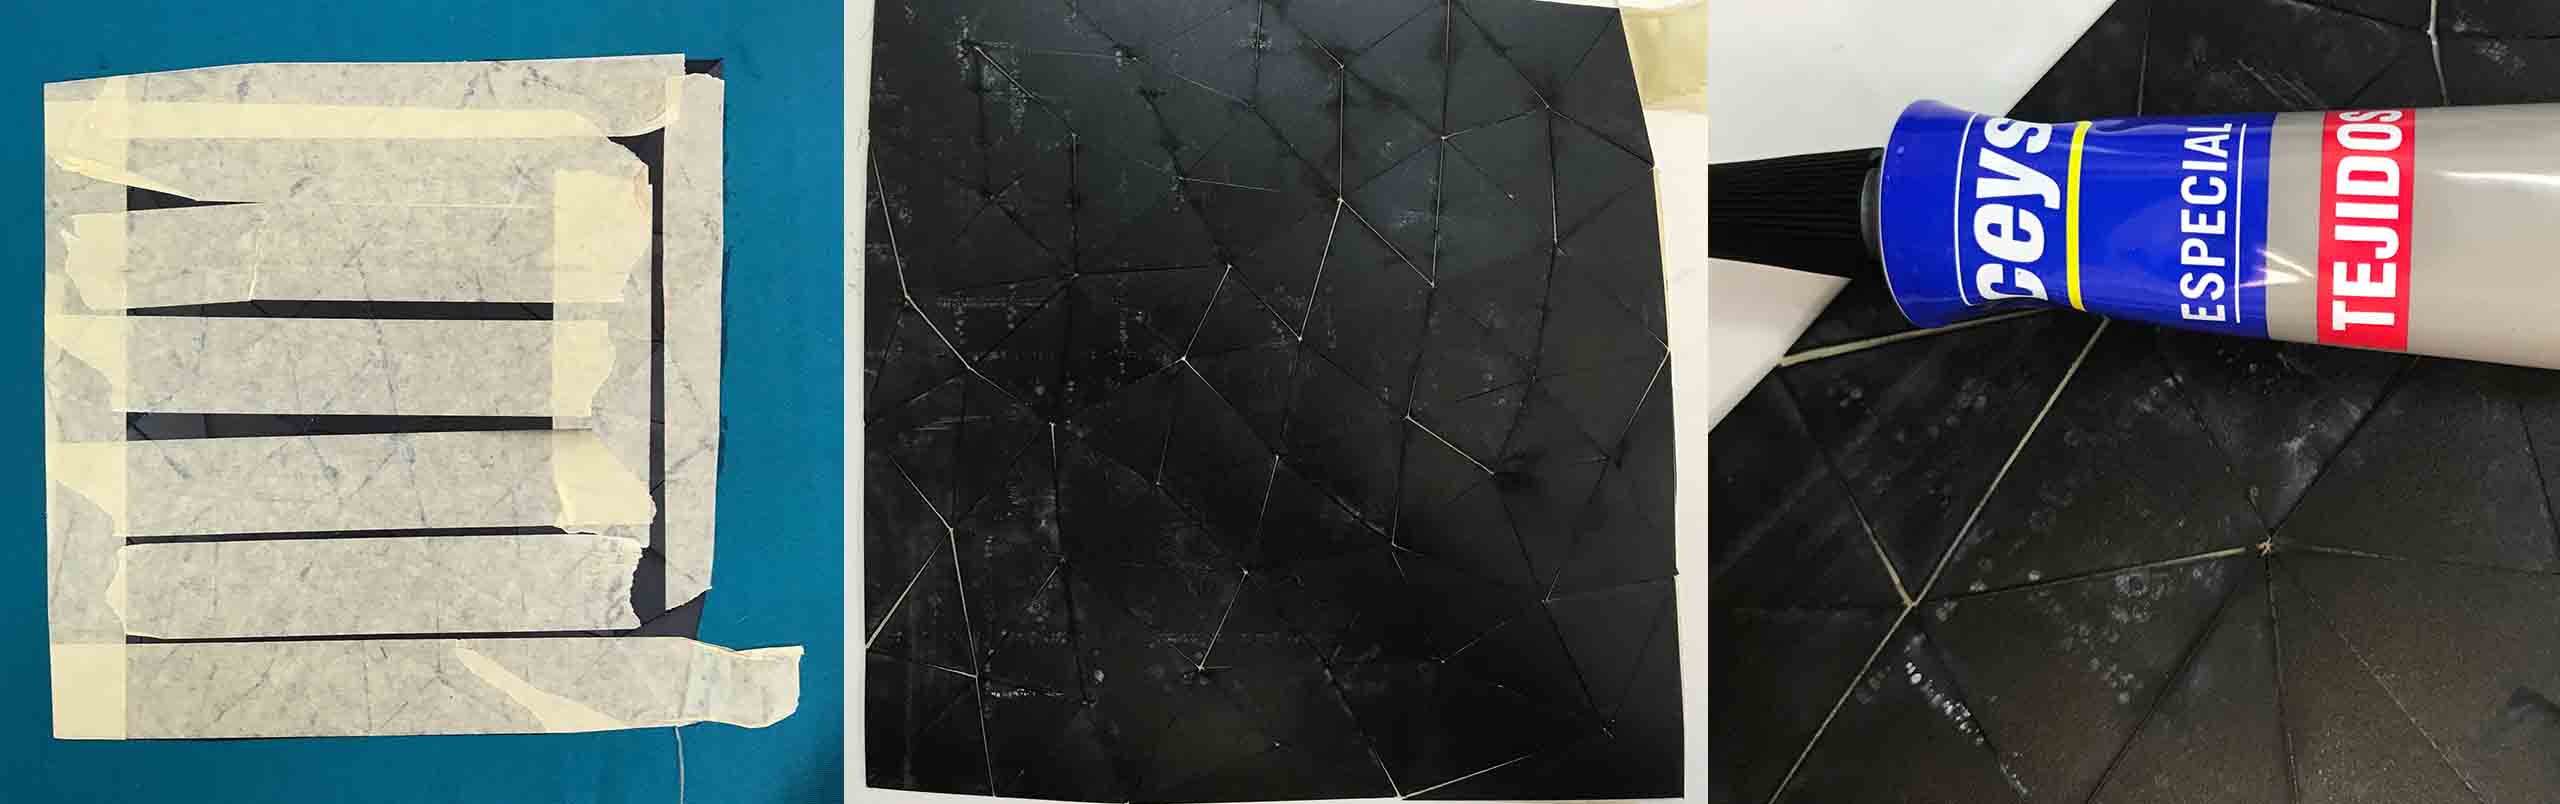
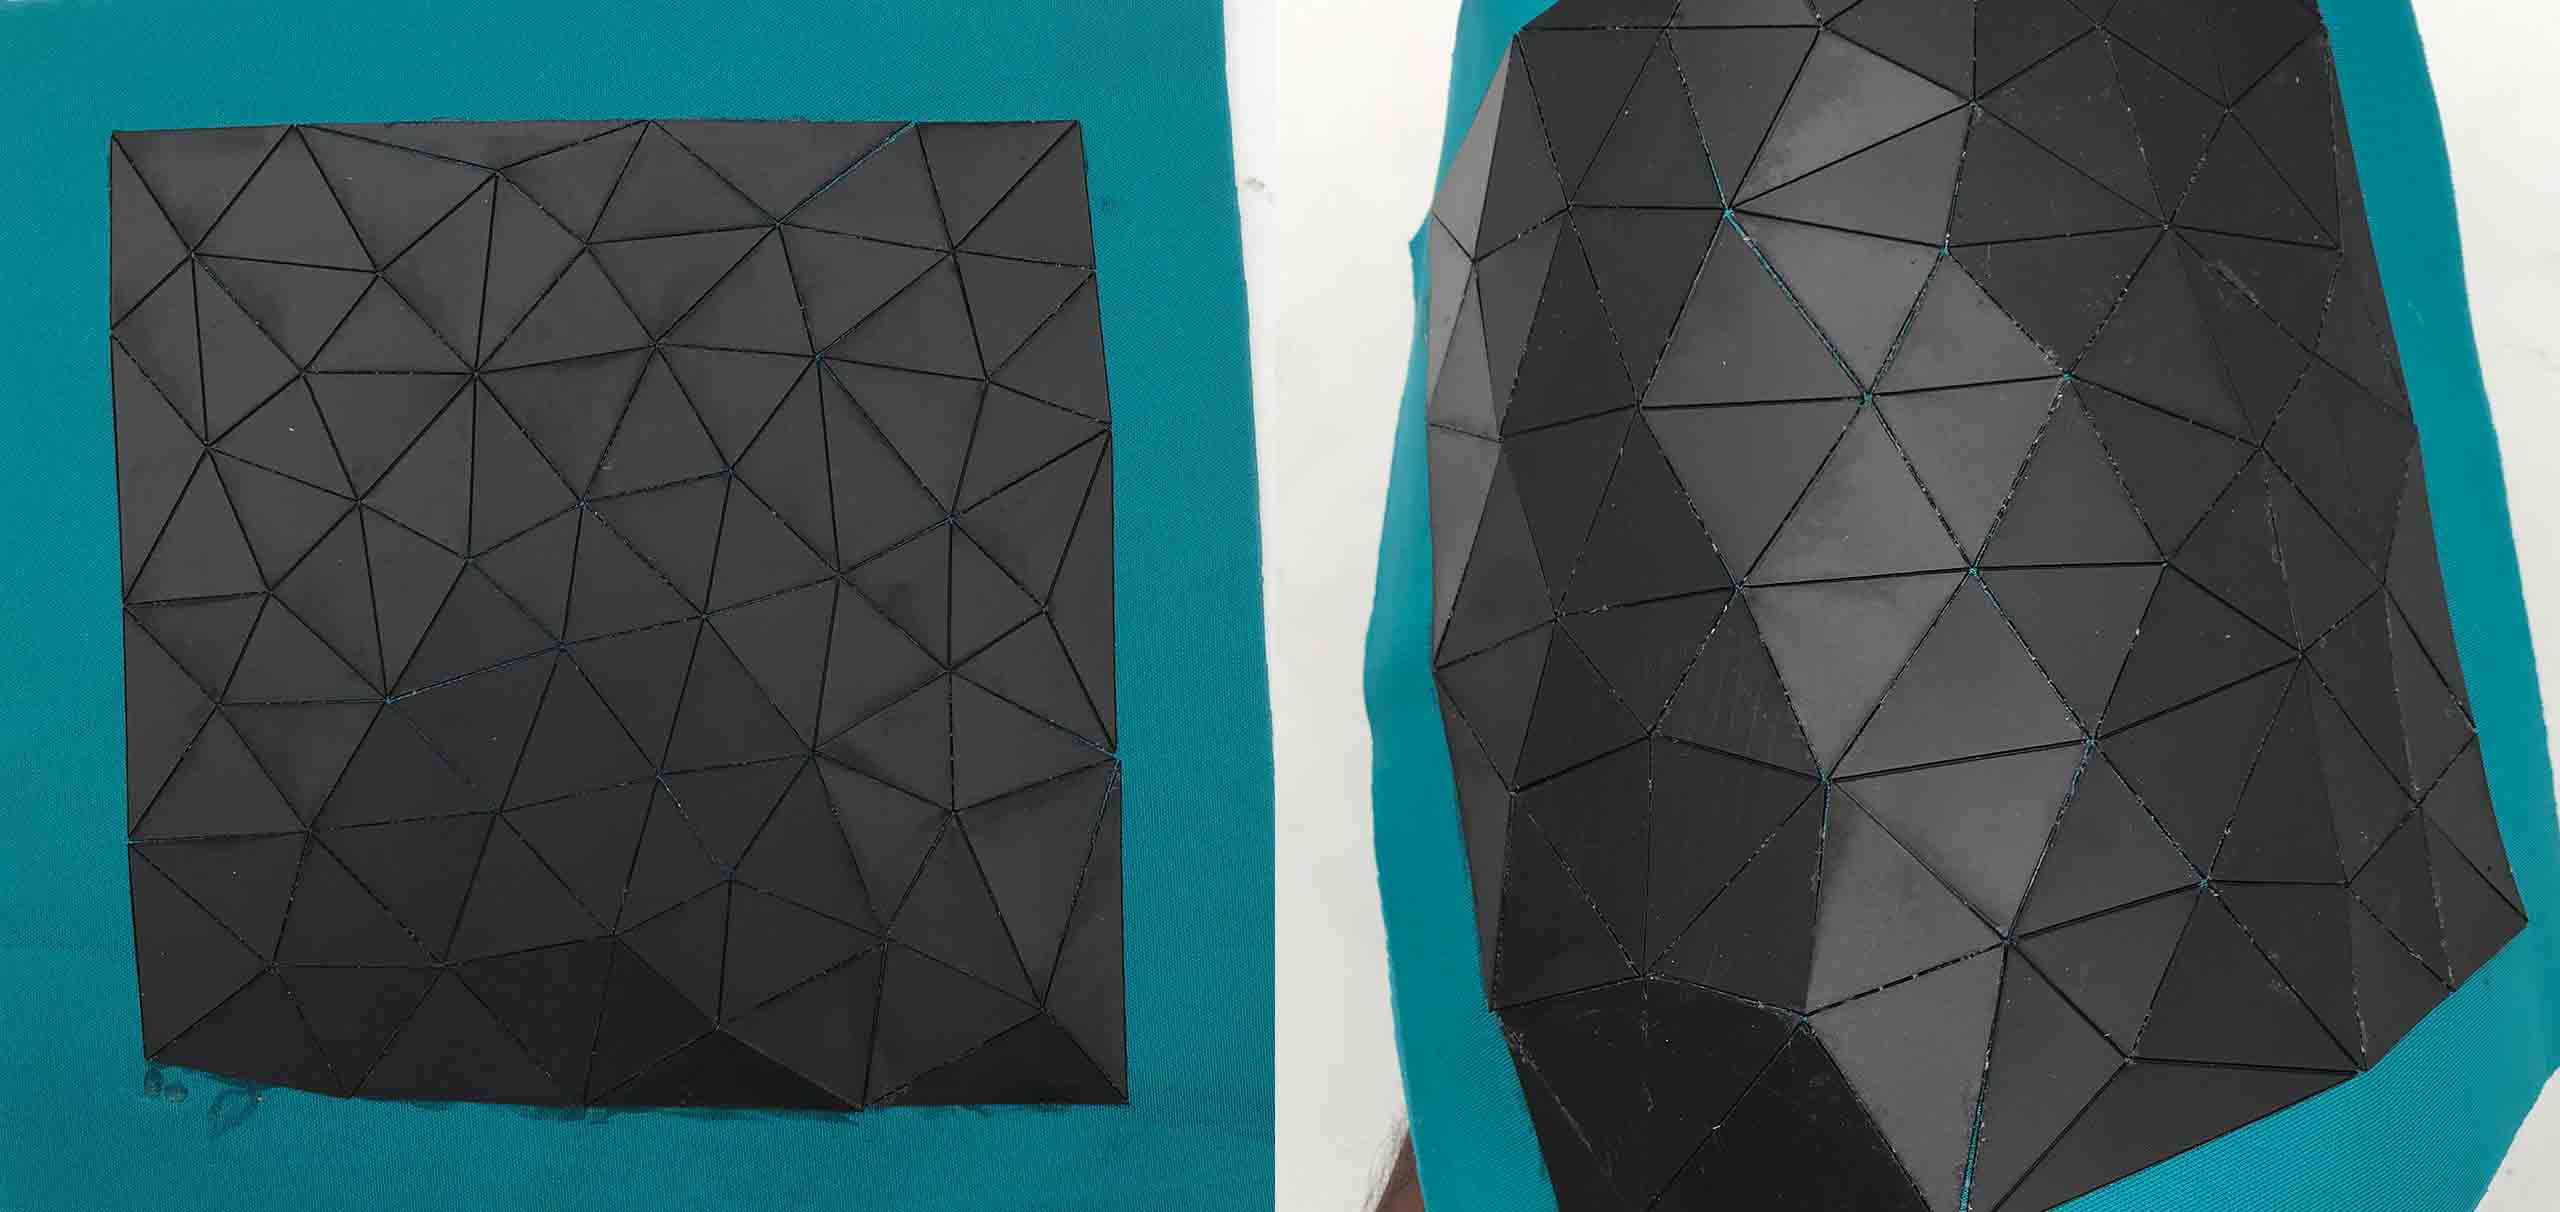
Final Look
Fabrication 2
Machine Settings
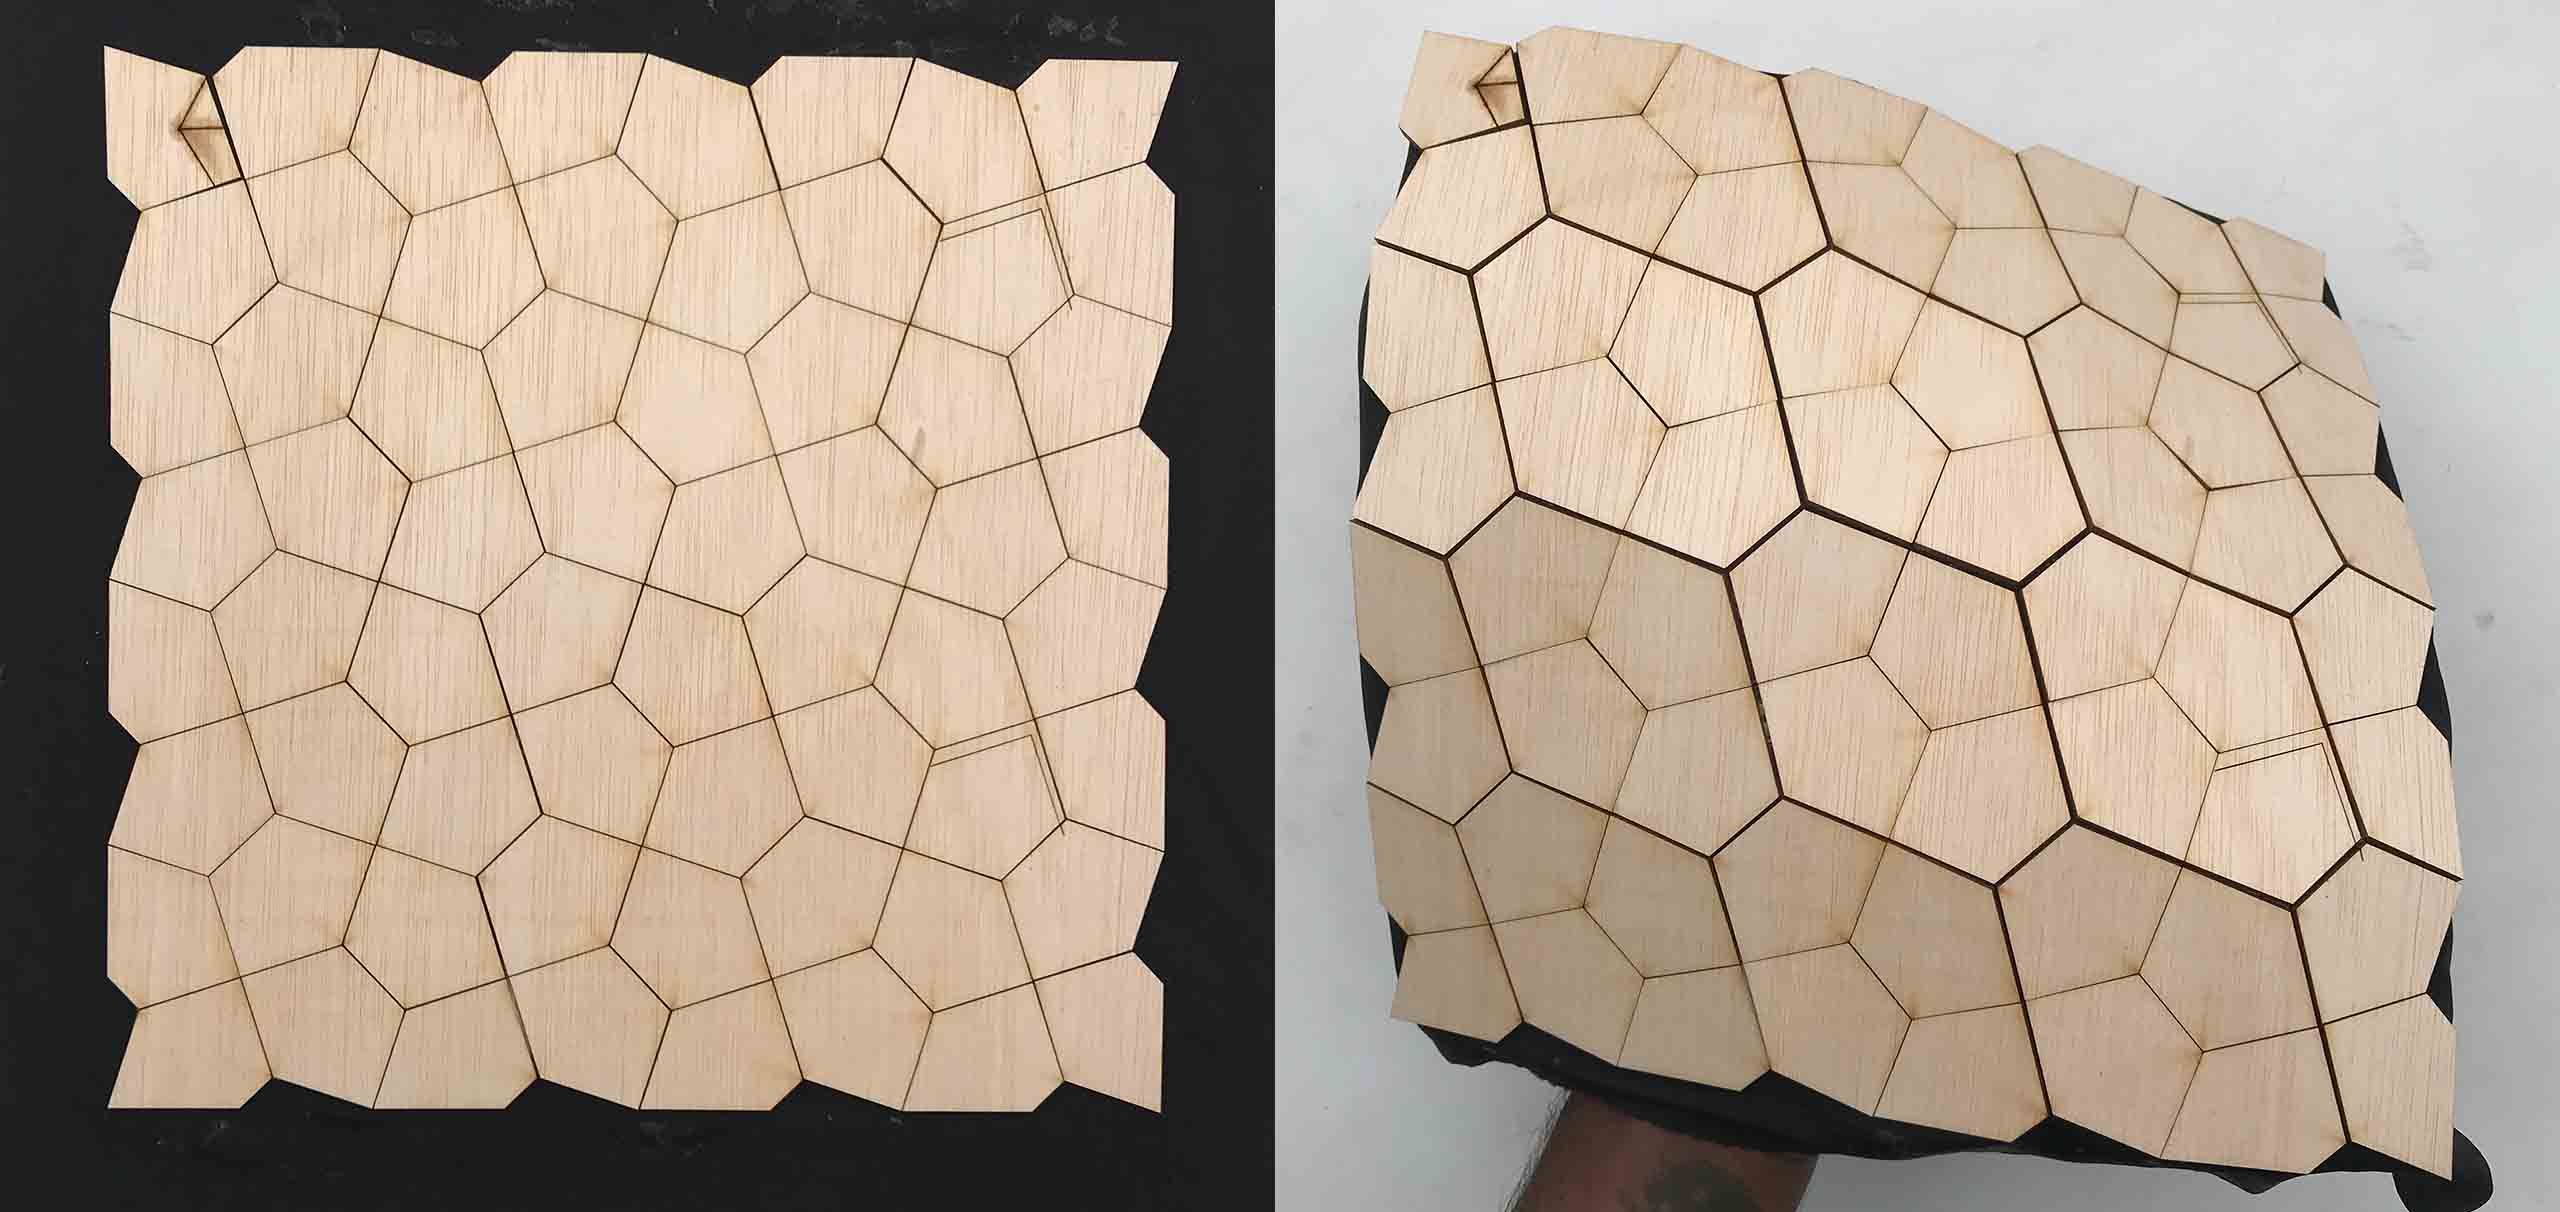
Final Look
Fabrication 2
Machine Settings
Final Look
Thank You