Project Development
My final project Glacial Bio Pottery was a whirlwind of fun troubleshooting and working on a very tight/non-exsistant budget of material research and process research to reformulate the porcelain slip casting process to be bio/waste material based. Beginning with the material investigation to then apply to the process development.
Project Timeline
I am more of a list person when it comes to organizing my workflow for a project and writing out each step on paper to then have the satisfaction of crossing things out once I have completed something. However, doing the GAANT layout helped me visualize the timeline I need to follow inorder to stay in check be sucessful. I have things organized more as goals/deadlines for different milestones of my project.
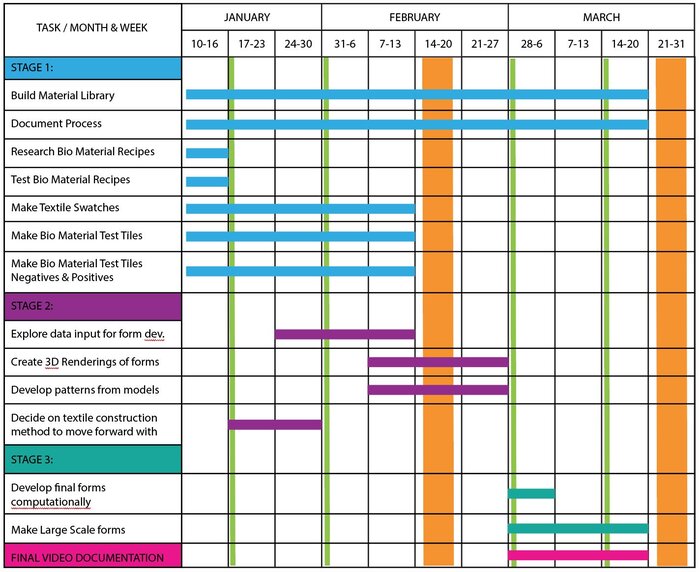
GAANT layout inspired by Olatz
Project Proposal
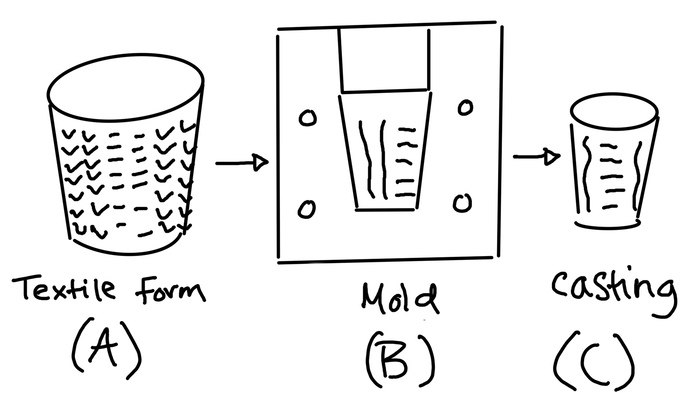
First Process: A - B - C - D
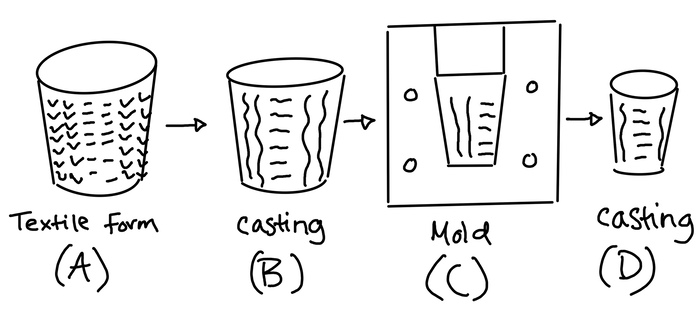
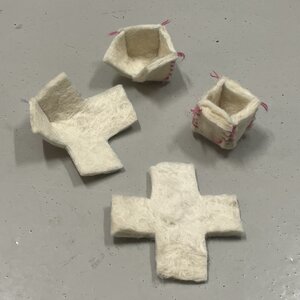
Taking inspiration from Mimmi Blomqvist ceramic casting process I looked into knit forms to casting a biomaterial in to then use for making a mold to then make a casting in the mold. This process involoved a lot of testing on textile and bio material compatibility and bio material to bio material compatibility.
Some recipe books and sites I used for recipe inspiration and reference to get started with:
BioPlastic Cook Book
Recipies for Material Activism
The Chemarts Cook Book
Nature Lab RISD
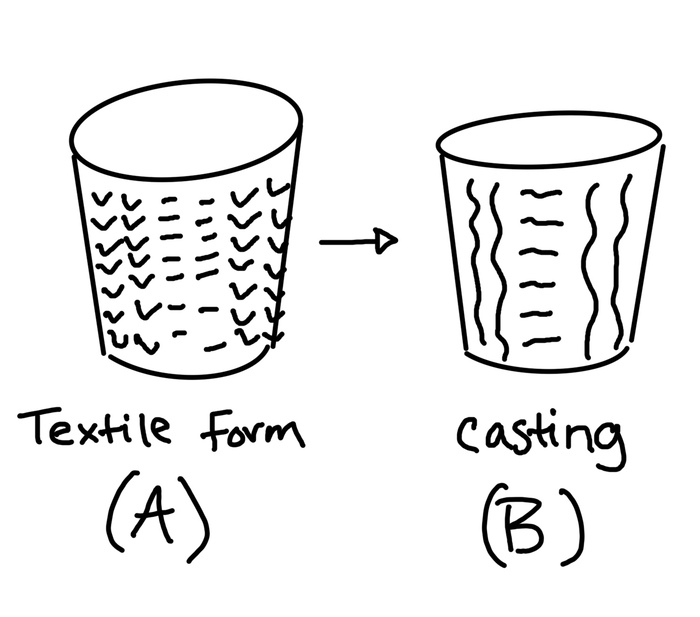
A - B (Textile and Casting)
Knit swatches and Forms
Below are the swatches I had made with how it was made, stitch pattern, and notes when using for making test tiles:
The goal of these swatches and forms were to see how compatible plaster and biomaterials are with the textiles with minimal leakage,ease in removing the biomaterial from textile, and reusability of the textile. The video below demonstrated how this compatibility went.
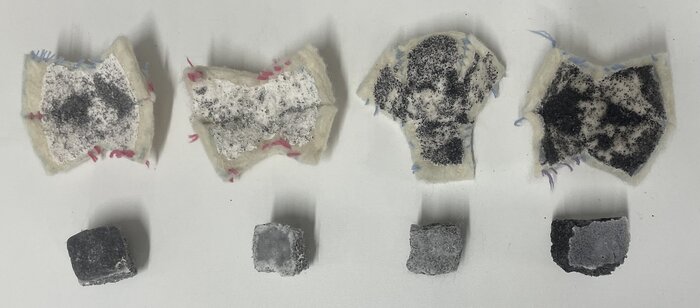
Tile and casting Tests
For the test tiles I laser cut frams to pour into with this file I made:
Tile laser cut file
  Laser Cut Settings:
  Speed: 9
  Power: 100
  Frequency: 10
Noted that if I were to make them again I would've laser cut them with acrylic instead of wood so they wouldn't warp over time.
Machine Knit Trouble Shooting
For the machine knit swatches I had some troubleshooting to over come because of my laziness to double check what the tension needed to be set at. So until I looked up the correct tension settings I was having issues with my carriage getting stuck because the stitches were too tight. But the Brother KH950 Manual was what I should have looked at before starting to get a proper refresher.
Test documentation:
And below is a recap video of the demolding of all the tile pieces.
Favorite recipe tests:

C - D (Molds and Casting)
To save space for photos on my gitlab I documented the recipe tests for molds and castings HERE.
Some key notes/take aways from the main tests I did:
With little eggshells to work with I looked at other food waste options and came across how to make Black Bean Tofu. I used the tofu recipe for pours in the cups and the excess "pulp" or waste from the tofu process to incorperate into the mold
Coating Molds Test Summary:
| Coating | Application | Result |
|---|---|---|
| Dish Soap | Brushed | Good Release |
| Aquafaba | Soak | Hit or Miss |
| Freezing | Freeze | Good Release |
Evaluating Process
- A (Textile):
- Sticking: bio material getting stuck in stitches and hairiness of fiber
- Time consuming for development
- Textiles were resuable and washable
- B (Casting):
- Picked up textures nicely
- Hard to remove from textiles
- Used a lot bio-material
- C (Molds):
- Melted or deformed when used for casting
- Used A LOT of bio-material
- Deformation of pulp molds when dried in dehydrator at 70C
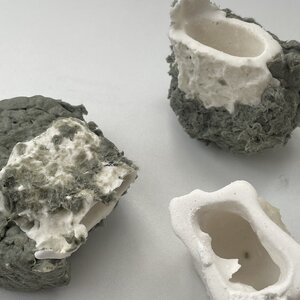
- D (Casting):
- Bio-material fuzing with no release agent
- Pulp sticks to casting
- Solid form that uses a lot of bio-material and not a vessel form
Recycling
When I was starting to run low on eggshells I looked into if it was possible to recycle my tests like one can with a "normal" clay body. With clay you just soad down an unfired piece to recyle it, but with the gelatin based recipes I had to use boil hot water to begin the disolving process of the gelatin.
Process
Indgredients
- Gelatin based casting
- Essentail Oil
- Boiling H2O
- Pot
- Stove top
- Spoon
- Prepared mold
Process
- Bring water to a boil in a pot
- Add gelatin based castings to recyle
- Add a few drops of essential oil
- Let dissolve
- Let it boil down to a liquidy paste
- Pour into a new mold
- Demold and let dry fully

Results:
- Egg geltain only
- Really easy to recycle
- Egg gelatin + sand
- Sand would settle at the bottom
- Egg gelatin + ash
- Ash wouldn't settle as much as sand but with the amount of gelatin that were in the orginal castings it had a pretty strong smell
- Sugar gelatin
- Really hard to recycle
- Salt gelatin
- Really hard to recycle too
Revising the Process
After reflecting on the ABCD process I looked for ways to revise it to be more economical with the materials I had. I also changed my focus from knitting to felting and sewing/quilting as I could have more "control" of the forms I wanted to cast. I first tested just having an AB process, but came across some complications with the bio material sticking to the felt. Then revised again and went forward with the ABC process that I used for my final pieces.
A - B
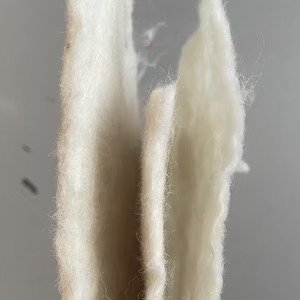
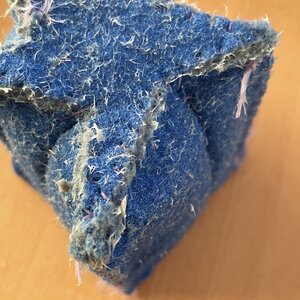
A (Felting Samples)
I first started felting with raw wool that I wet felted and then machine felted and did different thickness tests to see if it would impact the leakage of any bio material.
B (Casting Tests)
At this time we were without a coffee grinder for me to grind my eggshells with and so I played around more with potato starch and salt based recipes with sand as a filler. Which were documented HERE under the Salt & Starch tab.
The biggest issue was the hairiness of the felt getting caught and ripping the biomaterial as the felt was peeled off.
I did do one undocumented test of pouring into a frozen felted mold, but that will need to be revisted to get more reliable tests to compare.
A - B - C
Mid Term Presentation
A (Sand Stuffed Felted Form)
The forms I tested with were hand cut and sewn felted scraps I had from my earlier tests and some industrial made craft felt. I stuffed them with sand to give them volume for when I would make molds with them.
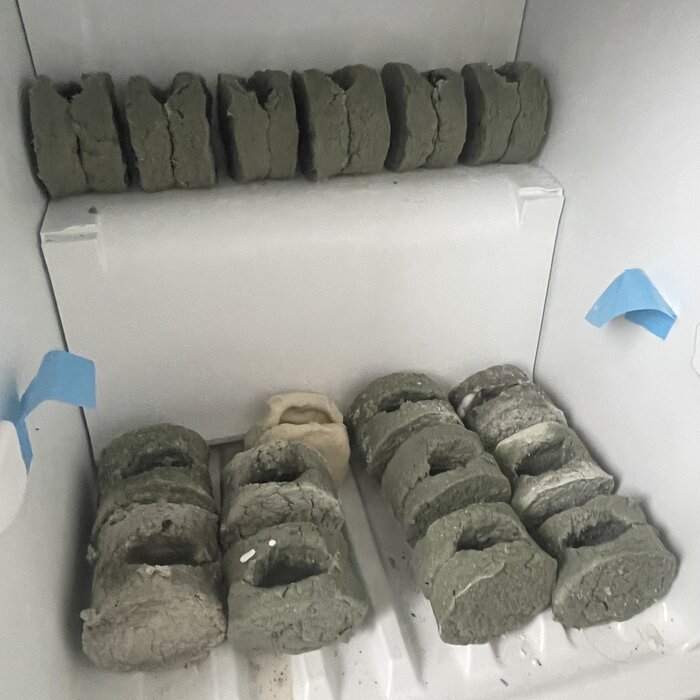
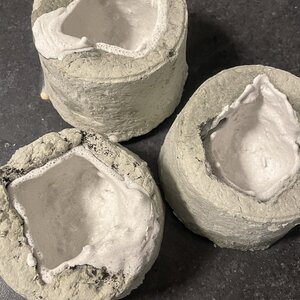
B (Frozen Molds)
The paper pulp molds I had been testing with before were dried out in the dehydrator and then used for casting to then be put in the freezer to set the castings. This involved using clamps and coating the molds with dish soap or aquafaba so the castings wouldn't rip off the paper pulp. I then wondered what would happen if I were to freeze the mold which the pulp was still wet and the results were just what I was looking for. A 1 part mold that I could cast in, set the casting without having to put it back in the freezer, and just let defrost to demold. I was still having issues with the pulp sticking, but not as badely and then when doing the final dishes set realized that I could "coat" the inside of the mold with strips of cardboard to the peel off after casting.
Process 1 is with the dry molds and Process 2 is with the wet molds
Materials
- Paper waste
- Hot or cold water
- Buckets
- Hand mixer
- Strainer
- Cup
- Flour clay
- Mold frame
- Sponge
Process1
- Shred/tear up paper waste
- Soak with hot or cold water for a few hours or overnight in bucket
- Use hand mixer to blend up. Add more water if it gets too thick
- Have mold frame prepared before hand with seams sealed with flour clay and felted form in the right position
- Scoop a cup of paper pulp into the strainer that will drain into another bucket
- Press out as much water as possible, but not so much that it becomes super dry
- Take damp pulp and press into mold frame around the felted form
- Repeat 5-8 until the felted form have about 1-1.5 inches of pulp covering it
- Compact the pulp mold with a sponge to soak up any excess water
- Flip mold frame over onto another moveable surface
- Remove mold frame walls
- Pull out the felted form carefully
- Smooth out any cracks
- Put in dehydrator at 40C overnight
- Clamp together after dry
- Coat interior with soap
- Put in freezer overnight before using for casting
Process2
- Shred/tear up paper waste
- Soak with hot or cold water for a few hours or overnight in bucket
- Use hand mixer to blend up. Add more water if it gets too thick
- Have mold frame prepared before hand with seams sealed with flour clay and felted form in the right position
- Scoop a cup of paper pulp into the strainer that will drain into another bucket
- Press out as much water as possible, but not so much that it becomes super dry
- Take damp pulp and press into mold frame around the felted form
- Repeat 5-8 until the felted form have about 1-1.5 inches of pulp covering it
- Compact the pulp mold with a sponge to soak up any excess water
- Flip mold frame over onto another moveable surface
- Remove mold frame walls
- Pull out the felted form carefully
- Smooth out any cracks
- Put in freezer overnight or until ready to cast with
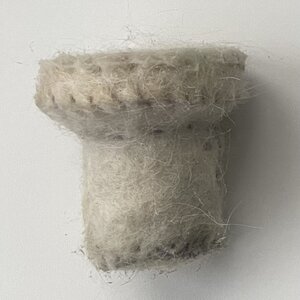
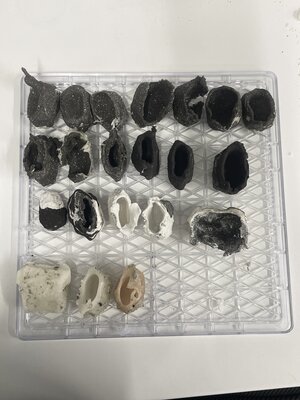
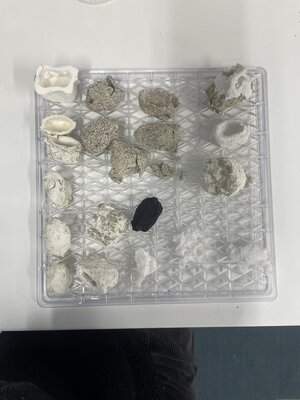
C (Casting tests)
The ratio and casting tests I did started with the dry molds, but then adapted to the frozen molds. The recipies can be found HERE and have detailed notes of each test. The goal of the ratio tests were to find the right consistency and timing for building a sturdy wall thickness and which fillers I wanted to use with the gelatin. Here is when I explored casting with sugar, marbling eggshells and ash, and salt recipies.
Final Process
Go to Final Process
Storytelling
There was a lot of revising that went into the storytelling of my project to incorrperate the concepts of connection, knowlege sharing, and the climate crises.
Video Message
I had read Andri Snær Magnason's book On Time and Water to gain a different perspective about how to talk about the climate crisis. I really resonated and was inspired by his concept about what your "life time" is and how it spans across those you interact with from you grandparents to your grandchildern. Here is a quote that speaks to this concept:
    "Imagine your time. I was born in 2008, and you'll know a person who'll
    still be alive in 2260 That's the length of time you connect, more than
    250 years. The time you can touch with your own hands. Your time is the
    time of the people you know and love, the time that molds you. And your
    time is also the time of the people you will know and love. The time
    that you will shape. Everything you do matters. You create the future
    every single day." (pg139)
In addition to the quote I have been very inspired by Iceland's glaciers throughout this whole project and reflected on what it might be like to have a conversation/get advice from a glacier. And so I materialized a story that connected my glacial inspiration and material resources with the act of knowlegde sharing the Bio-Pottery process and incorrperating the concerns of climate change.
Storyboard and Script
The letter was a big part in paying homage to our glaciers and the advice or inspiration they have given me by observing and researching them. The letter also speaks to the evolution of craft and is a call to action to explore to grow to community of bio-potters and see what local resources they can utilize for this accessabile nomadic process of "slip casting ceramics".
The Letter:

Dear Friend,

Look at these bio-pottery dishes I made.
They materialize our connection with our local resources and
evolution of craft across time.
May these glacial bio-pottery dishes inspire you…

… to carve your own path

… to layer and build the memories that shape you

… to keep moving under your pressures

… to not fight what you cannot control

… to be vocal in your progress

… to give as much as you take

… and to build a reservoir of knowledge to inspire others

Now look and explore what local resources you can use to make
your own bio-pottery.

Best,
Alice Sowa
Filming
The filming of process only took an evening. I had Sigurgeir Thoroddson be my actor while I filmed and directed him. There were some scenes where he had to hold the phone/camera as it was an action secene from his perspective. Below were the tools used while filming:
Tools
- iPhone 12 mini
- Bench/stool
The props for the filming included a box to hold the "shipped" glacial bio pottery pieces and a "booklet" of the bio pottery process. Below are the files that I made to the "caution tape" and bio pottery "booklet" cover.
Caution Tape
Booklet Cover
Editing
I used Videoleap to edit my video. I have been using this program on my phone and ipad for the past 7 years and have the yearly subscription to have access to all the editing features. In addition to the filming I did of opening the box and my pieces I used downloaded youtube videos and soundscapes to collage into the video linked below:
Iceberg
USPS Mail Truck
CBSN News Report
Glacial Soundscape 1
Glacial Soundscape 2