02_DIGITAL BODIES
Overview
The second week’s assignment was for me about design at the intersection of fiction and reality. As the name Digital bodies imply, the digital and nothing-is-impossible-world in the assignment combines its possibilities to manipulate the known, as a (human) body, through the capabilities of technology and its applications. The assignment was also about the contrast and combination of the precise tools we used, such as laser cutter, and unique organic forms that represent the natural world.
Inspiration and Reference
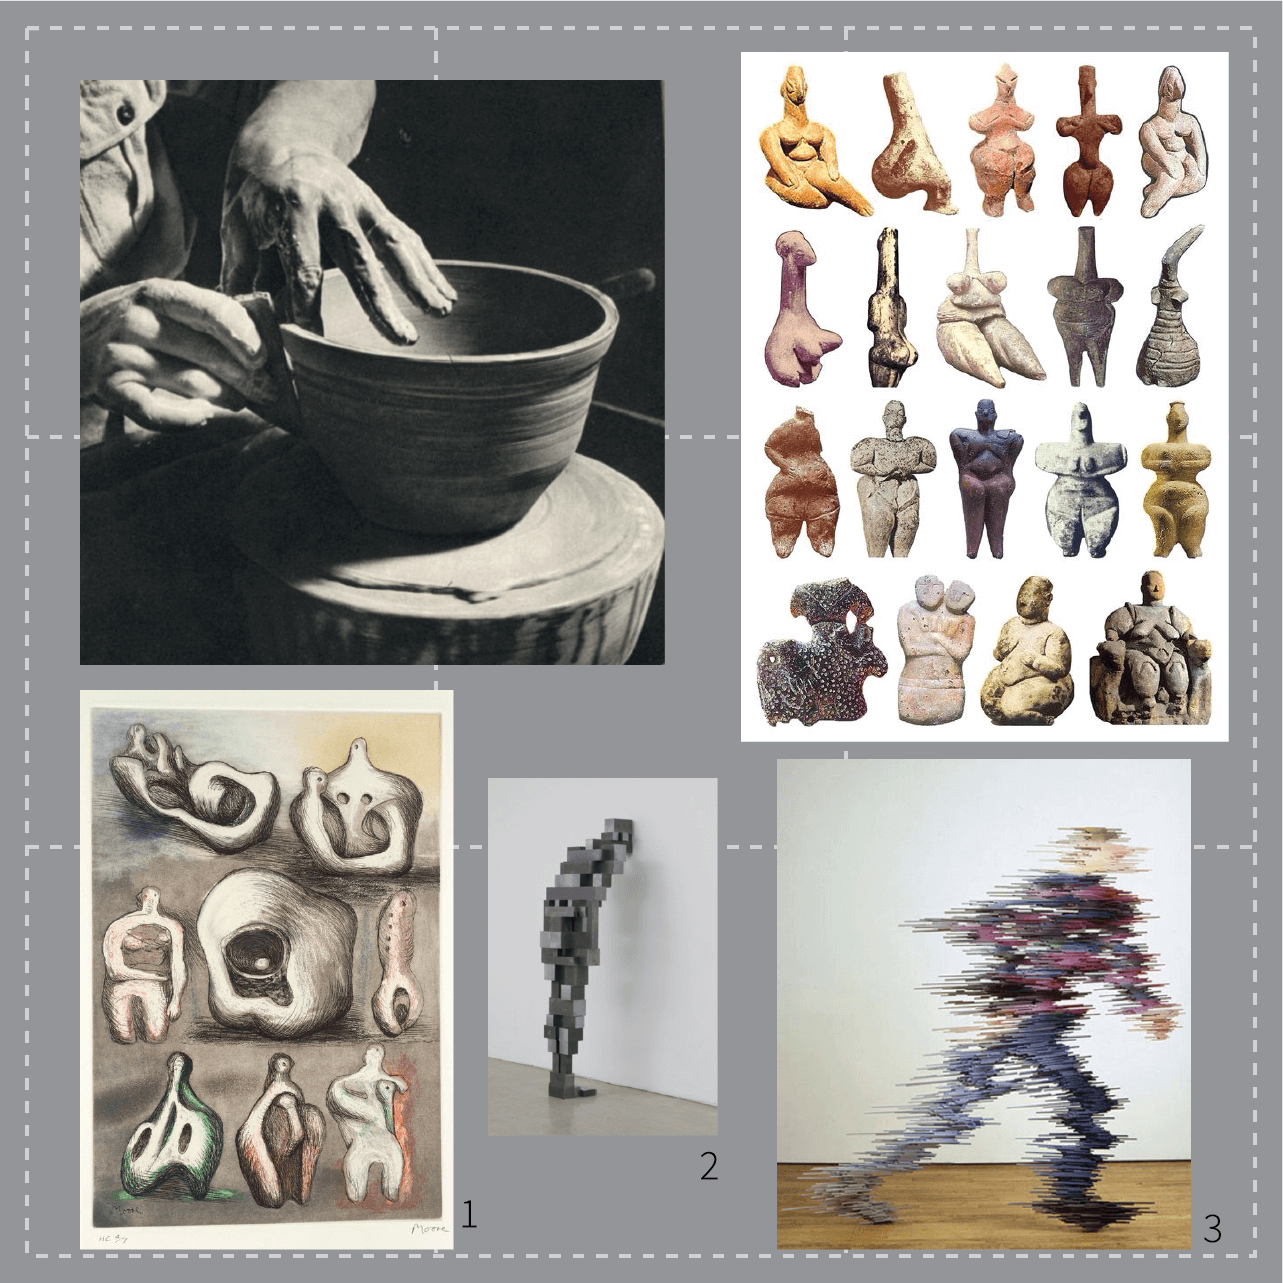
1 – Henry Moore
Technology this week
3D Scanning
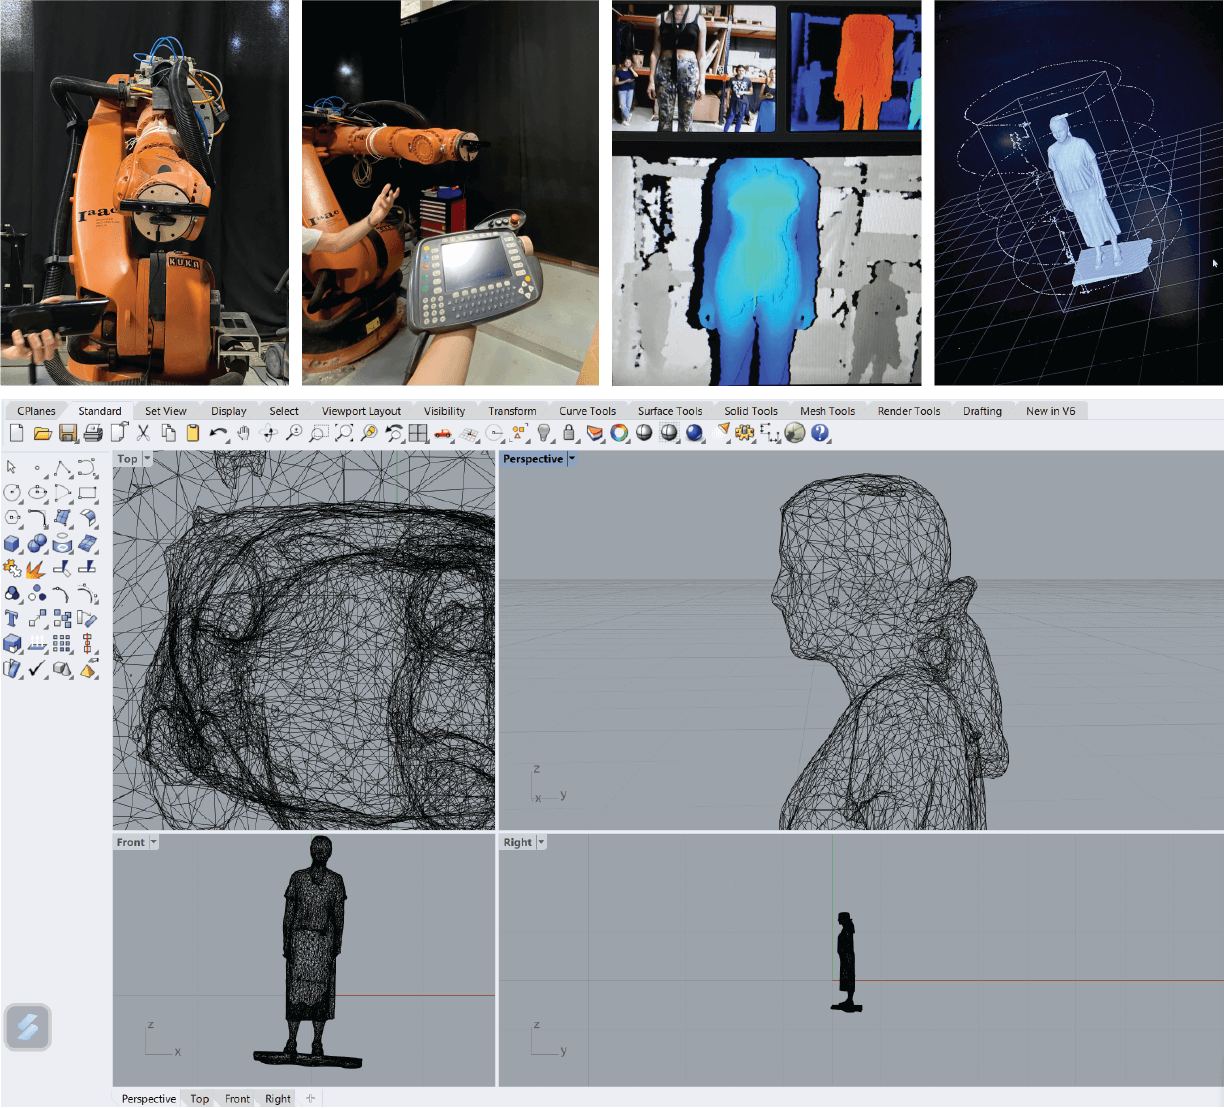
The second week, we were introduced to scanning a human body with the KUKA robot and [Kinect for 3D scanning]https://structure.io/skanect). The process of scanning on a big scale – a body, was exciting. Each of us was positioned on the rotating board to be fully scanned.
How it goes?
3D scanning is the process of creating digital representations, known as 3D models, of real-world objects or environments. This technology has a wide range of applications in fields such as manufacturing, medical imaging, reverse engineering, cultural heritage preservation, and computer graphics. With that technology, we were able to obtain a cloud of points that were later translated into solid objects with the help of Rhino program.
We scanned each other in 3 main levels, bottom, middle and top of the body. We did that so the scanner could collect multiple points and the results would be more precise, best. To operate the KUKA robot we used a control panel to move the robotic hand with scanner attached.

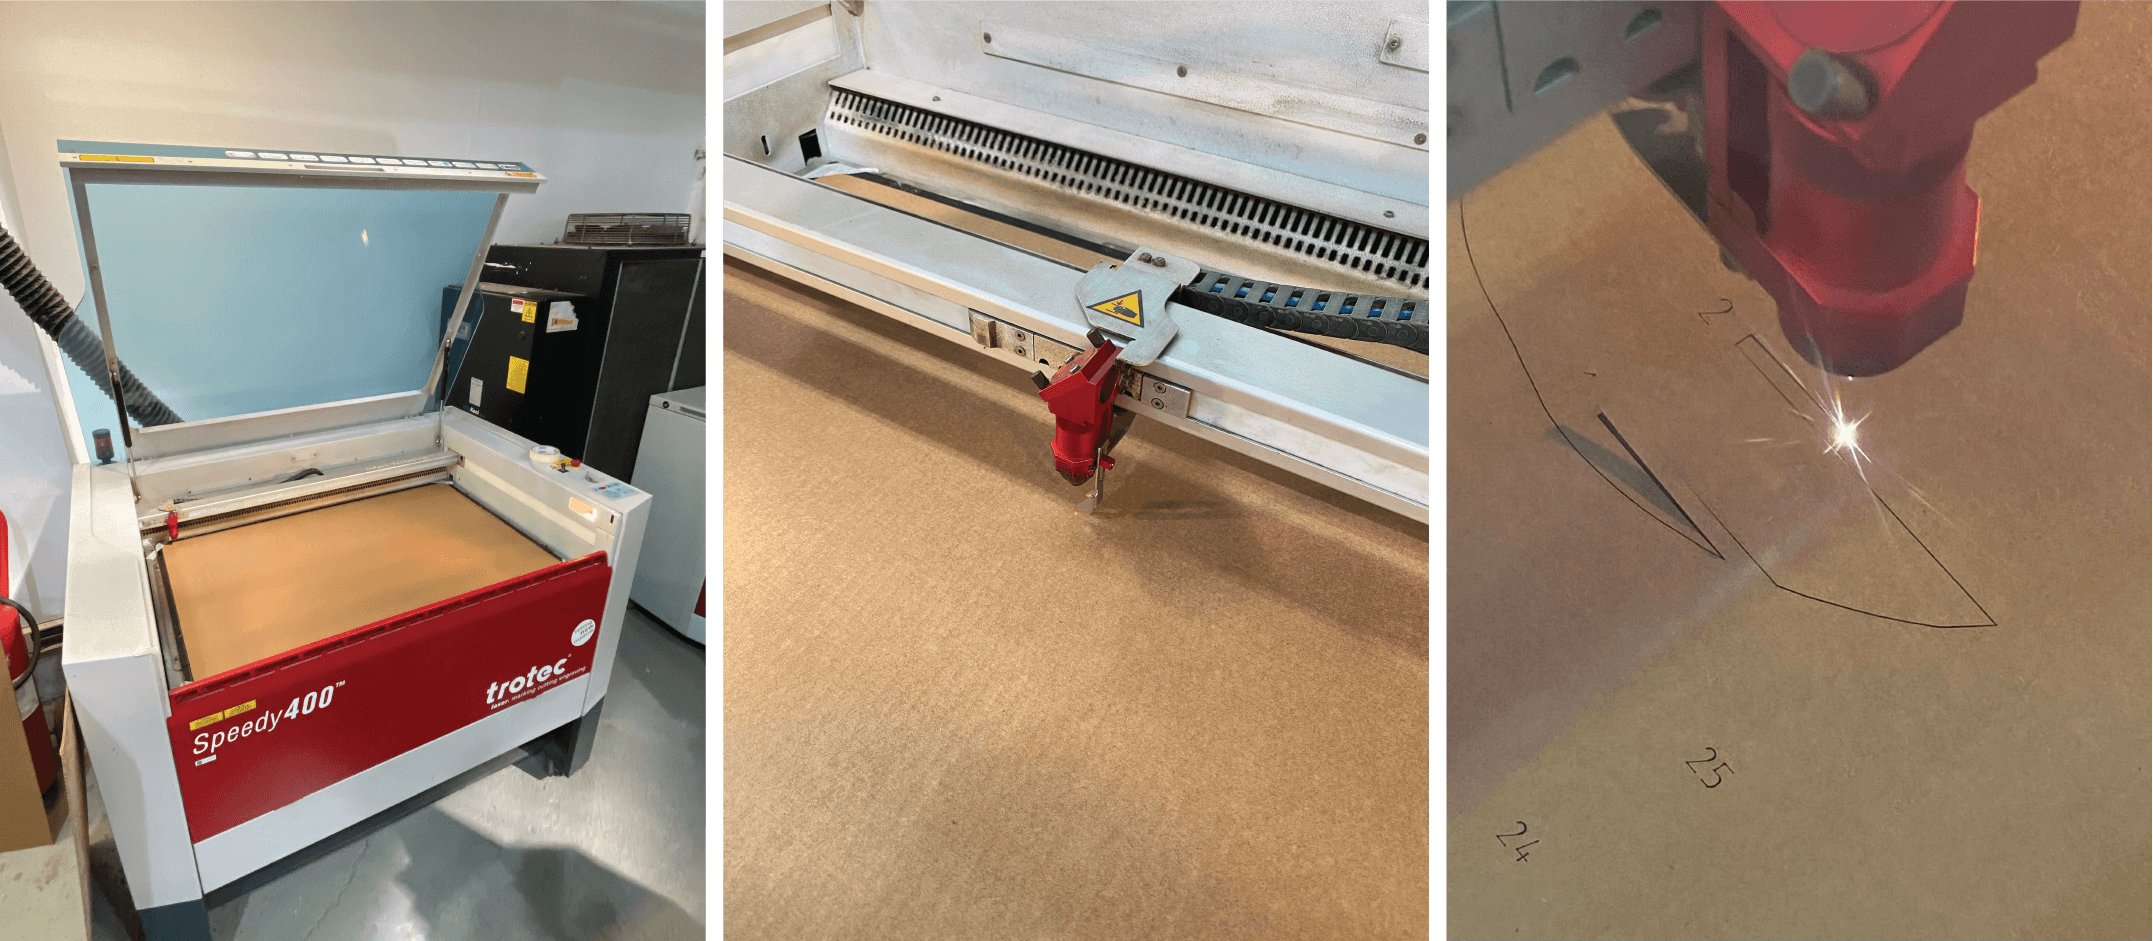
Laser cutting

Laser cutting is a technology that employs a beam of laser to cut or engrave materials with exceptional precision. It is a versatile method that finds application in various industries like manufacturing, crafting, prototyping, etc. The technique offers several advantages, including the capability to cut intricate shapes, high speed, and accuracy.
Materials you can use for laser cutting:
• Acrylic: Commonly used for signage, displays, and prototypes
• Wood: Used for crafting, furniture production, and architectural models
• Paper and Cardboard: Ideal for intricate paper cutting, packaging, and card design
• Metal: Fiber lasers are used for cutting metals such as steel and aluminium
• Textiles and Fabrics: Used in the fashion industry for cutting patterns and designs
• Plastics: Suitable for various plastics used in manufacturing
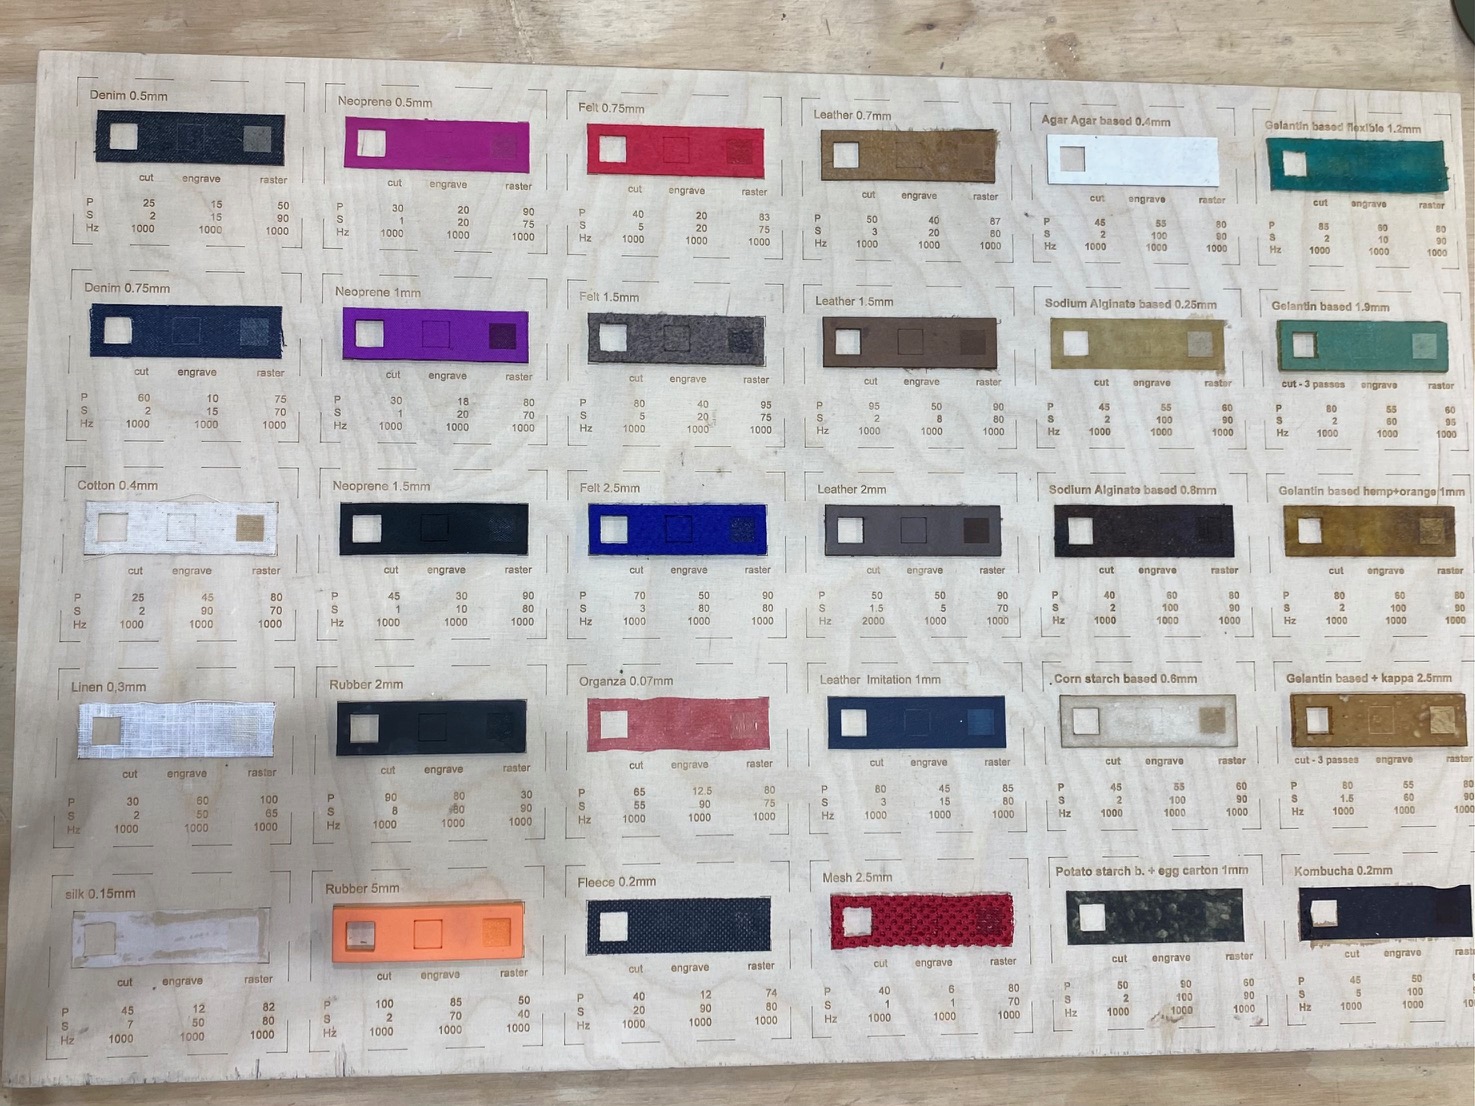
Example - settings I used for cutting the cardboard:
| Power | Speed | Hz |
| 30 | 1 | 1000 |
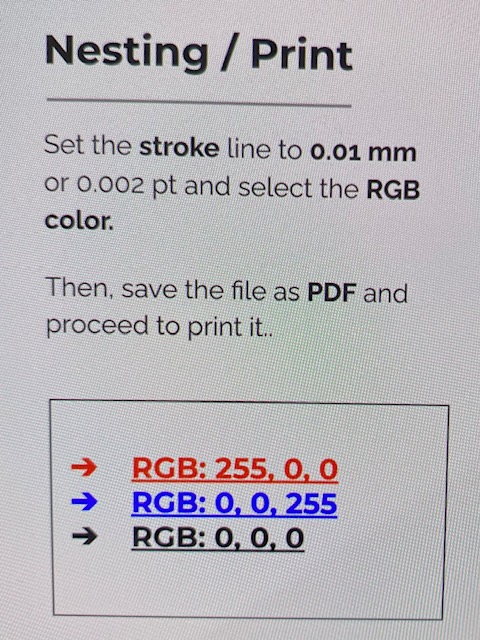
When laser cutting or engraving, you have to make sure the steps for cutting the design are followed by next colors:

When setting the nesting, use the following color code:
Other tools
- to compress images: TinyPNG
- free 3D models in OBJ or STL files: Thingiverse
- a free program to generate a 3D human body: Makehuman
- program for sculpturing a body or an object from a mesh: Autodesk Meshmixer
- program to slice an object and generate plans: Slicer for Fusion 360
- Rhino 6 and 5
- Adobe Illustrator
- iPhone :)
Ideation
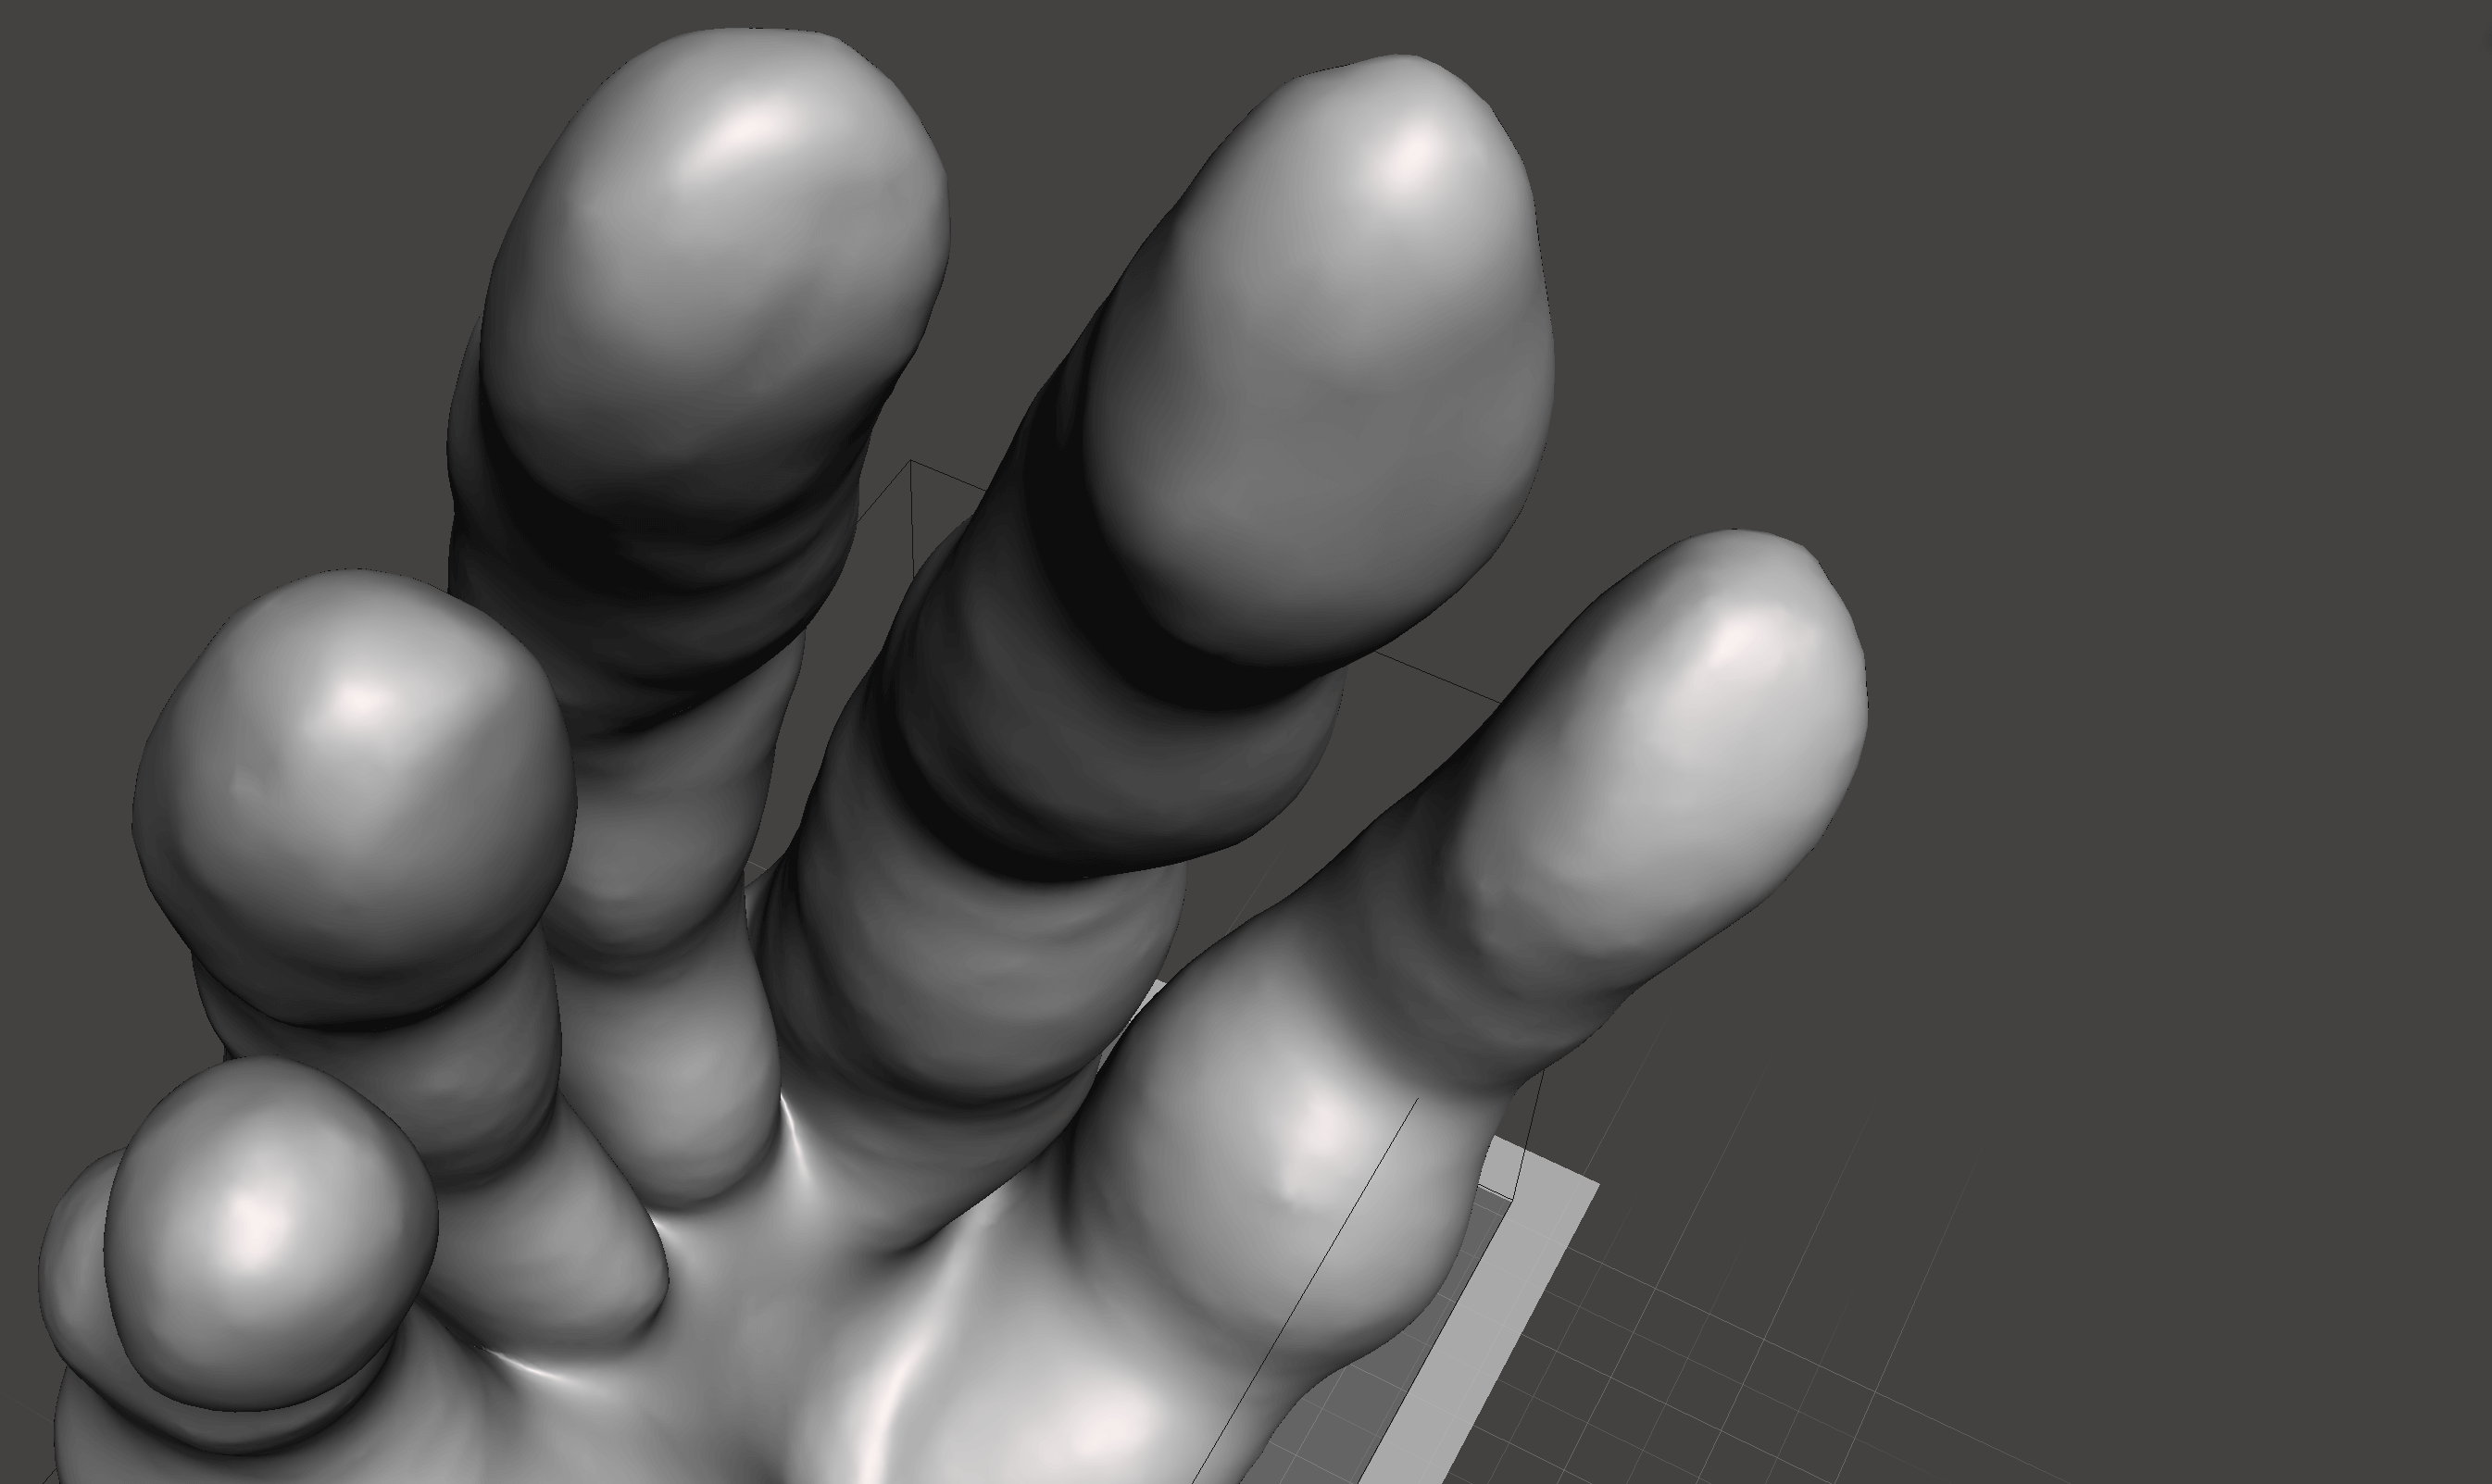
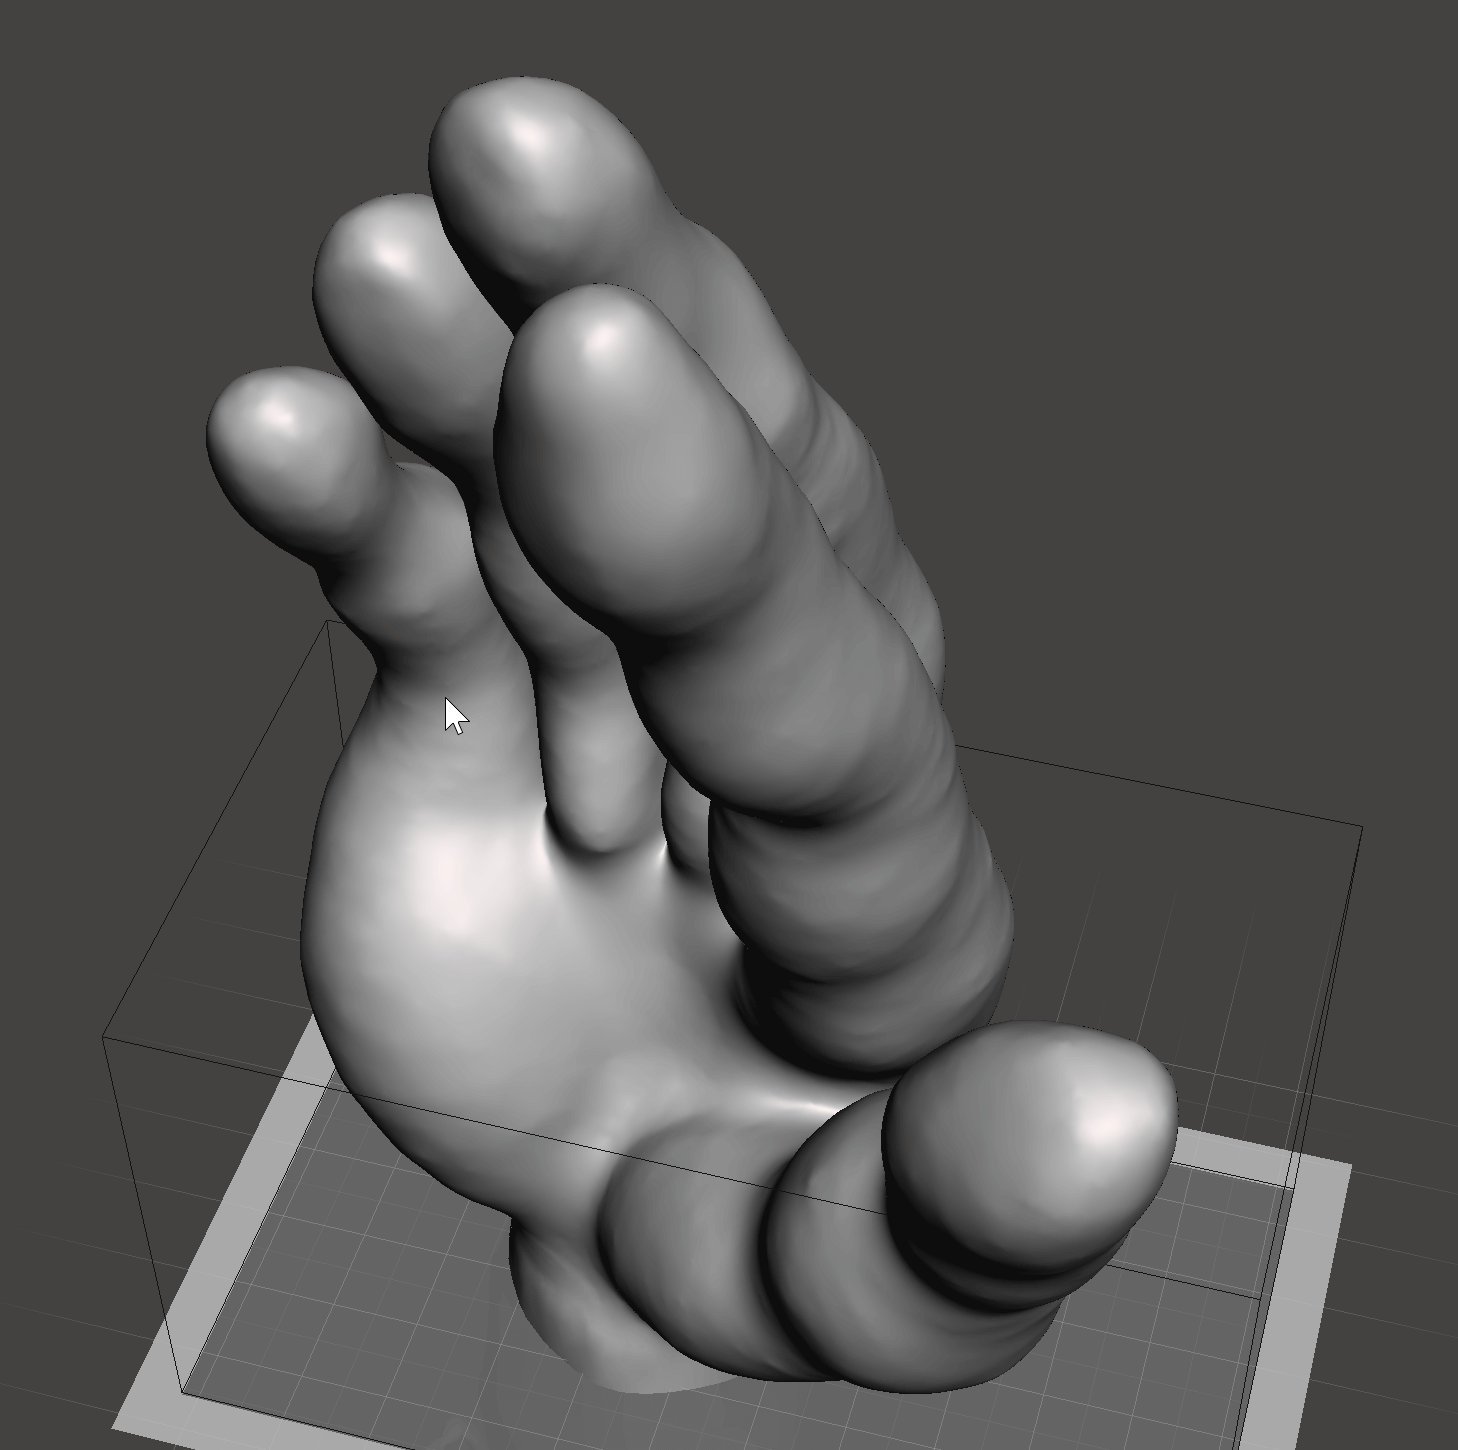
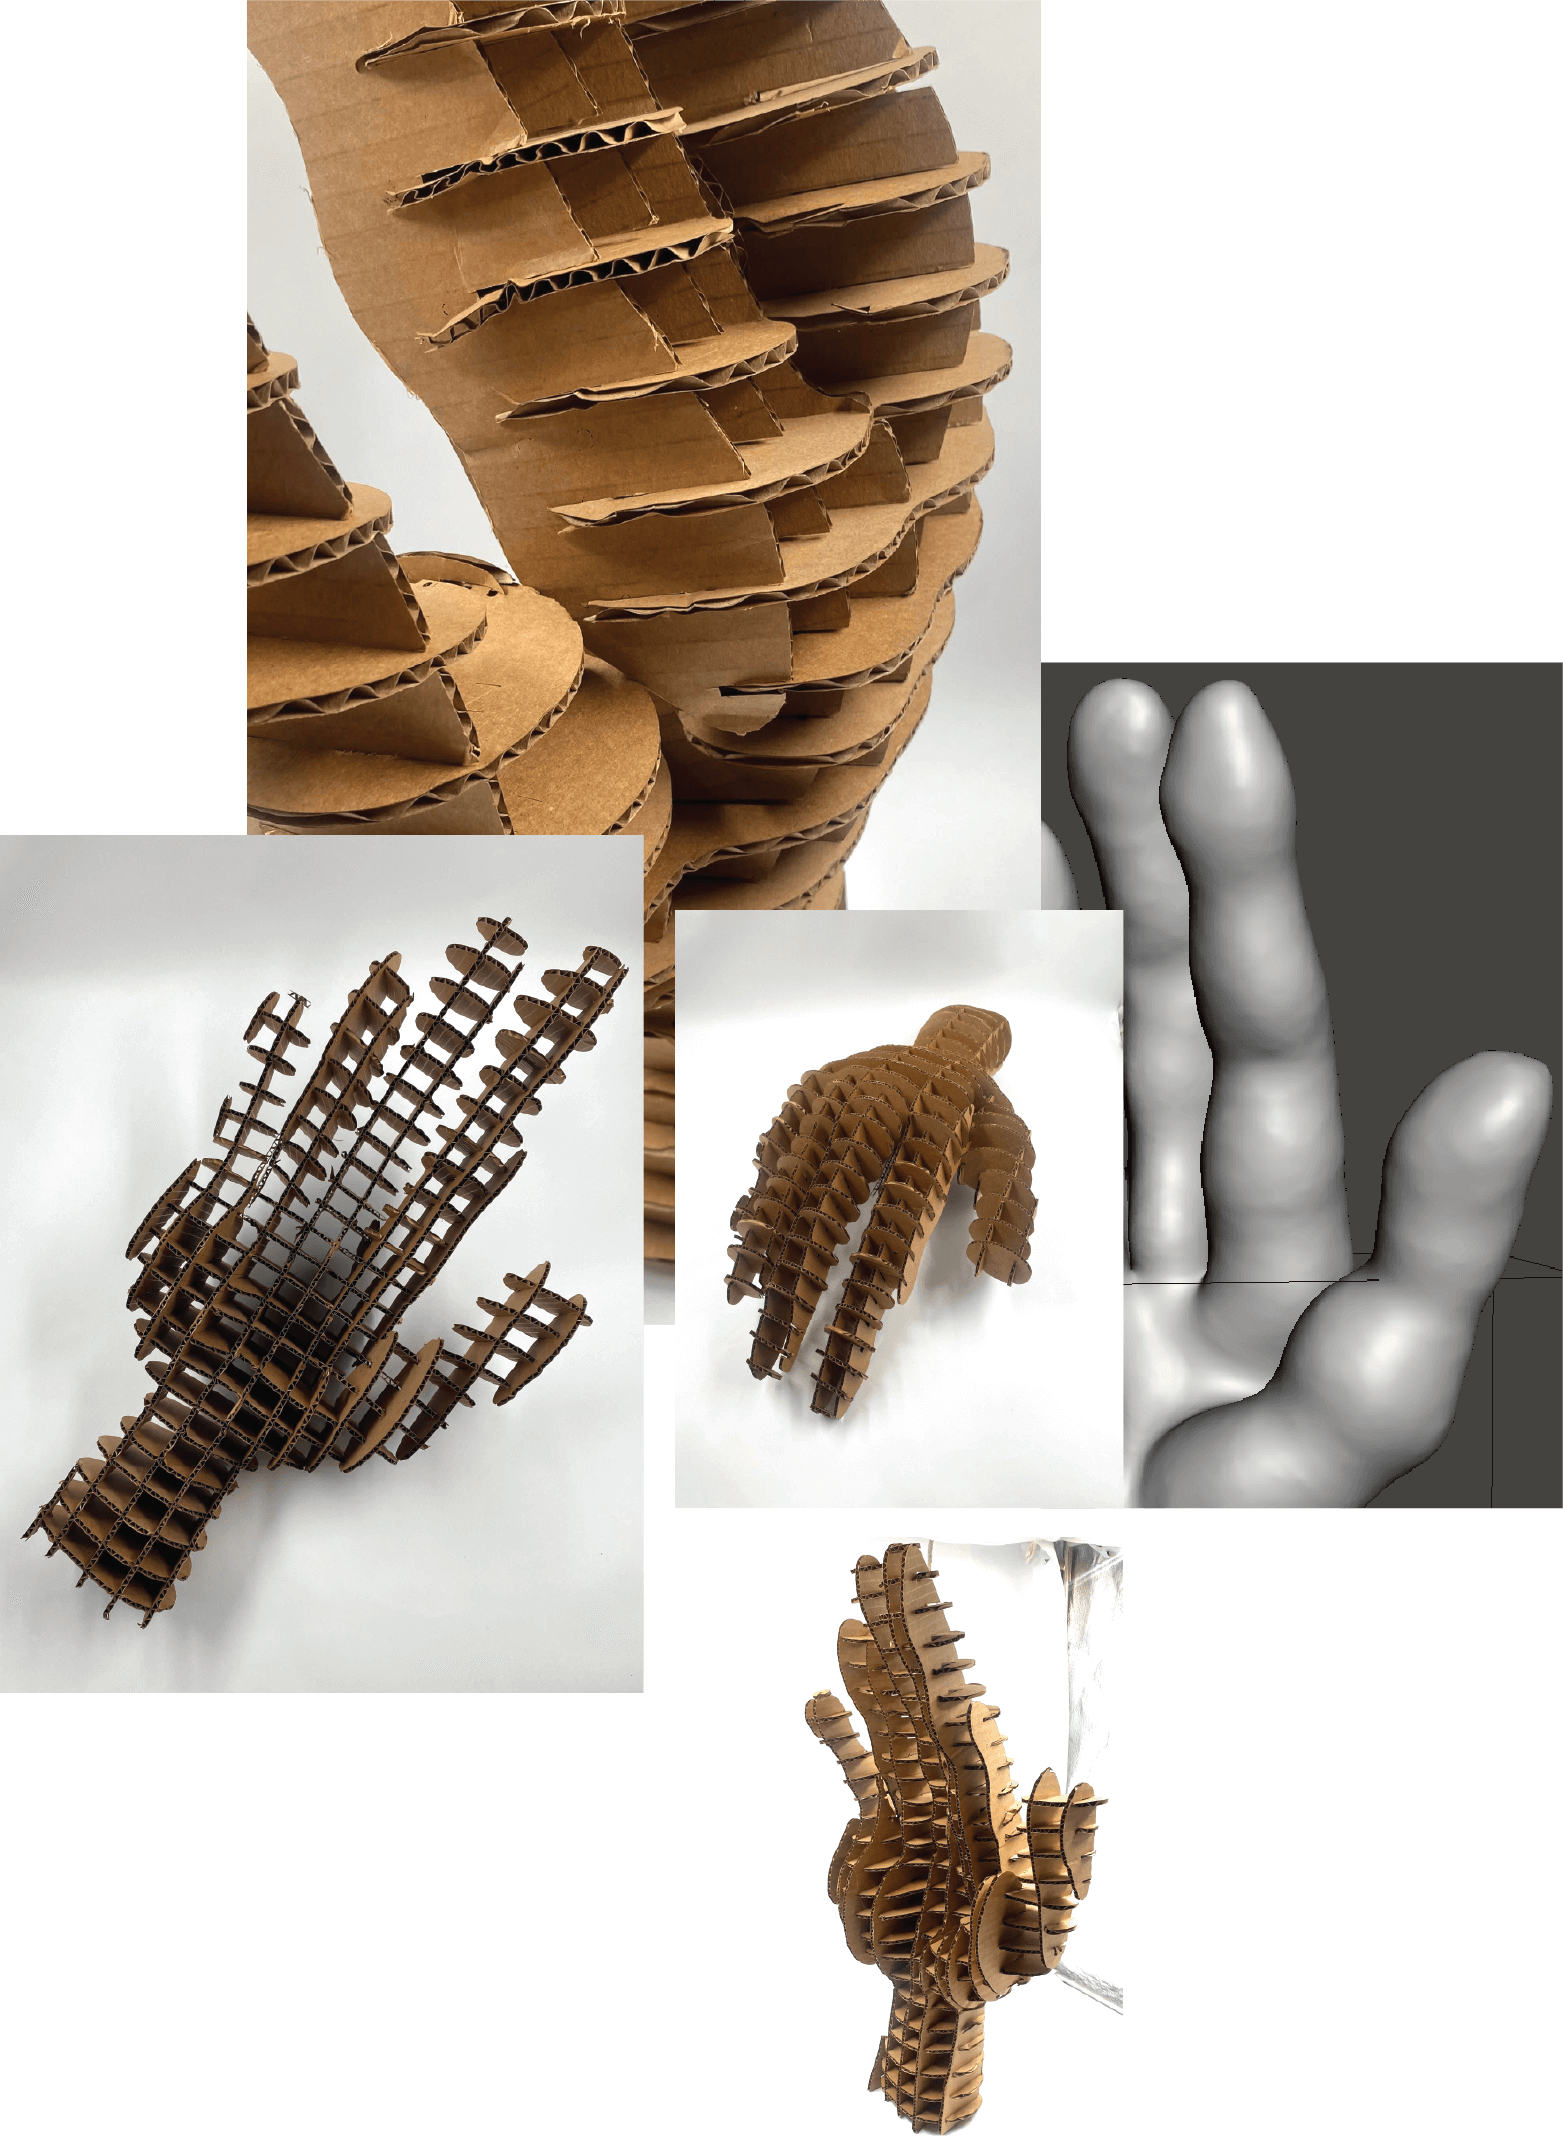
I chose a hand as a body part that represents an extension of a mind as a translator of a thought. For our body, a hand is a tool with which we communicate, feel, touch, express, eat, make, craft, and many more. I wanted to apply the possibilities of technology and digital tools to this assignment to design a deformed palm with elongated fingers that would resemble that extension.
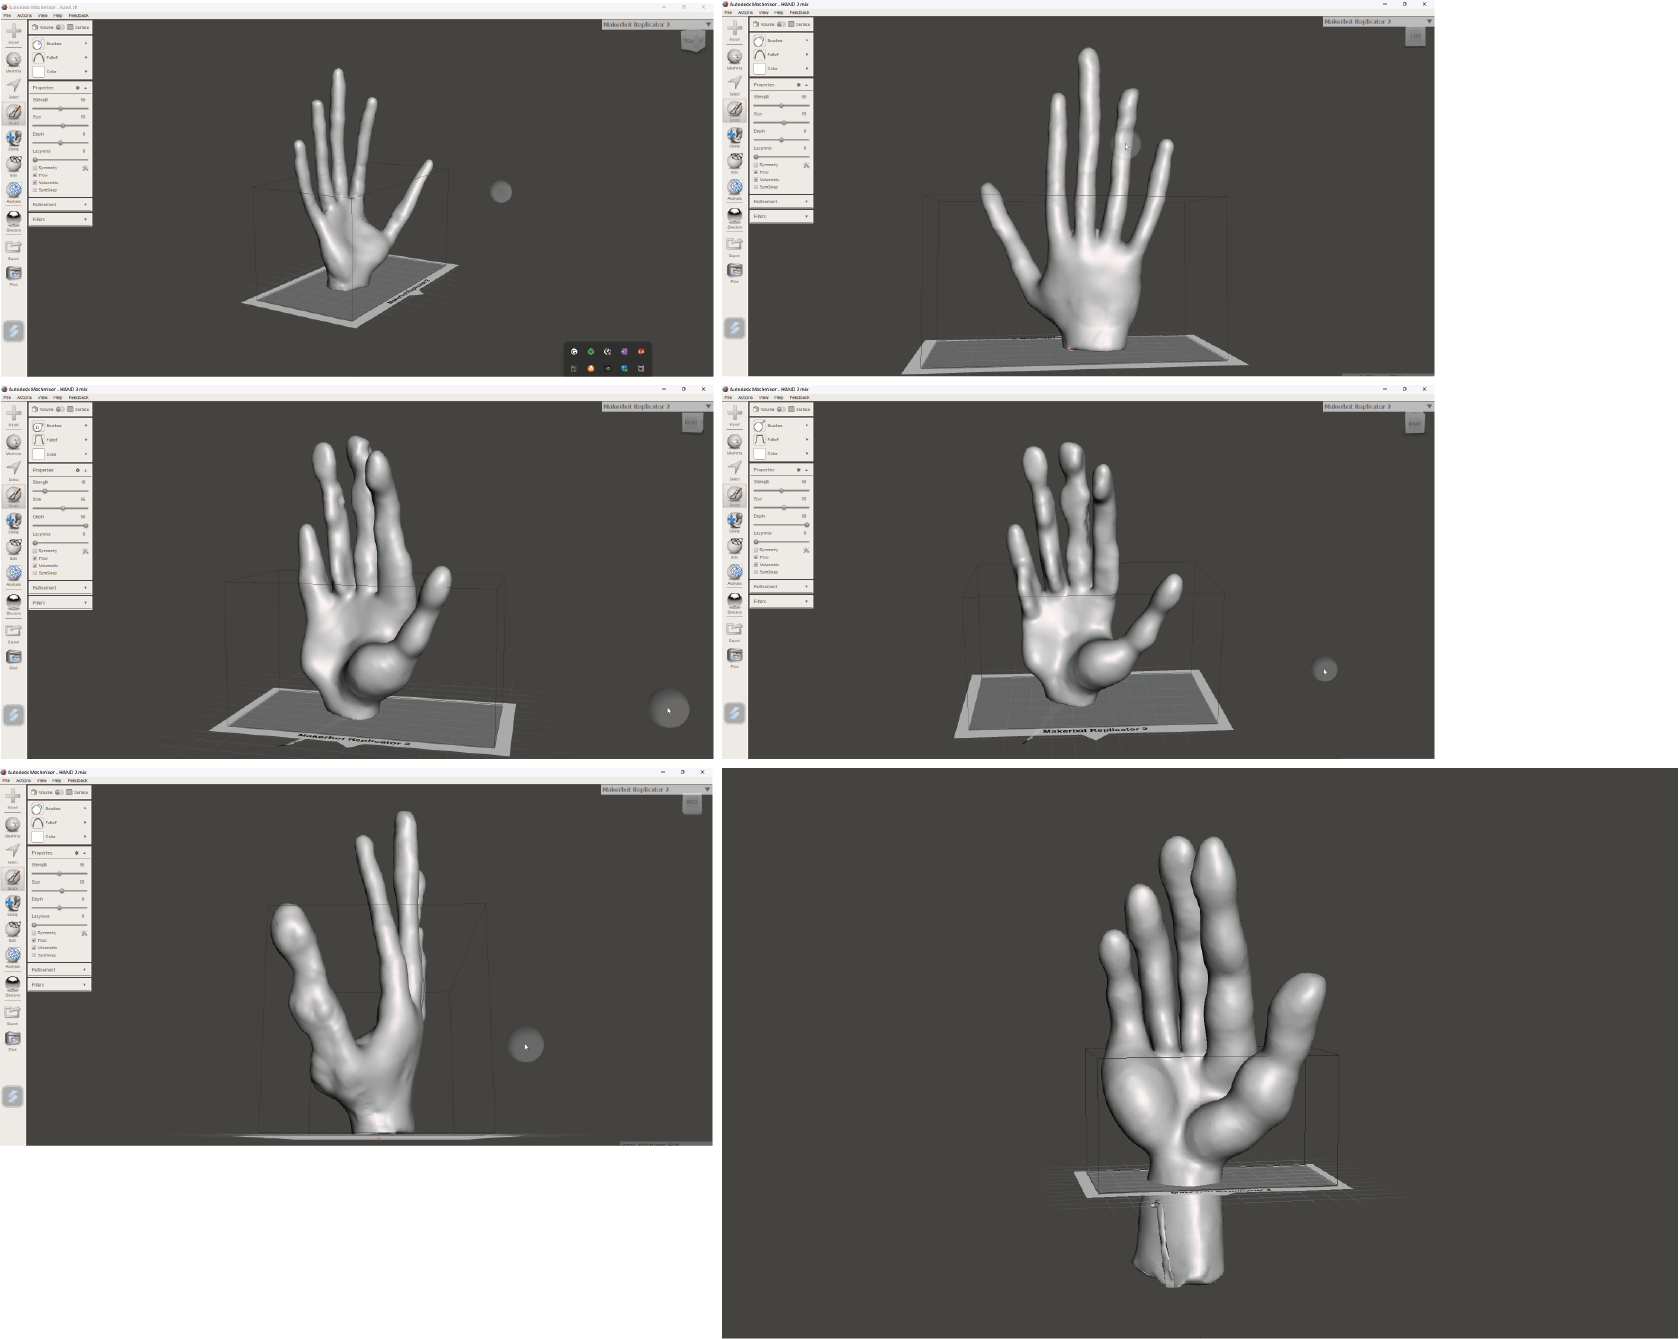
Step 1 -I downloaded the 3D hand available at Thingverse

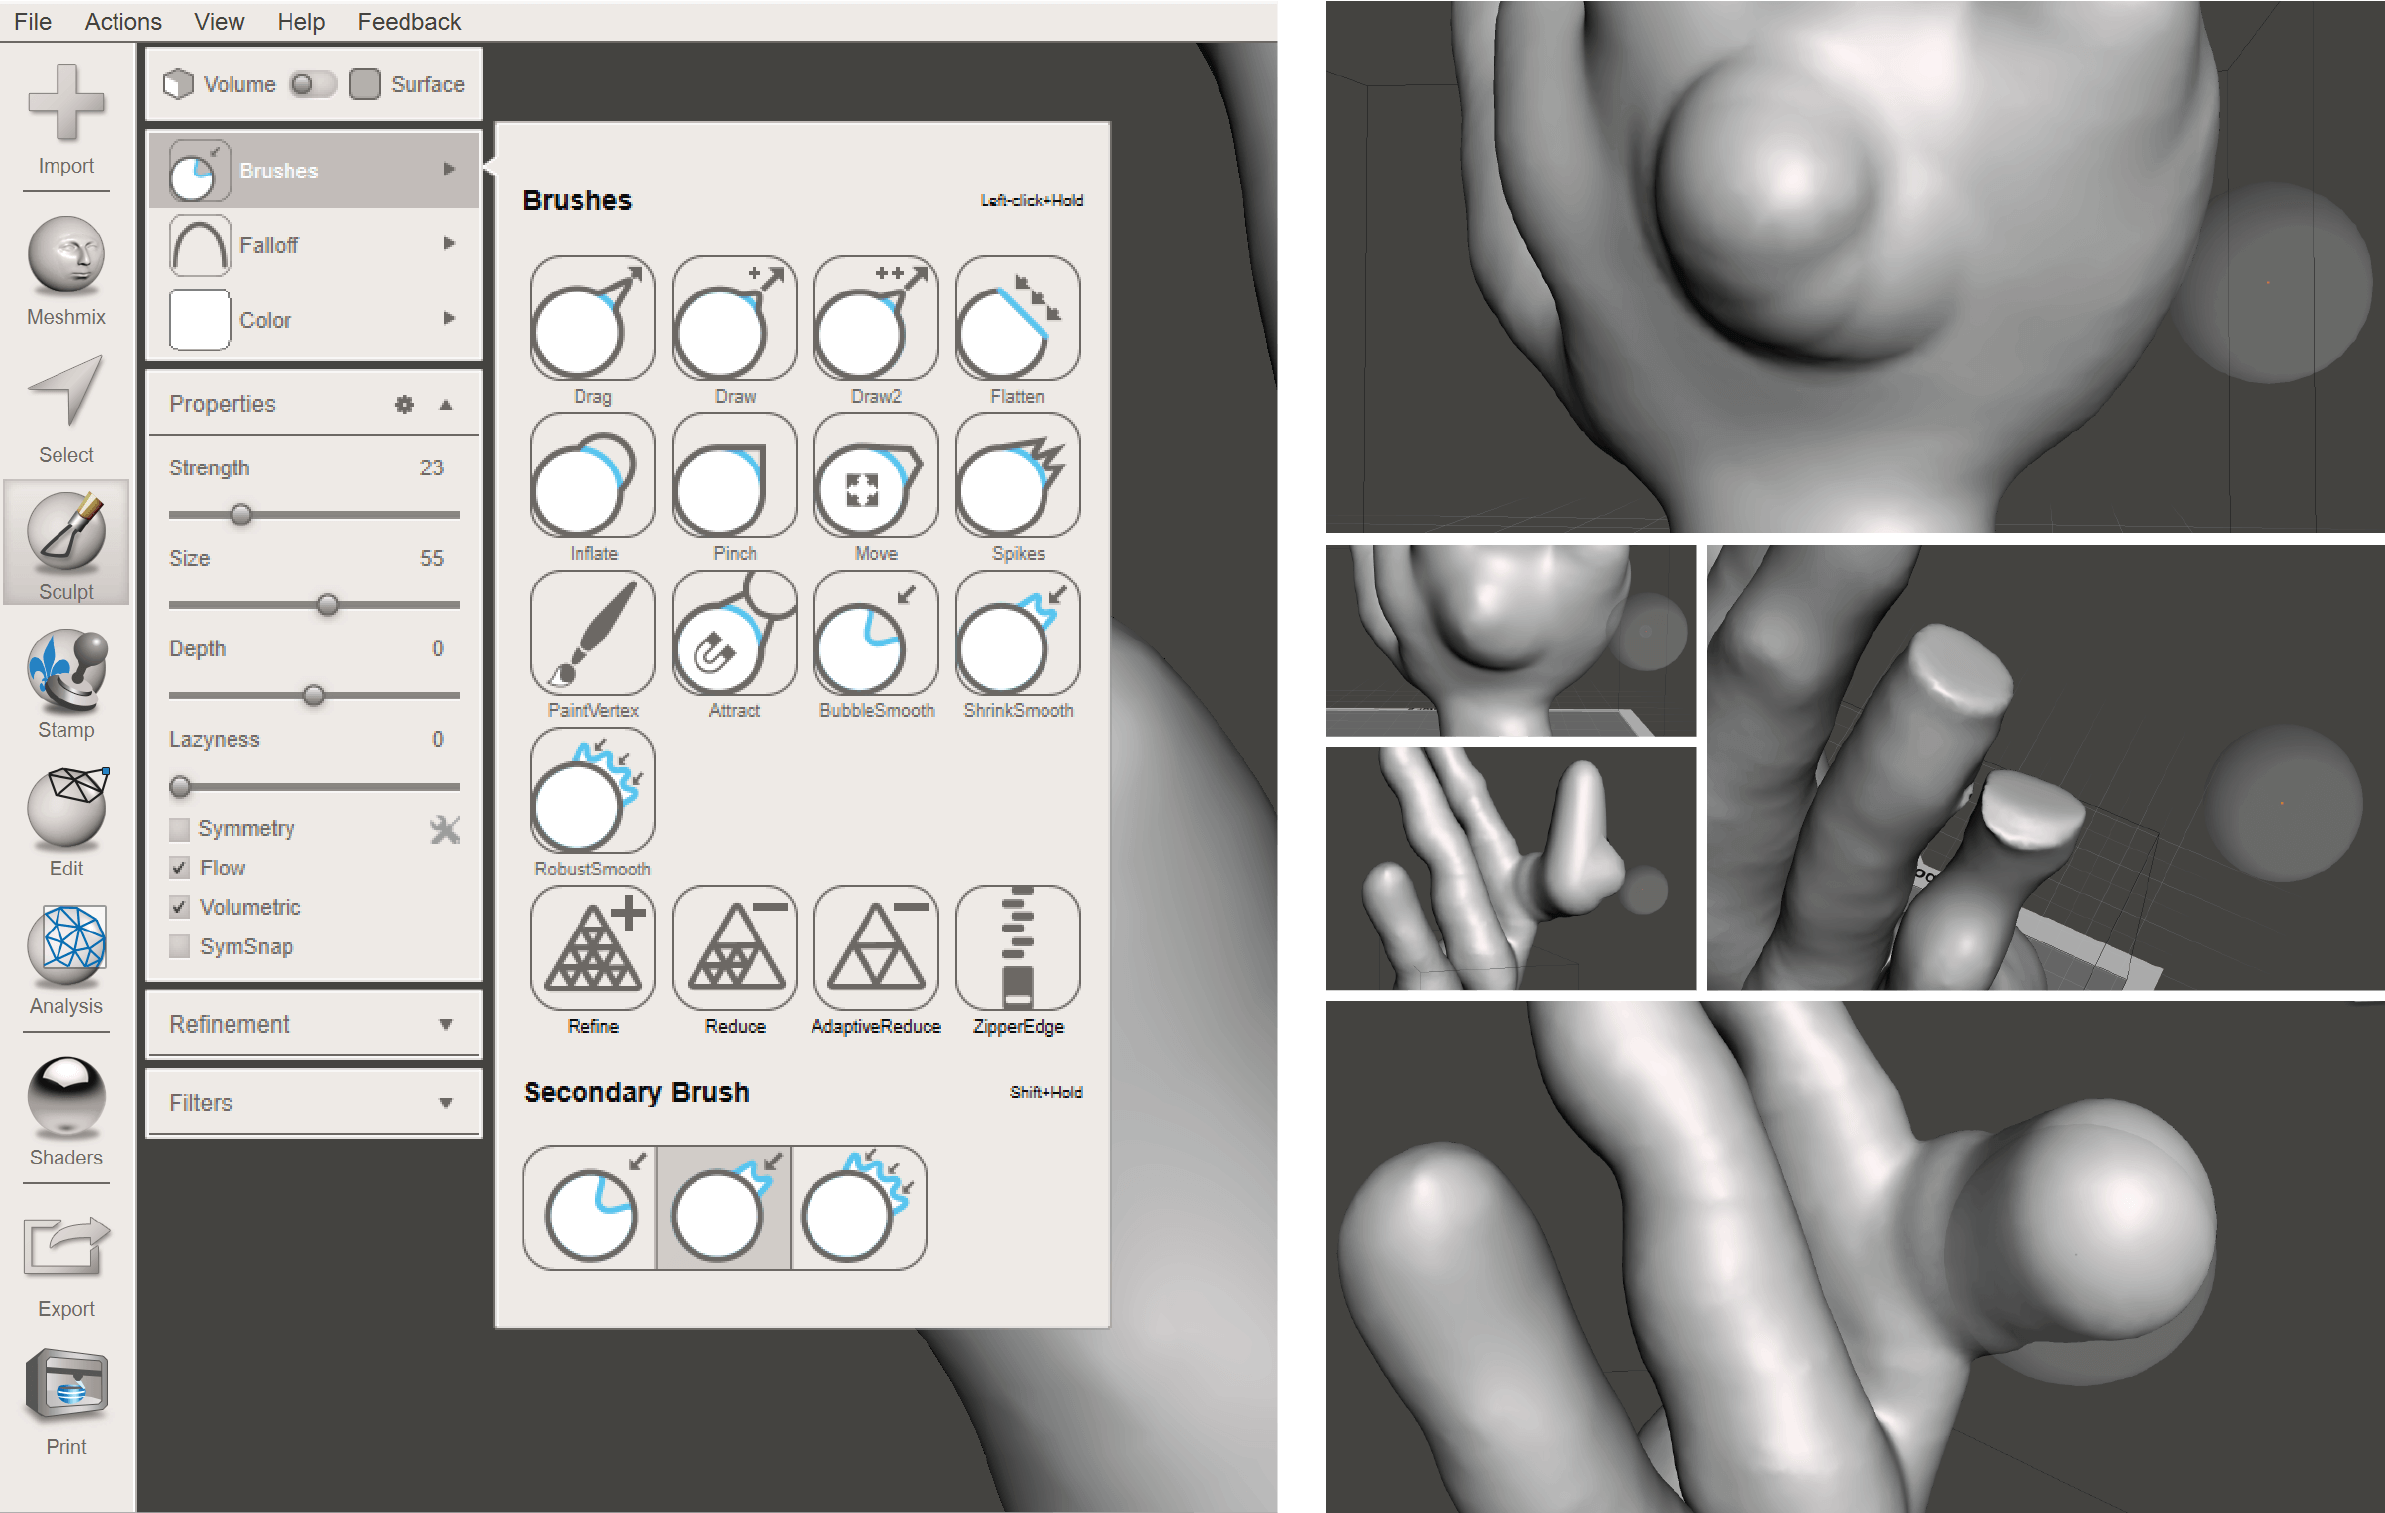
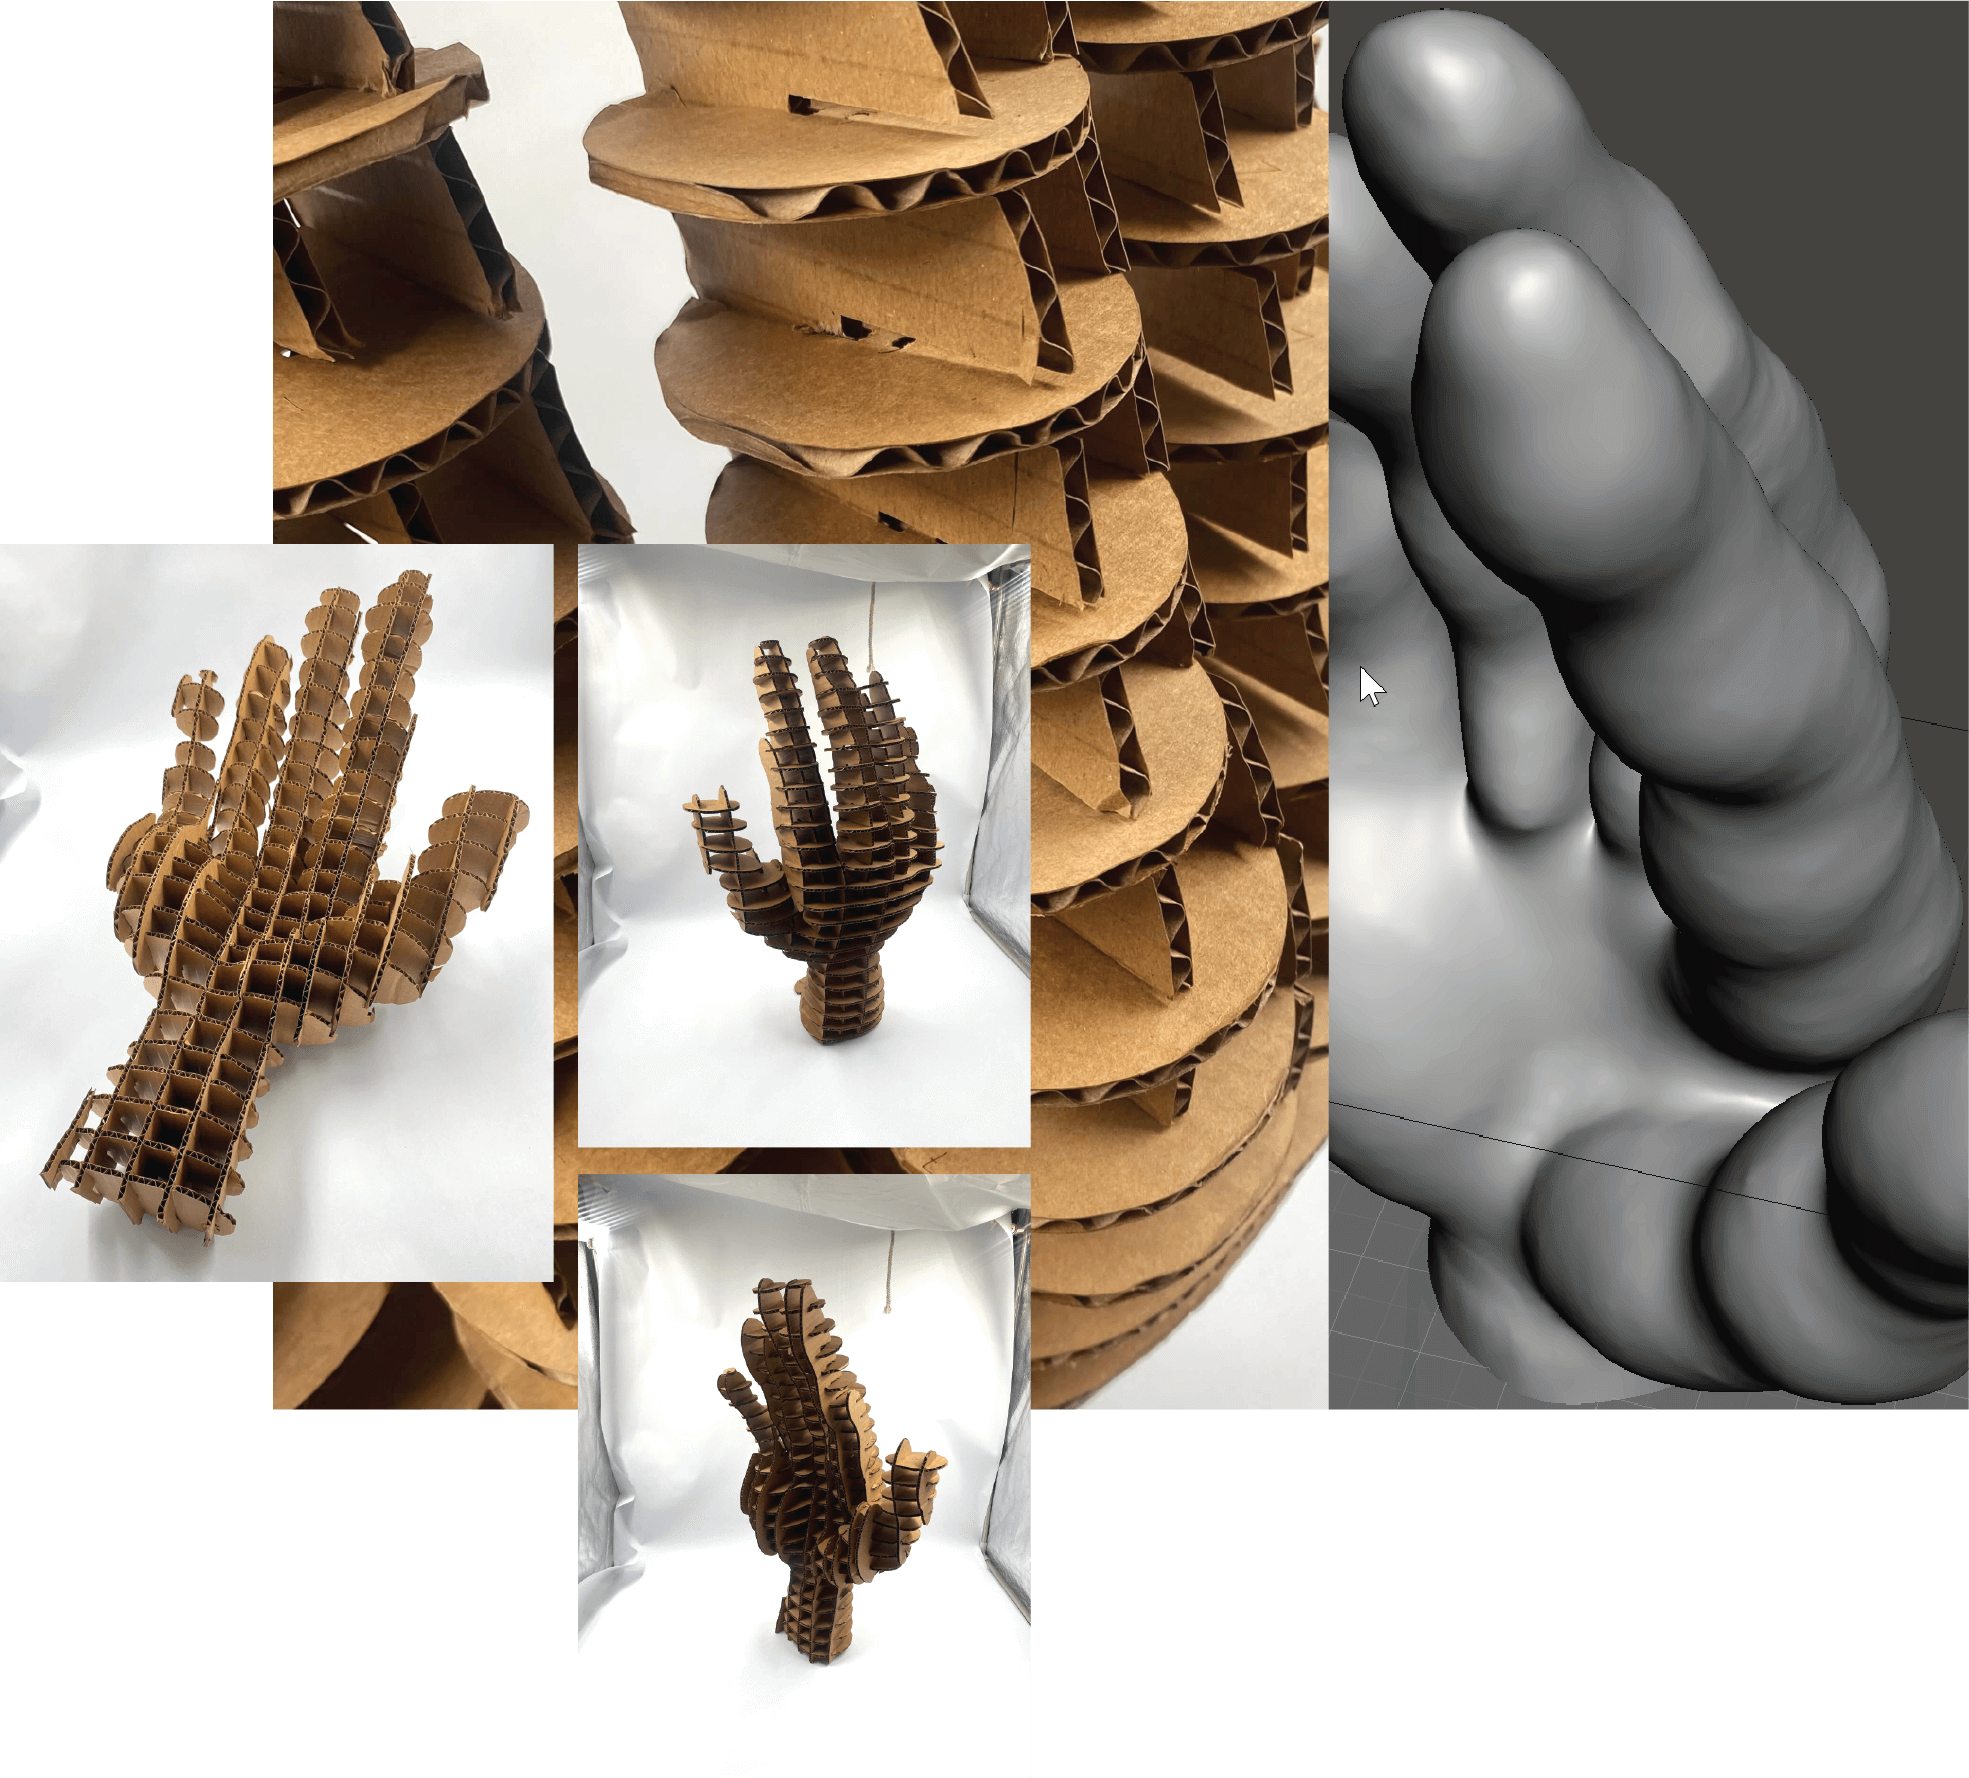
Step 2 - The next step I did in the Makehuman software, where I used different digital tools provided in the program, to shape the original hand. I navigated the sculpturing process by heart and just experimented with tools.
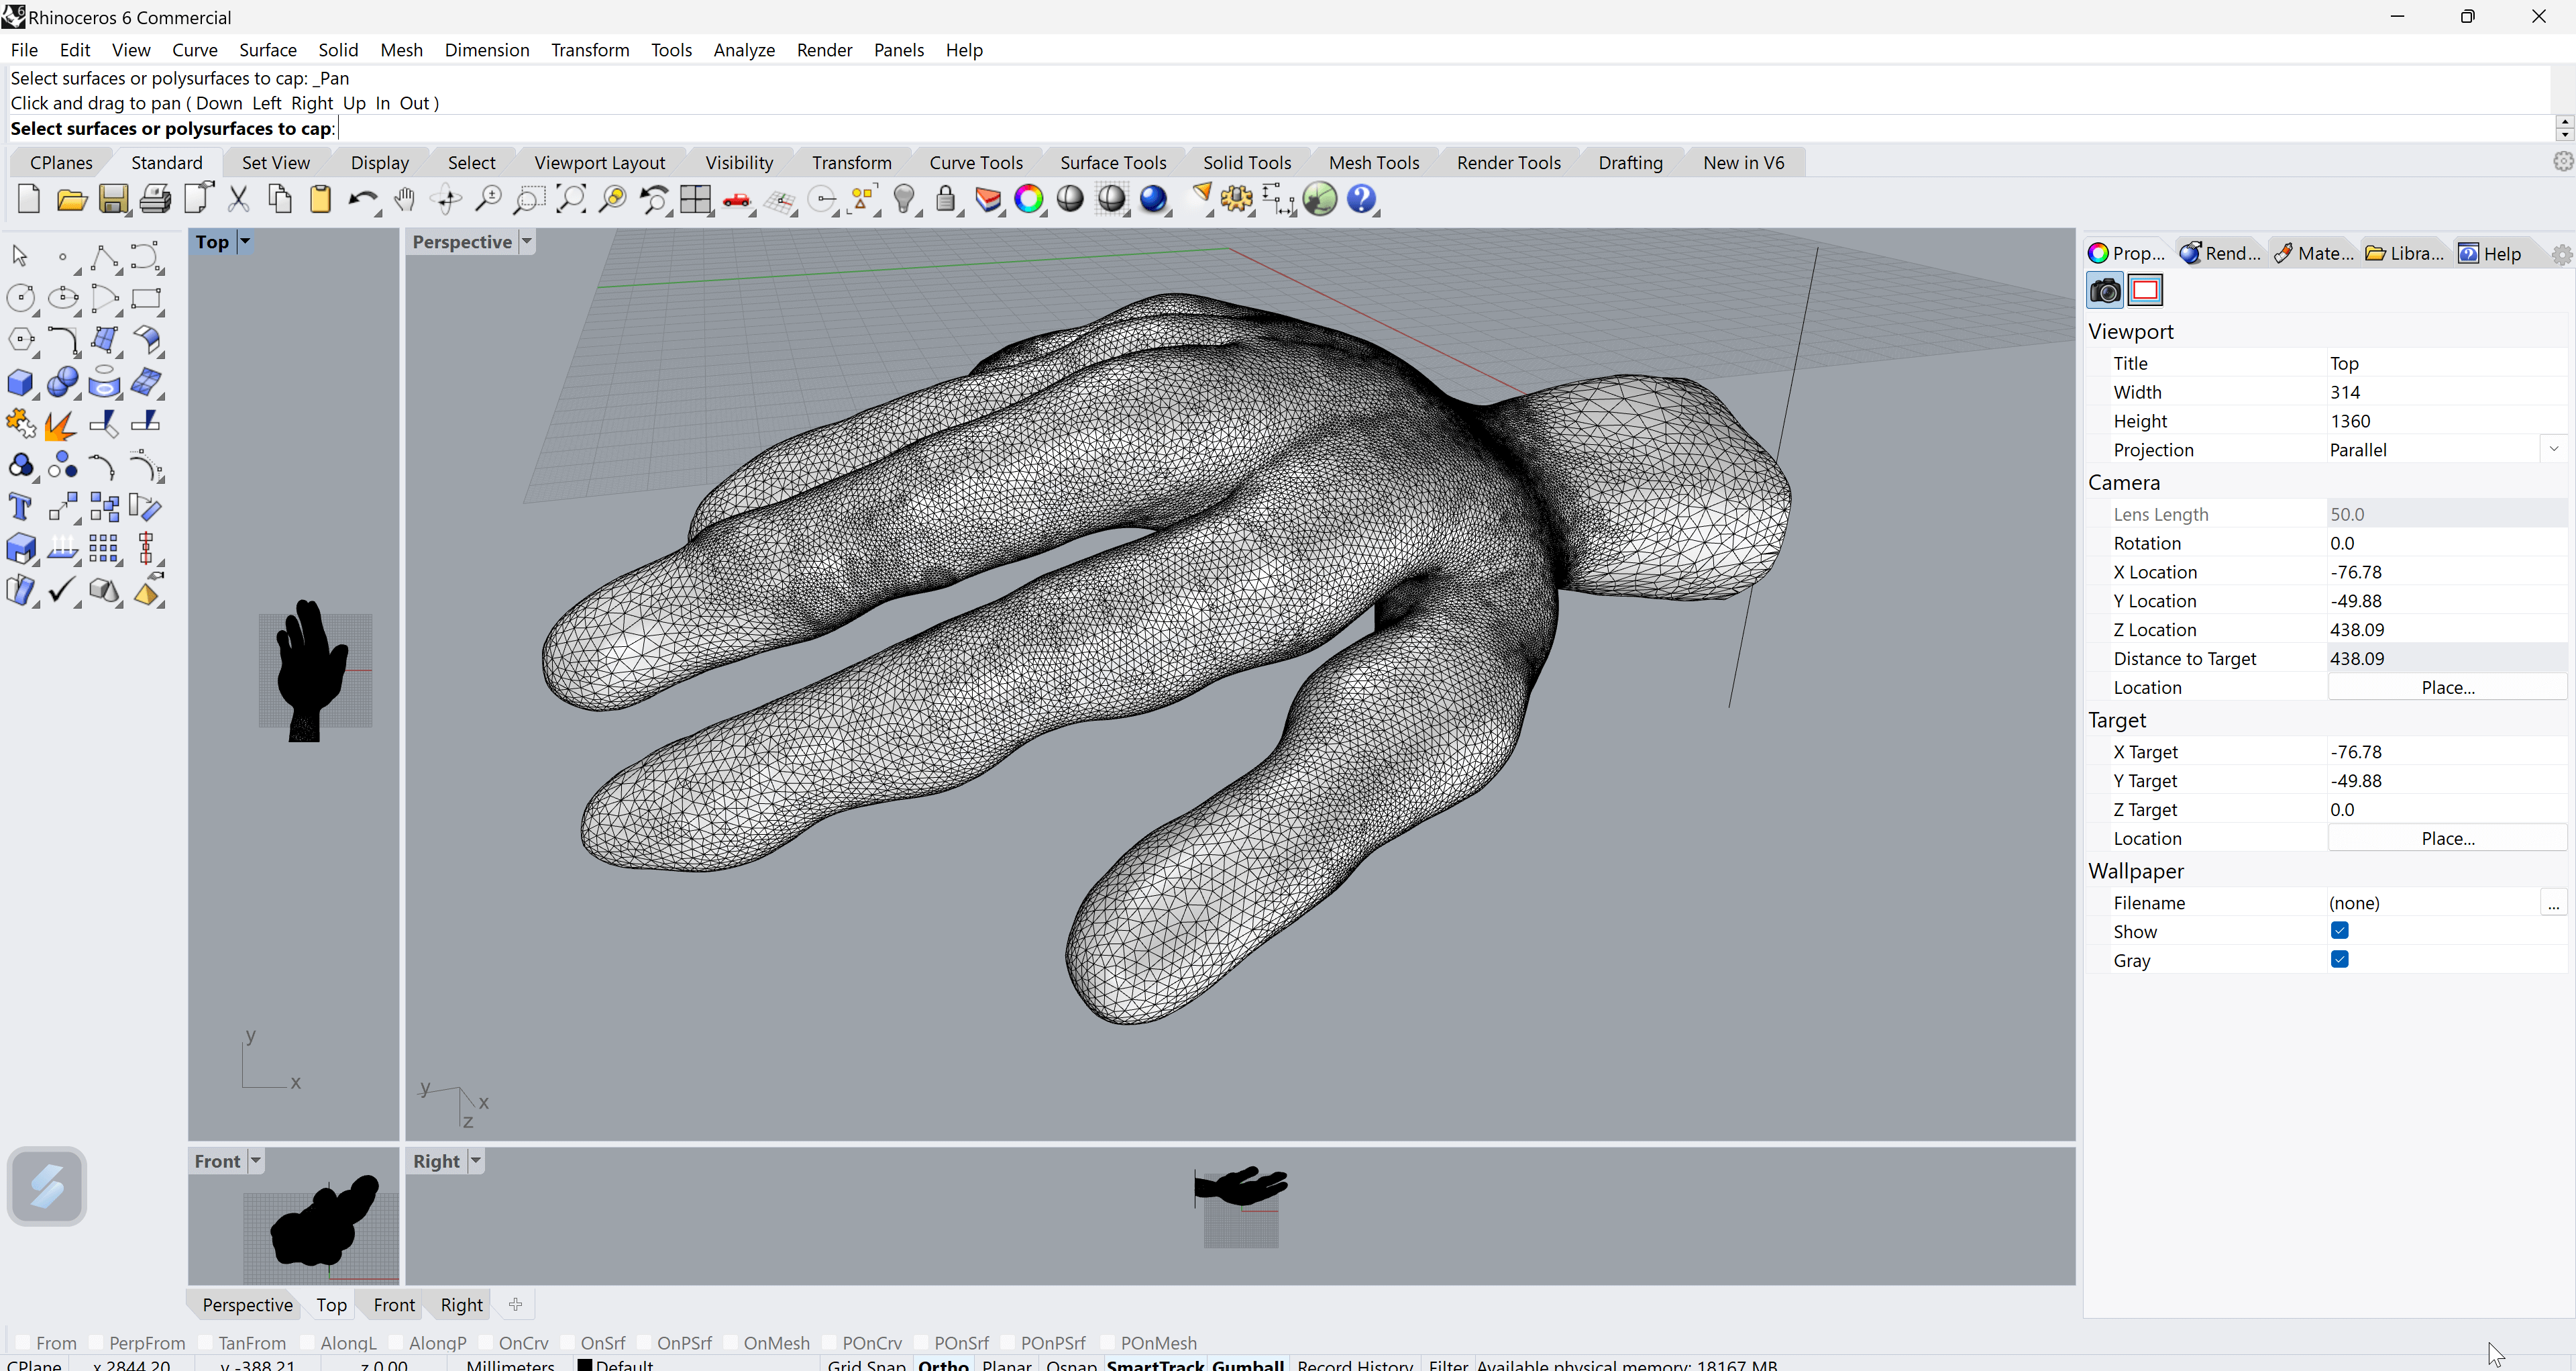
Step 4 - Once done, I put the hand file into Rhino, which created a polysurface. You have to have a solid object to laser-cut it.
Step 5 - Once we have a solid object, I used Slicer for Fusion 360, where I created the layers of the hand. I used interlocked slices technique with this one, creating horizontal and vertical layers that would support each other without any additional glue. Photo
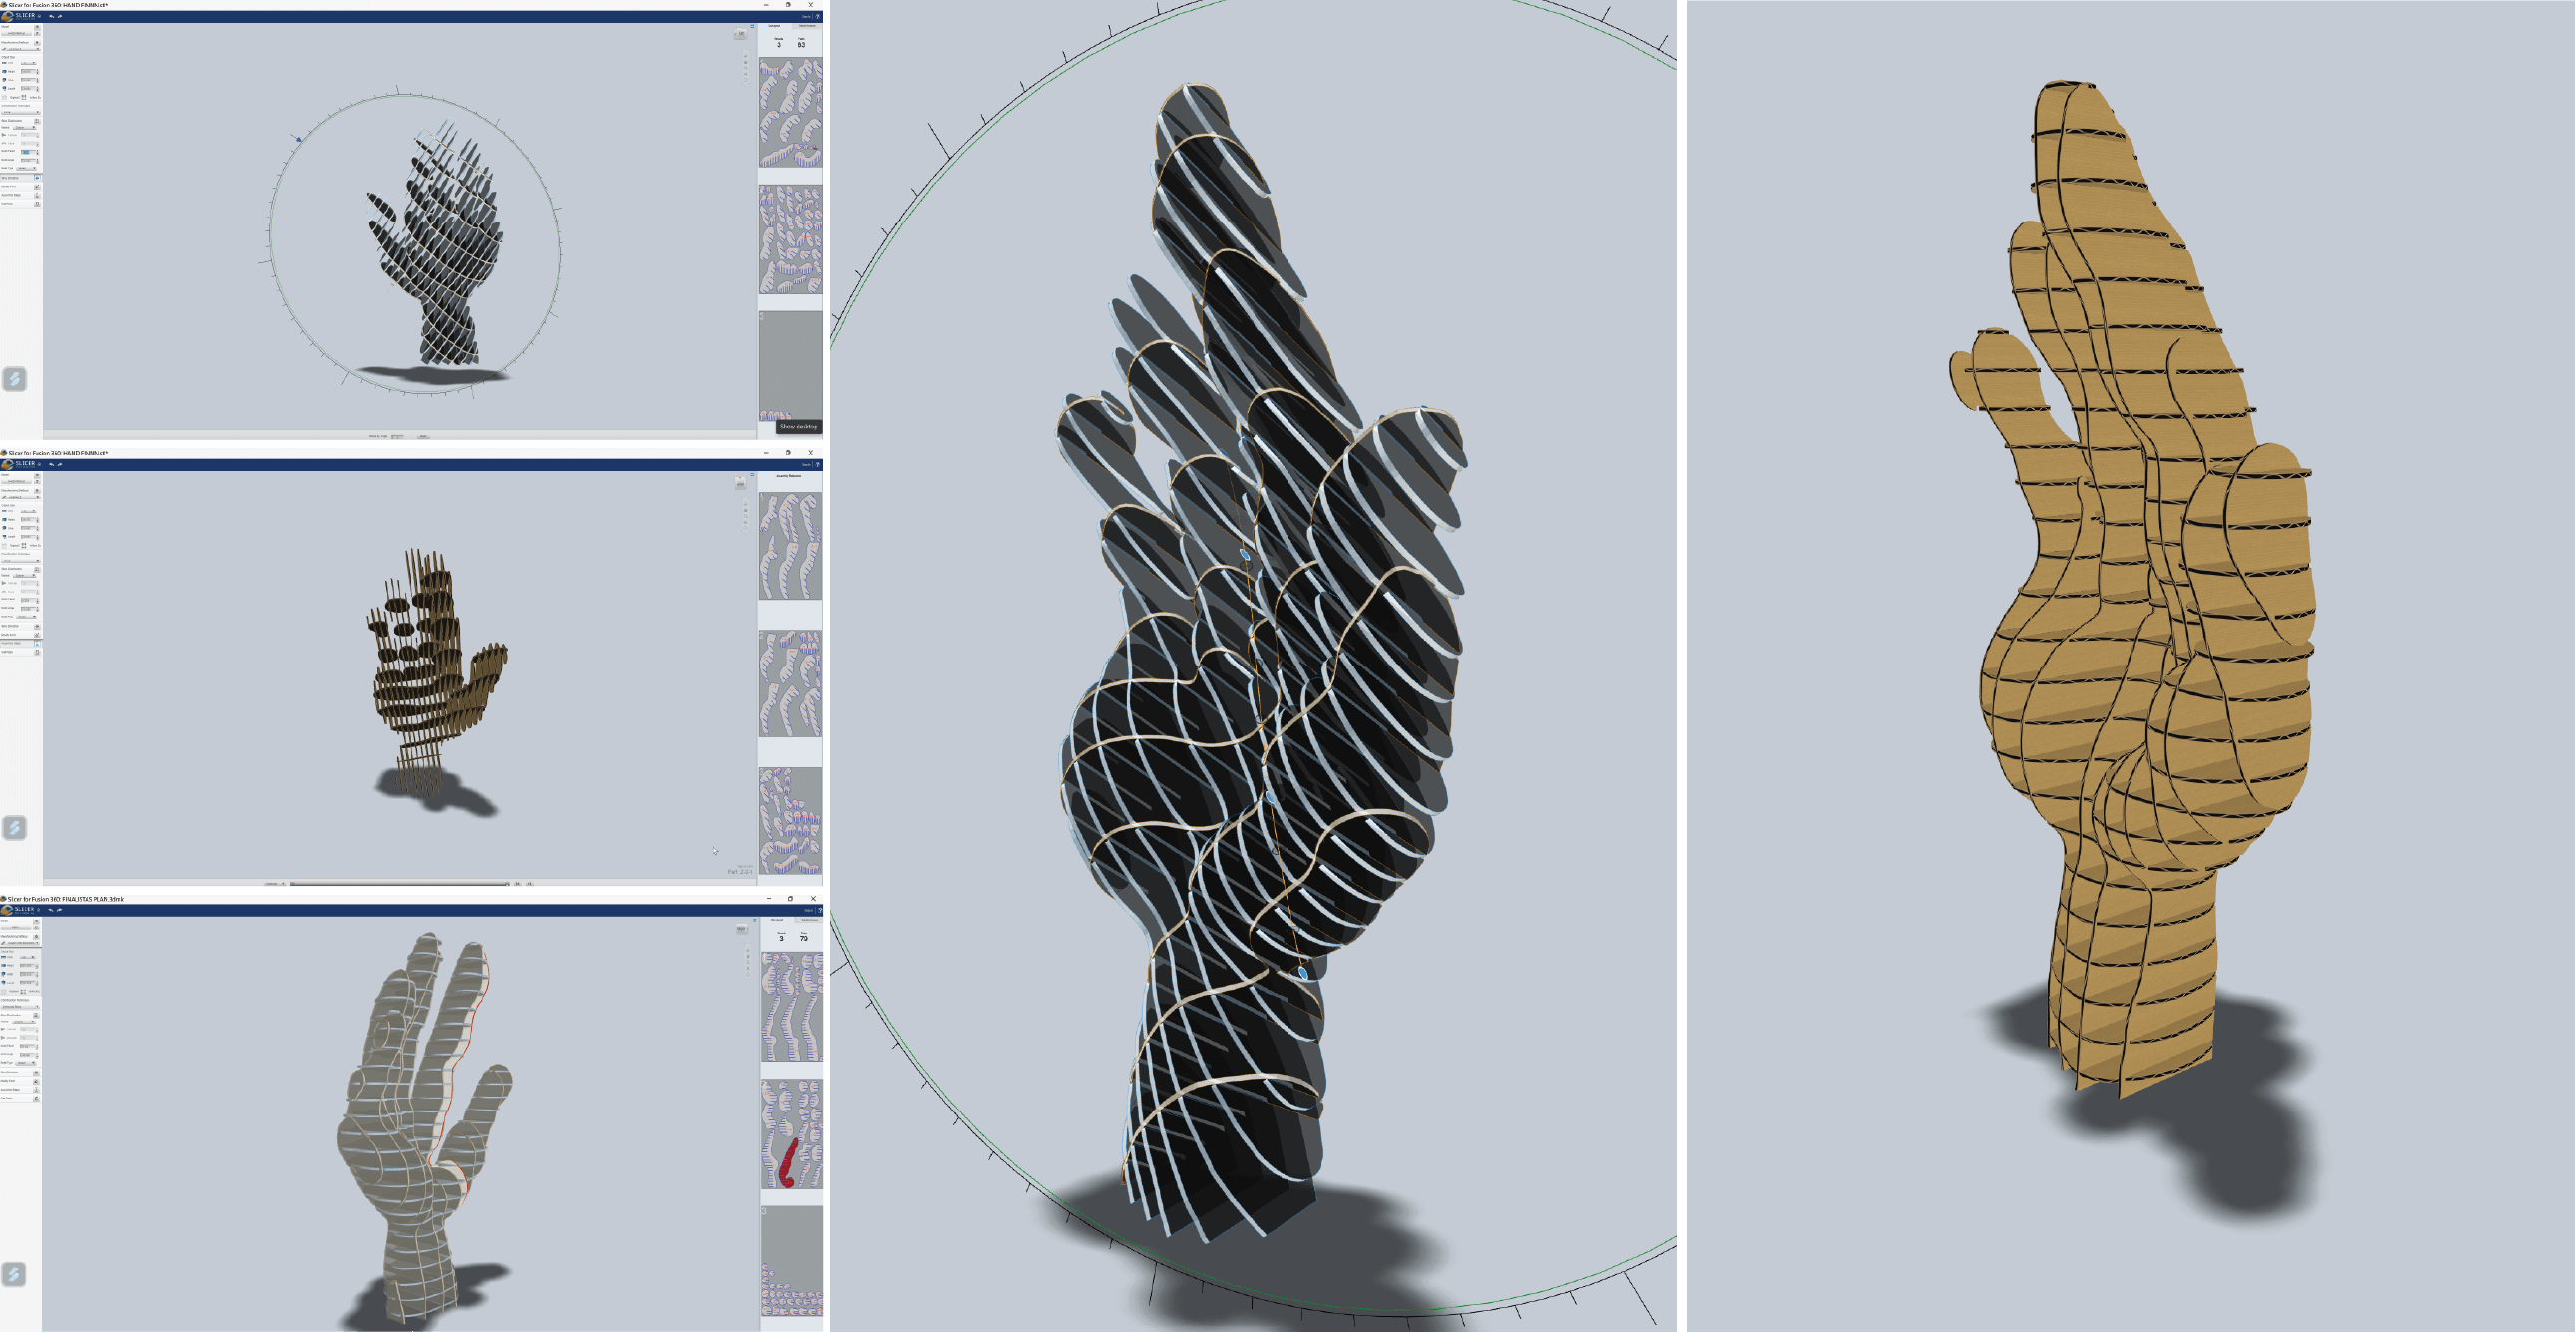
| Material Size | Width | Length | Thickness | Slot Offset |
|---|---|---|---|---|
| units - mm | 600 | 1000 | 3 | 0,30 |
Step 6 - Preparing the final file to laser cut. The Slicer program creates assembling process step-by-step, following the numbers of the slices, the assembly is easier to create.
Photo file
Photo laser
Settings I used for engraving the number for layers and cutting final pieces of the cardboard:
| Material | Thickness | Power | Speed |
|---|---|---|---|
| cardboard - engraving | 3 mm | 60 | 100 |
| cardboard - cutting | 3 mm | 30 | 1 |
Step 7 - Assembling process was following the numbers on the sliced pieces.
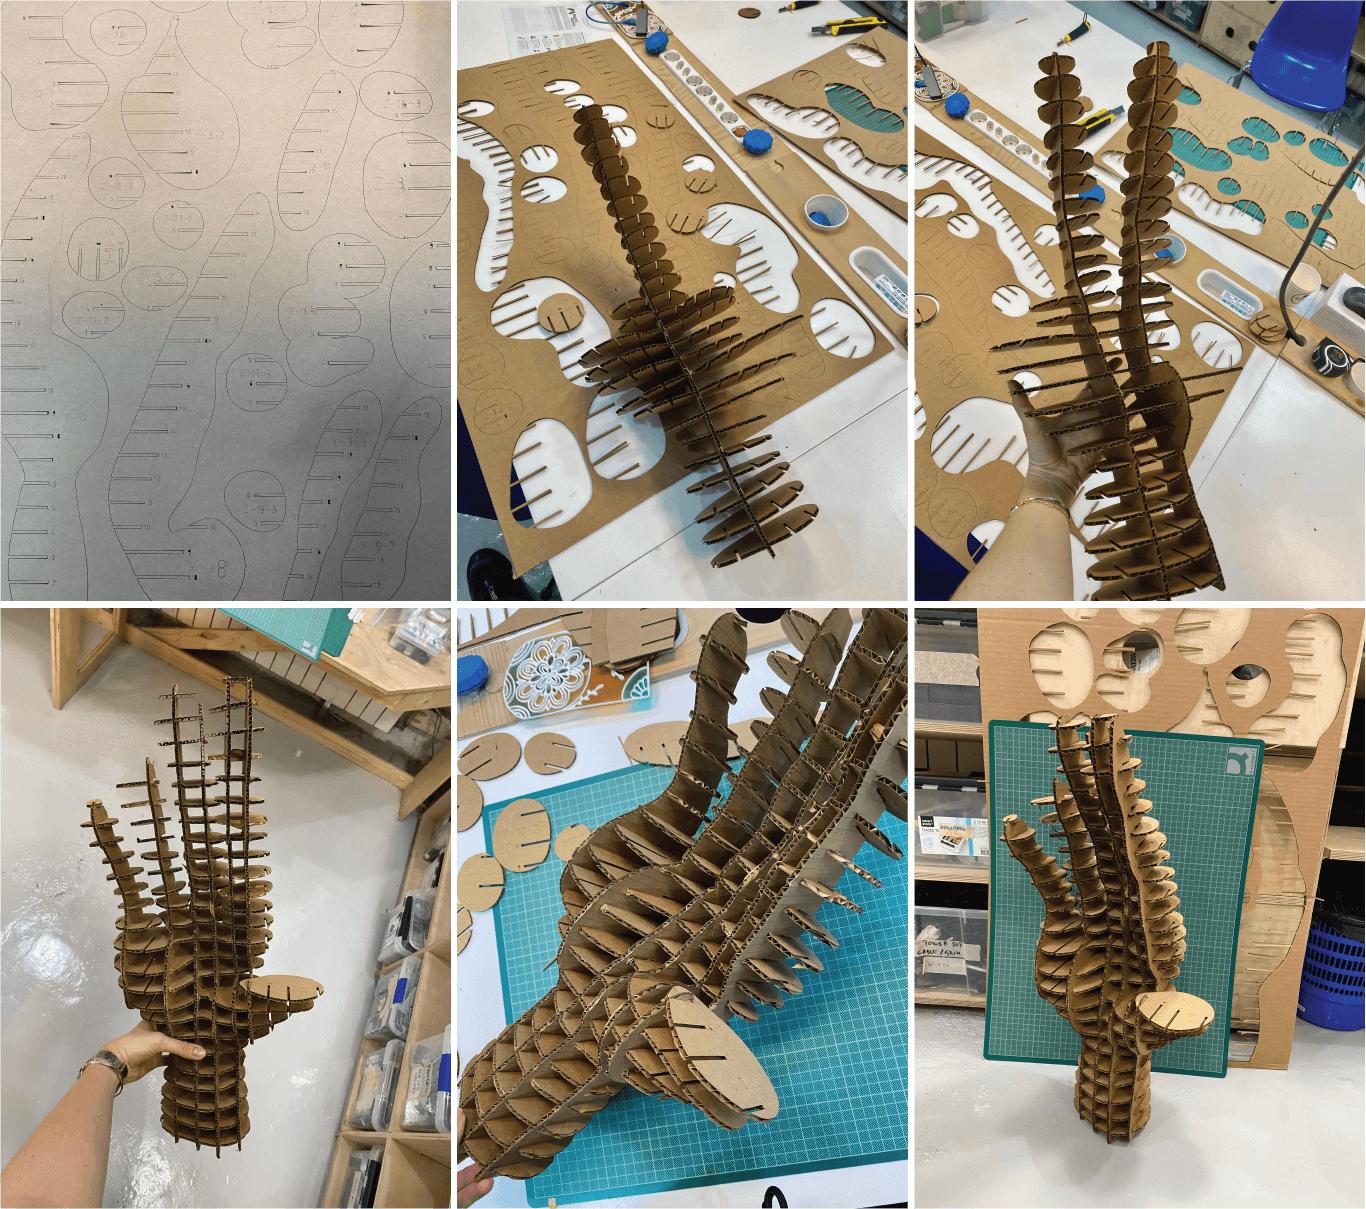
Step 8 - Final outcome
Fabrication files
-
File: 3d modelling of a hand ↩
-
File: Laser cut sheets ↩